February 12, 2019 10:01 AM EST
Dave Taylor
Hey there ol’ Cockeral… The Mik part I got done on Saturday noon… Had some time till the clock was to run out… So I started two more of the wagon top boxcars… Not really Mik stuff…
Continued excellence Dave.
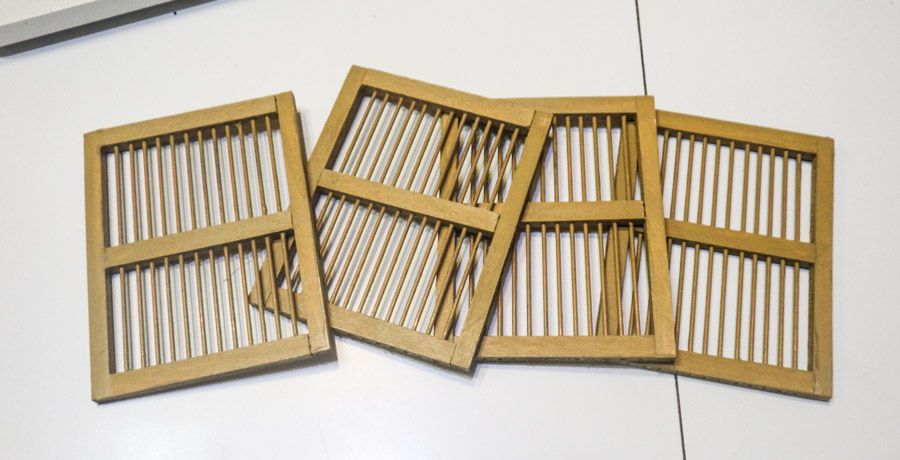
Got to start on the 4 vented doors for the two boxcars…
There are three cross pieces in each door…Top Mid and bottom. Each needed to have twelve bars drilled in alignment thru each one.
Mounted the pieces in my milling machine used a #49 bit and drilled.
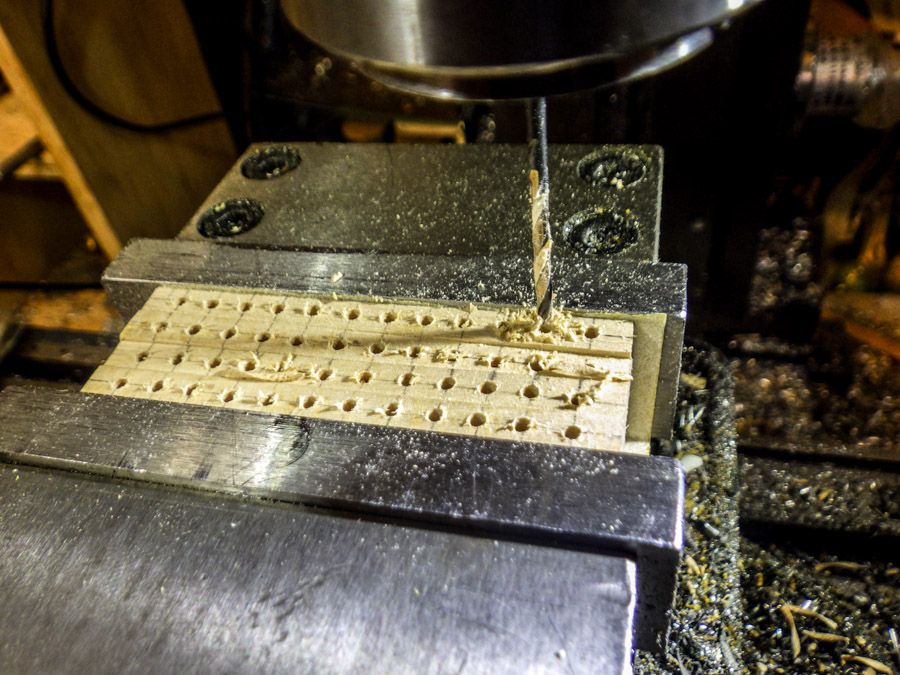
I didn’t drill all the way thru the bottom bar, just enough to hold the 1/16 " bars.
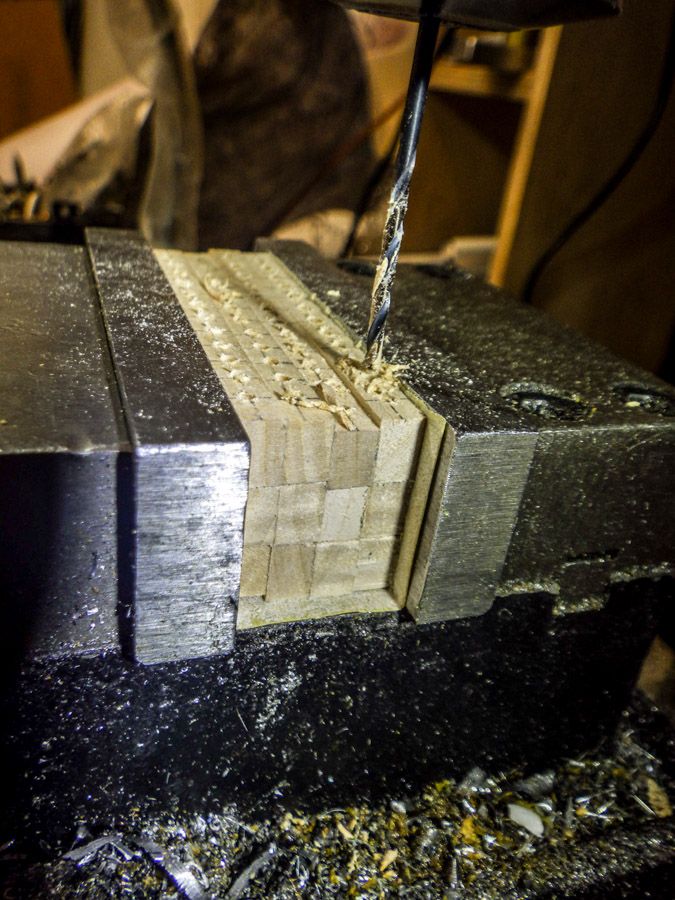
48 bars and some glue and … vented doors.
Onto the roof tomorrow…
Were suppose to get a bit of sun tomorrow… Maybe some outside pics of the three cars on the pike.
Dave, thanks for the tip on drilling all those holes. I would have spent 2 days drilling each bar individually and then 2 more days cussing myself because they didn’t line up.
Dave,
You knocked it out of the park. You could have just done the two “standard” woodies but that wagon top is just seriously cool.
Funny I never knew you had a pike …I thought you just did the 1:1 trains…
Oh Ya great job … (https://www.largescalecentral.com/externals/tinymce/plugins/emoticons/img/smiley-wink.gif)
Got some time to work on the two new wagon top cars.
On the first car, I used 1/32 basswood for the roof, It took two pieces, with the seam in the center. But, I had to cut each half from it’s own sheet of 4" x 24" stock. To do the two new cars, would have taken 4 sheets cut up. What a waste!! So for these two cars I was looking for something else to use. I explored thin stryene, but the sheets were two short and would have to be seamed. The sintra board just wouldn’t bend to fit the curve. I found sone plastic sheets large enough, but way to thin. Tried to laminate two sheets together… Disaster… wouldn’t bend. tried laminating two sheets bent over a curved “Mold” couldn’t get good adhesion between the curved layers. Thought to heat the sheets… Bent good, bad lamination.
In frustration I tried two layers of card stock laminated in my studio’s heat press to 235 deg using heat melt adhesive and quickly bent over a curved form for cooling… It worked really great. I used a commercial heat press, but anyone could do it with a hot iron also.
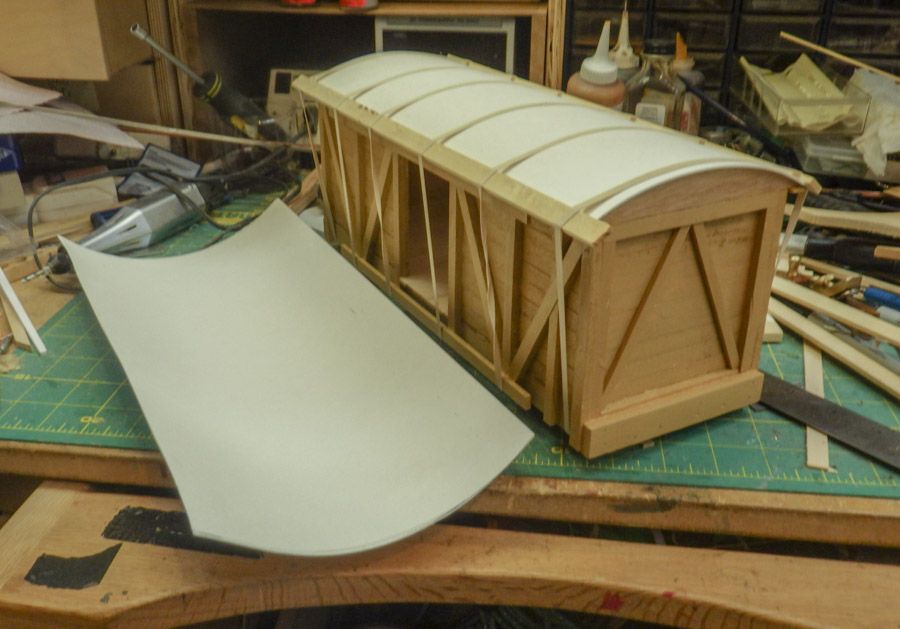
Goop’ed to the roof beams and rubber banded down. Perfect one piece fit.
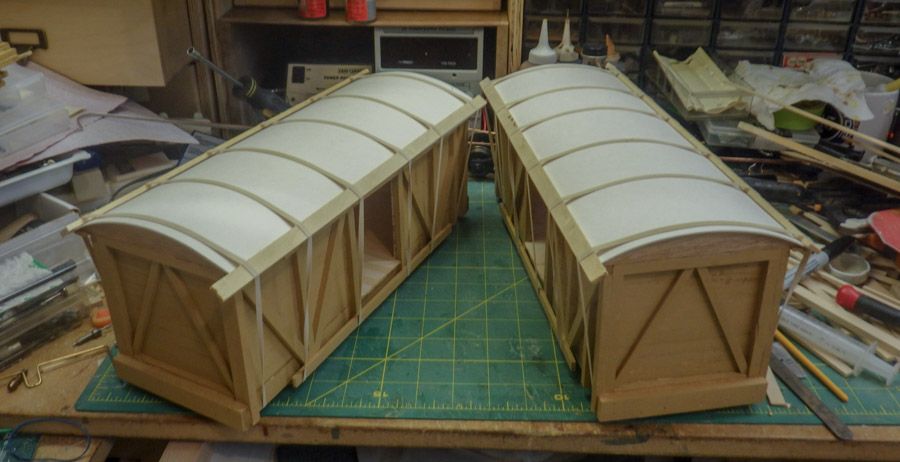
These are actually stronger then the wood roof. More rigid.
First coat of paint…
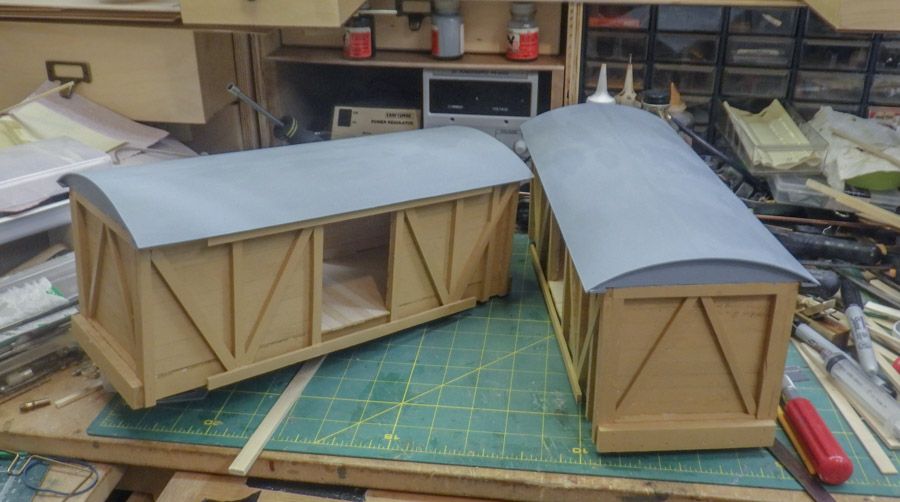
Progress…
Dave is a great technique with a wide range of application. What is the heat melt glue you used. How is it applied prior to laminating/heating?
Devon, It’s a photo mounting tissue, generally used for mounting photographs and art work to a substrate. Put the tissue between the photo and mounting board, Heat with a heat press or an iron, and cool.
I get the product in commercial 24" rolls 300 ft. long. I know its available in cut sheets at craft/hobby/art stores. and amazon.
Do a Amazon such for " Dry Mount Tissue "
Thanks Dave.
I will be getting some. Not 300 feet (http://largescalecentral.com/externals/tinymce/plugins/emoticons/img/smiley-wink.gif)
Just wondering if you have ever tried Kydex, the stuff I’ve used is black, sooth on 1 side and pebbly on the other, it’s moldable and very heat resistant, glues easily, bendable and might come in white you can get it from amazon. Makes great looking gravel roofs and tar paper roofs with pebbly side up. Picture is from my playmobil sawmill and the roof on the steam engine was painted white, let dry then painted black and again let dry. Then I blocked sanded just enough to get the black off the bumps leaving the black and it gave me a nice textured multicolored roof, Bill

Been an interesting week, I woke up to this:
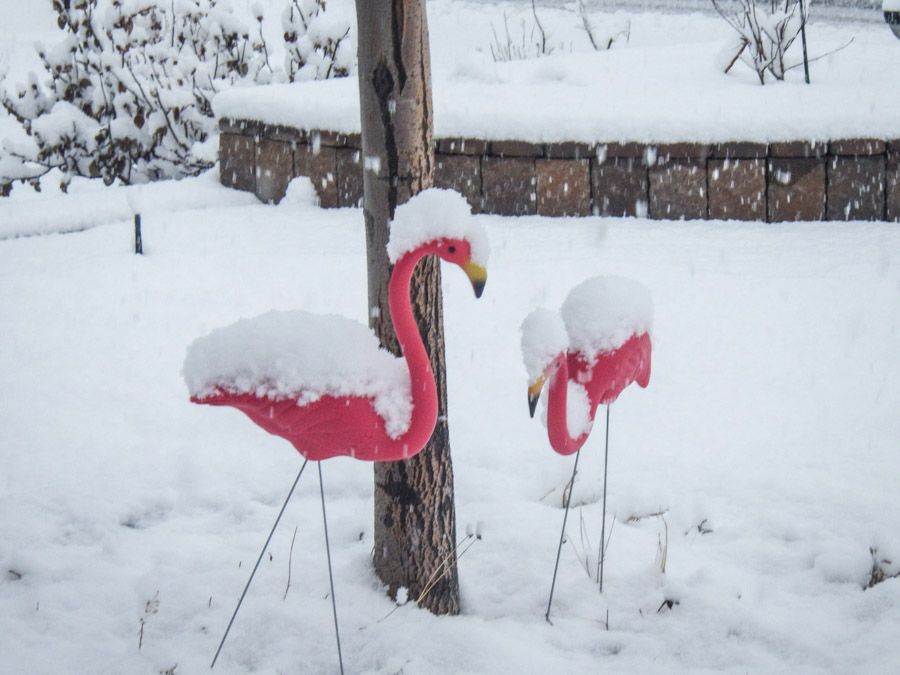
4 inches, and My poor flamingos are shivering, and wondering if they made a wrong turn at Albuquerque. Canceled all my Plans for the day…
So I stayed in and worked a bit on the Wagon top Boxcars.
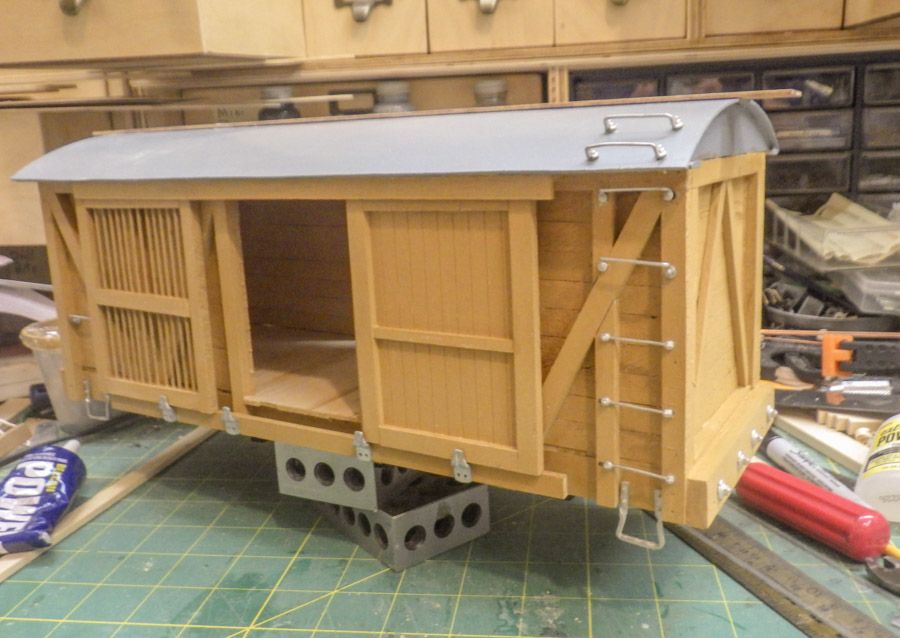
Inventoried my supply of the "Jewelry " and I don’t have everything that I need to finish up both cars… “Hello, Ozark Minitures?” I can get close on one car, but will have to wait for pieces for both.
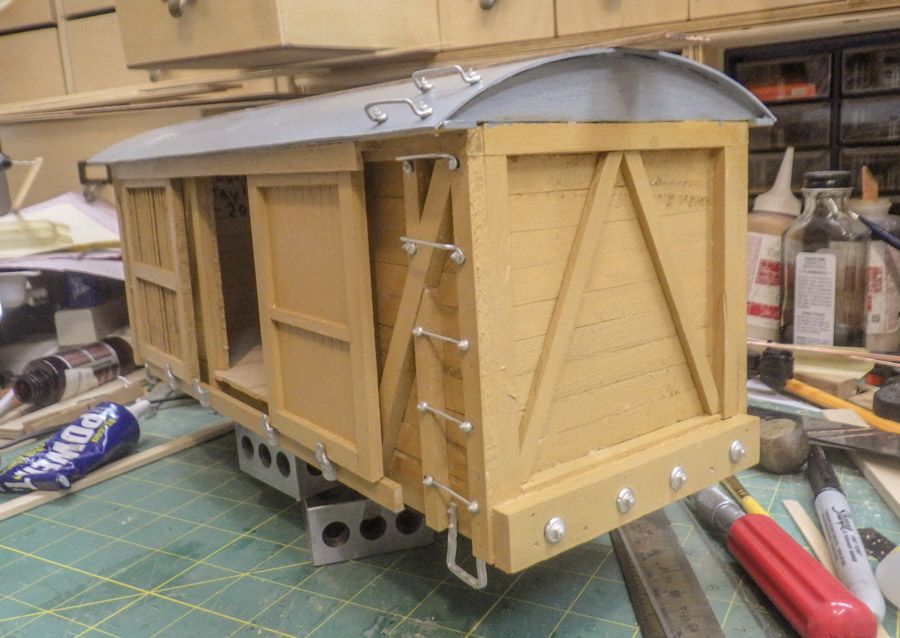
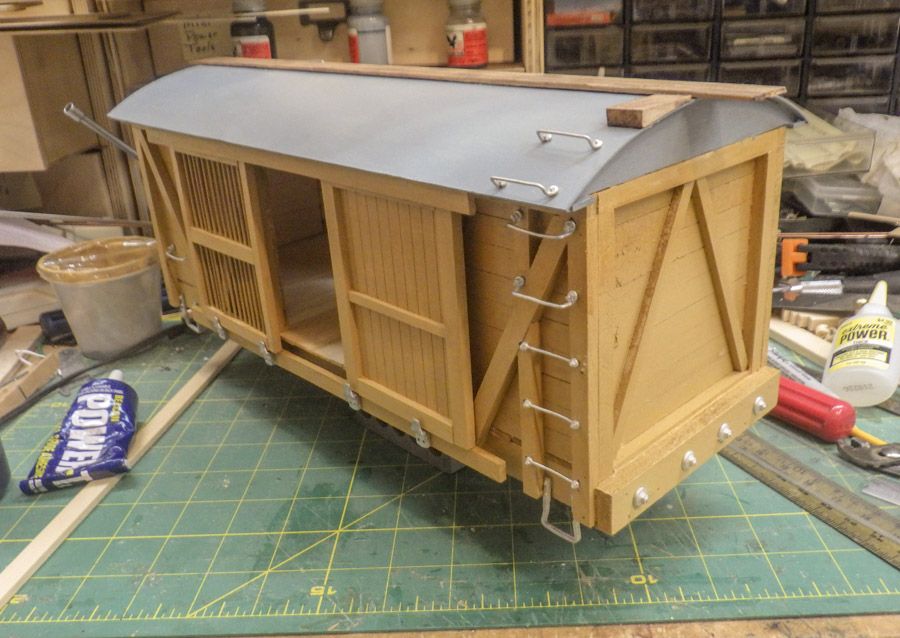
Oh… BTW, I learned early on in my car building career , Save the underside stuff till last. That way you have a good “Non Delicate” surface to set the car on while you manhandle it putting all the rest of the hardware on the top half. Setting the whole car down on the truss rods, isn’t a good thing.
Dave Taylor said:
…
Oh… BTW, I learned early on in my car building career , Save the underside stuff till last. That way you have a good “Non Delicate” surface to set the car on while you manhandle it putting all the rest of the hardware on the top half. Setting the whole car down on the truss rods, isn’t a good thing.
Oh, now you tell me … after I found out the hard way (https://www.largescalecentral.com/externals/tinymce/plugins/emoticons/img/smiley-sealed.gif)Great looking cars, Dave. Those are just too cool (https://www.largescalecentral.com/externals/tinymce/plugins/emoticons/img/smiley-laughing.gif)