Weather it or just paint over it.

Weather it or just paint over it.

I second Boomer’s motion.
Your cars are coming out great ! I really like that outside braced car with the curved roof. It stinks the paint had a reaction. Maybe you could do a bit of sanding a bit of weathering and have you thought about signage? You could make some signs that stick on the outside that will cover the blemishes.
OK guys… Thanks for the recommendations… I’ve never weathered a car so at this point…
I can’t screw it up much more, so with the latex paint being opaque ( more then a rattle can) I think that I will just paint over it with another coat of the butterscotch stuff and see what happens.
Cant be any worse. And if that goes way bad. There is always the final option of MOW Gray… Covers anything…
We will see soon.
I’ve never weathered a car before and look at what I’ve done. I’m slowly moving away from rattle can primers because of the same problem of crazing. I’ve started to use Badger Paint primers. It has great coverage and sprays super easy thru my airbrush.
Forrest Scott Wood said:
How well will the latex butterscotch color brush over whatever the clear coat was?
Would mostly-dry brushing it over the present mess create an acceptable weathered look?
On another note, if it were my car, for visual interest I’d add some strips across roof to represent seams in roofing material; place them, oh, about 3.5 to 4 scale feet apart.
Dave, I think these are good ideas Forrest has. Dry-brushing, building up some dry-brush layers might just do the trick. It’s worth a try I think.
Dave Taylor said:
OK guys… Thanks for the recommendations… I’ve never weathered a car so at this point…
I can’t screw it up much more, so with the latex paint being opaque ( more then a rattle can) I think that I will just paint over it with another coat of the butterscotch stuff and see what happens.
Cant be any worse. And if that goes way bad. There is always the final option of MOW Gray… Covers anything…
We will see soon.
It’s weathering so there is no right or wrong unless you are banging Mother Nature on the side? Now if you are we want VIDEO!
Rooster,
Thanks for that. I think one of the biggest problems people have with weathering is that they are trying to perfect that which is not perfect. Mother nature is not concerned with her rust being perfect. She just throws the stuff on wherever it sticks. I think people end up making hard lines trying to perfect the look instead of making soft erratic patterns that is reality.
Got the wagon top car re-painted…
I feel a lot better already. The re-paint,
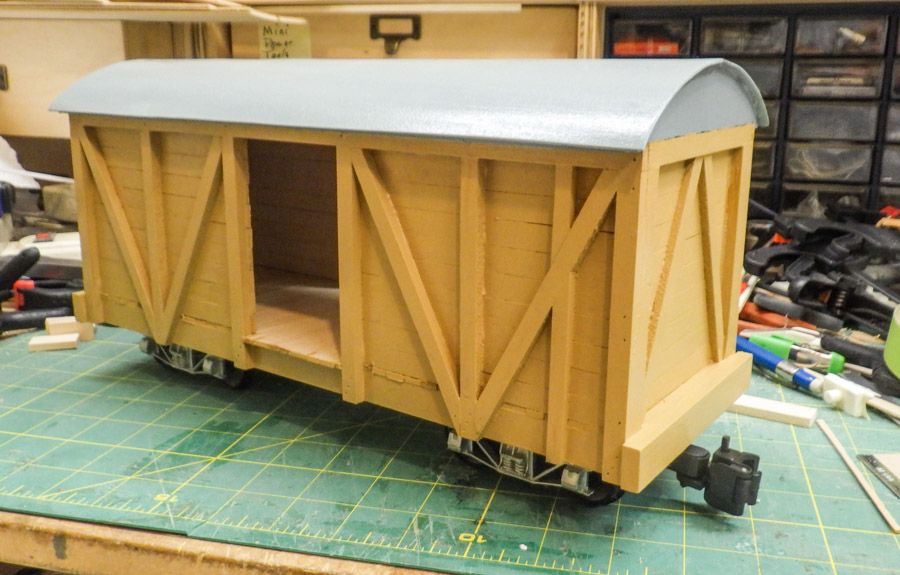
It covered the other stuff well
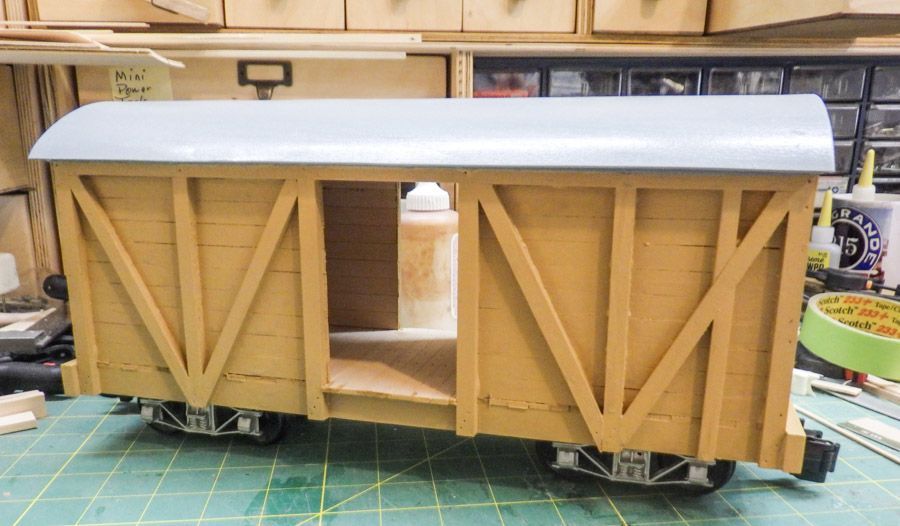
Covered all up
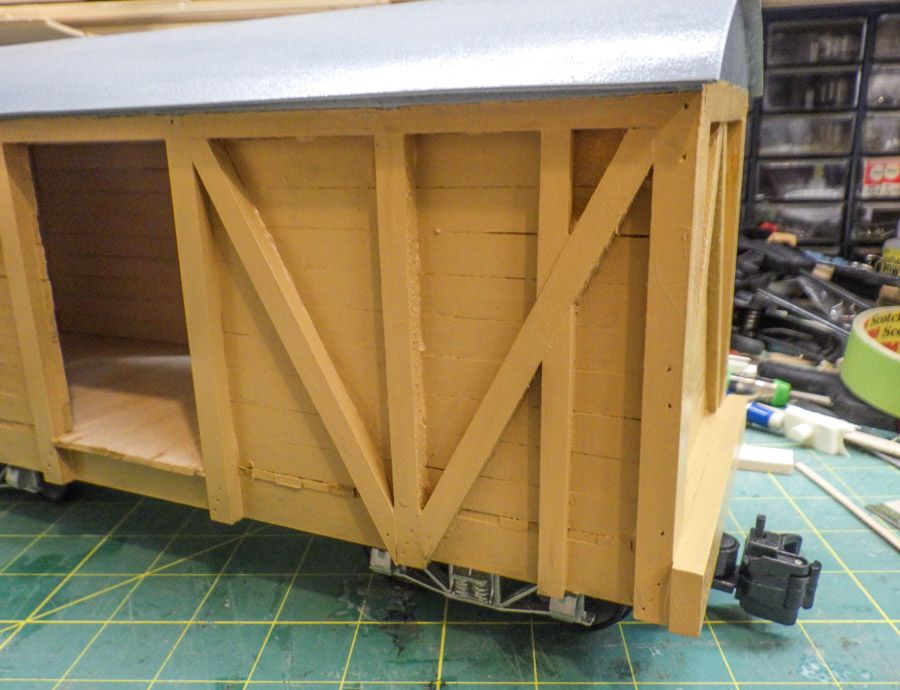
OK i’m back to sorta where I wanted to be…
On to detailing and figuring out the door mount.
Dave,
What style of cars used tension rods like truss bridges do? For some reason all of a sudden your external frame car made me think about that.
ALL wood body cars had truss rods. They added a tremendous amount of strength to the cars. They also held the entire car underbody together. Without the trusses the car would literally fall apart.
Even The first steel reinforced flats had trusses, Such as the D&RGW 6200 series flats.
Not the truss rods under the car frames. I am talking the vertical ones in the walls. The ones that keep the cars from sagging. Or at least I thought that was the purpose. Were they not common? I can swear I have seen pictures of them but your external frame got me wondering why I don’t see them on external framed cars, assuming they were always present on wood ones.
Nice save on the paint!
Devon Sinsley said:
Not the truss rods under the car frames. I am talking the vertical ones in the walls.
As far as I’ve ever read, there weren’t any, not even on passenger cars which were longer than freight cars.
Went playing on line and found this reference image, https://historicpittsburgh.org/islandora/object/pitt:20110217-hpicpitcairn-0163 But it is on a steel frame and that’s a bit of a different ball game from an all-wood car.
Title
Construction Crew at the Pennsylvania Railroad Shops
Creator
Unknown
Date
c.1920
Identifier
20110217-hpicpitcairn-0163
Description
The Pitcairn Yards shops could not only repair and refurbish railroad rolling stock, but the skilled workmen could also build complete cars in the carpentry shops. This picture shows a construction crew doing just that.
I can see in Sean’s picture rods that I assumed were tensioning rods like on bridges but it’s rather hard to tell
OK guys… I can only reply about the D&RGW wooden cars that I have personally rebuilt and handled. Other types of cars, some of which were made in house by their own railroads. But most all that I have personally been involved with have pretty much been built to common current practices at the time.
I have been involved in rebuilting 7 D&RGW freight cars, 3000 series boxcars, 4000 series Boxcar, a 30 reefer, and 2 cattle/stock cars.
On the 3000 series boxcars, They used diagonal steel trusses that tied the top plates to the bottom sills. They ran parallel to the diagonal 4x6 braces, 2 on each side of the doors, 4 on each side. The 5000 series stock cars are almost identical construction to the 3000 series boxcars, other then the siding, using the same diagonal bracing and diagonal steel truss rods.
On the 4000 series boxcars, they are older then the 3000 series, they used the diagonal wood bracing, ( like in the photo posted by Sean ). But they used vertical trusses, the same way in the photo, they were dadoed into the vertical braces, and bolted thru the top and bottom sill.
On the 30 ft reefers, they used the same vertical trusses but added trusses in the ends of the car also.
If you inspect a wood car you can notice the ends of the truss rods coming thru the bottom sill. On the Diagonal ones, there are tapered washers/spacers under the bolts, and on the vertical truss ends, there are only plates against the bottom sills.
Wooden cars are constructed with mortise and tenon joints. the sides and tops are mortise and tenoned, and held together only by the vertical and diagonal truss rods, and the bottom sills are likewise only held onto the end sills by the bottom truss rods.
Thank you Dave,
That answered my question perfectly and confirmed what I thought I had seen but explained that they (the vertical metal truss rod) was not standard to all wooden cars as I had thought. Good info on car construction. But now you did raise another question with the mortise and tenon. If I understand you correctly, the basically build the sides, top, and bottom framing and then it is all tied together with the steel truss rods through bolted through the top plates and bottom sills (whether with diagonal or vertical trusses?
Here is a photo of the top plate on D&RGW stock car 5564. This was before we replaced the top plate.
Notice the two truss rods running at a diagonal, from a single “V” plate.
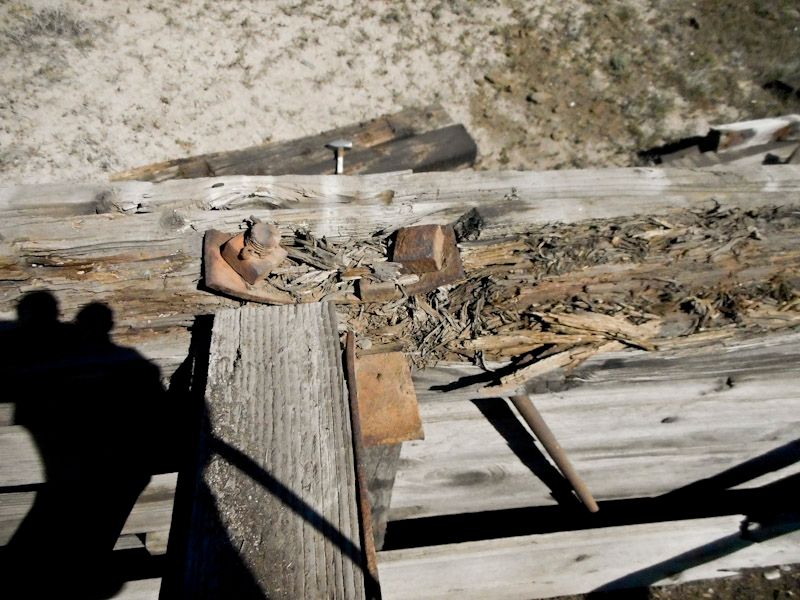
And here you can see both vertical and lateral truss rods.
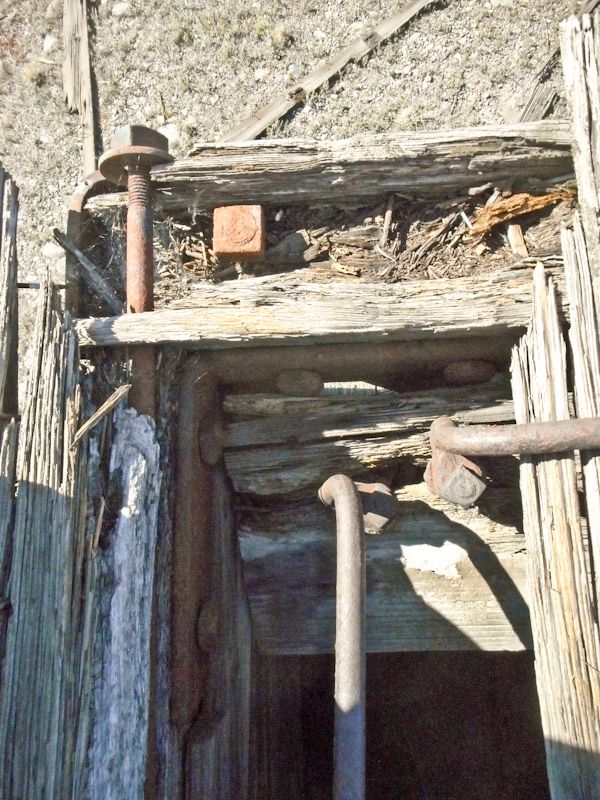
hope this helps.
**Dave Taylor said:**But they used vertical trusses, the same way in the photo, they were dadoed into the vertical braces, and …
That makes sense, the vertical post takes the force of compression instead of that force being taken mostly by the thin section of a longitundinal member.