Large Scale Central

CVSRy Shay #5 change to RailPro

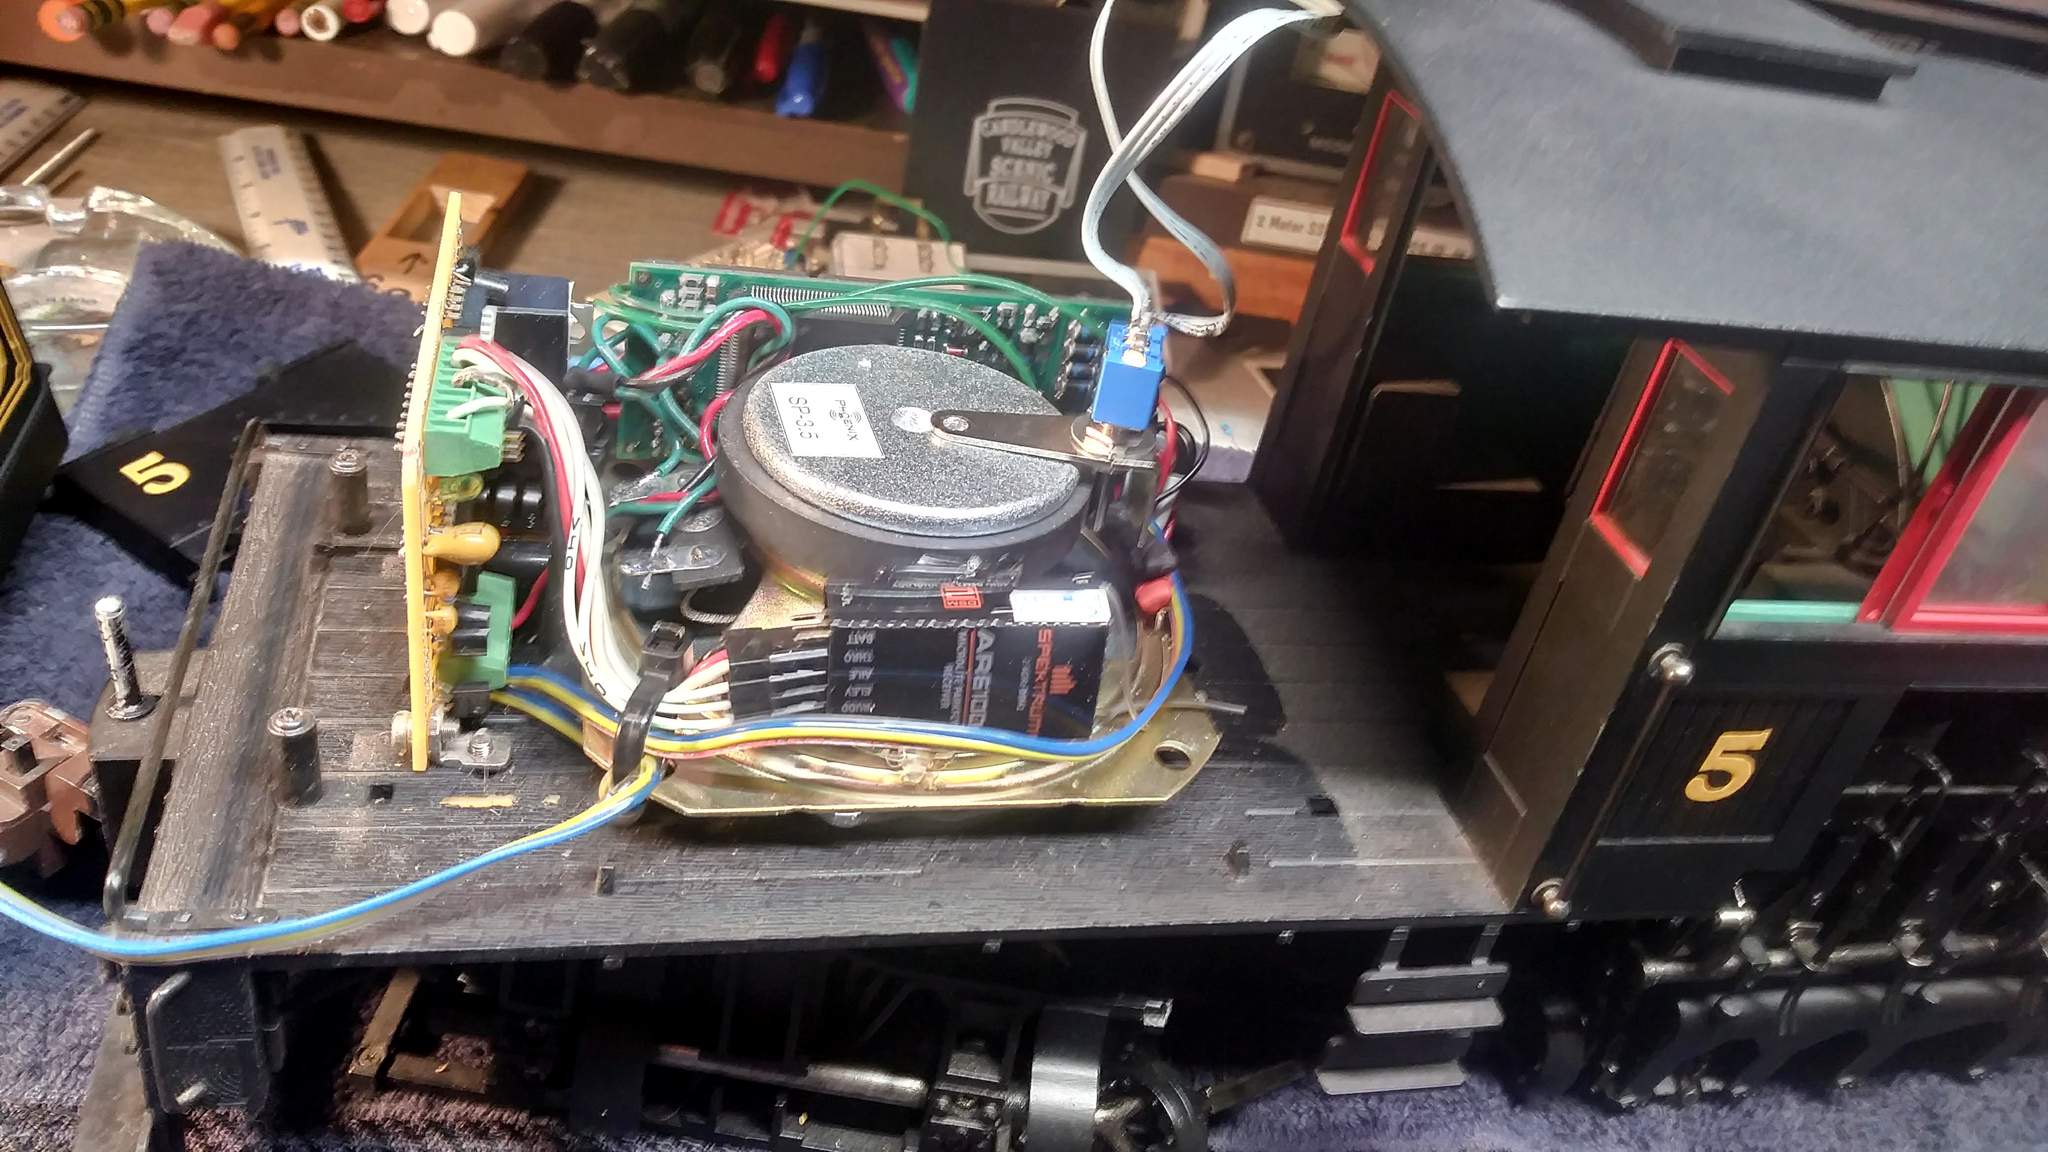
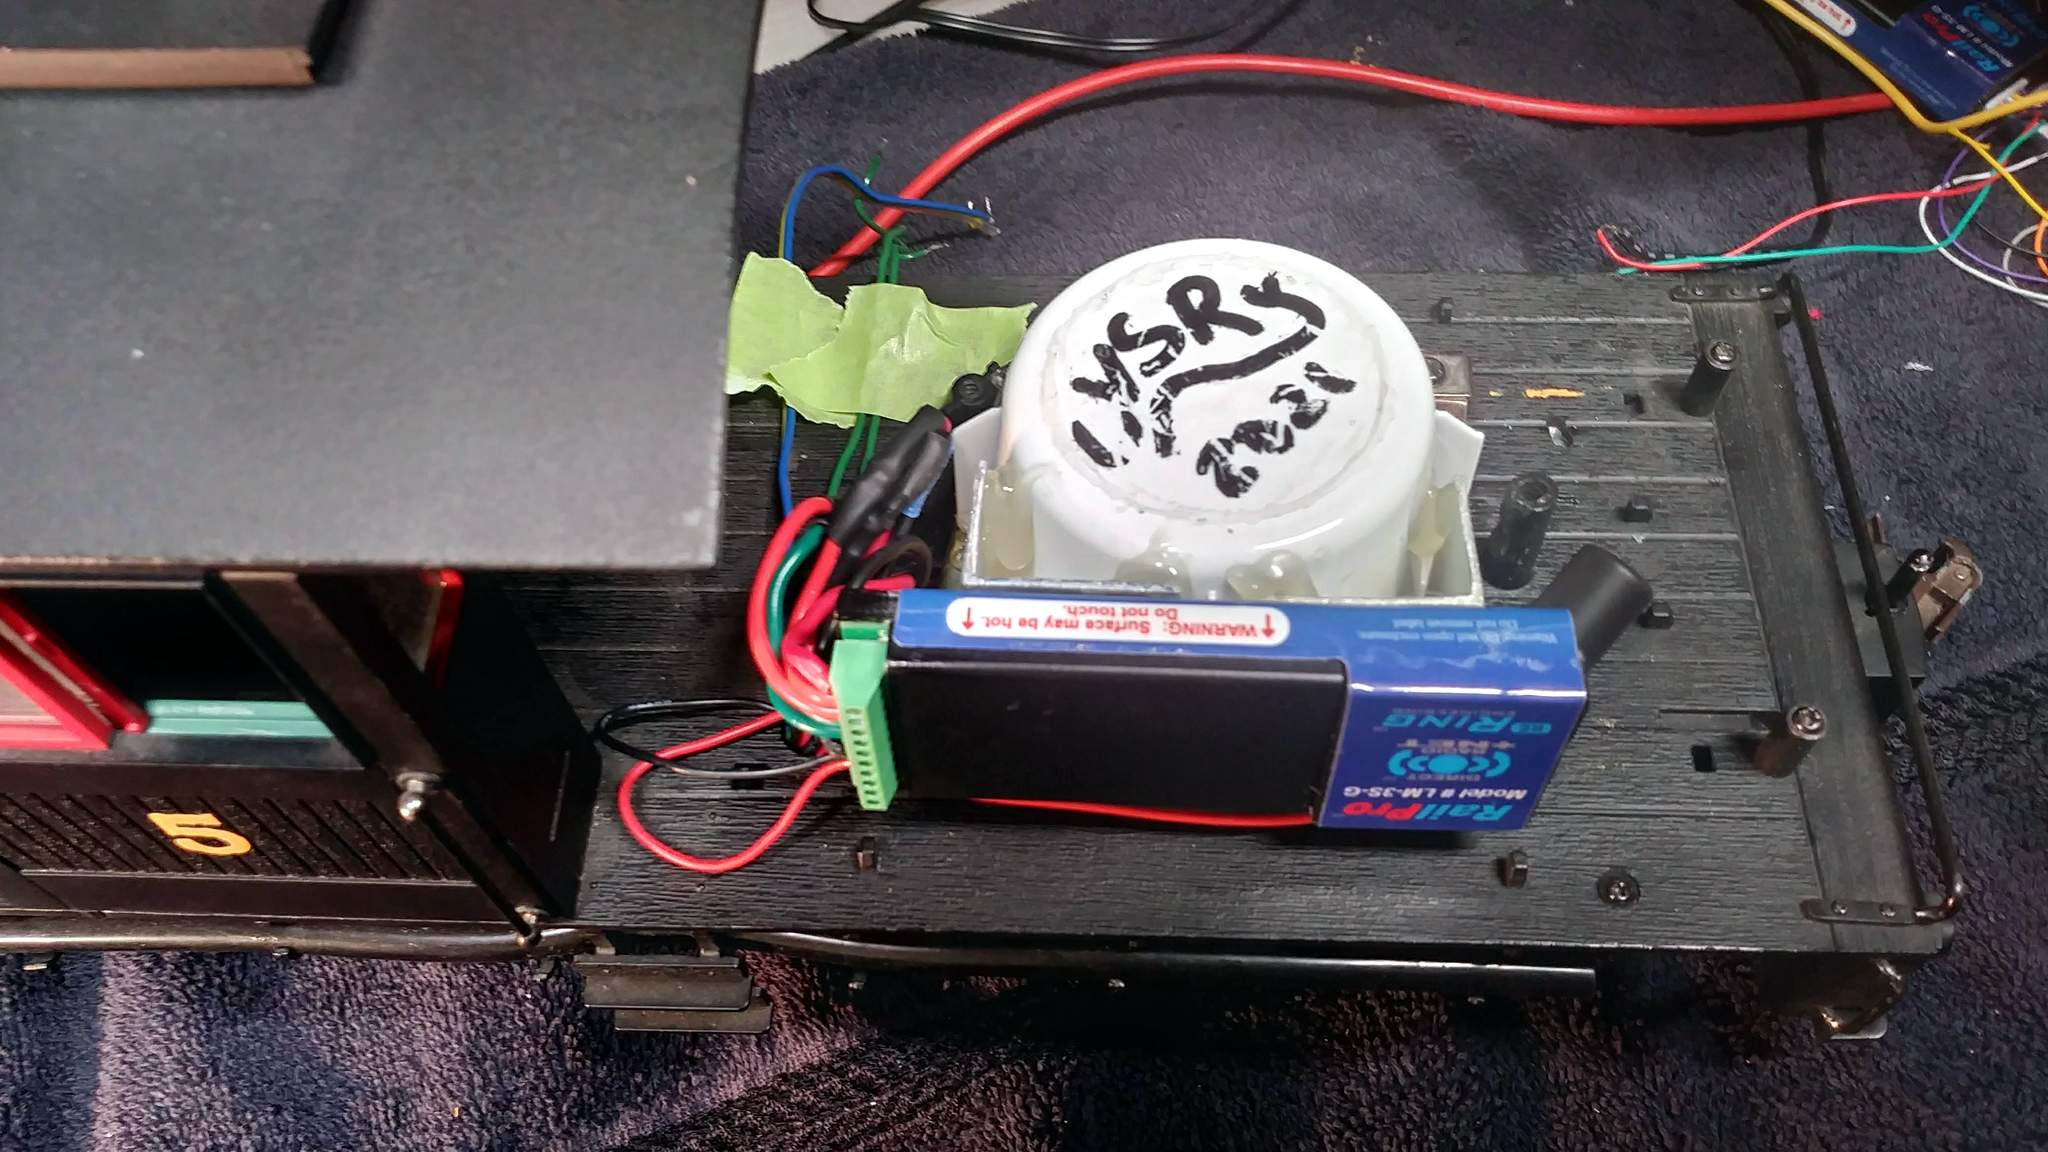
Today the railroad dragged (literally as Bachmann Shays will not free-wheel) Shay #5 off a storage track where it has sat since it somehow lost it’s link with my old 2-stick transmitter. In order to fix the link I would need to open it up, so I might as well convert it to RailPro while it’s open.

I managed to locate the wiring diagram from when I restored it and installed Battery/RC so I won’t need to reverse engineer anything.

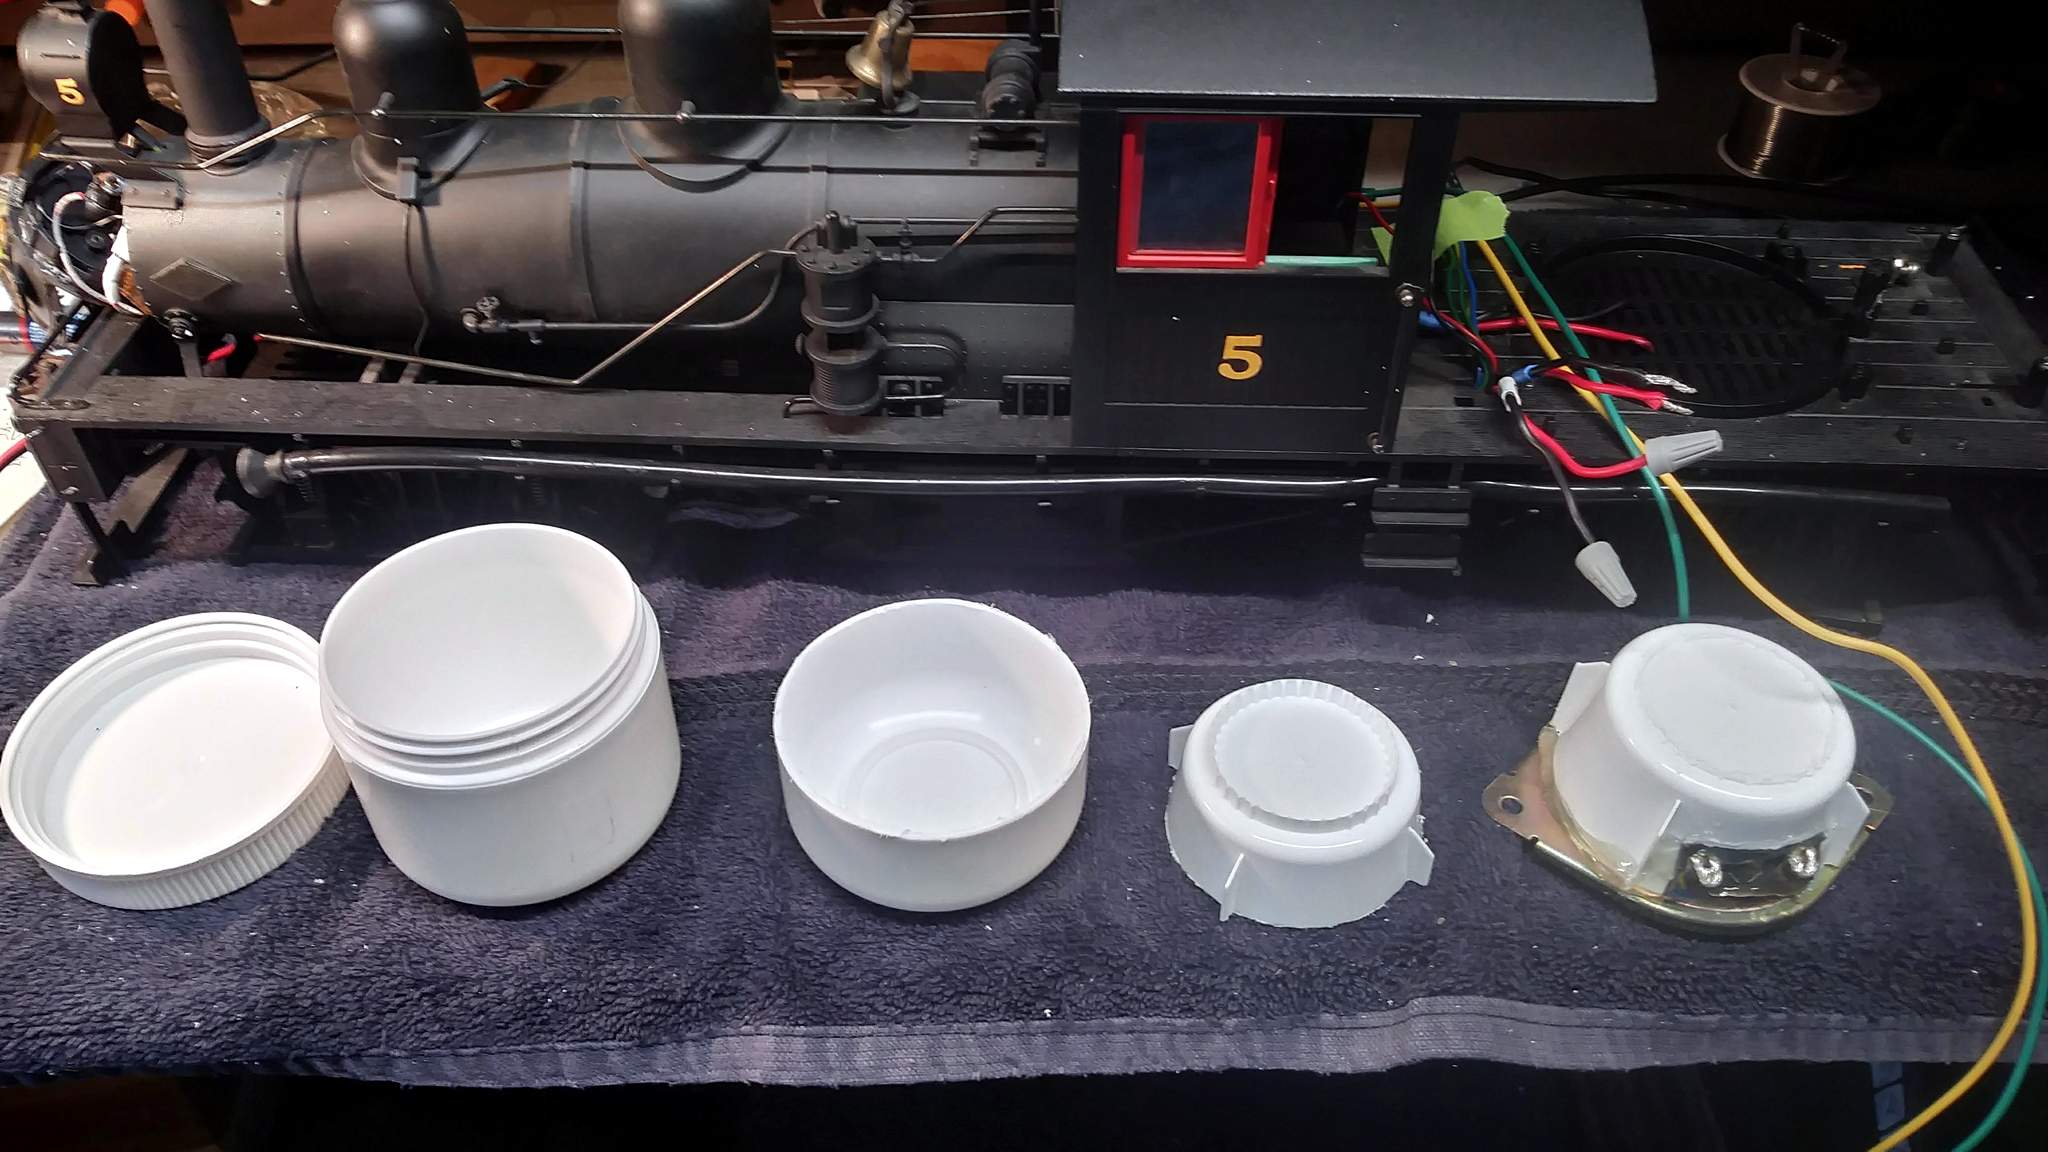
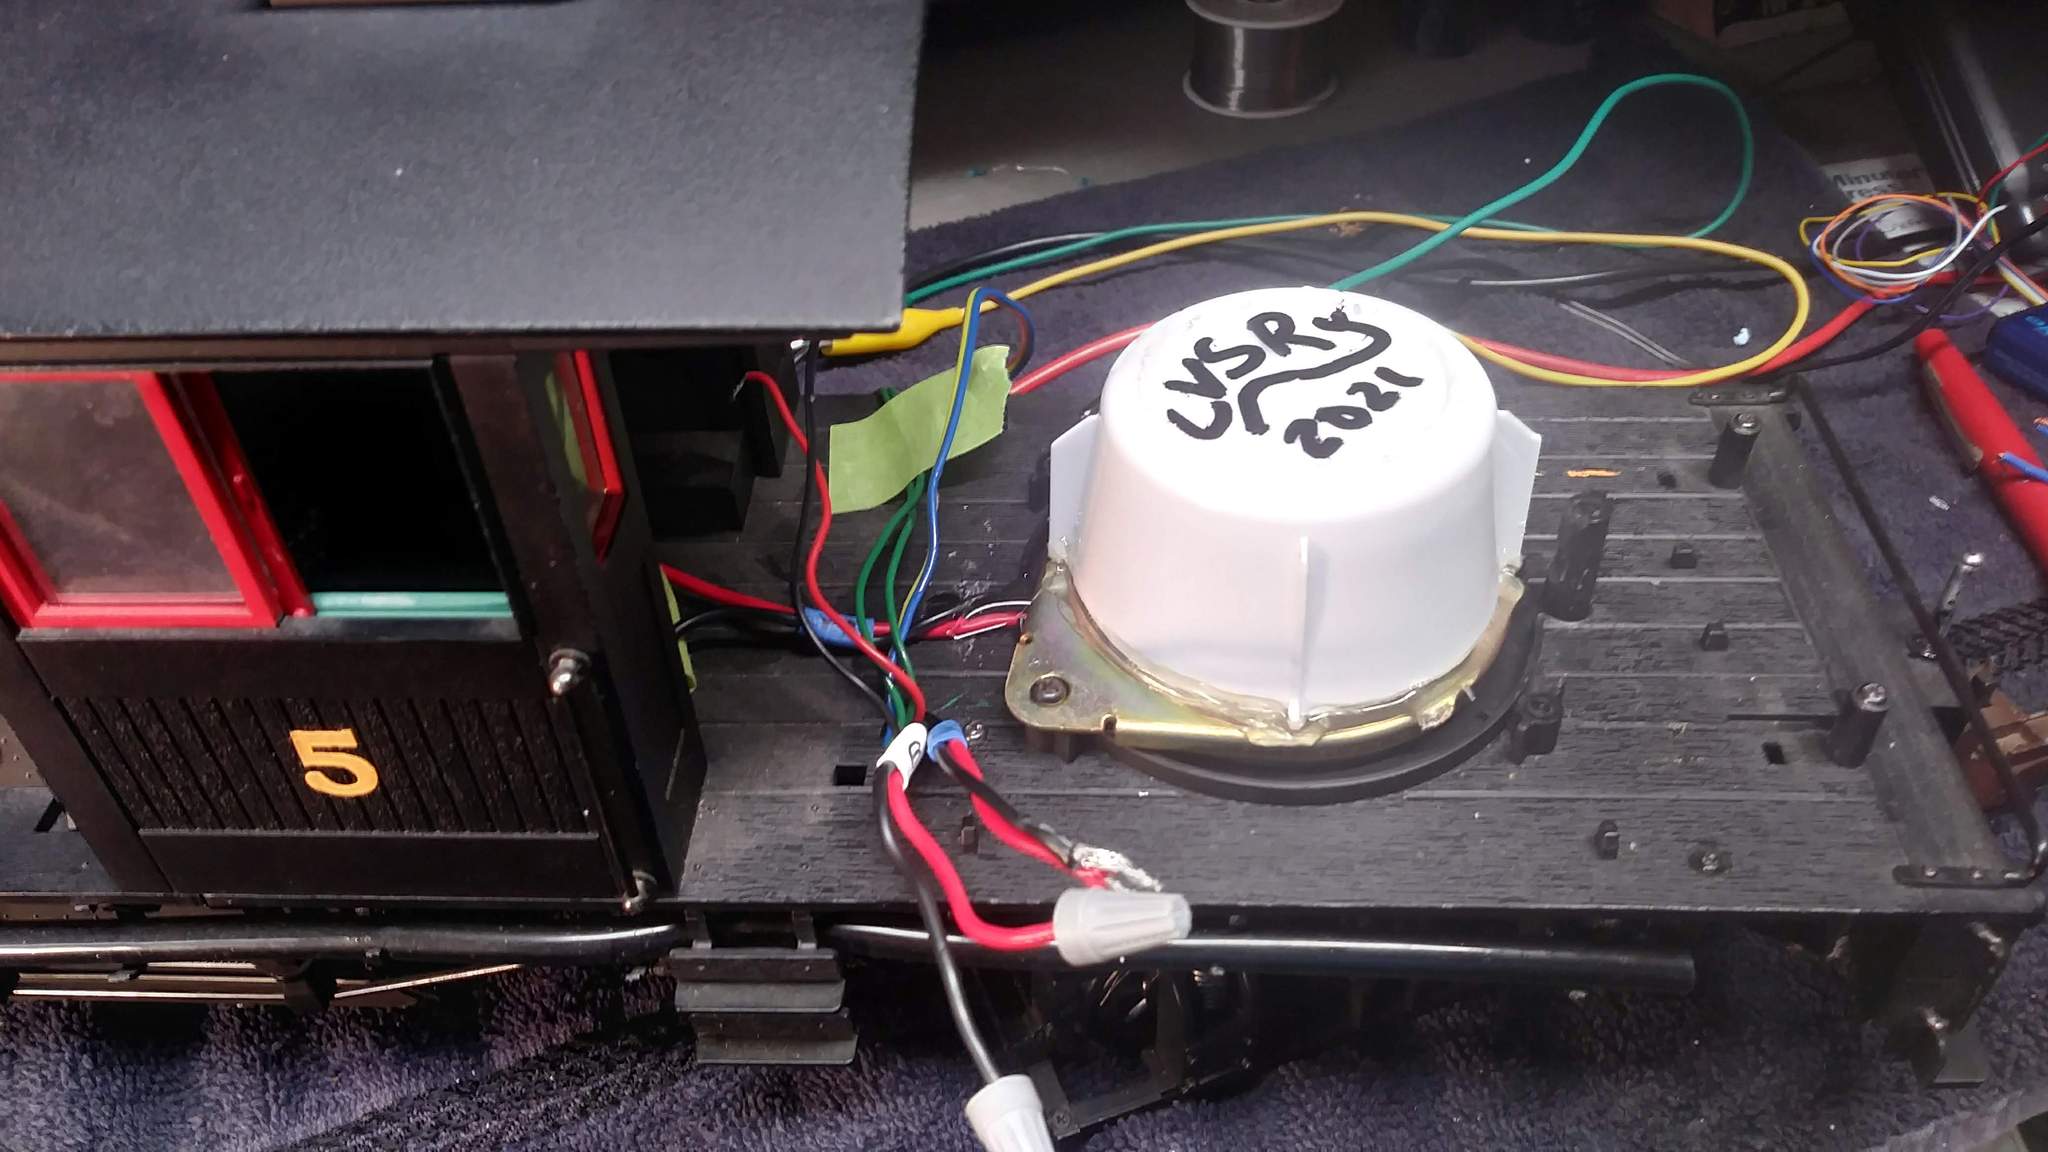
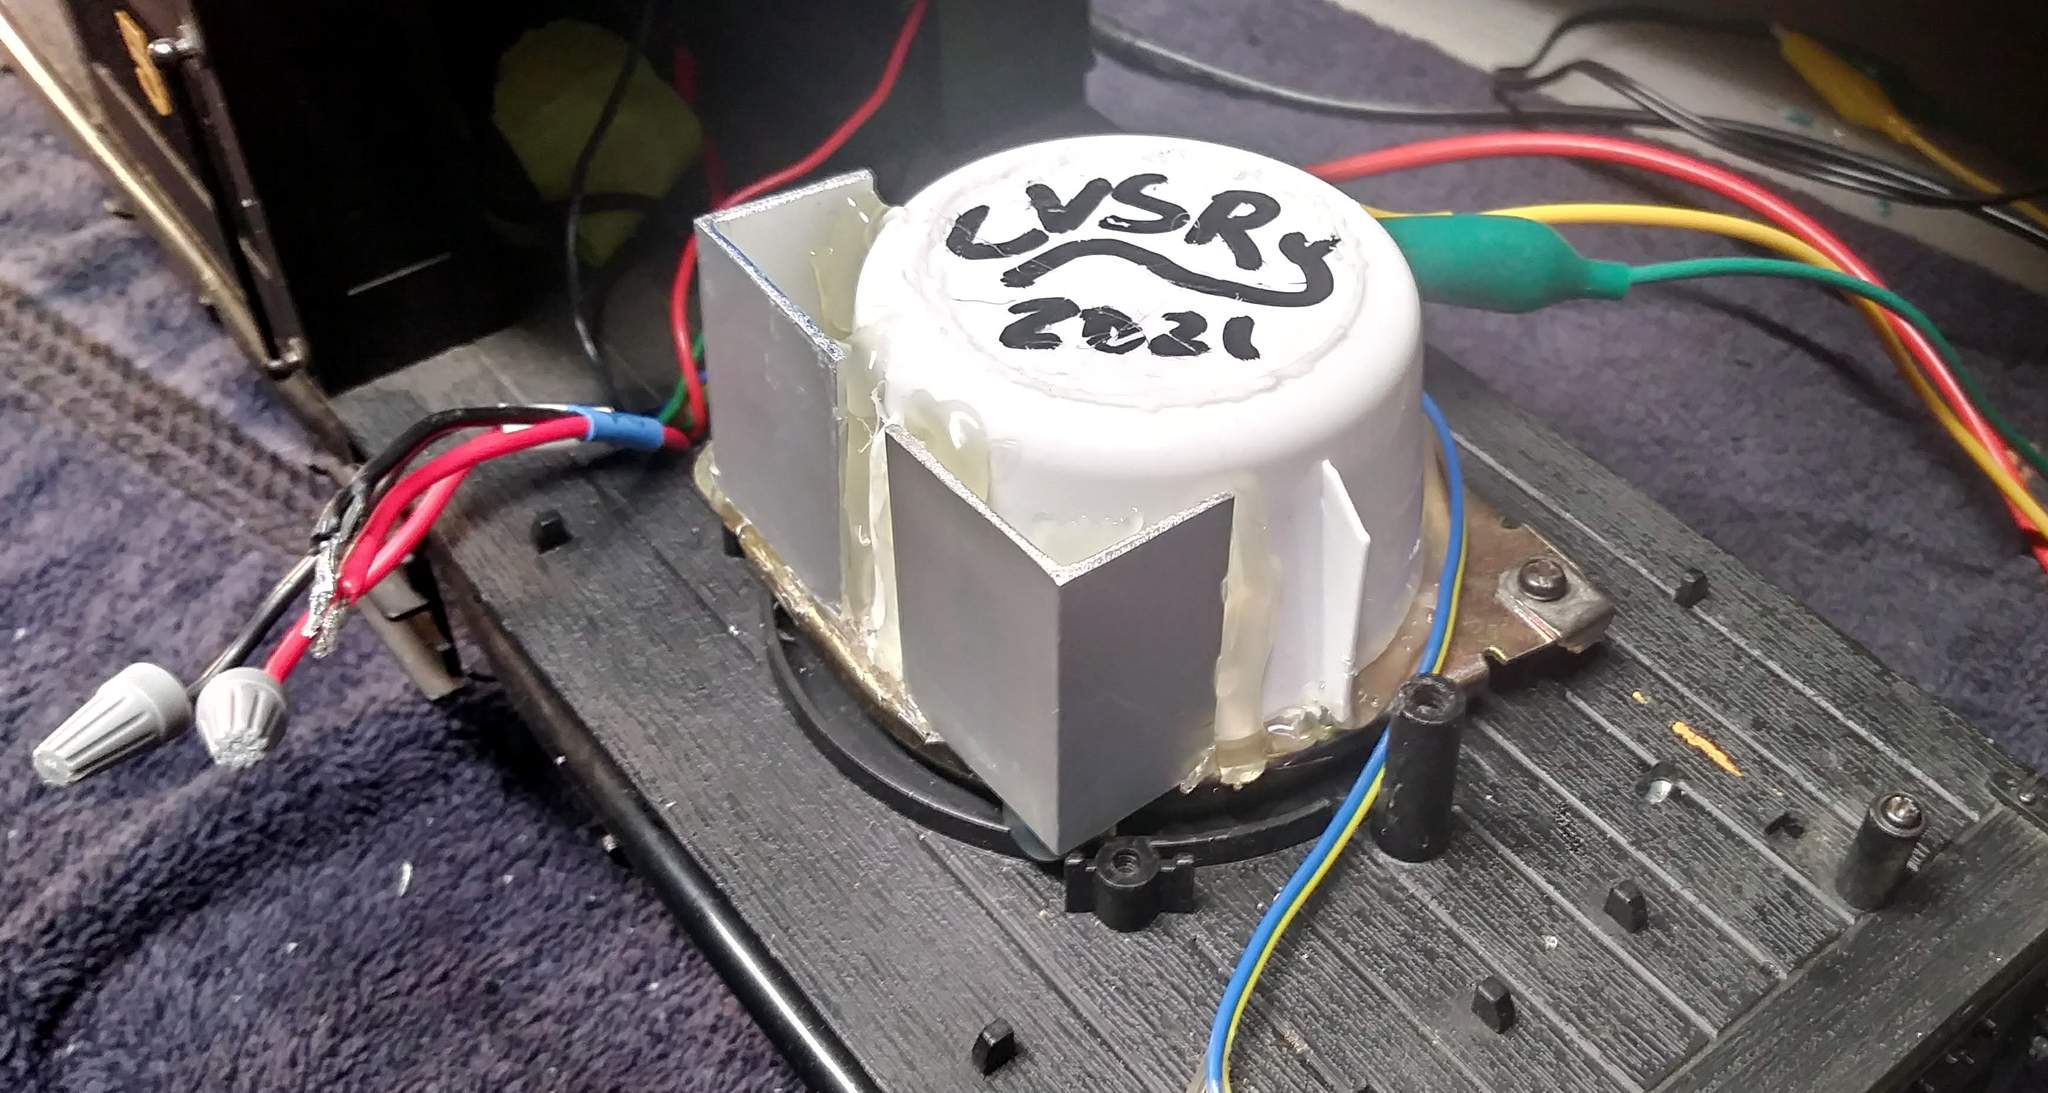
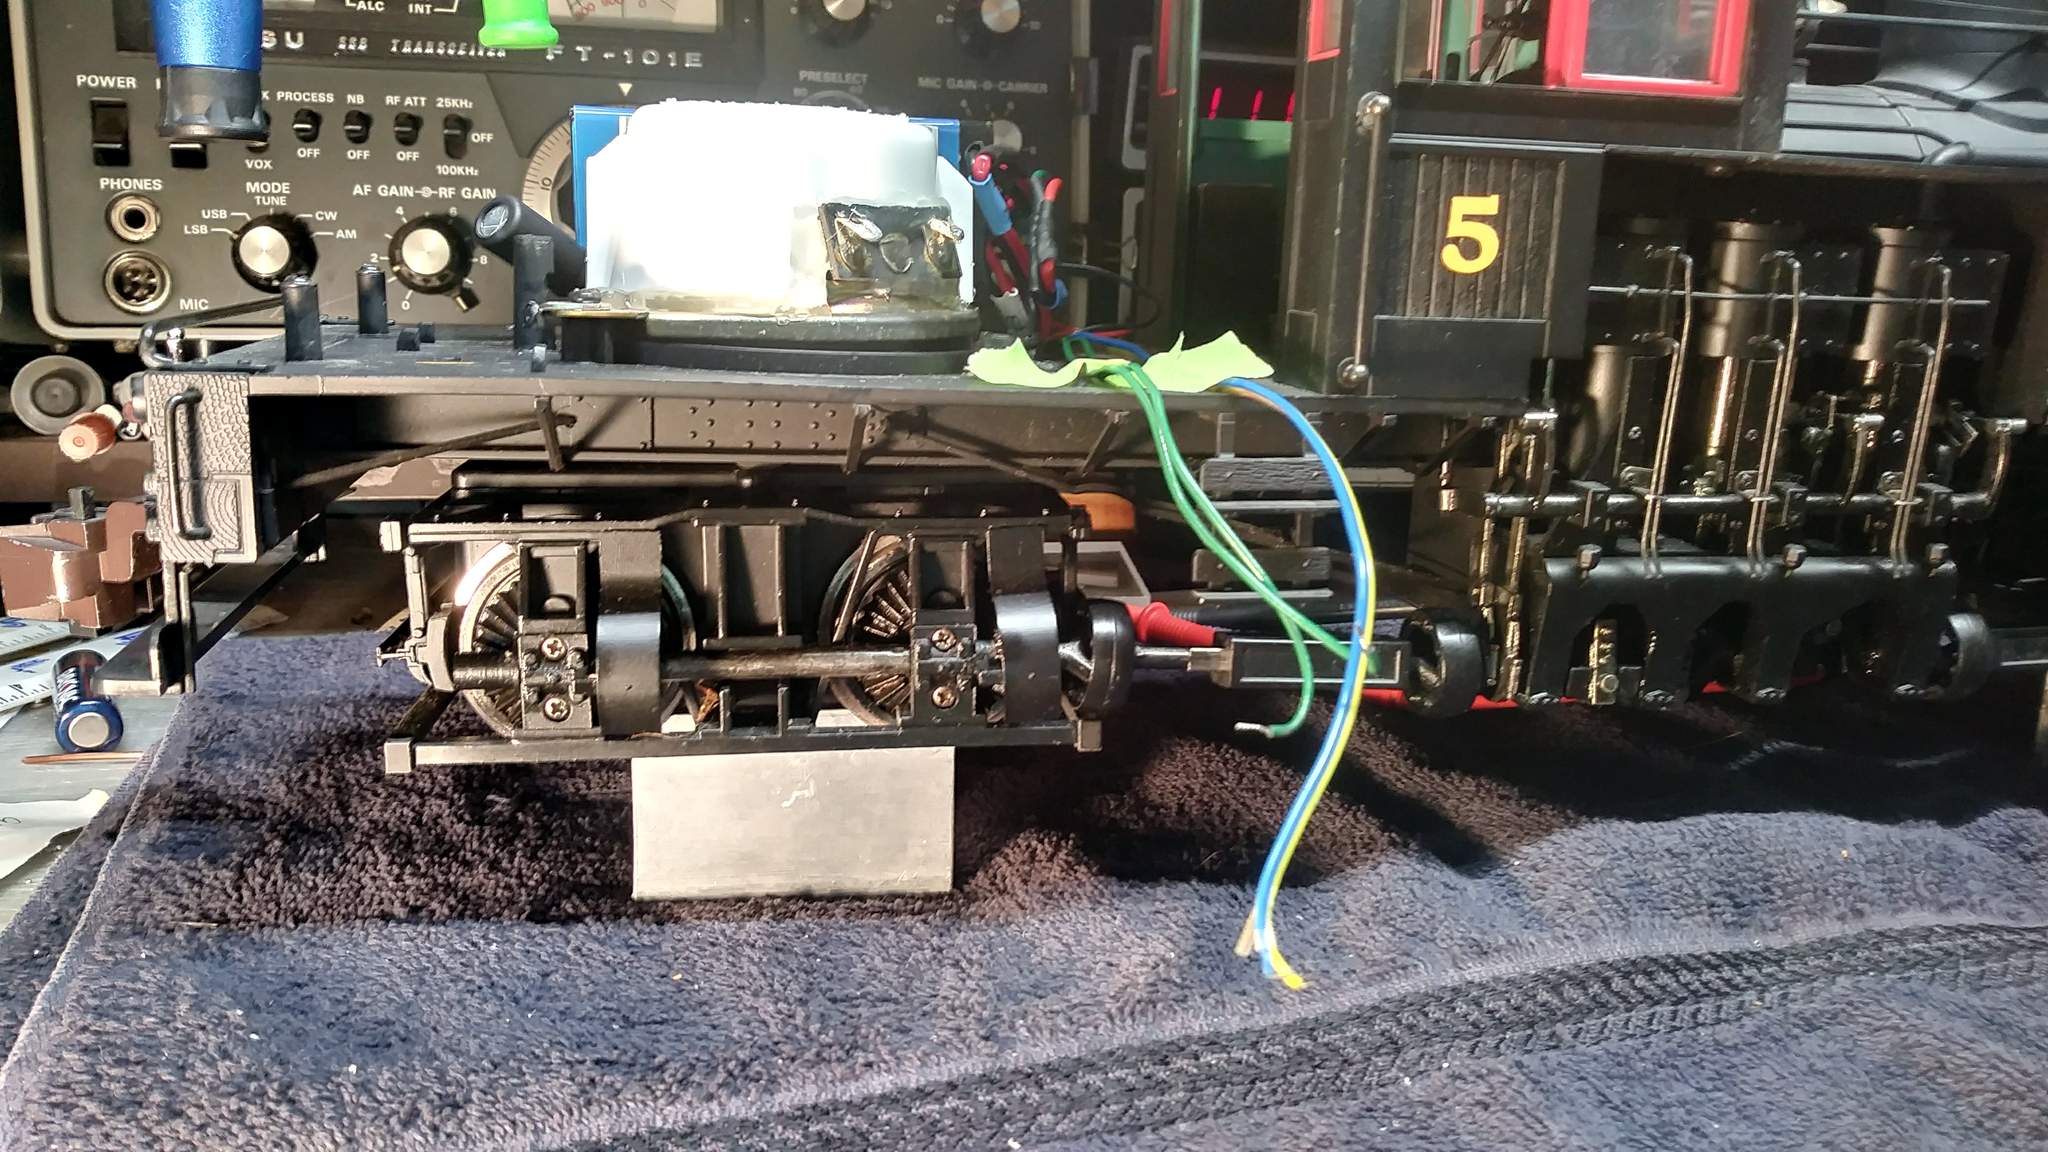
I’ll take pictures as soon as surgery begins. One item to be extracted is a Phoenix Big Sound 97 board with Shay chips. That will be available soon if anyone needs.

One RailPro module will replace all of this except the speaker.

I need to see about building a speaker enclosure too.

Jon,
I have used a cut down Styrfoam cup before, works good and is quick and easy. Just have to find one with the right sized bottom.

1 Like

Interesting, Jon. How did it go?

Well, I spent most of my bench time tonight brushing off years of dust and trying to remember how to open the tender. I was pretty sure it was a screw in the water hatch, but the hatch felt glued closed. A quick look at the parts diagram confirmed that was the way it was done, so a little persuasion with an exacto blade got the hatch open and the shell off.

That’s where I left it for tonight.

You’re doomed if you are trusting YOUR memory! :innocent:

Yesterday was lost to watching my team embarrass themselves on Monday Night Football. Tonight I removed of the Rail Boss and Phoenix and contemplated how and where I’m going to mount the RailPro module. It just barely fits cross-wise where the RailBoss board was.

A few photos from the process. First, all the old hardware just before removal…

After surgery was complete. Some of this wiring will go and the motor leads separated as RailPro provides two motor outputs for the trucks…

Playing around with where the LM3-S-G might fit. It’s looking like any speaker enclosure will need to be quite small…

The next few steps are pretty boring. I’ll take more pictures when there is something to show.

1 Like

Jon,
Put an oval speaker in the fire box, opens up all kinds of room in the bunker.

That could be done, but I kind of like the Firebox Flicker and have figured out how to keep it in an RC situation. It will fit in the bunker, but I need to get creative. Just adds to the fun.

I have a different speaker that is a bit smaller but sounds great that I might change to.

Looks nice Jon. Neat documentation of the process.

I ended up removing the Phoenix speaker and getting rid of lots of un-needed wires.
My attention to soldering and heat shrinking when I built this made for a bit of work to get it all apart. My decision to use high temp hot glue to hold down the speaker and organize wires was a good one. With a little screwdriver tip persuasion, everything pops apart.

I fould some speakers my son ripped out of his Neon 12 years ago. A bit smaller and significantly louder than the Phoenix speaker. I just happened to have a container that when cut down will enclose the back side perfectly. I need to seal it with some hot glue and get some pictures tomorrow.

2 Likes

So it took a few days to sort out what I was going to do for the speaker. I mentioned the smaller speakers I found were louder and better sounding than the Phoenix speaker. They have a Chrysler mark on them - definitely from the '95 Neon…

It needed something to close off the back side for better sound. I had some plastic jars kicking around that looked like a good candidate. When I cut one down I found it was double walled. I liked the insert better as it has ribs to reduce vibration. Here is the progression as it took me two attempts to get the size right…

The plastic is hot glued to the metal speaker basket and sounds great when operated loud!

Got the speaker mounted - It fits 2 of the the original mounts and I even remember where I had stored the hardware when I first converted this one years ago…

And that’s where I quit to go watch feetsball.

Just a little progress to report. I found a bit of 3/4" x 1" aluminum angle that I though could be used to create a flat mounting surface for the RailPro loco module. Did I mention I really like hot glue? Here the angles have been glued to the outside of the speaker enclosure…

I’ll use double sided tape to mount the module to the angles. I had already added some foam double sided tape but when I looked at the distance from the LM heat sink to the tank shell, I decided I need every bit of clearance I can gain, so I’ll use a thin double sided tape. The down side of the thin tape is that removal will be more difficult - no room to get a knife blade in. Maybe hot glue would be better?

Taking a few days off from this project now. Tomorrow is a road trip to Boston to see the Genesis Last Domino show, an overnight and a late morning ride home.

So just out of curiosity, have you ever considered using hot glue. I’ve read some people really like it. Apparently, like it a lot. :wink:

1 Like

I have been using it to hold down wires and mount things inside locos for years. I used to use a low temp crafting gun. Not so good. Got a professional high temp gun and it’s great!

Good idea using those angle pieces for a board mount.
Boy, wouldn’t it sure make things cleaner and maybe simpler if they came up with wireless connections for all the interconnecting pieces :smiley:

Good progress last evening. Turned out that my motor wiring from the first conversion was a little too heavy for the RailPro screw terminals, so I extended them a few inches with lighter wire. Motors and Battery are all hooked up ready to test…

I don’t own rollers for testing, but with battery power one just needs to get the wheels in the air. A pair cut-offs from scrap of 1.5" aluminum tube did the job. Everything working as it should…

I wired each of the trucks separately to the M1 and M2 connections. I’m not sure if those terminals are simply for convenience, or if they are separate motor drivers using Ring’s speed matching technology. I do know that once things were lubed up properly it runs very smooth from a crawl to blazing fast!

It’s a rainy day with no plans today, so I hope to get the lights and sound done so I can take her for a test spin on the indoor.

Nice job, Jon. Great photos, as always!

1 Like

Great how-to, Jon. Where are the batteries on the Shay?