Large Scale Central

Creating Board and Batten

Gentlemen,

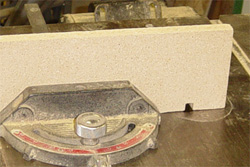
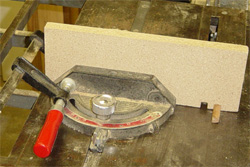
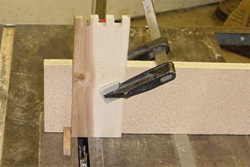
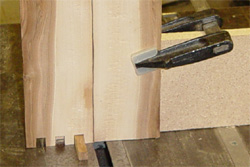
I have plans (Brewer) to construct an early 1900’s one room school house and church. One of the structures calls for board and batten construction. In order to simplify the b & b design, I had the idea to use cedar fence pickets. The thought is to plane the boards to ~ 3/8" thickness and run them through the table saw with a dado blade set to 1/4" in height and ~1/2" in width to create the batten and board. This is being built to 1:20.3 scale.

Anyone ever used this method before to create board and batten. Ideas/feedback are most appreciated.

Jerry

Jerry that is exactly what I do. Except I set the blade at 1/8" high, 3/8" wide and move the fence 1/2" after each cut.

Hi Randy,

Thanks for the fast response. I’ll go with your dimensions - sounds good to me.

I’ll post pics when I get started and continue through the project. This will be my first attempt building one of these structures… Any other suggestions are always welcome.

Jerry

Anyone know of a reasonably priced table saw fence setup that can do repeatable increments accurately? I have both a 10" table saw, and 10" portable bench saw, but they have the standard “loosen, move over some, tighten” fence. I’d like a nice one where I could give a wheel a crank or two and get EXACTLY a half inch, or whatever, without spending $300.

Only “cheap” fence I know of is the Delta. No wheel though its all still unlock and slide. I have the same type on my Rigid 10" and once its calibrated its fine.

http://www.amazon.com/DELTA-36-T30-30-Inch-Fence-System/dp/B000H0R1S2

I thought about the same Bob… Sure would make doing production cuts more efficient.

Jerry

HI Jerry
Alot of my smaller buildings are “board and batten” type and here is how I make them. I build the structure then use hobby craft sticks that have tightbond 3 glue brushed on them then they are pin nailed to the building. After the glue dries I cut the excess off and then paint the whole building. I also do corner boards the same way. Your idea might be stronger over time since it is all one piece but the sticks are a good alternative if you didn’t want to do all that cutting.
Todd

A trick I learned to accommodate my crappy Craftsman fence is to get it set up as accurately as possible to the setting furthest away from the blade. Make your first cut, then add a pre-made spacer between the work and the fence. Make another cut, add another spacer. Repeat then rinse.

If your spacers are accurate and you are able to get the fence parallel to the blade, you will end up with accurately spaced cuts.

You do need to have a bunch of spacers pre-made, but when you have more time than money it is doable :slight_smile:

Hi Todd,

Sounds like a good method as well. My thought for using the dado cut method was for durability. If you are not familiar with the Front Range (east side of the Rockies) it can be a rather harsh environment. i.e. - very low humidity and high degree of UV and ozone. Where I live is at 7000 ft above sea level. Just about the complete opposite of Cape Cod, MA.

All of that said - paint, adhesives and plastics take a beating around here. Titebound III is an excellent product and seems to hold up here. I’ll try both methods and see which ‘works’ the best.

Thanks for the suggestion.

Jerry

Hi Jon,

I like your idea! That crossed my mind after I made the original post. Did some internet searches and found a fence system that appears to be the ticket. Made by Incremental Tool in Dallas TX and the base model starts at ~$400. A fella can cut a lot of spacers for that money…

Thanks for the suggestion.

Jerry

A Thought… Wouldn’t a jig built on the same principal of a “Box Joint Cutter” work? Use the dado to make the Cut, and then move the piece over the next “registration Pin” which matches the dado cut, to achieve the offset. Repeat as often as necessary. For more stability use two or more Registration Pins set at the correct spacing.

Good idea Dave! Build a sled with a couple of small boards to register the work and you could easily and inexpensively make simulated board and batten walls! Nice thing about the sled is it can be made out of scrap wood so the cost is low, but the results can be top notch!

Yeah, you could use a scrap piece attached to your miter gauge, including a registering piece similar to the one shown, but sized to your project, say 1/2 to 3/4 inches. After each cut, just lift and slide the work over to the next register, and you are set. The work piece would, of course be horizontal, instead of vertical as in the photos.

(http://sawdustmaking.com/Box%20Joint/firstnotch.jpg)

(http://sawdustmaking.com/Box%20Joint/clamped.jpg)

(http://sawdustmaking.com/Box%20Joint/outsidetail.jpg)

(http://sawdustmaking.com/Box%20Joint/insidetail.jpg)

Click here for the full tutorial. Just remember that this is for box joints, not board and batten. For you gearheads, Take a look at this!

Great example Steve. Pictures worth a 1000 words! Thanks for the reference.

Jerry

Multiple spaces are a good way to go, but do it the way the oldtimers did - don’t use wood, use metal bars or square tubing. Much more accurate and they don’t warp or swell with humidity.

Another old trick - let’s say you need to cut some wood EXACTLY 2.000" wide. It’s really simple - place a piece, or pieces, of metal bar or tubing that total 2.000" wide, against the fence (which you set at least 4-5" away from the blade - think desired width + 2-3"), then rip a piece of scrap lumber to whatever width it comes out to. Then, clamp that newly cut piece to the saw tabletop and tight against the fence. Using the cut edge as your new “fence,” ripped cutoffs will now be exactly 2.000" wide.

Brian
Taxachusetts