Dan… what metal, or stock do you plan on using to make the panels from…?
Dave Taylor said:
Dan… what metal, or stock do you plan on using to make the panels from…?
I’ve been using 0.002" steel shim stock with the paper crimper with success. I also have 0.003 aluminum and 0.002 brass I am going to try. I’ve discovered through testing that the roller profile must be a little more aggressive than I originally thought.
Pete Lassen said:
Dan are you at all concerned with the plastic flexing and not giving repeatable results, and will the plastic rollers wear out quickly?
Pete, I don’t think the PETG filament I am using will wear out or flex. The paper crimper I have been using is all plastic including the rollers and I have seen no issues with it other than I can’t control the profile. Should the rollers wear out prematurely, I can print new ones or make them out of a different filament such as carbon fiber or even some of the newer filaments that have various forms of metal in them. I have used the carbon fiber before and it works well, but I’ve never used the metal infused filaments so there certainly would be a learning curve. This whole thing may be an experiment in what not to do but at least we’ll all know in the end.
Dan - chipping in here. I was looking to do something very similar, but then I found a press tool on eBay in the G Scale section. You’ve probably seen it. It makes sections about 4" x 7", which would be on the order of 96" x 168" in full scale if you were modeling in 1/24. This is larger than most real-life sheets would be, so I think the smaller pieces actually seem more realistic. He designed this for 36 gauge aluminum, but actually, using a cut-up pop can works pretty well. Search on “Make your own G or O scale roofing” and you can see what it looks like. Added bonus is the sheets come out flat!
Trent
Trent, I’ve not seen that particular press. it looks like it produces a form of standing seam roofing. I’ve consider something similar, kind of a hybrid between the press and the rollers I am attempting to use. Make a bed similar to what is shown on ebay, but instead of using a press, have a roller with a mating profile as the bed and let the roller move on a rack and pinion mechanism along the bed. The press is probably much easier sinc its less moving parts, but it would take a long time to make a large quantity of roofing. Thanks for the information. If this experiment fails, I may look at going the press route.
Trent said:
I was looking to do something very similar, but then I found a press tool on eBay in the G Scale section. You’ve probably seen it. It makes sections about 4" x 7", which would be on the order of 96" x 168" in full scale if you were modeling in 1/24.
I’m wondering how this works? The seller doesn’t specify. The plates look like they are clad in oak so I imagine you could just pound it with a mallet but there are the screw holes so I’m thinking you use bolts and ratchet it down. The holes are missing from one side probably to facilitate loading/unloading.
Dan, I believe this roofing is just corrugated “sinewave” type. Although it does look more “fanfold” than most. Standing seam has the edges raised high and the panels lock into each other rather than overlap. Just so happens I’m looking at putting a metal roof on my home now. Also, what crimper do you have? The only one I’ve seen is the one I have made by Fiskers and has metal rollers.
Dan Gilchrist said:
Trent said:
I was looking to do something very similar, but then I found a press tool on eBay in the G Scale section. You’ve probably seen it. It makes sections about 4" x 7", which would be on the order of 96" x 168" in full scale if you were modeling in 1/24.
I’m wondering how this works? The seller doesn’t specify. The plates look like they are clad in oak so I imagine you could just pound it with a mallet but there are the screw holes so I’m thinking you use bolts and ratchet it down. The holes are missing from one side probably to facilitate loading/unloading.
Dan, I believe this roofing is just corrugated “sinewave” type. Although it does look more “fanfold” than most. Standing seam has the edges raised high and the panels lock into each other rather than overlap. Just so happens I’m looking at putting a metal roof on my home now. Also, what crimper do you have? The only one I’ve seen is the one I have made by Fiskers and has metal rollers.
Dan, I have one made by Marvy and it definitely has plastic or some type of resin rollers. To lite for metal and I sliced a piece off with a hobby knife just to be sure.
More progress on the crimper. First tin has come off the rollers with some success. Still need to work on the profile to get where I want to be and I must perfect the feeding technique, but it works. Here is the first four pieces of .002" steel shim stock hot off the press … uh, mmmm … rollers …
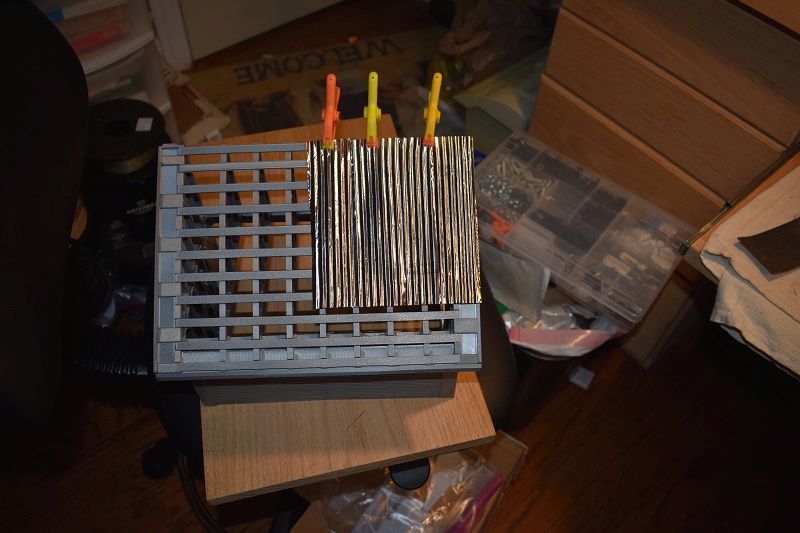
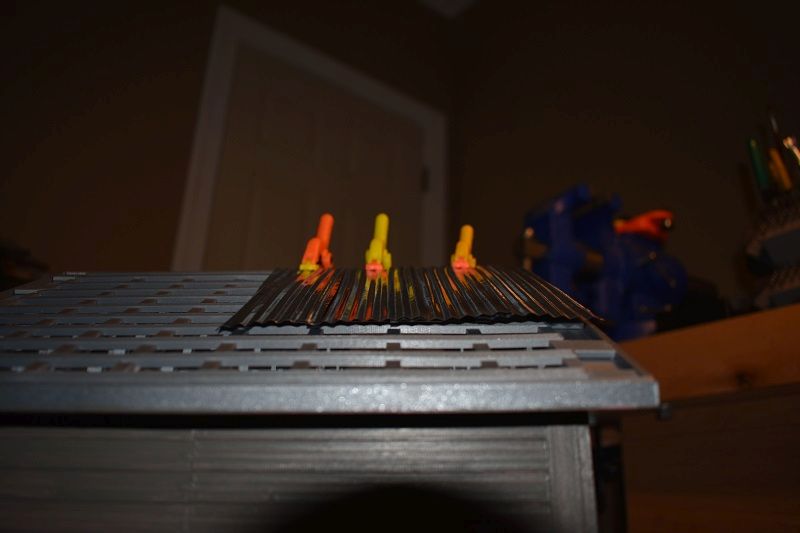
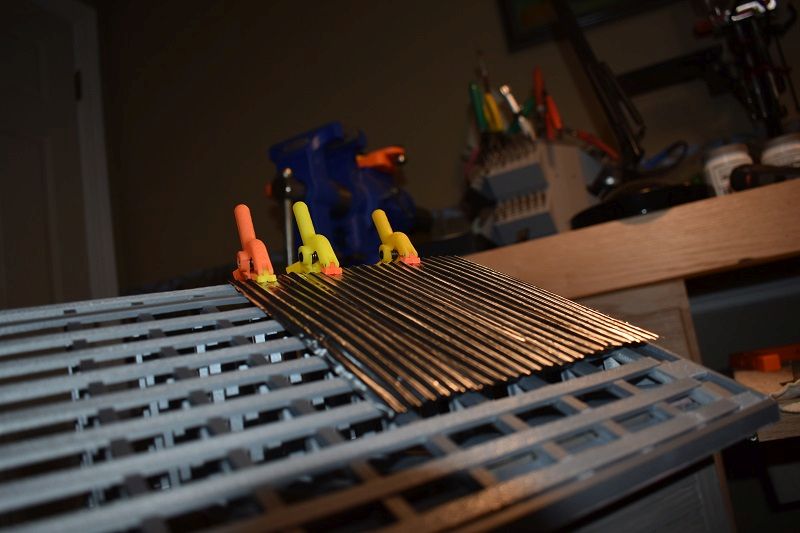
As you can see the profile is a little out of scale but you can see the rounded peaks and valleys vs the v shaped ones that come off the various paper crimpers. One benefit of this method is, at least in theory, you can make the pieces as long as you want, width is limited to the width of the rollers.
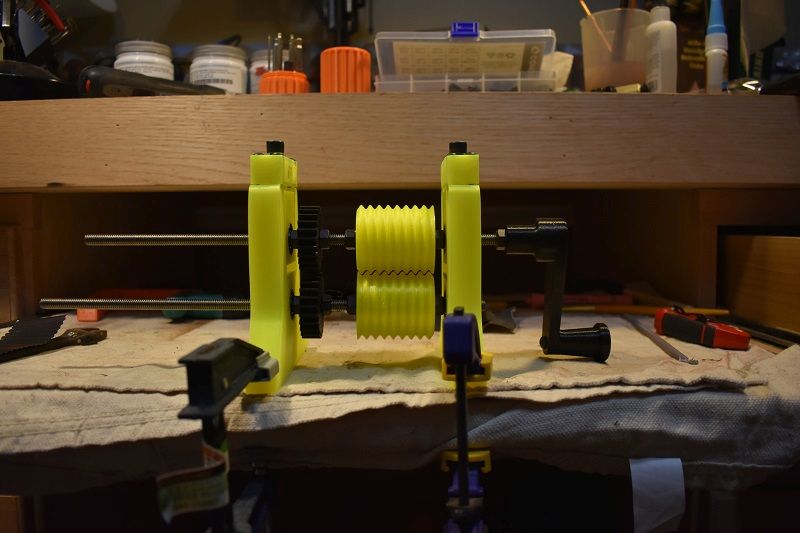
Here is the prototype tool as of now.
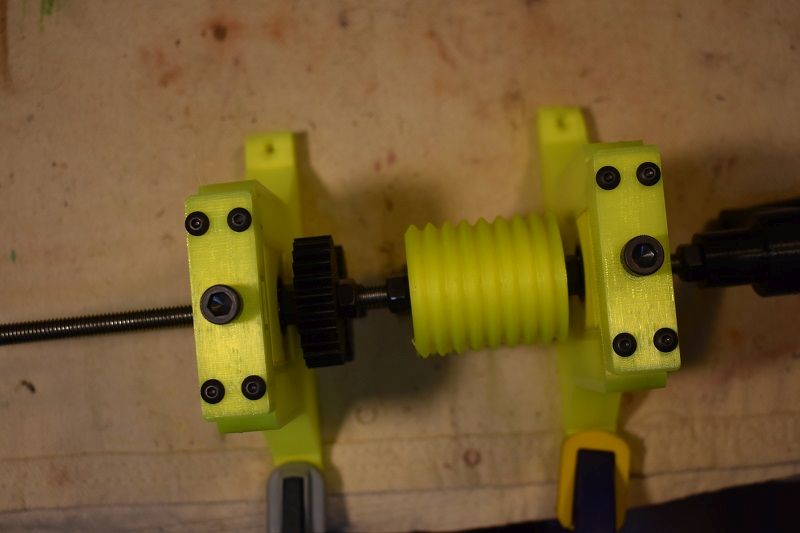
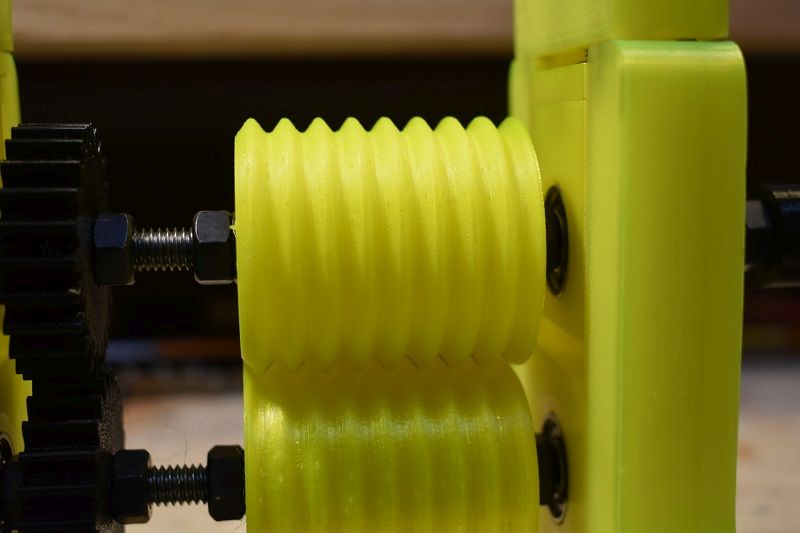
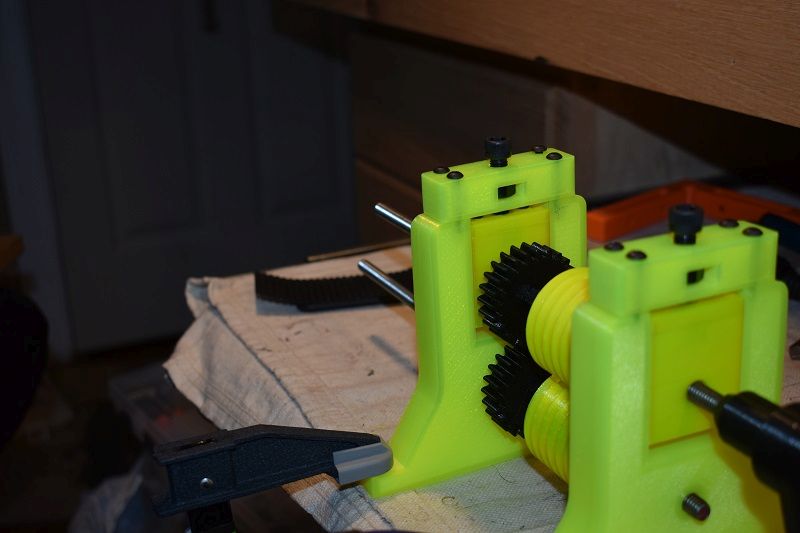
Nice you want to sell some? Looks way better than the paper crumpets and probably easier?
Layers of creativity:
“You know, I could make some.”
“You know, I could make a tool with which to make some.”
I’m looking for significant sized (A5 size) corrugated sheets to use to replace my shingled roofs, but am running into issues.
I want to use long pieces of corrugated metal to withstand Aussie summers and can’t justify the cost to involved buying 4 pieces of Dollhouse Roofing so have been looking for an alternative.
So I borrowed a Fiscars crimper from herself and the metal wandered during the crimping process.
I did find some commercial tin at Temu but they appear tiny.
EBay has some Flue Crimpers but I’m pretty sure that they are too small.
This looked suitable for indoor use only.
Even vintage flue crinpers look too small


It looks like I might have to build something.
Dan, how is your crimper holding up?
And how do you keep the edges from wandering?
Bill, it still works as designed. I will say that the resulting tin is not perfect like you would get with a stamp like the one @Dave_Taylor machined several years ago, but I think it adds character to the tin and structure as it gives it an aged look. I’m happy to share the files with you if you would like to print one for yourself or use it as a starting point for your own design. Just let me know.
1 Like
I use Fiscars crimper and the main thing is to start the sheet straight, they will sometimes wander some, most times they are good. That does make it hard to line up the next sheet.
Bill,
If you’re using a paper crimper, you absolutely need to anneal the cans before you run them. I anneal mine on my bbq
Awesome idea!
You cooked some hotdogs at the same time, right?
Thanks Dan,
Yes please. Would you like to upload your files to Printables (or similar site), the LSC member STL catalogue or via another route?
I’ve found they don’t crimp as well if you don’t anneal them.
The key is getting a junky old bbq, and replacing the regulator with an adjustable one then you can crank up the heat.
Aluminum anneals at 650°?
Bill, I’m traveling this week, but as soon as I get back in the office I will send you the files. What file type do you want? I can provide STL or Fusion or both.
Thanks Dan,
Could we do both? I really need to learn to start relying on fusion and get more practice in.
Absolutely, Bill. Hopefully I can get them to you later this week.