ah, now it makes sense!
i was wondering, why Jon needs external lighting at every corner…
By Rooster? In the past? 

The last two days I’ve been working on the framing for the original South wall. This building was not framed to be finished inside. The top plate of the South (rear) wall is about 4" lower than the side wall frame top. Using siding and 2x4s removed from the North wall, I fabricated some fill pieces to provide a nailing surface for the top of the wall sheets. They can be seen at the left. The block at top center is another fill piece to allow the first cieling joist to be a nailing surface for the ceiling edge…

The ceiling joist in place…

A prerequisite to this framing work was to get the South wall wired and connected to the sub panel eliminating a plugged in cable feeding the furnace and allowing the top plate to be covered. The south wall outlets are now all tied in and functional…

This is the sub panel I installed. The cable that goes over the surface of the framing is for a temporary wall outlet that can now be eliminated…

Two of the four permanent circuits are installed and functioning. I still need to wire outlets on the side walls. That will wait until the ceiling is framed and insulated.
Tomorrow I’ll re-do that insulation I removed and exposed to install the right hand outlet. The original insulation install is not correct with pieces folded and squashed to fit.
1 Like
Every time I take down an old plywood wall panel I find surprises. Today I needed to remove a wall panel that was cut too tall for my cieling joists to sit on the top plate. Fortunately they all are installed with star drive screws, so removal is quick.
This time I discovered a next to useless insulation job and some added framing at right who’s purpose is lost to history…

Those extra studs and blocks came out very easily opening it back up to 16" on center. When I removed the far left insulation I discovered a long abandoned rat’s nest. That batt of insulation went directly to the trash and a gap between the bottom plate and the siding was filled with expanding foam. One of those extra studs and a pair of blocks was used to create an inside corner. Insulation was cut to properly fit and stapled in place. By quitting time I had two more ceiling joists up…

Did I mention I purchased a $40 T50 pneumatic stapler for putting up the insulation? It’s very small and light and works great…

My hand appreciates it.
I also removed that temporary quad outlet and routed my heavy extension cord to one of the new outlets.
1 Like
Progress has been slow, but there has been some. Several more ceiling joists were hung and power was routed across for East wall outlets. I trimmed up the end of the T&G paneling and am ready to add a few vertical pieces to bring it to the next stud…

Before I go further with the ceiling joists, I’m going to deck the center of the top and hang insulation. There is so much stuff stored in here that piles need to be moved to gain access to the edges…

My excuse is that there are major distractions here on the weekends. The railroad’s Christmas in Coal Country event has a train going by 26 times over 3 days!
2 Likes
You’ve come a long way from where you started, not too long ago. Looking good. hope you’ve fed plywood sheets to the far end from there before you put in more rafters 
That is today’s plan. Once I get to the center opening they won’t fit so I’ll put enough up on both ends to deck what I want decked.
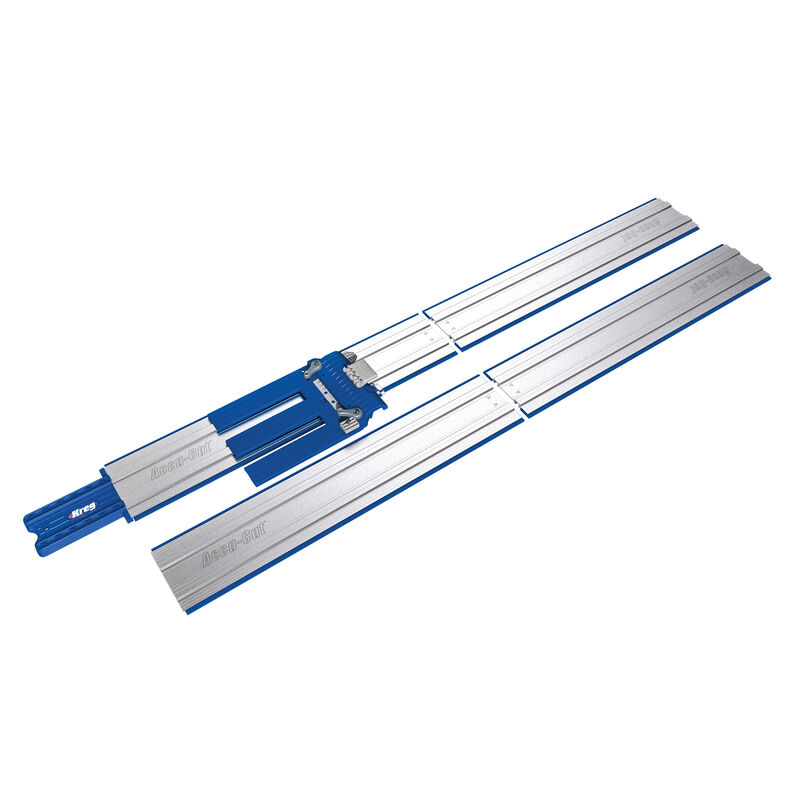
In order to make cutting 4x8’s easier I purchased a 100" Kreg Track Saw Guide system that works with my battery saw. Every wall sheet needs to be shortened and some ceiling sheets will need to be ripped. The track saw will make that much easier and more accurate…
1 Like
I did a lot of cutting with the Kreg track today. I’m really happy with it. I opted to spend the extra to get this over a Harbor Freight clamp on guide. After making about a dozen cuts with it, I’m glad I did. It’s very fast to line up and accurate.
All the decking for the south end is cut. The first 36 square feet is nailed down and the rest is up there waiting on the joists to be hung. I am doubling the 3/16" to give me an effective 3/8". I have confirmed that the decking and the joists will support my weight.
Would you consider this combination a good replacement for a tablesaw?
No. The table saw is better for smaller pieces. There are many things you can do with a table saw that this can not do. I would consider this as a good budget and space option over a panel saw.
My application is cutting 4x8 sheets. My table saw doesn’t have enough in-feed and out-feed support for large sheets, especially working alone.
I have the same problem with my table saw and 4x8 sheets. I might have to look into this for cutting styrene. After all, I cut styrene with a fine tooth blade on my my table saw so no reason it couldn’t work on a circular saw.
Your only issue may be that the styrene is too slippery for the track to grip. They sell clamps that go under the sheet for that reason. I’ve not had any problem with the track moving on plywood.
I have a structural question for the collective knowledge base here.
Before I started, there existed only 3 2x4’s connecting the rafters making a truss. Two are on 16" centers in the middle of the structure and one is 32" away where the roll-up door was hung. I want to leave the two that are on 32" centers as that is where I will make the access opening. That leaves one in a spot that will make sliding things into the overhead storage area a problem.
You can see them in this old shot…

I am adding a cieling joist at every rafter, effectively creating a truss where there was none. I think that once a joist is in place directly under the one at the rear, I can remove it without creating any structural issue. Here they are as of today…

If you see any reason why removing the one in the back, where the light is hanging, please comment!
I’m all caught up with prerequisites and ready to start hanging ceiling insulation at the far end. I don’t want to work from a ladder or my step stool so I built a 4 sq. ft. work platform just under 16" tall. I would have made it longer, but then moving it and storage becomes an issue…

Just trying to understand… You’re placing new joists at every rafter, all the way to the front; and thank you, cuz that early photo still keeps me up at night!! 
Yes, you’re replacing the functionality of the old joists above, in the rear of the shed, probably with better fasteners. And at a better mechanical advantage, being further down on the rafters. The old upper ones are now redundant.
FWIW, my pre-built shed came with joists on every other rafter pair, which leaves good space for inserting stock material upon them.
1 Like
Just my opinion but those existing cross members are neither a joist ( bottom cord of a truss) nor a collar tie. But if they have to have a name and purpose i think collar tie would be best choice.
Your new bottom cords (joists) should be fastened to the rafters as well as the walls top plate preferably with Simpson Clips made for that purpose.
Another thing to consider is putting new/additional collar ties across all the rafters about 18" --24" down from the peak of the rafters.
As Cliff said those existing cross ties become completely redundant and can be completely removed if replaced the way you are doing it.
Rafter framing, see diagram about half way down the page
https://www.homedepot.com/c/ah/pro-guide-to-roof-framing/9ba683603be9fa5395fab90188285eb8
Simpson Clips, the cheaper Hurricane Tie is a good one to use here.
https://www.strongtie.com/strapsandties_woodconnectors/category
What is your snow load rating in that area? Must not be much if that shed has kept a level roof and vertical walls all this time.
these beams, you call joists, have one reason of existence only:
evade, that the ridge of the roof wanders lower, pushing the sidewalls to the outside.
you can take them all away, if you either replace them by shorter ones installed a foot, or 1.5 ft below te ridge. (second best way, because the inclined roof-beams can bend with time and pushing the sidewalls a little bit outwards)
best option would be in my eyes as an ex-insurance inspector to just bolt every second of your white beams with 3/8 bolts to the roof beams.
and take off any of the natural coloured beams, that is in your way.
(best way. very probable, that not even a hurricane would take the roof (but the whole shed…))
Thanks for the replies.
Yes, except skipping just one in the center for the access hatch.
I would have to look it up, but this shed can’t have been designed for much, yet it has survived for maybe 20 years. When we built the front wall we should have pulled the walls square. When the siding went on we had to cut a triangular fill piece about 2 inches at the top.
EDIT: Looked up the snow load: The ground snow load for Huntingdon County, PA, is 30 pounds per square foot
Yea, 30 lbs is pretty standard everywhere. But think about the average snowfall and moisture content.
Yes I understand that shed has stood there a number of years BUT, It wasn’t your shed and you hadn’t spent the time and money remodeling it and it didn’t house your trains. 
Point taken!
The average annual snowfall is 32". Moisture content wasn’t easily found, but I would guess it to be on the high side. We are on the East side of most of the mountains. The Western side gets more.
I measured from the bottom of the new chord to the peak at about 37". I have plenty of salvage 2x4 that I could do collar ties. They couldn’t be much more than 12" down or they would kill the storage space. I’m not sure they would add much up that high.
As previously noted, this shed is not framed like a house at all. There is no ridge board, just mitered rafter ends and a plywood tie. The rafters do not have the birdsmouth cut at the top plate, it just rests on it. The top plate is also in a vertical orientation with the rafter toe nailed into it. I think your suggestion of of the hurricane ties is a good one, especially how poorly the roof is joined to the wall.
1 Like