Large Scale Central

Building another Bridge

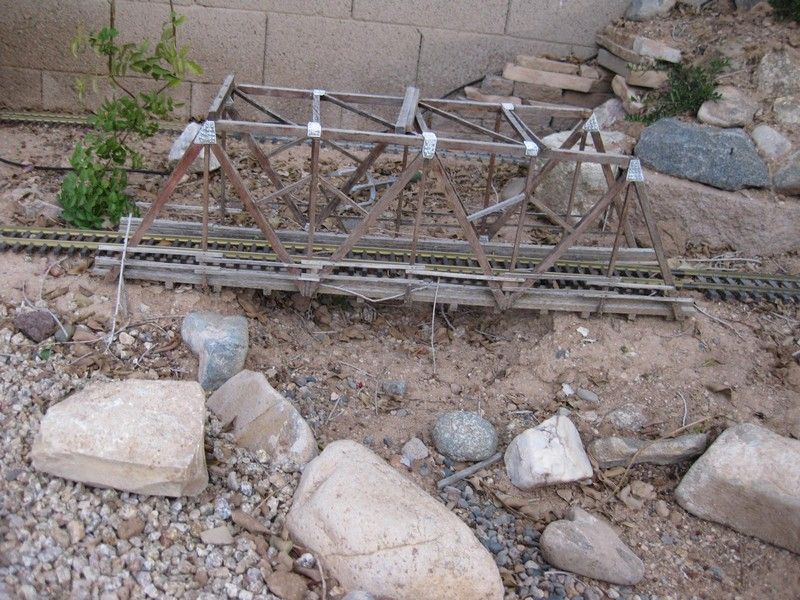
The railroad has experienced some growth in freight traffic, and has caught the eyes of RR inspectors, the upper Babs River bridge has failed inspections and has to be replaced within the next 90 days, or stiff fines will be levied. So the main office has issued a purchase order and a nearby multi purpose Shop has been awarded the contract to build at least 1 bridge, with an estimated scale length of 80’ and some new base footings will also need to be constructed and set. But first the great Christmas party of 2005, and founder Babs

After the Christmas party a survey was taken and careful guesses on length and WAG’s on height from precision photograph of the location

back at the shop, a template was located from a previous build, some modifications were made to the sizes and work was commenced.

Suitable material was located in a storage area nearby. I had replaced all the sun screens last spring and so plenty of material was available

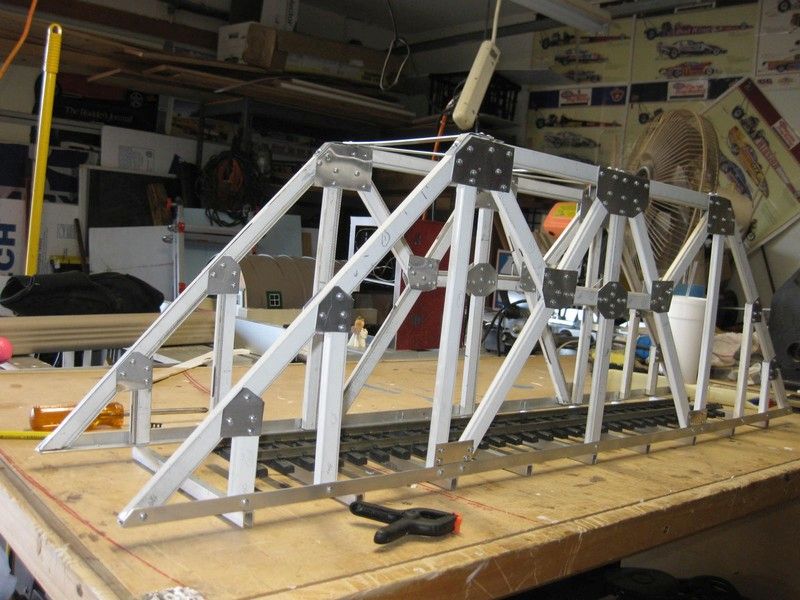
Construction began by almost clearing enough room to do some construction and cutting with a hacksaw and a small miter box to assist on some of the angles. Using a method shown here on LSC I cut and laid out both sides of the project using my miles of tape the hold things together plan.

both sides all cut

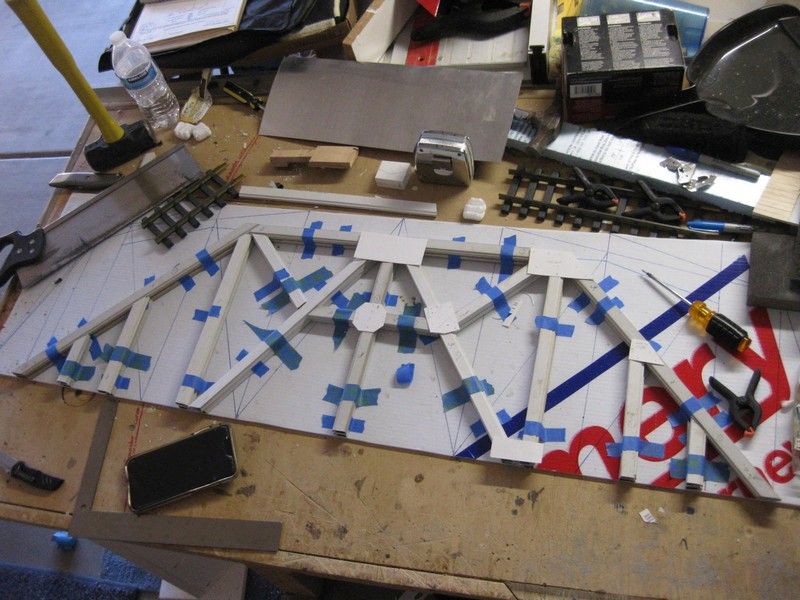
you can see the cardboard templates for the gussets are sitting on their various spots, and as one nice man who will not be named (Bobcope) said " gussets, good they hide oops. Obviously he has looked at other builds from this shop!

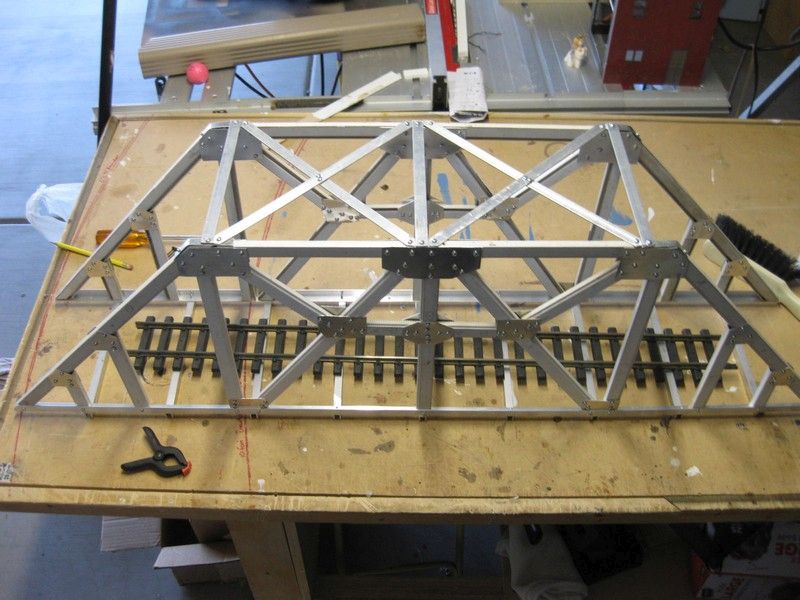
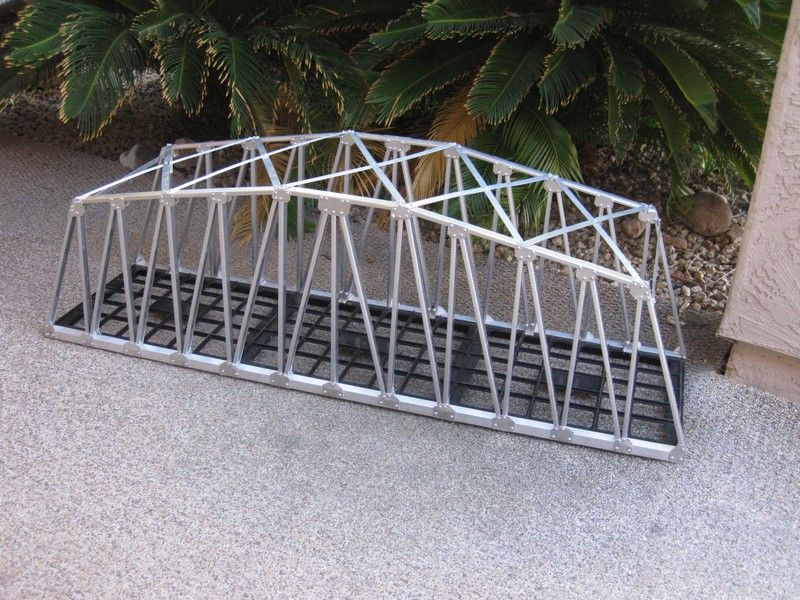
Next was to pick the base material for the roadbed, again, calling up previous work from LSC and a fine gentleman here, Diesel Dude, a plastic milk crate was cut up to add to the structure. Since this is a single track bridge, , this one will be wide with plenty of clearance for whatever rolls through

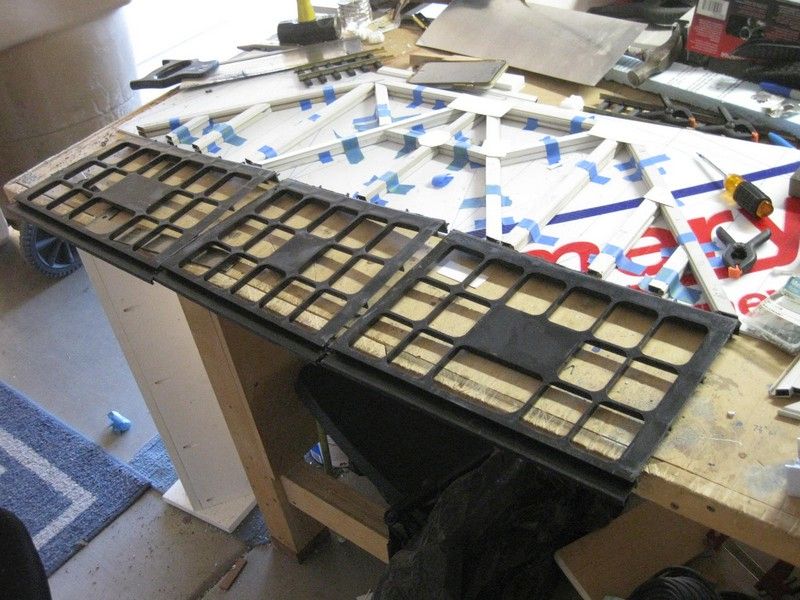
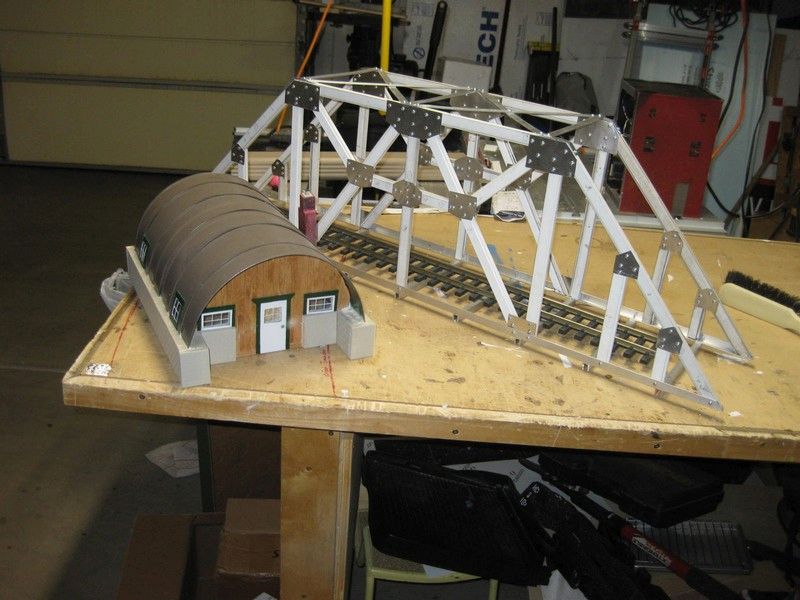
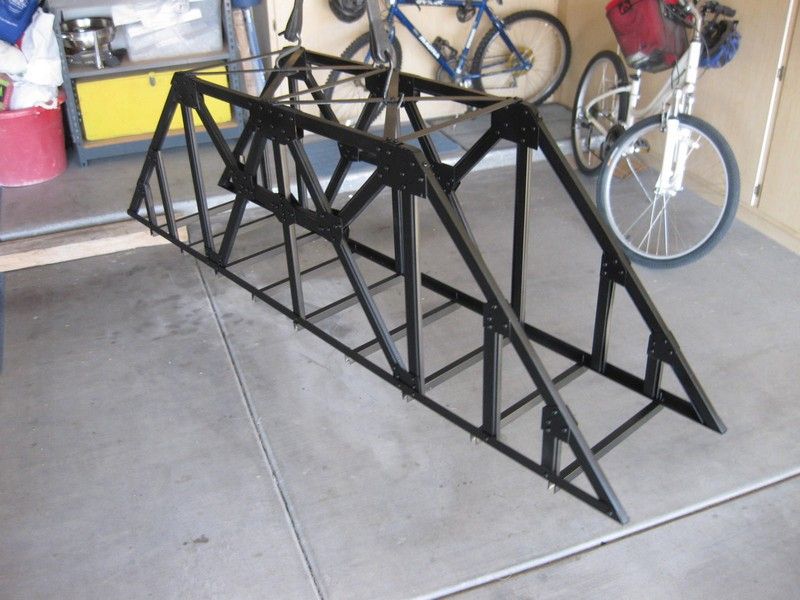
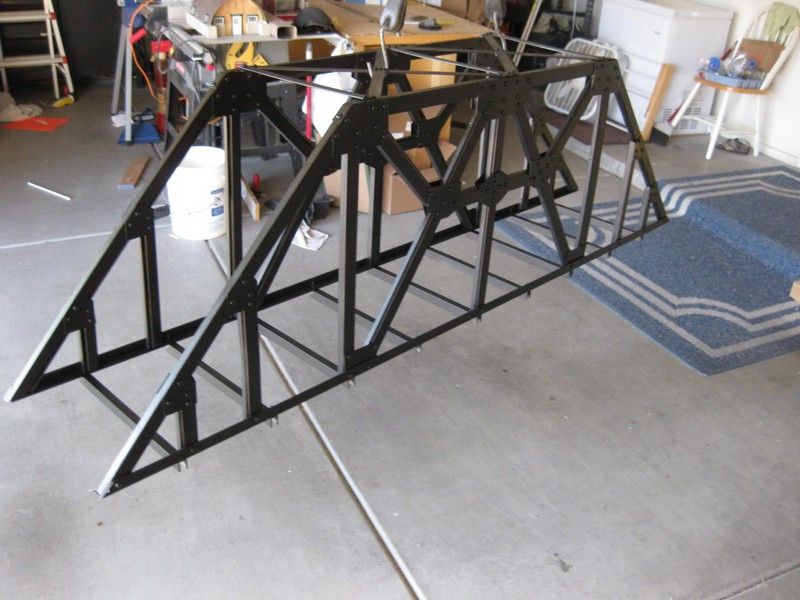
And just for informational purposes, this is the material used, Aluminum screen frame , it is sold at the 2 Big Box Home centers in I believe 6 foot lengths, this bridge will be getting painted, the last one was left as bare aluminum. More as it comes together.

Great stuff, Pete. I’m following this build and reading every word. I see a world of possibilities in my railroad’s future.

Nice design.

If you want to glue the aluminum pieces directly to each other you will have good luck with Henkle Loctite HY 4070 which is a hybrid 2-part epoxy with a very fast fixture time. I use it for may different substrates at work. It works especially well bonding aluminum. Comes in a small syringe with several small mixing tubes. Great for precision work. A little pricey at $20.15 on Amazon, but really works well. It is now my go-to for most jobs. The only thing it’s not great for is very small jobs because you will waste a tube and 4-5" of cement each time you use it.

Well thought out design, Pete. I like the use of recycled materials. Too bad you couldn’t figure a way to utilize a “tin can” (https://www.largescalecentral.com/externals/tinymce/plugins/emoticons/img/smiley-wink.gif)Would have made a great Challenge project.

Yeah Dan, I had started about 2 weeks ago… what was I thinking??? Should have waited and I could have figured out something!

Well I was going to show in progress pictures, but somehow they got forgotten as I did short spots of work from time to time, and suddenly its almost finished

I am still going to paint this one when its finally done.

As I put it together some discrepancies showed up even though the parts were cut and fitted all together, so must be the workers getting lax. I need some supervisors and foreman to make sure this doesn’t happen on the next bridge.

Since the Hippy hut was nearby I thought I would add it to the picture

As you can see plenty wide , in case a schneezebill wooden drop deck car should make its way out of NW New Mexico, we can interchange with that RR!

I did abandon the milk crate parts for the base, I was using the leftover sides and they would have been very difficult to attach in a decent way and keep everything solid, so I got some U channel from Lowes and used it instead for the bottom cross bracing. flat 1/4" was used for the top bracing.

By my count 346 #4 screws, 8ft of 1/4" angle, 8ft of 1/4" flat and 7ft of U channel. Not sure how much screen material was used, had to cut out bad parts wher ther was kinks and bends from dismantling. on to the paint shop now.

Ya done good, Pete. I’m sure Babs is looking down and smiling at her new bridge. Can’t wait to see trains traveling across it.

Thanks Dan!

I am thinking of flat black paint… just to make it different from the other one

That has turned out nicely.

Having gone with aluminum channel instead of the milk crate segments for the bottom of bridge probably even looks better too.

Very nice!

Forrest Scott Wood said:

That has turned out nicely.

Having gone with aluminum channel instead of the milk crate segments for the bottom of bridge probably even looks better too.

Forrest, here is a shot of the first bridge I build, using the bottoms of milk crates and it looks about the same , the milk crate bottoms give it some more depth and interest to the overall look and the tracks make it unobtrusive.

I added some wood to the decking before it was finally installed on the layout. need to add it to this one too!

Well, I sprayed it Matte black so its a little shinier than I expected , but I am sure it will weather to a nice looking finish. Now when I can get some time I will start on layout installation

Talk about playing with fire, this picture has the bridge hanging from the arm on the garage door opener, the wife is due home soon and she always pushes the button before coming around the corner to our home

right after taking this picture I realized the danger and about 10 seconds after I had removed it from its perch the door started closing. Disaster and bad words averted.

Now on to the next. One or 2 more are really needed, plus I may be building one for a friend. This was a fun little build and fairly easy to do.

edited because of spelling issues and to add content

Nice, Pete! The camera angles make it look huuuuuuuge! Like you could ride your bike across it…

Jim, 11" tall, about 42" long and I believe about 8" wide, cant remember if that is inside or outside measurement