took a while before I got to the idea that when you make 1 part, you should make 8 total at the same time.
Yup. that way you can make sure that they are all the same.
took a while before I got to the idea that when you make 1 part, you should make 8 total at the same time.
Yup. that way you can make sure that they are all the same.
Break it down further and do the same step for all, then the next step … Production Work! Hated it! (https://www.largescalecentral.com/externals/tinymce/plugins/emoticons/img/smiley-yell.gif)Hated it for 15 years!, Yet I got efficient at it…
It’s easier to repeat learned muscle movements.
Looking good and strong.
John Caughey said:
Break it down further and do the same step for all, then the next step …
Like I done on my bridge.
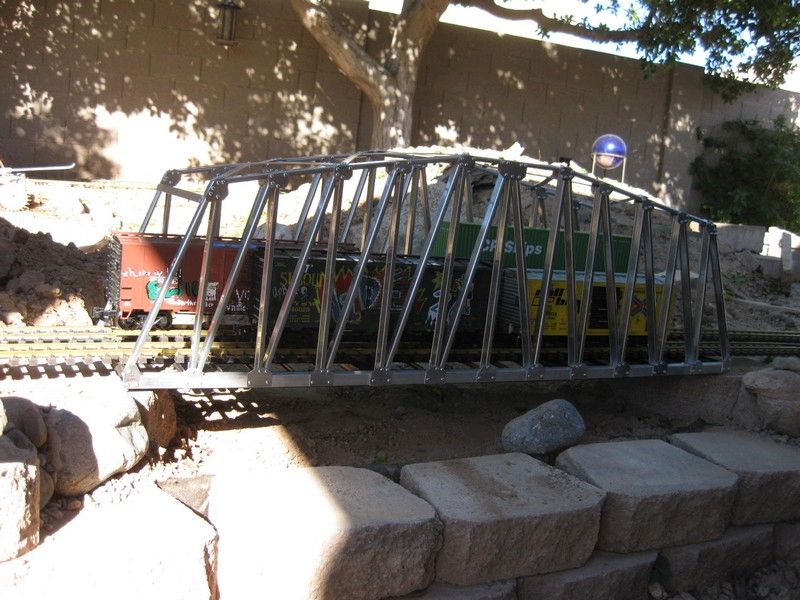
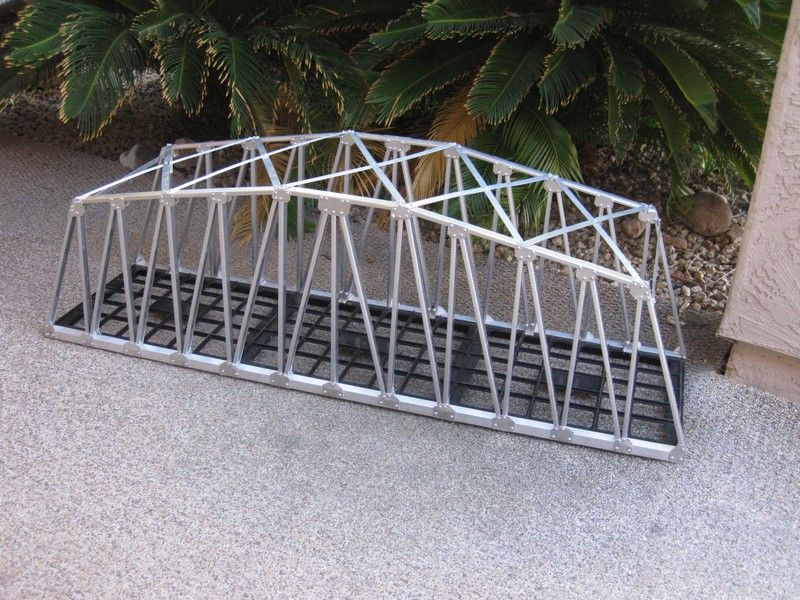
Well over the holiday I was able to finish the building of the bridge, not sure if I am going to add walkways, guardrails and all the bling bling to it. Now to figure out what color to paint( or leave it natural) it. Right now at home the consensus is it looks good like it is.

I sized it so I have clearance for a double stack intermodal,they are bigly tall!!. Double tracked, but not huge amount of room between the tracks

I placed the footings and backfilled them, dropped the border blocks one layer to give the better view to the “streambed”. Still to be decided is if the stream will be dry or will have water in it. that might be a down the road project, as it would be nice to get all the track in, have the ballast finished and be able to actually run some trains on a consistant basis, and get the trackwork to a comfortable status.

I loosely followed Diesel Dudes build using milk crates for the bottom of the track and aluminum window screen frame for the main framework. This was a fun build , there are things I will do differently next time, it was a learn as you go project, and as long as no one gets up real close it looks great. the 3 crate bottoms, after sawing off the sides, I ruined one figuring out where to cut, but 3 bases were bolted together, then the angle aluminum was bolted to the bases.
One unexpected thing was the angle bolted to the bases had a slight outward angle to it so after the sides were built I had to pull them in to make the sides vertical. Ifanyone wants, if I do another I will take more pictures along the way to show better how it was done.
Materials used were:
1 1/2 x1/2 angle aluminum for the main bottom rails,
3 Lowes cheapo milk crates for the base
5 or 6 7’ lengths of aluminum window screen frame
4 6’ lengths of 1/2 aluminum for the top x braces
1 .025 6"x24" flat aluminum for the connecting brackets
383 #4x3/8 pan head screws
total cost, more than I thought when I add it up, about $175.00, most of the flat aluminum left over.
nice work Pete(https://www.largescalecentral.com/externals/tinymce/plugins/emoticons/img/smiley-cool.gif)
Yup, it adds up fast.
A rusty looking primer would get rid of the sheen … it would unify the hole unit … It came out great !(http://www.largescalecentral.com/externals/tinymce/plugins/emoticons/img/smiley-laughing.gif)
i tried to count the rivets. - but there are too many of them…
i think, Sean is right. paint or rust would change it from very good to perfect.
Well after getting some good feedback , thanks to all, I think the bridge is going to remain as is for now. Unless sanded, paint will probably not stick well and if you all think I am going to take it all apart and sand the pieces individually, well I have considered it, but would probably lead to a bigger mess. So now comes the installation phase and maybe, just maybe after one more project I can start running some trains.
I need to decide what will sit under the switchesto protect them from dirt clogging the points, I have a ton of bricks that may get pressed into duty and some square pavers that if I can spilt in half will probably look a little better than bricks due to the color of the pavers compa to the red bricks. Hopefully some time this weekend I can start to see what works and how well.
So rained today for a bit so I was able to get into the garage/workshop and do some more bridge work, I added some wood “walkways” to give a proper look, and with the added job of keeping the track from moving and causing clearances issues

the track was just to get the proper clearances, I have 2 6 ft pieces of track that will actually be used when it gets placed outside so there are no joints in track on the bridge for less problems

I have good vertical clearances , I can fit a double stacked container car, and there is room, not a lot but there is room between car and bridge. trying to decide if some kind of horizontal railing would be to protect workers. may be something to add to the bridge at a later date. So far very pleased on how this has turned out

I think for now I am going to call it all done and maybe tomorrow install it and send a train around to see how it looks.
Looks great Pete,
Don’t fear paint…not sure of the look you want but if it was me I would shoot some grey primer on it then “gloss” brown, then “mist” it with a flat very dark green, then paint it with a flat black until you decide where to stop. No need to sand anything just shoot it as is unless you like the natural finish and there is nothing wrong with that as it’s your RR. Only my thoughts and experience speaking.
It looks very good . I’d leave it as is and get it installed. (https://largescalecentral.com/externals/tinymce/plugins/emoticons/img/smiley-wink.gif)
Great looking bridge. Don’t forget the No Fishing From Bridge signs. Seen most often over dry washes! (https://www.largescalecentral.com/externals/tinymce/plugins/emoticons/img/smiley-wink.gif)
Nice build… Looks fantastic… (http://www.largescalecentral.com/externals/tinymce/plugins/emoticons/img/smiley-cool.gif)
John , I was thinking no diving signs, didn’t think about no fishing
Sean, since you changed your avatar, it has taken me until now to realize who you are. Was wondering who this guy Sean without the dog picture is! D’oh! I sure am slow to get with it! Dropping the last name didn’t help me much either! How is your recovery coming along?
No recover for any hurts for a while… just enjoying life… thru these forums…(http://www.largescalecentral.com/externals/tinymce/plugins/emoticons/img/smiley-wink.gif)
Thanks for asking…
I use to use this for a while…
(http://www.largescalecentral.com/public/user/1849f/1849f_e9cf.jpg?c=fc0a)for the rivet counters…

Since I last posted anything I have added some rock and ballast to the layout and got to work on sidings. I was going to have a This one and one that comes from the upper left of the picture to about where the right siding ends, but was not happy with how it would work, so I split this one for the area. The bridge is installed in its permanent homebut I need to get a couple of pictures of it. If I can figure out videos I will attempt to add some.

I have been installing paver blocks under all my switches and will add rock only to around the ties when I get some, Also getting the siding set for my pitiful facade, I still need to get the awning built for the track area, and make some good signs for it. Its progress, but this month, one of the best to be outside my weekends have been booked with family stuff.
I like the first shot. Ballast looks really good.
Shane
I love that bridge, Pete. I like it fine colored just the way it is, but if you want to spray it with primer and paint it will hold up, in my experience. I first learned about using window aluminum from a fellow in the south named Shane Wedekamm, who made a bridge for me. It appears he’s no longer active unfortunately. The first video shows one of his bridges painted, and the second video shows the lift bridge he made for me, a scale model of a bridge in Canada I took a liking to…I am the “gentleman out in Colorado” to whom he refers.
I hope you don’t mind me posting these here. If I had known you make bridges, well, maybe all of us should start commissioning you to make our bridges!!