Large Scale Central

Build Contest Challenge Final Judging Log

The END is NEAR for the build challenge! and hopefully you are just about finished with your projects.

I have been very impressed with the projects that guys have taken on and I don’t envy the judges in picking a winner but in the end we are all winners given that we have expanded our modelling skills and expanded our rolling stock rosters with a unique custom piece or otherwise improved our RR’s.

I propose that instead of putting your finished photo at the end of your build log maybe everyone involved in the contest could put their final photo on a seperate link or even here so we can all check out each others builds without having to go and search through from log to log.

Please post Your name, a photo or 2, a brief description of why your RR needed this piece and how it will be used and a grand total spent.

Joe Zullo’s 2013 Challenge

I built Dave Taylor’s kit as a gondola because the HDRR needed a gondola to put in inventory.

My total for this build was $15.74

$11.25 for detail parts and $4.49 for paint.

(http://freightsheds.largescalecentral.com/users/sparkyjoe/_forumfiles/IMG_5094-worked-Medium.jpg)

(http://freightsheds.largescalecentral.com/users/sparkyjoe/_forumfiles/IMG_5092-worked-Medium.jpg)

sounds like a good idea Todd…

Hi Todd,

I used Dave Taylor’s great kit and an old Bachmann Flat car to build this moldering gondola ballast car (MOW #01) for the Little River Rail Road, a logging outfit in East Tennessee. I needed an actual operating ballast car for laying track and repairs on my garden RR.

Total cost of detail parts and tiny hinges $18.75.

This challenge was a lot of fun. It was my first time in a modeling challenge.

Doc Tom

(http://i542.photobucket.com/albums/gg412/DrGrab/DSC06211.jpg)

(http://i542.photobucket.com/albums/gg412/DrGrab/DSC06216.jpg)

(http://i542.photobucket.com/albums/gg412/DrGrab/DSC06219.jpg)

(http://i542.photobucket.com/albums/gg412/DrGrab/DSC06224.jpg)

(http://i542.photobucket.com/albums/gg412/DrGrab/DSC06227.jpg)

(http://i542.photobucket.com/albums/gg412/DrGrab/DSC06230.jpg)

As for my project car… My “Railroad” needed some heavy artillery to help guard a tressle that the union army kept trying to destroy… So the Confederate army came up with a mobile car with a rather large gun that can be moved rather quickly from one end of the bridge to the other across the river… with infantry support to hel pprotect he gun crew that will be manning the gun. If all of the trials of the new car go well, the Army will develope more cars with possibly different types of artillery to help with other bridges or fortifications. The “Engineering Dept.” is considering a motar class car next… :slight_smile:

Here is my final entry. I will be adding lettering later when I can get into town to pick up the proper type of white pen for the lettering. I am also looking for a few figures to add later… My total expense was 7.50 for the wiseman Link and Pins…

Front

(http://i1194.photobucket.com/albums/aa375/General1861/100_7367_zps4e0b86fb.jpg)

Side

(http://i1194.photobucket.com/albums/aa375/General1861/100_7369_zpsf47f0aef.jpg)

Rear

(http://i1194.photobucket.com/albums/aa375/General1861/100_7370_zps07fb3e79.jpg)

The following photo is what I was trying to build from the book "Civil War Railroads and Models by: Edwin P. Alexander.(http://i1194.photobucket.com/albums/aa375/General1861/100_7361_zps4e8a62c6.jpg)

Thanks for looking. Travis

This was my second attempt at a narrow gauge car in 1:32 scale. I spent about $2.50 for the car, $.22 for reducing the plans to correct size, and about $2.00 for brass strips to make the stirrup steps.

My ng railway received an order to deliver a brand new Chevrolet Ambulance to Mercy – Red Mountain Hospital. Ambulance was delivered to the interchange dual gauge and transferred to the world’s shortest auto rack!

Still need to put decals on it, but will wait 'til I get my white decal paper. I use a cricut machine to cut white decal paperimg[img]

img[img]

I’ll take a picture on the layout tomorrow, as it’s now dark and the 49’s are really behind and the power is half out at New Orleans.

Unlike the others, I have no story to go with my build. I thought the idea of everyone starting with the same basic car would lead to some interesting results. I simply tried to create something that was not mainstream.

I have built about 15 cars for my railroad and they all started life as a piece of lumber. I get a great deal of pleasure in creating something truly from scratch. I also like to show others that you can do a great deal just by being creative with the materials you have at hand. Everything on the car was either scrounged from discarded cars,( trucks, truss rods, brake wheel), or created from what I had lying around the shop. Couplers were purchased, but before the build commenced. The only thing actually purchased specifically for this build was the paint.

Here are some pics of the finished car, also posted in my build thread.

(http://i846.photobucket.com/albums/ab29/trainman57/challenge%202013/DSCN4089_zpscb7dc915.jpg)

(http://i846.photobucket.com/albums/ab29/trainman57/challenge%202013/DSCN4084_zpsccb9bd85.jpg)

(http://i846.photobucket.com/albums/ab29/trainman57/challenge%202013/DSCN4083_zpsb0551e5e.jpg)

(http://i846.photobucket.com/albums/ab29/trainman57/challenge%202013/DSCN4080_zps34c1be47.jpg)

There are some truly unique and interesting ideas expressed here in the various builds and the choice of the judges is not going to be easy.

Congratulations to everyone who participated, and thank you especially to Tac and Dave for putting this together.

Ron

That really is a nice Livestock car!!!

OK Here are my final pics

(http://1stclass.mylargescale.com/vsmith/LCS_Challenge_10.JPG)

(http://1stclass.mylargescale.com/vsmith/LCS_Challenge_11.JPG)

(http://1stclass.mylargescale.com/vsmith/LCS_Challenge_12.JPG)

(http://1stclass.mylargescale.com/vsmith/LCS_Challenge_13.JPG)

(http://1stclass.mylargescale.com/vsmith/LCS_Challenge_14.JPG)

(http://1stclass.mylargescale.com/vsmith/LSC%20Challenge%20Final%2008.JPG)

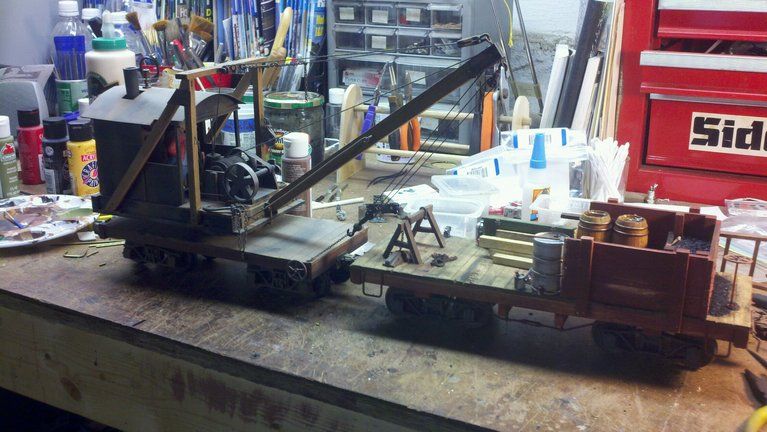
This Challenge really got my juices flowing and as a result I did 3 other quick bashes after I finished the caboose. But they are not part of the challenge, they are just for my fun.

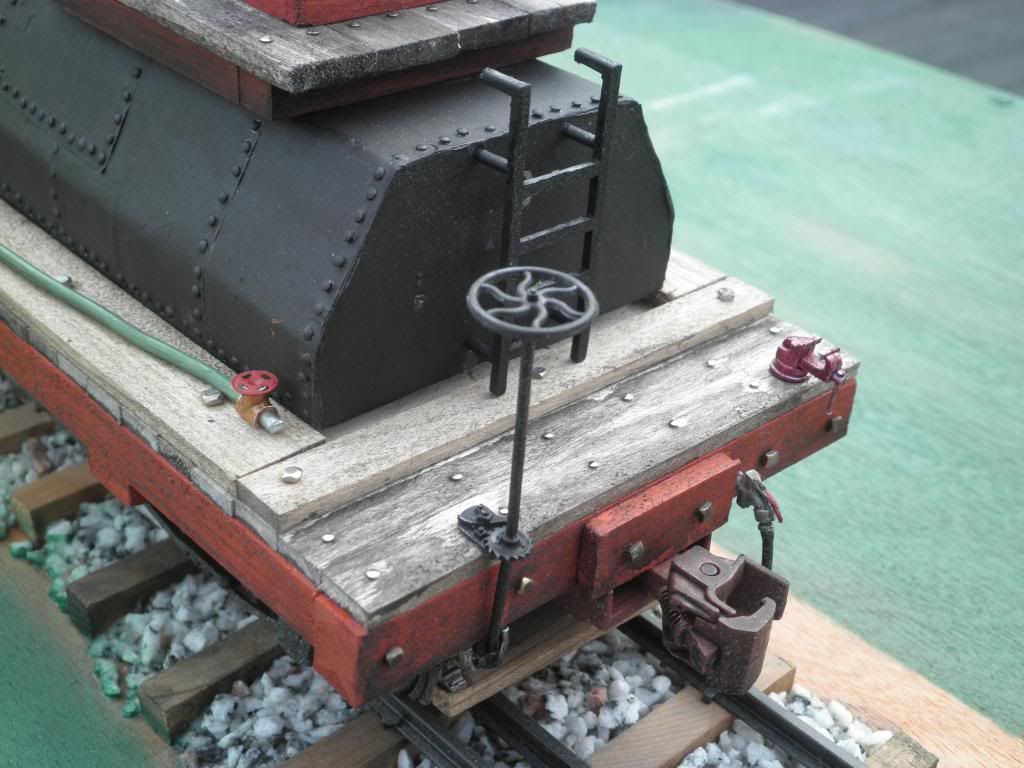
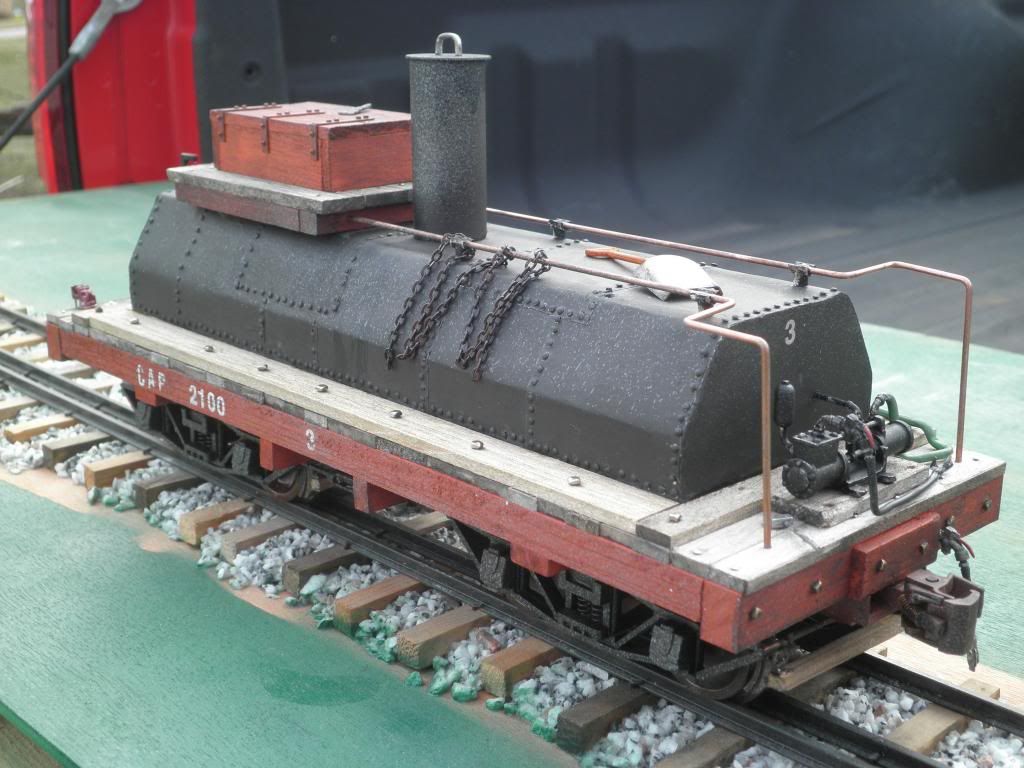
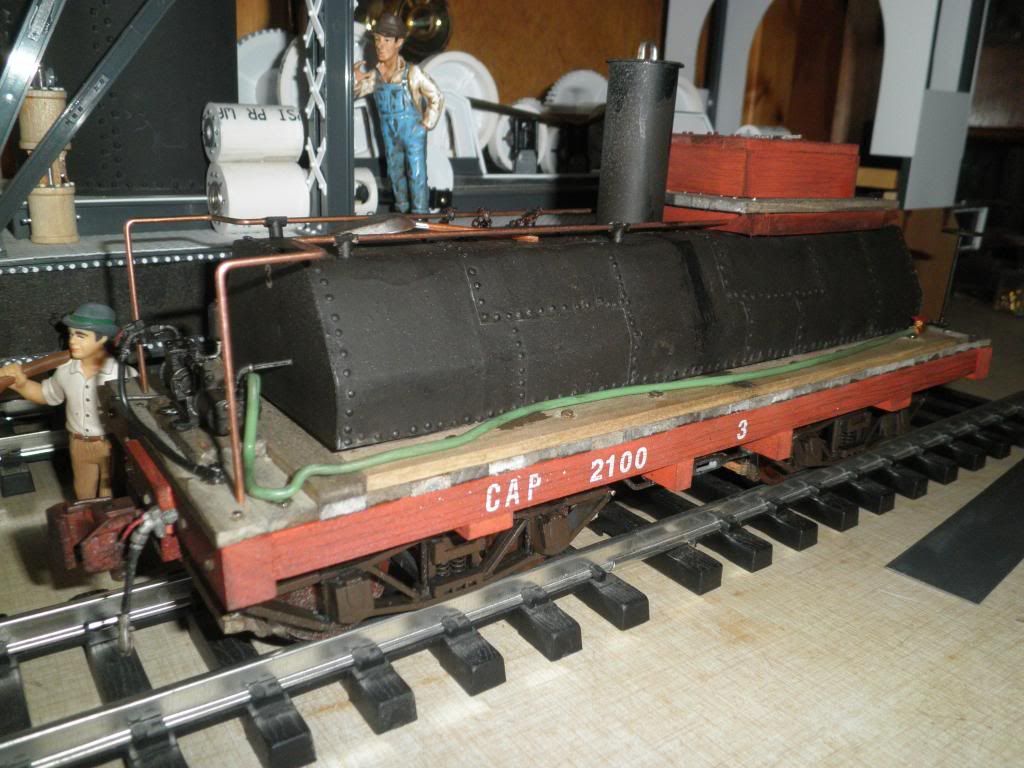
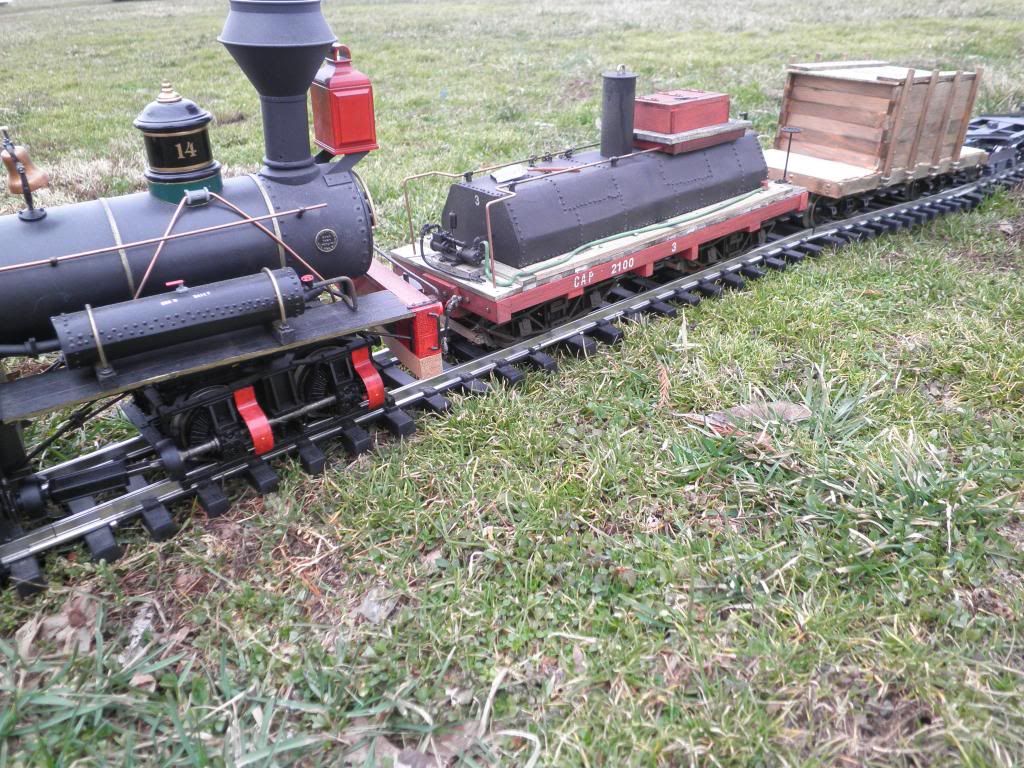
Here is the whole resulting consist, the “Challenge” Transfer Caboose, the “Left Over Parts” Tank Car, the “I need something to do” Flatcar, and “Man I Gotta Try This Idea” Boxcab:

(http://1stclass.mylargescale.com/vsmith/LSC%20Challenge%20Final%2001.JPG)

(http://1stclass.mylargescale.com/vsmith/LSC%20Challenge%20Final%2002.JPG)

(http://1stclass.mylargescale.com/vsmith/LSC%20Challenge%20Final%2003.JPG)

(http://1stclass.mylargescale.com/vsmith/LSC%20Challenge%20Final%2004.JPG)

(http://1stclass.mylargescale.com/vsmith/LSC%20Challenge%20Final%2005.JPG)

(http://1stclass.mylargescale.com/vsmith/LSC%20Challenge%20Final%2006.JPG)

(http://1stclass.mylargescale.com/vsmith/LSC%20Challenge%20Final%2007.JPG)

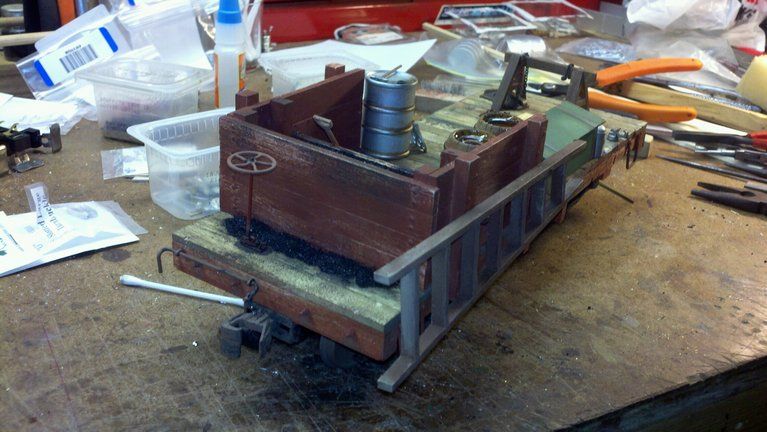
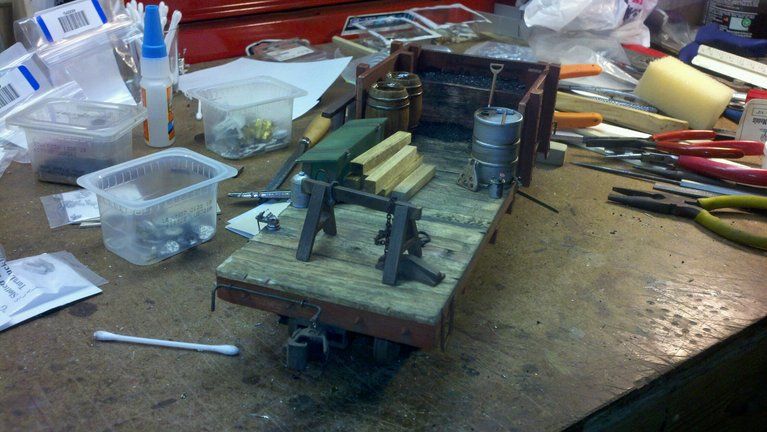
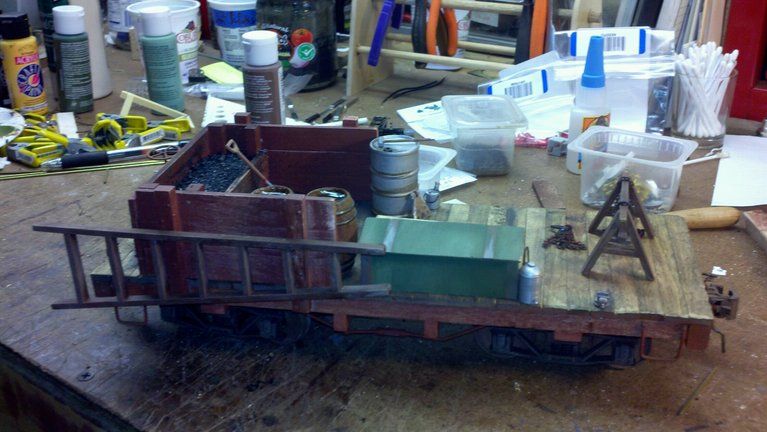
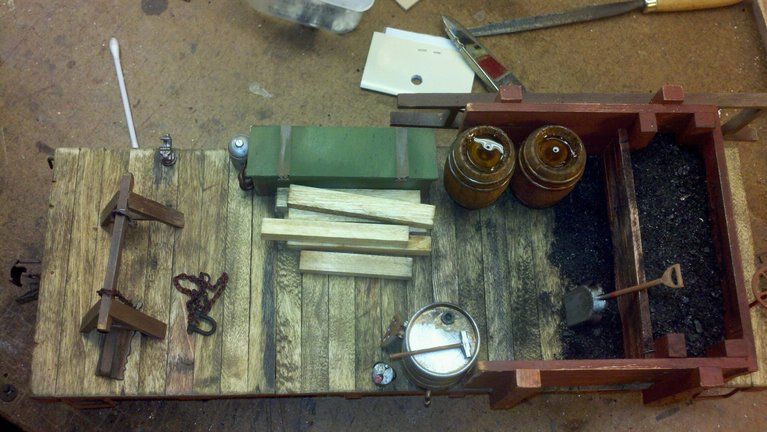
This will be used as a crew transfer car and as the spacer car that is pushed onto the car barge on the Gotham Harbor layout. Locomotives were prohibited from going onto the barges to shunt cars, as the weight shift could upset the barge, so a string of flatcars or gondolas would be used as idler cars to go onto the barge for shunting cars on and off, sometimes one of the idler car would have a shack set up so the train’s shunting crew had shelter during the winter months, that’s where the idea for this came up.

Costs:

Chassis: Dave’s kit: Free (Thank you so much for offering the kit Dave)

Caboose Shell: Free, This was an old Bloody L bobber that was going to be a British brake van for a small line of Thomas I was going to have, but that went away, so I repurposed it for the new layout.

Trucks: Free, pilfered and repurposed from another much less useful car.

Cargo and detail parts: Free, scrounged from whatever I could find.

Total costs: $0

Here are the finished photos from the Loyet Logging Co.

(http://i1050.photobucket.com/albums/s414/trainbuffjr1/finishedcar003_zps42d67d58.jpg)

(http://i1050.photobucket.com/albums/s414/trainbuffjr1/finishedcar008_zps3aadb7ff.jpg)

(http://i1050.photobucket.com/albums/s414/trainbuffjr1/tanker-skidder007_zps294c9a6a.jpg)

(http://i1050.photobucket.com/albums/s414/trainbuffjr1/fueltrain-ihcbash006_zps9a057b51.jpg)

Started out as one of Dave’s great kits, a 2x4 for the tank, and a pair of trucks from another car. I then detailed it with parts from the bin. It will now serve as a fuel car for my tower skidder when it is completed.

Total cost: $0.00

I’m amazed at what you guys have thought of and built from Dave’s humble gondola kit starting point. There is certainly no lack of imagination on this forum.

When the contest was announced I didn’t know what to build but then I remembered being struck by a photo of a really neat M.A.C. Speeder in a Kinsey Photography book. My RR the Rock Root and Pup Poop needed a gas speeder to dash around and inspect and deliver odds and ends to work crews etc… The speeder is leased through the Cape Cod Central which operates diesel freight service on my RR.

I spent about $18 for the RC car and the link and pin pockets. The rest was sourced from bits, pieces, scraps and goodies like the bell off a dusty shelf queen.

Since my build is motorised I made a quick video this morning of it in action.

http://www.youtube.com/watch?v=xT8U2iE8oK4

(http://freightsheds.largescalecentral.com/users/capecodtodd/_forumfiles/SpeederBuild9.jpg)

(http://freightsheds.largescalecentral.com/users/capecodtodd/_forumfiles/SpeederBuild10.jpg)

(http://freightsheds.largescalecentral.com/users/capecodtodd/_forumfiles/SpeederBuild11.jpg)

In constructing the vat car I spent a total of $6.45 on brass shapes. Rod was used for the trussrods and square tubing for the four ladder legs.

The Littleton and Smallville Railroad is a Turn of the Century Common Carrier running inland from Littleton, on the Atlantic Seaboard. Down by the harbour, Simian Bros. Sea Products required a vat car for their Sea Monkey/Instant Pet/Brine Shrimp operations. Starting with Dave’s plan and four salmon tins, this challenged me to build the car. I did not have one of kits to begin with.

Operations on the old “Late and Slow” frequently take the form of switching puzzles, which generally require standard-length cars, so I built this car to fit with our operating procedures around here.

The model is entirely scratchbuilt of material that was on hand: wood, brass and copper, with plastic used to make the 46 nut-bolt-washer combinations on the model. The only commercial parts are the trucks and link and pin couplers; they were also on hand. The brakewheel is recycled from an old ship model.

(http://freightsheds.largescalecentral.com/users/choochoo_chaboogie/Vatfin01.jpg)

(http://freightsheds.largescalecentral.com/users/choochoo_chaboogie/Vatfin02.jpg)

(http://freightsheds.largescalecentral.com/users/choochoo_chaboogie/Vatfin03.jpg)

John, very nice vat car. Don’t think I’ve ever seen one, either a model or real life. But it looks like your crews were pretty sloppy with the brine. There’s recrystallized salt everywhere! Get out the brooms!

Sorry I missed this topic to post here. My pics are crap, my layout is buried as is everything here.

(http://i73.photobucket.com/albums/i231/paintjockey/photobucket-40387-1359751188115_zpsc86ec934.jpg)

(http://i73.photobucket.com/albums/i231/paintjockey/photobucket-30923-1359751189120_zps2a8ad6bd.jpg)

(http://i73.photobucket.com/albums/i231/paintjockey/photobucket-38338-1359751188647_zpsa7344ab3.jpg)

(http://i73.photobucket.com/albums/i231/paintjockey/photobucket-17925-1359751187603_zps734284f8.jpg)

(http://i73.photobucket.com/albums/i231/paintjockey/photobucket-31157-1359751187064_zpsc60590f7.jpg)

(http://i73.photobucket.com/albums/i231/paintjockey/photobucket-23787-1359751600892_zpsd2a9893a.jpg)

Total spent $0.00

Terry

Wow! That’s a beautiful combination, Terry! Lovely!

I can see that rig parked near Doc’s ballast car.

I want! I want! I want!!!