Large Scale Central

Beating the Boredom - Regner Heisler Kit Build

The next project on my desk is to make up my Regner Heisler kit. I took a few photos for your entertainment.

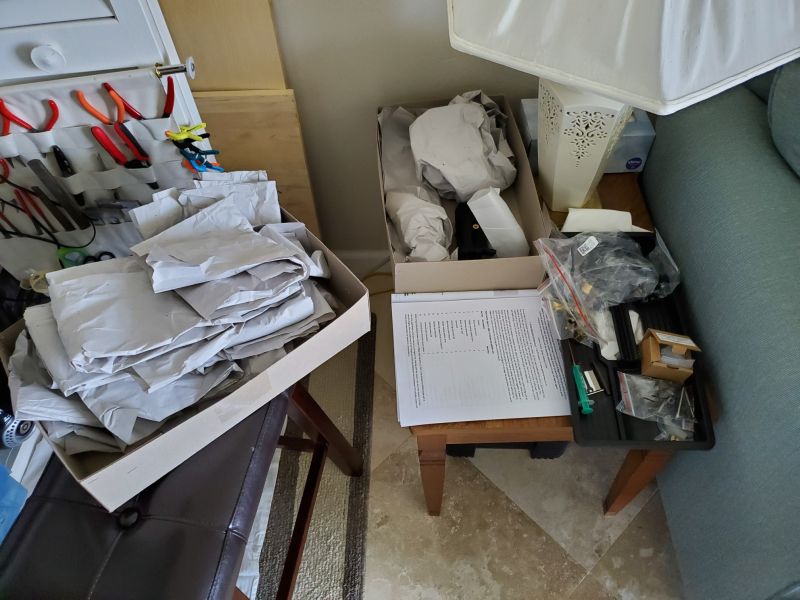
It comes in a plain box and all the parts and bags of small parts are wrapped in paper. On the left in this pic is the stack of wrap. Big parts (cab, etc.,) in the other box, and smaller bags and stuff in the tray on the right. I luckily got my hands on a set of instructions in English from the UK dealer, though I got the kit from The Train Dept.
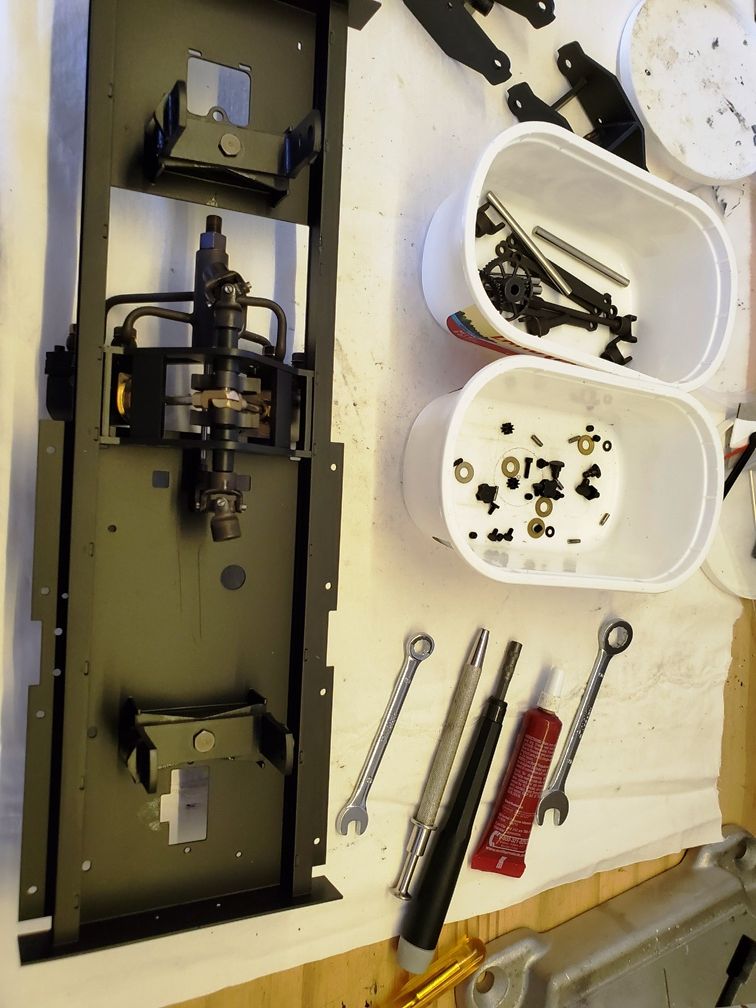
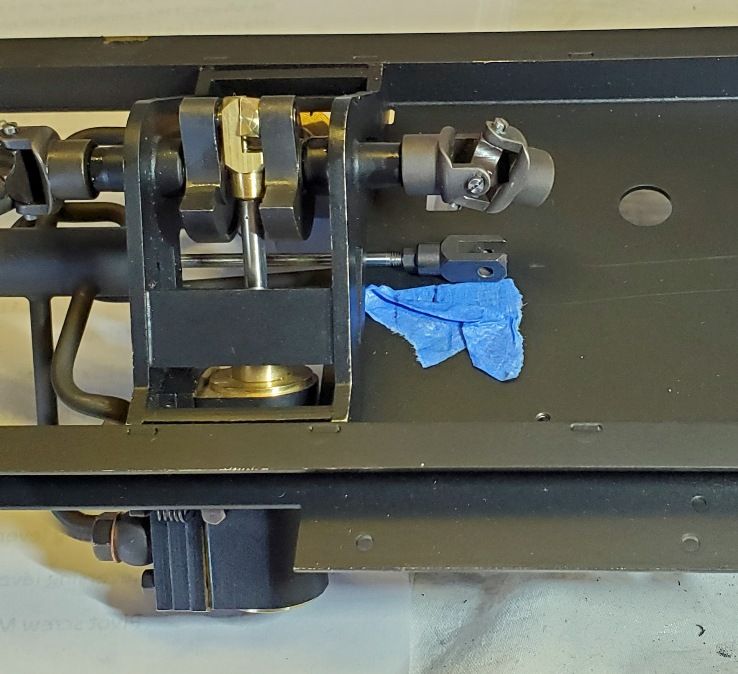
The first 3 steps are to attach the steam pipes and reversing valve to the pre-built cylinders, then bolt it to the chassis. The 4 steam pipes were a struggle to fit, but they went in eventually. I included this pic so you can see the tools I’m starting to accumulate next to the project area, and the myriad of parts for the next step - trucks. The tube is ‘thread locker’ as all those universal pins have to be screwed in and it is best that they be locked.

With the trucks under way, I got out my Regner wheel back-to-back gauge. This is a very useful tool when your wheels are just held on with setscrews - the screws tend to let the wheels move occasionally.
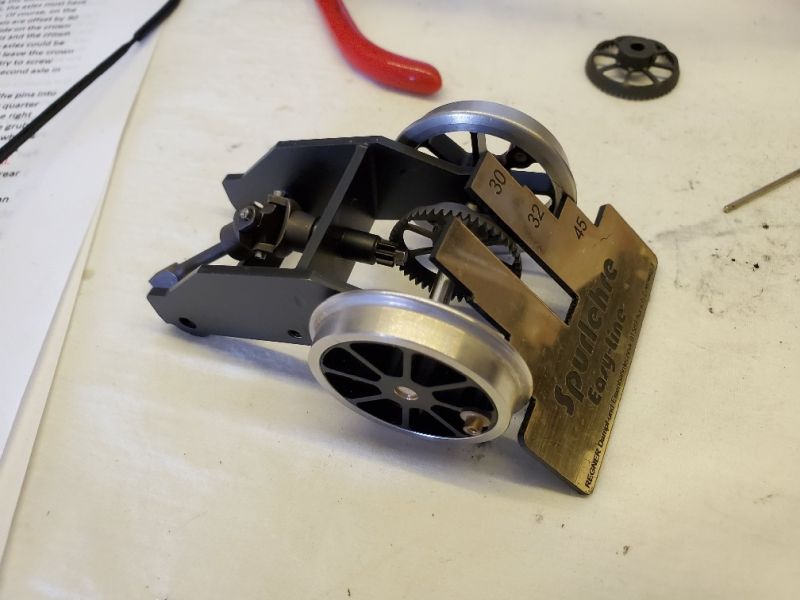
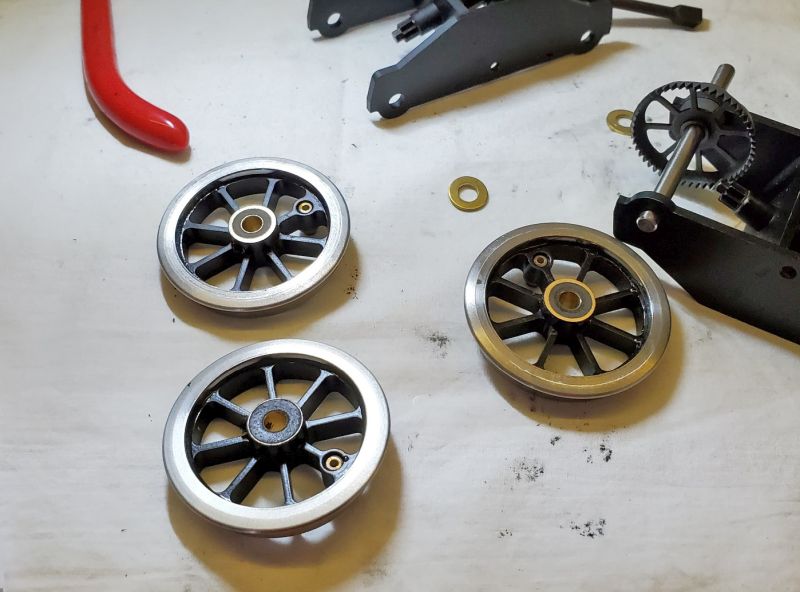
One comment from the UK dealer was to make sure there was a little play so the frame could expand when it got hot. There were several places where the paint obstructed the fit (I couldn’t even get the steam dome to sit over the safety without clearing the paint in the hole.) In this case, I put some 320 grit emery on the bench and rubbed the paint off the back of the wheels to give myself a little more play against the sideframes. In this pic 2 wheels are done, and 1 is halfway. I also sanded the paint on the truck side carefully. I ended up with wheels in gauge and a tiny bit of play from side-to-side.
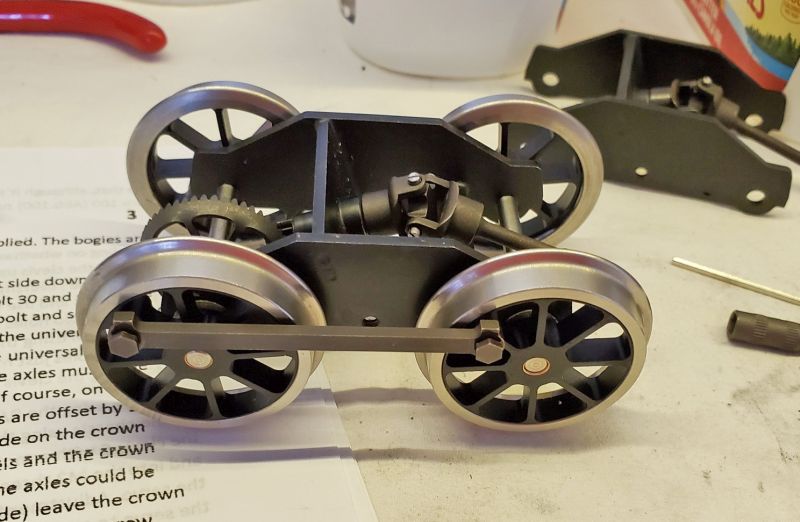
Quartering the wheels and rods, so that one side is 90 degrees different from the other, was easy, as you can see through one wheel to the back of the spokes on the opposite wheel.
With the trucks on, you are then supposed to contort your fingers to reach the reversing rod bolt above the truck and between the frames. A fiddle but not too difficult, as the hole is threaded so you don’t have to hold a nut at the same time!
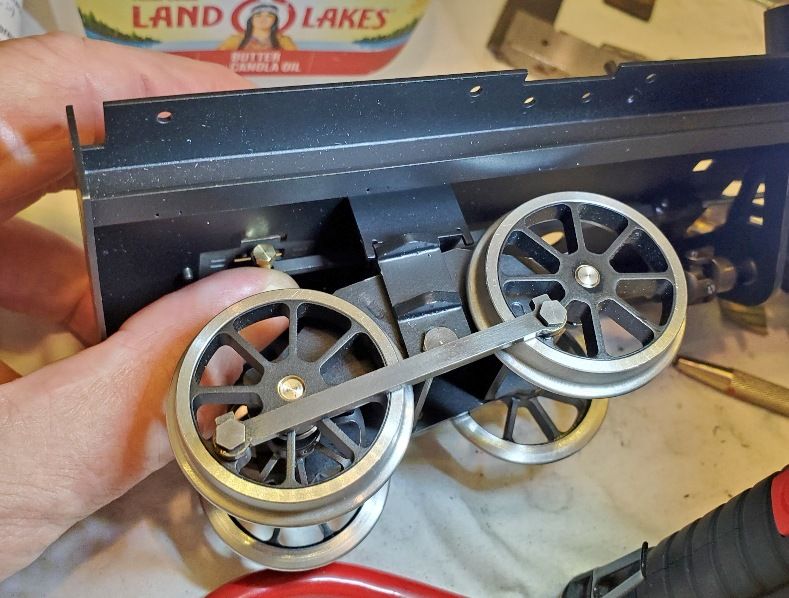
And here we are ready for an air test. Feed air in to the steam pipe in the center, and the engine should spin. (A little oil all around also helps.) It did, though only in one direction.
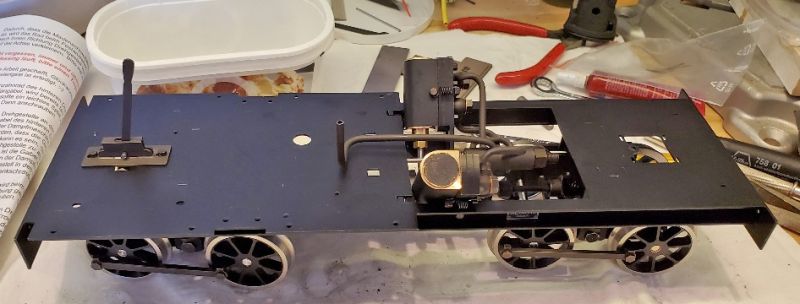
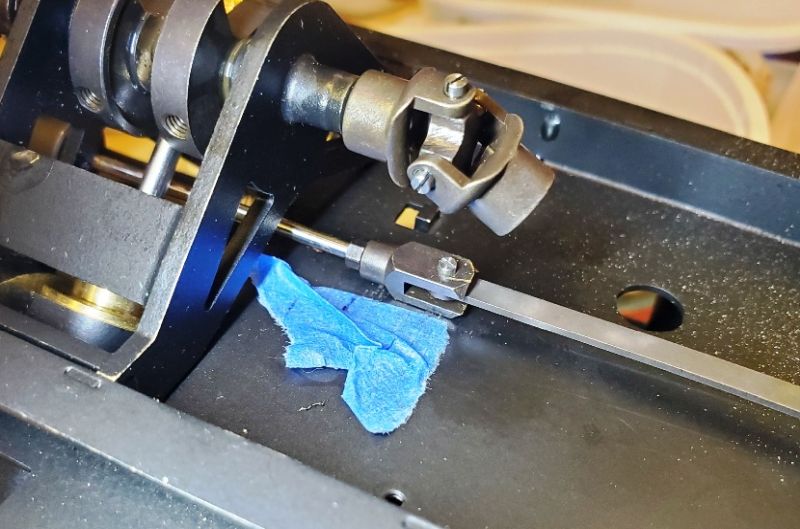
As the reversing rod seemed to need some adjustment, I removed it and tried the air test again with some blue tape and a handy marker. In this pic the 2 black marks correspond to the position of the start of the threads on the rod for fwd and reverse, which were easy to find with the tape and the engine upside down. I didn’t re-fit the rod, as I am waiting for the R/C kit to arrive.
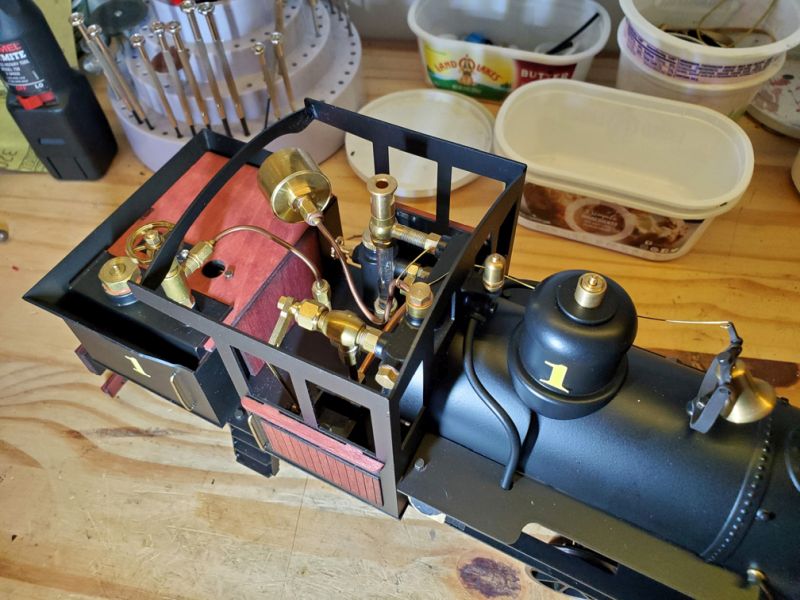
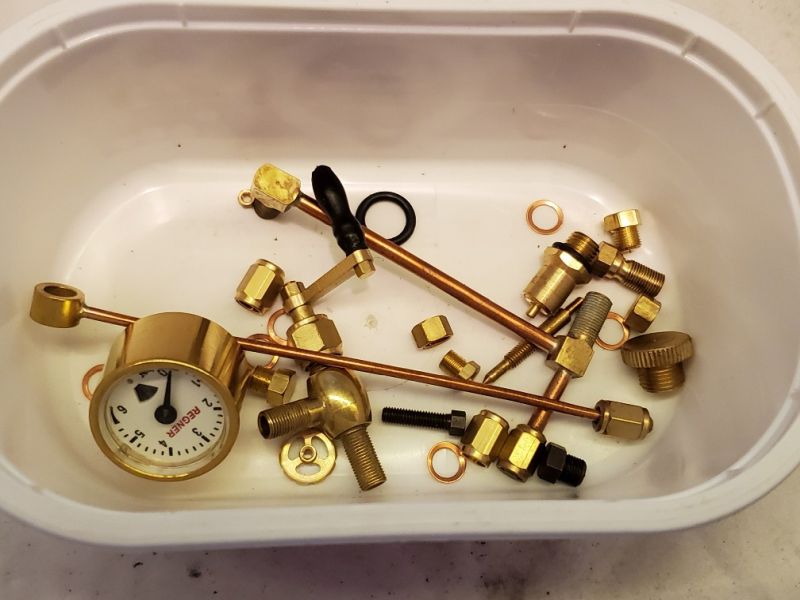
A potpourri of boiler fittings ready for the next step.
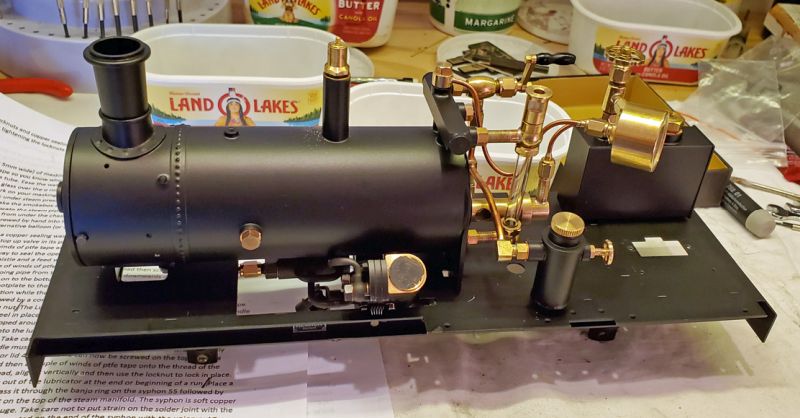
After a lot of careful fitting and bending, I got the various parts in the right place. My instructions said it could be steam tested, so that’s what I did. I left the trucks off, as there are plenty of parts to be fitted from below.
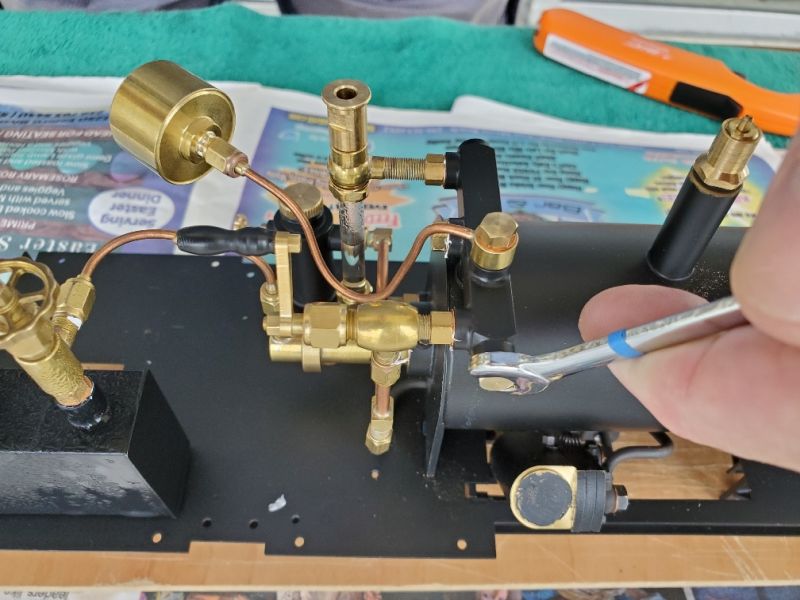
You get the pleasure of installing the meter screw in the lubricator, and I didn’t see an instruction telling me to back it out 1/2 turn or more before steaming. The other thing I didn’t see was the 3rd blank plug/bolt. You can see the one on the boiler above, and the one on the back of the steam manifold. Once steam came up it wafted out of the hole in the far end of the manifold - the side away from me as I did most of the work this way round.

Anyway, the bolt was duly fitted and the steam test was successful.
Nice Pete- coming along very nicely. When you get back, I can watch from the deck and you can run it on the SC&M!

Jerry

Nice Pete- coming along very nicely. When you get back, I can watch from the deck and you can run it on the SC&M!

Jerry

Looking good Pete!

Jerry Bohlander said:

Nice Pete- coming along very nicely. When you get back, I can watch from the deck and you can run it on the SC&M!

Jerry

Unlikely. I have so much stuff to move to MD that the Heisler is probably staying in FL. Besides, it is perfect for the Calusa Creek RR. (http://www.largescalecentral.com/externals/tinymce/plugins/emoticons/img/smiley-cool.gif)

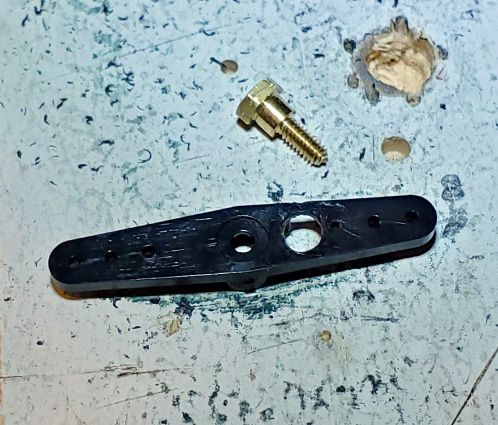
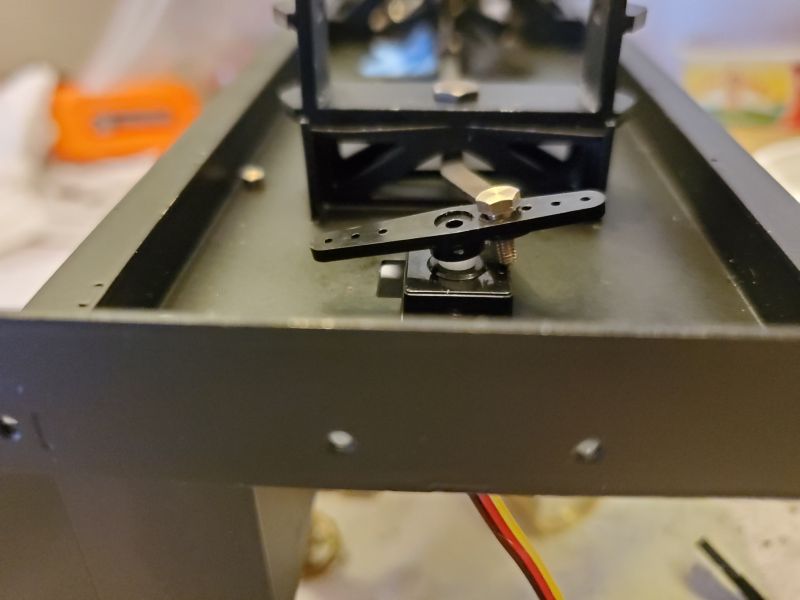
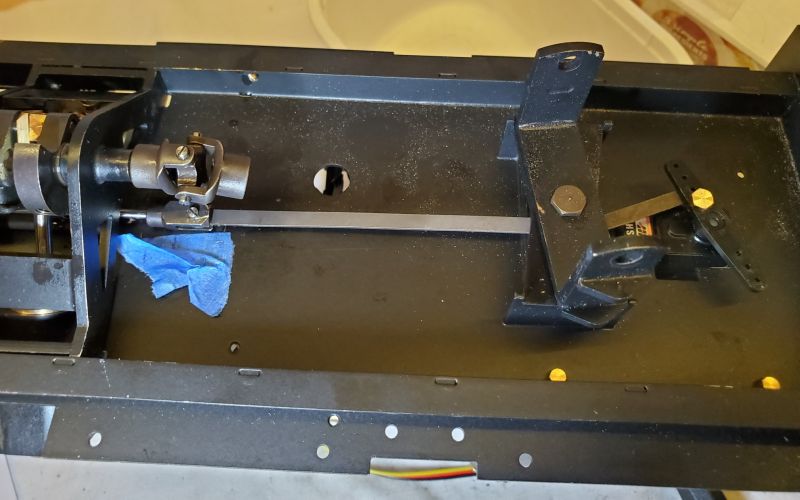
The R/C kit arrived so I got back to work. I had to swap the rod to the reversing valve clevis, and use the M3 bolt to attach it to the servo arm/horn. Unfortunately the servo arms were tiny. I picked a thick one and carefully drilled it out to take the bolt.

The rod doesn’t have to move more than about 1/4", and is quite stiff, so I drilled as close to the hub as possible. So the bolt is too long. Fetch the Dremel and cut-off disk.

I mentioned that I marked the reversing position on a piece of tape. When I got the servo working, it wouldn’t operate in the desired range (between my two marks.] In this pic it is fully out to the right.

The answer, of course, is to remove the lock nut and screw the clevis tightly to the rod. That got things aligned nicely. I’ll probably have to trim the arm when the trucks go on, but for now it can wait.

Pete,

Cool stuff! Live steam is something we are not likely to be able to pursue, so I am enjoying following this as you go from kit to locomotive!

Eric

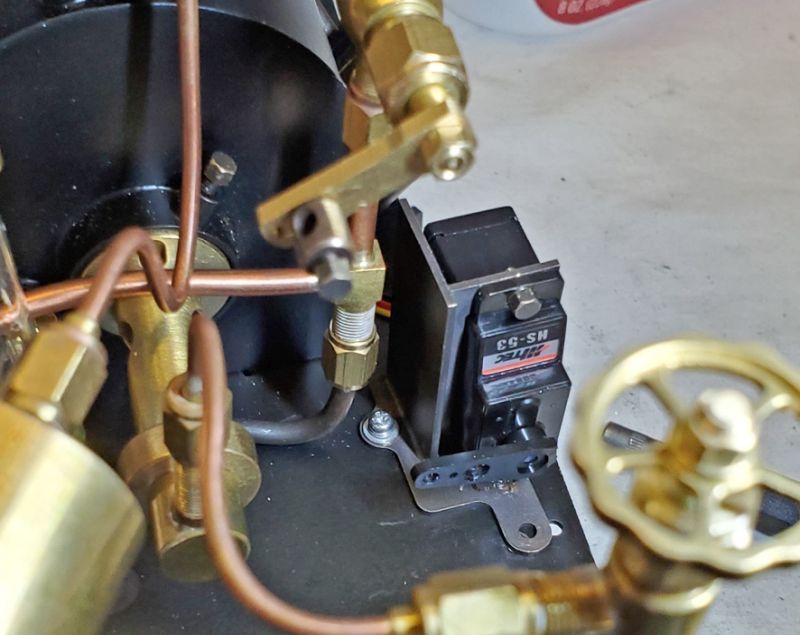
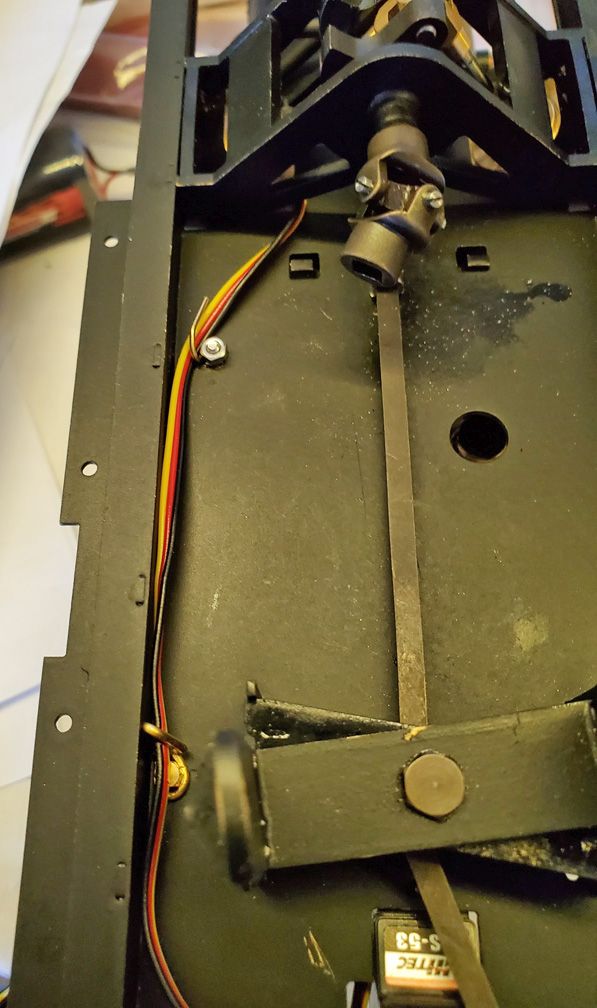
Today’s task was to rework the R/C on the throttle and run another steam test. The servo mount for the throttle was a pig, so I drilled out the frame and substituted an M2 screw and nut (I found my box of metric nuts and bolts.)

Much easier to hold it still while I add the nut underneath. Another reason was the servo cable, which runs along underneath. No clips are supplied, so to stop it dangling I added some made from brass wire.

And away we go!

Don’t know what your talking about half the time, but it is cool watching you get it working…(https://www.largescalecentral.com/externals/tinymce/plugins/emoticons/img/smiley-wink.gif)

Ken Brunt said:

Don’t know what your talking about half the time, but it is cool watching you get it working…(https://www.largescalecentral.com/externals/tinymce/plugins/emoticons/img/smiley-wink.gif)

Ken,

That’s because he’s using real butter in the tubs no less!

Really, really cool, Pete!

And the final report until I get a track test.

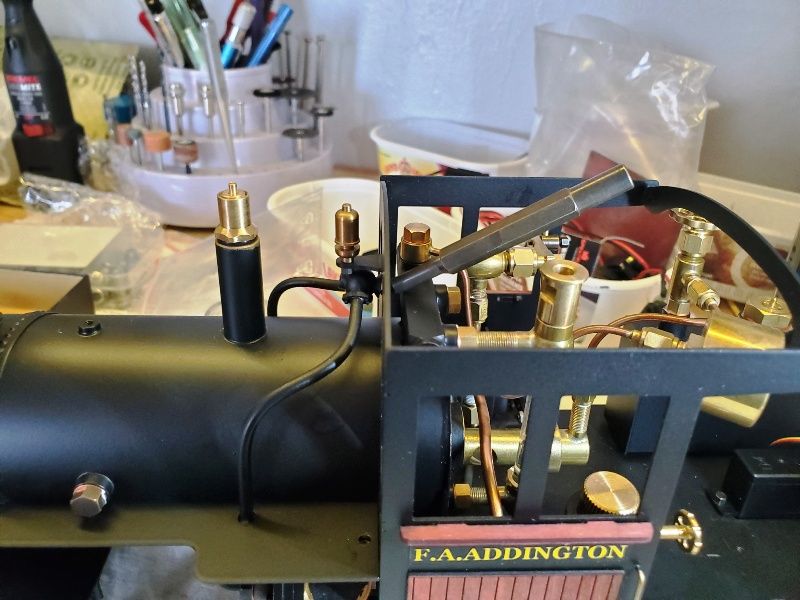
Installing all the pretty bits did pop up one small problem - a bolt that was supposed to be installed behind the manifold. No way.

The solution is to release the cab from its bolts so you can get the bolt in the steam line under the whistle.

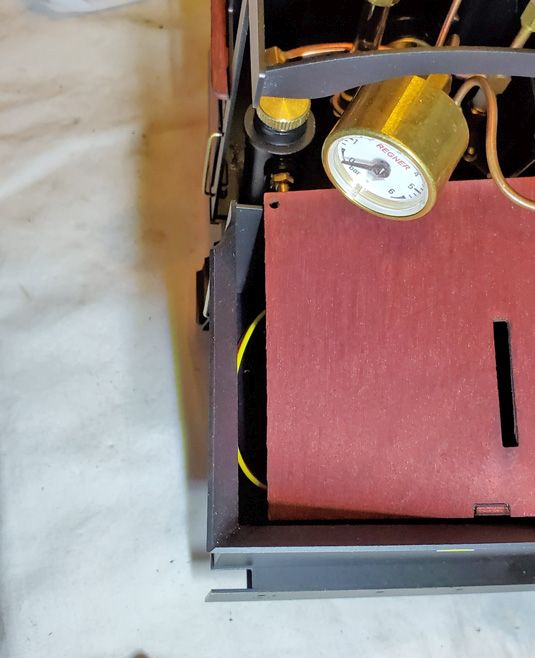
With the bunker in place, I started working on hiding the R/C gear. I seem to be missing a tab to screw in the bunker cover.

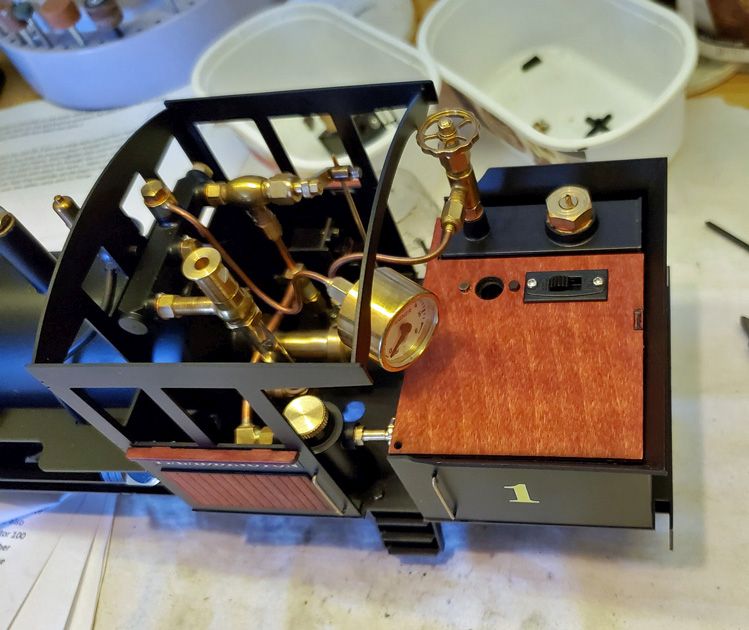
Oh well, I want access to the R/C gear anyway. The slot is for the reversing lever, which I am not using. Here’s the new cover which came with the R/C kit. (A friend who is clearing his bushes promised me some twigs to make scale logs.)

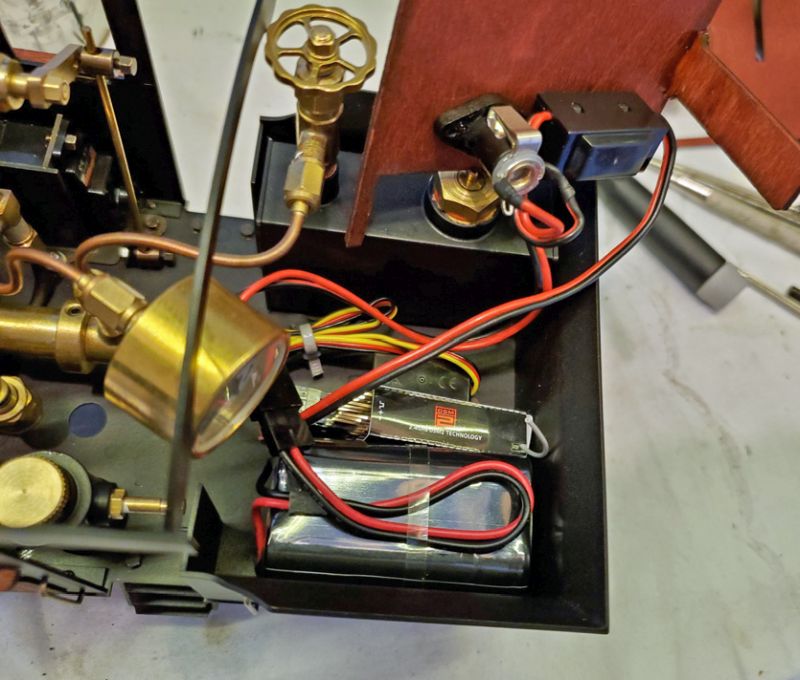
The R/C gear is well hidden. I tidied up the long cables from the servos, and discovered the receiver would fit next to the battery and servo in the floor. The on/off switch and charging socket were pre-wired, which is nice. No idea what size the socket is, but my 5.5mm ones seem to fit. In practice, I charge the batteries out of my locos as I try to make sure I carry them between my 2 homes - I don’t want to leave one for 6-7 months without a top-up.

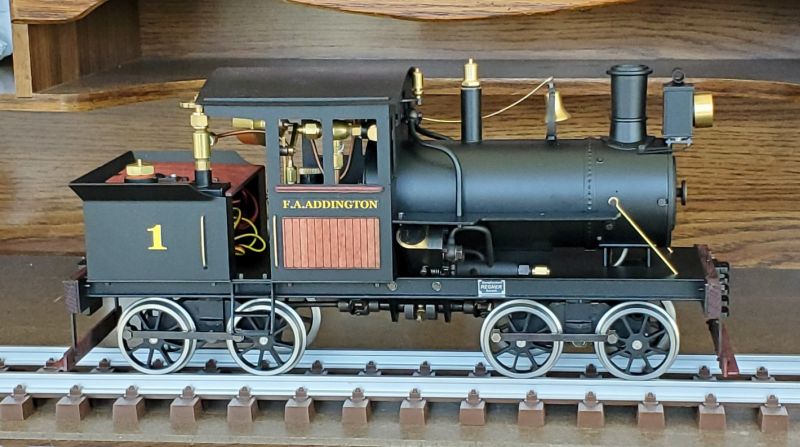
Doesn’t it look nice? Mine has the optional headlight and a Ronson fill valve. I even got the rods almost at the same position!

I put it on rollers and ran another steam test. I’ll try to post a video when it gets some track time.

It’s a very nice kit that anyone who can handle a screwdriver and a set of small spanners can build. Quite impressive.

Edit: Just realised I forgot to drop the steam dome over the safety! It was in a bag for scratch-free sate keeping.

Very nice Pete. Is it hefty enough to handle a good grade?

Jon Radder said:

Very nice Pete. Is it hefty enough to handle a good grade?

Jon, it is geared - 4:1 or greater, so it can probably handle anything! My local tract (Calusa Creek RR) has lots of hills so we will see.

We will also find out if I set the wheels (8) and gears (2) with the setscrews in good positions, or if they will creep and throw everything off! Regner’s do that until you get them set. They also take a while to run in so I am not expecting too much this year.

Thanks. What I was thinking was weight. The gearing makes it powerful, but if it’s too light all that power goes to waste in wheel slip. My 2 Cyl. Shay would happily pull more up hill if it could hang on to the rail :smiley:

The reason I ask is that my outdoor features a curving grade that approaches 5% in spots. That really limits any LS locos I could consider.

Jon Radder said:

Thanks. What I was thinking was weight. The gearing makes it powerful, but if it’s too light all that power goes to waste in wheel slip. My 2 Cyl. Shay would happily pull more up hill if it could hang on to the rail :smiley:

The reason I ask is that my outdoor features a curving grade that approaches 5% in spots. That really limits any LS locos I could consider.

This thing is solid brass and is quite heavy compared to my other live steamers. It’s 2-3 times heavier than a plastic loco with battery r/c and needs 2 hands to pick it up. I doubt it would slip on your grade. (It handles R1 curves too, apparently.) In fact my only design complaint is that it has solid trucks - while they are allowed to rock front-to-back, there is no lateral yaw in the truck mount and the axles aren’t allowed to rock independently. Probably because it would make the rods bind or the gears slip. Any track irregularity from side to side will reduce the grip.

I was wondering about my next project and tidying up the bench and the excess parts, when I came across the original bunker top, which was replaced by a new one in the R/C kit. Aha! This could be used to make a bunker front to hide/protect all the R/C wiring. And it did. (I put the steam dome on before taking this pic.)

Really, really neat looking engine, Pete!

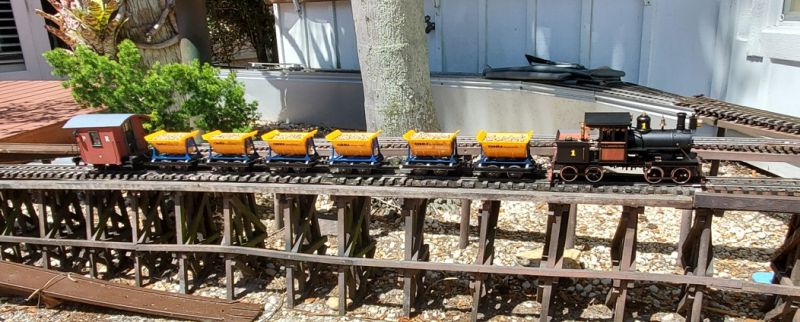
Running in at the Calusa Creek RR in Fort Myers, FL.

That had to be a satisfying moment, Pete! Congratulations!