Large Scale Central

Beating the Boredom - Brunt Coal on the C.V.S.Ry.

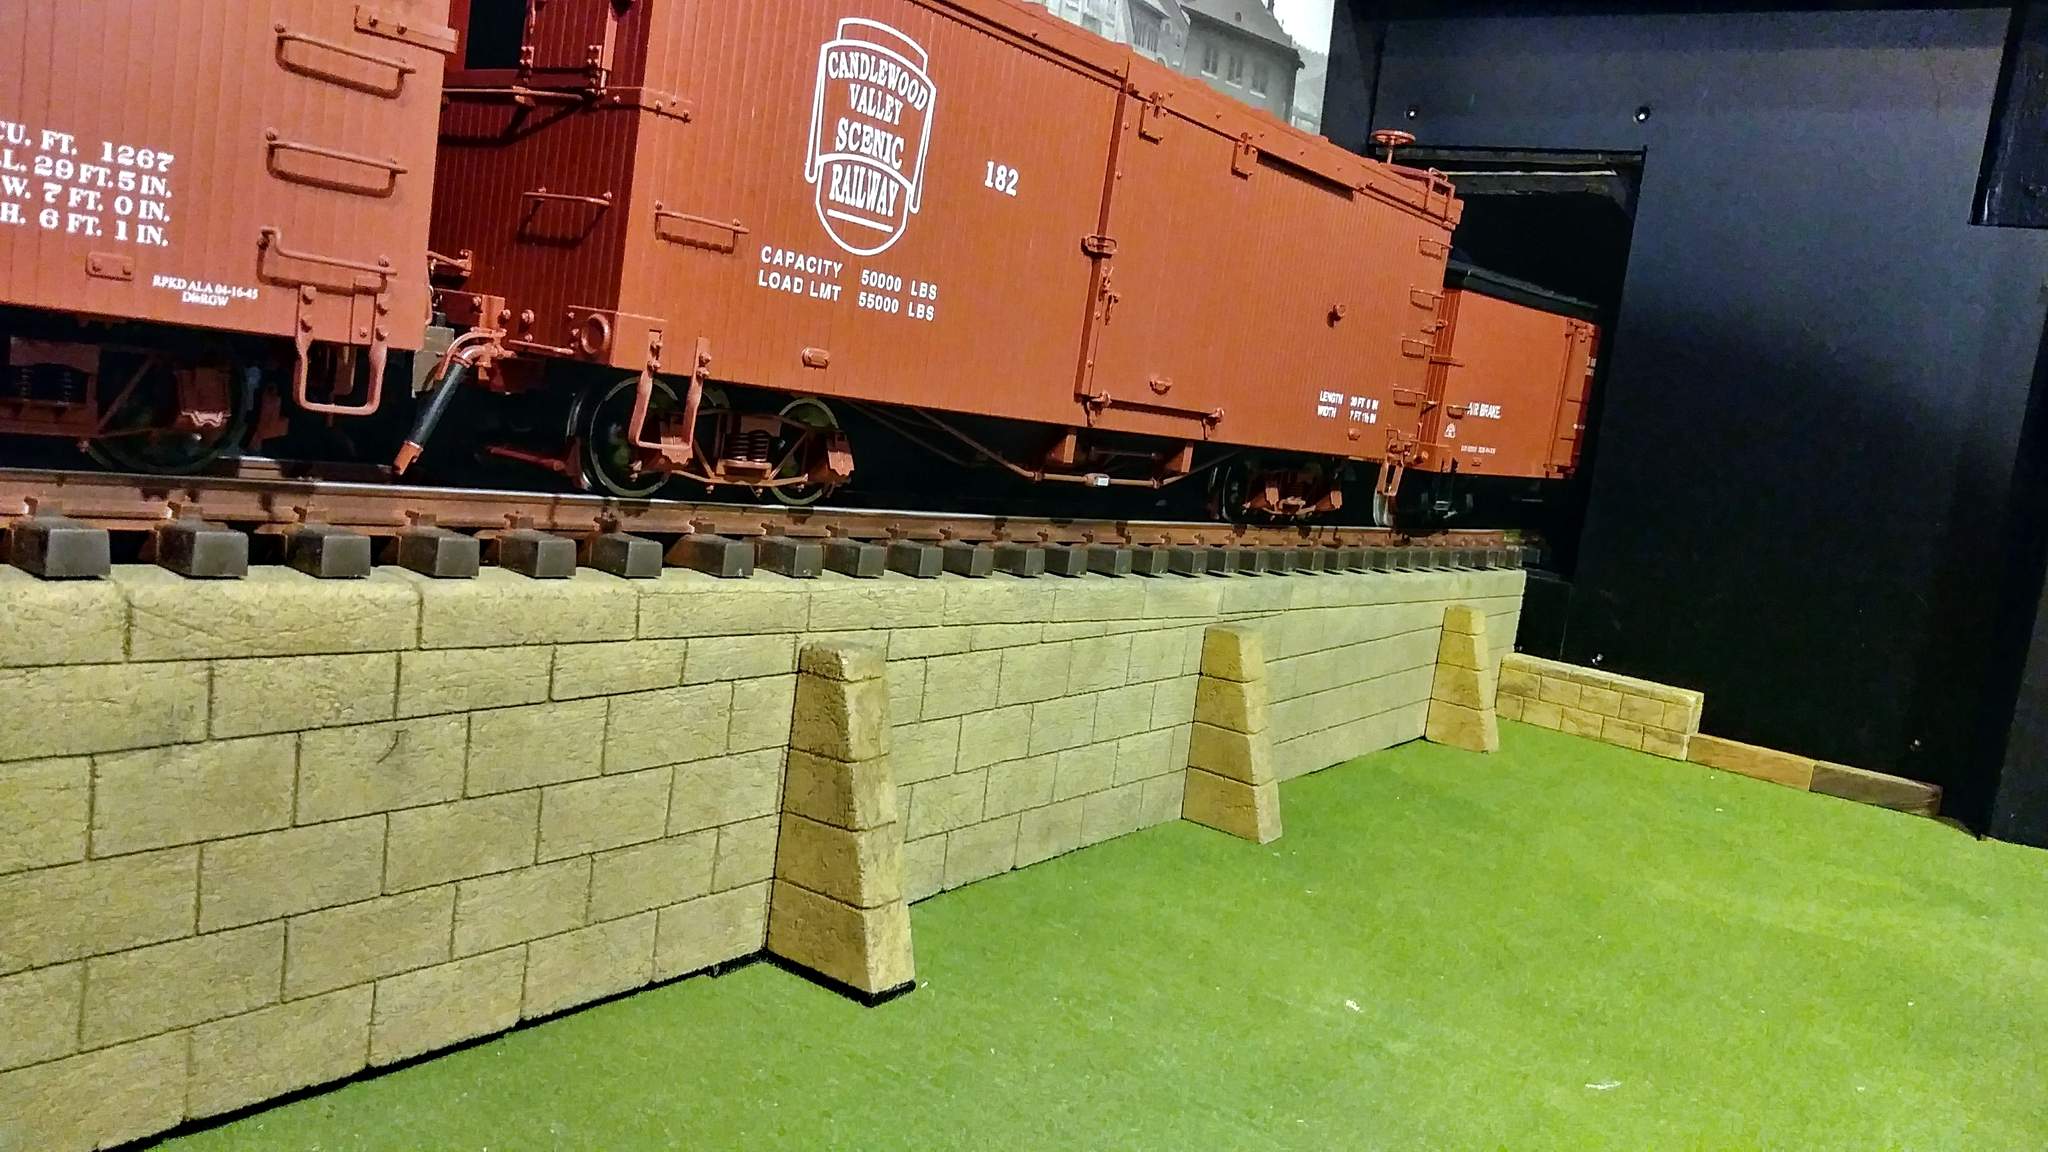
Not only does Marilyn allow me to build on her washer, she volunteered the ironing board when I needed a place to lay out the entire wall taped together :grin: I needed to connect them because when I did the first pass on color as separate pieces, they didnā€™t blend well at the seams. So here you see the entire wall, including the counterforts I made today, laid out to dry after additional coloringā€¦

I chose to build Counterforts, rather than Buttresses as suggested because I like the word better!

This next image shows how one of the the counterforts is positioned to hide a seam in the middle of the sceneā€¦

Tomorrow will be the first nice weather day in a while, and the only one for several days, so I need to get back to some outdoor projects. Sunday weather will push me back inside.

counĀ·ā€‹terĀ·ā€‹fort | \ "+ĖŒ-
plural -s
Definition of counterfort

: a buttress built against or integral with a wall (as a retaining wall or dam) but on the back or thrust-receiving side

David Marconi,FOGCH said:

counĀ·ā€‹terĀ·ā€‹fort | \ "+ĖŒ-
plural -s
Definition of counterfort

: a buttress built against or integral with a wall (as a retaining wall or dam) but on the back or thrust-receiving side

Then I guess Iā€™ll just have to put them on the back side where they wonā€™t be seen (https://www.largescalecentral.com/externals/tinymce/plugins/emoticons/img/smiley-surprised.gif)

Jon Radder said:

David Marconi,FOGCH said:

counĀ·ā€‹terĀ·ā€‹fort | \ "+ĖŒ-
plural -s
Definition of counterfort

: a buttress built against or integral with a wall (as a retaining wall or dam) but on the back or thrust-receiving side

Then I guess Iā€™ll just have to put them on the back side where they wonā€™t be seen (https://www.largescalecentral.com/externals/tinymce/plugins/emoticons/img/smiley-surprised.gif)

Nope, you got them right. The dirt pushes out(https://www.largescalecentral.com/externals/tinymce/plugins/emoticons/img/smiley-cool.gif)

Do it in the buttress ?

https://www.youtube.com/watch?v=FShE0VifCYs

David Marconi,FOGCH said:

Jon Radder said:

David Marconi,FOGCH said:

counĀ·ā€‹terĀ·ā€‹fort | \ "+ĖŒ-
plural -s
Definition of counterfort

: a buttress built against or integral with a wall (as a retaining wall or dam) but on the back or thrust-receiving side

Then I guess Iā€™ll just have to put them on the back side where they wonā€™t be seen (https://www.largescalecentral.com/externals/tinymce/plugins/emoticons/img/smiley-surprised.gif)

Nope, you got them right. The dirt pushes out(https://www.largescalecentral.com/externals/tinymce/plugins/emoticons/img/smiley-cool.gif)

Well. I read ā€œbut on the back, or thrust receiving sideā€ As being on the side being pushed against. Kind of like a dead man. But I only play a retaining wall engineer on the internet.

Only progress today was to squirt some paint on the rails going down the ramp.

Looks like I miss read so Iā€™ll call your wall buttressed (https://www.largescalecentral.com/externals/tinymce/plugins/emoticons/img/smiley-cool.gif)

Another step closer. The retaining wall and ramp track went back in today. Iā€™m using Fuze It construction adhesive to hold the HDU Foam to the PVC board trestle, and also foam-to-foam for the buttressesā€¦

When I was doing the dry fit I noticed that even though my taper cut was good, it didnā€™t stay aligned with both the top of the roadbed and the bench work. I opted to leave the gap at the bottom of the wall where it wonā€™t be readily visible. I can also use some ballast and or coal dust to hide it laterā€¦

I stuck a fill piece under the butress but not wanting to cut another taper, I just left air space for most of it. Iā€™m debating putting ballast on the ramp track. It will just fall off the wall unless I glue it. Iā€™m not a fan of glued ballast since I like to change things up. This last shot taken without the bright white light onā€¦

Trestle construction begins tomorrow.

Sometimes rubber cement makes a good trial glue ā€¦

almond colored caulk to fill the small gaps, it will look close enough to a concrete bed the blocks were laid on.

Pete Lassen said:

almond colored caulk to fill the small gaps, it will look close enough to a concrete bed the blocks were laid on.

Good idea Pete. Iā€™m pretty sure I only have white in stock, but itā€™s paintableā€¦ Hmmm. Was going to start setting the trestles today, but it might be a good idea to do that first. I need to take a closer look with the bent forest in place. It may take an act of contortion to see it then!

Well; Remembering that Iā€™m not very neat when it comes to caulk, I began pondering other methods when I remembered I had some small balsa wood sticks and grey acylic paint in stock. Even with the bent forest in place, I wasnā€™t real happy with the shadow, so several lengths of balsa were trimmed to fit, then painted. I also painted the fill piece that was previously black. Fortunately I could slip a sheet of paper under the buttresses to protect the grass matā€¦

I need to decide on how perfect I want this, now that tiny sliver of a gap to the right is more noticeable. I do have styrene and that same color grey in vinyl. I guess bent building may wait some more!

And while waiting for the paint to dry I went over the bents and stringers one more time. This time I used a stiff nylon brush to remove some of the iron oxide coating that made a few of them look like steel. I then brushed on a liberal coat of white vinegar to smooth out / tone down the color and raise some additional grain. Here they are drying after getting the treatmentā€¦

So I told my boss today that even though I am not at work, I am keeping my fabrication and painting skills sharp!

Significant progress this morning. I was delayed by good weather and outdoor projects, but rain has me back to work on the trestle. In the first things first department, I had to build a bumper for the mainline track. Nothing exciting, just a couple of vertical beams and a few boards to push against. This was the only part of todays work that involved wood glue. I want to be sure that if Ken visits that Iā€™m prepared :open_mouth:

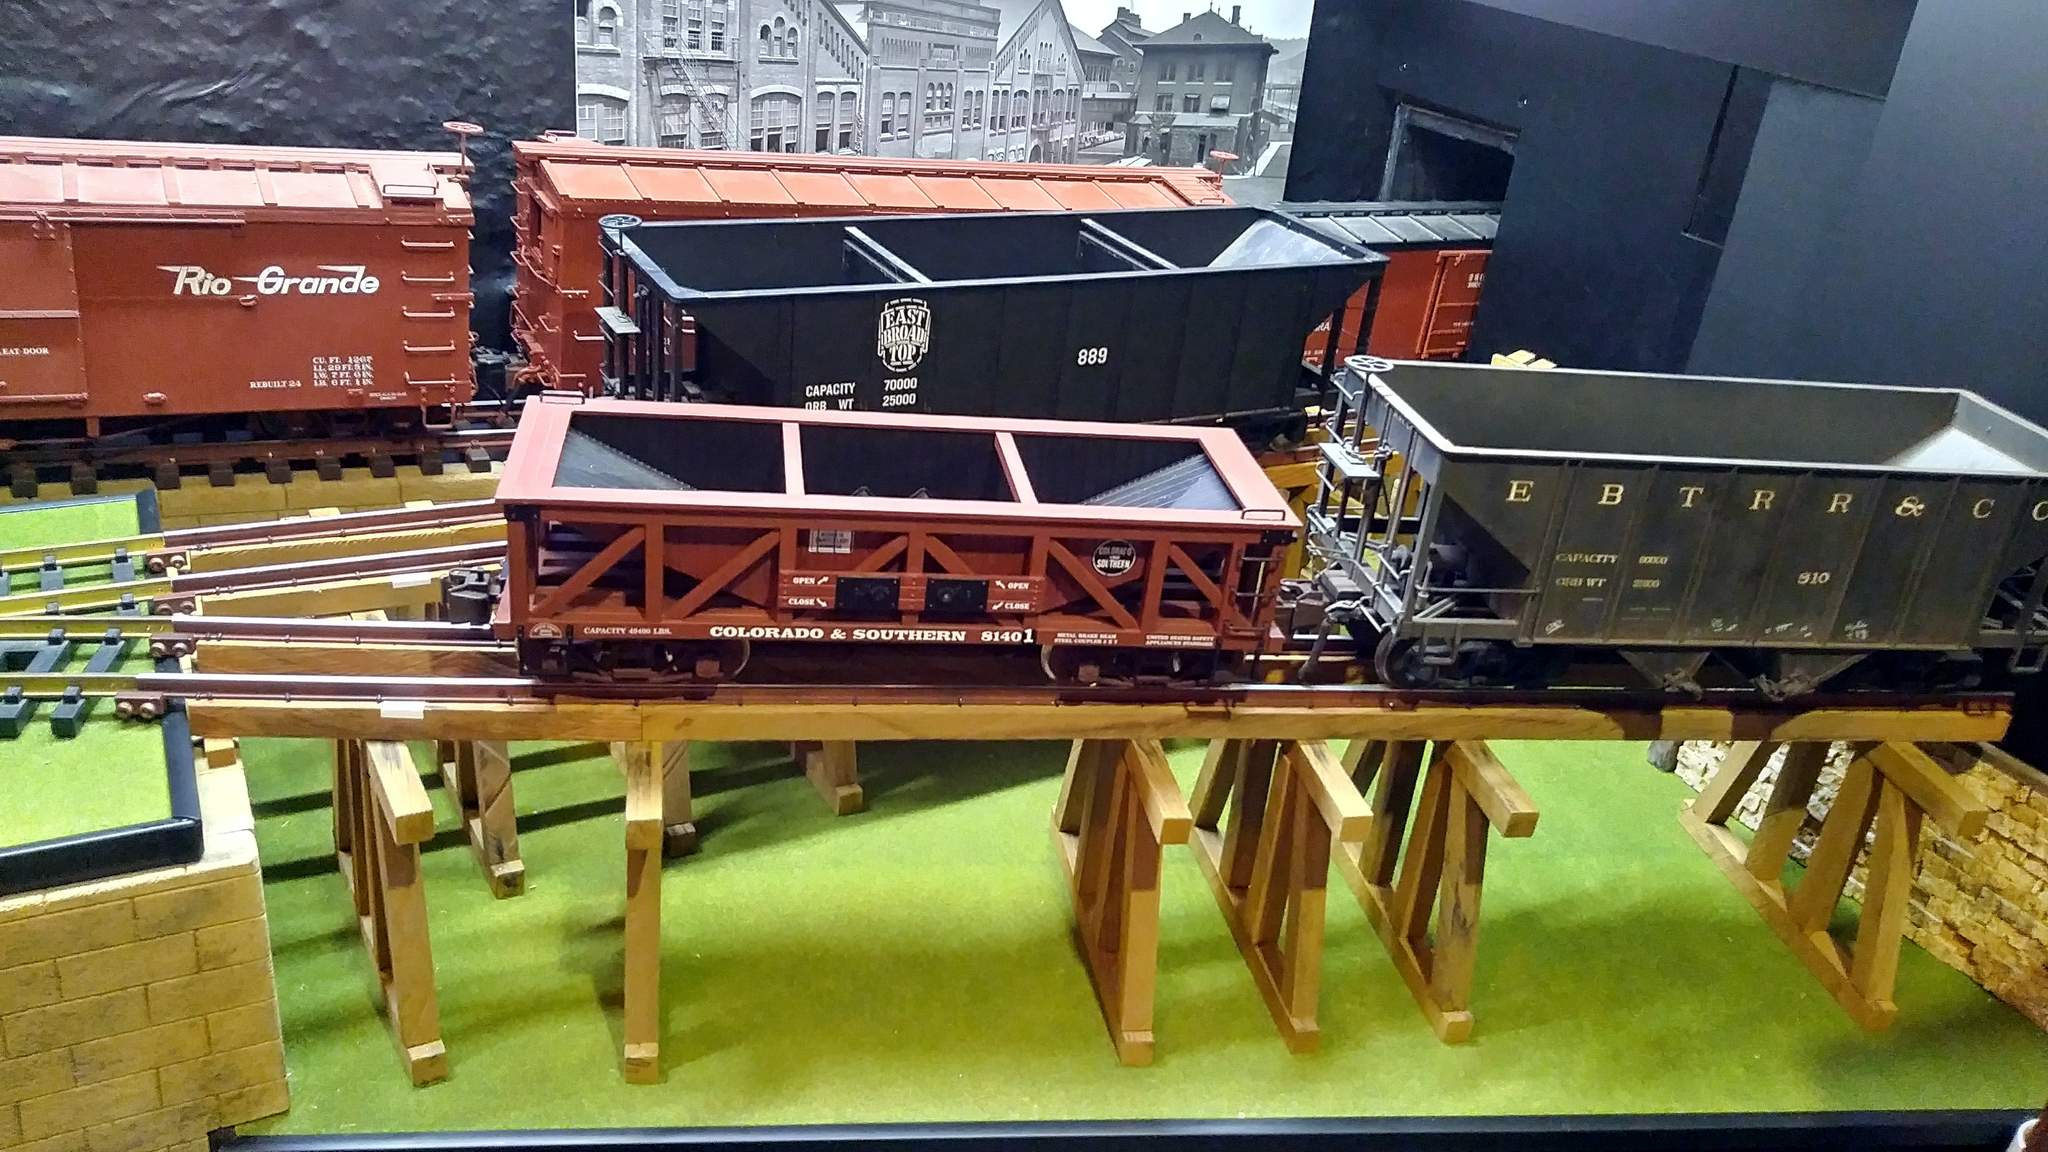
With that complete, I pinned in the first two bents and stringers for both tracks, then extended the stringer for the main so I could work out final spacing. I decided on 7 foot centers for the main with a wide bin in the middle for a single 3 bay hopperā€¦

Once the spacing was determined the bents were pinned to the bench top, then the stringers to the bents. Finally, the finish rail was pinned to the stringers. As per the prototype, there are no ties on the delivery trestle - rail is spiked directly to the stringersā€¦

Moving on now to the delivery siding (front track). But first, I need to clean up my mess so I can drill my two bay wood and steel hoppers out of the yard to double check the bent placement.

looks great ā€¦are you going to add walkways ?

Sean McGillicuddy said:

looks great ā€¦are you going to add walkways ?

Yes, eventually there will be walkways, railings, a ladder and and some bins. For now I have reached my goal of getting the track operational again. As weather improves Iā€™ll be shifting foocus to outside, but this is still a great place to mess with on rainy days and evenings. Plenty to keep me busy for weeks to come!

and just that easy the little gap has disappeared into the background!!! looks great! Wish I had a basement!

This will be a stopping point for a while as I plan out walkways, railings and bins. Track is back in service as of this eveningā€¦

The foreground track is the Brunt Coal siding. It can accommodate 2 wood hoppers or a wood hopper and a 2 bay steel hopper. A single 3 bay could be unloaded in stages by moving it around the trestle.

The next track back is presently the main. I did include a bin area to accommodate one 3 bay hopperā€¦

I need to determine if this will actually be an spot for Brunt Coal. Having this tail clear allows me to pull the entire contents of the long siding at Willow Hill. If a car is spotted here it might need to be moved first before Willow Hill can be serviced. That might be a bit weird as itā€™s two ā€œtownsā€ away.

View from track levelā€¦

Might be time for a vacation from my vacation :smiley:

Nice work on a tough area Jon. Though Box was built to aid in the switching of Willow Hill I believe and this therefore an extension of that idea, I think limiting the length of train into Box when switching WH would maintain the forethought you now need for those operations. YMMV (https://www.largescalecentral.com/externals/tinymce/plugins/emoticons/img/smiley-cool.gif)

Interesting start to finish. Thanks for the write up, as you went along. Look forward to the walkways and ladders. Iā€™m wondering on bins, Iā€™m kind of leaning toward just dumped piles of coal. When too much was piled around bents, it would just be shoveled out. I doubt if organization (meaning the building of bins), time and labor would have been a good use of men and material. When I built the power plant in the old basement, I used fish tank charcoal filter carbon. it was a good size, matching the coal in the Bachmann hoppers.

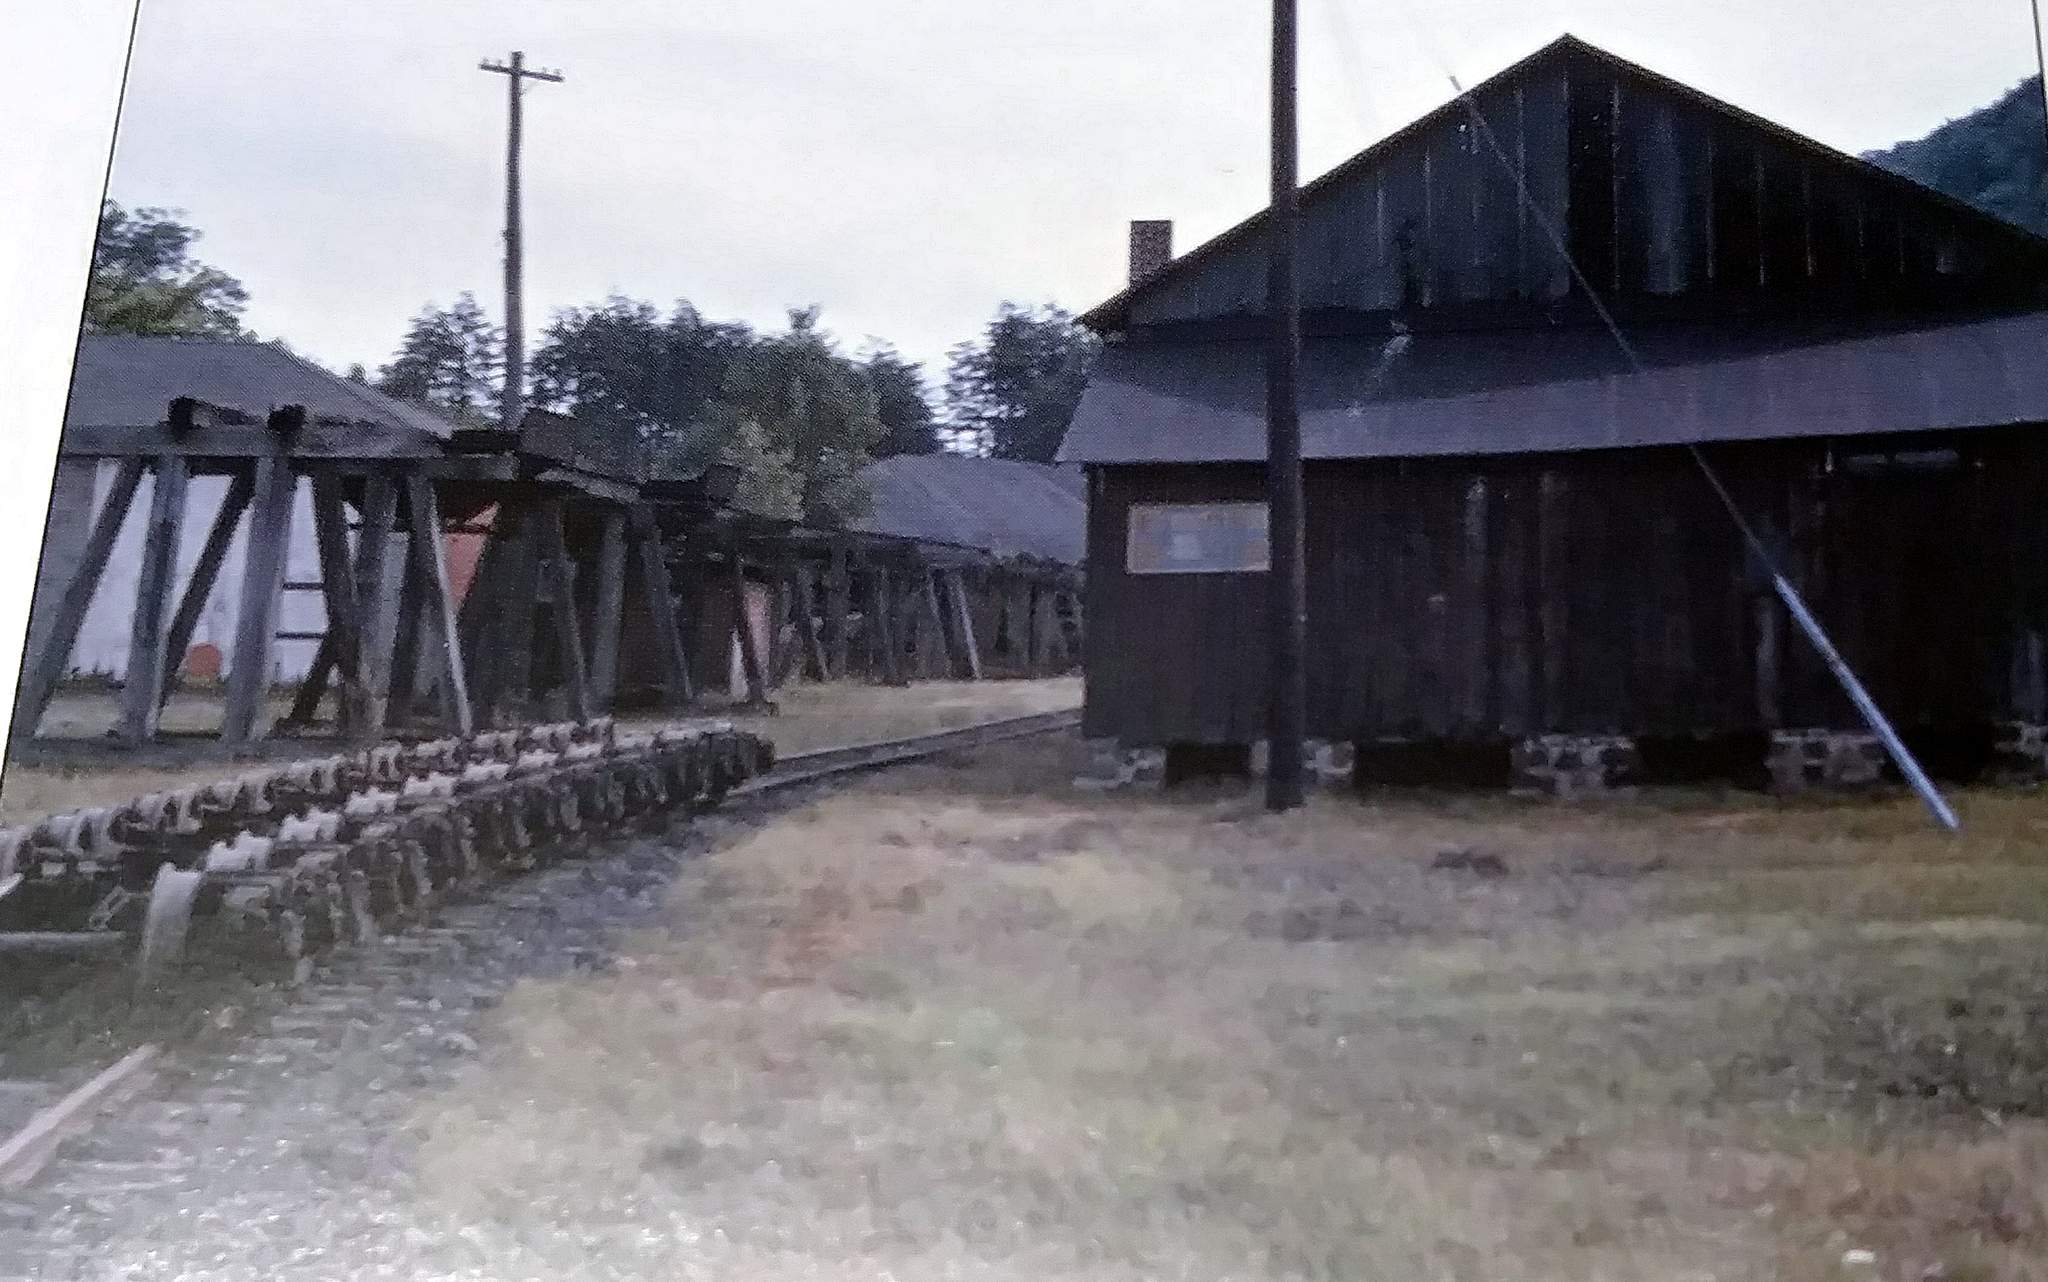
Perhaps ā€œbinā€ is not the correct term. What I am talking about is some sheet steel hung from the trestle with a bit of slope forming a rectangular funnel to concentrate the coal to the center of the unloading bay. The purpose so that most of the dump goes into a waiting truck below. Because the trestle is already close to the ground, this device might only hang down a foot or so. In one of the prototype photos you can see that it also extends above the trackā€¦

Iā€™m thinking I can bend something from sheet aluminum at work on the brake. Probably in two or four pieces. I have found a really nice two part adhesive for aluminum that looks like a weld bead if applied carefully to a joint. Iā€™m thinking flat black on the bottom, then a heavy application of rust solution and coal dust on the top. Paper and shirt cardboard mock ups will be the first step.