Here in the Pacific North West, we have 2 or 3 seasons, depending on how you look at it.
July, August and Winter gives us three seasons.
Winter and Road Construction gives us two.
It all depends on how you look at it. ![]()
Here in the Pacific North West, we have 2 or 3 seasons, depending on how you look at it.
July, August and Winter gives us three seasons.
Winter and Road Construction gives us two.
It all depends on how you look at it. ![]()
You all seem to know, but I have to ask:
Stan, where is your layout?
Stan is in MA, west of Boston, not far from Bob.
The thing about this winter for me is not the amount of snow, we have had far worse in the 20 years I’ve been in this house, but rather the frequency of storms and well below normal temps. I’m tired of shoveling and fighting ice build up. This time of year the high sun angle should melt paved surfaces pretty quickly, but at 10F that doesn’t happen.
Re the tarp: I was thinking it would keep the snow out of the track, ties and roadbed. Yes, you would need to shovel off any accumulation of more than a few inches.
Lou Luczu said:
You all seem to know, but I have to ask:
Stan, where is your layout?
In his backyard…
Chelmsford, MA.
Jon Radder said:
Stan is in MA, west of Boston, not far from Bob.
The thing about this winter for me is not the amount of snow, we have had far worse in the 20 years I’ve been in this house, but rather the frequency of storms and well below normal temps. I’m tired of shoveling and fighting ice build up. This time of year the high sun angle should melt paved surfaces pretty quickly, but at 10F that doesn’t happen.
Re the tarp: I was thinking it would keep the snow out of the track, ties and roadbed. Yes, you would need to shovel off any accumulation of more than a few inches.
I knew what ya meant Jon. Just giving you a little “ribbing”
Most of the work so far has been indoors building custom turnouts. The outside work has been necessary to ensure the turnouts will fit into the planned layout, We have indeed placed a tarp over the yard when snow has been in the forecast (all to much lately) so that shoveling is easier and that once shoveled the tarp removed to expose the yard. This has kept most of the snow off the ties and has made working outdoors more pleasant.
With a few days of warmer weather before the next cold snap we decided to start the actual construction. First up is rebuilding the south side edge. The yard will be laid out starting on the south side working one track at a time. Since the level will have to change slightly getting this job done early will help a lot as we move towards operation in March.
Unfortunately the winter has been colder then usual so the ground was frozen about 8". So today Deb and I burnt brush to heat up the ground and thaw it out. Tomorrow on a warm sunny day actual construction begins.
Stan

Stan
only 8" of frost, i have been told we are at 47"
Richard
Richard Beverly said:
Stan
only 8" of frost, i have been told we are at 47"
Richard
Richard
This is about a normal year for us as far as freeze depth goes. We have measured 16" of ice in our pond one year that we had lots of sub zero weather. Fortunately it was not that deep this year.
We now have the south side edge installed as well as the separator edge between the arrival track and the yard proper. This allows us to wire the yard on nice days.
With the major construction for this segment done we will turn to finishing the turnout construction and wait till the next warm spell when we can get a load of new ballast.
Stan

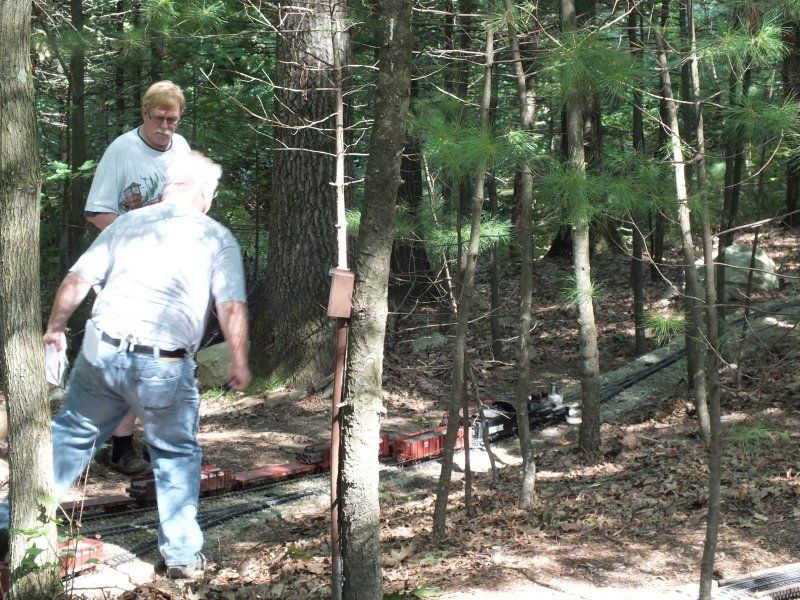
Wow, that is going to be a big yard. Comparing it to the first photo, there will definitely be more room.
Construction continues but at a slower pace.
The snow pack is still over a foot here and the cold has hampered outdoor construction so most work has moved indoors to finish the turnout construction.
There are two basic styles of turnouts. One is a 2 meter curve off of a straight track which is about a #5 and the other is a 2m/3m curved turnout. Over the years I have found that brass plates soldered to the SS rail and screwed to ties is best long term solution. Eventually the rail sides will be painted and other ties with spikes added to make the turnouts look more complete
5 of the 7 custom turnouts in the main yard are now ready for installation. The other two will be completed in the next few days.
This weekend it is warmer so I will have the time to wire up the west end. We will get our first load of ballast Tuesday and hopefully we will get a thaw soon so the North Side can be started.
Stan

I love it …keep the progress pics coming!
What solder formula are you using for brass to stainless? The joints look like it flows pretty good.
Jon Radder said:
What solder formula are you using for brass to stainless? The joints look like it flows pretty good.
The key is the flux, Harris Stay Clean
I use resistance soldering for the plates and a torch for the frog.
For the plates I use Stay Bright 8 solder for its strength. For wires I use normal 60/40 rosin core solder
First I use a grinder to clean up the bottom of the rail and roughen it up a bit. Apply flux and add a layer of solder and clean off the excess flux with water. I also pre-solder the plates. Then I join the two surfaces.
I do the same procedure for wires, tin the wire and add solder the rail and then join the two together.
Been doing this since stainless first came out and it has worked well.
Stan
Stan Ames said:
Jon Radder said:
What solder formula are you using for brass to stainless? The joints look like it flows pretty good.
The key is the flux, Harris Stay Clean
The liquid flux?
The Stay Bright looks to be a lead free Tin & Silver compound. Very interesting.
Nice work of the switches Stan. It is pleasing to see custom track being made. I wouldn’t even attempt it however.
Looking forward to more pics of your interesting railroad later in the year Stan.
Incidentally it is good to see you post without having someone being abusive towards you.
Alan Lott said:
Incidentally it is good to see you post without having someone being abusive towards you.
Big day today on the SJR&P. Finally a warm and sunny day.
Finished up the initial wiring for Bat House Yard, got a load of ballast, and installed the first sections of the North Edges.
Assuming that the snow melts we have a big operating session on the 30th which is only 2 ½ weeks away.
Saturday we get our 2nd load of ballast and by Sunday the wall for the North West edge should be in place.
Stan


Hummmmm Lot of wires ,would DCC not have been better. Later RJD
R.J. DeBerg said:
Hummmmm Lot of wires ,would DCC not have been better. Later RJD
It IS DCC…
The Brown box on the tree is where you plug the throttle in.
R.J. DeBerg said:
Hummmmm Lot of wires ,would DCC not have been better. Later RJD
Indeed as Ken pointed out the layout IS DCC. Likely one of the larger DCC layouts around. And one that works and works very well, requires little maintenance and is operated year round except when buried in deep snow.
I tend to overdesign and overbuild and this applies to most things I work on.
Having grown up in the smaller scales I learned long ago not to rely on rail joiners. When you rely on rail joiners for connectivity they seem to also fail during an operating session or when you have visitors. So each section of track on the layout (except for the turnouts) has a set of feeder wires to the section track bus. These feeders serve a dual purpose. Electrical connectivity and once the ballast settles in the feeders serve as a track anchor and hold that section firmly in place. The ends of the rails may move slightly in the heat or cold but the center where the feeders are will not move.
When you have a track powered layout on the ground you learn rather quickly that it is a real pain to dig up the ballast to install any new wiring so I tend to overkill at the start.
In the trench are
The main bus wire (8 gauge) that goes from the power stations inside to wire junction boxes around the layout
The track bus wires (10 gauge) that goes from the wire junction boxes to different areas of the layout. For future signaling, bi directional location sensing, and for the ability to isolate sections for potential troubleshotting, the layout is blocked with a separate track bus going to each section.
Track feeders (12 gauge) that goes from the track bus wires to the track
Xpressnet pair of 12 gauge power wires and pair of 18 gauge network wires. This is a linear network and goes from post to post.
Phone cable for future phone capability (not used currently)
Cat 5 network that goes between all the wire junction boxes. There has been a lot of talk about a future network and for me it is best to install it now (not used currently)
A 18 gauge pair for turnout feedback. Never used and only in the older sections of the layout. Now serves as an XpressNet backup should it ever be needed.
This section of the layout has two other characteristics that add to the wiring. The Y is part of the main line and is connected to a reverse loop controller in the shed and there is a power station change here so there are different bus wires on each side of the gap.
Each set of wires is twisted to avoid any radio interface issues (a long wire with lots of power in a gravel trench is a fantastic antenna)
Stan