Large Scale Central

Bashing a LGB baggage into a RhB baggage

In the meantime I cut the frame/chassis to size:

The roof has been filled and sanded, for filler I use “Ever-Glaze & Spot Putty” from Evercoat. Works really well, sets quickly, very little shrinkage and sands nicely. The arrows in the picture show the staggered joint positions. Since M-E-K does the chemical weld this will be as sturdy as …

Hi,

Great work. No measuring, milling, drilling, M.E:K.-ering. The chassis seems to fit as far one can see it in the dark.

Pure magic.

Have Fun

Juergen Zirner

Trim strips:

Removing the trim strips comes next. I use an Olfa knife (X-acto knife) to shave off the plastic by drawing the blade across it. More filling and sanding, if one works carefully there is not much of that. To fill little dents etc. I apply a very small amount of the filler and then use a M-E-K soaked brush to distribute it. KISS. The next step will be the new trim strips and the sliding doors. The trim strips of the D4016 differ from the D4021 shown at the start of the thread, the same goes for the windows. The sliding doors

One could fill in the existing window with styrene, fill all the gaps and sand. Yes, one could… and would find that a very flat surface is not in the cards because of the different hardness of the plastics. The patch work will always be visible if the light falls at the right angle! So I decided to cut the door right by the hooklever housing and fashion a new upper half from styrene. The new trim strips are Evergreen .020 x .040 strips. Fill and sand the joint. PS of course the chassis was cut to use the existing screw bosses (this was mentioned earlier :wink: ). Yes, the screws still fit. :wink: :slight_smile: To be continued.

Hey Zirner.

Care to show us something constructive you have done?

Tony,

He could bring out that old chestnut how he invented rust. He is the “inventor of rust”, prior to him inventing it no-one knew how to weather rolling stock realistically, age wood at an accelerated rate etc. etc.

The whole community - that includes everyone who models anything, be it dollhouses, military scenes, railroads etc. etc. - was waiting for Zirner to show up and invent rust.

It’s either that - the world according to Zirner - or all of us who knew how that process works figured everyone else knew already as well. After all it is a very old process!

But Zirner was/is seriously considering claiming the fame of “inventing” rust! :slight_smile: :wink: :smiley:

Fits right in with today’s marketing methods!

He can’t make that claim…I invented Rust…in fact it happened one windy, rain swept night in 1539…I was out sitting by a pile of what we now know as iron ore. Feeling the call of nature…I took an old sheep skin and covering my head walked over to the iron ore pile…after relieving myself, I went back into the cave and slept soundly.
Next morning I awoke and going outside I found a pile of what we now know as RUST…I called it RUST because it seemed to "R"un into the stream beside the pile; left an "U"nsightly colour; "S"eemed like a nice word; and then sat down and had a cuppa, to give myself the idea of the name…the “T” came from the other invention; "T"ea that I invented by accidentally putting a couple of dry leaves in with my sheep skin underwear while washing them, in a stone bowl over a hot fire. but that’s another story.

Damn, Fred. I hope I get a chance to meet you some day. I really have to try some of the contents of that keg you seem to be forever sipping from…:smiley:

Warren

TonyWalsham said:
Hey Zirner. Care to show us something constructive you have done?

Hi, I chopped up some LGB stuff ten years ago at my kitchen table with simple hand tools.

Today I´d probably do these kind of modelling from scratch. It´s cheaper and faster. More recently I was part of Mr. Fletchers Masterclass als MLS. I did the proof building of one of the Carter Brothers Coach designs, made on a laser cutting machine in Germany. Check here: http://mylargescale.com/forum/topic.asp?TOPIC_ID=37449&whichpage=7 I am part of www.lasergang.de , a group of friends, which develop and sell lasercut models. At the moment, I mainly work on 1 : 22,5 / 32mm gauge models, remote controlled and battery powered. In spite of Mr. Mueller´s cold war propaganda and lies, I never claimed for myself the invention of rust. But I indeed sued somebody for publishing details from one of my weathering workshops he had attended for 3 of the 8 hours. He did not have my permission and did not mention my name, but gave the impression, he had invented and developped the techniques he discribed himself. Have Fun Juergen Zirner

Fred Mills said:
He can't make that claim.........I invented Rust.......in fact it happened one windy, rain swept night in 1539......I was out sitting by a pile of what we now know as iron ore. Feeling the call of nature......I took an old sheep skin and covering my head walked over to the iron ore pile......after relieving myself, I went back into the cave and slept soundly. Next morning I awoke and going outside I found a pile of what we now know as RUST.......I called it RUST because it seemed to "R"un into the stream beside the pile; left an "U"nsightly colour; "S"eemed like a nice word; and then sat down and had a cuppa, to give myself the idea of the name.....the "T" came from the other invention; "T"ea that I invented by accidentally putting a couple of dry leaves in with my sheep skin underwear while washing them, in a stone bowl over a hot fire. but that's another story.
Hi Fred,

You need to be careful, :wink: there could be a precise timeline on who invented what first.

http://spassbahn.de/view_topic.php?id=485&forum_id=15

It happened before, but at that time it was all ignored and made for a good laugh. :wink: :slight_smile:

Juergen,
The prototype is not my cup of tea but it sure looks like nice work.

Nice train photo Juergen , your photo may be the first that I have seen , that actually has a guard/brakeman in the seat on the last car , nice train . Thanks for shareing

I have been known to “Share the keg”…but you have to get here on your own…!!!

TonyWalsham said:
Juergen, The prototype is not my cup of tea but it sure looks like nice work.
Yes Tony,

That is a fairly clean train.

Zirner’s modeling is not questioned, doing whimsical stuff is an acquired taste and arguing over taste is a waste of time. :wink: :wink:

Hans-Joerg Mueller said:
Hi Fred,

You need to be careful, :wink: there could be a precise timeline on who invented what first.

http://spassbahn.de/view_topic.php?id=485&forum_id=15

It happened before, but at that time it was all ignored and made for a good laugh. :wink: :slight_smile:


Hi,

I hope, you all were able to follow and read Mr. Muellers link to this German forum, so you are wiser than before.

Besides offending some members of that forum, including me (at least I am in the members list) , plus the work of foreigners like Malcolm Furlow, he offered to show some examples of his weathering techniques. - Of course, nobody cared for it. They ignored him. So he had a good laugh, I suppose.

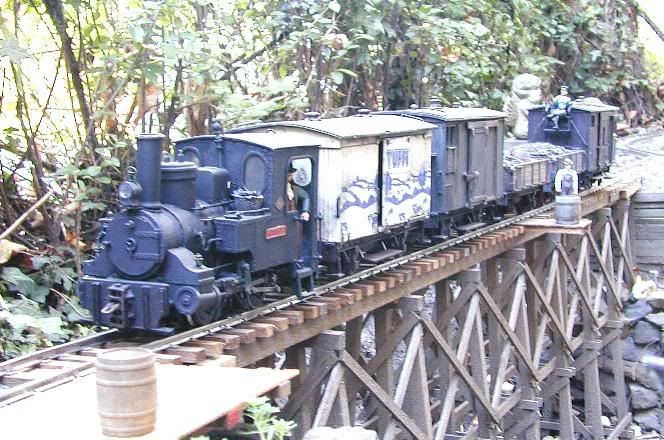
@Dennis: These waggons with guards seat once were a common sight on German narrow gauge lines. Cabooses (Cabeese?) were not used. Some of the museum lines still have and use them. Of course, LGB made one as well a few years ago for their Harz-Meter-Gauge-Line.

Excuse me folks, for pirating Mr. Muellers LGB baggage thread. But I was asked, to show something. Before I was able to start a new thread, Mr. Mueller started the offensive rust bit. He is much faster than the rest of the world. He just never sleeps. Must be his Troll-alarm-clock.

Have fun

Juergen Zirner

And on to the new trim strips

The existing trim strips at the corners of the carbody were left in place. All one needs to do now is get a suitable spacer of the correct dimension, snug it up to the corner strip, use a really samll brush to apply the M-E-K along the spacer, apply the M-E-K to the .020 x .040 styrene strip and apply. Then repeat etc. I’m sure everyone can figure out how to calculate the width of the spacer for whatever car you may use this method on. :wink: :slight_smile:

The strips/panels on the left have been cleaned up - no M-E-K residues. The ones on the right are “as just applied”, the trim around the windows is a good guide when it comes to milling the openings.

The question was posed - not here, we don’t get “smart questions” like that - if I would just forget about the windows, since they were in the incorrect location. :wink: :slight_smile: I was sorely tempted to reply that I bought a special printing machine and was planning on just printing them on. But I could resist, would have sounded too much like copying the window method of a LCE. :wink: To be continued. PS Anything that is slightly mucked up i.e. sanding just won’t fix it, will be “fixed” be applying heavy weathering. Remember this car was built in 1904, anyone who thinks it isn’t “a bit worn” approx. 70 years later hasn’t paid attention. Just watch and see! :wink: :slight_smile: :smiley:

Starting on the platform railing

As mentioned in another thread I picked up this method from Knut Martin’s article on weathering/detailing a Bachmann 4-4-0 in GARTENBAHNprofi 6/2003. He used 2mm brass tubing and hammered it flat to make a railing around the 4-4-0 tender top. I use 1/16" (1,5mm) brass tubing to get flatbar with rounded corners that scales out to 42mm wide by 15mm thick when flattened. That looks more to scale than the LGB item in the picture! For the roundbar which extends from the step to the underside of the roof overhang I’ll use 3/64" (1.1mm) brass rod, that scales to 28mm diameter. That allows me to drill through the flatbar, solder, then trim to size to look like it is welded. That will also be sturdier than just soldering. More on that coming up :wink: PS there are a few R-T-R boxcars that await the same treatment.

There are one or two things that need to be done prior to the railings.

The D4016 has simple railings, so the ones that are molded with the platforms need to be removed. In order to allow the car-to-car plate to still swivel I milled off some of the first board and covered with a .020" strip of styrene to keep the plate in place.

After that it’s on to the platform steps

The hanger and the step are made from styrene Another detail are the corner reinforcements for the roof. The originals are too ornate, but the ones from a ToyTrain car are just about right!

Another slice and glue job coming up. To be continued.