Several years ago, I purchased a couple of Bachmann 2 truck Shays. These are the older models with the plastic gears. Now I knew at the time that the gears were probably no good, but the price was right, and I knew I could replace them. I purchased several sets of gears from Bachmann and I’ve also purchased 2 sets of the new updated trucks. I could just put the new trucks on and let that be it, but I figured I would save those for when I can no longer get replacement gears.
The engines have just been setting in their boxes since I purchased them but a few weeks ago, I decided to get them out and see how much trouble it was to replace the gears. While I had them apart, I also went ahead and removed the track pickup mechanisms and began the process of wiring them for battery/RC.
Not sure if this process has been described here, but I thought since I was going through the trouble, I may as well document the steps and share it with everyone. There may be a different or better way of doing it, but this is how I went about it. Please note that this How-to only covers the replacement of the axle gears. All the others were inspected, and I did not see any issues with them, so I chose to leave them until they start giving problems. I still have one engine to go, so when I tear it down if I find the other gears are bad, I will update this to cover their replacement also.
Here we go.
To take the truck off the engine, there are 4 screws that must be removed. 1 on each side of the truck as indicated by the red arrows below.
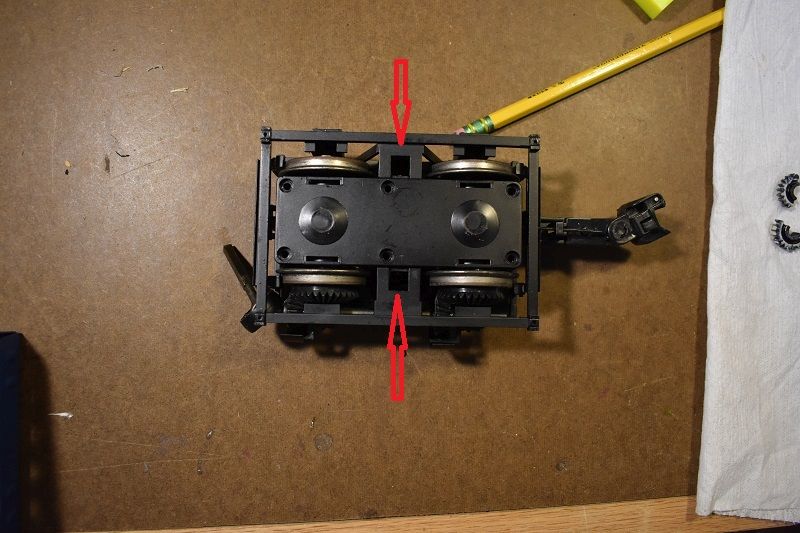
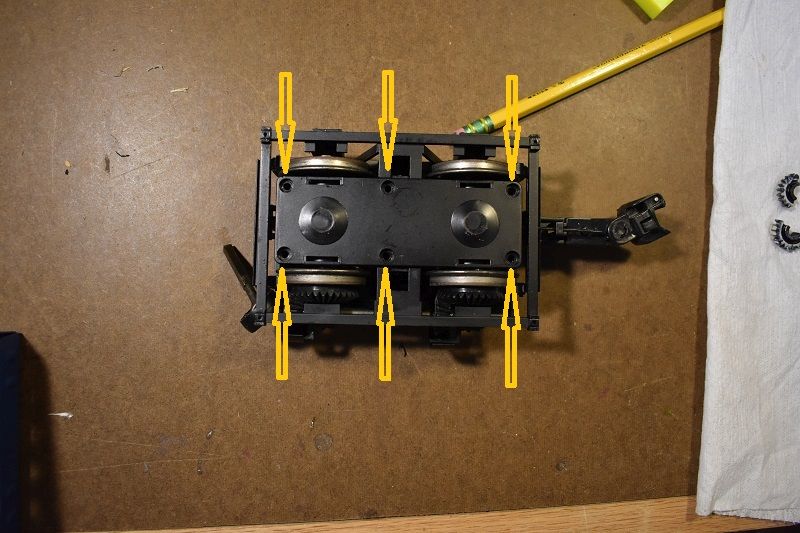
The other 2 can only be accessed after you remove the bottom plate by removing the 6 screws indicated in yellow below.
The final 2 screws to remove the truck can be found on each end as shown by the red arrows below.
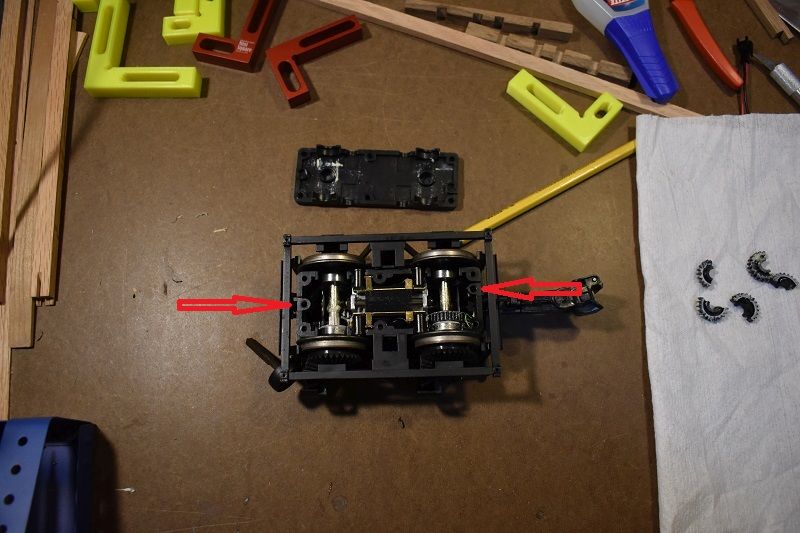
It should be noted that you don’t necessarily have to remove the trucks to make this repair because once you have the bottom cover off, you have access to remove the axles so the gears can be replaced. I removed the entire truck for 2 reasons: it makes it much easier to work on when you’re not worried about breaking all the details on the engine and I wanted to rewire it so I had to be able to get to both sides of the truck.
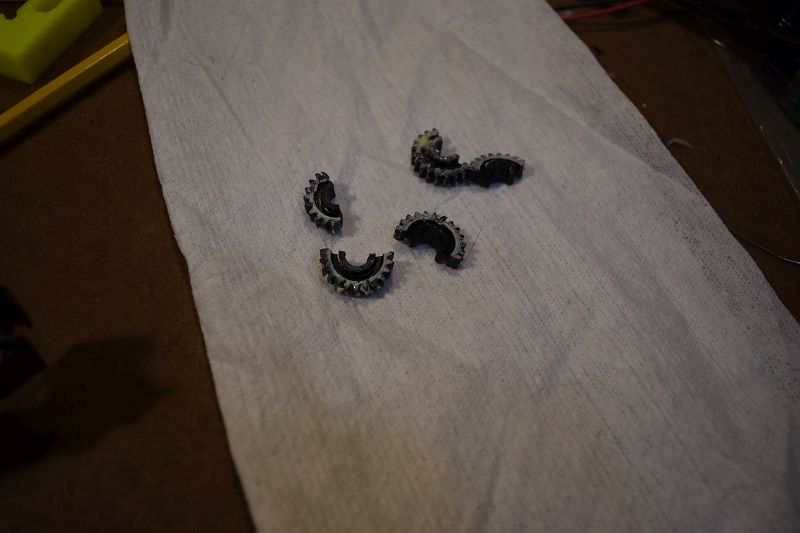
Once the cover is off (whether you remove the truck or not) you’ll be able to see the axle gears. On this particular truck, you can see that one is completely gone, and one appears to still be ok. Remember, appearances can and in this case are very deceiving (more on that in a minute). The gear that is missing was in pieces under the axle. I removed those as you can see on the napkin to the left of the truck.
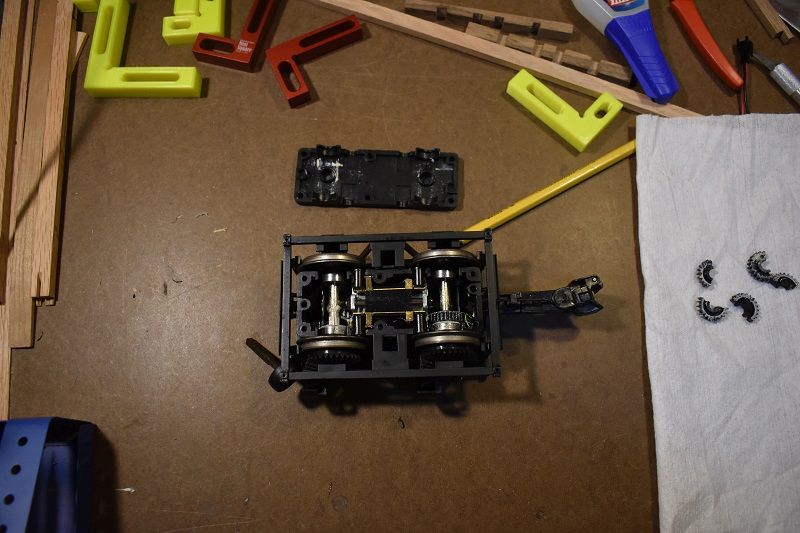
Here is a better view of the broken gear. Actually, there is more than one broken gear shown. I had already repaired the other truck before documenting the process. I had to figure out how to do it first.
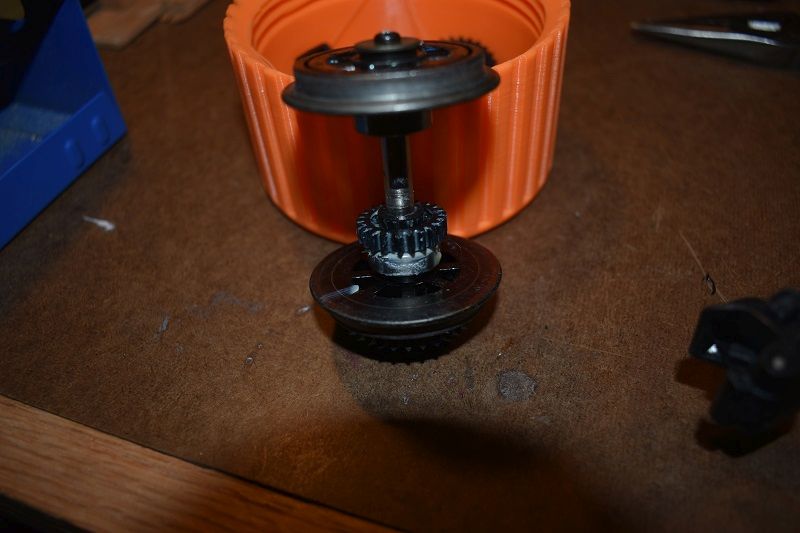
At this point the axles can be simply pulled out. They are a little snug, but they should come out without any external force other than your fingers. I would advise against trying to pry them out since everything around them is plastic and easily broken. Once the axle is out it looks like the photo below. Now, if your gear is in as bad a shape as my broken one, obviously it won’t still be on the axle. Remember when I said looks can be deceiving, well upon close inspection, I found 2 problems with the gear remaining on the axle. First, it spins on the axle and it should NOT do that. This gear is what drives the axle and if it spins, well, the axle won’t turn and the engine is just a static display at that point. Second, the free spinning was due to the gear being cracked. I don’t think it can be made out in the photo, but it is right there in front. It starts at the axle and runs about ¾ of the way across the gear.
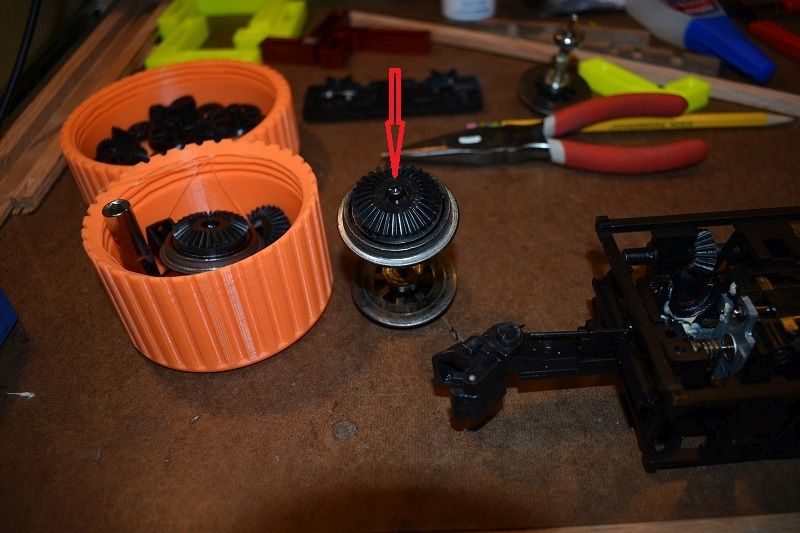
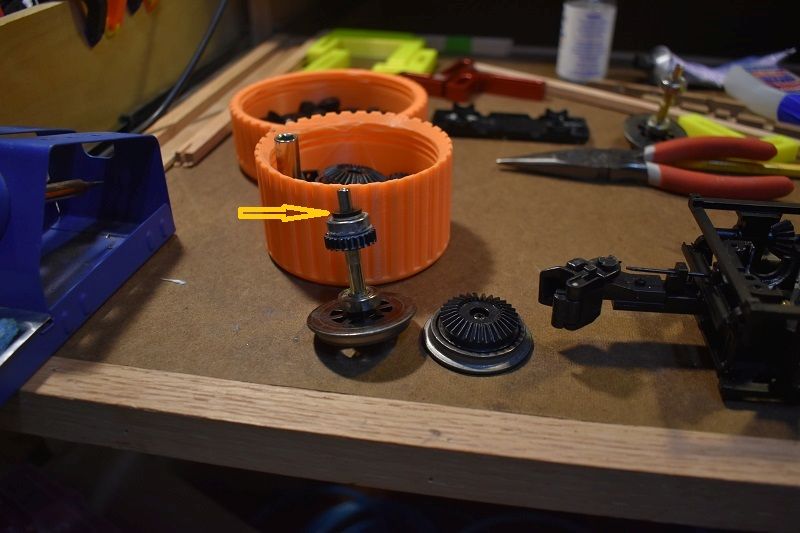
Now, to remove the gear and bearing, we must remove the outer gear and wheel. This is accomplished by removing the single screw shown by the red arrow below. Be careful, there are two washers between the wheel and the bearing. A plastic one against the wheel and a metal one against the bearing. The washers are indicated by the yellow arrow in the second picture.
Once the wheel is off, you need a way to remove the bearing, and gear in this particular case. The method I used was to place the axle in a vise as shown below. The vise is NOT closed around the axle. DO NOT TIGHTEN THE VISE ON THE AXLE. It can and probably will damage the axle, especially if the bearing is not present. There are splines on the axle which is what keeps the axle from spinning. If these splines are damaged, the axle will become useless. Now, the way I am doing this will destroy the gear that is on the axle. But in my case that is ok because it is no good anyway. If you were in a position where you needed to remove the bearing without damaging the gear, you would need to use a bearing pulley. I’m not going to discuss that particular tool here, but if anyone wants an explanation just let me know and I can show you one and how it works.
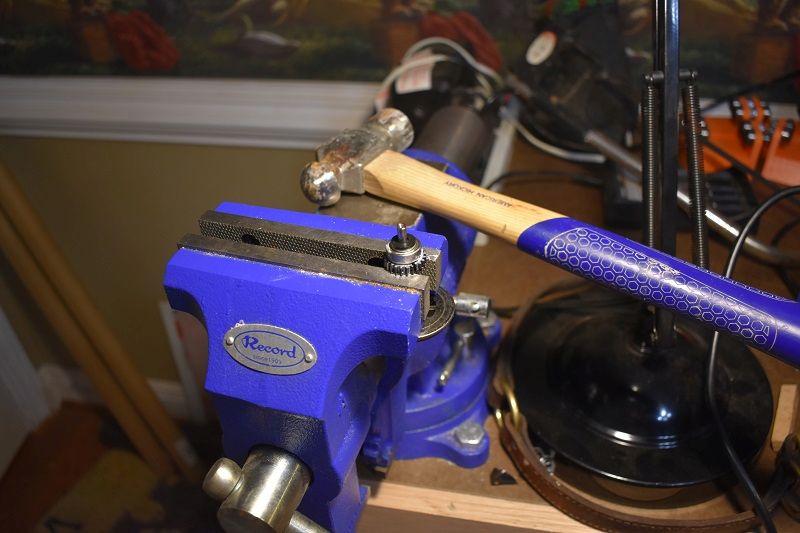
Now, to remove the axle, I used a block of wood and a hammer to drive the axle through the bearing. Now once you drive it so far, the axle will just fall off so be prepared to catch it or make sure it falls in something that prevents any damage to the axle and remaining wheel on it. DO NOT use any hard metal to drive the axle out. It’s best to use wood as I have done, but you could also use an appropriately sized piece of brass. The end of the axle is threaded and hitting it will steel or something like that will more than likely damage the threads and once again, that is the end of the axle.
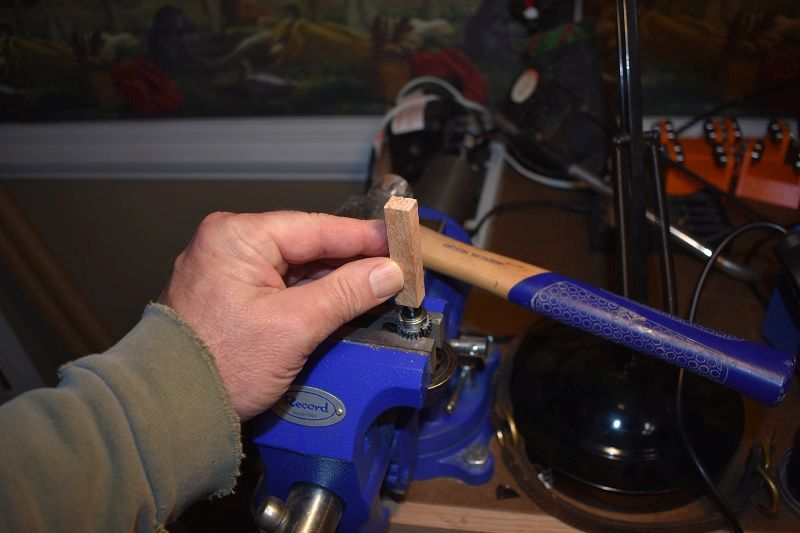
Below is how this setup will look without the gear on the axle. Again, note that the vise is not against the axle. Its close, but it is NOT touching. You want to get pretty close to the center of the bearing to limit the stress on the outer race.
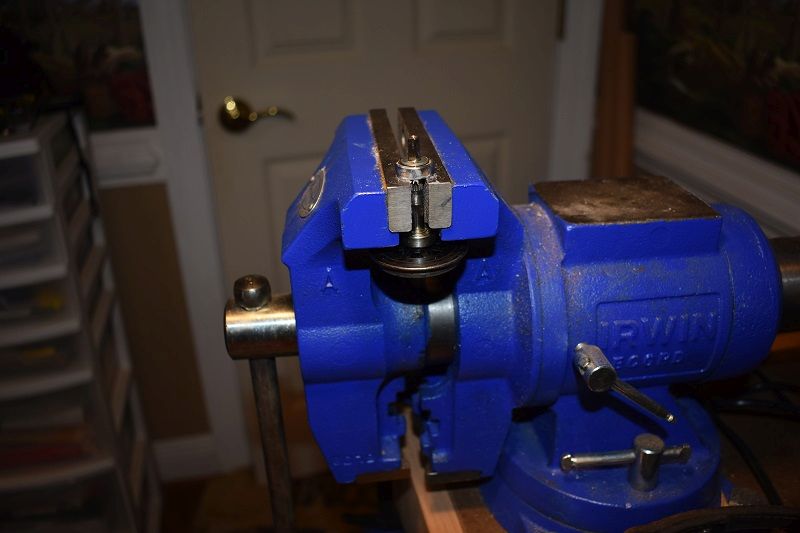
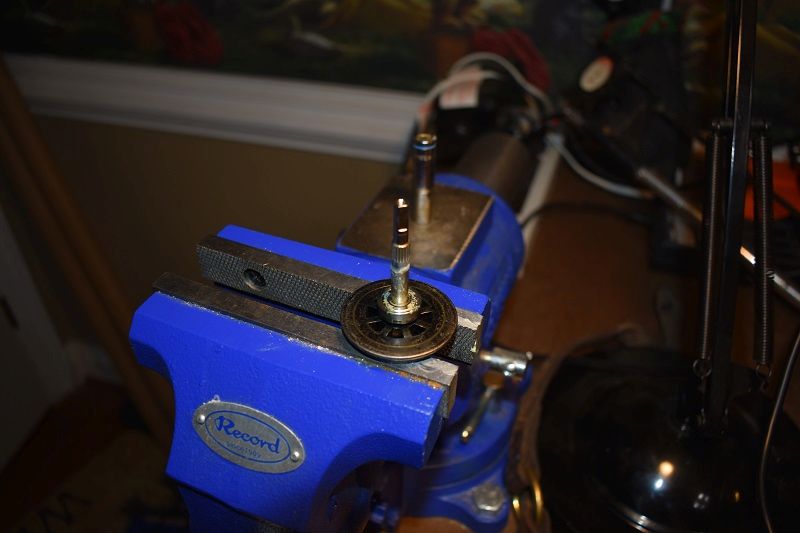
The axle should look like the photo below when the bearing and gear have been removed.
Ok, I’m gonna stop here for tonight. Next time I’ll go through the steps to place the gear and bearing on the axle and replace it in the truck. I’ll also go over the steps I took to prepare the engine for battery/RC for those interested. All comments and questions are welcome.