During the Build Challenge this year several members asked about the weathering on by Heel Boom Loader build and Jim asked for an SBS article to show what I did to get this finish. So here is a description of what I used and how I used it to get the results that I ended up with.
You may or may not care for the colors I chose for the base coats or the rust so if you try this method feel free to change to any colors you want.
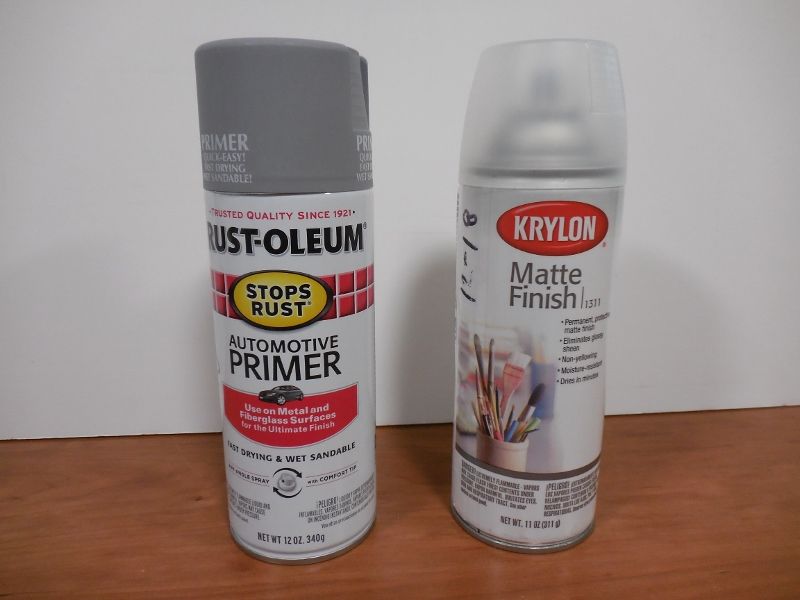
I like the RUST-OLEUM brand of automotive primers in red, white, or gray, as it covers well and dries hard very fast. I have never had a problem with it on any material I have used it on, such as; Styrene, glass, metal, or wood or over other painted surfaces as shown later.
The other rattle can spray that is a constant for me is the Krylon matte finish 1311. I like it better that a clear flat because it seems to give more “tooth” to the finish for the weathering to grab on to. I also like to use it over any flat finish color because it prevents the marring that can, well, mar flat finishes.
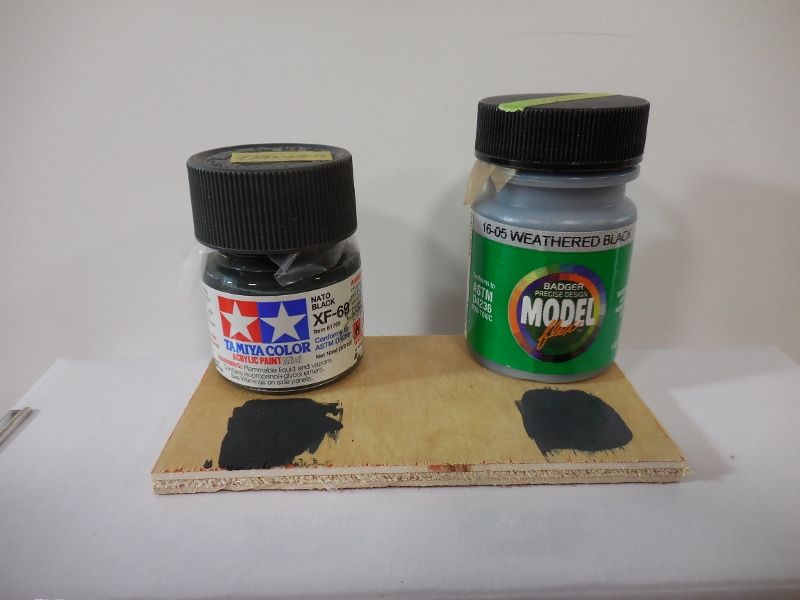
For the Heel Boom build I wanted a black base color but not too black, my two choices, shown above, were both in the ball park but I went with the Badger product for its lighter tone. These are both water based Acrylic paints and overcoat the spray enamels with no problems.
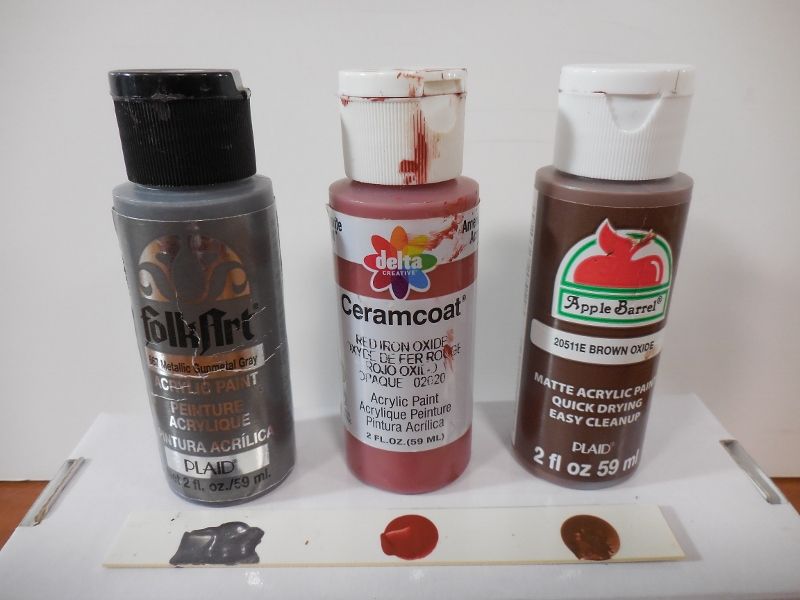 For the base weathering colors I use Craft paints and you can see I am not fussy about brand names. Brown Oxide for the basic wash, Red Oxide for the highlights and Metallic Gunmetal Gray for the dry brush accents.
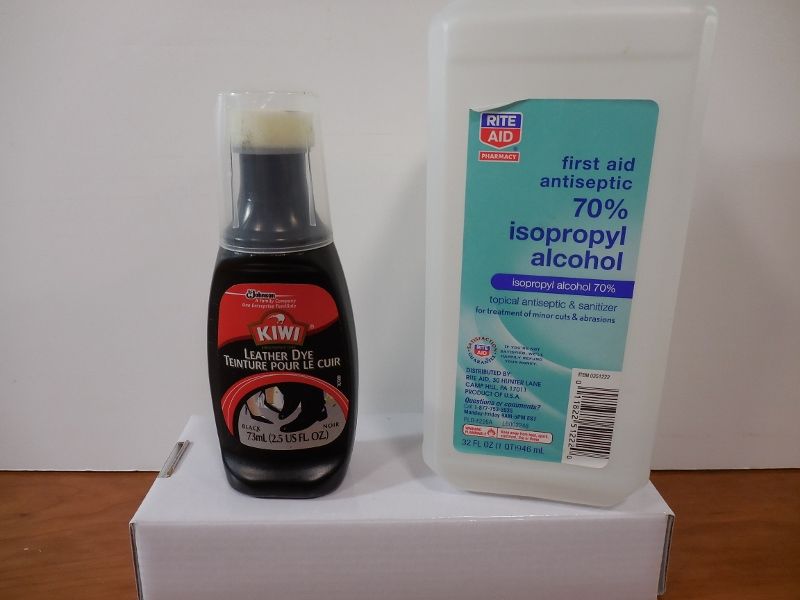
My basic wash, it’s cheap, easy and works on everything. The mix proportions are non critical, if you want it darker add more dye, lighter add more alcohol. Literally everything I build on the railroad gets a coat or two of this somewhere in the build process.
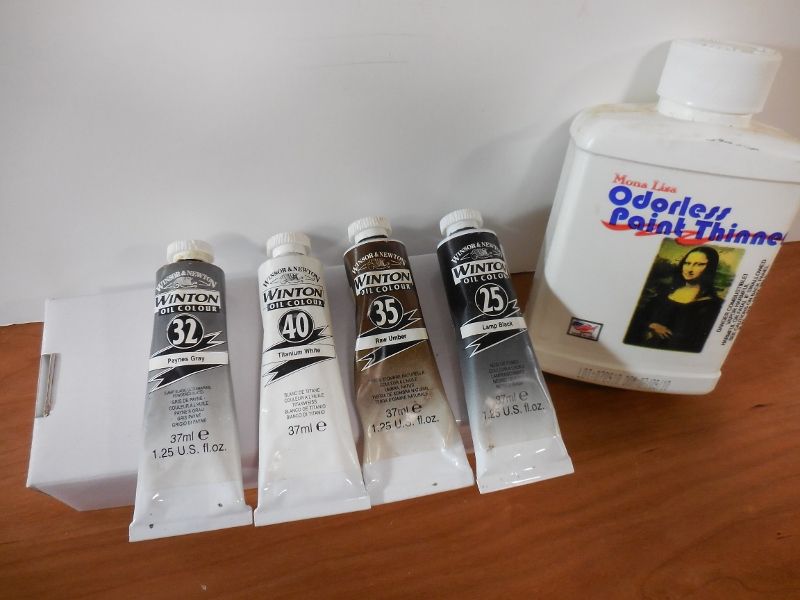
The final weathering was done with artist oil colors; again they are not expensive and are easy to use. Lamp Black and the Paynes Gray are used as a mix as the black by its self is just too black to represent old grease and sludge. The white is used for dried mineral/lime stains and the Raw Umber for an overall dirty look. If you want a little more washed or globby rusty look at this point you can add a Burnt Umber or Burnt Sienna.
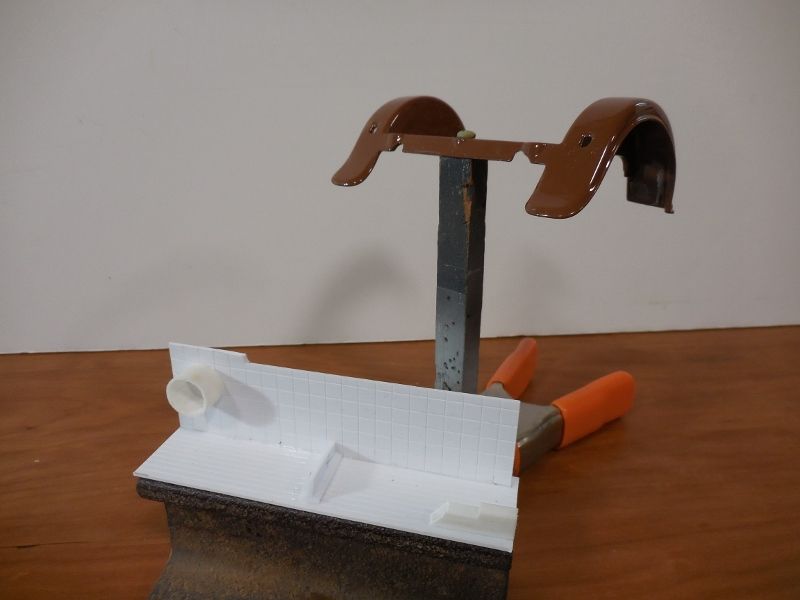
Presenting the main players of the demonstration; As I have no project along these lines going on now I just glued together some pieces from the Styrene scrap box and a pair of painted die-cast rear fenders from a ’34 Ford model found in the junk box.

The parts were sprayed with the Gray primer and let dry about 30 minutes over a small oil-fill heater to help the process because of the high humidity this time of year. I always warm my spray cans before use, in the Winter I warm them on the mentioned heater in the Summer I soak them in a hot water bath. Heating the cans seems to increase the spray pressure and give a finer more even spray.
Next the Weathered Black was sprayed using an Air Brush, the Acrylic covers and binds fine to the enamel primer. I let this coat dry about 2 days just to make sure it is completely cured before moving on. I am not going to talk about an Air Brush or Air Brushing techniques as that is another huge topic by itself.
End of part 1, stay tuned for part 2
Please add any comments or questions over on the Build Challenge topic; Rick's Mik, 2019