<p>Canadian National SD60f Build</p>
<p> </p>
<p><img src=“http://www.canadianrailroads.ca/rail/gscale/sd60f/677.jpg” alt="" width=“800” height=“462”></p>
<p> </p>
<p>This build will require an Aristocraft SD45, 2 pieces of aluminum angles 1/16” x 3/4” x 25 1/2”, 3 USA trains SD70 roof fans and DB fan, and lots of styrene.</p>
<p> </p>
<p>You will need the SD45 trucks, electrical components, end plates/steps, fuel tank and air reservoirs.</p>
<p> </p>
<p><img src=“http://www.canadianrailroads.ca/rail/gscale/sd60f/001.jpg” alt="" width=“640” height=“331”></p>
<p> </p>
<p>First thing you are going to need is a 27 1/2" x 4" x .125" styrene base.</p>
<p> </p>
<p><img src=“http://www.canadianrailroads.ca/rail/gscale/sd60f/002.jpg” alt="" width=“640” height=“196”></p>
<p> </p>
<p>Both ends will need to be cut as shown below. Keep the pieces you cut out as we’ll be using them later.</p>
<p> </p>
<p><img src=“http://www.canadianrailroads.ca/rail/gscale/sd60f/003.jpg” alt="" width=“640” height=“480”></p>
<p> </p>
<p>Now mark your top side, and mount the two aluminum angles. Mount them a 1/2" from the sides and 1" from the ends. I used 6 screws on each one evenly spaced out and it should give you a fairly sturdy base to work with. You can also mark the front and rear to avoid confusion later.</p>
<p> </p>
<p><img src=“http://www.canadianrailroads.ca/rail/gscale/sd60f/004.jpg” alt="" width=“640” height=“480”></p>
<p> </p>
<p>Important - Mark your base center lines on both sides for length and width.</p>
<div>
<p> </p>
<p>Our next step is to set up the ends of the base to accept the SD45 steps and end plates.</p>
<p> </p>
<p><img src=“http://www.canadianrailroads.ca/rail/gscale/sd60f/005.jpg” alt="" width=“640” height=“323”></p>
<p> </p>
<p>Here’s what we’re going to do. Take some .06 x .125" strip and cut 1 (red) 2 5/8" piece, 2 (green) 1 5/8" pieces, and 1 (blue) 3cm piece. This step will use a couple of metric measurements only because they are an exact match to the original. The light blue are the step cut outs from the previous post. The brown are two .04" shims. I used 1/4 x 1/2", but you can use anything that fits.</p>
<p>1)Apply red piece 1/2" from the end. You should already have a line from the previous post. Narrow (.06) side down.</p>
<p>2)Apply the two green pieces. The outer edge is 17mm from center.</p>
<p> </p>
<p><img src=“http://www.canadianrailroads.ca/rail/gscale/sd60f/006.jpg” alt="" width=“640” height=“449”></p>
<p> </p>
<p>Hold your end plate in place, and add your cut out pieces (light blue). You want them snug, but not tight, and make sure they do not extend over the side of the base.</p>
<p> </p>
<p><img src=“http://www.canadianrailroads.ca/rail/gscale/sd60f/007.jpg” alt="" width=“640” height=“425”></p>
<p> </p>
<p>Once the light blue pieces are secure, hold your steps in place again. Place the blue piece behind the steps, again snug, but not tight. Add the two brown shims and mark and drill for the screws. (5/64")</p>
<p> </p>
<p><img src=“http://www.canadianrailroads.ca/rail/gscale/sd60f/008.jpg” alt="" width=“640” height=“385”></p>
<p> </p>
<p>It should look like this when you are done. Make sure you do both ends of the base.</p>
<p> </p>
<p><img src=“http://www.canadianrailroads.ca/rail/gscale/sd60f/009.jpg” alt="" width=“640” height=“406”></p>
<p> </p>
<p>I added a .02" on top of the red piece to snug things up, but it’s a little too much. A .01" strip should be enough to make the steps sit nicely.</p>
<p> </p>
<p>Now we have to drill the holes for the trucks. This part is a pain in the butt, and I do not look forward to doing it again. Use your SD45 base to help with your measurements.</p>
<p> </p>
<p><img src=“http://www.canadianrailroads.ca/rail/gscale/sd60f/010.jpg” alt="" width=“640” height=“816”></p>
<p> </p>
<p>Start with a 9/32" hole. The center of it should be 3 13/16" from the end of the base. Draw a 1/8" wide ring around the hole. Be careful not to damage this area as I think it would be difficult to repair with any strength. Now you need to make the 1/4" holes on each side. I started with 4 small guide holes.</p>
<p> </p>
<p><img src=“http://www.canadianrailroads.ca/rail/gscale/sd60f/011.jpg” alt="" width=“640” height=“525”></p>
<p> </p>
<p>I drilled four 1/4" holes and then carefully cut and shaped between them. </p>
<p> </p>
<p><img src=“http://www.canadianrailroads.ca/rail/gscale/sd60f/012.jpg” alt="" width=“640” height=“816”></p>
<p> </p>
<p>Half an inch behind these holes, you need a cut for the electrical to feed through. I made a 1/4 x 3/4" cut like the original, but it is probably easier to drill a couple holes and cut out between them.</p>
<p> </p>
<p><img src=“http://www.canadianrailroads.ca/rail/gscale/sd60f/013.jpg” alt="" width=“640” height=“292”></p>
<p> </p>
</div>
<p>Now if you survived that step, we’ll make this one easy. Start with a 3 1/4 x 1 x .06" piece of styrene. We need 4 isosceles trapezoids. (Like those big words :P) Base 1" Height 1" Top 1/2"</p>
<p> </p>
<p><img src=“http://www.canadianrailroads.ca/rail/gscale/sd60f/014.jpg” alt="" width=“640” height=“218”></p>
<p> </p>
<p>These get secured on both sides of your truck cuts.</p>
<p> </p>
<p><img src=“http://www.canadianrailroads.ca/rail/gscale/sd60f/015.jpg” alt="" width=“640” height=“867”></p>
<p> </p>
<p>Now for the frame skirt you’ll need four 14 x .25 x .06" pieces of styrene. Mark the lengthwise center of your base and apply two pieces per side keeping the top flush with the base. You’ll have a joint in the middle that you might have to fill and sand. The SD60f skirt is the same height across the entire locomotive which makes this part easy.</p>
<p> </p>
<p><img src=“http://www.canadianrailroads.ca/rail/gscale/sd60f/016.jpg” alt="" width=“640” height=“106”> </p>
<p><img src=“http://www.canadianrailroads.ca/rail/gscale/sd60f/017.jpg” alt="" width=“640” height=“316”></p>
<p> </p>
<p>You can leave the end overhangs for now. We’ll deal with them later.</p>
<p> </p>
<p>At this point we have a nice base for our model. You can easily build different base lengths using these steps. For narrow hood models, you would need to find a way to adjust your reinforcement to keep it inside the body.</p>
<div>
<p> </p>
<p>So now we’re going to mark and drill the holes for mounting the air reservoirs. On the bottom of the base, you want to start with a lengthwise line 1/4" from the outer edge which includes the skirt. The skirt may make this measurement difficult, so you can also go 1 13/16" from your width wise center line. Take great care with these measurements as these holes need to be accurate.</p>
<p> </p>
<p>Now your front center points will be 15/16" from the length center line and the rear will be 3" from the length center line.</p>
<p> </p>
<p><img src=“http://www.canadianrailroads.ca/rail/gscale/sd60f/019.jpg” alt="" width=“730” height=“640”></p>
<p><img src=“http://www.canadianrailroads.ca/rail/gscale/sd60f/020.jpg” alt="" width=“512” height=“328”></p>
<p> </p>
<p>Now mark the center points with an awl, and drill four small guide holes.</p>
<p> </p>
<p><img src=“http://www.canadianrailroads.ca/rail/gscale/sd60f/021.jpg” alt="" width=“640” height=“509”></p>
<p> </p>
<p>Now drill the full size holes. Make sure to take note that the holes are a different size. Be careful to get the sizing right. I drill the main holes with my power drill, but I do not use power. I find I have more control if I secure the base, hold the drill in place, and then turn the chuck by hand to drill.</p>
<p> </p>
<p><img src=“http://www.canadianrailroads.ca/rail/gscale/sd60f/022.jpg” alt="" width=“640” height=“541”></p>
<p> </p>
<p>Now your SD45 conductor’s side reservoir needs the end braces cut off flush with the reservoir. Once trimmed, it should match the engineer side. You can test fit, but do not mount them at this point. We want to keep the base flat for now so that it is easier to work with.</p>
<p> </p>
<p><img src=“http://www.canadianrailroads.ca/rail/gscale/sd60f/023.jpg” alt="" width=“869” height=“138”></p>
</div>
<div>
<p> </p>
<p>Oh no, our fuel tank is too short.</p>
<p> </p>
<p><img src=“http://www.canadianrailroads.ca/rail/gscale/sd60f/024.jpg” alt="" width=“640” height=“106”></p>
<p> </p>
<p>On the bottom of the base, mark the fuel tank extremes 4 3/4" off center. Our completed tank will sit within these lines.</p>
<p> </p>
<p><img src=“http://www.canadianrailroads.ca/rail/gscale/sd60f/025.jpg” alt="" width=“640” height=“260”></p>
<p> </p>
<p>We need to extend the length of the fuel tank by 1 1/16". I staggered the cuts as I’m hoping it will strengthen the completed tank. Glue it really good and set it aside for now. You may want to glue it multiple times to make sure the two sides are well secured.</p>
<p> </p>
<p><img src=“http://www.canadianrailroads.ca/rail/gscale/sd60f/026.jpg” alt="" width=“640” height=“238”></p>
<p><img src=“http://www.canadianrailroads.ca/rail/gscale/sd60f/028.jpg” alt="" width=“640” height=“233”></p>
<p> </p>
<p>Do not fill the gaps yet. You can get rid of the fuel gauges and access panels (or is that a second fuel gauge???) These two details need to be filled and sanded smooth.</p>
<p> </p>
<p><img src=“http://www.canadianrailroads.ca/rail/gscale/sd60f/027.jpg” alt="" width=“640” height=“132”></p>
<p> </p>
</div>
<p>Now we’re going to drill the ends of the air reservoirs. Start by removing the pipe stubs sticking out of the ends. You should be able to just snap them off.</p>
<p> </p>
<p><img src=“http://www.canadianrailroads.ca/rail/gscale/sd60f/029.jpg” alt="" width=“640” height=“126”></p>
<p><img src=“http://www.canadianrailroads.ca/rail/gscale/sd60f/030.jpg” alt="" width=“640” height=“141”></p>
<p> </p>
<p>Now drill 3/32" holes in the reservoir ends. Remember to start with small guide holes.</p>
<p> </p>
<p><img src=“http://www.canadianrailroads.ca/rail/gscale/sd60f/031.jpg” alt="" width=“640” height=“480”></p>
<p> </p>
<p>Now we’re going to do a bit of work on the trucks. First remove the center brake cylinders.</p>
<p> </p>
<p><img src=“http://www.canadianrailroads.ca/rail/gscale/sd60f/032.jpg” alt="" width=“640” height=“227”></p>
<p> </p>
<p>Remove the lip around the hole over the center wheel.</p>
<p> </p>
<p><img src=“http://www.canadianrailroads.ca/rail/gscale/sd60f/033.jpg” alt="" width=“640” height=“155”></p>
<p> </p>
<p>Now we’re going to drill a third hole between the wheels. Mark your center points and drill small guide holes.</p>
<p> </p>
<p><img src=“http://www.canadianrailroads.ca/rail/gscale/sd60f/034.jpg” alt="" width=“640” height=“209”></p>
<p> </p>
<p>Now drill the full size 7/64" holes.</p>
<p> </p>
<p><img src=“http://www.canadianrailroads.ca/rail/gscale/sd60f/035.jpg” alt="" width=“640” height=“164”></p>
<p> </p>
<p>Now remove your remaining brake cylinders. Notch the ends and drill 3/64" holes.</p>
<p> </p>
<p><img src=“http://www.canadianrailroads.ca/rail/gscale/sd60f/036.jpg” alt="" width=“640” height=“465”></p>
<p> </p>
<p>Now take a 7 1/4" piece of 3/64" brass rod. Make a mark 1/2" from each end. wrap the ends around a 3/16" drill bit using the 1/2" mark as the center of your curve. You want the end product to be 6" long.</p>
<p> </p>
<p><img src=“http://www.canadianrailroads.ca/rail/gscale/sd60f/037.jpg” alt="" width=“640” height=“210”></p>
<p> </p>
<p>Insert into the ends of your brake cylinders.</p>
<p> </p>
<p><img src=“http://www.canadianrailroads.ca/rail/gscale/sd60f/038.jpg” alt="" width=“640” height=“140”></p>
<p> </p>
<p>Now remount this assembly back onto the truck.</p>
<p> </p>
<p><img src=“http://www.canadianrailroads.ca/rail/gscale/sd60f/039.jpg” alt="" width=“640” height=“129”></p>
<p> </p>
<div>
<p>Okay, lets cut off the skirt ends flush with the step cuts.</p>
<p> </p>
<p><img src=“http://www.canadianrailroads.ca/rail/gscale/sd60f/040.jpg” alt="" width=“640” height=“272”></p>
<p> </p>
<p>Now take the piece you cut off, and glue it in along the step cut. Keep it flush with the top of the deck. Your angled cut from the previous step should fit in the inside corner.</p>
<p> </p>
<p><img src=“http://www.canadianrailroads.ca/rail/gscale/sd60f/041.jpg” alt="" width=“640” height=“357”></p>
<p> </p>
<p>Now cut off the protruding end flush with the deck skirt… Make sure you do all four corners.</p>
<p> </p>
<p><img src=“http://www.canadianrailroads.ca/rail/gscale/sd60f/042.jpg” alt="" width=“640” height=“310”></p>
<p> </p>
<p>Now cut four .06 x .125 x 1/4" pieces. These are going to complete the underside deck bracing to match your original SD45 base</p>
<p> </p>
<p><img src=“http://www.canadianrailroads.ca/rail/gscale/sd60f/043.jpg” alt="" width=“640” height=“165”></p>
<p><img src=“http://www.canadianrailroads.ca/rail/gscale/sd60f/044.jpg” alt="" width=“640” height=“173”></p>
<p> </p>
<p>Do both ends.</p>
</div>
<p>Now on your top side, you need to mark where the sections of the body will be placed. Start with a line 15/16" from the rear of your base plate. From that line, measure a 7" section, then a 7 7/8" section and lastly a 5 3/4" section. This should leave you with roughly 6" left to the front of your plate.</p>
<p> </p>
<p>The circled numbers 1-4 will be used as a reference for some of this work.</p>
<p> </p>
<p><img src=“http://www.canadianrailroads.ca/rail/gscale/sd60f/045.jpg” alt="" width=“640” height=“1000”></p>
<p> </p>
<p>Now we’ll need two .125 x .125 x 5" pieces, one .125 x .438 x 9 7/8" piece and one .125 x .438 x 15 3/8" piece.</p>
<p> </p>
<p><img src=“http://www.canadianrailroads.ca/rail/gscale/sd60f/046.jpg” alt="" width=“640” height=“94”></p>
<p> </p>
<p>On the long .125 x .438 x 15 3/8" mark a line dividing the length into two sections 5 1/2" and 9 7/8". Remove 1/16" from the 5 1/2" section as shown below.</p>
<p> </p>
<p><img src=“http://www.canadianrailroads.ca/rail/gscale/sd60f/047.jpg” alt="" width=“640” height=“143”></p>
<p> </p>
<p>Referring to #1 in the previous post, glue a .125 x .125 x 5" piece flush to the outer edge of the skirt. The rear edge should start at your 15/16" base line shown in the previous post. This will leave it 1/16" from the corner of the skirt.</p>
<p> </p>
<p><img src=“http://www.canadianrailroads.ca/rail/gscale/sd60f/050.jpg” alt="" width=“640” height=“351”></p>
<p><img src=“http://www.canadianrailroads.ca/rail/gscale/sd60f/048.jpg” alt="" width=“640” height=“116”></p>
<p> </p>
<p>Referring to #2 in the previous post, glue a .125 x .438 x 9 7/8" piece in front of the above 5" piece, again flush with the outer edge of the skirt. The front of it should end up on the front line of the 7 7/8" section shown in the previous post.</p>
<p> </p>
<p><img src=“http://www.canadianrailroads.ca/rail/gscale/sd60f/049.jpg” alt="" width=“640” height=“62”></p>
<p> </p>
<p>Referring to #3 in the previous post, glue a .125 x .125 x 5" piece flush to the outer edge of the skirt just like you did on the opposite side.</p>
<p> </p>
<p><img src=“http://www.canadianrailroads.ca/rail/gscale/sd60f/051.jpg” alt="" width=“640” height=“62”></p>
<p> </p>
<p>Referring to #4 in the previous post, glue a .125 x .438 x 15 3/8" piece in front of the above 5" piece, again flush with the outer edge of the skirt. The 5 1/2" portion that you trimmed 1/16" goes towards the front of the base. The 9 7/8" line should end up on the front line of the 7 7/8" section shown in the previous post, directly in line with the end of the 9 7/8" piece you mounted on the opposite side.</p>
<p> </p>
<p><img src=“http://www.canadianrailroads.ca/rail/gscale/sd60f/052.jpg” alt="" width=“640” height=“37”></p>
<p> </p>
<p>The end of this piece will end up 1/4" short of the front 5 3/4" sectional line as shown in the previous post’s drawing.</p>
<p> </p>
<p><img src=“http://www.canadianrailroads.ca/rail/gscale/sd60f/053.jpg” alt="" width=“640” height=“108”></p>
<p> </p>
<p>Now we’ll need one .125 x .125 x 1 1/4" piece (green) and two .125 x .125 x 1 5/8" pieces (red). Mark the center line of your green piece, 5/8" from each end.</p>
<p> </p>
<p><img src=“http://www.canadianrailroads.ca/rail/gscale/sd60f/054.jpg” alt="" width=“640” height=“263”></p>
<p> </p>
<p>Mount the 1 1/4" (green) piece 11/16" from your 15/16" base line and 1/8" from the end of the base. Match your center lines leaving 5/8" on each side.</p>
<p> </p>
<p><img src=“http://www.canadianrailroads.ca/rail/gscale/sd60f/055.jpg” alt="" width=“640” height=“759”></p>
<p> </p>
<p>Now mount your 1 5/8" (red) pieces on each side. I started by laying a straight edge and drawing a guide line between the green piece and the 5" side pieces that were mounted in the previous post. The line should be about 1/16" back from the skirt edge in the step cut. I layed the 1 5/8" pieces on top of the frame pieces that were already mounted, marked and cut the angles. Once mounted, you can see that they sit about 1/16" back from the step skirt edge.</p>
<p> </p>
<p><img src=“http://www.canadianrailroads.ca/rail/gscale/sd60f/056.jpg” alt="" width=“640” height=“216”></p>
<p> </p>
<div>
<p>Okay take some 1/16" thick styrene and cut two 7 3/4" x 3 1/16" and two 7 7/8" x 3 1/16". On the 7 7/8" pieces, draw a line 1/16" in from each end as shown on the lower piece in the photo below.</p>
<p> </p>
<p><img src=“http://www.canadianrailroads.ca/rail/gscale/sd60f/057.jpg” alt="" width=“640” height=“736”></p>
<p> </p>
<p>Now center the 7 3/4" piece on the 7 7/8" piece between the lines you drew. It helps if you set some weight on it. Glue them together.</p>
<p> </p>
<p><img src=“http://www.canadianrailroads.ca/rail/gscale/sd60f/058.jpg” alt="" width=“640” height=“368”></p>
<p> </p>
<p>Both ends will have a 1/16" gap.</p>
<p> </p>
<p><img src=“http://www.canadianrailroads.ca/rail/gscale/sd60f/059.jpg” alt="" width=“640” height=“84”></p>
<p> </p>
<p>Make two of these. The longer piece will be the bottom.</p>
<p> </p>
<p><img src=“http://www.canadianrailroads.ca/rail/gscale/sd60f/060.jpg” alt="" width=“640” height=“205”></p>
<p> </p>
</div>
<p>Now on the top face (shorter 7 3/4" section) we need to measure as shown below.</p>
<p> </p>
<p><img src=“http://www.canadianrailroads.ca/rail/gscale/sd60f/061.jpg” alt="" width=“640” height=“281”></p>
<p> </p>
<p>Mirror these measurements on the second piece. These are opposing sides of the center of the body.</p>
<p> </p>
<p><img src=“http://www.canadianrailroads.ca/rail/gscale/sd60f/062.jpg” alt="" width=“640” height=“486”></p>
<p> </p>
<p>Now we need to cut out a set of doors for each side using .01" styrene.</p>
<p>We’ll need:</p>
<p>Two 3/4" x 2 5/8"</p>
<p>Two 1 1/4" x 2 5/8"</p>
<p>Four 2 1/2" x 2 5/8"</p>
<p> </p>
<p><img src=“http://www.canadianrailroads.ca/rail/gscale/sd60f/063.jpg” alt="" width=“640” height=“215”></p>
<p> </p>
<p>Mark a center line on the 1 1/4" pieces. (5/8" x 2)</p>
<p> </p>
<p><img src=“http://www.canadianrailroads.ca/rail/gscale/sd60f/064.jpg” alt="" width=“640” height=“1253”></p>
<p> </p>
<p>Draw dividing lines on the 2 1/2" piece into four 5/8" sections.</p>
<p> </p>
<p><img src=“http://www.canadianrailroads.ca/rail/gscale/sd60f/065.jpg” alt="" width=“640” height=“568”></p>
<p> </p>
<p>Now take a metal ruler, and cut along each line with a razor saw. Run the tip of the saw blade along the line 4 or 5 times until you have a nice defined line. I cleaned the tip of the blade after each cut. You don’t want to cut right through.</p>
<p> </p>
<p><img src=“http://www.canadianrailroads.ca/rail/gscale/sd60f/066.jpg” alt="" width=“640” height=“436”></p>
<p> </p>
<p> Now one at a time, place your doors on your marked up side pieces. I used some weight to keep them in place while gluing. Use your solvent sparingly as this thin styrene will distort easily if too much solvent is used. Too much weight could also cause distortion.</p>
<p> </p>
<p><img src=“http://www.canadianrailroads.ca/rail/gscale/sd60f/067.jpg” alt="" width=“640” height=“340”></p>
<div>
<p> </p>
<p>Okay Guys, we need some 1/16 " styrene and we’ll need the following:</p>
<p>1 - 1/16 x 2 1/2 x 7 3/4"</p>
<p>1 - 1/16 x 2 1/2 x 7 7/8"</p>
<p>2 - 1/16 x 15/16 x 7 3/4"</p>
<p>2 - 1/16 x 15/16 x 7 7/8"</p>
<p> </p>
<p><img src=“http://www.canadianrailroads.ca/rail/gscale/sd60f/070.jpg” alt="" width=“640” height=“404”></p>
<p><img src=“http://www.canadianrailroads.ca/rail/gscale/sd60f/071.jpg” alt="" width=“640” height=“338”></p>
<p> </p>
<p>Take the three 7 7/8" pieces and mark lines 1/16" from each end.</p>
<p> </p>
<p><img src=“http://www.canadianrailroads.ca/rail/gscale/sd60f/072.jpg” alt="" width=“640” height=“387”></p>
<p> </p>
<p>Glue the 7 3/4" pieces on top of the 7 7/8" pieces leaving the 1/16" gap at each end. Mark the end of each piece, and on the narrow pieces, mark a 30 on the center side and a 60 on the outside side.</p>
<p> </p>
<p><img src=“http://www.canadianrailroads.ca/rail/gscale/sd60f/073.jpg” alt="" width=“640” height=“401”></p>
<p> </p>
<p>Put some tape on the bottom of the two narrow pieces leaving the 30 side exposed.</p>
<p> </p>
<p><img src=“http://www.canadianrailroads.ca/rail/gscale/sd60f/074.jpg” alt="" width=“640” height=“123”></p>
<p> </p>
<p>Flip them over and sand the edge at 30 degrees until you have a nice sharp edge. I did the sanding by hand. I initially tried with power, but couldn’t get the clean edge I wanted. By hand, I just ran it from side to side. It takes some time, but makes a nice clean edge. The tape protects the bottom while sanding. Remove the tape when done.</p>
<p> </p>
<p><img src=“http://www.canadianrailroads.ca/rail/gscale/sd60f/075.jpg” alt="" width=“640” height=“425”></p>
<p> </p>
</div>
<p>Now I made a jig to help glue the angles. Using 1/8" styrene, I cut four 3" x 1 1/4" pieces and I made a 30 degree cut on one end.</p>
<p> </p>
<p><img src=“http://www.canadianrailroads.ca/rail/gscale/sd60f/076.jpg” alt="" width=“640” height=“270”></p>
<p> </p>
<p>One piece I kept as is. The other 3 I cut some 1 x 1 1/4" pieces and glued a jig as shown below.</p>
<p> </p>
<p><img src=“http://www.canadianrailroads.ca/rail/gscale/sd60f/077.jpg” alt="" width=“640” height=“619”></p>
<p> </p>
<p>Now take one of the narrow pieces, place it tightly against your center piece and tape it in place.</p>
<p> </p>
<p><img src=“http://www.canadianrailroads.ca/rail/gscale/sd60f/078.jpg” alt="" width=“640” height=“238”></p>
<p> </p>
<p>Flip it over, and using the jig set the 30 degree corner and tape it again to hold it in place.</p>
<p> </p>
<p><img src=“http://www.canadianrailroads.ca/rail/gscale/sd60f/079.jpg” alt="" width=“640” height=“506”></p>
<p><img src=“http://www.canadianrailroads.ca/rail/gscale/sd60f/080.jpg” alt="" width=“640” height=“257”></p>
<p> </p>
<p>Apply the second side the same way, and then glue everything in place. DO NOT remove the tape.</p>
<p> </p>
<p><img src=“http://www.canadianrailroads.ca/rail/gscale/sd60f/081.jpg” alt="" width=“640” height=“312”></p>
<p> </p>
<p>Now to get the 60 degree bottom angles, I put some 80 grit sandpaper on a flat surface, and sanded until I got the nice sharp angles. I’ve left the tape on for extra strength, and the roof was also allowed to dry over night before this step.</p>
<p> </p>
<p><img src=“http://www.canadianrailroads.ca/rail/gscale/sd60f/082.jpg” alt="" width=“640” height=“461”></p>
<p><img src=“http://www.canadianrailroads.ca/rail/gscale/sd60f/083.jpg” alt="" width=“640” height=“251”></p>
<p><img src=“http://www.canadianrailroads.ca/rail/gscale/sd60f/084.jpg” alt="" width=“640” height=“483”></p>
<p> </p>
<p>Now once the sanding is complete, remove the tape, and glue the areas that were covered by the tape. You should now have a nice roof for your center section.</p>
<p> </p>
<p><img src=“http://www.canadianrailroads.ca/rail/gscale/sd60f/085.jpg” alt="" width=“640” height=“592”></p>
<p><img src=“http://www.canadianrailroads.ca/rail/gscale/sd60f/086.jpg” alt="" width=“640” height=“688”></p>
<p> </p>
<p>I should get another build update uploaded this weekend.</p>
<p>Here’s a couple of teaser photos.</p>
<p> </p>
<p><img src=“http://www.canadianrailroads.ca/rail/gscale/sd60f/091.jpg” alt="" width=“640” height=“259”></p>
<p><img src=“http://www.canadianrailroads.ca/rail/gscale/sd60f/092.jpg” alt="" width=“640” height=“575”></p>
<p> </p>
<p>On your side panels, mark the single doors 3/4" from the top, centered (5/8" from each side) and drill guide holes.</p>
<p> </p>
<p><img src=“http://www.canadianrailroads.ca/rail/gscale/sd60f/087.jpg” alt="" width=“640” height=“538”></p>
<p> </p>
<p>Now we need to drill 9/16" windows. I picked up this bit with sharp teeth at the edges of the blade. It cut into the styrene quite nicely.</p>
<p> </p>
<p><img src=“http://www.canadianrailroads.ca/rail/gscale/sd60f/088.jpg” alt="" width=“640” height=“140”></p>
<p><img src=“http://www.canadianrailroads.ca/rail/gscale/sd60f/089.jpg” alt="" width=“640” height=“629”></p>
<p> </p>
<p>Now we need to build a box to assist with assembly of the walls and roof. Using 1/8" styrene, make it 3 7/8" wide and 3" tall. I made mine 3" long, but the length can be anything you choose. I wouldn’t go less then 2 or greater then 4.</p>
<p> </p>
<p><img src=“http://www.canadianrailroads.ca/rail/gscale/sd60f/090.jpg” alt="" width=“640” height=“663”></p>
<p> </p>
<div>
<p>Now on the back side of your side walls, mark lines 1 1/2" in from the ends.</p>
<p> </p>
<p><img src=“http://www.canadianrailroads.ca/rail/gscale/sd60f/093.jpg” alt="" width=“640” height=“1394”></p>
<p> </p>
<p>Using these lines as guides, tape your sides to the box you made.</p>
<p> </p>
<p><img src=“http://www.canadianrailroads.ca/rail/gscale/sd60f/094.jpg” alt="" width=“640” height=“476”></p>
<p> </p>
<p>Now tape on the roof. Allow the sides to overhang by about 1/32". They will be sanded to a slight curve once dry.</p>
<p> </p>
<p><img src=“http://www.canadianrailroads.ca/rail/gscale/sd60f/095.jpg” alt="" width=“640” height=“640”></p>
<p> </p>
<p>Glue it up once you are happy with the placement. Be careful NOT to glue in the box. Once everything is secure, remove the box and tape. Glue it again to get all the spots you couldn’t the first time.</p>
<p> </p>
<p><img src=“http://www.canadianrailroads.ca/rail/gscale/sd60f/096.jpg” alt="" width=“640” height=“576”></p>
<p> </p>
<p>Cut two pieces of 1/8" x 1/8" x 7 7/8"</p>
<p> </p>
<p><img src=“http://www.canadianrailroads.ca/rail/gscale/sd60f/097.jpg” alt="" width=“640” height=“36”></p>
<p> </p>
<p>Apply one on each side to reinforce the joint.</p>
<p> </p>
<p><img src=“http://www.canadianrailroads.ca/rail/gscale/sd60f/098.jpg” alt="" width=“640” height=“348”></p>
<p> </p>
</div>
<p>Now place some tape to protect the tops of your side doors while sanding.</p>
<p> </p>
<p><img src=“http://www.canadianrailroads.ca/rail/gscale/sd60f/099.jpg” alt="" width=“640” height=“348”></p>
<p> </p>
<p>Carefully sand the lower roof edges. You want a defined curve, but nothing more.</p>
<p> </p>
<p><img src=“http://www.canadianrailroads.ca/rail/gscale/sd60f/100.jpg” alt="" width=“640” height=“247”></p>
<p> </p>
<p>Here’s a close-up. You just want to take off enough to curve the edge, and smooth it up.</p>
<p> </p>
<p><img src=“http://www.canadianrailroads.ca/rail/gscale/sd60f/101.jpg” alt="" width=“640” height=“523”></p>
<p> </p>
<p>Now take some .06" angle and cut two 7 3/4" lengths.</p>
<p> </p>
<p><img src=“http://www.canadianrailroads.ca/rail/gscale/sd60f/102.jpg” alt="" width=“640” height=“60”></p>
<p> </p>
<p>Secure one on each side above your side doors. This is your drip lip for all your running in rainy weather. :)</p>
<p> </p>
<p><img src=“http://www.canadianrailroads.ca/rail/gscale/sd60f/103.jpg” alt="" width=“640” height=“94”></p>
<p> </p>
<p>Now cut two 1/8" x 1" x 7" pieces.</p>
<p> </p>
<p><img src=“http://www.canadianrailroads.ca/rail/gscale/sd60f/104.jpg” alt="" width=“640” height=“233”></p>
<p> </p>
<p>Mount these on the inside of both sides. keep them 1/2" form the window end, and overhang them by 7/16". These will help the section sit properly on the base. These will slip behind your base side frames.</p>
<p> </p>
<p><img src=“http://www.canadianrailroads.ca/rail/gscale/sd60f/105.jpg” alt="" width=“640” height=“280”></p>
<p> </p>
<p>Okay, now we need an exhaust vent to get those nasty diesel fumes out.</p>
<p>Now on the end OPPOSITE of the windows, measure out where the vent will be placed as shown below. The measurements from the end are for the upper layer only. DO NOT include the 1/16" lip. The 1 7/8" line will not be used in this post.</p>
<p> </p>
<p><img src=“http://www.canadianrailroads.ca/rail/gscale/sd60f/106.jpg” alt="" width=“640” height=“329”></p>
<p> </p>
<p>You can choose how to cut the hole. It gets covered up, so it can be a little rough. I measured it off to drill two holes. Of course I started with two guide holes.</p>
<p> </p>
<p><img src=“http://www.canadianrailroads.ca/rail/gscale/sd60f/107.jpg” alt="" width=“640” height=“815”></p>
<p> </p>
<p>I used the same bit I used for the windows. The holes pass the lines a little, but as it will be covered I’m not concerned about it.</p>
<p> </p>
<p><img src=“http://www.canadianrailroads.ca/rail/gscale/sd60f/108.jpg” alt="" width=“640” height=“494”></p>
<p> </p>
<p>Now cut it out to the proper shape.</p>
<p> </p>
<p><img src=“http://www.canadianrailroads.ca/rail/gscale/sd60f/109.jpg” alt="" width=“640” height=“341”></p>
<p> </p>
<p>OPTIONAL STEP</p>
<p>We’re going to add a layer to the end of the roof. If you skip this, I doubt that most people would notice.</p>
<p> </p>
<p><img src=“http://www.canadianrailroads.ca/rail/gscale/sd60f/110.jpg” alt="" width=“640” height=“293”></p>
<p> </p>
<p>Cut a piece of .01" styrene 1 7/8" x 5". Mark it into 3 sections 1 1/4 - 2 1/2" - 1 1/4". Fold it along the dividing lines and place it using the 1 7/8" line you marked in the previous step.</p>
<p> </p>
<p><img src=“http://www.canadianrailroads.ca/rail/gscale/sd60f/111.jpg” alt="" width=“640” height=“339”></p>
<p> </p>
<p>Carefully glue it in place leaving the overhangs. Remember not to use too much solvent as .01" is easily distorted.</p>
<p> </p>
<p><img src=“http://www.canadianrailroads.ca/rail/gscale/sd60f/112.jpg” alt="" width=“640” height=“232”></p>
<p> </p>
<p>Once dry, place some solvent along the underside edge, and then carefully roll it over the edge and hold in place until it bonds. Again be careful to apply even pressure so that there is no distortion. It should end just over the drip lip. Trim if necessary.</p>
<p> </p>
<p><img src=“http://www.canadianrailroads.ca/rail/gscale/sd60f/113.jpg” alt="" width=“640” height=“182”></p>
<p> </p>
<p>If you did the optional step, cut out the hole once dry, and glue again around the edge of the hole.</p>
<p>Now we’ll need a 1/16" piece 1 7/8" x 2 1/2". Cut the hole as shown below.</p>
<p> </p>
<p><img src=“http://www.canadianrailroads.ca/rail/gscale/sd60f/114.jpg” alt="" width=“640” height=“751”></p>
<p> </p>
<p>For the stack We’ll need two 1/16" x 1/4" x 1 1/4" and two 1/16" x 1/4" x 1/2".</p>
<p> </p>
<p><img src=“http://www.canadianrailroads.ca/rail/gscale/sd60f/115.jpg” alt="" width=“640” height=“598”></p>
<p> </p>
<p>Now we need one 1/16" x 1 3/4" x 2 1/8" and one 1/8" x 1 3/4" x 2 1/8". Cut the hole on both as shown on the right piece. The space above, below and to the left is 5/16". To the right is 11/16".</p>
<p> </p>
<p><img src=“http://www.canadianrailroads.ca/rail/gscale/sd60f/116.jpg” alt="" width=“640” height=“356”></p>
<p> </p>
<p>The 1/16" piece is the top so make sure you cut a nice clean hole.</p>
<p> </p>
<p><img src=“http://www.canadianrailroads.ca/rail/gscale/sd60f/117.jpg” alt="" width=“640” height=“864”></p>
<p> </p>
<p>Now glue the above two pieces together. Take the 1 7/8" x 2 1/4" piece you cut in the first step and glue the stack pieces around the hole. Also mark a line 1/16" in from each side.</p>
<p> </p>
<p><img src=“http://www.canadianrailroads.ca/rail/gscale/sd60f/118.jpg” alt="" width=“640” height=“263”></p>
<p> </p>
<p>Take the above two pieces, and mount the right piece on top of the left piece. Leave the 1/16" gap around the edge. you will have a 1/16" gap above and below the stack, and a 1/8" gap on each side. If the above right piece has a noticeable joint around the edge, you can clad it with some .01" styrene.</p>
<p> </p>
<p><img src=“http://www.canadianrailroads.ca/rail/gscale/sd60f/119.jpg” alt="" width=“640” height=“582”></p>
<p> </p>
<p>Take your completed assembly and mount it on the roof. There will be a 1/8" gap on both sides.</p>
<p> </p>
<p><img src=“http://www.canadianrailroads.ca/rail/gscale/sd60f/120.jpg” alt="" width=“640” height=“552”></p>
<p> </p>
<p>Now cut five 1/2" pieces of .05" rod.</p>
<p> </p>
<p><img src=“http://www.canadianrailroads.ca/rail/gscale/sd60f/121.jpg” alt="" width=“640” height=“275”></p>
<p> </p>
<p>Mount these in the stack with 1/8" spacing.</p>
<p> </p>
<p><img src=“http://www.canadianrailroads.ca/rail/gscale/sd60f/122.jpg” alt="" width=“640” height=“646”></p>
<p> </p>
<div>
<div>
<p>Now spin it around and we’re going to mount the front of the winter hatch on the window end. Mark the roof up as shown below. As with previous steps, DO NOT include the 1/16" lip in the measurements.</p>
<p> </p>
<p><img src=“http://www.canadianrailroads.ca/rail/gscale/sd60f/123.jpg” alt="" width=“640” height=“835”></p>
<p> </p>
<p>Cut out the middle portion.</p>
<p> </p>
<p><img src=“http://www.canadianrailroads.ca/rail/gscale/sd60f/124.jpg” alt="" width=“640” height=“917”></p>
<p> </p>
<p>Now we’ll need two 1/8" x 1/4" x 1 1/16". Take a 1/8" x 1/8" chunk out of each end as shown below.</p>
<p> </p>
<p><img src=“http://www.canadianrailroads.ca/rail/gscale/sd60f/125.jpg” alt="" width=“640” height=“654”></p>
<p> </p>
<p>Mount them on each side of the hole as shown below.</p>
<p> </p>
<p><img src=“http://www.canadianrailroads.ca/rail/gscale/sd60f/126.jpg” alt="" width=“640” height=“505”></p>
<p> </p>
<p>Now you’ll need a 1/8" x 1/8" x 1 7/8" piece. mount it in between as shown below.</p>
<p> </p>
<p><img src=“http://www.canadianrailroads.ca/rail/gscale/sd60f/127.jpg” alt="" width=“640” height=“191”></p>
<p> </p>
<p>Now for the top you’ll need a piece 1/8" x 1 1/16" x 2 1/8". Sand the 3 sides shown at 45 degrees.</p>
<p> </p>
<p><img src=“http://www.canadianrailroads.ca/rail/gscale/sd60f/128.jpg” alt="" width=“640” height=“633”></p>
<p><img src=“http://www.canadianrailroads.ca/rail/gscale/sd60f/129.jpg” alt="" width=“640” height=“349”></p>
<p> </p>
<p>Mount the top as shown below. Next week we’ll start work on the tail end.</p>
<p> </p>
<p><img src=“http://www.canadianrailroads.ca/rail/gscale/sd60f/130.jpg” alt="" width=“640” height=“396”></p>
<p> </p>
<p>Here’s another teaser photo. I’ve started designing and constructing the cab. People aren’t going to like me when this gets shared. There are lots of cuts and angles.</p>
<p> </p>
<p><img src=“http://www.canadianrailroads.ca/rail/gscale/sd60f/131.jpg” alt="" width=“640” height=“406”></p>
<p> </p>
<p>Okay Guys, a couple more steps on the middle section, and then we’ll start the tail.</p>
<p>We’re going to add 1/16" to the height of the winter hatch. Cut a 1" x 1 7/8" piece and sand the 1" sides and one 1 7/8" side at 45 degrees. Glue on top of winter hatch as shown below.</p>
<p> </p>
<p><img src=“http://www.canadianrailroads.ca/rail/gscale/sd60f/132.jpg” alt="" width=“640” height=“387”></p>
<p> </p>
<p>Now take some 1/16 x 1/16" styrene and complete the lip around the winter hatch to match the end of the section.</p>
<p> </p>
<p><img src=“http://www.canadianrailroads.ca/rail/gscale/sd60f/133.jpg” alt="" width=“640” height=“232”></p>
<p> </p>
<p>We’ll start with the tail roof. You’ll need a 1/8" piece cut 7 13/16 x 2 1/2".</p>
<p> </p>
<p><img src=“http://www.canadianrailroads.ca/rail/gscale/sd60f/134.jpg” alt="" width=“640” height=“210”></p>
<p> </p>
<p>On one end, mark the center line. Mark the corners 5/8" from center and the sides 5/16" from the ends. Cut off the corners.</p>
<p> </p>
<p><img src=“http://www.canadianrailroads.ca/rail/gscale/sd60f/135.jpg” alt="" width=“640” height=“111”></p>
<p><img src=“http://www.canadianrailroads.ca/rail/gscale/sd60f/136.jpg” alt="" width=“640” height=“169”></p>
<p> </p>
<p>Sand this end at 45 degrees. The angle will be the bottom side, so in the photo below, you are looking at the bottom.</p>
<p> </p>
<p><img src=“http://www.canadianrailroads.ca/rail/gscale/sd60f/137.jpg” alt="" width=“640” height=“197”></p>
<p> </p>
<p>Now flip it over, and mark a line 7 " from the uncut end. We’ll now divide the 7" section up to drill for roof fans. The roof fan holes are 1 3/4". They are spaced 3/8" apart, with a 1/2" gap on the ends of the 7" section. Mark the hole centers and drill small guide holes.</p>
<p> </p>
<p><img src=“http://www.canadianrailroads.ca/rail/gscale/sd60f/138.jpg” alt="" width=“640” height=“217”></p>
<p> </p>
<p>Now drill the fan holes. You’ll have to sand them until your fans fit snug, but not tight.</p>
<p> </p>
<p><img src=“http://www.canadianrailroads.ca/rail/gscale/sd60f/139.jpg” alt="" width=“640” height=“213”></p>
<p> </p>
<p>Now we’ll need two end corner pieces. Start with two 1/8 x 1 5/8 x 3 7/8". The outer corners have to be cut off. If you set the pieces together as shown below, mark 11/16" in from the center and 1/2" down from the tops.</p>
<p> </p>
<p><img src=“http://www.canadianrailroads.ca/rail/gscale/sd60f/140.jpg” alt="" width=“640” height=“638”></p>
<p> </p>
<p>Cut off the corners.</p>
<p> </p>
<p><img src=“http://www.canadianrailroads.ca/rail/gscale/sd60f/141.jpg” alt="" width=“640” height=“580”></p>
<p> </p>
<p>Now sand the tops at 45 degrees and the middles at 30 degrees.</p>
<p> </p>
<p><img src=“http://www.canadianrailroads.ca/rail/gscale/sd60f/142.jpg” alt="" width=“640” height=“689”></p>
<p> </p>
<p>Now for the center end we’ll need two 1/16 x 3 7/8 x 1 1/4" pieces.</p>
<p> </p>
<p><img src=“http://www.canadianrailroads.ca/rail/gscale/sd60f/143.jpg” alt="" width=“640” height=“524”></p>
<p> </p>
<p>Now mark one for a door cut out. Keep 1/8" gap at the bottom. Your door will be 3/4" wide with a 1/2" gap on each side. Mark it 2 1/4" tall</p>
<p> </p>
<p><img src=“http://www.canadianrailroads.ca/rail/gscale/sd60f/144.jpg” alt="" width=“640” height=“231”></p>
<p> </p>
<p>Cut it out and glue it on top of the uncut piece.</p>
<p> </p>
<p><img src=“http://www.canadianrailroads.ca/rail/gscale/sd60f/145.jpg” alt="" width=“640” height=“223”></p>
<p> </p>
<p>Flip it over and sand the top edge to 45 degrees.</p>
<p> </p>
<p><img src=“http://www.canadianrailroads.ca/rail/gscale/sd60f/146.jpg” alt="" width=“640” height=“236”></p>
<p> </p>
<p>Now take your three end pieces and lay them tightly together and tape. All the angled edges will be down.</p>
<p> </p>
<p><img src=“http://www.canadianrailroads.ca/rail/gscale/sd60f/147.jpg” alt="" width=“640” height=“553”></p>
<p> </p>
<p>Now using the 30 degree jig you made, set your corners and tape. Set it on your base to make sure that it sits properly on your frame. When happy, run a piece of tape around the entire thing and glue it up.</p>
<p> </p>
<p><img src=“http://www.canadianrailroads.ca/rail/gscale/sd60f/148.jpg” alt="" width=“640” height=“534”></p>
<p><img src=“http://www.canadianrailroads.ca/rail/gscale/sd60f/149.jpg” alt="" width=“756” height=“738”></p>
<p> </p>
<p>Once dry, sand on a flat surface just like you did with your middle section roof to get nice sharp edges.</p>
<p> </p>
<p><img src=“http://www.canadianrailroads.ca/rail/gscale/sd60f/150.jpg” alt="" width=“640” height=“468”></p>
<p><img src=“http://www.canadianrailroads.ca/rail/gscale/sd60f/151.jpg” alt="" width=“640” height=“190”></p>
<p> </p>
<p>Now hopefully you have a nice looking rear section.</p>
<p> </p>
<p><img src=“http://www.canadianrailroads.ca/rail/gscale/sd60f/152.jpg” alt="" width=“640” height=“509”></p>
<p> </p>
<p>Now Take a piece of .02" styrene and cut a piece 1/16" high and 11/16" wide. trim the ends at 45 degrees as shown.</p>
<p> </p>
<p><img src=“http://www.canadianrailroads.ca/rail/gscale/sd60f/153.jpg” alt="" width=“320” height=“77”></p>
<p> </p>
<p>Mount this at the bottom of the door cut flush with the top. Using a razor saw, cut lines at each side of the door cut as shown by the red arrows. Just cut enough to make a defined groove similar to the cuts you made when making your side doors on the middle section.</p>
<p> </p>
<p><img src=“http://www.canadianrailroads.ca/rail/gscale/sd60f/154.jpg” alt="" width=“640” height=“108”></p>
<p> </p>
<p>Now we need a back door. Cut two pieces of .02" styrene ( one .04" if you have .04) 3/4" x 2 1/4". Glue them together and sand the edges so that it fits in your door cut with a noticeable gap around the edges. The edges of your door can be slightly rounded.</p>
<p> </p>
<p><img src=“http://www.canadianrailroads.ca/rail/gscale/sd60f/155.jpg” alt="" width=“640” height=“502”></p>
<p> </p>
<p>Now mount your door in the door cut, and drill a window guide hole 11/16" from the top of the door.</p>
<p> </p>
<p><img src=“http://www.canadianrailroads.ca/rail/gscale/sd60f/156.jpg” alt="" width=“640” height=“347”></p>
<p> </p>
<p>Now drill your 9/16" window.</p>
<p> </p>
<p><img src=“http://www.canadianrailroads.ca/rail/gscale/sd60f/157.jpg” alt="" width=“320” height=“564”></p>
<div>
<h3> </h3>
<div> </div>
</div>
<div>
<p>Now for the sides of the tail, we’ll need two 1/8" pieces cut 7" x 2 7/16". Cut out a 2 x 5/16" piece out of each side as shown below.</p>
<p> </p>
<p><img src=“http://www.canadianrailroads.ca/rail/gscale/sd60f/158.jpg” alt="" width=“640” height=“473”></p>
<p> </p>
<p>Now cut a 1/8" piece 3 7/8 x 7 5/8".</p>
<p> </p>
<p><img src=“http://www.canadianrailroads.ca/rail/gscale/sd60f/159.jpg” alt="" width=“640” height=“333”></p>
<p> </p>
<p>At the back end, cut a 1 5/16 x 5/8" piece out of each corner.</p>
<p> </p>
<p><img src=“http://www.canadianrailroads.ca/rail/gscale/sd60f/160.jpg” alt="" width=“640” height=“221”></p>
<p> </p>
<p>Lay this on top of the aluminum angles on your locomotive base plate. We’re going to attach the rear side panels to the piece.</p>
<p> </p>
<p><img src=“http://www.canadianrailroads.ca/rail/gscale/sd60f/161.jpg” alt="" width=“640” height=“310”></p>
<p> </p>
<p>Use the box you made for the center section to help square things up. Flush up the front edges. The black arrow shows that I placed a narrow piece under the box so that I could glue without worrying about the box getting glued in. The narrow piece is also temporary for this step so ensure it does not get glued.</p>
<p> </p>
<p><img src=“http://www.canadianrailroads.ca/rail/gscale/sd60f/162.jpg” alt="" width=“640” height=“565”></p>
<p> </p>
<p>Slide the box to the front and tape your tail in place. Glue it when you are happy with the placement. DO NOT glue anything to the locomotive base. As noted above, the tail will not make contact with the plate you cut.</p>
<p> </p>
<p><img src=“http://www.canadianrailroads.ca/rail/gscale/sd60f/163.jpg” alt="" width=“640” height=“640”></p>
<p> </p>
</div>
<p>Once it is dry enough to handle, take it off of the locomotive base plate and we’re going to add some reinforcement. Cut two pieces of 1/8 x 1/8 styrene 5/8" long.</p>
<p> </p>
<p><img src=“http://www.canadianrailroads.ca/rail/gscale/sd60f/164.jpg” alt="" width=“320” height=“300”></p>
<p> </p>
<p>On the bottom side of the tail end, glue the above two pieces into the corners as shown by the green arrows below. Cut some 1/8" scrap 1 1/4" wide and glue it as shown by the red arrow to tie in the tail end. This piece does not have to square up. Just make sure it makes good contact with the tail for gluing.</p>
<p> </p>
<p><img src=“http://www.canadianrailroads.ca/rail/gscale/sd60f/165.jpg” alt="" width=“640” height=“171”></p>
<p> </p>
<p>Now cut two 1/8 x 1/8 pieces 1 11/16" long.</p>
<p> </p>
<p><img src=“http://www.canadianrailroads.ca/rail/gscale/sd60f/166.jpg” alt="" width=“640” height=“201”></p>
<p> </p>
<p>Flip your tail end over, and mount the above two pieces in the top side corners as shown by the green arrows below. Once again take some 1/8" scrap and tie in the tail as shown by the red arrow.</p>
<p> </p>
<p><img src=“http://www.canadianrailroads.ca/rail/gscale/sd60f/167.jpg” alt="" width=“640” height=“287”></p>
<p> </p>
<p>One last update for tonight. We’re going to make some roof joists. Cut two pieces of 1/8" styrene 4 1/8 x 2".</p>
<p> </p>
<p><img src=“http://www.canadianrailroads.ca/rail/gscale/sd60f/168.jpg” alt="" width=“640” height=“651”></p>
<p> </p>
<p>Now mark these up as shown below. The only difference in the two is the bottom corners. The front piece has 1/8" cuts at the bottom corners. The rear piece has 1/4" cuts at the bottom as it must fit between the 1/8 x 1/8" reinforcement we added in the rear corners.</p>
<p> </p>
<p><img src=“http://www.canadianrailroads.ca/rail/gscale/sd60f/169.jpg” alt="" width=“640” height=“656”></p>
<p> </p>
<p>Cut off the top and bottom corners, and the 1/8" off the center top.</p>
<p> </p>
<p><img src=“http://www.canadianrailroads.ca/rail/gscale/sd60f/170.jpg” alt="" width=“640” height=“636”></p>
<p> </p>
<p>Now flip them over so you have a clean side to draw on and draw lines 3/4" in from the sides, and 3/4" below the top 1/8" cut.</p>
<p> </p>
<p><img src=“http://www.canadianrailroads.ca/rail/gscale/sd60f/171.jpg” alt="" width=“640” height=“607”></p>
<p> </p>
<p>Cut out these center pieces.</p>
<p> </p>
<p><img src=“http://www.canadianrailroads.ca/rail/gscale/sd60f/172.jpg” alt="" width=“640” height=“643”></p>
<p> </p>
<p>Now mount the one with the 1/4" bottom cuts right at the rear (red arrow) of your tail section, with the cuts dropping between your corner reinforcement. It’s a fairly easy mount because it rests against your tail end section. The front will be a little trickier (green arrow). Mount this on top of the sides with the 1/8" cuts dropping down in between the sides. Flush it with the ends of the walls and glue it in.</p>
<p> </p>
<p><img src=“http://www.canadianrailroads.ca/rail/gscale/sd60f/173.jpg” alt="" width=“640” height=“619”></p>
<p> </p>
<div>
<p>Okay, we need to get the roof mounted.</p>
<p>We’ll need two .125 x .438 x 6 3/4" pieces. Sand one side of each piece at 30 degrees as shown below.</p>
<p> </p>
<p><img src=“http://www.canadianrailroads.ca/rail/gscale/sd60f/175.jpg” alt="" width=“640” height=“130”></p>
<p> </p>
<p>Using some 1/8" styrene, cut two 7/16 x 15/16" right angle triangles. You can sand the 7/16" edges at 30 degrees. The hypotenuse (long) edge angle will need to be about 45 degrees. I cut the angle of this edge by hand until I got the fit I desired.</p>
<p> </p>
<p><img src=“http://www.canadianrailroads.ca/rail/gscale/sd60f/176.jpg” alt="" width=“640” height=“399”></p>
<p><img src=“http://www.canadianrailroads.ca/rail/gscale/sd60f/177.jpg” alt="" width=“320” height=“207”></p>
<p> </p>
<p>I mounted the roof piece first. It may overhand the front a little. If it does, sand it flush. (Ignore the fans. I was just testing fit) I then mounted the two .125 x .438 x 6 3/4" pieces. They mount between the roof joists. Set the 30 degree angle with the roof. If they don’t quite match the angle of the roof joists that is okay. We will have to do a bit of sanding and filling later. Now mount the two corner triangles between the roof, tail, and end roof joist. Again don’t worry about flushing the roof joist. Make sure these pieces are flush with the roof and the tail.</p>
<p> </p>
<p><img src=“http://www.canadianrailroads.ca/rail/gscale/sd60f/178.jpg” alt="" width=“640” height=“435”></p>
<p> </p>
<p>Now cut a piece of .01" styrene 2 1/4 x 7 1/4".</p>
<p> </p>
<p><img src=“http://www.canadianrailroads.ca/rail/gscale/sd60f/179.jpg” alt="" width=“640” height=“213”></p>
<p> </p>
<p>Mount this on the roof flush with the front, and 1/8" in from each side. Make sure you flip it over and glue the edges of the fan hole cuts.</p>
<p> </p>
<p><img src=“http://www.canadianrailroads.ca/rail/gscale/sd60f/180.jpg” alt="" width=“640” height=“296”></p>
<p> </p>
<p>Once it’s dry, cut out the fan holes. Glue the edges of the holes again once you’ve cut them out.</p>
<p> </p>
<p><img src=“http://www.canadianrailroads.ca/rail/gscale/sd60f/181.jpg” alt="" width=“640” height=“281”></p>
<p> </p>
</div>
<div>
<p>Now We need to build the tail section of the winter hatch.</p>
<p>Take one of your roof fans and cut off the electrical conduits. We are going to mount this fan sideways to make sure it clears the winter hatch. The hatch will hide this when complete.</p>
<p> </p>
<p><img src=“http://www.canadianrailroads.ca/rail/gscale/sd60f/182.jpg” alt="" width=“640” height=“635”></p>
<p> </p>
<p>Now take some 1/8 x 1/4" styrene and cut one 1 7/8" piece and two 2 7/16" pieces. Glue these together as shown below. The narrow 1/8" side is up.</p>
<p> </p>
<p><img src=“http://www.canadianrailroads.ca/rail/gscale/sd60f/183.jpg” alt="" width=“640” height=“726”></p>
<p> </p>
<p>Now I’ve decided I don’t want this hatch permanently attached as it will make painting difficult, and would also make it impossible to get at the fan. We’re going to get a little fancy, and pin this to the roof so that it will be removable. We’ll pin using 3/64" brass rod. Using a 3/64" bit, drill the corners, and from the corners, drill at 1" and 2" from the corners. The open end is the front.</p>
<p> </p>
<p><img src=“http://www.canadianrailroads.ca/rail/gscale/sd60f/184.jpg” alt="" width=“640” height=“714”></p>
<p> </p>
<p>On the .01" roof plate, draw a line 1/16" in from each side.Place this frame on your roof. The frame will sit between these lines. Line it up, flush with the front, and mark and drill the holes through the roof.</p>
<p> </p>
<p><img src=“http://www.canadianrailroads.ca/rail/gscale/sd60f/185.jpg” alt="" width=“640” height=“559”></p>
<p> </p>
<p>Once the holes are drilled in the roof, Take a 1/16" bit and widen the tops of the holes. This will help guide the pins into place when you mount the winter hatch on the roof.</p>
<p> </p>
<p><img src=“http://www.canadianrailroads.ca/rail/gscale/sd60f/186.jpg” alt="" width=“640” height=“798”></p>
<p> </p>
<p>Cut six 1/2" pieces of 3/64" brass rod and insert your pins. Make sure you flush them with the top of the frame. I scarred the top 1/4" with a knife so that they would anchor to the frame. Make sure the portion going through the roof is smooth. Carefully remove the frame from the roof. If the pins moved at all, flush them back up. Apply some solvent and the pins should remain nicely attached to this frame.</p>
<p> </p>
<p><img src=“http://www.canadianrailroads.ca/rail/gscale/sd60f/187.jpg” alt="" width=“640” height=“433”></p>
<p> </p>
<p>While the frame is still attached to the roof, mark lines on the inside front edges of where the frame meets the roof. We are going to mount a small plate in the next step that will help the tail tie in to the middle section.</p>
</div>
<p> </p>
<div>
<p>Now we need a 1/8" piece of styrene 1 13/16 x 7/8". This piece will sit at the front end of the roof. It sits between the winter hatch frame, and snug against the fan. It’s a good idea to place the fan and frame in place to verify the placement. It will overhang the roof by 1/2", leaving 3/8" on the roof. Glue to the roof when you are happy with the placement. Make sure that it fits between the winter hatch frame without applying any pressure as this could effect your pin alignment.</p>
<p> </p>
<p><img src=“http://www.canadianrailroads.ca/rail/gscale/sd60f/188.jpg” alt="" width=“320” height=“486”></p>
<p> </p>
<p>Now we’re going to build up the winter hatch. We’ll need some 1/8 x 1/8" styrene. Cut two 2 1/16" pieces and one 1 7/8" piece. You will also need to cut some 1/8" styrene 3/8 x 2 1/8". Mount these pieces as shown below. The larger piece is the front of that hatch.</p>
<p> </p>
<p><img src=“http://www.canadianrailroads.ca/rail/gscale/sd60f/189.jpg” alt="" width=“640” height=“444”></p>
<p> </p>
<p>Now we’ll need a 1/16" piece of styrene cut 2 1/8 x 2 7/16". Mark a line 7/16" from the front, and 1/4" in from the other three sides. Cut out the center piece.</p>
<p> </p>
<p><img src=“http://www.canadianrailroads.ca/rail/gscale/sd60f/190.jpg” alt="" width=“640” height=“731”></p>
<p><img src=“http://www.canadianrailroads.ca/rail/gscale/sd60f/191.jpg” alt="" width=“451” height=“518”></p>
<p> </p>
<p>Mount this on top of your hatch. Once everything is dry, sand the back and sides at 45 degrees. Sand through the top two layers down to where they meet the 1/4" frame you built in the previous post. You want to be left with a 1/16" band at the top rear and sides that is not angled.</p>
<p> </p>
<p><img src=“http://www.canadianrailroads.ca/rail/gscale/sd60f/192.jpg” alt="" width=“640” height=“471”></p>
<p> </p>
<p>Now if you pin this to the roof, it should look like below.</p>
<p> </p>
<p><img src=“http://www.canadianrailroads.ca/rail/gscale/sd60f/193.jpg” alt="" width=“640” height=“360”></p>
</div>
<p> </p>
<div>
<p>Now we’ll need two 1/8 x 1 x 2" pieces of styrene. We need to notch them both as shown below with a 1/2 x 1/8" notch 3/4" from the bottoms.</p>
<p> </p>
<p><img src=“http://www.canadianrailroads.ca/rail/gscale/sd60f/194.jpg” alt="" width=“640” height=“506”></p>
<p> </p>
<p>Mount one of these on each side of the front to the backs of the walls. They will fit below the roof joist, and the notch will fit around the plate holding the walls together.</p>
<p> </p>
<p><img src=“http://www.canadianrailroads.ca/rail/gscale/sd60f/195.jpg” alt="" width=“640” height=“918”></p>
<p> </p>
<p>The green arrows below show how they fit around the plate. The middle section will slide over these eventually.</p>
<p>Now see the red arrow. We need to build a box out of 1/8" styrene. Make it 3/4" tall. The length should be around 1 1/2" long. Mount it flush to the front and centered as shown below. This will be a screw anchor point.</p>
<p> </p>
<p><img src=“http://www.canadianrailroads.ca/rail/gscale/sd60f/196.jpg” alt="" width=“640” height=“776”></p>
<p> </p>
<p>Now take same more 1/8" styrene and cut it 3/4" tall. The length can be similar to the above box. Build two boxes as shown below to fit between your frame and the aluminum angle. Sand a bit of a curve on the outer bottom edges as shown by the green arrows. This will help them slide in place. I filled the box with an extra piece for added strength.</p>
<p> </p>
<p><img src=“http://www.canadianrailroads.ca/rail/gscale/sd60f/197.jpg” alt="" width=“640” height=“420”></p>
<p> </p>
<p>Mount these boxes on the bottom of the tail body 1/2" in from the end of the plate (corner) as shown below. These are two more screw anchor points.</p>
<p> </p>
<p><img src=“http://www.canadianrailroads.ca/rail/gscale/sd60f/198.jpg” alt="" width=“640” height=“447”></p>
<p> </p>
<p>Now place your tail on your base, and drill three anchor holes as shown by the green arrows below. 3 screws will secure the tail to the base.</p>
<p> </p>
<p><img src=“http://www.canadianrailroads.ca/rail/gscale/sd60f/199.jpg” alt="" width=“640” height=“353”></p>
</div>
<p> </p>
<p>Now we need to mark up both sides of the tail for doors. They will be mirrored.</p>
<p> </p>
<p><img src=“http://www.canadianrailroads.ca/rail/gscale/sd60f/201.jpg” alt="" width=“560” height=“281”></p>
<p><img src=“http://www.canadianrailroads.ca/rail/gscale/sd60f/200.jpg” alt="" width=“640” height=“393”></p>
<p> </p>
<p>Using .01" styrene, cut two sets of doors. You will need two 1 15/16 x 1 15/16" pieces, two 2 1/4 x 1 1/2" pieces, and two 2 1/4 x 3/4" pieces. Using the same technique you used for the middle section, cut door grooves as shown below. Remember the other side is mirrored, so the 11/16" door will be on the opposite end. They will be the front doors.</p>
<p> </p>
<p><img src=“http://www.canadianrailroads.ca/rail/gscale/sd60f/202.jpg” alt="" width=“640” height=“263”></p>
<p> </p>
<p>Mount them like you did on the middle section. The 1/8" gap you marked behind the single door (red arrow) is for a panel we’ll add later.</p>
<p> </p>
<p><img src=“http://www.canadianrailroads.ca/rail/gscale/sd60f/203.jpg” alt="" width=“640” height=“339”></p>
<p> </p>
<p>Now if you mount your tail on the base, it should look like the photo below.</p>
<p> </p>
<p><img src=“http://www.canadianrailroads.ca/rail/gscale/sd60f/204.jpg” alt="" width=“640” height=“531”></p>
<p> </p>
<p>Your middle section will slide over the pieces shown by the red arrows. The green arrow piece will slide inside the middle section of the winter hatch.</p>
<p> </p>
<p><img src=“http://www.canadianrailroads.ca/rail/gscale/sd60f/205.jpg” alt="" width=“640” height=“444”></p>
<p> </p>
<p>They should fit together as shown below.</p>
<p> </p>
<p><img src=“http://www.canadianrailroads.ca/rail/gscale/sd60f/206.jpg” alt="" width=“640” height=“216”></p>
<p> </p>
<p>You may have to do a bit of sanding to get them to fit tightly against each other. When complete, this center section will slide off to give you access to the guts.</p>
<p> </p>
<p><img src=“http://www.canadianrailroads.ca/rail/gscale/sd60f/207.jpg” alt="" width=“640” height=“729”></p>
<p><img src=“http://www.canadianrailroads.ca/rail/gscale/sd60f/208.jpg” alt="" width=“640” height=“433”></p>
<p> </p>
<p>I’ve been busy working on the taper and the front vents. With 1/8" spacing, I’m 6 fins short of the prototype, but I think I’m happy with the outcome.</p>
<p> </p>
<p><img src=“http://www.canadianrailroads.ca/rail/gscale/sd60f/209.jpg” alt="" width=“640” height=“387”></p>
<p> </p>
<p>I’ve decided to use a USA trains SD70 horn. The original horns had 3 stubby chimes that all faced forward. These locomotives are nearing 30 years old, and they now sport a variety of horns, including this SD70 style.</p>
<p>The horn mounts on the conductor’s side. (somebody in design didn’t like conductors. <img src=“http://www.largescalecentral.com/externals/tinymce/plugins/emoticons/img/smiley-cool.gif” alt="">) We’ll need a 1/8" x 1/4" hole. I kept it 3/4" from the front of the middle section, and 1/8" below the bend on the roof.</p>
<p> </p>
<p><img src=“http://www.canadianrailroads.ca/rail/gscale/sd60f/210.jpg” alt="" width=“640” height=“453”></p>
<p> </p>
<p>I first drilled 3 1/8" holes and then cleaned it up with a sharp X-Acto blade.</p>
<p> </p>
<p><img src=“http://www.canadianrailroads.ca/rail/gscale/sd60f/211.jpg” alt="" width=“640” height=“610”></p>
<p> </p>
<p>Mounted horn.</p>
<p> </p>
<p><img src=“http://www.canadianrailroads.ca/rail/gscale/sd60f/212.jpg” alt="" width=“640” height=“468”></p>
<p> </p>
<p>Now we’re going to start on the cab. We’ll start with the cab floor which will sit between the cab walls. The sides of this piece will act as the back walls of the steps cut into the sides of the cab.</p>
<p>We’ll need some 1/8" styrene. Cut one piece 3 7/8 x 3 1/4" and two 1 1/8 x 3 1/4" pieces.</p>
<p> </p>
<p><img src=“http://www.canadianrailroads.ca/rail/gscale/sd60f/213.jpg” alt="" width=“640” height=“521”></p>
<p> </p>
<p>Glue the short pieces below the large piece, flush with the sides as shown below.</p>
<p> </p>
<p><img src=“http://www.canadianrailroads.ca/rail/gscale/sd60f/214.jpg” alt="" width=“640” height=“498”></p>
<p> </p>
<p>Now for the cab sides, I used 4 layers per side of .03" styrene cut 3 1/2 x 5". You’ll need 8 pieces total.</p>
<p> </p>
<p><img src=“http://www.canadianrailroads.ca/rail/gscale/sd60f/215.jpg” alt="" width=“640” height=“637”></p>
<p> </p>
<p>We’ll cut these as shown below. All eight pieces will have all the cuts except the red. The red cut will only appear on four pieces.</p>
<p> </p>
<p><img src=“http://www.canadianrailroads.ca/rail/gscale/sd60f/216.jpg” alt="" width=“640” height=“609”></p>
<p> </p>
<p>I started with the door cut. The door cut is 2 1/16 x 3/4". It is 3/16" from the back edge, and 3/16" from the top.</p>
<p> </p>
<p><img src=“http://www.canadianrailroads.ca/rail/gscale/sd60f/217.jpg” alt="" width=“640” height=“448”></p>
<p> </p>
<p>Now cut out a 1 13/16 x 7/8" window 7/16" in front of the door, and 1/4" from the top.</p>
<p> </p>
<p><img src=“http://www.canadianrailroads.ca/rail/gscale/sd60f/218.jpg” alt="" width=“640” height=“455”></p>
<p> </p>
<p>Now cut out over the nose 1 3/8" high by 1 5/8" long.</p>
<p> </p>
<p><img src=“http://www.canadianrailroads.ca/rail/gscale/sd60f/219.jpg” alt="" width=“640” height=“446”></p>
<p> </p>
<p>Now cut out two 9/16 x 1/4" step cuts. They are centered below the door. The spacing is 5/16" below the door, 5/16" between steps, and 1/8" over the bottom of the cab.</p>
<p> </p>
<p><img src=“http://www.canadianrailroads.ca/rail/gscale/sd60f/220.jpg” alt="" width=“640” height=“446”></p>
<p> </p>
<p>Now the red cut on 4 of your 8 pieces is 3/16 x 3 1/4". It is 1/4" below the top of the cab just like the window. It is 1/8" in front of the door, and 1/8" behind the window.</p>
<p> </p>
<p><img src=“http://www.canadianrailroads.ca/rail/gscale/sd60f/221.jpg” alt="" width=“640” height=“444”></p>
<p> </p>
<p>Sand all of your pieces to make sure the cuts are flat.</p>
<p> </p>
<p><img src=“http://www.canadianrailroads.ca/rail/gscale/sd60f/222.jpg” alt="" width=“640” height=“490”></p>
<p> </p>
<p>Now build your two opposing sides. Each side will be 2 layers without the red cut topped by two layers with the red cuts. Remember to mirror the sides. Line your layers up, tape, and glue.</p>
<p> </p>
<p><img src=“http://www.canadianrailroads.ca/rail/gscale/sd60f/223.jpg” alt="" width=“640” height=“906”></p>
<p> </p>
<p>Today we’ll get the basic cab completed. We’ll start with the roof and top of nose. Using 1/8" styrene we’ll need one 2 1/2 x 4 1/8" piece, two 15/16 x 3 11/16" pieces, one 2 1/2 x 2 3/8" piece and two 15/16 x 1 15/16" pieces.</p>
<p>Cut everything as shown below and sand the required angles.</p>
<p> </p>
<p><img src=“http://www.canadianrailroads.ca/rail/gscale/sd60f/224.jpg” alt="" width=“640” height=“939”></p>
<p> </p>
<p>Your center roof pieces should be exactly the same, other then length.</p>
<p> </p>
<p><img src=“http://www.canadianrailroads.ca/rail/gscale/sd60f/225.jpg” alt="" width=“640” height=“1407”></p>
<p> </p>
<p>You’ll have two sets as shown below. (nose shown)</p>
<p> </p>
<p><img src=“http://www.canadianrailroads.ca/rail/gscale/sd60f/226.jpg” alt="" width=“640” height=“1303”></p>
<p> </p>
<p>Lay them out with all the angles down, and tape them together. Set your 30 degree angles with your jig and glue them up like you did for your previous roof sections.</p>
<p> </p>
<p><img src=“http://www.canadianrailroads.ca/rail/gscale/sd60f/227.jpg” alt="" width=“640” height=“436”></p>
<p> </p>
<p>Sand them both on a flat surface until you have sharp points just like you did with the other roof sections.</p>
<p> </p>
<p><img src=“http://www.canadianrailroads.ca/rail/gscale/sd60f/228.jpg” alt="" width=“640” height=“610”></p>
<p> </p>
<p>Now we’ll make the front of the nose. We’ll need two 1/8" pieces cut 2 5/8 x 2 3/16". Cut the outside top corners off them as shown below. Sand the tops at 45 degrees and the middle at 20 degrees.</p>
<p> </p>
<p><img src=“http://www.canadianrailroads.ca/rail/gscale/sd60f/229.jpg” alt="" width=“640” height=“377”></p>
<p> </p>
<p>Glue the centers together. Because they are smaller pieces, I set the angle by hand. To make sure it was accurate, I drew a 40 degree angle on a piece of paper, and just made sure it matched before gluing.</p>
<p> </p>
<p><img src=“http://www.canadianrailroads.ca/rail/gscale/sd60f/230.jpg” alt="" width=“640” height=“363”></p>
<p> </p>
<p>Sand the back side of the nose on a flat surface like you did with the roof pieces, but NOT to a sharp point. Just sand until you have about 1/16" left as shown below.</p>
<p> </p>
<p><img src=“http://www.canadianrailroads.ca/rail/gscale/sd60f/231.jpg” alt="" width=“320” height=“425”></p>
<p> </p>
<p>Now take the fancy box we built earlier, and tape the sides to it. Keep the backs flush with the box to make sure that everything squares up.</p>
<p> </p>
<p><img src=“http://www.canadianrailroads.ca/rail/gscale/sd60f/232.jpg” alt="" width=“640” height=“461”></p>
<p><img src=“http://www.canadianrailroads.ca/rail/gscale/sd60f/233.jpg” alt="" width=“640” height=“444”></p>
<p> </p>
<p>Now tape on roof and top of the nose. You’ll have a slight overhang on the sides like you did with the previous roof sections. Tape the front of the nose on last. Line up the top which will leave a slight overhang on the bottom. Glue it good when you are happy with it.</p>
<p> </p>
<p><img src=“http://www.canadianrailroads.ca/rail/gscale/sd60f/234.jpg” alt="" width=“640” height=“633”></p>
<p> </p>
<p>If you have any gaps as shown below, Fill with some scrap styrene, and cut it off flush when it’s dry.</p>
<p> </p>
<p><img src=“http://www.canadianrailroads.ca/rail/gscale/sd60f/235.jpg” alt="" width=“640” height=“386”></p>
<p><img src=“http://www.canadianrailroads.ca/rail/gscale/sd60f/236.jpg” alt="" width=“640” height=“308”></p>
<p> </p>
<p>Now as you can see below, the nose will have a bit of overhang. Sand it down to match the bottoms of the side pieces.</p>
<p> </p>
<p><img src=“http://www.canadianrailroads.ca/rail/gscale/sd60f/237.jpg” alt="" width=“640” height=“121”></p>
<p> </p>
<p>Once everything is dry, take out the box, remove all of the tape, and glue anything that was missed.</p>
<p>Now for the back we’ll need a 1/16" piece of styrene cut 3 7/8 x 3 7/8". Place this square in the back of the cab, flush with the bottom. Mark the top and cut to fit.</p>
<p> </p>
<p><img src=“http://www.canadianrailroads.ca/rail/gscale/sd60f/238.jpg” alt="" width=“640” height=“298”></p>
<p> </p>
<p>Now cut out two 1/4 x 7/8" windows as shown below, and cut a piece out of the bottom so it will fill over your aluminum angles.</p>
<p> </p>
<p><img src=“http://www.canadianrailroads.ca/rail/gscale/sd60f/239.jpg” alt="" width=“640” height=“630”></p>
<p> </p>
<p>Glue the back of the cab into place keeping everything flush.</p>
<div>
<p>Window Template</p>
<p>We’re going to build a template to help lay out the front windows.</p>
<p>STEP 1</p>
<p>Take a .01" piece of styrene and cut it 4 3/8 x 1 7/8". Using the top half of the diagram below, measure and cut off the top corners, and the lower center area.</p>
<p>STEP 2</p>
<p>Mark out the windows as shown in the lower half of the diagram. Trace 1/8" circles in each corner of the windows. Mark the centers of the circle and drill 3/64" holes.</p>
<p>Note - On the side windows, do not draw the bottom line until you mark the 1/8" circles in the inner bottom corners. Draw the bottom line to connect the bottom inner circles, and the bottom of the outside edge lines. Now draw the outside bottom corner circle within the lines.</p>
<p> </p>
<p><img src=“http://www.canadianrailroads.ca/rail/gscale/sd60f/240.jpg” alt="" width=“640” height=“485”></p>
<p> </p>
<p>Your template should look like the one below with a 3/64" hole drilled in the center of each corner circle.</p>
<p>Note - The space between the side and middle window has no relation to the bend on the nose hood.</p>
<p> </p>
<p><img src=“http://www.canadianrailroads.ca/rail/gscale/sd60f/241.jpg” alt="" width=“640” height=“277”></p>
</div>
<p> </p>
<div>
<p>Now for the window section, we’ll use 1/16" styrene. Cut two pieces 1 7/8 x 2 3/16". Make the cuts shown below. Sand the tops at 45 degrees, and the middles at 20 degrees.</p>
<p> </p>
<p><img src=“http://www.canadianrailroads.ca/rail/gscale/sd60f/242.jpg” alt="" width=“640” height=“248”></p>
<p> </p>
<p>Place the two pieces together with the angled sides down. Place your template on top, and trace all the holes you drilled.</p>
<p> </p>
<p><img src=“http://www.canadianrailroads.ca/rail/gscale/sd60f/243.jpg” alt="" width=“640” height=“296”></p>
<p> </p>
<p>Use these marks to drill guide holes.</p>
<p> </p>
<p><img src=“http://www.canadianrailroads.ca/rail/gscale/sd60f/244.jpg” alt="" width=“640” height=“272”></p>
<p> </p>
<p>Now drill again with a 1/8" bit. Draw lines between all the holes as shown in red and cut out your windows.</p>
<p> </p>
<p><img src=“http://www.canadianrailroads.ca/rail/gscale/sd60f/245.jpg” alt="" width=“640” height=“265”></p>
<p> </p>
<p>Mount on your cab, making sure you are square to the nose. Later on we’ll mount some trim at the bottom, so if there’s a bit of a gap, it will get covered. The outside edges were not angled, so you may have to sand them a bit to get a good fit.</p>
<p> </p>
<p><img src=“http://www.canadianrailroads.ca/rail/gscale/sd60f/246.jpg” alt="" width=“640” height=“426”></p>
<p> </p>
<div>
<p>Flip your cab over and add some 1/8 x 1/8 reinforcement as shown below.</p>
<p> </p>
<p><img src=“http://www.canadianrailroads.ca/rail/gscale/sd60f/247.jpg” alt="" width=“640” height=“869”></p>
<p> </p>
<p>Flip it right side up and we’re going to do some sanding.</p>
<p>RED - Clean these edges up if necessary, but keep them sharp.</p>
<p>BLUE - Sand just enough to curve. Match it up to the sanding you did on the middle roof.</p>
<p>GREEN - Sand to a nice curve around 1/16".</p>
<p> </p>
<p><img src=“http://www.canadianrailroads.ca/rail/gscale/sd60f/248.jpg” alt="" width=“640” height=“634”></p>
<p> </p>
<p>Hopefully when done it looks like below.</p>
<p> </p>
<p><img src=“http://www.canadianrailroads.ca/rail/gscale/sd60f/249.jpg” alt="" width=“640” height=“568”></p>
<p> </p>
<p><strong>Note - The front window and nose dimensions of this cab work for all modern GM/EMD safety cabs. (GP38/GP40/SD40/SD50) The SD50f cab is an exact match except for number boards. The SD60f’s (5504-5563) have low number boards. The rest have high boards. Units 5500-5503 were delivered as SD50Af’s and were upgraded to SD60f’s, so they have high number boards. These dimensions will not work for GE’s. Older MLW’s have a different style of windows.</strong></p>
</div>
<p><br>Now we need to patch our fuel tank. Using 1/8" styrene cut two 3/8 x 5/8 and two 1/2 x 1 5/8" pieces. Cut a 1/8 x 9/16" piece out of a corner of the long pieces as shown below.</p>
<p> </p>
<p><img src=“http://www.canadianrailroads.ca/rail/gscale/sd60f/252.jpg” alt="" width=“640” height=“446”></p>
<p> </p>
<p>Fill the 2 small holes (yellow arrows) and 2 large holes (blue arrows). When filling the large holes, stay flush with the top of the fuel tank shown by the red arrow and line.</p>
<p> </p>
<p><img src=“http://www.canadianrailroads.ca/rail/gscale/sd60f/253.jpg” alt="" width=“640” height=“227”></p>
<p> </p>
<p>Now take some 1/16" styrene and cut two pieces 1 1/16 x 3". Place them in the two holes in the tank flush with the bottom. Glue them good and let them dry overnight.</p>
<p> </p>
<p><img src=“http://www.canadianrailroads.ca/rail/gscale/sd60f/254.jpg” alt="" width=“640” height=“490”></p>
<p> </p>
<p>Now carefully shape them to match the tank curve and glue in place.</p>
<p> </p>
<p><img src=“http://www.canadianrailroads.ca/rail/gscale/sd60f/255.jpg” alt="" width=“640” height=“557”></p>
<p> </p>
<p>Once dry, cut off the overhang 1/16" below the top of the tank.</p>
<p> </p>
<p><img src=“http://www.canadianrailroads.ca/rail/gscale/sd60f/256.jpg” alt="" width=“640” height=“323”></p>
<p> </p>
<p>Now for the top of the tank, cut two pieces of 1/16" styrene 1 1/16 x 1 1/4". Make a fairly sharp bend 1/2" from one end as shown below to match the bend in the top of the tank.</p>
<p> </p>
<p><img src=“http://www.canadianrailroads.ca/rail/gscale/sd60f/257.jpg” alt="" width=“640” height=“499”></p>
<p> </p>
<p>Glue these in place. They fit below the frame patch and over the side tank patch. Once dry, sand and fill as needed.</p>
<p> </p>
<p><img src=“http://www.canadianrailroads.ca/rail/gscale/sd60f/258.jpg” alt="" width=“640” height=“468”></p>
<p> </p>
<p>Now take your frame, and on both sides there is a seam between the frame skirt and the upper framework we added. Along these seams, make a bunch of marks 1/32" on each side to help place some trim. Take some .02 x .06" styrene, tape over the seam and glue in place once you are happy with the placement.</p>
<p>Note-this trim does NOT extend to the front of the locomotive. It ends where the upper frame ends.</p>
<p> </p>
<p><img src=“http://www.canadianrailroads.ca/rail/gscale/sd60f/259.jpg” alt="" width=“640” height=“111”></p>
<p><img src=“http://www.canadianrailroads.ca/rail/gscale/sd60f/260.jpg” alt="" width=“640” height=“131”></p>
<p> </p>
<p>Now for the corners, take some .04 x .125" styrene and cut four 1/4" pieces.</p>
<p> </p>
<p><img src=“http://www.canadianrailroads.ca/rail/gscale/sd60f/261.jpg” alt="" width=“420” height=“313”></p>
<p> </p>
<p>Apply these to both ends of the skirt on both sides of the frame. (all four corners) The trim will have to be notched at the back corners to accommodate these pieces.</p>
<p> </p>
<p><img src=“http://www.canadianrailroads.ca/rail/gscale/sd60f/262.jpg” alt="" width=“640” height=“339”></p>
<p> </p>
<p>Once they are dry, cut or sand them flush with the step cuts</p>
<p> </p>
<p><img src=“http://www.canadianrailroads.ca/rail/gscale/sd60f/263.jpg” alt="" width=“640” height=“379”></p>
<p> </p>
<p>Now we’re going to attach the air reservoirs and piping. We’ll use 3/32" brass rod for the piping. The ends of your reservoirs should have been drilled in an earlier step.</p>
<p>We’ll start with the engineer’s side (small reservoir holes) We’ll need a 2 1/2" piece of brass for the back pipe. Make a 30 degree bend 1 " from the end of the rod. Drill a hole at 30 degrees in your base 2 " from the end of the reservoir. Insert the rod into the reservoir. You should have about a 1/2" inserted which allows you to adjust when mounted. For the front pipe, we’ll need a 4 1/2" piece. Drill a hole in your base 3 1/2" from the end of the reservoir. Bend the end at 90 degrees. The bend will be roughly 1/2" from the end of the rod. When the piping is put in place, you do not want it poking out of the top of the base.</p>
<p> </p>
<p><img src=“http://www.canadianrailroads.ca/rail/gscale/sd60f/264.jpg” alt="" width=“640” height=“120”></p>
<p> </p>
<p>I installed the reservoir, and then applied glue into the top side of the holes to secure it. You do not need to glue the piping. The fit should be tight enough to hold them in place.</p>
<p> </p>
<p><img src=“http://www.canadianrailroads.ca/rail/gscale/sd60f/265.jpg” alt="" width=“640” height=“68”></p>
<p> </p>
<p>Now on the conductor’s side, we’ll need about 8" for the back pipe. Drill a 45 degree hole 7" from the back of the reservoir. You want the pipe straight for 3 1/2", and then a slight bend to the 45 degree hole.</p>
<p> </p>
<p><img src=“http://www.canadianrailroads.ca/rail/gscale/sd60f/266.jpg” alt="" width=“640” height=“223”></p>
<p><img src=“http://www.canadianrailroads.ca/rail/gscale/sd60f/267.jpg” alt="" width=“640” height=“99”></p>
<p> </p>
<p>Now for the front pipe, we’ll need 2". This one comes out of the reservoir, and at 1/2" bends toward the center of the base at 90 degrees. Then 1/2" in it bends at 90 degrees into the base.</p>
<p> </p>
<p><img src=“http://www.canadianrailroads.ca/rail/gscale/sd60f/268.jpg” alt="" width=“640” height=“343”></p>
<p> </p>
<p>Now to mount the fuel tank, we’ll need:</p>
<p>1/8 x 1" aluminum flat-two 7" pieces and two 2 3/4" pieces.</p>
<p>2 - 5/16 x 2" carriage bolts</p>
<p>4 - 5/16"nuts</p>
<p>4 - 5/16" fender washers</p>
<p>4 - 5/16" lock washers</p>
<p>1 - 1/8" styrene piece cut 7 x 1 3/4"</p>
<p>1 - 1/8" styrene piece cut 7 x 2 3/4"</p>
<p>Take your two 7" aluminum flats and the two 7" pieces of styrene. Mark 1 1/2" in from each end. Mark the center of each line.</p>
<p> </p>
<p><img src=“http://www.canadianrailroads.ca/rail/gscale/sd60f/269.jpg” alt="" width=“640” height=“112”></p>
<p> </p>
<p>Drill 5/16" holes.</p>
<p> </p>
<p><img src=“http://www.canadianrailroads.ca/rail/gscale/sd60f/270.jpg” alt="" width=“640” height=“104”></p>
<p> </p>
<p>Make sure that they all match up as these will all be secured together.</p>
<p> </p>
<p><img src=“http://www.canadianrailroads.ca/rail/gscale/sd60f/271.jpg” alt="" width=“640” height=“678”></p>
<p> </p>
<p>Put your carriage bolts into one of the flats and throw on the nuts and tighten them enough to seat them in the flat. You may need to square the holes a little. Once seated, remove the nuts. Place the wide piece of styrene on the bolts, followed by the narrow piece.</p>
<p> </p>
<p><img src=“http://www.canadianrailroads.ca/rail/gscale/sd60f/272.jpg” alt="" width=“320” height=“457”></p>
<p> </p>
<p>Keep everything loose on the bolts and insert into the fuel tank. Now secure with fender washers, lock washers and nuts. Lift it into place. The narrow piece of styrene needs to be a snug fit so that it will hold in place, but with some pressure can still be adjusted between front and rear.</p>
<p> </p>
<p><img src=“http://www.canadianrailroads.ca/rail/gscale/sd60f/273.jpg” alt="" width=“640” height=“744”></p>
<p> </p>
<p>Now place the second aluminum flat on top. It needs to be flush with the side frames. Apply some spacers if necessary.</p>
<p> </p>
<p><img src=“http://www.canadianrailroads.ca/rail/gscale/sd60f/274.jpg” alt="" width=“640” height=“293”></p>
<p> </p>
<p>This is a lifting point, and will also hold weight, so it’s a pretty heavy duty mount. Once the tank is detailed, you can fill it with sand or lead shot before mounting.</p>
<p>Now earlier we marked the base for the fuel tank. The mounting holes (RED) will be 2 1/2" and 6 1/2" from the front line. </p>
<p> </p>
<p><img src=“http://www.canadianrailroads.ca/rail/gscale/sd60f/275.jpg” alt="" width=“640” height=“260”></p>
<p> </p>
<p>Drill the holes and scar the front and center line with a knife as shown by the red lines. This way you’ll still have them after painting.</p>
<p> </p>
<p><img src=“http://www.canadianrailroads.ca/rail/gscale/sd60f/276.jpg” alt="" width=“640” height=“246”></p>
<p> </p>
<p>On the top side, you’ll need to add a 1/16" spacer to flush the base with the aluminum angles. I used a 1 1/2 x 6" piece. Glue it in place and drill to match the base holes.</p>
<p> </p>
<p><img src=“http://www.canadianrailroads.ca/rail/gscale/sd60f/277.jpg” alt="" width=“640” height=“299”></p>
<p> </p>
<p>Take your two short aluminum flats, and drill holes in the centers.</p>
<p> </p>
<p><img src=“http://www.canadianrailroads.ca/rail/gscale/sd60f/278.jpg” alt="" width=“640” height=“262”></p>
<p> </p>
<p>Now test fit your fuel tank. Place on the flats, fender washers, lock washers and nuts. Before you tighten everything, carefully slide the fuel tank to flush it with the front marker line. Now tighten it up. The fender washers protect the aluminum from the lock washers.</p>
<p> </p>
<p><img src=“http://www.canadianrailroads.ca/rail/gscale/sd60f/279.jpg” alt="" width=“640” height=“368”></p>
<p> </p>
<div>
<p>Now before removing your fuel tank, mark the front of the fuel tank, and the center of the fuel cap on both sides of the frame. Now you can remove it, and in the next update we’ll do some detailing.</p>
<p> </p>
<p><img src=“http://www.canadianrailroads.ca/rail/gscale/sd60f/280.jpg” alt="" width=“640” height=“502”></p>
<p> </p>
<p>Here’s a cross section showing what we’ve done to secure the fuel tank. The large piece of styrene (red) holds the fuel tank from within. The aluminum keeps everything square. The tops of the fuel frame, and the upper aluminum flat all make good contact with the bottom of the base. The short upper aluminum pieces tie the tank into the aluminum angles so that there is no stress on the styrene. The styrene spacer between the angles ensures that the base plate does not get pulled up between the angles. Clear as mud. <img src=“http://www.largescalecentral.com/externals/tinymce/plugins/emoticons/img/smiley-surprised.gif” alt=""></p>
<p> </p>
<p><img src=“http://www.canadianrailroads.ca/rail/gscale/sd60f/281.jpg” alt="" width=“640” height=“449”></p>
<p> </p>
</div>
<p>Tonight we’ll complete the frame detail. We’ll start with the following:</p>
<p>2 - .01 x 3/16 x 3/16" squares. Drill a 1/16" hole in the center.</p>
<p>2 - .01 x 1/16 x 3/16"</p>
<p>2 - 1/16" pieces of .05" styrene rod.</p>
<p>2 - .02 x .06 x 5/16" Sand both ends as shown below.</p>
<p> </p>
<p><img src=“http://www.canadianrailroads.ca/rail/gscale/sd60f/282.jpg” alt="" width=“640” height=“449”></p>
<p> </p>
<p>The first thing we’ll need are the 3/16" squares. These are the emergency fuel cut-off covers.</p>
<p> </p>
<p><img src=“http://www.canadianrailroads.ca/rail/gscale/sd60f/283.jpg” alt="" width=“320” height=“213”></p>
<p> </p>
<p>Center these between the two lines you drew on the frame skirt and mark the hole for drilling the skirt. Keep them at the base of the skirt.</p>
<p> </p>
<p><img src=“http://www.canadianrailroads.ca/rail/gscale/sd60f/284.jpg” alt="" width=“320” height=“242”></p>
<p> </p>
<p>Drill a hole to accomodate the .05" rod. This hole goes through the skirt. The rod is the emergency fuel cut-off button.</p>
<p> </p>
<p><img src=“http://www.canadianrailroads.ca/rail/gscale/sd60f/285.jpg” alt="" width=“320” height=“157”></p>
<p> </p>
<p>Drill a second 1/8" hole half way into the skirt. You can glue the rods into the holes. keep them flush with the outside of the skirt.</p>
<p> </p>
<p><img src=“http://www.canadianrailroads.ca/rail/gscale/sd60f/286.jpg” alt="" width=“320” height=“215”></p>
<p> </p>
<p>Now you can glue the cover over the botton. Leave a gap at the bottom just enough to be noticeable. Apply the .01" rectangles centered over the fuel cap mark 1/32" above the bottom of the skirt. These are the fuel tags.</p>
<p> </p>
<p><img src=“http://www.canadianrailroads.ca/rail/gscale/sd60f/287.jpg” alt="" width=“480” height=“257”></p>
<p> </p>
<p>Now apply your AEI tags. Notice the engineer’s side is 6 5/8" from the front corner, and the conductor’s side is from the rear corner.</p>
<p> </p>
<p><img src=“http://www.canadianrailroads.ca/rail/gscale/sd60f/288.jpg” alt="" width=“640” height=“272”></p>
<p> </p>
<p>Now we’re going to build the jacking/lift points. We’ll need four 1/16 x 3/8 x 5/8" pieces and four .03 x 1/4 x 5/8" pieces.</p>
<p> </p>
<p><img src=“http://www.canadianrailroads.ca/rail/gscale/sd60f/289.jpg” alt="" width=“640” height=“371”></p>
<p> </p>
<p>Mount the .03" pieces on top of the 1/16" pieces flush with the bottom.</p>
<p> </p>
<p><img src=“http://www.canadianrailroads.ca/rail/gscale/sd60f/290.jpg” alt="" width=“640” height=“377”></p>
<p> </p>
<p>Now cut four 1/16 x 1/2 x 1/4" pieces.</p>
<p> </p>
<p><img src=“http://www.canadianrailroads.ca/rail/gscale/sd60f/291.jpg” alt="" width=“640” height=“302”></p>
<p> </p>
<p>Now punch 3/16" holes against one of the long sides which will be the bottom side. Keep them about 1/32" in from the sides. As you can see below, it doesn’t matter if you break through.</p>
<p> </p>
<p><img src=“http://www.canadianrailroads.ca/rail/gscale/sd60f/292.jpg” alt="" width=“640” height=“430”></p>
<p> </p>
<p>Now cut the bottom corners as shown below. you can sand the front edge of the holes to soften them up a little.</p>
<p> </p>
<p><img src=“http://www.canadianrailroads.ca/rail/gscale/sd60f/293.jpg” alt="" width=“480” height=“361”></p>
<p> </p>
<p>Cut eight 1/16 x 1/8 x 3/16" pieces. Take four and mount them on the back of the above pieces centered and flush with the bottom. The 3/16" is the height, and the 1/8" is the width.</p>
<p> </p>
<p><img src=“http://www.canadianrailroads.ca/rail/gscale/sd60f/294.jpg” alt="" width=“640” height=“539”></p>
<p> </p>
<p>Flip the pieces around, and mount the remaining four pieces as shown below. The long (3/16") side faces front. Let it overhand the front enough to be noticeable.</p>
<p> </p>
<p><img src=“http://www.canadianrailroads.ca/rail/gscale/sd60f/295.jpg” alt="" width=“640” height=“133”></p>
<p> </p>
<p>Now 3 1/2" back from all four corners of your skirt, first mount the first 4 pieces you made at the top of this post. The 1/16" piece slides behind the skirt leaving the .03" piece below the skirt. Now take the above four pieces, and mount them on the bottoms keeping them centered as shown below.</p>
<p> </p>
<p><img src=“http://www.canadianrailroads.ca/rail/gscale/sd60f/296.jpg” alt="" width=“640” height=“192”></p>
<p> </p>
<p>Now on the rear engineer’s side, we’ll add some brake detail.</p>
<p>Take some 1/16" styrene and cut one 1/4 x 5/8" piece and one 5/8 x 3/16" piece. Trim the front bottom corner of the 1/4" piece as shown below.</p>
<p> </p>
<p><img src=“http://www.canadianrailroads.ca/rail/gscale/sd60f/297.jpg” alt="" width=“640” height=“510”></p>
<p> </p>
<p>Now mount the smaller piece on the back side flush with the rear and overhanging the top by 1/8".</p>
<p> </p>
<p><img src=“http://www.canadianrailroads.ca/rail/gscale/sd60f/298.jpg” alt="" width=“320” height=“457”></p>
<p> </p>
<p>Mount this against the rear side of the rear jack/lift point. 2" befind it, drill a 3/32" hole and mount a piece of 3/32" brass rod as shown below.</p>
<p> </p>
<p><img src=“http://www.canadianrailroads.ca/rail/gscale/sd60f/299.jpg” alt="" width=“640” height=“208”></p>
<p> </p>
<p>From the front side it should look like the photo below. The brass rod represents a pipe that the brake chain travels through into the rear of the locomotive. The brake wheel is hidden inside the locomotive.</p>
<p> </p>
<p><img src=“http://www.canadianrailroads.ca/rail/gscale/sd60f/300.jpg” alt="" width=“640” height=“245”></p>
<p> </p>
<p>If you want to add any additional detail, do it now. Once complete, paint the base, making sure not to paint the top where the tapered section will be attached.</p>
<p> </p>
<p><img src=“http://www.canadianrailroads.ca/rail/gscale/sd60f/301.jpg” alt="" width=“640” height=“314”></p>
<p> </p>
<p>Now we’re going to detail the fuel tank. We’ll start with the traction motor cables. For the cables, I used some aluminum craft (stringing) wire. It has some type of black coating, is cheap, and easy to work with. I used 14 guage, and 5/64" holes for mounting.</p>
<p>To start we’ll need ten pieces of .04 x .125" styrene cut 1/2" long. Mark for holes 1/16" in from the ends and 1/8" between holes.</p>
<p> </p>
<p><img src=“http://www.canadianrailroads.ca/rail/gscale/sd60f/302.jpg” alt="" width=“640” height=“253”></p>
<p> </p>
<p>On the engineer’s side of the fuel tank, drill 4 holes with 1/8" spacing 1" back from the front of the tank as shown below.</p>
<p> </p>
<p><img src=“http://www.canadianrailroads.ca/rail/gscale/sd60f/303.jpg” alt="" width=“640” height=“248”></p>
<p> </p>
<p>Take four 3" pieces of wire and feed them into three of your cable supports.</p>
<p> </p>
<p><img src=“http://www.canadianrailroads.ca/rail/gscale/sd60f/304.jpg” alt="" width=“872” height=“203”></p>
<p> </p>
<p>Now you’ll have to shape your cables as shown below and feed them into the holes you drilled in the fuel tank. Set all the spacing, and then glue in place. The styrene spacers do not have to sit the same. They just keep the cables neat and tidy. The tail end will be hidden by the air reservoir.</p>
<p> </p>
<p><img src=“http://www.canadianrailroads.ca/rail/gscale/sd60f/305.jpg” alt="" width=“640” height=“249”></p>
<p> </p>
<p>On the conductor’s side we’ll need four 10 1/2" pieces of wire. 3/4" will fold around each end of the fuel tank. Using your remaining seven cable supports/spacers, set it up as shown below. The area with no supports/spacers is hidden behind the air reservoir.</p>
<p> </p>
<p><img src=“http://www.canadianrailroads.ca/rail/gscale/sd60f/306.jpg” alt="" width=“640” height=“119”></p>
<p> </p>
<p>Glue it in place with the ends wrapped around the ends of the fuel tank as shown below.</p>
<p> </p>
<p><img src=“http://www.canadianrailroads.ca/rail/gscale/sd60f/307.jpg” alt="" width=“906” height=“279”></p>
<p> </p>
</div>
<p>Okay, now we’re going to add a couple access hatches. Hopefully you have a hole punch. Punch two 9/32" circles out of .03" styrene, and two 3/16" circles out of .01" styrene.</p>
<p> </p>
<p><img src=“http://www.canadianrailroads.ca/rail/gscale/sd60f/308.jpg” alt="" width=“320” height=“181”></p>
<p> </p>
<p>Glue the 3/16 on top of the 9/32 centered as shown below.</p>
<p> </p>
<p><img src=“http://www.canadianrailroads.ca/rail/gscale/sd60f/309.jpg” alt="" width=“320” height=“142”></p>
<p> </p>
<p>On the conductor’s side, glue one 1/2" behind the fuel fill pipe.</p>
<p> </p>
<p><img src=“http://www.canadianrailroads.ca/rail/gscale/sd60f/310.jpg” alt="" width=“480” height=“406”></p>
<p> </p>
<p>On the engineer’s side, glue one 1/4" from the rear of the fuel tank.</p>
<p> </p>
<p><img src=“http://www.canadianrailroads.ca/rail/gscale/sd60f/311.jpg” alt="" width=“320” height=“402”></p>
<div>
<p> </p>
<p>Now we have to add some venting (bleed pipe) details. We’ll need to start with two pieces of .125 x .25 styrene cut 3/8" long. (1/8 x 1/4 x 3/8) Cut these into a triangle as shown below.</p>
<p> </p>
<p><img src=“http://www.canadianrailroads.ca/rail/gscale/sd60f/312.jpg” alt="" width=“320” height=“230”></p>
<p> </p>
<p>Mount these at the front of the fuel tank on both sides. Set them back from the front by 1/16" and flush the tops with the top bend in the fuel tank.</p>
<p> </p>
<p><img src=“http://www.canadianrailroads.ca/rail/gscale/sd60f/313.jpg” alt="" width=“480” height=“272”></p>
<p> </p>
<p>For the pipe we’ll need two pieces of phone wire about 3/4" long. Strip about 1/16" of insulation from the ends.</p>
<p> </p>
<p><img src=“http://www.canadianrailroads.ca/rail/gscale/sd60f/314.jpg” alt="" width=“320” height=“186”></p>
<p> </p>
<p>Drill 1/32" holes as shown below. The two green holes are the same on both sides. The blue hole is on the engineer’s side only, and is 1/8" from the front and centered. The green hole on the side also sits back 1/8" and will be used later on. The hole on the filler pipe is straight into the side of the band you can see in the photo.</p>
<p>To shape your wire, make it drop from the filler pipe into a drip loop and then back up and into the tank.</p>
<p> </p>
<p><img src=“http://www.canadianrailroads.ca/rail/gscale/sd60f/315.jpg” alt="" width=“640” height=“412”></p>
<p> </p>
<p>On the conductor’s side, using some .03" styrene, cut a 3/16" square and apply it as shown by the green lines below. Center it between the sides and keep the same spacing at the front. On top of this and centered, add a piece of 1/8" styrene tube about 1/2" long. Make sure that it does not extend above the top of the fuel tank frame. It just needs to be tall enough to disappear behind the frame skirt when the fuel tank is mounted. Drill a 1/32" hole in the bottom, back of this tube for your wire. Apply your wire as shown below.</p>
<p> </p>
<p><img src=“http://www.canadianrailroads.ca/rail/gscale/sd60f/316.jpg” alt="" width=“640” height=“569”></p>
<p> </p>
</div>
<p>Now these locomotives use sight glasses for fuel gauges so we need to build a set. We’ll need two pieces of .04 x .125" styrene cut 1 1/2" long, and four pieces of .125 x .125" styrene, two cut 1/8" long and two cut 3/16" long.</p>
<p>The 1/8" pieces are squares. Drill a 1/16" hole through them as shown below.</p>
<p>Drill a 1/16" hole half way through the 3/16" pieces on a long side equally spaced at one end as shown below.</p>
<p> </p>
<p><img src=“http://www.canadianrailroads.ca/rail/gscale/sd60f/317.jpg” alt="" width=“640” height=“402”></p>
<p> </p>
<p>These will be mirrored. Mount the square pieces at the tops with the holes facing top to bottom. Mount the 3/16" pieces at the bottom with the holes facing up and to the rear. (lined up with the top holes.) Take some .015 x .1" styrene, cut two pieces 1 1/2" long and mount them on the insides as shown below. (red arrows)</p>
<p> </p>
<p><img src=“http://www.canadianrailroads.ca/rail/gscale/sd60f/318.jpg” alt="" width=“480” height=“462”></p>
<p> </p>
<p>Now roll them towards each other onto their sides. We’ll need two more pieces of .015 x .1" styrene cut 1 1/4" long. These mount on the fronts (the thick piece is the rear.) as shown by the red arrows. keep them below the tops as shown by the green arrows.</p>
<p> </p>
<p><img src=“http://www.canadianrailroads.ca/rail/gscale/sd60f/319.jpg” alt="" width=“320” height=“501”></p>
<p> </p>
<p> Drill 1/32" holes into the top backs. Only drill through the back piece. Make sure you don’t drill into the 1/8" square at the top.</p>
<p> </p>
<p><img src=“http://www.canadianrailroads.ca/rail/gscale/sd60f/320.jpg” alt="" width=“480” height=“369”></p>
<p> </p>
<p>We’re going to mount these on each side of the front of the fuel tank. Keep them flush to the bottom and the insides line up with the bend in the top of the tank as shown by the green lines below.</p>
<p> </p>
<p><img src=“http://www.canadianrailroads.ca/rail/gscale/sd60f/321.jpg” alt="" width=“640” height=“270”></p>
<p> </p>
<p>Strip some phone wire and run a bleed line as shown below.</p>
<p> </p>
<p><img src=“http://www.canadianrailroads.ca/rail/gscale/sd60f/322.jpg” alt="" width=“640” height=“645”></p>
<p><img src=“http://www.canadianrailroads.ca/rail/gscale/sd60f/323.jpg” alt="" width=“640” height=“531”></p>
<p> </p>
<div>
<p>Okay, now we need a pollutant retention tank.</p>
<p>Cut two pieces of 1/8" and one piece of 1/16" 3 1/4 x 1" and glue them together. The edges will be clad so they don’t need to be a perfect match. Mark a side as the top rear and round it slightly with sandpaper.</p>
<p> </p>
<p><img src=“http://www.canadianrailroads.ca/rail/gscale/sd60f/324.jpg” alt="" width=“640” height=“289”></p>
<p> </p>
<p>Make a line 1/4" from the bottom, and mark the corners at 1/4" for cuts. make a 45 degree cut on the left side, and cut out the entire square on the right side.</p>
<p> </p>
<p><img src=“http://www.canadianrailroads.ca/rail/gscale/sd60f/325.jpg” alt="" width=“640” height=“232”></p>
<p><img src=“http://www.canadianrailroads.ca/rail/gscale/sd60f/326.jpg” alt="" width=“640” height=“274”></p>
<p> </p>
<p>Use some scraps to make some drains/plugs in the square cut. I drilled to take the two pieces of brass bent at 90 degrees.</p>
<p> </p>
<p><img src=“http://www.canadianrailroads.ca/rail/gscale/sd60f/327.jpg” alt="" width=“320” height=“593”></p>
<p> </p>
<p>Take some .01" styrene and clad the sides. On the angled side, use one piece to cover the red and green side. On the opposite side only clad the green side. </p>
<p> </p>
<p><img src=“http://www.canadianrailroads.ca/rail/gscale/sd60f/328.jpg” alt="" width=“640” height=“449”></p>
<p><img src=“http://www.canadianrailroads.ca/rail/gscale/sd60f/329.jpg” alt="" width=“187” height=“393”></p>
<p> </p>
<p>Now cut a piece to cover the top and rear. Cut 1/4" off of both bottom corners at 45 degrees. Carefully fold it. Cut it a little big so that there is a rim around the edges.</p>
<p> </p>
<p><img src=“http://www.canadianrailroads.ca/rail/gscale/sd60f/330.jpg” alt="" width=“640” height=“456”></p>
<p> </p>
</div>
<p>Now we’ll want to center this on the rear of the fuel tank and add some .06" angle on the sides and top as mounting brackets.</p>
<p> </p>
<p><img src=“http://www.canadianrailroads.ca/rail/gscale/sd60f/331.jpg” alt="" width=“640” height=“265”></p>
<p><img src=“http://www.canadianrailroads.ca/rail/gscale/sd60f/332.jpg” alt="" width=“640” height=“388”></p>
<p><img src=“http://www.canadianrailroads.ca/rail/gscale/sd60f/333.jpg” alt="" width=“640” height=“131”></p>
<p> </p>
<p>Here’s a side shot that shows how the detail looks at the bottom.</p>
<p> </p>
<p><img src=“http://www.canadianrailroads.ca/rail/gscale/sd60f/334.jpg” alt="" width=“320” height=“501”></p>
<p> </p>
<p>One last detail to add before painting the fuel tank. I think it’s the drain for dumping the water, but that’s just a guess.</p>
<p>We’ll need a piece of .125 x .25" styrene cut 2 1/2" long. Drill a hole centered at one end and add a small piece of 1/16" brass rod.</p>
<p> </p>
<p><img src=“http://www.canadianrailroads.ca/rail/gscale/sd60f/335.jpg” alt="" width=“640” height=“189”></p>
<p> </p>
<p>Now we’ll need a piece of 1/8" styrene tube cut 1 1/8" long. Place over the brass rod and glue in place.</p>
<p> </p>
<p><img src=“http://www.canadianrailroads.ca/rail/gscale/sd60f/336.jpg” alt="" width=“640” height=“329”></p>
<p> </p>
<p>Now take a piece of 1/8" styrene cut 5/8 x 7/8" and apply as shown be the red arrow below. The long edge runs left to right.</p>
<p> </p>
<p><img src=“http://www.canadianrailroads.ca/rail/gscale/sd60f/337.jpg” alt="" width=“640” height=“324”></p>
<p> </p>
<p>Flip this over. Now take a piece of 1/8" styrene cut 1/4 x 7/8" and apply as shown be the red arrow below.</p>
<p> </p>
<p><img src=“http://www.canadianrailroads.ca/rail/gscale/sd60f/338.jpg” alt="" width=“480” height=“535”></p>
<p> </p>
<p>Mount this directly above the retention tank. Make it flush with the side of the fuel tank. If your tube hangs down lower then the bottom of the fuel tank, you will have to trim it flush.</p>
<p> </p>
<p><img src=“http://www.canadianrailroads.ca/rail/gscale/sd60f/339.jpg” alt="" width=“480” height=“645”></p>
<p> </p>
<div>
<p>Once your paint is dry, cut two pieces of clear 1/16" rod 1 3/8" long and insert from the top into your sight glass assemblies.</p>
<p> </p>
<p><img src=“http://www.canadianrailroads.ca/rail/gscale/sd60f/340.jpg” alt="" width=“480” height=“207”></p>
<p> </p>
<p>The flash makes it look really blue, but in normal light it looks pretty good. (bottom photo is no flash)</p>
<p> </p>
<p><img src=“http://www.canadianrailroads.ca/rail/gscale/sd60f/341.jpg” alt="" width=“654” height=“603”></p>
<p> </p>
<p>I bought the stuff with a blue tinge, but there was also a yellow tinge available and I’m thinking it may have been a better choice. I think I’m going to make some better looking fuel caps, but that will have to wait for a future update.</p>
<p>You can now add your weight and mount your fuel tank to your base. Next update we’ll start on the tapered section.</p>
<p> </p>
<p><img src=“http://www.canadianrailroads.ca/rail/gscale/sd60f/251.jpg” alt="" width=“640” height=“427”></p>
</div>
<p> </p>
<p>I should have an update posted in the next few days. Here’s a sneak peek at the taper. I’ve discovered that there are minor variations to the tapered section on the conductor’s side. I copied unit 5510 which has a very defined joint at the bend. Unit 5538 in the lower part of the photo has no joint. Another unit has the joint at the edge of the vent frame.</p>
<p> </p>
<p><img src=“http://www.canadianrailroads.ca/rail/gscale/sd60f/342.jpg” alt="" width=“640” height=“815”></p>
<p> </p>
<p>Today we’re going to start on the taper. This section is not that hard to build. The difficulty will be making the instructions straight forward.</p>
<p>For the base, we’ll need a piece of 1/8" styrene cut 5 3/4 x 3 7/8". This will sit on top of the aluminum angles. Once cut, the front should be flush with the outsides of the aluminum angles. On the front, mark 7/16" in from each side.</p>
<p>Engineer’s side-Mark a line from the 7/16" mark to the back corner and cut off.</p>
<p>Conductor’s side - From the 7/16" mark, draw a line 1 3/16" keeping it 7/16" from the edge. Connect the end of the line to the bottom corner and cut off.</p>
<p> </p>
<p><img src=“http://www.canadianrailroads.ca/rail/gscale/sd60f/343.jpg” alt="" width=“640” height=“915”></p>
<p><img src=“http://www.canadianrailroads.ca/rail/gscale/sd60f/344.jpg” alt="" width=“480” height=“711”></p>
<p> </p>
<p>Now for the front of the conductor’s side, Take some 1/16" styrene and cut a piece 1 1/16 x 3 5/8". Cut a second piece 1 1/8 x 3 5/8".</p>
<p> </p>
<p><img src=“http://www.canadianrailroads.ca/rail/gscale/sd60f/345.jpg” alt="" width=“480” height=“604”></p>
<p> </p>
<p>Mount the narrow piece on top flush with the right side. The left stepped side is the front.</p>
<p> </p>
<p><img src=“http://www.canadianrailroads.ca/rail/gscale/sd60f/346.jpg” alt="" width=“320” height=“862”></p>
<p> </p>
<p>Now take some 1/8" styrene and cut two pieces as shown below. Notice that the front and rears are different lengths, so the top cut is angled. The red cut on the shorter piece allows it to fit around the upper frame. The 3 5/8" sides are the fronts.</p>
<p> </p>
<p><img src=“http://www.canadianrailroads.ca/rail/gscale/sd60f/347.jpg” alt="" width=“640” height=“792”></p>
<p> </p>
<p>Now we need to make the vent cuts. On all three pieces, draw a line 2 1/2" from the bottoms. The #1 vents have 1/8" frames, so the cut will be 1/8" over the line. The #2 vents have 1/16" frames, so the cuts will be 1/16" over the line.</p>
<p> </p>
<p>Cut the #1 vents first. These are at the rear of both sides, and have 3/16" posts on each side.</p>
<p>Cut the #2 vents second 3/16" in front of the #1 vents. The only difference between the A and B vent is the shape of the front bottom corner. The front posts are 5/8" long.</p>
<p>Note - The posts heights will vary because of the angled top.</p>
<p> </p>
<p><img src=“http://www.canadianrailroads.ca/rail/gscale/sd60f/348.jpg” alt="" width=“640” height=“786”></p>
<p> </p>
<div>
<p>Now on the two angled pieces, sand the ends at 5 degrees for a good fit. Mount the short conductor side piece to your base first. It will sit against the aluminum angle. Make sure to keep everything square. Now you can mount the long conductor piece to the base and front piece.</p>
<p> </p>
<p><img src=“http://www.canadianrailroads.ca/rail/gscale/sd60f/349.jpg” alt="" width=“480” height=“358”></p>
<p> </p>
<p>Mount the engineer’s side last. The front will butt against the aluminum angle as shown below.</p>
<p> </p>
<p><img src=“http://www.canadianrailroads.ca/rail/gscale/sd60f/350.jpg” alt="" width=“640” height=“249”></p>
<p> </p>
</div>
<p>Once everything is dry, you’ll have to cut a piece out of the rear of the base to ensure that you can get at your fuel tank mount.</p>
<p> </p>
<p><img src=“http://www.canadianrailroads.ca/rail/gscale/sd60f/351.jpg” alt="" width=“640” height=“350”></p>
<p><img src=“http://www.canadianrailroads.ca/rail/gscale/sd60f/352.jpg” alt="" width=“640” height=“435”></p>
<p><img src=“http://www.canadianrailroads.ca/rail/gscale/sd60f/353.jpg” alt="" width=“640” height=“255”></p>
<p> </p>
<div>
<p>Now you can build the roof for your taper. Using 1/8" styrene cut one piece 2 1/2 x 5 3/4" and two 15/16 x 5 3/4" pieces. Build a roof section just like you did in earlier posts.</p>
<p> </p>
<p><img src=“http://www.canadianrailroads.ca/rail/gscale/sd60f/354.jpg” alt="" width=“640” height=“630”></p>
<p><img src=“http://www.canadianrailroads.ca/rail/gscale/sd60f/082.jpg” alt="" width=“640” height=“461”></p>
<p> </p>
</div>
<div>
<p>Now for the front bracing which will support the roof, we’ll need a 1/8" piece of styrene cut 1 1/4 x 3". cut a 1/4" square out of the top corners, and sand the engineer’s side at 5 degrees.</p>
<p> </p>
<p><img src=“http://www.canadianrailroads.ca/rail/gscale/sd60f/355.jpg” alt="" width=“640” height=“337”></p>
<p> </p>
<p>Mount this at the front of the taper. If you set it against the cab, you can use the cab to set the correct height. Line it up with the bottom of the cab roof.</p>
<p> </p>
<p><img src=“http://www.canadianrailroads.ca/rail/gscale/sd60f/356.jpg” alt="" width=“640” height=“279”></p>
</div>
<p> </p>
<div>
<p>Now we’ll build one for the rear. We’ll need a 1/8" piece of styrene cut 2 1/4 x 3 7/8". Sand both sides of this piece at 5 degrees. Cut a piece out of the top corners 3/8 x 11/16" as shown below.</p>
<p> </p>
<p><img src=“http://www.canadianrailroads.ca/rail/gscale/sd60f/357.jpg” alt="" width=“640” height=“332”></p>
<p> </p>
<p>Set and glue in place. Cut a hole out of the top center to allow the smoke unit to slide in. You can measure or trace the smoke unit. The chimney stays outside of the taper, so do not include it when making your measurements.</p>
<p>The photo shows the cab being used to set the height just as you did for the front.</p>
<p> </p>
<p><img src=“http://www.canadianrailroads.ca/rail/gscale/sd60f/358.jpg” alt="" width=“640” height=“358”></p>
<p> </p>
</div>
<p>Now take some 1/8" styrene and cut two 1" right triangles. Also cut two pieces 1/4 x 1".</p>
<p> </p>
<p><img src=“http://www.canadianrailroads.ca/rail/gscale/sd60f/359.jpg” alt="" width=“480” height=“316”></p>
<p> </p>
<p>Mark the bottoms of the screw brackets as shown by the red arrow, and mount a support on each side as shown.</p>
<p>Note-These brackets are on the outside of the rear of the taper. You can’t really tell in the photos.</p>
<p> </p>
<p><img src=“http://www.canadianrailroads.ca/rail/gscale/sd60f/360.jpg” alt="" width=“640” height=“551”></p>
<p> </p>
<p>Now you can adjust your smoke unit to line up with the exhaust vent on the middle section, and screw it in place.</p>
<p> </p>
<p><img src=“http://www.canadianrailroads.ca/rail/gscale/sd60f/361.jpg” alt="" width=“480” height=“464”></p>
<p> </p>
<p>Now we’ll add some frames to the vents. For the rear vents, I used .015 x .1" styrene. Try not to show a joint at the corners as these frames appear to be one piece.</p>
<p> </p>
<p><img src=“http://www.canadianrailroads.ca/rail/gscale/sd60f/362.jpg” alt="" width=“640” height=“260”></p>
<p> </p>
<p>For the front vents, I used .02 x .06" styrene. For this frame, cut the corners at 45 degrees.</p>
<p> </p>
<p><img src=“http://www.canadianrailroads.ca/rail/gscale/sd60f/363.jpg” alt="" width=“640” height=“259”></p>
<p> </p>
<p>I’ve only shown one side, but make sure you do both.</p>
<div>
<p>Now we need to drill holes in the front frames for 3/64" wire. The first wire is 1/8" over the frame, and then the spacing is 1/4".</p>
<p> </p>
<p><img src=“http://www.canadianrailroads.ca/rail/gscale/sd60f/364.jpg” alt="" width=“640” height=“265”></p>
<p><img src=“http://www.canadianrailroads.ca/rail/gscale/sd60f/365.jpg” alt="" width=“640” height=“250”></p>
<p> </p>
<p>Now you can cut your wires and insert them into one side of the frame. I used piano wire for the added strength, but it’s a lot harder to work with then brass, so it’s up to you as to which you use.</p>
<p> </p>
<p><img src=“http://www.canadianrailroads.ca/rail/gscale/sd60f/366.jpg” alt="" width=“640” height=“250”></p>
<p><img src=“http://www.canadianrailroads.ca/rail/gscale/sd60f/367.jpg” alt="" width=“640” height=“286”></p>
<p> </p>
</div>
<div>
<p>Now we’ll add the vent fins. We’ll use .02 x .25" styrene. Cut twenty three 1" pieces.</p>
<p> </p>
<p><img src=“http://www.canadianrailroads.ca/rail/gscale/sd60f/368.jpg” alt="" width=“640” height=“323”></p>
<p> </p>
<p>Draw a center line on every piece, and drill 1/32" holes as shown below. Keep the holes in front of your center line.</p>
<p> </p>
<p><img src=“http://www.canadianrailroads.ca/rail/gscale/sd60f/369.jpg” alt="" width=“480” height=“481”></p>
<p> </p>
<p>On the conductor’s side, you’ll need two additional 3/4" pieces. They will be short 1 hole as shown below. You still have 1/8" spacing on each end.</p>
<p> </p>
<p><img src=“http://www.canadianrailroads.ca/rail/gscale/sd60f/370.jpg” alt="" width=“320” height=“303”></p>
<p> </p>
<p>The above two pieces are placed first as shown below. Use a 1/8" piece of styrene to set your spacing and keep everything straight.</p>
<p> </p>
<p><img src=“http://www.canadianrailroads.ca/rail/gscale/sd60f/371.jpg” alt="" width=“480” height=“398”></p>
<p> </p>
<p>Add the 1" pieces, leaving them bunched up until you bend your wires and insert into the frame.</p>
<p> </p>
<p><img src=“http://www.canadianrailroads.ca/rail/gscale/sd60f/372.jpg” alt="" width=“612” height=“388”></p>
<p> </p>
<p>Once your wires are in place, adjust all of your spacing and then glue the bottoms in place.</p>
<p> </p>
<p><img src=“http://www.canadianrailroads.ca/rail/gscale/sd60f/373.jpg” alt="" width=“640” height=“348”></p>
<p> </p>
<p>Prototype note- The real units have four additional long fins for a total of sixteen. If you have some 0.1" styrene, you could use that to set your spacing and add the four additional fins. As I didn’t have 0.1", I used 0.125" resulting in the fin reduction.</p>
</div>
<p>Now do your engineer side the same way, starting with three shorter pieces as shown below, followed by eleven 1 " pieces. Once happy with the spacing, glue the bottoms into place.</p>
<p> </p>
<p><img src=“http://www.canadianrailroads.ca/rail/gscale/sd60f/374.jpg” alt="" width=“640” height=“297”></p>
<p> </p>
<p>Now take some sharp pointed scissors and trim the top fronts of all your vents. Take off about 1/8" at 45 degrees.</p>
<p> </p>
<p><img src=“http://www.canadianrailroads.ca/rail/gscale/sd60f/376.jpg” alt="" width=“640” height=“254”></p>
<p> </p>
<p>Now cut two pieces of .015 x .1" styrene 2 1/4" long.</p>
<p> </p>
<p><img src=“http://www.canadianrailroads.ca/rail/gscale/sd60f/375.jpg” alt="" width=“640” height=“176”></p>
<p> </p>
<p>Make sure all of your top spacing is good, and then apply the above strips to the top rear of each vent. If they make contact with the frame, that will add extra strength, but if they don’t line up, don’t worry about it. Glue everything good.</p>
<p> </p>
<p><img src=“http://www.canadianrailroads.ca/rail/gscale/sd60f/377.jpg” alt="" width=“480” height=“147”></p>
<p> </p>
<p>Now glue the tapered section to the base. It is the only piece that is permanently attached to the base. On the engineer’s side, it butts up against the end of the upper frame as shown below.</p>
<p> </p>
<p><img src=“http://www.canadianrailroads.ca/rail/gscale/sd60f/378.jpg” alt="" width=“640” height=“359”></p>
<p> </p>
<p>On the conductor’s side, the taper fits over the upper frame. It butts against the spot where the upper frame drops 1/16". Notice how the upper frame does not line up with the taper. It ends 1/4" from the end of the taper.</p>
<p> </p>
<p><img src=“http://www.canadianrailroads.ca/rail/gscale/sd60f/379.jpg” alt="" width=“640” height=“308”></p>
<p> </p>
<p>Now cut a piece of .015 x .1" styrene 5 3/4" long.</p>
<p> </p>
<p><img src=“http://www.canadianrailroads.ca/rail/gscale/sd60f/380.jpg” alt="" width=“640” height=“295”></p>
<p> </p>
<p>On the engineer’s side, glue this piece of trim at the base of the taper as shown below.</p>
<p> </p>
<p><img src=“http://www.canadianrailroads.ca/rail/gscale/sd60f/381.jpg” alt="" width=“640” height=“113”></p>
<p> </p>
<p>Now take some .125 x .25" styrene and cut two 3 1/4" pieces.</p>
<p> </p>
<p><img src=“http://www.canadianrailroads.ca/rail/gscale/sd60f/382.jpg” alt="" width=“640” height=“153”></p>
<p> </p>
<p>These get mounted on each side of the rear of the taper. The center section will slide over these pieces. They will keep everything straight, and help hold the center section properly in place.</p>
<p>They are mounted 1/8" in from the outer edge of the locomotive and sit behind the upper frame.</p>
<p> </p>
<p><img src=“http://www.canadianrailroads.ca/rail/gscale/sd60f/383.jpg” alt="" width=“480” height=“724”></p>
<p><img src=“http://www.canadianrailroads.ca/rail/gscale/sd60f/384.jpg” alt="" width=“640” height=“540”></p>
<p> </p>
<div>
<p>Now we need to add some detail to the conductor’s side. We’ll need some 1/8" styrene. Cut two pieces 1 1/16 x 2". A third piece will be needed for the center. You can use a piece of scrap that is a similar size, like I did, or just cut a third piece the same size.</p>
<p> </p>
<p><img src=“http://www.canadianrailroads.ca/rail/gscale/sd60f/385.jpg” alt="" width=“360” height=“562”></p>
<p> </p>
<p>The front piece needs a 3/4 x 3/8" piece cut out of the bottom right, leaving a small 1/4" tab to the left.</p>
<p> </p>
<p><img src=“http://www.canadianrailroads.ca/rail/gscale/sd60f/386.jpg” alt="" width=“480” height=“855”></p>
<p> </p>
<p>You should now have three pieces as shown below.</p>
<p> </p>
<p><img src=“http://www.canadianrailroads.ca/rail/gscale/sd60f/387.jpg” alt="" width=“480” height=“307”></p>
<p> </p>
<p>Glue these three pieces together.</p>
<p> </p>
<p><img src=“http://www.canadianrailroads.ca/rail/gscale/sd60f/388.jpg” alt="" width=“480” height=“376”></p>
<p><img src=“http://www.canadianrailroads.ca/rail/gscale/sd60f/389.jpg” alt="" width=“360” height=“704”></p>
<p> </p>
<p>Now take some .01" styrene and clad the right end and top.</p>
<p> </p>
<p><img src=“http://www.canadianrailroads.ca/rail/gscale/sd60f/390.jpg” alt="" width=“640” height=“488”></p>
<p> </p>
</div>
<p>Take some 1/16" brass rod and make two handles about 1/4" tall and with 3/16" spacing.</p>
<p> </p>
<p><img src=“http://www.canadianrailroads.ca/rail/gscale/sd60f/391.jpg” alt="" width=“480” height=“388”></p>
<p> </p>
<p>Mount these 1/8" in from each side of the top. Take some .02 x .06" styrene and run some trim along the top and right side as shown below.</p>
<p> </p>
<p><img src=“http://www.canadianrailroads.ca/rail/gscale/sd60f/392.jpg” alt="" width=“360” height=“440”></p>
<p> </p>
<p>Now take some .04" hex (or rod) and cut ten bolt heads. Apply five to the front and back of the top as shown below.</p>
<p> </p>
<p><img src=“http://www.canadianrailroads.ca/rail/gscale/sd60f/393.jpg” alt="" width=“480” height=“240”></p>
<p> </p>
<div>
<p>Take some .01" styrene and cut a piece 1 15/16 x 1 7/16".</p>
<p> </p>
<p><img src=“http://www.canadianrailroads.ca/rail/gscale/sd60f/394.jpg” alt="" width=“640” height=“438”></p>
<p> </p>
<p>Draw lines 1/16" in from the top and right. Mark evenly spaced 8 bolt locations along the top and 6 along the right side. Take a tack, or something with a fairly fine point and gently press into each bolt point. You want to leave a mark, but you do not want to poke a hole.</p>
<p> </p>
<p><img src=“http://www.canadianrailroads.ca/rail/gscale/sd60f/395.jpg” alt="" width=“640” height=“421”></p>
<p> </p>
<p>Flip over, and draw lines 1/16" in from the top and left. (bolt sides)</p>
<p> </p>
<p><img src=“http://www.canadianrailroads.ca/rail/gscale/sd60f/396.jpg” alt="" width=“640” height=“434”></p>
</div>
<p> </p>
<div>
<p>Now take some .03" styrene and cut a piece 3/16 x 1 3/8". Mount this just inside the line on the left side leaving the 1/16" with the bolt marks hanging out.</p>
<p> </p>
<p><img src=“http://www.canadianrailroads.ca/rail/gscale/sd60f/397.jpg” alt="" width=“640” height=“401”></p>
<p> </p>
<p>Now cut two more lengths of .03" styrene 3/16 x 1 3/4". Cut these lengthwise into triangles.</p>
<p> </p>
<p><img src=“http://www.canadianrailroads.ca/rail/gscale/sd60f/398.jpg” alt="" width=“640” height=“399”></p>
<p> </p>
<p>Mount one 1/16" from the top, one flush with the bottom, and the remaining two evenly spaced in the center.</p>
<p> </p>
<p><img src=“http://www.canadianrailroads.ca/rail/gscale/sd60f/399.jpg” alt="" width=“640” height=“494”></p>
<p> </p>
<p>Cut a piece of .01" styrene 1 13/16 x 1 3/8". Mark and poke bolts on the bottom and left the same way you did above. Mark seven on the bottom and six on the side. Notice the bolt on the bottom right sits about 1/8" from the edge. (Ignore the center line. This is a scrap showing some old marks.)</p>
<p> </p>
<p><img src=“http://www.canadianrailroads.ca/rail/gscale/sd60f/400.jpg” alt="" width=“480” height=“475”></p>
<p> </p>
<p>Flip this piece over and mount it on top of your framework. Flush it to the left side which will leave a bit of a gap at the right.</p>
<p> </p>
<p><img src=“http://www.canadianrailroads.ca/rail/gscale/sd60f/401.jpg” alt="" width=“640” height=“487”></p>
<p> </p>
<p>Now take some .03" styrene and cut a triangle 3/16 x 1 7/8". Mount it on the bottom extended out the left side flush with the bolted frame.</p>
<p> </p>
<p><img src=“http://www.canadianrailroads.ca/rail/gscale/sd60f/402.jpg” alt="" width=“640” height=“440”></p>
<p> </p>
<p>You can see by the red arrows below how it extends out to the edge of the frame.</p>
<p> </p>
<p><img src=“http://www.canadianrailroads.ca/rail/gscale/sd60f/403.jpg” alt="" width=“275” height=“560”></p>
<p> </p>
<div>
<p>Okay you should have two fancy pieces as you see below. These mount on both sides of the taper on the conductor’s side.</p>
<p> </p>
<p><img src=“http://www.canadianrailroads.ca/rail/gscale/sd60f/404.jpg” alt="" width=“640” height=“399”></p>
<p> </p>
<p>The front piece mounts on the red x below. It fits over and in front of the frame and should be flush with the front. You can draw a line with a straight edge to help line it up.</p>
<p> </p>
<p><img src=“http://www.canadianrailroads.ca/rail/gscale/sd60f/405.jpg” alt="" width=“640” height=“483”></p>
<p> </p>
<p>The rear piece sits on top (red arrow) of the frame flush with the rear of the taper.</p>
<p> </p>
<p><img src=“http://www.canadianrailroads.ca/rail/gscale/sd60f/406.jpg” alt="" width=“594” height=“445”></p>
<p> </p>
<p>Cut a piece of 1/8" styrene 3/8 x 2 9/16".</p>
<p> </p>
<p><img src=“http://www.canadianrailroads.ca/rail/gscale/sd60f/407.jpg” alt="" width=“640” height=“130”></p>
<p> </p>
<p>Glue this into the bottom of the taper to match the height of the outside frame.</p>
<p> </p>
<p><img src=“http://www.canadianrailroads.ca/rail/gscale/sd60f/408.jpg” alt="" width=“640” height=“168”></p>
<p> </p>
<p>Now measure and cut a piece of .01" styrene to cover the center area as shown below.</p>
<p> </p>
<p><img src=“http://www.canadianrailroads.ca/rail/gscale/sd60f/409.jpg” alt="" width=“640” height=“323”></p>
<p> </p>
<p>Take some .02 x .06" strip and add three pieces of trim as shown below.</p>
<p> </p>
<p><img src=“http://www.canadianrailroads.ca/rail/gscale/sd60f/410.jpg” alt="" width=“640” height=“380”></p>
</div>
<p> </p>
</div>
<p>Take a piece of .01 x .04" styrene and run one more piece of trim as shown below.</p>
<p> </p>
<p><img src=“http://www.canadianrailroads.ca/rail/gscale/sd60f/411.jpg” alt="" width=“480” height=“685”></p>
<p> </p>
<p>Now from the front edge of the rear vent draw a line down to the bottom of the taper.</p>
<p> </p>
<p><img src=“http://www.canadianrailroads.ca/rail/gscale/sd60f/412.jpg” alt="" width=“640” height=“313”></p>
<p> </p>
<p>Behind this line drill three 1/16" holes with 1/16" spacing.</p>
<p> </p>
<p><img src=“http://www.canadianrailroads.ca/rail/gscale/sd60f/413.jpg” alt="" width=“480” height=“562”></p>
<p> </p>
<p>Cut some 1/16" brass tube and insert in the holes. I placed them over a backwards 1/32" drill bit in my pin vice to insert them.</p>
<p> </p>
<p><img src=“http://www.canadianrailroads.ca/rail/gscale/sd60f/414.jpg” alt="" width=“640” height=“180”></p>
<p><img src=“http://www.canadianrailroads.ca/rail/gscale/sd60f/415.jpg” alt="" width=“640” height=“235”></p>
<p><img src=“http://www.canadianrailroads.ca/rail/gscale/sd60f/416.jpg” alt="" width=“480” height=“453”></p>
<p> </p>
<p>Keep them protruding just enough to look like a rim around the holes.</p>
<p> </p>
<p><img src=“http://www.canadianrailroads.ca/rail/gscale/sd60f/417.jpg” alt="" width=“480” height=“301”></p>
<p> </p>
<p>I’ll leave you with a teaser photo.</p>
<p> </p>
<p><img src=“http://www.canadianrailroads.ca/rail/gscale/sd60f/418.jpg” alt="" width=“640” height=“453”></p>
<p> </p>
<p>Okay, let’s see if we can get the taper complete. We’ll start with 4 pieces of .02 x .25" styrene cut 2 1/2" long.</p>
<p> </p>
<p><img src=“http://www.canadianrailroads.ca/rail/gscale/sd60f/421.jpg” alt="" width=“640” height=“346”></p>
<p> </p>
<p>Divide them lengthwise into 3 sections measuring 1/16" | 1/8" | 1/16". On the fronts, mark 1/4" in from each end and cut off the corners to the first 1/8" marks.</p>
<p> </p>
<p><img src=“http://www.canadianrailroads.ca/rail/gscale/sd60f/422.jpg” alt="" width=“640” height=“217”></p>
<p> </p>
<p>Draw a line connecting the rear 1/8" marks.</p>
<p> </p>
<p><img src=“http://www.canadianrailroads.ca/rail/gscale/sd60f/423.jpg” alt="" width=“640” height=“155”></p>
<p> </p>
<p>Mount one in the bottoms of each of the two rear vents. These pieces overhang by 1/8", so the cut off corners end up flush with the fronts of the frames.</p>
<p> </p>
<p><img src=“http://www.canadianrailroads.ca/rail/gscale/sd60f/424.jpg” alt="" width=“640” height=“164”></p>
<p> </p>
<p>Take some 1/16" styrene and cut two 13/16 x 2 1/4" pieces.</p>
<p> </p>
<p><img src=“http://www.canadianrailroads.ca/rail/gscale/sd60f/425.jpg” alt="" width=“640” height=“468”></p>
<p> </p>
<p>Take your two remaining pieces from the previous step, and mount the above pieces centered and in front of the 1/8" lines you drew.</p>
<p> </p>
<p><img src=“http://www.canadianrailroads.ca/rail/gscale/sd60f/426.jpg” alt="" width=“640” height=“176”></p>
<p><img src=“http://www.canadianrailroads.ca/rail/gscale/sd60f/427.jpg” alt="" width=“320” height=“463”></p>
<p> </p>
<p>Now flip these over and mount one on each side as shown below. The tops will be flush with the outside of the frames just like the bottom, and the bottoms attach just like the tops in front of the 1/8" lines.</p>
<p> </p>
<p><img src=“http://www.canadianrailroads.ca/rail/gscale/sd60f/428.jpg” alt="" width=“640” height=“240”></p>
<p> </p>
<p>Now you’ll need a piece on each side to fill the top gaps. They should be around 1/8" on the one end to 1/32" at the other. Mount these at the very back of the tops.</p>
<p> </p>
<p><img src=“http://www.canadianrailroads.ca/rail/gscale/sd60f/429.jpg” alt="" width=“640” height=“261”></p>
<p><img src=“http://www.canadianrailroads.ca/rail/gscale/sd60f/430.jpg” alt="" width=“640” height=“129”></p>
<p><img src=“http://www.canadianrailroads.ca/rail/gscale/sd60f/431.jpg” alt="" width=“640” height=“282”></p>
<p> </p>
<p>Now the vents you took off of the SD45 should fit snugly between the top and bottom frames. The tabs will go through the holes at each side, but the pinch of the frame should be enough to hold them. You can permanently secure them if you want to, but I have kept mine removable. You can test fit now, but keep them off for now to facilitate painting.</p>
<p>Now on the inside of the front vents, we need something to keep the birds out, or I guess bugs in G scale <img src=“http://www.largescalecentral.com/externals/tinymce/plugins/emoticons/img/smiley-tongue-out.gif” alt=""> I purchased some decorative ribbon called tulle from the craft store for this. I cut a chunk for each side, and glued into place. I glued a small piece of styrene on each side and the bottom to help it bond to the styrene below.</p>
<p> </p>
<p><img src=“http://www.canadianrailroads.ca/rail/gscale/sd60f/432.jpg” alt="" width=“640” height=“295”></p>
<p> </p>
<p>Now you can paint the taper and install the rear vents.</p>
<p> </p>
<p><img src=“http://www.canadianrailroads.ca/rail/gscale/sd60f/433.jpg” alt="" width=“640” height=“359”></p>
<p> </p>
<p>Now this is a good time to screw on the tail, and test fit the center. Sand if necessary so that the center fits into place. You want it snug, but not tight. If you need to sand, try to sand the taper and tail as shown by the green arrows. You don’t want to sand the middle section if possible as it will effect the gap between the sections.</p>
<p>When sanding, don’t grip the fuel tank too tightly or you may pop a joint like I did. <img src=“http://www.largescalecentral.com/externals/tinymce/plugins/emoticons/img/smiley-surprised.gif” alt=""></p>
<p> </p>
<p><img src=“http://www.canadianrailroads.ca/rail/gscale/sd60f/434.jpg” alt="" width=“640” height=“455”></p>
<p> </p>
<p>Now we’re going to move to the taper roof detail. Start with a 1/16" piece cut 2 3/4 x 2 5/8".</p>
<p> </p>
<p><img src=“http://www.canadianrailroads.ca/rail/gscale/sd60f/435.jpg” alt="" width=“480” height=“413”></p>
<p> </p>
<p>Mark it up as shown below.</p>
<p> </p>
<p><img src=“http://www.canadianrailroads.ca/rail/gscale/sd60f/436.jpg” alt="" width=“640” height=“613”></p>
<p> </p>
<p>Now we need 2 pieces of 1/8" styrene cut 1 7/8 x 2 3/8". Glue them together, and sand the long edges at 45 degrees to a sharp point. If the ends are rough, you can clad them with some .01" styrene, or sand and fill.</p>
<p> </p>
<p><img src=“http://www.canadianrailroads.ca/rail/gscale/sd60f/437.jpg” alt="" width=“640” height=“460”></p>
<p> </p>
<p>Mount this on top of the 1/16" piece between the lines you drew.</p>
<p> </p>
<p><img src=“http://www.canadianrailroads.ca/rail/gscale/sd60f/438.jpg” alt="" width=“640” height=“516”></p>
<p> </p>
<p>Mount this at the rear of the taper roof, 1/4" gap to the rear and 1/8" gap to the front. Leave a 1/32" gap at the rear of the roof.</p>
<p> </p>
<p><img src=“http://www.canadianrailroads.ca/rail/gscale/sd60f/439.jpg” alt="" width=“640” height=“453”></p>
<p> </p>
<p>Let’s see if we can complete the taper roof. We’ll need a piece of .04 x .25" styrene cut 1/4" long. (square)</p>
<p> </p>
<p><img src=“http://www.canadianrailroads.ca/rail/gscale/sd60f/440.jpg” alt="" width=“160” height=“138”></p>
<p> </p>
<p>Cut off the right top corner 1/16" from the top left and 1/32" from the bottom right. Drill a 1/16" hole about 1/16" below the top, and centered between the two sides.</p>
<p> </p>
<p><img src=“http://www.canadianrailroads.ca/rail/gscale/sd60f/441.jpg” alt="" width=“240” height=“211”></p>
<p> </p>
<p>Mount this at the center rear as shown below.</p>
<p> </p>
<p><img src=“http://www.canadianrailroads.ca/rail/gscale/sd60f/442.jpg” alt="" width=“480” height=“494”></p>
<p> </p>
<p>Now let’s go fishing. we’ll need a couple of small fish hooks. You want the hook eye to be about 1/16". Cut off the eyes with about a 1/4" length.</p>
<p> </p>
<p><img src=“http://www.canadianrailroads.ca/rail/gscale/sd60f/443.jpg” alt="" width=“480” height=“305”></p>
<p> </p>
<p>These go on each side of the front of the panel. Keep them 1/4" back from the front of the raised center, and 1/16" from the 45 degree slope. The hole size will depend on your hook, so you’ll have to figure out what size to drill.</p>
<p> </p>
<p><img src=“http://www.canadianrailroads.ca/rail/gscale/sd60f/444.jpg” alt="" width=“360” height=“494”></p>
<p> </p>
<p>Insert your hooks. You will probably need to use some pliers, and mine took a bit of force. You will not hurt the hooks, but be careful not to slip and damage your styrene.</p>
<p>Optional - I added a base to the lift rings. I punched a 3/32" circle out of .03" styrene, drilled it, and applied to the hook before inserting them into the roof.</p>
<p> </p>
<p><img src=“http://www.canadianrailroads.ca/rail/gscale/sd60f/445.jpg” alt="" width=“480” height=“338”></p>
<p> </p>
<p>Now we need a small vent. We’ll build the frame with 3/64" angle. Cut four pieces with an inside length of 7/16" as shown below. All corners are cut at 45 degrees.</p>
<p> </p>
<p><img src=“http://www.canadianrailroads.ca/rail/gscale/sd60f/446.jpg” alt="" width=“480” height=“470”></p>
<p> </p>
<p>I glued these pieces onto a metal straight edge. This helps you glue everything square.</p>
<p> </p>
<p><img src=“http://www.canadianrailroads.ca/rail/gscale/sd60f/447.jpg” alt="" width=“360” height=“313”></p>
<p> </p>
<p>Now for the grate we’ll use .025"rod. Cut eight 7/16" pieces. Place 7 into the frame, soak them with solvent and get them all evenly spaced using the blade of your x-acto knife. When you are happy with the spacing, glue the remaining piece across the top.</p>
<p> </p>
<p><img src=“http://www.canadianrailroads.ca/rail/gscale/sd60f/448.jpg” alt="" width=“360” height=“393”></p>
<p> </p>
<p>Let it dry a little, and then carefully cut it away from the straight edge.</p>
<p> </p>
<p><img src=“http://www.canadianrailroads.ca/rail/gscale/sd60f/449.jpg” alt="" width=“360” height=“337”></p>
<p> </p>
<p>Apply this on the top 1/2" from the front, and 1/8" from the right side. I wanted the grate running front to back, but after getting it all set in place, I discovered that my grate was running from side to side. Bad Shane. <img src=“http://www.largescalecentral.com/externals/tinymce/plugins/emoticons/img/smiley-surprised.gif” alt=""></p>
<p> </p>
<p><img src=“http://www.canadianrailroads.ca/rail/gscale/sd60f/450.jpg” alt="" width=“640” height=“417”></p>
<p> </p>
<div>
<p>Now for the dynamic brake fan housing, we’ll need two pieces of 1/8" styrene and one piece of 1/16" cut 2 3/8 x 2 5/8". I decided to use the USA trains SD70 DB fan.</p>
<p> </p>
<p><img src=“http://www.canadianrailroads.ca/rail/gscale/sd60f/451.jpg” alt="" width=“640” height=“574”></p>
<p> </p>
<p>Glue the two 1/8" pieces together, and mark the long (2 5/8") sides as front and rear. Mark a center point as shown below. Notice that the rear measurement is only 1 1/16". Sand the sides and front at 45 degrees to sharp points which will bring them down to 1 1/16" to match the rear. Glue this on top of the 1/16" piece.</p>
<p> </p>
<p><img src=“http://www.canadianrailroads.ca/rail/gscale/sd60f/452.jpg” alt="" width=“640” height=“507”></p>
<p> </p>
<p>Place this on the roof 1/32" in front of the other section and drill a guide hole through the housing and roof. (DO NOT glue to the roof) Notice the sides of these panels overhang the sides of the flat roof by about 1/32". This is correct.</p>
<p> </p>
<p><img src=“http://www.canadianrailroads.ca/rail/gscale/sd60f/453.jpg” alt="" width=“640” height=“426”></p>
<p> </p>
<p>Drill a 2" hole in the fan housing, and a 1 3/4" hole in the roof. Your DB fan has two clips on the bottom which need to be cut off to give it a flat bottom. (not shown)</p>
<p> </p>
<p><img src=“http://www.canadianrailroads.ca/rail/gscale/sd60f/454.jpg” alt="" width=“640” height=“600”></p>
<p> </p>
<p>You can now glue the housing into place on the roof. Remember to leave the 1/32" gap at the back.</p>
<p> </p>
<p><img src=“http://www.canadianrailroads.ca/rail/gscale/sd60f/455.jpg” alt="" width=“640” height=“337”></p>
<p> </p>
<p> Now carefully sand the outside edges of the roof to match the curves on the cab and middle section. Remember you just want enough for a defined curve, nothing drastic.</p>
</div>
<p>Now we need some lifting points for the fan housing. Take some .03 x .1" styrene and cut three 7/16" pieces. Drill a 1/16" hole in the center as shown below.</p>
<p> </p>
<p><img src=“http://www.canadianrailroads.ca/rail/gscale/sd60f/456.jpg” alt="" width=“480” height=“234”></p>
<p> </p>
<p>Now if you look at your DB fan, notice how it is divided into twelve sections. If you place the fan with a section centered at the front, secure the lift points at the front, and in the sections to each side of the rear as illustrated below.</p>
<p> </p>
<p><img src=“http://www.canadianrailroads.ca/rail/gscale/sd60f/457.jpg” alt="" width=“640” height=“472”></p>
<p><img src=“http://www.canadianrailroads.ca/rail/gscale/sd60f/458.jpg” alt="" width=“480” height=“301”></p>
<p> </p>
<div>
<p>Now we need to add four panels, and then the top of the roof is complete. All panels are .01" styrene. cut two 5/8 x 1 1/4" pieces and two 13/16 x 2 5/8" pieces. We’ll start with the two small pieces.</p>
<p> </p>
<p><img src=“http://www.canadianrailroads.ca/rail/gscale/sd60f/459.jpg” alt="" width=“480” height=“328”></p>
<p> </p>
<p>Mount these on the front corners. Leave the overhang until dry, and then fold and glue around the curved edge. Once dry cut off the excess.</p>
<p> </p>
<p><img src=“http://www.canadianrailroads.ca/rail/gscale/sd60f/460.jpg” alt="" width=“640” height=“227”></p>
<p> </p>
<p>Now the long pieces attach on each side of the rear. Before attaching, using a razor saw, cut a dividing line part way through at the center point. (green arrow) Use the same technique you used when making the side doors for the middle and tail.</p>
<p>Now mount them centered with the rear panel, and centered on the sloped side of the roof. (red arrows)</p>
<p> </p>
<p><img src=“http://www.canadianrailroads.ca/rail/gscale/sd60f/461.jpg” alt="" width=“640” height=“445”></p>
<p> </p>
<p>Hopefully you now have a roof that looks like the one below.</p>
<p> </p>
<p><img src=“http://www.canadianrailroads.ca/rail/gscale/sd60f/462.jpg” alt="" width=“640” height=“893”></p>
<p> </p>
<p>It’s now okay to remove the fan and paint the top of the roof. DO NOT paint the bottom.</p>
<p> </p>
<p><img src=“http://www.canadianrailroads.ca/rail/gscale/sd60f/463.jpg” alt="" width=“640” height=“448”></p>
<p><img src=“http://www.canadianrailroads.ca/rail/gscale/sd60f/464.jpg” alt="" width=“640” height=“399”></p>
<p> </p>
<div>
<p>I could use some help from the minions. <img src=“http://www.largescalecentral.com/externals/tinymce/plugins/emoticons/img/smiley-wink.gif” alt=""> Mind you, it may end up looking like a unicorn.</p>
<p> </p>
<p>Okay let’s see if we can complete the center section detail. We’ll need some hinges from Burl. (Thanks Burl) This step is pretty time consuming. You’ll need to cut out all of the required hinges and then crazy glue them into place. It took me most of a day.</p>
<p> </p>
<p><img src=“http://www.canadianrailroads.ca/rail/gscale/sd60f/465.jpg” alt="" width=“640” height=“390”></p>
<p> </p>
<p>We’ll mark three lines on both sides. Measure from the bottom of the doors up 1/4", 1 1/4" and 2 1/4". DO NOT include the 1/16" space below the doors. The hinges are placed above these lines in the locations shown below. The space between the windowed door, and first four door set is too narrow for two hinges. I applied a hinge for the windowed door, and then filled the remaining space with a small piece of styrene for the lower part of the other hinge.</p>
<p> </p>
<p><img src=“http://www.canadianrailroads.ca/rail/gscale/sd60f/466.jpg” alt="" width=“640” height=“478”></p>
<p><img src=“http://www.canadianrailroads.ca/rail/gscale/sd60f/467.jpg” alt="" width=“640” height=“347”></p>
<p> </p>
<p>Now on the windowed doors, on the outside edge mark for drilling 1/16" in from the edge, and centered with the top/bottom of the door. Drill a 1/16" hole. Door handles will be added later to make it easier to tape and paint the stripes. You can see the modified hinges in this photo.</p>
<p> </p>
<p><img src=“http://www.canadianrailroads.ca/rail/gscale/sd60f/468.jpg” alt="" width=“640” height=“438”></p>
<p> </p>
</div>
<p>Now we need some lift brackets for this section. Take some .03" styrene, and cut four pieces as shown below. They are 3/16" wide, with one side 3/16" and the other 1/4".</p>
<p> </p>
<p><img src=“http://www.canadianrailroads.ca/rail/gscale/sd60f/469.jpg” alt="" width=“480” height=“264”></p>
<p> </p>
<p>Drill 3/32" holes centered on the square end.</p>
<p> </p>
<p><img src=“http://www.canadianrailroads.ca/rail/gscale/sd60f/470.jpg” alt="" width=“480” height=“213”></p>
<p> </p>
<p>Clip the corners as you see below on the lower left hand piece, and then sand to a nice curve like the upper pieces.</p>
<p>Note - These are a little taller then the prototype to allow the base to be reinforced.</p>
<p> </p>
<p><img src=“http://www.canadianrailroads.ca/rail/gscale/sd60f/471.jpg” alt="" width=“480” height=“271”></p>
<p> </p>
<p>Mark all four lower corners of the sloped roof sections 1/8" from the ends (not including the 1/16" end trim) and 1/8" from the lower edge.</p>
<p> </p>
<p><img src=“http://www.canadianrailroads.ca/rail/gscale/sd60f/472.jpg” alt="" width=“480” height=“509”></p>
<p><img src=“http://www.canadianrailroads.ca/rail/gscale/sd60f/473.jpg” alt="" width=“480” height=“562”></p>
<p> </p>
<p>Mount your brackets in all four corners. I added some .025" rod on both sides of the base to add a little more strength. (not shown) I figured they would look like a weld at the base. (This does not match the prototype)</p>
<p> </p>
<p><img src=“http://www.canadianrailroads.ca/rail/gscale/sd60f/474.jpg” alt="" width=“320” height=“477”></p>
<p> </p>
</div>
<p>Now we need some lift rings for the exhaust section. We’ll use some .04 x .125" styrene. We’ll need two 3/16" pieces with a 1/16" hole. These pieces are small, so it’s easiest to drill the holes before cutting the pieces off. Center the holes at one of the ends.</p>
<p> </p>
<p><img src=“http://www.canadianrailroads.ca/rail/gscale/sd60f/475.jpg” alt="" width=“320” height=“147”></p>
<p> </p>
<p>Make two.</p>
<p> </p>
<p><img src=“http://www.canadianrailroads.ca/rail/gscale/sd60f/476.jpg” alt="" width=“160” height=“123”></p>
<p> </p>
<p>Sand the ends around the hole into a smooth curve.</p>
<p> </p>
<p><img src=“http://www.canadianrailroads.ca/rail/gscale/sd60f/477.jpg” alt="" width=“320” height=“190”></p>
<p> </p>
<p>Cut them in half giving you four pieces.</p>
<p> </p>
<p><img src=“http://www.canadianrailroads.ca/rail/gscale/sd60f/478.jpg” alt="" width=“320” height=“161”></p>
<p> </p>
<p>On the front and rear of the exhaust section, mark 1/8" in from each side, and mount the above pieces to the insides of these lines.</p>
<p> </p>
<p><img src=“http://www.canadianrailroads.ca/rail/gscale/sd60f/479.jpg” alt="" width=“640” height=“192”></p>
<p> </p>
<p>They should end up flush with the top.</p>
<p> </p>
<p><img src=“http://www.canadianrailroads.ca/rail/gscale/sd60f/480.jpg” alt="" width=“640” height=“331”></p>
<p> </p>
<p>Hopefully you have a middle section that looks like the one below. I had to do a little filling and sanding on the sloped part of the winter hatch.</p>
<p> </p>
<p><img src=“http://www.canadianrailroads.ca/rail/gscale/sd60f/481.jpg” alt="" width=“640” height=“463”></p>
<p> </p>
<p>You can now paint the middle section. Paint inside and out.</p>
<p> </p>
<p><img src=“http://www.canadianrailroads.ca/rail/gscale/sd60f/482.jpg” alt="" width=“640” height=“363”></p>
<p> </p>
<p>Well it’s slowly starting to look like something.</p>
<p> </p>
<p><img src=“http://www.canadianrailroads.ca/rail/gscale/sd60f/483.jpg” alt="" width=“640” height=“348”></p>
<p> </p>
<div>
<p>We’ll need 4 pieces of .02" styrene cut 3 x 5/8", 2 pieces of .03" styrene cut 2 7/8 x 9/16" and one 1/8" piece cut 2 7/8 x 9/16".</p>
<p> </p>
<p><img src=“http://www.canadianrailroads.ca/rail/gscale/sd60f/493.jpg” alt="" width=“640” height=“478”></p>
<p> </p>
<p>Measure the four .02" pieces as shown above and cut off the two corners.</p>
<p> </p>
<p><img src=“http://www.canadianrailroads.ca/rail/gscale/sd60f/494.jpg” alt="" width=“640” height=“146”></p>
<p><img src=“http://www.canadianrailroads.ca/rail/gscale/sd60f/495.jpg” alt="" width=“640” height=“148”></p>
<p> </p>
<p>Now measure the 2 x .03" pieces and 1/8" piece as shown above and cut off the corners.</p>
<p> </p>
<p><img src=“http://www.canadianrailroads.ca/rail/gscale/sd60f/496.jpg” alt="" width=“640” height=“349”></p>
<p> </p>
<p>You should now have 7 pieces as shown below.</p>
<p> </p>
<p><img src=“http://www.canadianrailroads.ca/rail/gscale/sd60f/497.jpg” alt="" width=“640” height=“549”></p>
<p> </p>
</div>
<p>Now take 2 of the .02" pieces and 1 of the .03" pieces. I used a scrap of aluminum angle to help glue everything flush. The long sides are the rear and must be flush. Layer the pieces .02/.03/.02.</p>
<p> </p>
<p><img src=“http://www.canadianrailroads.ca/rail/gscale/sd60f/498.jpg” alt="" width=“640” height=“212”></p>
<p> </p>
<p>Build two of these.</p>
<p> </p>
<p><img src=“http://www.canadianrailroads.ca/rail/gscale/sd60f/499.jpg” alt="" width=“640” height=“242”></p>
<p> </p>
<p>Now glue the 1/8" piece between the above two pieces.</p>
<p> </p>
<p><img src=“http://www.canadianrailroads.ca/rail/gscale/sd60f/500.jpg” alt="" width=“640” height=“283”></p>
<p> </p>
<p>It should look like the piece below when complete. Carefully sand so that the .02" layers all match. You can also slightly round the front corners. The rear corners remain square. The lower piece of styrene is just holding the anti-climber up for the photo.</p>
<p> </p>
<p><img src=“http://www.canadianrailroads.ca/rail/gscale/sd60f/501.jpg” alt="" width=“640” height=“150”></p>
<p> </p>
<div>
<p>Now take your rear end plate and remove all of the detail parts except for the hoses. (The front plate will be covered at a later date, as it incorporates a plow and ditch lights.)</p>
<p>Mark the corners as shown below. You’ll be removing 1/4 x 5/16" from each corner.</p>
<p> </p>
<p><img src=“http://www.canadianrailroads.ca/rail/gscale/sd60f/502.jpg” alt="" width=“640” height=“349”></p>
<p> </p>
<p>Drill 7/64" holes in the corners, and then carefully cut off the corners into these drill holes. This should leave the inner corners rounded.</p>
<p> </p>
<p><img src=“http://www.canadianrailroads.ca/rail/gscale/sd60f/503.jpg” alt="" width=“640” height=“350”></p>
<p> </p>
<p>Sand the outer corners round as shown below.</p>
<p> </p>
<p><img src=“http://www.canadianrailroads.ca/rail/gscale/sd60f/504.jpg” alt="" width=“832” height=“441”></p>
<p> </p>
<p>Cut the top overhang off flush.</p>
<p> </p>
<p><img src=“http://www.canadianrailroads.ca/rail/gscale/sd60f/505.jpg” alt="" width=“640” height=“334”></p>
<p> </p>
</div>
<p>Now secure the anti-climber flush with the top of the end plate. Be careful to keep it squared.</p>
<p> </p>
<p><img src=“http://www.canadianrailroads.ca/rail/gscale/sd60f/506.jpg” alt="" width=“640” height=“362”></p>
<p> </p>
<p>Install the operating lever. My new operating levers were made to match the originals, adding the 1/4 x 1/2" (inner measurement) loop for top operation.</p>
<p> </p>
<p><img src=“http://www.canadianrailroads.ca/rail/gscale/sd60f/507.jpg” alt="" width=“640” height=“349”></p>
<p> </p>
<p>You’ll have to patch a couple of spots on the end plate to bring it up flush with the top.</p>
<p> </p>
<p><img src=“http://www.canadianrailroads.ca/rail/gscale/sd60f/508.jpg” alt="" width=“640” height=“56”></p>
<p> </p>
<p>Drill four 3/64" holes for grab irons on each side of the hoses as shown below. Drill 1/16" to the inside and 3/16" to the outside of the hoses.</p>
<p> </p>
<p><img src=“http://www.canadianrailroads.ca/rail/gscale/sd60f/509.jpg” alt="" width=“640” height=“235”></p>
<p> </p>
<p>Now I invited my Auntie Martha over with her fancy lace punch.</p>
<p> </p>
<p><img src=“http://www.canadianrailroads.ca/rail/gscale/sd60f/510.jpg” alt="" width=“640” height=“426”></p>
<p> </p>
<p>Using .01" styrene, I created this beautiful lace. <img src=“http://www.largescalecentral.com/externals/tinymce/plugins/emoticons/img/smiley-tongue-out.gif” alt=""></p>
<p> </p>
<p><img src=“http://www.canadianrailroads.ca/rail/gscale/sd60f/511.jpg” alt="" width=“640” height=“484”></p>
<p> </p>
<p>Now before you get laughed at, throw this crap away, but keep all the punched out petal shaped pieces.</p>
<p> </p>
<p><img src=“http://www.canadianrailroads.ca/rail/gscale/sd60f/512.jpg” alt="" width=“640” height=“384”></p>
<p> </p>
<p>Take some .04" styrene hex and cut some short pieces to represent nuts.</p>
<p> </p>
<p><img src=“http://www.canadianrailroads.ca/rail/gscale/sd60f/513.jpg” alt="" width=“640” height=“328”></p>
<p> </p>
<p>Use these to make the grab iron anchors next to the holes. I overlap a little and then clean out the holes once dry.</p>
<p> </p>
<p><img src=“http://www.canadianrailroads.ca/rail/gscale/sd60f/514.jpg” alt="" width=“640” height=“373”></p>
<p> </p>
<p>Using 3/64" brass rod, make two grab irons 5/8" wide and 3/8" deep. Install these 1/8" into the plate leaving 1/2" hanging out.</p>
<p> </p>
<p><img src=“http://www.canadianrailroads.ca/rail/gscale/sd60f/515.jpg” alt="" width=“640” height=“344”></p>
<p> </p>
<p>Now take some .03" styrene and cut two 3/8" right triangles and two supports as shown below. The supports in the diagram are facing you. Sand the back side top and bottom at 45 degrees.</p>
<p> </p>
<p><img src=“http://www.canadianrailroads.ca/rail/gscale/sd60f/516.jpg” alt="" width=“640” height=“354”></p>
<p> </p>
<p>Hold the triangles flush with the bottom of the anti-climber, and mark and drill where the operating lever will fit.</p>
<p> </p>
<p><img src=“http://www.canadianrailroads.ca/rail/gscale/sd60f/517.jpg” alt="" width=“640” height=“396”></p>
<p> </p>
<p>Hollow out the backside of the triangles as shown below. On the back side of the supports, mark 1/8" in from center.</p>
<p> </p>
<p><img src=“http://www.canadianrailroads.ca/rail/gscale/sd60f/518.jpg” alt="" width=“640” height=“374”></p>
<p> </p>
<p>Mount the triangles on the back of the supports along the 1/8" marks you measured. The narrow side of the support is the top.</p>
<p> </p>
<p><img src=“http://www.canadianrailroads.ca/rail/gscale/sd60f/519.jpg” alt="" width=“640” height=“374”></p>
<p> </p>
<p>Mount the supports under the anti-climber over the operating lever. I lined them up with the inside of the hoses.</p>
<p> </p>
<p><img src=“http://www.canadianrailroads.ca/rail/gscale/sd60f/520.jpg” alt="" width=“640” height=“288”></p>
<p> </p>
<p>You can see below how they mount over the operating lever.</p>
<p> </p>
<p><img src=“http://www.canadianrailroads.ca/rail/gscale/sd60f/521.jpg” alt="" width=“480” height=“763”></p>
<p> </p>
<p><strong>Note-In these photos, you may notice that the inset portions of the anti-climber are inset more then what you built. I originally used a 1/8" inset, but decided it was too much. I changed it to 1/16".</strong></p>
<p> </p>
<p><img src=“http://www.canadianrailroads.ca/rail/gscale/sd60f/523.jpg” alt="" width=“640” height=“372”></p>
<p><img src=“http://www.canadianrailroads.ca/rail/gscale/sd60f/524.jpg” alt="" width=“480” height=“451”></p>
<p> </p>
<div>
<p>We’re going to add a plate to the bottom of the tail end. Start with a 3 1/4 x 1/2" piece of .02" styrene. Measure it up as shown below, and cut 1/4 x 1" out of the top corners.</p>
<p> </p>
<p><img src=“http://www.canadianrailroads.ca/rail/gscale/sd60f/527.jpg” alt="" width=“640” height=“157”></p>
<p> </p>
<p>Cut two bolt heads from .04" hex and secure them as shown below.</p>
<p> </p>
<p><img src=“http://www.canadianrailroads.ca/rail/gscale/sd60f/528.jpg” alt="" width=“640” height=“131”></p>
<p> </p>
<p>Secure this flush with the bottom as shown below.</p>
<p> </p>
<p><img src=“http://www.canadianrailroads.ca/rail/gscale/sd60f/529.jpg” alt="" width=“640” height=“379”></p>
<p> </p>
<p>Now You can use the same instructions for the front end, but DO NOT add the grab irons over the hoses or the plate at the bottom.</p>
<p> </p>
<p><img src=“http://www.canadianrailroads.ca/rail/gscale/sd60f/530.jpg” alt="" width=“640” height=“379”></p>
</div>
<p> </p>
<p>On the front, cut off the mu hoses, and drill some 3/64" holes to accommodate future air hoses.</p>
<p> </p>
<p><img src=“http://www.canadianrailroads.ca/rail/gscale/sd60f/531.jpg” alt="" width=“640” height=“364”></p>
<p> </p>
<p>I’m using a plow from Miniatures by Eric.</p>
<p><a href=“https://miniatures-by-eric.myshopify.com/collections/g-guage-parts/products/gp1-diesel-plow” target="_blank">https://miniatures-by-eric.myshopify.com/collections/g-guage-parts/products/gp1-diesel-plow</a></p>
<p>The center of the plow needs to be cut down 1/4"</p>
<p> </p>
<p><img src=“http://www.canadianrailroads.ca/rail/gscale/sd60f/532.jpg” alt="" width=“640” height=“262”></p>
<p><img src=“http://www.canadianrailroads.ca/rail/gscale/sd60f/533.jpg” alt="" width=“640” height=“266”></p>
<p> </p>
<p>Using epoxy, secure the plow flush with the bottom.</p>
<p> </p>
<p><img src=“http://www.canadianrailroads.ca/rail/gscale/sd60f/534.jpg” alt="" width=“742” height=“403”></p>
<p> </p>
<p>Coupler installation. Start by trimming 1/8" off the back of the coupler box.</p>
<p> </p>
<p><img src=“http://www.canadianrailroads.ca/rail/gscale/sd60f/535.jpg” alt="" width=“640” height=“555”></p>
<p> </p>
<p>We’re going to build a bracket to hold the coupler snuggly in place as shown below.</p>
<p> </p>
<p><img src=“http://www.canadianrailroads.ca/rail/gscale/sd60f/536.jpg” alt="" width=“360” height=“298”></p>
<p> </p>
<p>This bracket will be made using 1/8" styrene. Start with a 2 x 3/4" piece and mark as shown below. Cut out the 3/4 x 5/16" corner pieces.</p>
<p> </p>
<p><img src=“http://www.canadianrailroads.ca/rail/gscale/sd60f/537.jpg” alt="" width=“640” height=“260”></p>
<p><img src=“http://www.canadianrailroads.ca/rail/gscale/sd60f/538.jpg” alt="" width=“640” height=“243”></p>
<p> </p>
<p>Cut a 1 1/4 x 1/2" piece and secure it centered and flush with the back as shown below.</p>
<p> </p>
<p><img src=“http://www.canadianrailroads.ca/rail/gscale/sd60f/539.jpg” alt="" width=“480” height=“279”></p>
<p> </p>
<p>Now your scrap should have lots of corners you’ve cut off. Use a couple to reinforce the top as shown below, and two more will be placed on the sides of the coupler.</p>
<p> </p>
<p><img src=“http://www.canadianrailroads.ca/rail/gscale/sd60f/540.jpg” alt="" width=“640” height=“469”></p>
<p> </p>
<p>Cut the reinforcement flush.</p>
<p> </p>
<p><img src=“http://www.canadianrailroads.ca/rail/gscale/sd60f/541.jpg” alt="" width=“640” height=“350”></p>
<p> </p>
<p>From the front looking through, the bracket fits around the coupler (light blue box) as shown. The above piece is installed flush with the top of the coupler. Once it is securely in place, screw on the coupler, and then add the reinforcement on each side of the coupler. (The two lower yellow pieces.)</p>
<p> </p>
<p><img src=“http://www.canadianrailroads.ca/rail/gscale/sd60f/542.jpg” alt="" width=“640” height=“347”></p>
<p> </p>
<p>From the top rear, you can see how it fits against the plate clear of the two tabs at the top.</p>
<p> </p>
<p><img src=“http://www.canadianrailroads.ca/rail/gscale/sd60f/543.jpg” alt="" width=“640” height=“176”></p>
<p> </p>
<p>View from the back. The bottom reinforcement not only adds strength, it also keeps the coupler from twisting.</p>
<p> </p>
<p><img src=“http://www.canadianrailroads.ca/rail/gscale/sd60f/544.jpg” alt="" width=“640” height=“426”></p>
<p> </p>
<p>Take some 1/8 x 1/8" styrene and cut 8 pieces (4 for each end) 1/4" long.</p>
<p> </p>
<p><img src=“http://www.canadianrailroads.ca/rail/gscale/sd60f/545.jpg” alt="" width=“640” height=“440”></p>
<p> </p>
<p>Cut a corner off as shown below. Do not cut to a sharp edge. Leave a bit of a space at each corner of the cut.</p>
<p> </p>
<p><img src=“http://www.canadianrailroads.ca/rail/gscale/sd60f/546.jpg” alt="" width=“320” height=“164”></p>
<p> </p>
<p>Take some .02" styrene and cut two pieces 1/4 x 3/4".</p>
<p> </p>
<p><img src=“http://www.canadianrailroads.ca/rail/gscale/sd60f/547.jpg” alt="" width=“320” height=“152”></p>
<p> </p>
<p>Shape the front corners as shown below.</p>
<p> </p>
<p><img src=“http://www.canadianrailroads.ca/rail/gscale/sd60f/548.jpg” alt="" width=“320” height=“173”></p>
<p> </p>
<p>On the tops of the anti-climbers, mark a line (red line below) 1/16" from the front as shown below. Measure the stanchion placements as shown by the black lines. (do both sides the same)</p>
<p> </p>
<p><img src=“http://www.canadianrailroads.ca/rail/gscale/sd60f/549.jpg” alt="" width=“640” height=“218”></p>
<p> </p>
<p>Install the stanchion support brackets behind the 1/16" line as shown below. Install the plate in the center overhanging about 1/8".</p>
<p> </p>
<p><img src=“http://www.canadianrailroads.ca/rail/gscale/sd60f/550.jpg” alt="" width=“640” height=“191”></p>
<p> </p>
<div>
<p>On the tail end, install the mu socket/bracket in the corner as shown below.</p>
<p> </p>
<p><img src=“http://www.canadianrailroads.ca/rail/gscale/sd60f/551.jpg” alt="" width=“640” height=“352”></p>
<p> </p>
<p>Take your end railings and cut 1/8" off of the bottom of the stanchions. Straighten the first bend in the rail as shown by the red arrows. Twist the bottom connectors, and adjust the stanchions to properly sit in place.</p>
<p> </p>
<p><img src=“http://www.canadianrailroads.ca/rail/gscale/sd60f/552.jpg” alt="" width=“640” height=“382”></p>
<p> </p>
<p>Once you are happy with the fit, epoxy them into place.</p>
<p> </p>
<p><img src=“http://www.canadianrailroads.ca/rail/gscale/sd60f/553.jpg” alt="" width=“640” height=“519”></p>
<p> </p>
<p>Now you can paint them up and add your reflective stripes.</p>
<p> </p>
<p><img src=“http://www.canadianrailroads.ca/rail/gscale/sd60f/554.jpg” alt="" width=“640” height=“600”></p>
<p> </p>
<p>The stripes on the plow are 1" and set at 45 degrees.</p>
<p> </p>
<p><img src=“http://www.canadianrailroads.ca/rail/gscale/sd60f/555.jpg” alt="" width=“640” height=“557”></p>
<p> </p>
</div>
<div>
<p>Here’s some files for the project.</p>
<p>Number Boards</p>
<p><img src=“http://www.canadianrailroads.ca/rail/gscale/sd60f/numberboards.bmp” alt="" width=“166” height=“46”></p>
<p>Silhouette Files <a href=“http://www.canadianrailroads.ca/rail/gscale/sd60f/SD60f.zip”>ZIP File</a></p>
<p>SD60f Rear Vents - Use this file to score the outline on .02" styrene.</p>
<p>Backboard Decal</p>
<p>Fire Extinguisher Decal</p>
<p>Tail Number 5536</p>
<p>Front Number 5536</p>
<p>Cab Side Number 5536</p>
<p>CN Logo</p>
<p> </p>
</div>
<div>
<p>We’re going to start with the nose detail today. I used a headlight from <a href=“https://miniatures-by-eric.myshopify.com/collections/g-guage-parts/products/gl-dual-pyle-lights”>Miniatures by Eric.</a></p>
<p>You need to start by filing out a flat spot. Keep it 3/16" below the hood of the nose 1/8" below the curved edge. It will extend 1/4" to each side from the center joint. It needs to be 3/4" tall, and the bottom will need to be filed at 45 degrees.</p>
<p> </p>
<p><img src=“http://www.canadianrailroads.ca/rail/gscale/sd60f/564.jpg” alt="" width=“640” height=“614”></p>
<p> </p>
<p>I started by cutting the top and bottom line (green arrows) with a razor saw. Then I filed the section between the two cuts flat. Then I cut and filed the bottom (red arrow) at 45 degrees.</p>
<p> </p>
<p><img src=“http://www.canadianrailroads.ca/rail/gscale/sd60f/565.jpg” alt="" width=“480” height=“566”></p>
<p> </p>
<p>Mark the placement of your headlight, and then drill two 7/32" holes to match up with it. The light has a solid back, so you’ll have to drill it as well.</p>
<p> </p>
<p><img src=“http://www.canadianrailroads.ca/rail/gscale/sd60f/566.jpg” alt="" width=“480” height=“448”></p>
<p> </p>
<p>Using some epoxy, mount the light.</p>
<p> </p>
<p><img src=“http://www.canadianrailroads.ca/rail/gscale/sd60f/567.jpg” alt="" width=“480” height=“448”></p>
<p> </p>
<p>Now you can mark and drill for the nose ladder. Keep it 5/16" to the left of the center of the nose. Starting from the bottom, measure the lines 9/16" apart. The top line should end up being about 3/8" below the top of the nose.</p>
<p>The photo is a little deceptive. The holes on the hood of the nose are 9/16" from the edge. DO NOT measure from the top line on the nose.</p>
<p> </p>
<p><img src=“http://www.canadianrailroads.ca/rail/gscale/sd60f/568.jpg” alt="" width=“640” height=“912”></p>
<p> </p>
</div>
<p>Now we’re going to build the front door. We’ll need a piece of 1/16" styrene cut 2 1/4 x 7/8" and a .02" piece cut 2 1/8 x 3/4".</p>
<p>NOTE - If you are building an older gp38/40/SD40 wide cab, you need to reduce the widths to 3/4" and 5/8". The door is the same, but is 1/8" narrower.</p>
<p> </p>
<p><img src=“http://www.canadianrailroads.ca/rail/gscale/sd60f/569.jpg” alt="" width=“470” height=“524”></p>
<p> </p>
<p>Center the .02" piece on the back of the door.</p>
<p> </p>
<p><img src=“http://www.canadianrailroads.ca/rail/gscale/sd60f/570.jpg” alt="" width=“320” height=“664”></p>
<p> </p>
<p>Sand the edges of your door to a slight curve, and then mark it up as shown below for hinges and a door handle.</p>
<p> </p>
<p><img src=“http://www.canadianrailroads.ca/rail/gscale/sd60f/571.jpg” alt="" width=“320” height=“653”></p>
<p> </p>
<p>Cut four pieces of .06 x .125" styrene 1/16" long. Glue these on the side of the door as shown below. They do not quite come up to the top of the door. With your door on a flat surface as shown, make sure these pieces extend past the door so that they sit against your flat surface. The .02" piece on the rear of the door lifts it a bit, so make sure these pieces extend right to the flat surface.</p>
<p> </p>
<p><img src=“http://www.canadianrailroads.ca/rail/gscale/sd60f/572.jpg” alt="" width=“320” height=“658”></p>
<p> </p>
<p>Cut four pieces of .02 x .06" styrene 1/8". These go on top of the door as shown below, flush with the outer edge of the door.</p>
<p> </p>
<p><img src=“http://www.canadianrailroads.ca/rail/gscale/sd60f/573.jpg” alt="" width=“320” height=“761”></p>
<p> </p>
<p>Cut a piece of .02" styrene 1/16 x 1/16" and mount it as shown by the blue arrow. Cut four pieces of .025" rod 1/8" long and mount them as shown by the green arrow. Keep them to the outside of the edge of the door. Now cut some bolt heads from .04" hex and mount them as shown by the red arrows.</p>
<p> </p>
<p><img src=“http://www.canadianrailroads.ca/rail/gscale/sd60f/574.jpg” alt="" width=“320” height=“582”></p>
<p> </p>
<p>Now for a door handle, I start with a 1/16 x 1/16 x 1/4" piece of styrene. Cut out the green sections as shown below. Sand it to smooth it out and taper it a little, and then mount it on your door. I kept a thin piece of styrene under the inner edge while drying to keep it away from the door.</p>
<p> </p>
<p><img src=“http://www.canadianrailroads.ca/rail/gscale/sd60f/575.jpg” alt="" width=“480” height=“378”></p>
<p> </p>
<p>Now the door will be mounted 1/4" to the right of the center of the nose, and 3/16" up from the base.</p>
<p> </p>
<p><img src=“http://www.canadianrailroads.ca/rail/gscale/sd60f/576.jpg” alt="" width=“360” height=“595”></p>
<p><img src=“http://www.canadianrailroads.ca/rail/gscale/sd60f/577.jpg” alt="" width=“480” height=“523”></p>
<p> </p>
<p>NOTE - On the older GP38/40/SD40 units, cut a piece of 1/16" u channel 7/8" long, and mount it centered just above the door as a drip trim. It will extend slightly over the headlight. This trim was not used on the SD60f.</p>
<p> </p>
<p>For the bottom hatches, start with two pieces of .02" styrene cut 1/2 x 3/4"</p>
<p> </p>
<p><img src=“http://www.canadianrailroads.ca/rail/gscale/sd60f/578.jpg” alt="" width=“640” height=“185”></p>
<p> </p>
<p>Mark these for latches. The latches measure 1/8 x 1/4". They sit 1/16" from the top of the hatch. The latch will be towards the inside.</p>
<p> </p>
<p><img src=“http://www.canadianrailroads.ca/rail/gscale/sd60f/579.jpg” alt="" width=“640” height=“236”></p>
<p> </p>
<p>Using .01" styrene, cut four pieces 1/8 x 1/4" and punch one end with a 3/32" hole. Punch holes on the inner side of the latch marks on the hatch as shown by the green arrow.</p>
<p> </p>
<p><img src=“http://www.canadianrailroads.ca/rail/gscale/sd60f/580.jpg” alt="" width=“480” height=“612”></p>
<p> </p>
<p>Glue the latches into place, and once dry file the holes to square them.</p>
<p> </p>
<p><img src=“http://www.canadianrailroads.ca/rail/gscale/sd60f/581.jpg” alt="" width=“480” height=“171”></p>
<p> </p>
<p>These mount on the bottom corners of the nose. They are 3/16" in from the outer edges, and 1/16" from the bottom.</p>
<p> </p>
<p><img src=“http://www.canadianrailroads.ca/rail/gscale/sd60f/582.jpg” alt="" width=“640” height=“130”></p>
<p><img src=“http://www.canadianrailroads.ca/rail/gscale/sd60f/583.jpg” alt="" width=“640” height=“137”></p>
<p> </p>
<p>NOTE - On the older GP38/40/SD40 units, flip the hatches over so that the latches are at the bottom. There will be a larger gap between the hatch and the door because the door is 1/8" narrower. You’ll have to add hinges to the top as shown in red. You’ll also have to add the bracket shown in blue. You can lock the hatch into this bracket to hold it open.</p>
<p> </p>
<p><img src=“http://www.canadianrailroads.ca/rail/gscale/sd60f/584.jpg” alt="" width=“640” height=“392”></p>
<p> </p>
<p>Now you can add the grab iron detail as shown on page 12 of the thread.</p>
<p> </p>
<p><img src=“http://www.canadianrailroads.ca/rail/gscale/sd60f/585.jpg” alt="" width=“480” height=“1064”></p>
<p> </p>
<p>Using 3/64" brass rod, make some grab irons. The measurements are between the curves.</p>
<p> </p>
<p><img src=“http://www.canadianrailroads.ca/rail/gscale/sd60f/586.jpg” alt="" width=“640” height=“486”></p>
<p> </p>
<p>Class Lights WGR | RGW</p>
<p>NOTE-Class lights and number boards are above the windows on the old GP38/40/SD40 units.</p>
<p>We’ll start with two pieces of .02" styrene cut 11/16 x 1/4". Mark center lines for width and height, and mark 1/8" in from each side as shown.</p>
<p> </p>
<p><img src=“http://www.canadianrailroads.ca/rail/gscale/sd60f/587.jpg” alt="" width=“640” height=“524”></p>
<p> </p>
<p>Drill some guide holes.</p>
<p> </p>
<p><img src=“http://www.canadianrailroads.ca/rail/gscale/sd60f/588.jpg” alt="" width=“320” height=“340”></p>
<p> </p>
<p>Gradually work your way up to 3/16".</p>
<p> </p>
<p><img src=“http://www.canadianrailroads.ca/rail/gscale/sd60f/589.jpg” alt="" width=“640” height=“153”></p>
<p> </p>
<p>Punch six 1/8" circles out of .01" styrene, and punch 5/32" holes out of the centers.</p>
<p> </p>
<p><img src=“http://www.canadianrailroads.ca/rail/gscale/sd60f/590.jpg” alt="" width=“640” height=“461”></p>
<p> </p>
<p>Mount the rings nicely spaced as shown below.</p>
<p> </p>
<p><img src=“http://www.canadianrailroads.ca/rail/gscale/sd60f/591.jpg” alt="" width=“320” height=“283”></p>
<p> </p>
<p>Sand the corners of the base to match the curvature of the lights.</p>
<p> </p>
<p><img src=“http://www.canadianrailroads.ca/rail/gscale/sd60f/592.jpg” alt="" width=“480” height=“125”></p>
<p> </p>
<p>Mount these 2" from the bottom of the nose, and 5/16" in from the sides of the nose. This should result in the right hand class lights sitting tight to the door hinge.</p>
<p> </p>
<p><img src=“http://www.canadianrailroads.ca/rail/gscale/sd60f/593.jpg” alt="" width=“800” height=“192”></p>
<p> </p>
<p>Now it’s time for the number boards. Start with some .02" styrene cut 7/16 x 15/16".</p>
<p> </p>
<p><img src=“http://www.canadianrailroads.ca/rail/gscale/sd60f/594.jpg” alt="" width=“640” height=“152”></p>
<p> </p>
<p>Mark the frame 1/8" from the top, 1/16" from the bottom and 3/16" from the sides. The corners will be drilled at 1/8" so mark the 1/16" centers.</p>
<p> </p>
<p><img src=“http://www.canadianrailroads.ca/rail/gscale/sd60f/595.jpg” alt="" width=“480” height=“508”></p>
<p> </p>
<p>Drill guide holes and then work up to 1/8"</p>
<p> </p>
<p><img src=“http://www.canadianrailroads.ca/rail/gscale/sd60f/596.jpg” alt="" width=“480” height=“504”></p>
<p> </p>
<p>Cut out between the drilled holes.</p>
<p> </p>
<p><img src=“http://www.canadianrailroads.ca/rail/gscale/sd60f/597.jpg” alt="" width=“480” height=“141”></p>
<p> </p>
<p>Cut some .03 x .1" styrene for the frame. Cut two pieces 15/16" and two pieces 3/8".</p>
<p> </p>
<p><img src=“http://www.canadianrailroads.ca/rail/gscale/sd60f/598.jpg” alt="" width=“480” height=“553”></p>
<p> </p>
<p>Glue the top and bottom pieces to the back, flush with the edges.</p>
<p> </p>
<p><img src=“http://www.canadianrailroads.ca/rail/gscale/sd60f/599.jpg” alt="" width=“360” height=“379”></p>
<p> </p>
<p>Once the top and bottom are dry, glue the sides into place. You may have to sand them a little to get a good fit.</p>
<p> </p>
<p><img src=“http://www.canadianrailroads.ca/rail/gscale/sd60f/600.jpg” alt="" width=“480” height=“332”></p>
<p> </p>
<p>Cut a couple of base plates 7/8" x 3/8" out of 1/16" styrene. Sand them so that they fit nicely into the rear of the number board frames. If they are too tight, you’ll pop the side frames.</p>
<p> </p>
<p><img src=“http://www.canadianrailroads.ca/rail/gscale/sd60f/601.jpg” alt="" width=“640” height=“258”></p>
<p> </p>
<p>The number boards mount 1 1/2" from the bottom of the nose, 1/16" from the outer edge, and 1 3/16" from the center of the nose. Mount the base pieces centered within these marks, leaving room for the .03" frames. The right hand number board sits snug against the door hinge. Make sure you have enough space for the .03" frame to slide into place.</p>
<p> </p>
<p><img src=“http://www.canadianrailroads.ca/rail/gscale/sd60f/602.jpg” alt="" width=“800” height=“449”></p>
<p> </p>
<p>Now for some detail. Cut eight pieces of .025" rod 1/8" long. Four will be for hinges, and four will be for wing screws.</p>
<p> </p>
<p><img src=“http://www.canadianrailroads.ca/rail/gscale/sd60f/603.jpg” alt="" width=“480” height=“307”></p>
<p> </p>
<p>Cut four pieces of .03 x .1" styrene into squares.</p>
<p> </p>
<p><img src=“http://www.canadianrailroads.ca/rail/gscale/sd60f/604.jpg” alt="" width=“480” height=“404”></p>
<p> </p>
<p>File one side into a nice curve.</p>
<p> </p>
<p><img src=“http://www.canadianrailroads.ca/rail/gscale/sd60f/605.jpg” alt="" width=“480” height=“248”></p>
<p> </p>
<p>Cut four more pieces 1/16" long and mount them on the squared side.</p>
<p> </p>
<p><img src=“http://www.canadianrailroads.ca/rail/gscale/sd60f/606.jpg” alt="" width=“640” height=“168”></p>
<p> </p>
<p>The hinge pieces mount on top 1/8" in from the edges. The above pieces mount on the bottom 1/8" in from the edges with the 1/16" piece down, larger curved piece up with the curve at the bottom. Then mount a piece of rod on top to represent the wing screws. Try to mount them at different angles. (painting note - these wing screws are unpainted brass)</p>
<p> </p>
<p><img src=“http://www.canadianrailroads.ca/rail/gscale/sd60f/607.jpg” alt="" width=“640” height=“397”></p>
<p><img src=“http://www.canadianrailroads.ca/rail/gscale/sd60f/608.jpg” alt="" width=“640” height=“508”></p>
<p> </p>
<p>Sand hatches. We’re going to build three sand hatches. Two are for the nose, and one is for the tail.</p>
<p>Front - two pieces of .03" styrene cut 1/2 x 5/16" and two pieces of 1/16" styrene cut 7/16 x 1/4".</p>
<p>Rear - one piece of 1/16" styrene cut 1/2 x 5/16" and one 1/16" piece cut 7/16 x 1/4".</p>
<p> </p>
<p><img src=“http://www.canadianrailroads.ca/rail/gscale/sd60f/609.jpg” alt="" width=“640” height=“628”></p>
<p> </p>
<p>Center and glue the smaller pieces on the larger ones. The lid of the tail end is thicker.</p>
<p> </p>
<p><img src=“http://www.canadianrailroads.ca/rail/gscale/sd60f/610.jpg” alt="" width=“480” height=“309”></p>
<p> </p>
<p>Cut three pieces of .015 x .1" styrene 1/16".</p>
<p> </p>
<p><img src=“http://www.canadianrailroads.ca/rail/gscale/sd60f/611.jpg” alt="" width=“480” height=“518”></p>
<p> </p>
<p>Mark a 1/8" section centered on the short side of the tail lid and centered on the long side of the front lids.</p>
<p> </p>
<p><img src=“http://www.canadianrailroads.ca/rail/gscale/sd60f/612.jpg” alt="" width=“480” height=“160”></p>
<p> </p>
<p>Glue the little pieces you cut overhanging one side by half as shown.</p>
<p> </p>
<p><img src=“http://www.canadianrailroads.ca/rail/gscale/sd60f/613.jpg” alt="" width=“640” height=“257”></p>
<p> </p>
<p>Cut six pieces of .015 x .1" styrene 3/16", and mark a line 1/16" from one end.</p>
<p> </p>
<p><img src=“http://www.canadianrailroads.ca/rail/gscale/sd60f/614.jpg” alt="" width=“480” height=“407”></p>
<p> </p>
<p>Cut about 2/3 out of the 1/8" side.</p>
<p> </p>
<p><img src=“http://www.canadianrailroads.ca/rail/gscale/sd60f/615.jpg” alt="" width=“320” height=“293”></p>
<p> </p>
<p>Mount these on the opposite side of the small tab along the lines you drew.</p>
<p> </p>
<p><img src=“http://www.canadianrailroads.ca/rail/gscale/sd60f/616.jpg” alt="" width=“480” height=“342”></p>
<p> </p>
<p>Cut three pieces of .025" rod 1/8" long.</p>
<p> </p>
<p><img src=“http://www.canadianrailroads.ca/rail/gscale/sd60f/617.jpg” alt="" width=“480” height=“182”></p>
<p> </p>
<p>Mount these as shown below at the base of the two thin pieces to represent hinges. File the top outside corners of the thin pieces to a slight curve. Leave the bottom squared.</p>
<p> </p>
<p><img src=“http://www.canadianrailroads.ca/rail/gscale/sd60f/618.jpg” alt="" width=“480” height=“183”></p>
<p> </p>
<p>The tail end hatch mounts centered and 1/4" in from the end. Facing the tail end, the hinge is towards the right.</p>
<p> </p>
<p><img src=“http://www.canadianrailroads.ca/rail/gscale/sd60f/619.jpg” alt="" width=“480” height=“443”></p>
<p> </p>
<p>For the front hatches, draw a line on the nose from the back edge of the side corner curve up to the bend in the nose hood.</p>
<p> </p>
<p><img src=“http://www.canadianrailroads.ca/rail/gscale/sd60f/620.jpg” alt="" width=“800” height=“532”></p>
<p> </p>
<p>The front hatches mount with the hinge towards the center of the nose. Looking at the hatch from above, line it up with the bend in the nose hood, and the line you drew. From above, it should stay within these two lines.</p>
<p> </p>
<p><img src=“http://www.canadianrailroads.ca/rail/gscale/sd60f/621.jpg” alt="" width=“640” height=“424”></p>
<p><img src=“http://www.canadianrailroads.ca/rail/gscale/sd60f/622.jpg” alt="" width=“800” height=“334”></p>
<p> </p>
<p>Run some 3/64" angle along the rear of the nose.</p>
<p> </p>
<p><img src=“http://www.canadianrailroads.ca/rail/gscale/sd60f/623.jpg” alt="" width=“640” height=“437”></p>
<p> </p>
<p>For the rear window frames, start with two pieces of .02" styrene cut 5/16 x 15/16". Mark a 1/16" frame around the edges. Drill 1/8" holes in the inner four corners and then cut out between the holes. Sand the outer corners to match the inner curves.</p>
<p> </p>
<p><img src=“http://www.canadianrailroads.ca/rail/gscale/sd60f/624.jpg” alt="" width=“480” height=“517”></p>
<p> </p>
<p>Center these on the rear windows and secure them. Make sure they do not interfere when the cab is placed against the tapered section.</p>
<p> </p>
<p><img src=“http://www.canadianrailroads.ca/rail/gscale/sd60f/625.jpg” alt="" width=“640” height=“178”></p>
<p> </p>
<p>For the front window frames, cut a .02" piece of styrene 3 1/2 x 7/8". Divide it up into four 7/8" squares. Mark lines 5/16" between the windows at the top. Mark 1/16" frames and mark the inner corners to be drilled at 1/8".</p>
<p> </p>
<p><img src=“http://www.canadianrailroads.ca/rail/gscale/sd60f/626.jpg” alt="" width=“800” height=“261”></p>
<p> </p>
<p>Drill the inner corners.</p>
<p> </p>
<p><img src=“http://www.canadianrailroads.ca/rail/gscale/sd60f/627.jpg” alt="" width=“640” height=“186”></p>
<p> </p>
<p>Cut out between the drill holes.</p>
<p> </p>
<p><img src=“http://www.canadianrailroads.ca/rail/gscale/sd60f/628.jpg” alt="" width=“640” height=“179”></p>
<p> </p>
<p>Separate the window frames.</p>
<p> </p>
<p><img src=“http://www.canadianrailroads.ca/rail/gscale/sd60f/629.jpg” alt="" width=“640” height=“167”></p>
<p> </p>
<p>Cut off the excess at the bottoms. File the outer corners to match up to the inner curves. (not shown)</p>
<p> </p>
<p><img src=“http://www.canadianrailroads.ca/rail/gscale/sd60f/630.jpg” alt="" width=“640” height=“163”></p>
<p> </p>
<p>Tape them into place and once you are happy with the spacing, glue them in.</p>
<p> </p>
<p><img src=“http://www.canadianrailroads.ca/rail/gscale/sd60f/631.jpg” alt="" width=“640” height=“260”></p>
<p> </p>
<p>Once they are dry, you can clean them up as required with a file.</p>
<p> </p>
<p><img src=“http://www.canadianrailroads.ca/rail/gscale/sd60f/632.jpg” alt="" width=“640” height=“181”></p>
<p> </p>
<p>Now on the roof, draw a line 1/8" back from the front edge.</p>
<p> </p>
<p><img src=“http://www.canadianrailroads.ca/rail/gscale/sd60f/633.jpg” alt="" width=“640” height=“252”></p>
<p> </p>
<p>Run some 3/64" angle along this line. End it just before the curve at the outside edges of the roof. Keep the angled corner towards the rear.</p>
<p> </p>
<p><img src=“http://www.canadianrailroads.ca/rail/gscale/sd60f/634.jpg” alt="" width=“800” height=“300”></p>
<p> </p>
<p>Now for the bell mount start with two pieces of .02" styrene 1/2" squares. Mark them up and cut them as shown below.</p>
<p> </p>
<p><img src=“http://www.canadianrailroads.ca/rail/gscale/sd60f/635.jpg” alt="" width=“640” height=“322”></p>
<p> </p>
<p>Cut a 1/2" piece of 1/8 x 1/8" styrene. Drill a 1/16" hole 1/8" from the front, and notch the rear slightly so that it will sit nicely against the bend between the front windows. Insert the bell, and glue on the sides.</p>
<p> </p>
<p><img src=“http://www.canadianrailroads.ca/rail/gscale/sd60f/636.jpg” alt="" width=“480” height=“406”></p>
<p> </p>
<p>Mount it up against the top curve of the cab.</p>
<p> </p>
<p><img src=“http://www.canadianrailroads.ca/rail/gscale/sd60f/637.jpg” alt="" width=“480” height=“467”></p>
<p> </p>
<p>Cut two 1/2" pieces of .01 x .04" styrene.</p>
<p> </p>
<p><img src=“http://www.canadianrailroads.ca/rail/gscale/sd60f/638.jpg” alt="" width=“360” height=“459”></p>
<p> </p>
<p>Glue one on each side of the bell assembly.</p>
<p> </p>
<p><img src=“http://www.canadianrailroads.ca/rail/gscale/sd60f/639.jpg” alt="" width=“360” height=“357”></p>
<p> </p>
<p>Cut four small pieces of .05" round styrene and mount around the top of the bell as shown. I also added a small piece of stripped telephone wire for the air line. I drilled a small hole for the rear and used epoxy to attach the front.</p>
<p> </p>
<p><img src=“http://www.canadianrailroads.ca/rail/gscale/sd60f/640.jpg” alt="" width=“360” height=“379”></p>
<p> </p>
<p>The side nose grab irons sit 1/8" from the sides and rear. The front is 1/4" back from the line you drew for the sand hatch. Drill 3/64" holes within these lines. You should have 1" between the holes.</p>
<p> </p>
<p><img src=“http://www.canadianrailroads.ca/rail/gscale/sd60f/641.jpg” alt="" width=“640” height=“386”></p>
<p> </p>
<p>Add your grab anchors towards the center of the nose.</p>
<p> </p>
<p><img src=“http://www.canadianrailroads.ca/rail/gscale/sd60f/642.jpg” alt="" width=“480” height=“584”></p>
<p> </p>
<p>I made a little jig as shown below to help get the shape I was after, and to keep the shape consistent. I started at the left, bending the rod into place, and then cutting off the excess at the right.</p>
<p> </p>
<p><img src=“http://www.canadianrailroads.ca/rail/gscale/sd60f/643.jpg” alt="" width=“687” height=“421”></p>
<p> </p>
<p>Now bend both sides around the outside guides.</p>
<p> </p>
<p><img src=“http://www.canadianrailroads.ca/rail/gscale/sd60f/644.jpg” alt="" width=“480” height=“335”></p>
<p> </p>
<p>This should allow you to get a consistent look.</p>
<p> </p>
<p><img src=“http://www.canadianrailroads.ca/rail/gscale/sd60f/645.jpg” alt="" width=“640” height=“127”></p>
<p> </p>
<p>Mount these with about 1/16" of space between the nose and the center part of the grab iron.</p>
<p> </p>
<p><img src=“http://www.canadianrailroads.ca/rail/gscale/sd60f/646.jpg” alt="" width=“640” height=“250”></p>
<p> </p>
<p>Now for the grab irons above the windows. Draw lines 1/8" below the roof lines as shown. On the outside edges, draw a line that lines up with the inside edge of the window frame as shown. The inside holes will be 3/16" from the bell.</p>
<p> </p>
<p><img src=“http://www.canadianrailroads.ca/rail/gscale/sd60f/647.jpg” alt="" width=“800” height=“299”></p>
<p> </p>
<p>Drill your 3/64" holes, and add anchor detail to the outside edges of the holes.</p>
<p> </p>
<p><img src=“http://www.canadianrailroads.ca/rail/gscale/sd60f/648.jpg” alt="" width=“800” height=“124”></p>
<p> </p>
<p>Using 3/64" brass rod, shape your grab irons to match the 1/8" lines you drew.</p>
<p> </p>
<p><img src=“http://www.canadianrailroads.ca/rail/gscale/sd60f/649.jpg” alt="" width=“640” height=“193”></p>
<p> </p>
<p>Now on your roof, draw a center line front to rear. You’re going to mount an antenna 1" from the rear.</p>
<p> </p>
<p><img src=“http://www.canadianrailroads.ca/rail/gscale/sd60f/650.jpg” alt="" width=“640” height=“359”></p>
<p> </p>
<p>I used an antenna from <a href=“https://miniatures-by-eric.myshopify.com/collections/g-guage-parts/products/sinclair-antenna”>Miniatures by Eric.</a> </p>
<p> </p>
<p><img src=“http://www.canadianrailroads.ca/rail/gscale/sd60f/651.jpg” alt="" width=“480” height=“184”></p>
<p> </p>
<p>Now we’re going to build the side window frames. Start with two pieces of .02" styrene cut 1 x 1 15/16". Mark them up as shown below. The frames are 1/8" except for the one between the front and center windows which is 3/16".</p>
<p>Front Windows - 3/8 x 3/4" / Center Windows - 13/16 x 3/4" / Rear Windows - 1/8 x 3/4"</p>
<p> </p>
<p><img src=“http://www.canadianrailroads.ca/rail/gscale/sd60f/652.jpg” alt="" width=“640” height=“646”></p>
<p> </p>
<p>Cut out the window holes.</p>
<p> </p>
<p><img src=“http://www.canadianrailroads.ca/rail/gscale/sd60f/653.jpg” alt="" width=“480” height=“486”></p>
<p> </p>
<p>Now take two pieces of .02" styrene cut 1/2 x 7/8" and mark a 1/16" frame around the edge.</p>
<p> </p>
<p><img src=“http://www.canadianrailroads.ca/rail/gscale/sd60f/654.jpg” alt="" width=“320” height=“456”></p>
<p> </p>
<p>Take two more pieces of .02" styrene cut 5/16 x 7/8" and mark a 1/16" frame around the edge.</p>
<p> </p>
<p><img src=“http://www.canadianrailroads.ca/rail/gscale/sd60f/655.jpg” alt="" width=“320” height=“628”></p>
<p> </p>
<p>Cut out the centers. These will be the lower part of the front and rear window frames.</p>
<p> </p>
<p><img src=“http://www.canadianrailroads.ca/rail/gscale/sd60f/656.jpg” alt="" width=“480” height=“441”></p>
<p> </p>
<p>Mount theses around the front and rear window holes.</p>
<p> </p>
<p><img src=“http://www.canadianrailroads.ca/rail/gscale/sd60f/657.jpg” alt="" width=“480” height=“265”></p>
<p> </p>
<p>Now take some .04 x .04" styrene and run this around the front and rear holes to build the upper frames.</p>
<p> </p>
<p><img src=“http://www.canadianrailroads.ca/rail/gscale/sd60f/658.jpg” alt="" width=“640” height=“326”></p>
<p> </p>
<p>Now on both sides of your cab, draw lines 1/16" above, below, and in front of the window holes.</p>
<p> </p>
<p><img src=“http://www.canadianrailroads.ca/rail/gscale/sd60f/659.jpg” alt="" width=“640” height=“337”></p>
<p> </p>
<p>Mount your frames in place with the large window towards the front.</p>
<p> </p>
<p><img src=“http://www.canadianrailroads.ca/rail/gscale/sd60f/660.jpg” alt=""></p>
<p><img src=“http://www.canadianrailroads.ca/rail/gscale/sd60f/661.jpg” alt="" width=“800” height=“503”></p>
<p> </p>
<p>Now for the rear step detail, start with two pieces of .01" styrene cut 1 1/16 x 1". Mark up as shown below. The blue areas will be cut out.</p>
<p> </p>
<p><img src=“http://www.canadianrailroads.ca/rail/gscale/sd60f/662.jpg” alt="" width=“800” height=“414”></p>
<p> </p>
<p>Cut out the blue areas.</p>
<p> </p>
<p><img src=“http://www.canadianrailroads.ca/rail/gscale/sd60f/663.jpg” alt="" width=“640” height=“306”></p>
<p> </p>
<p>Now we need some venting on the conductor’s side. Cut four pieces of .04" quarter round 5/8" long.</p>
<p> </p>
<p><img src=“http://www.canadianrailroads.ca/rail/gscale/sd60f/664.jpg” alt="" width=“480” height=“588”></p>
<p> </p>
<p>Now on the conductor’s piece (front to the left) divide up between the step holes 1/32-1/16/1/16-1/16-1/16-1/32" as shown.</p>
<p> </p>
<p><img src=“http://www.canadianrailroads.ca/rail/gscale/sd60f/665.jpg” alt="" width=“480” height=“463”></p>
<p> </p>
<p>Mount the quarter round pieces centered to the holes. Flush the tops with the 1/16" lines. Once dry, round the outer corners.</p>
<p> </p>
<p><img src=“http://www.canadianrailroads.ca/rail/gscale/sd60f/666.jpg” alt="" width=“800” height=“346”></p>
<p> </p>
<p>Now mount these on each side of the cab around the step holes. The rear and bottom will sit about 1/16" from the edges. The front will sit against the notch in the side of the cab.</p>
<p> </p>
<p><img src=“http://www.canadianrailroads.ca/rail/gscale/sd60f/667.jpg” alt="" width=“640” height=“655”></p>
<p><img src=“http://www.canadianrailroads.ca/rail/gscale/sd60f/668.jpg” alt="" width=“640” height=“731”></p>
<p> </p>
<p>Now we’re going to install the cab side doors.</p>
<p>Take some .01 x .04" styrene and cut four pieces 3/4" long.</p>
<p> </p>
<p><img src=“http://www.canadianrailroads.ca/rail/gscale/sd60f/680.jpg” alt="" width=“600” height=“590”></p>
<p> </p>
<p>Install one on each side centered over the door cut. The remaining two will be used later on.</p>
<p> </p>
<p><img src=“http://www.canadianrailroads.ca/rail/gscale/sd60f/681.jpg” alt="" width=“600” height=“265”></p>
<p> </p>
<p>Now, you will need 4 of the .03" pieces you were left with after cutting out the doors when making the cab sides. Cut out 1/2 x 13/16" windows as shown below 1/16" from the top and 1/8" from the sides.</p>
<p> </p>
<p><img src=“http://www.canadianrailroads.ca/rail/gscale/sd60f/682.jpg” alt="" width=“300” height=“714”></p>
<p> </p>
<p>Mark out the window, and drill guide holes 1/16" in from the corners.</p>
<p> </p>
<p><img src=“http://www.canadianrailroads.ca/rail/gscale/sd60f/683.jpg” alt="" width=“480” height=“528”></p>
<p> </p>
<p>Drill the 1/8" corner holes.</p>
<p> </p>
<p><img src=“http://www.canadianrailroads.ca/rail/gscale/sd60f/684.jpg” alt="" width=“480” height=“560”></p>
<p> </p>
<p>Cut out the windows. On two of the door pieces, smooth the outer edges and smooth the corners. These will be the outer pieces.</p>
<p> </p>
<p><img src=“http://www.canadianrailroads.ca/rail/gscale/sd60f/685.jpg” alt="" width=“480” height=“512”></p>
<p> </p>
<p>Glue the smoothed piece to a square piece, and install them on each side. Try to center the smoothed piece so that the gap around the edge is consistent. To secure the door, glue the squared piece from the back side of the cab.</p>
<p> </p>
<p><img src=“http://www.canadianrailroads.ca/rail/gscale/sd60f/686.jpg” alt="" width=“600” height=“843”></p>
<p> </p>
<p>Now, using the same instructions for the front cab door handle, cut four handles for the side doors, 2 per door.</p>
<p> </p>
<p><img src=“http://www.canadianrailroads.ca/rail/gscale/sd60f/687.jpg” alt="" width=“300” height=“345”></p>
<p> </p>
<p>Using .02 x .06" styrene, cut the handle bases. Cut two 1/16" long and two 1/8" long.</p>
<p> </p>
<p><img src=“http://www.canadianrailroads.ca/rail/gscale/sd60f/688.jpg” alt="" width=“400” height=“719”></p>
<p> </p>
<p>Mount the handles to the bases. The top door handle gets the 1/8" base. Mount the handle at the bottom of the base.</p>
<p>The lower handle below is the top handle.</p>
<p> </p>
<p><img src=“http://www.canadianrailroads.ca/rail/gscale/sd60f/689.jpg” alt="" width=“400” height=“384”></p>
<p> </p>
<p>The door handles will be mounted on the front side of the door (facing the nose). Set them back 1/16" from the front of the door.</p>
<p>The bottom handle is 1/8" from the bottom of the door, and the top handle is 1" from the bottom of the door.</p>
<p>A piece of scrap styrene is used to hold them in the correct position until dry.</p>
<p> </p>
<p><img src=“http://www.canadianrailroads.ca/rail/gscale/sd60f/690.jpg” alt="" width=“637” height=“703”></p>
<p> </p>
<p>Take the two remaining .01 x .04 x 3/4" pieces you cut earlier and mount them on the bottom of the doors.</p>
<p> </p>
<p><img src=“http://www.canadianrailroads.ca/rail/gscale/sd60f/691.jpg” alt="" width=“480” height=“697”></p>
<p> </p>
<p>For the mirrors, cut four pieces of .04 x .25" styrene 5/8" long.</p>
<p> </p>
<p><img src=“http://www.canadianrailroads.ca/rail/gscale/sd60f/692.jpg” alt="" width=“480” height=“562”></p>
<p> </p>
<p>Round the corners with a file.</p>
<p> </p>
<p><img src=“http://www.canadianrailroads.ca/rail/gscale/sd60f/693.jpg” alt="" width=“320” height=“310”></p>
<p> </p>
<p>Cut four pieces of .04 x .04" styrene 1/8" long.</p>
<p> </p>
<p><img src=“http://www.canadianrailroads.ca/rail/gscale/sd60f/694.jpg” alt="" width=“480” height=“550”></p>
<p> </p>
<p>Mount these on the top and bottom of the mirrors as shown below.</p>
<p> </p>
<p><img src=“http://www.canadianrailroads.ca/rail/gscale/sd60f/695.jpg” alt="" width=“320” height=“370”></p>
<p> </p>
<p>Taking some more .04 x .04" styrene, cut four 1/16" pieces and four 1/8" pieces.</p>
<p> </p>
<p><img src=“http://www.canadianrailroads.ca/rail/gscale/sd60f/696.jpg” alt="" width=“480” height=“382”></p>
<p> </p>
<p>The 1/16" pieces mount at the top and bottom rear of the mirror as shown below.</p>
<p> </p>
<p><img src=“http://www.canadianrailroads.ca/rail/gscale/sd60f/697.jpg” alt="" width=“640” height=“570”></p>
<p> </p>
<p>Cut two 7/8" mounting plates from .015 x .1" styrene.</p>
<p> </p>
<p><img src=“http://www.canadianrailroads.ca/rail/gscale/sd60f/698.jpg” alt="" width=“480” height=“664”></p>
<p> </p>
<p>The 1/8" pieces will be attached to the mounting plate at the top and bottom to hold the mirror in place.</p>
<p> </p>
<p><img src=“http://www.canadianrailroads.ca/rail/gscale/sd60f/699.jpg” alt="" width=“320” height=“284”></p>
<p> </p>
<p>Mount the top and bottom piece to the mounting plate, and glue the mirror in between at an angle of around 45 degrees.</p>
<p> </p>
<p><img src=“http://www.canadianrailroads.ca/rail/gscale/sd60f/700.jpg” alt="" width=“640” height=“185”></p>
<p> </p>
<p>Cut eight pieces of .04" hex about 1/16" long.</p>
<p> </p>
<p><img src=“http://www.canadianrailroads.ca/rail/gscale/sd60f/701.jpg” alt="" width=“240” height=“480”></p>
<p> </p>
<p>Mount these on the top and bottom, and on the outside of the mirror. The top placement is shown below. Do the same for the bottom.</p>
<p> </p>
<p><img src=“http://www.canadianrailroads.ca/rail/gscale/sd60f/702.jpg” alt="" width=“340” height=“317”></p>
<p> </p>
<p>Mount these on the window frame in front of the sliding windows as shown below.</p>
<p> </p>
<p><img src=“http://www.canadianrailroads.ca/rail/gscale/sd60f/703.jpg” alt="" width=“640” height=“497”></p>
<p> </p>
<p> </p>
<p><br><br><br><br><br><br><br><br></p>
</div>
</div>
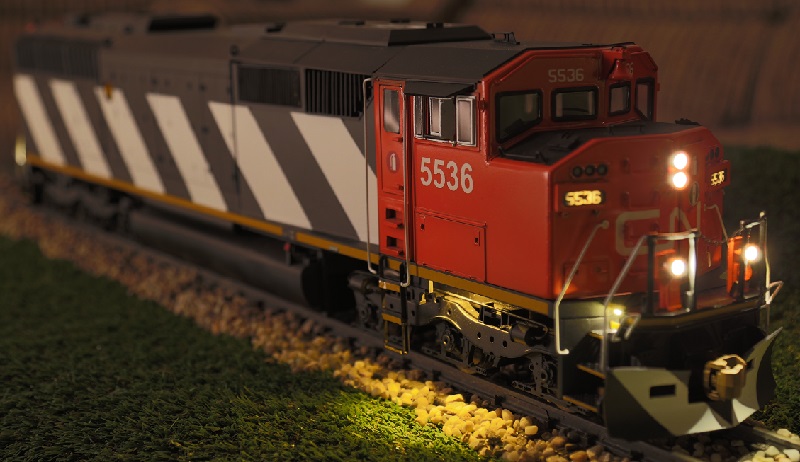
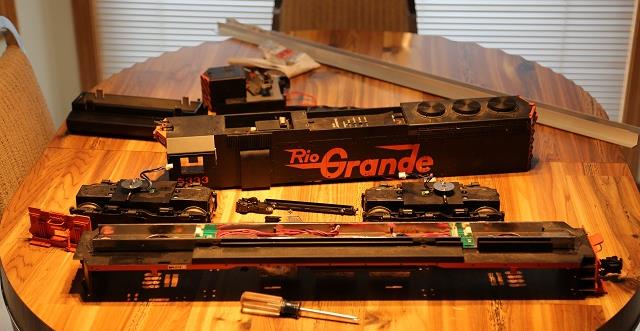
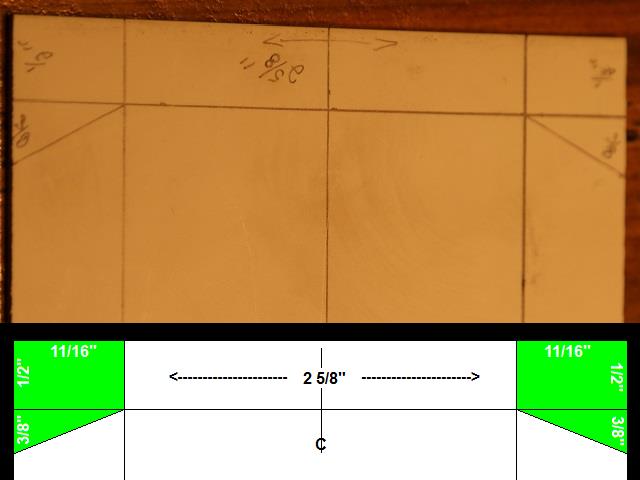
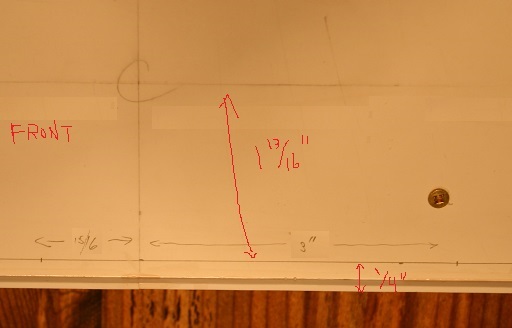
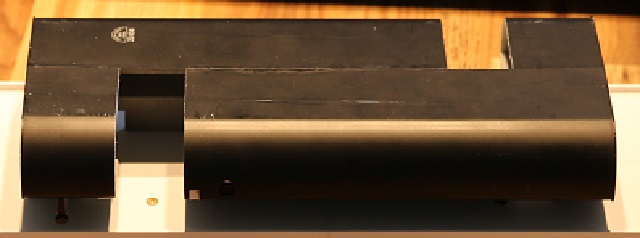
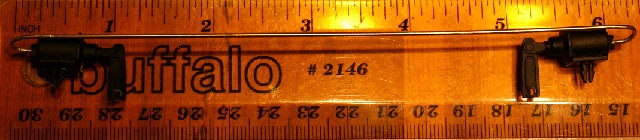
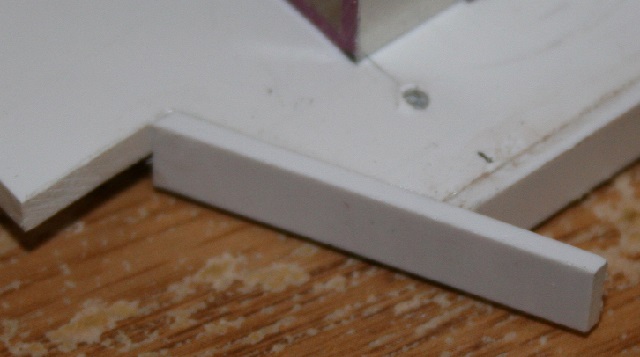
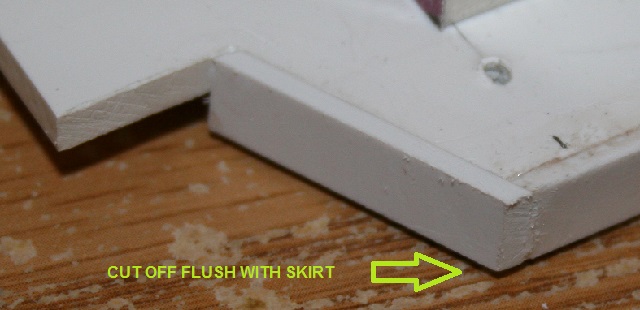
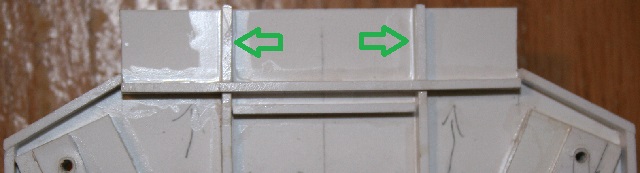
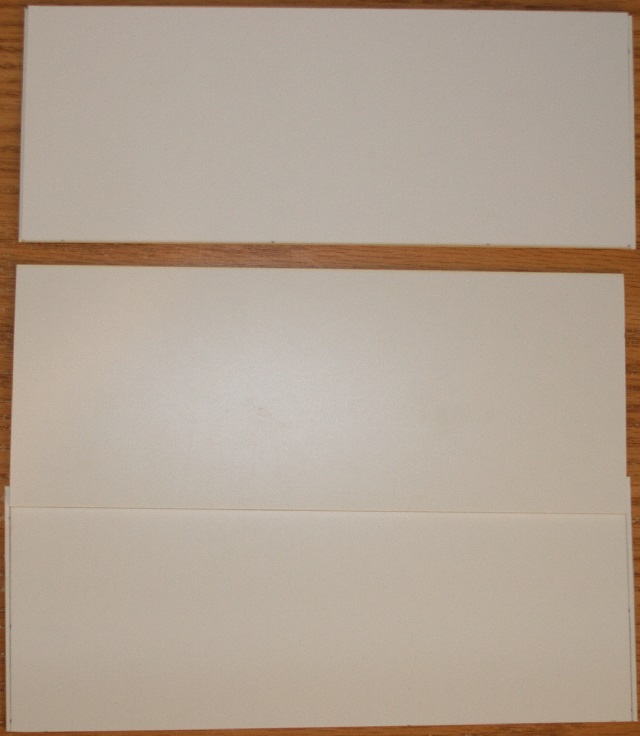
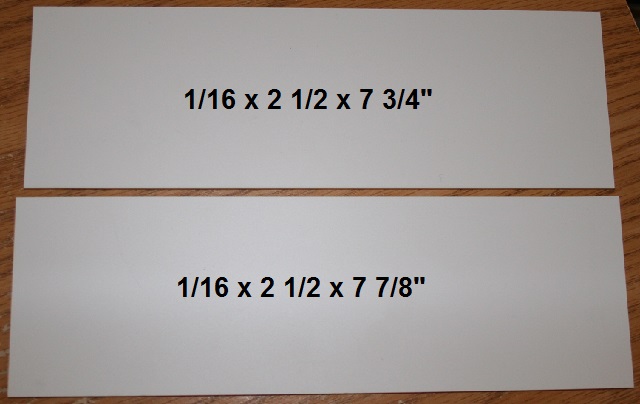
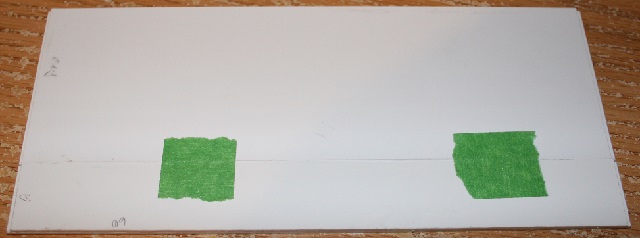
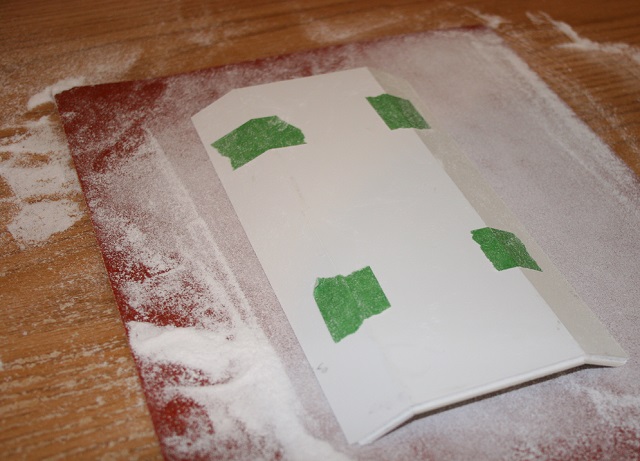
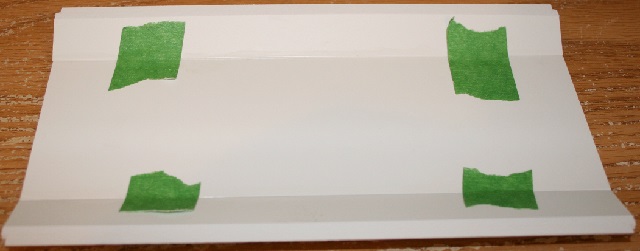
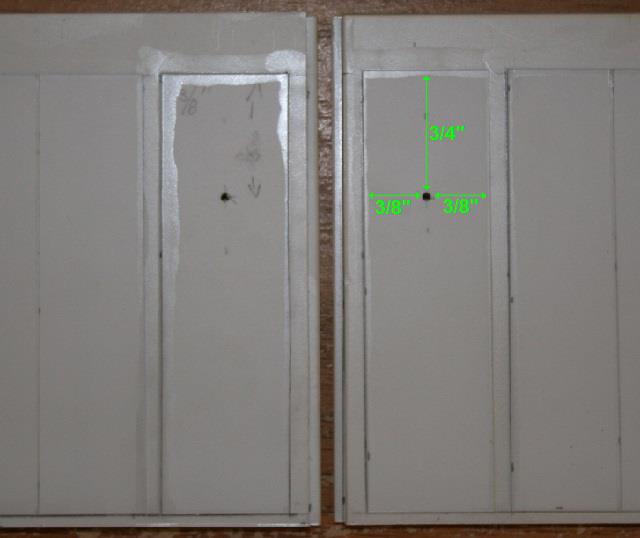
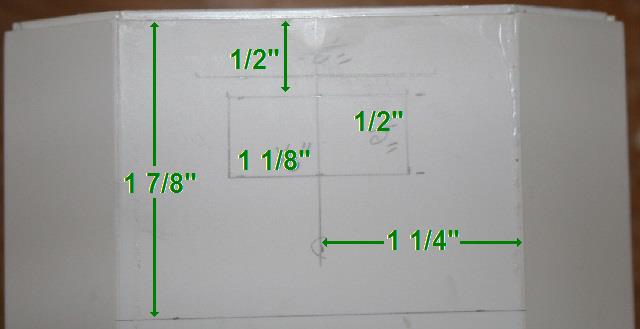
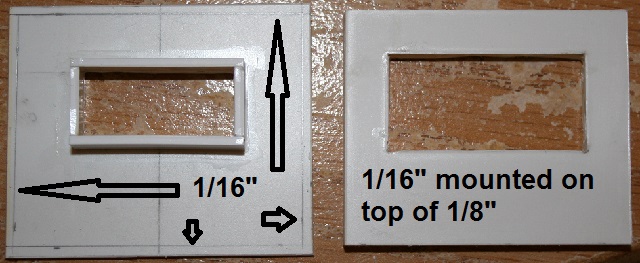
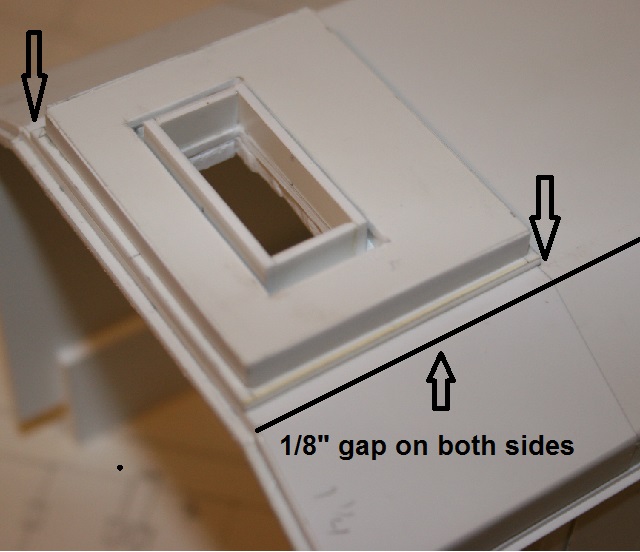
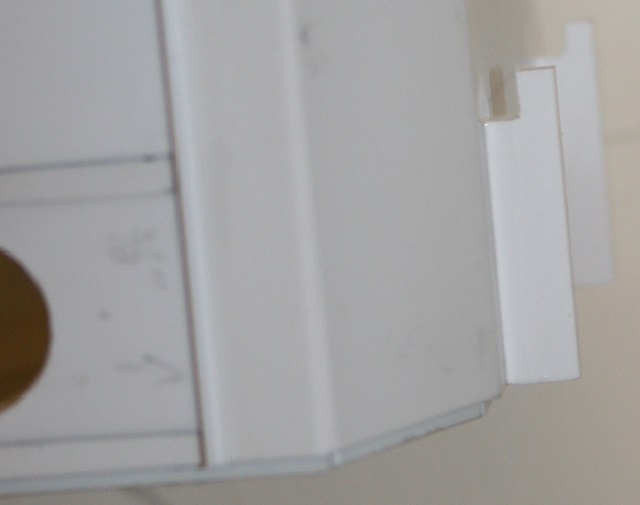
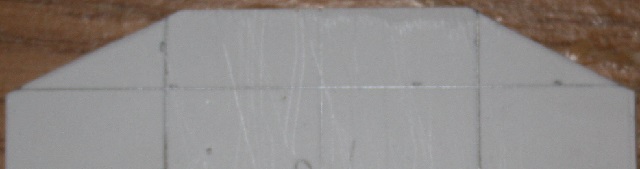
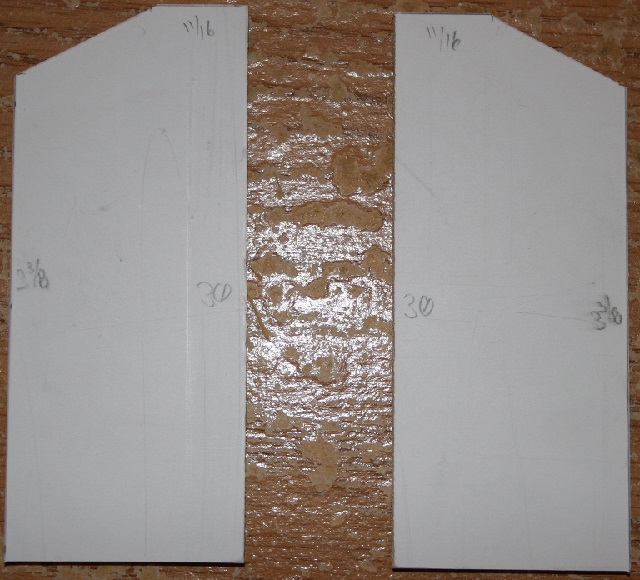
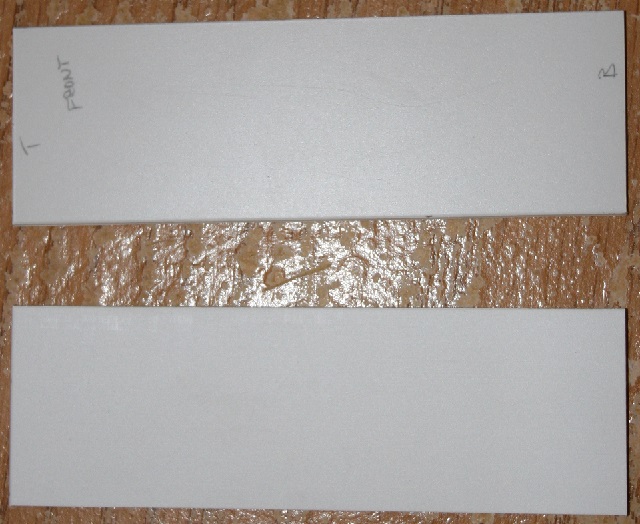
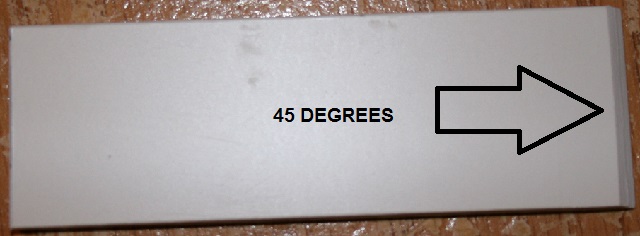
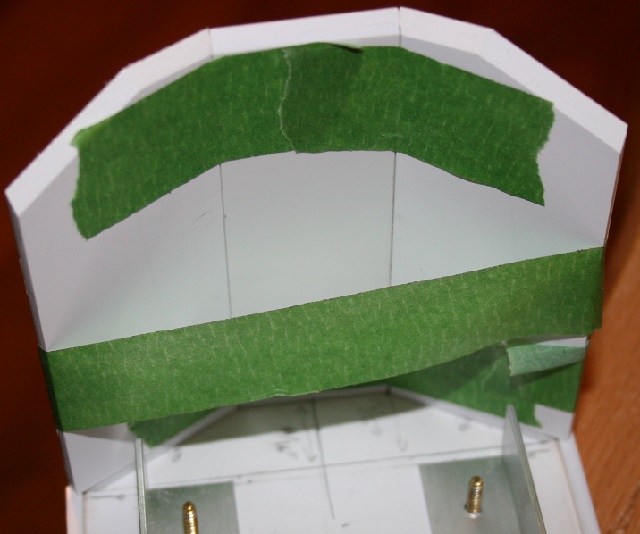
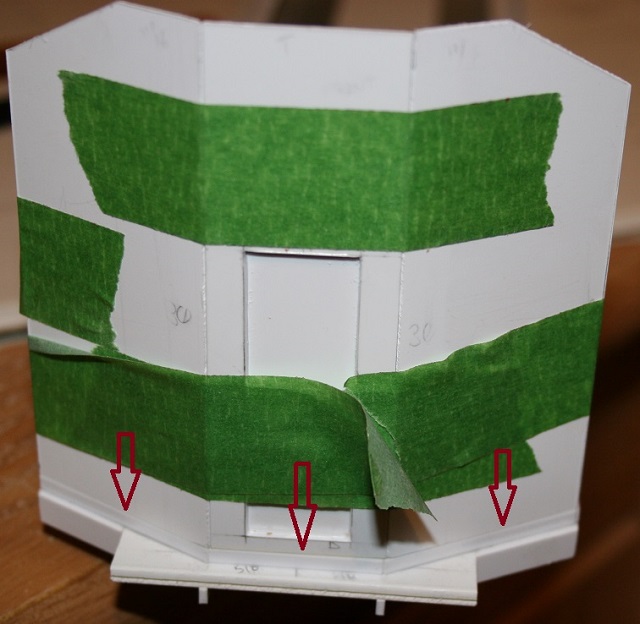
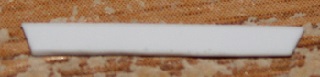
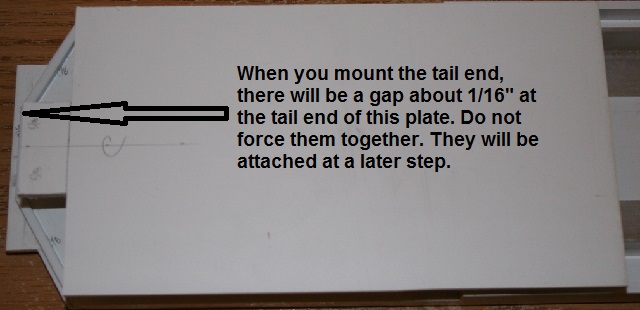
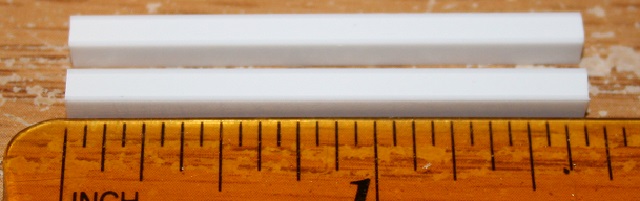
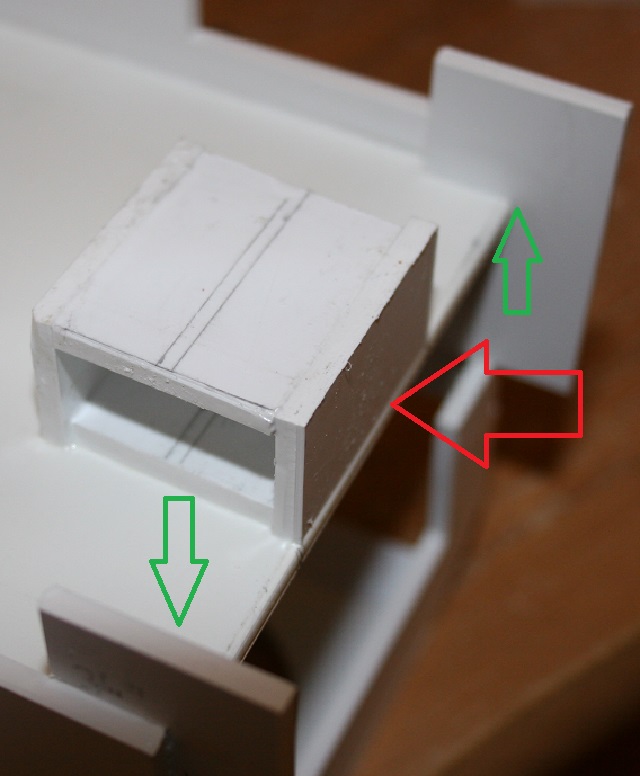
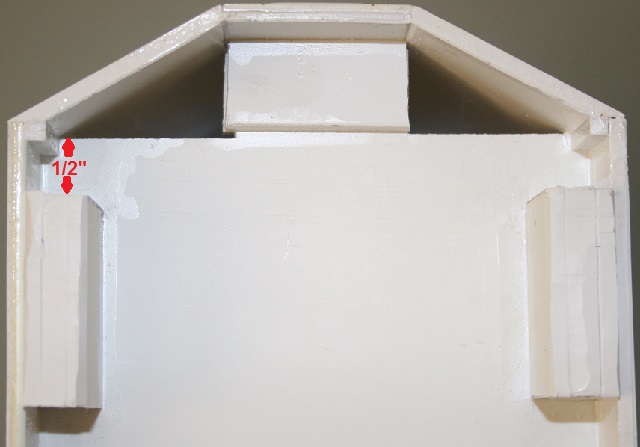
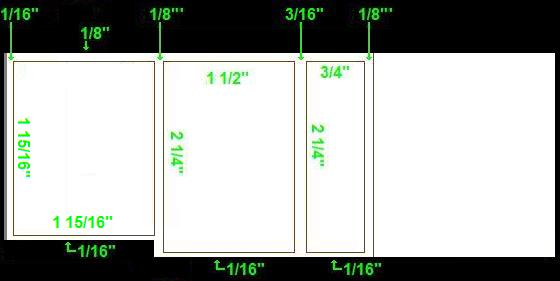
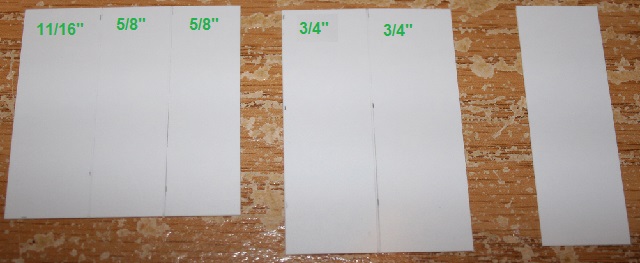
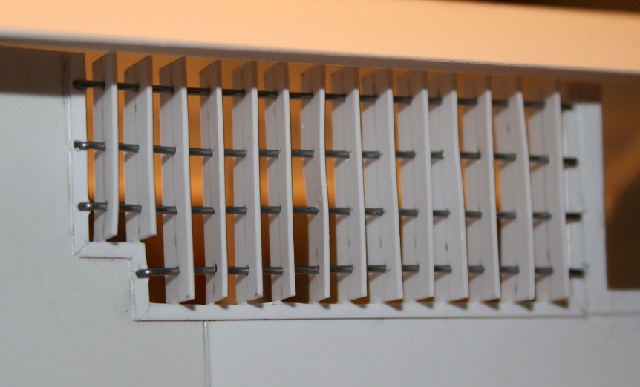
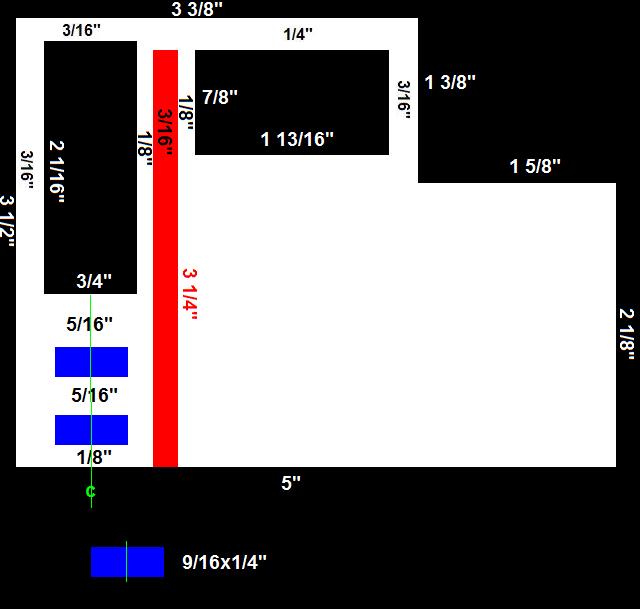
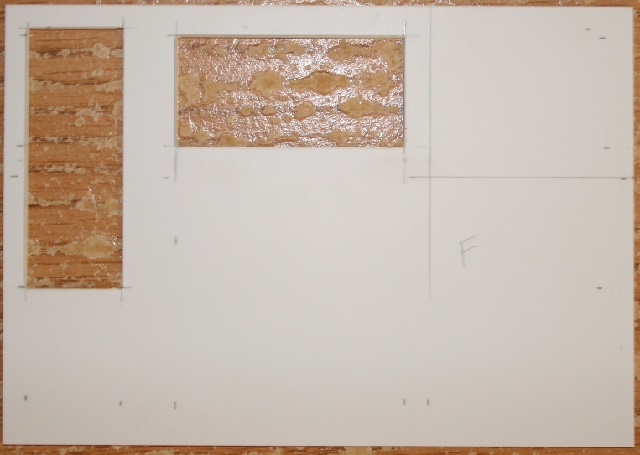
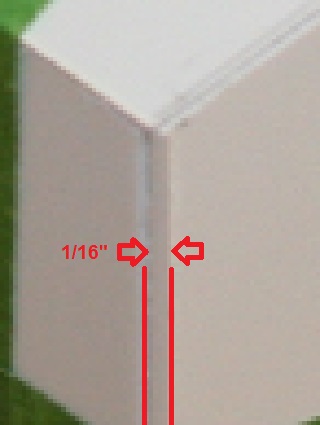
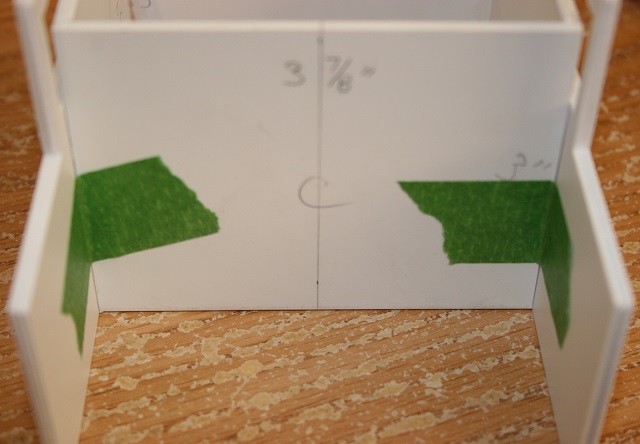
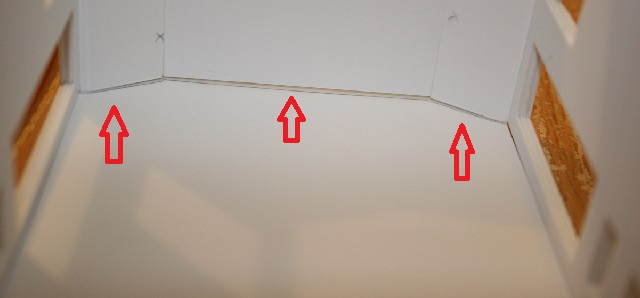
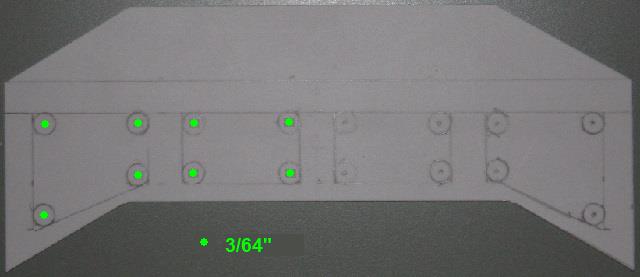
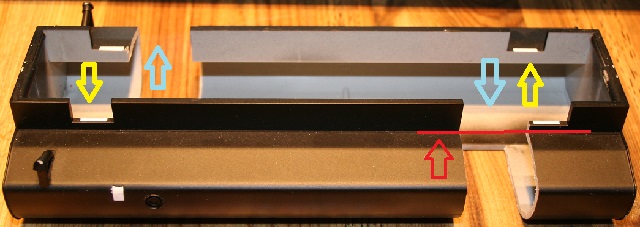
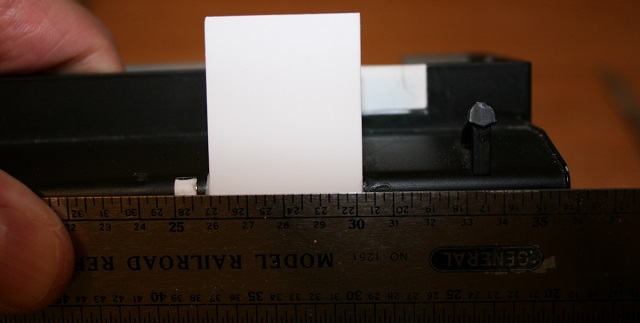
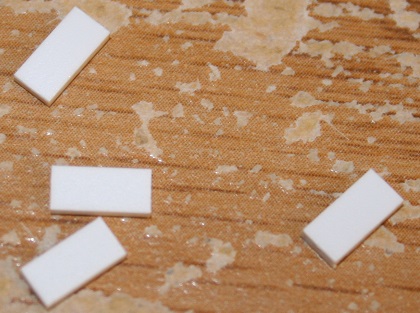
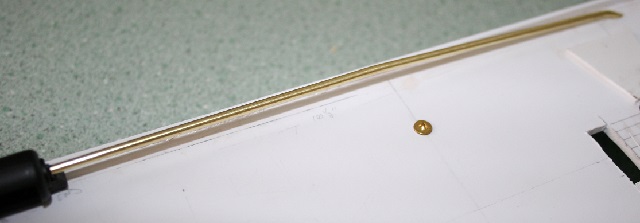
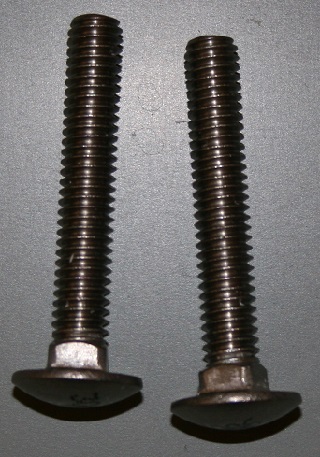
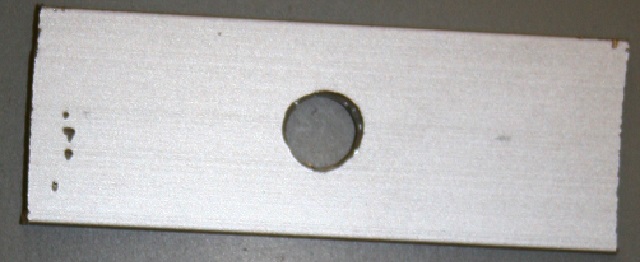
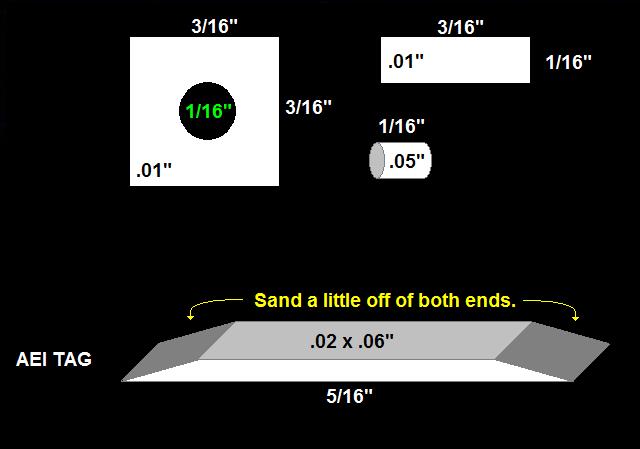
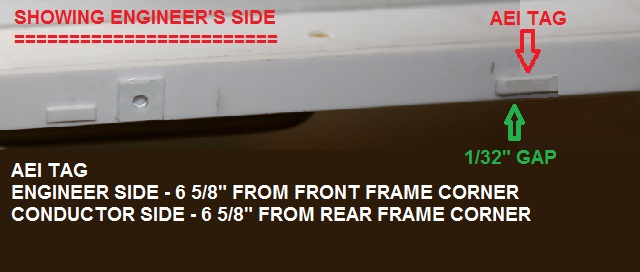
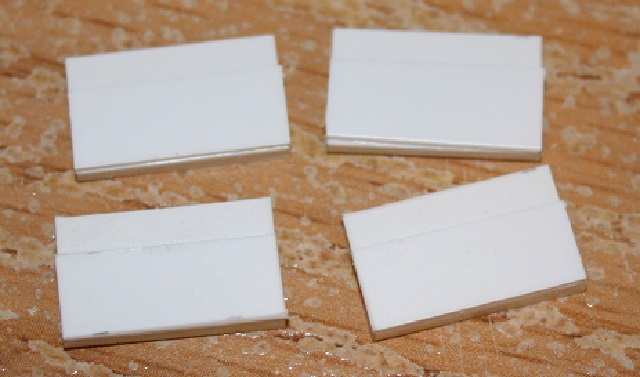
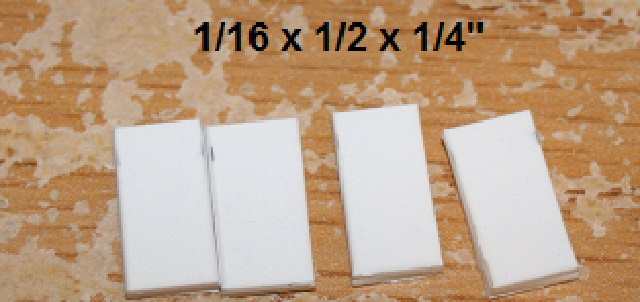
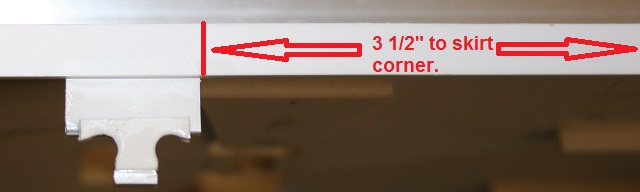
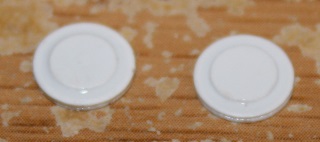
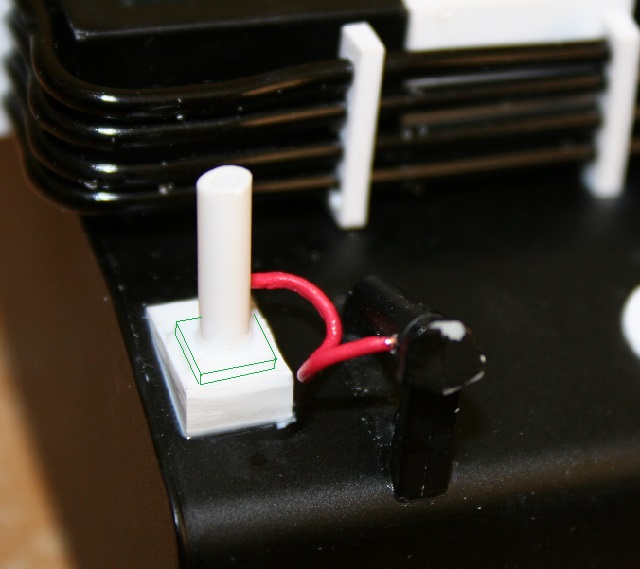
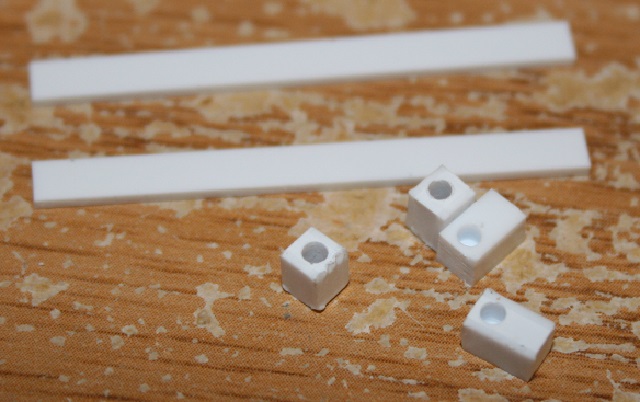
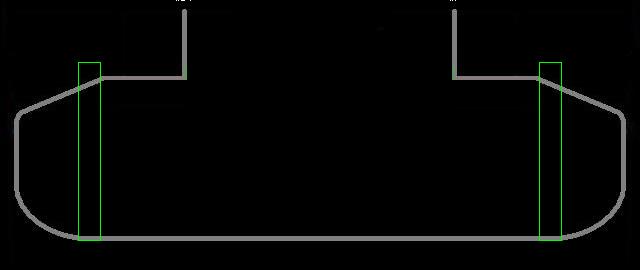
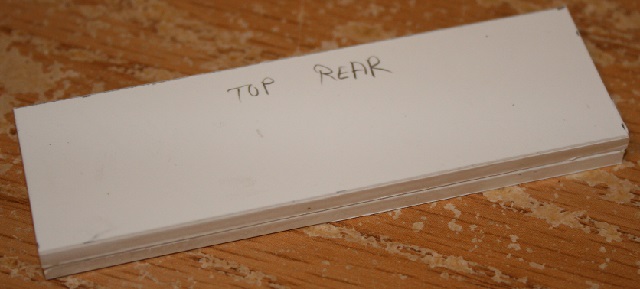
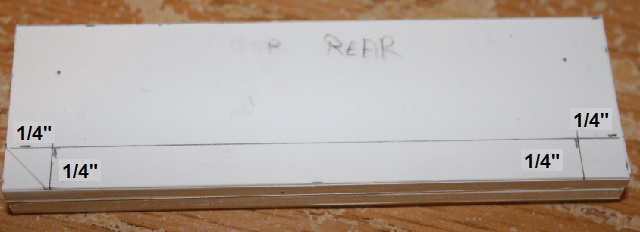
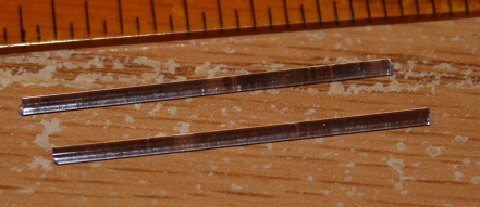
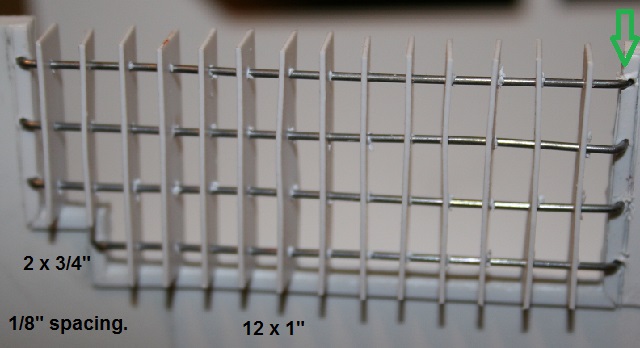
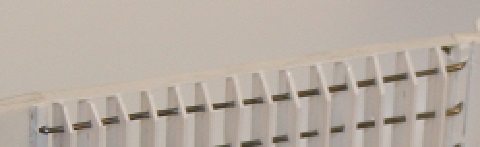
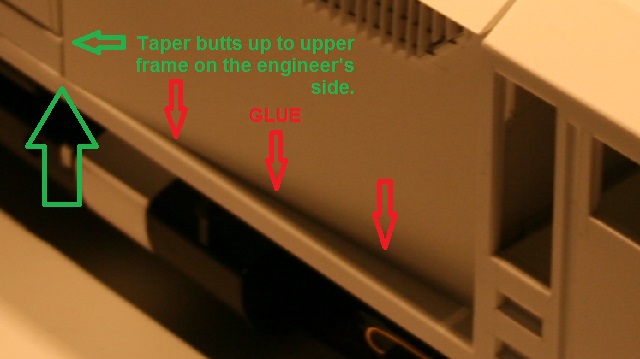
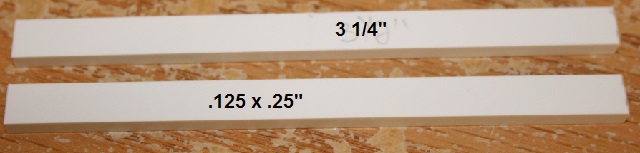
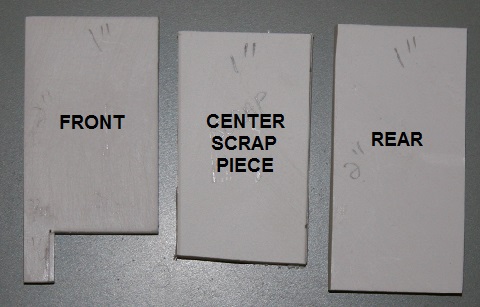
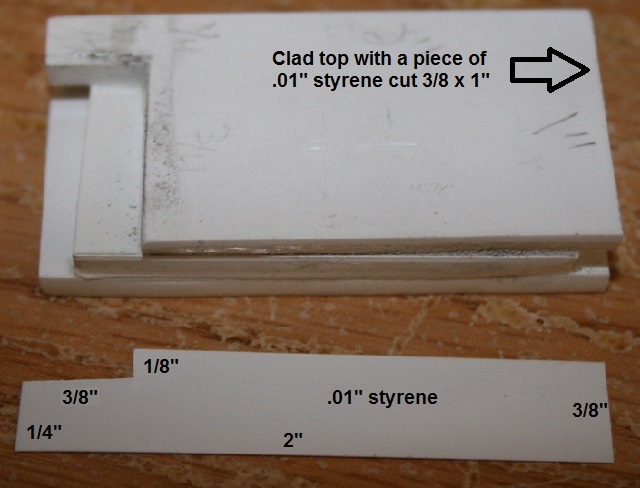
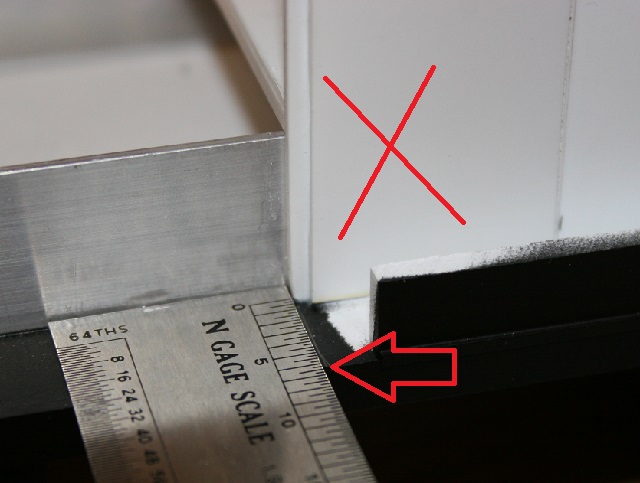
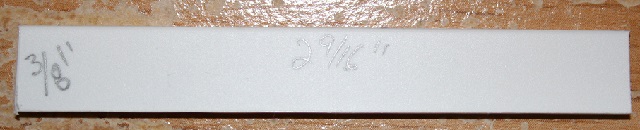
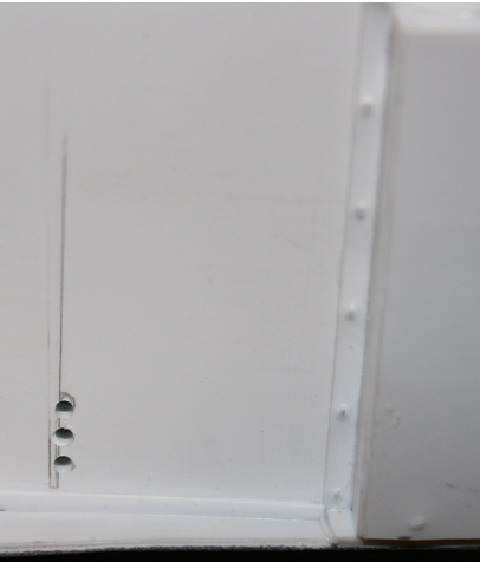
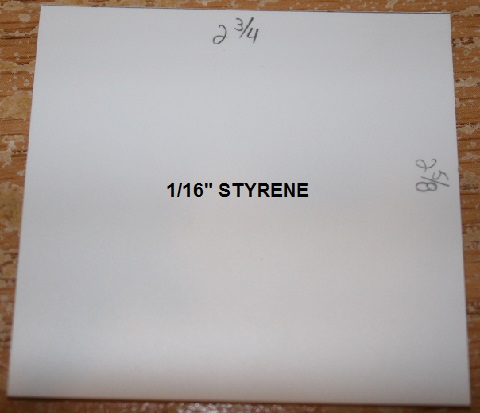
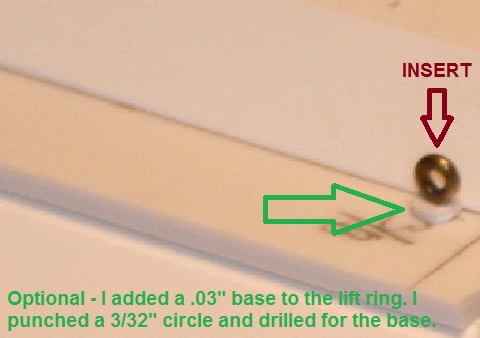
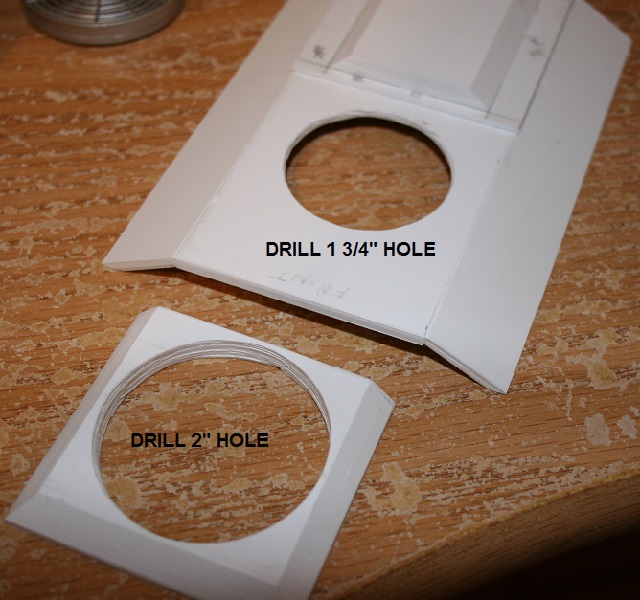
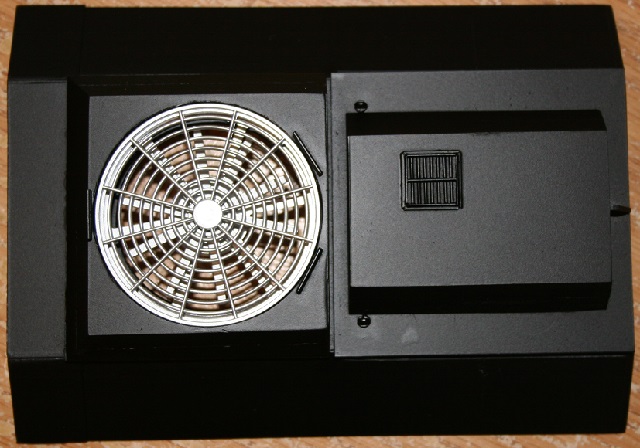
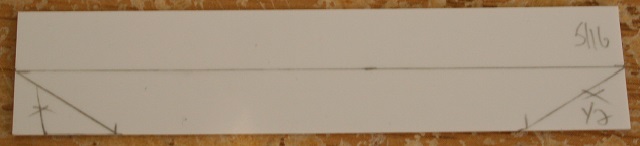
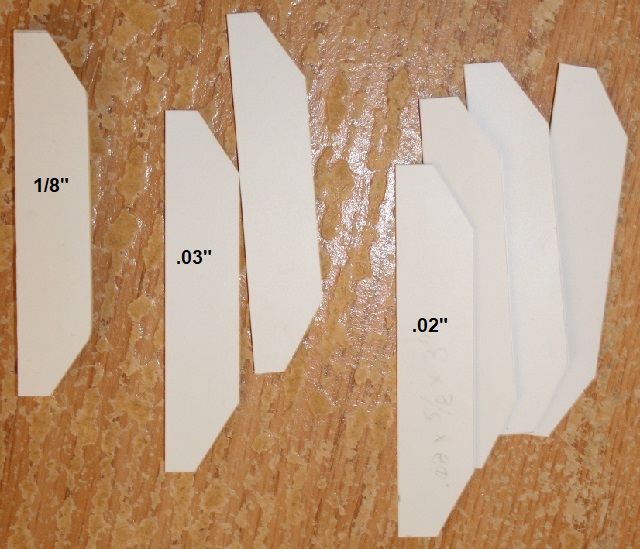
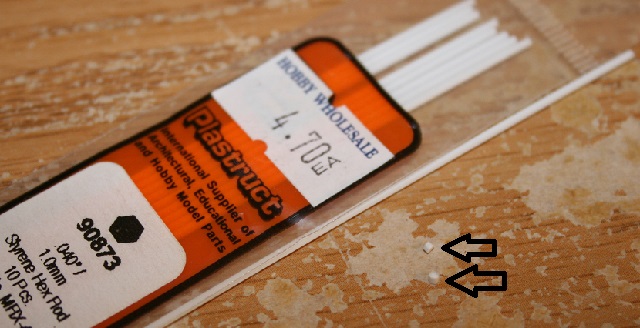
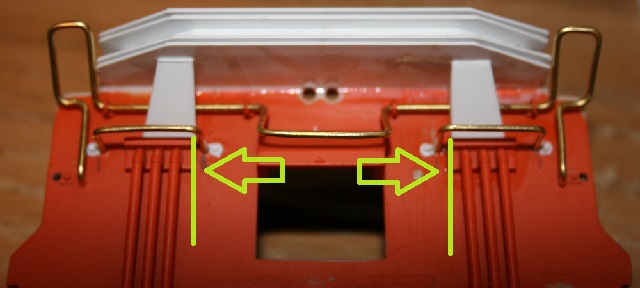
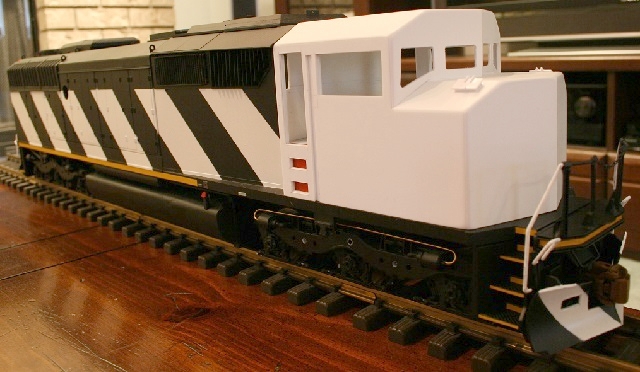
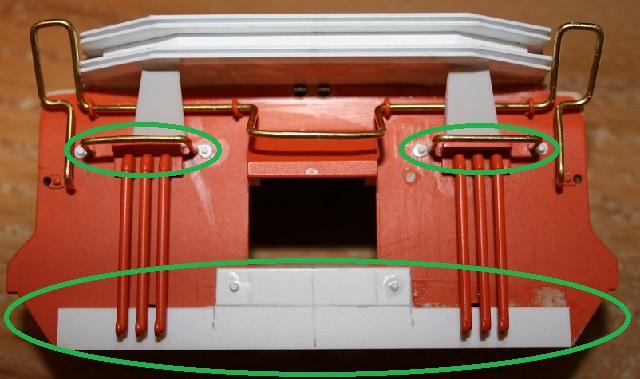
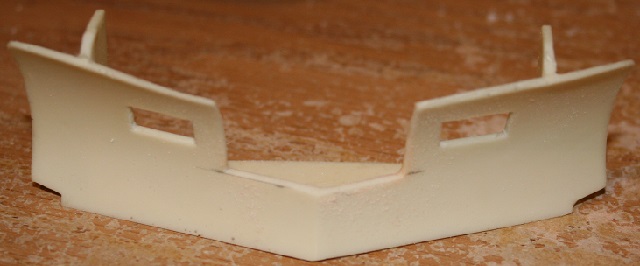
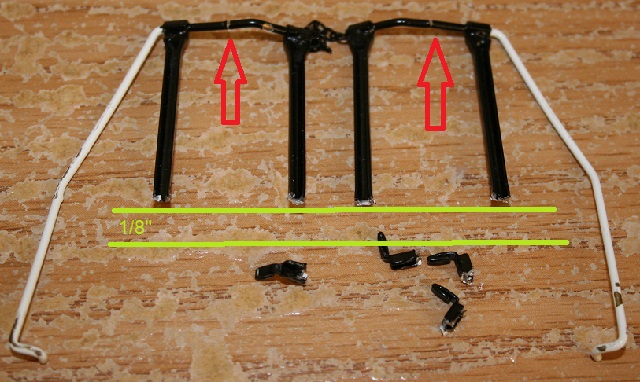
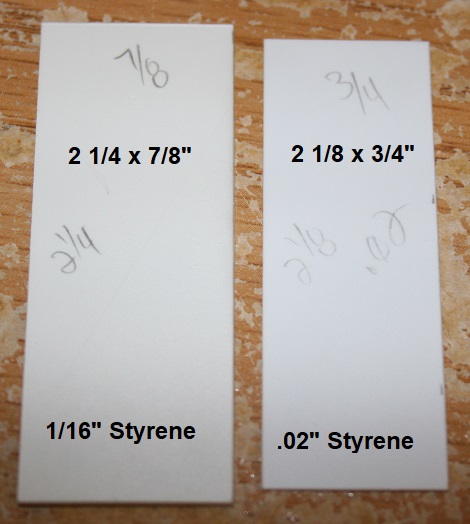
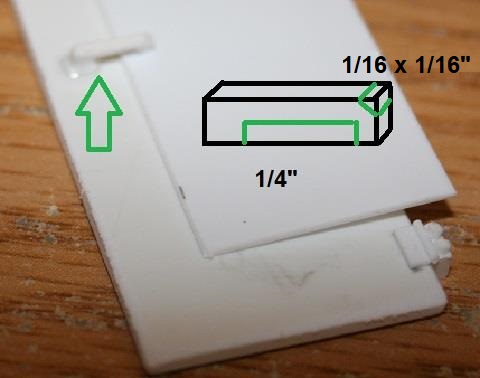
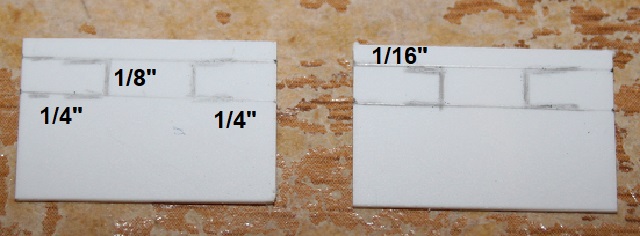
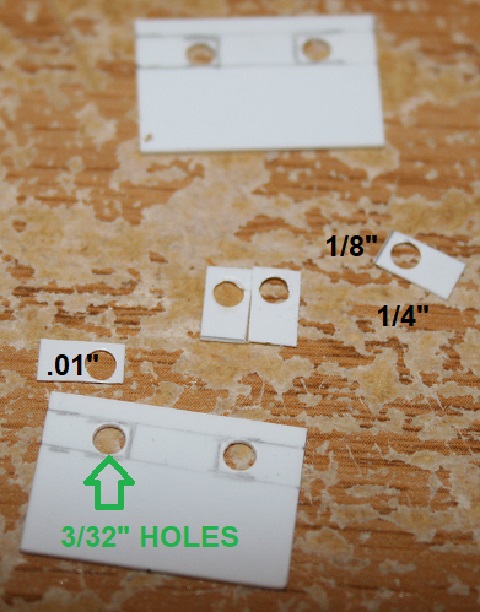
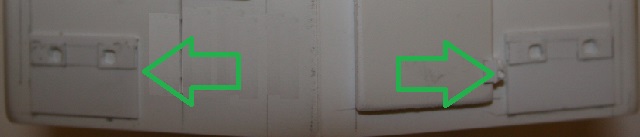
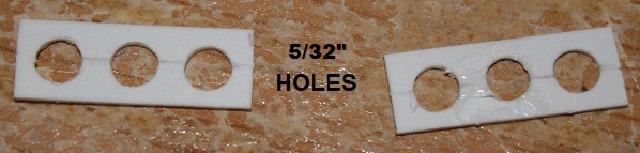
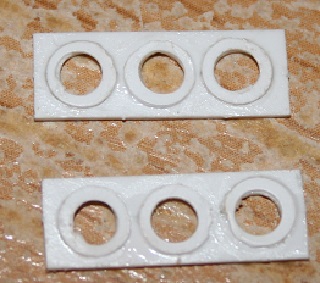
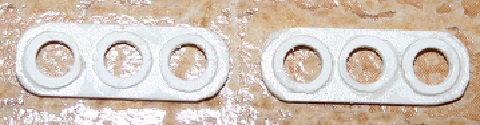
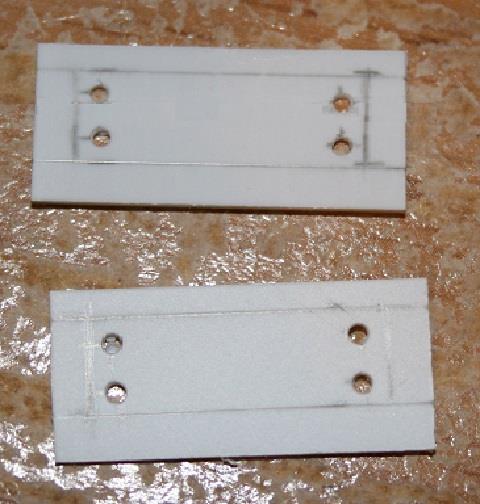
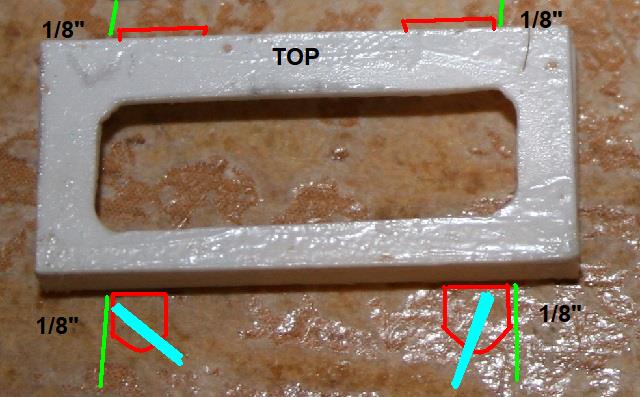
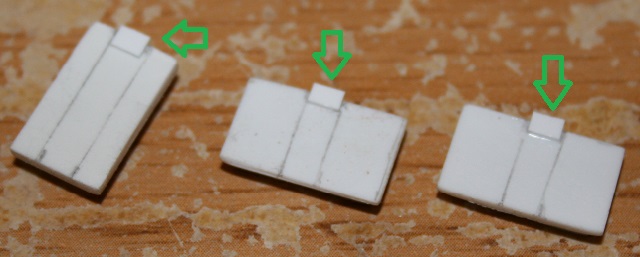
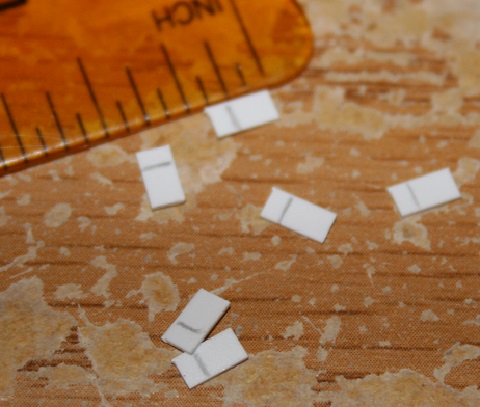
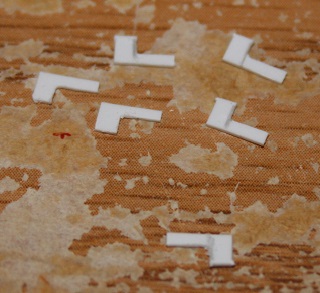
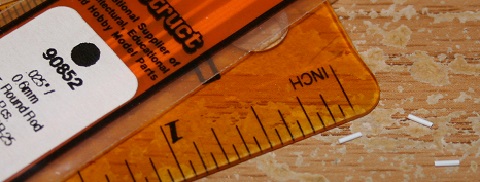
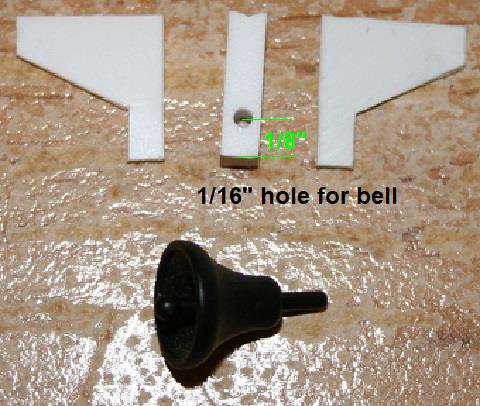
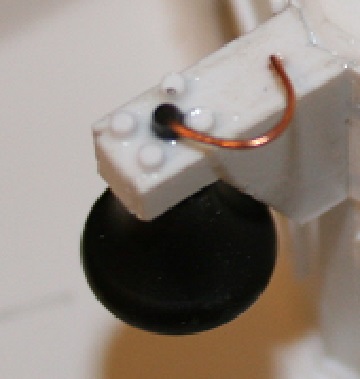
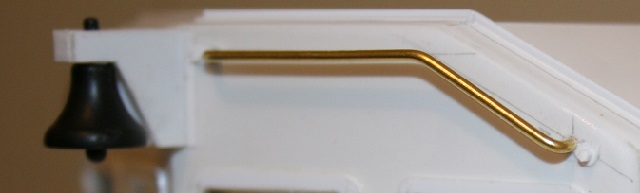
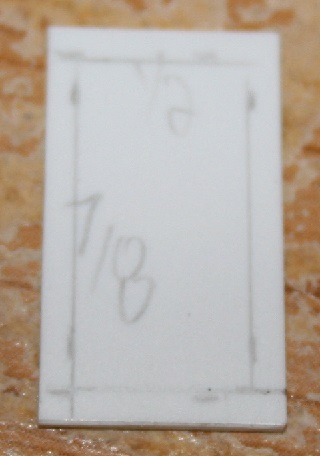
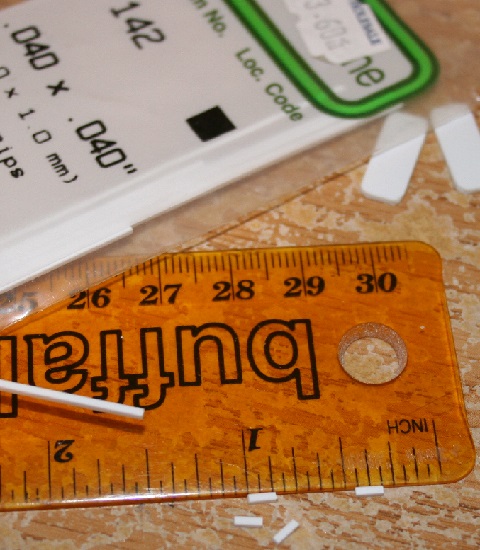
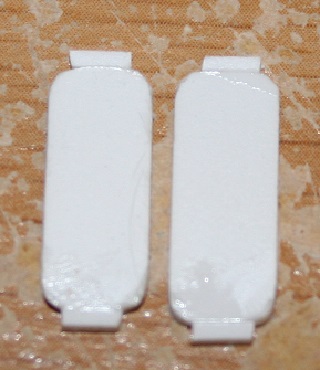
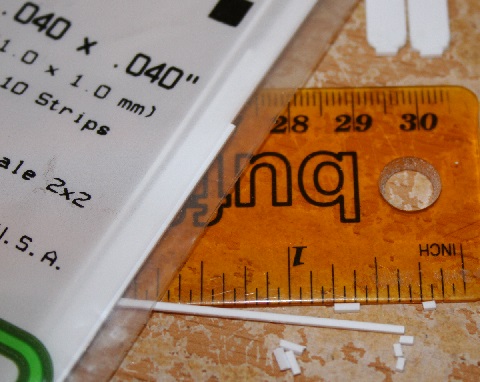
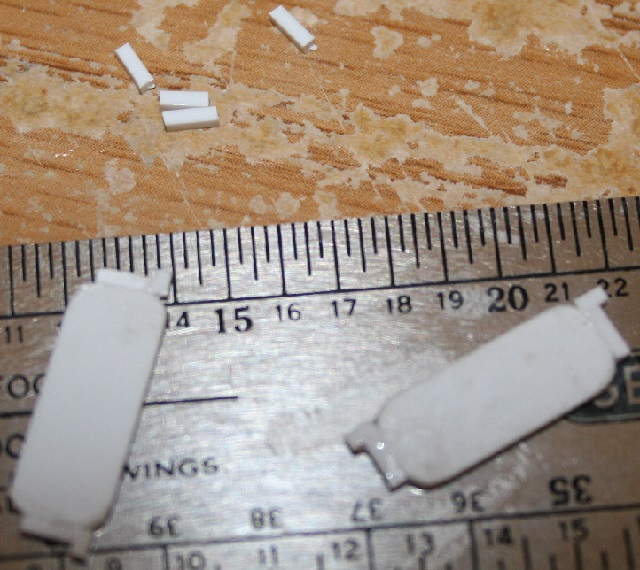