I've had an idea for a raised layout for quite a few years now, but it hasn't been serious until about the last five years or so. This last winter has convinced me to go ahead with this idea. But first let me include a little history here. I've had a garden railroad for the past 28 years, since 1988. It's always been directly on the ground. The first layout I built was all sectional track on a road bed of dust and gravel called "screenings" and occupied an area that was built up with PT landscape ties.. It was also track powered with wires everywhere. It was fun, but it was also a night mare to maintain. Eventually after about 15 years or so, the landscape ties began to deteriorate and it had to be dismantled. About that time my oldest son was working at a Garden Center that sold E.P. Henry landscaping blocks, so a solution for the wall holding up the area was found. More on that can be found at: http://rgsgardenrailroad.com/RGSpage4.htm
In rebuilding the layout, I also wanted a firmer roadbed, so a ladder type road bed was used using Trimplank, which is 2 PVC 1"x 3" boards on edge with a 1" spacer between them.The problem I have since run into is the constant freeze-thaw cycle that occurs during the winter months in the northeast part of the country. It has played havoc on the track work in the last 2 years. This last winter was the worst. This freeze-thaw cycle has raised the track work about 4-6" higher than it was originally over the last 6 years or so. This past winter has really done a number on it. Parts of the ladder are so far above the ground you can see under it. Another concern I had was that the outside ladder on the curves would lift up higher than the inside curve forcing n me to shim the track on the inside rail to keep it level. All in all, having to spend the summer getting the layout in half decent operational shape has been a real pain in the neck.
Over the last 15 years I've had the opportunity to get up to Ottawa and operate on Fred Mill's layout with the rest of the OVGRS gang. What has impressed me the most about it has been it's operational reliability, it's ease of maintenance, the ability to change things around easily, and it sits low to the ground in most spots. I've also been able to visit Dave Goodson's layout and those 2 visits also convinced me to switching to battery and radio control for my engines. I had paid a visit to Richard Smith's layout and saw what Roger Caizza has done at the Finger lakes Live Steamer with their G scale layout. I've also admired Rick Marty's layout from some of the pictures he's posted. Last summer while on our trip out to Medford, OR. for my son's wedding, I had a chance to slip on over to see Richard again and picked his brain about his layout. So from all this a plan began to form about what I would like in a raised layout.
My main concerns were where to put it so it wouldn't overwhelm the yard, making it as unobtrusive as possible and how to keep the gardening aspect of a garden rail road with a raised layout. Car storage was also a problem that would need attention, since where the layout is now made the storage in the garage convenient. After a survey of the yard last summer and the ideas I've had beginning to gel and take shape over the past 2 years, where to put it was a no brainer. Since I have a 16 x 16 shed out back that would take care of the storage problem there's a nice reasonably flat area just to the side of it. I'm comfortable that my concerns have been resolved and construction can begin. I had built a 2 foot square test bed of my idea and set it outside where's it's been for the last 2 years. 
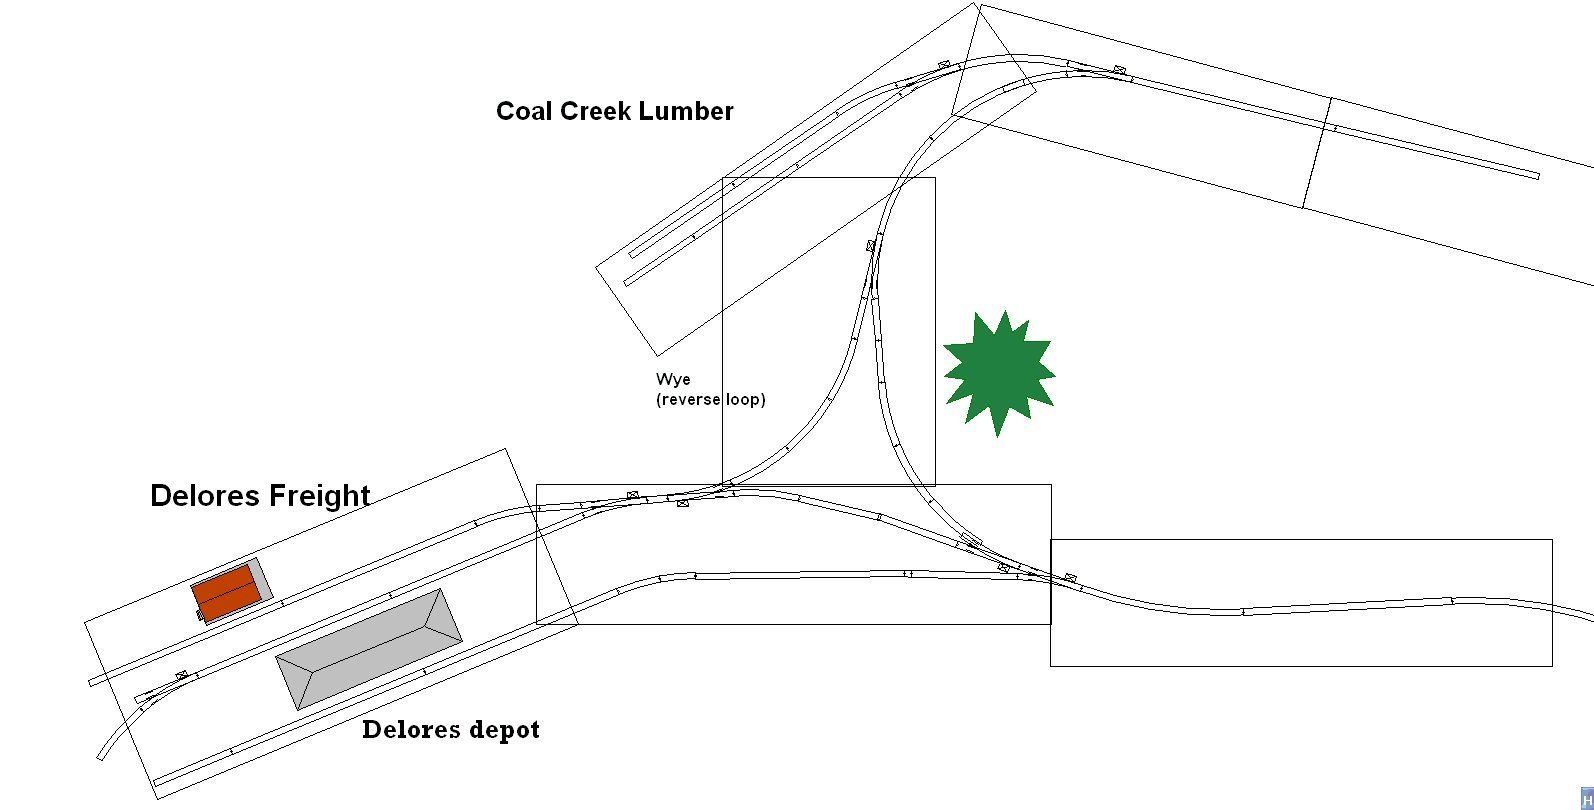
During the winter I dug out the old RRTrack software and began some track planning. This helped me to see what would fit in a certain area and how big the bench work should be for that particular spot. I also wanted to incorporate most of the existing track plan in relation to sidings and industries into the new plan. Most of the guys who have run on it found it a challenge and interesting. I wanted to keep that. I also found that I could add on to the layout with another town, add a wye, and still retain both a point to point and a continuous running layout.
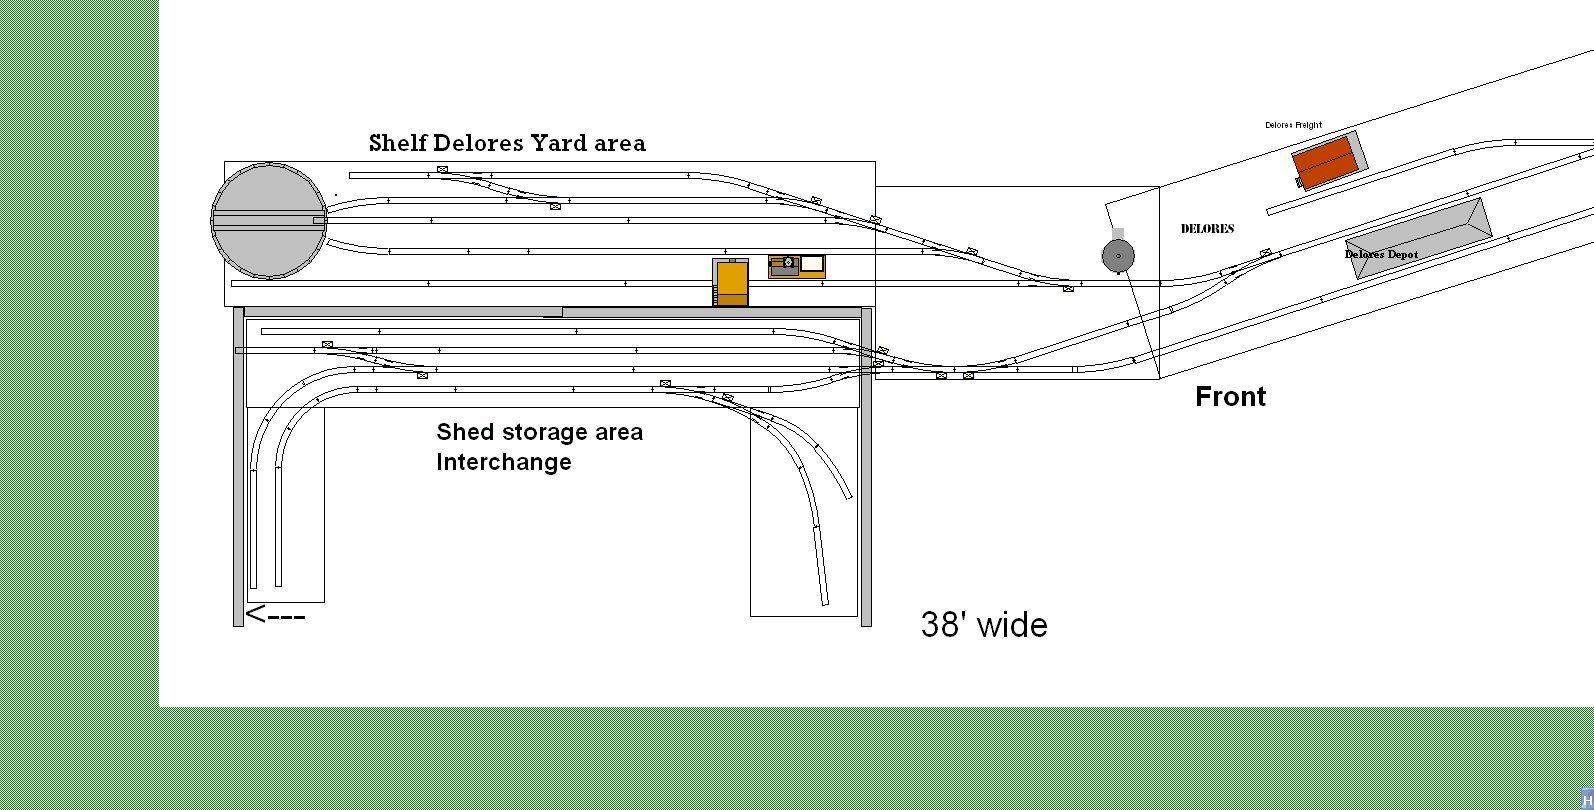
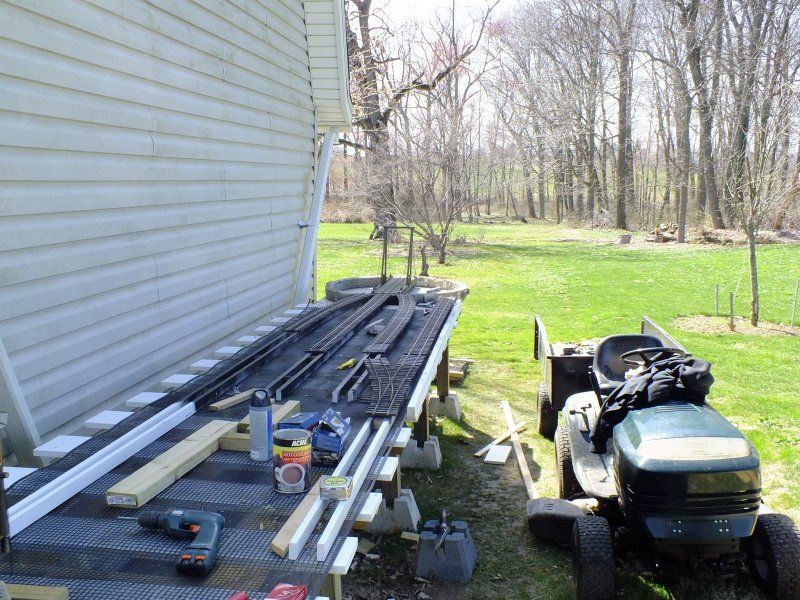
So with a plan in hand, it was off to Lowe's to start gathering the material needed for this project. I had a nice day in March and got started on the bench work behind the shed for the Delores yard area. This will be the highest area, about 3 foot high. The grounds slopes progressively upward from this point, so the bench work begins to sit lower by the time its about 8 foot beyond the shed. There it's about 18" high.
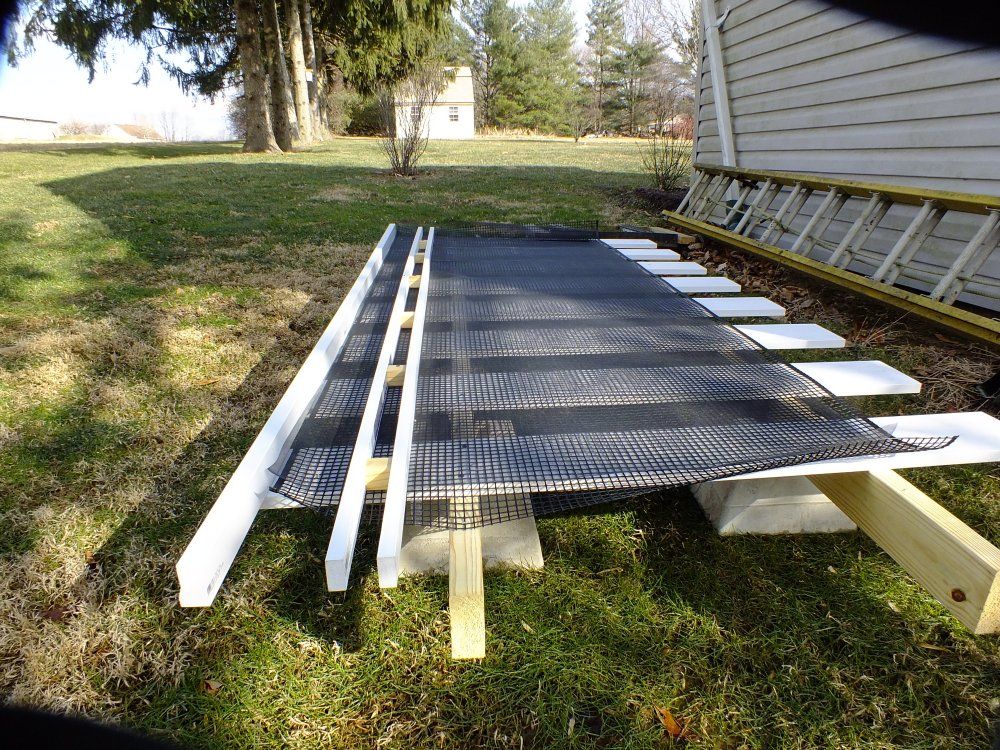
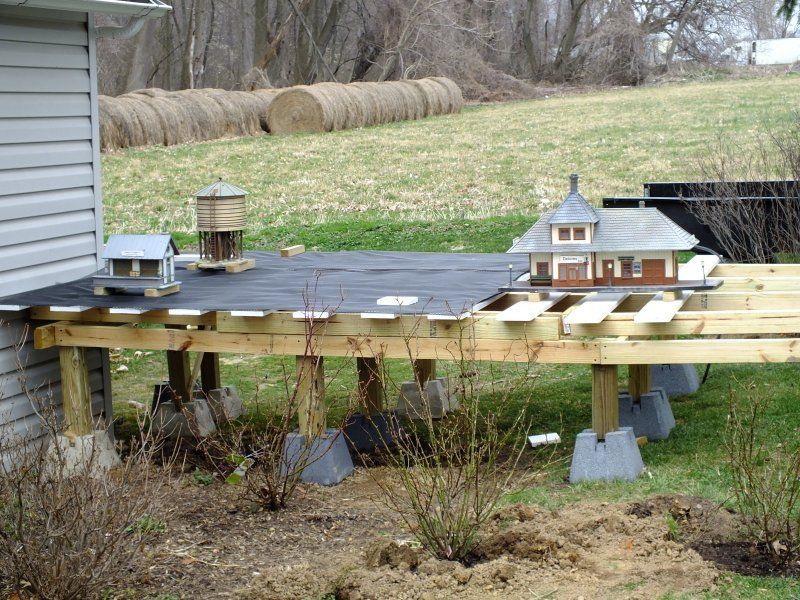
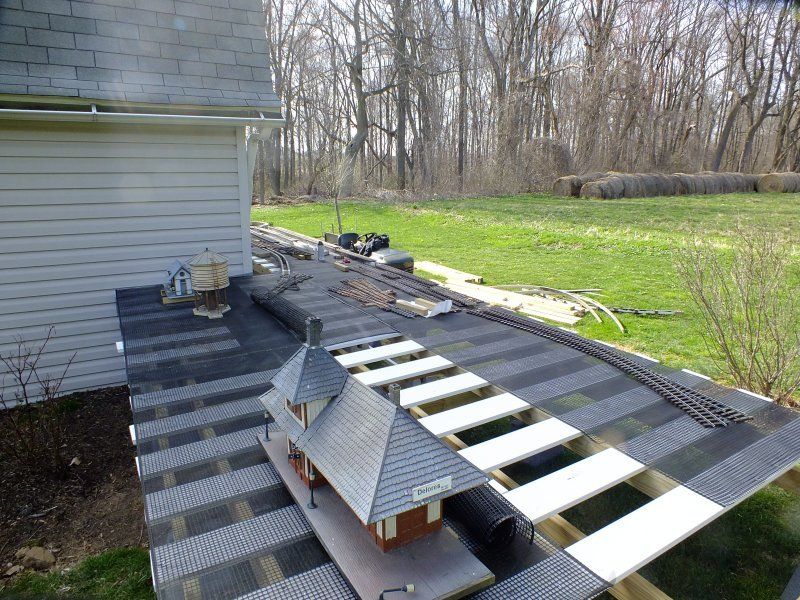
The bench work is basically built as modules, 2, 3 or 4 foot wide by 6-8 foot long and in the shelf area resting on a table made of PT4 x4 'sand 2x4's sitting on support blocks. The modules them selves are made from PT 2x4's with 1x6 PVC boards spaced 6" apart fastened perpendicular to the 2x4's. On top of these will be a 1/4" plastic mesh screen used for fencing with window screening over that. The purpose of this is to hold dirt and ballast and provide drainage. A ladder road bed will be fastened to this also for the track work
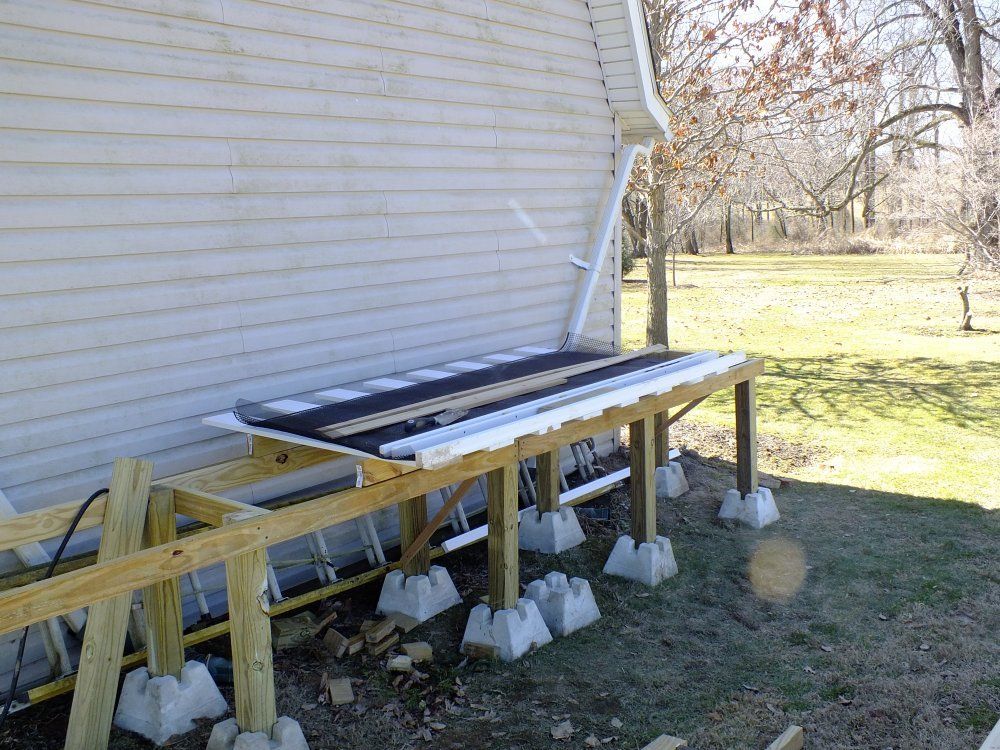
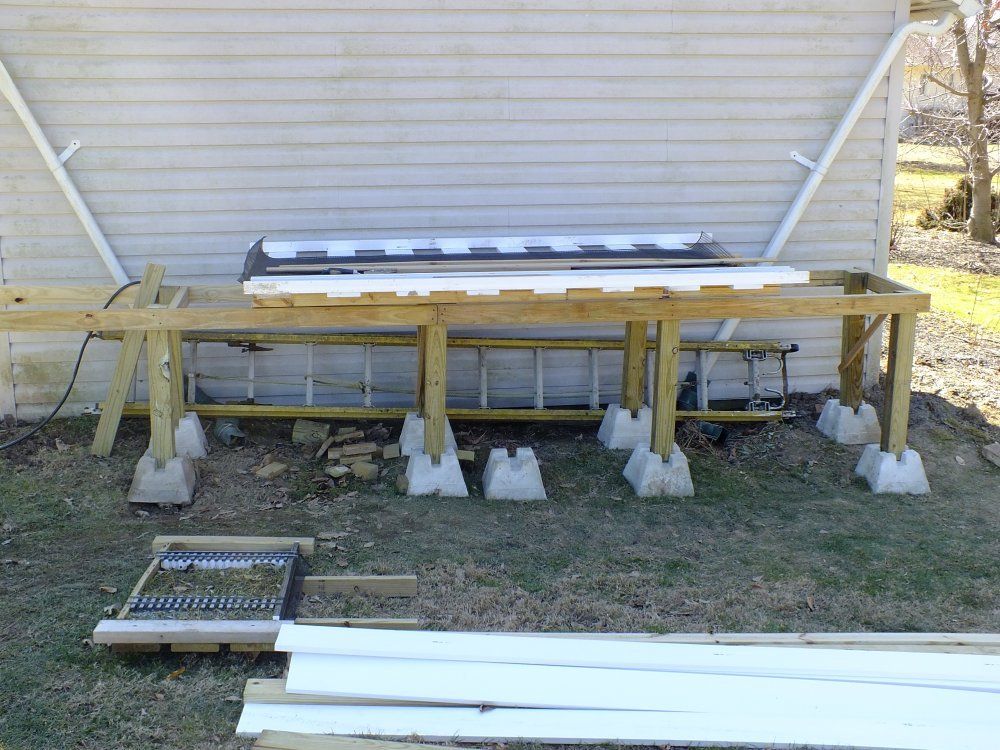
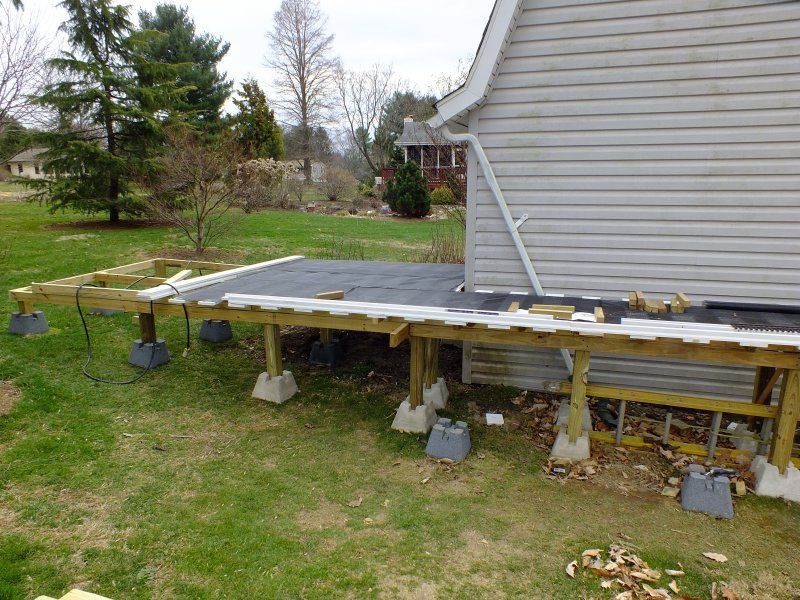
This part here is roughly 32' long by 3' wide at the back of the shed and 6' wide extending out from the shed. The far right of the shelf is 40" off the ground.
The far left is 18" off the ground.
The layout will extend out in front of this row of pine trees.
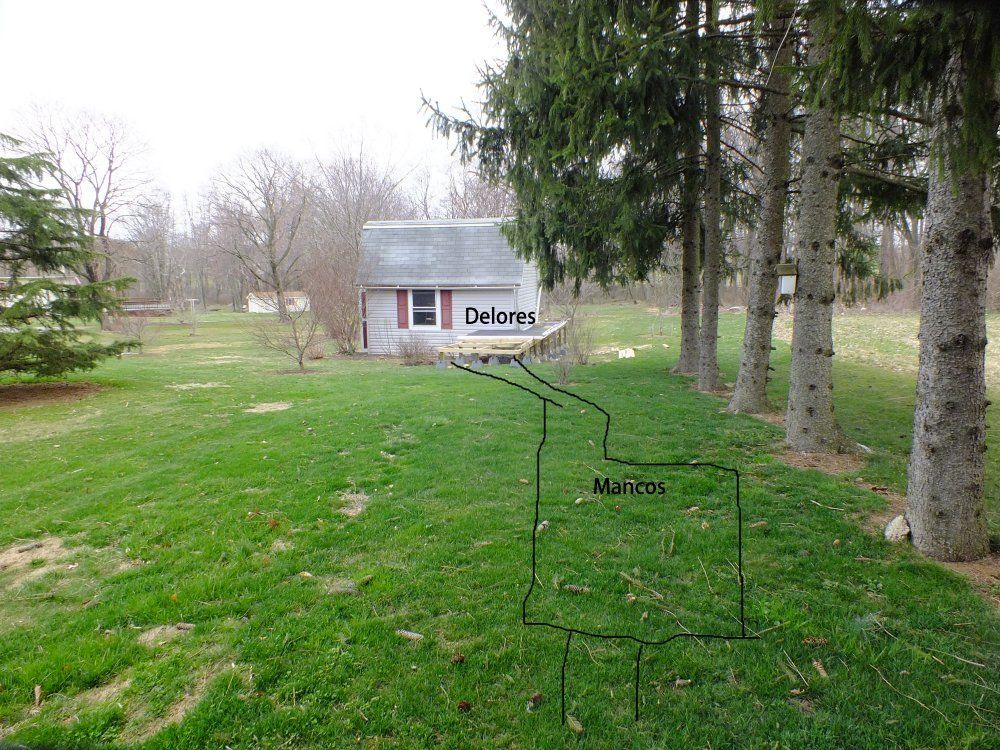
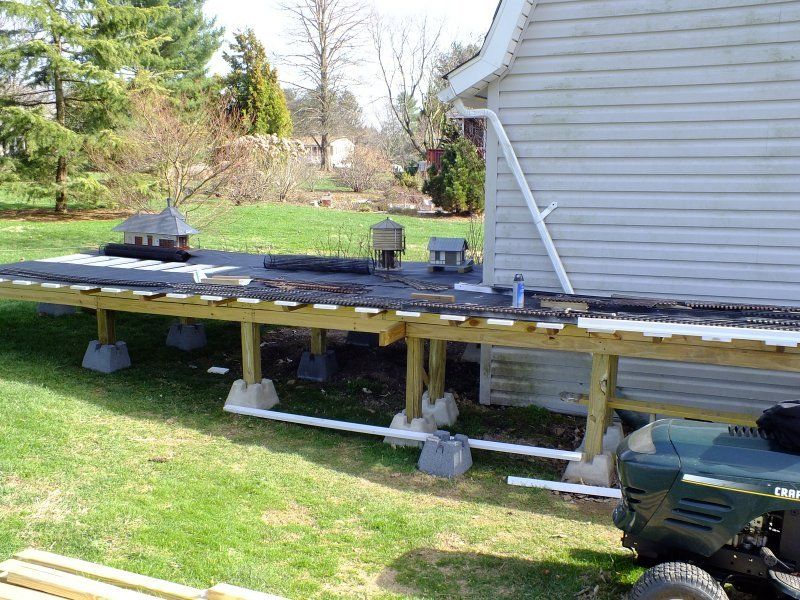
And eventually loop around to the other side of the trees and back toward the shed.
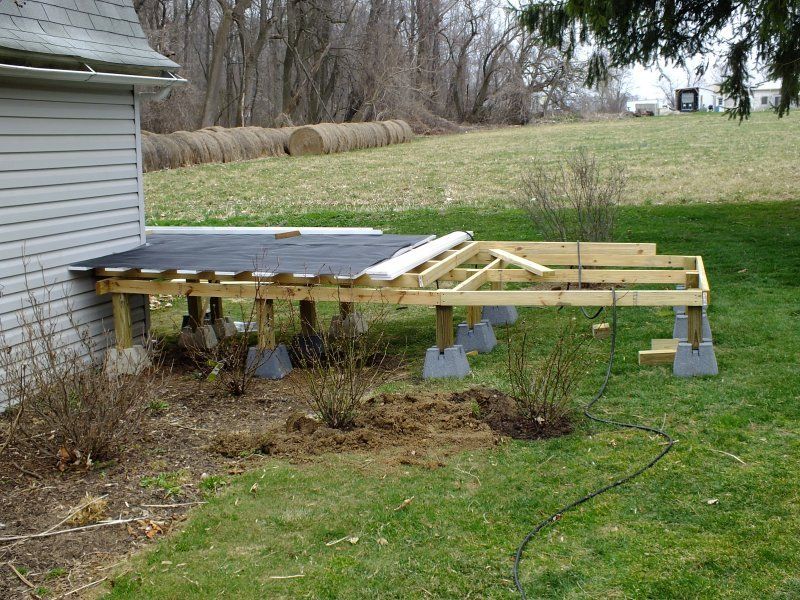
I had to move 2 rose bushes that ended up being under the bench work.
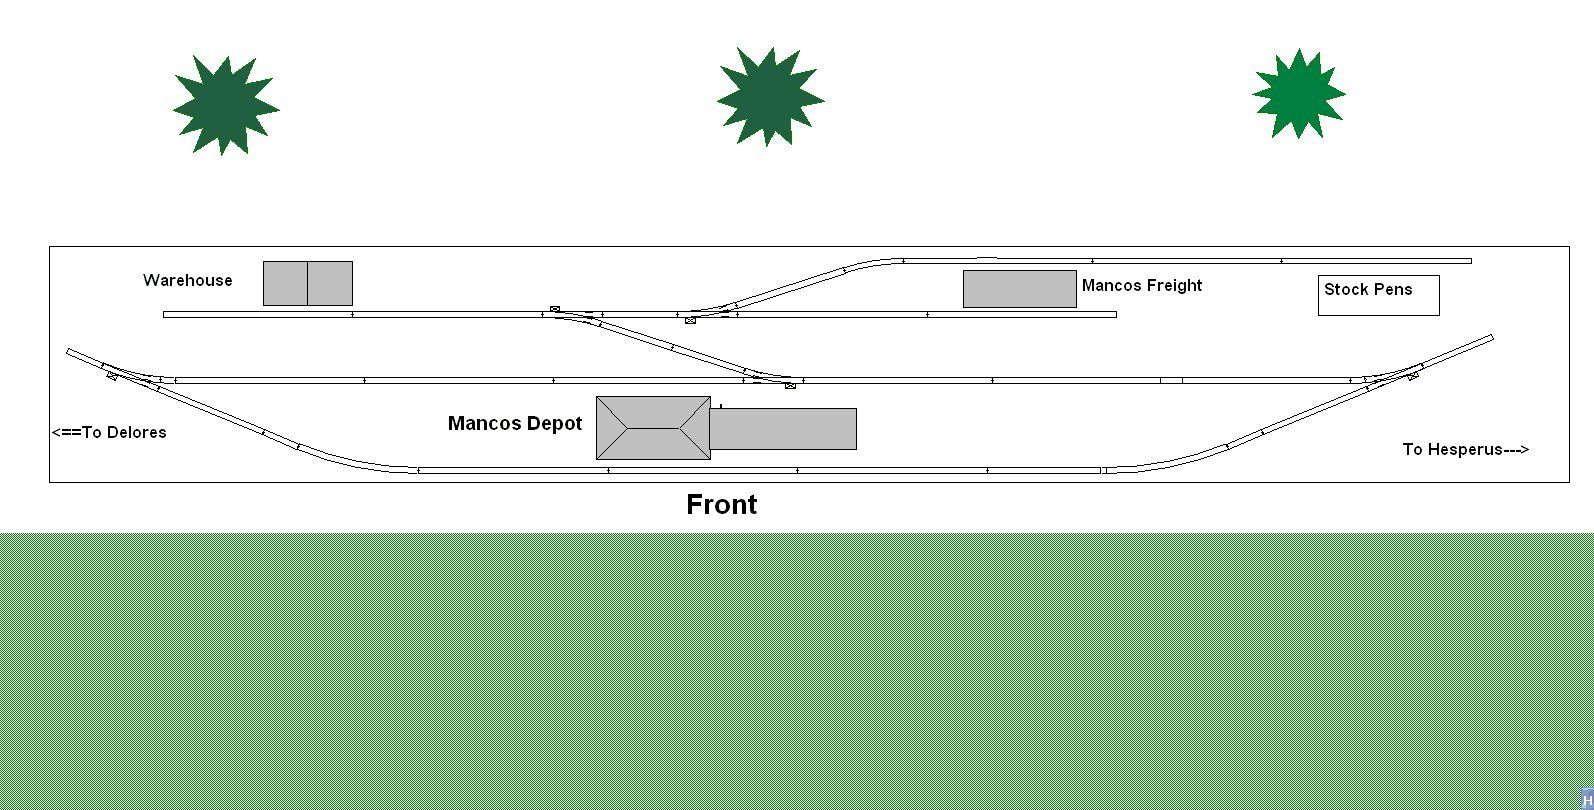
From Delores the track work will extend about 15' or so to the next town which is Mancos. Most of this will be only about a foot or less above the ground.
The supports for this part will rest on cap blocks about 2 high. This module is approximately 4' wide and 20' long and will be accessible from both sides.
From this point it will loop around to the backside of the tress to the next town of Hesperus.
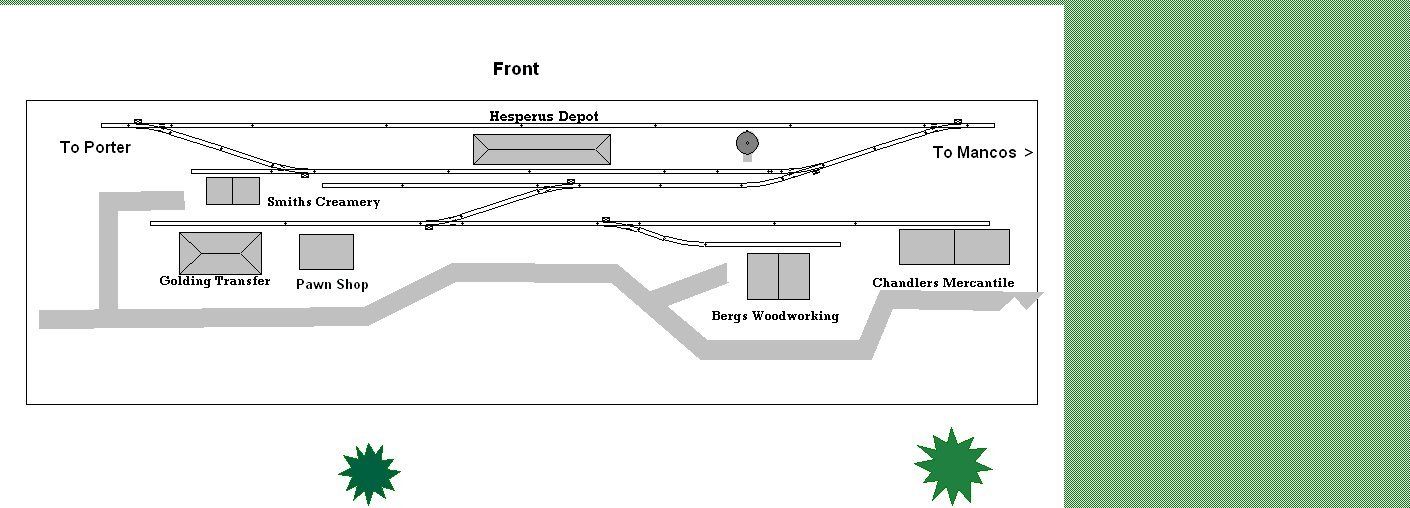
I don't plan on getting this far this year, but it's possible.
Like all plans, they usually change with the first shot fired. I've already seem some ways to change what I had planned for the Delores area.
April 12, 2015 Update:
To get started on the track work I needed a starting point. On Sunday morning I dug up the TT pit on the old layout and cleaned it up a bit. It needs some repair work but this can be done while it's in place. I got it positioned and secured to the layout then started with the ladder road bed from here.

From here I could I start with the ladder road bed. I originally was only going to have two leads onto the TT, but found that 3 worked very well. Once the ladder was in place,
the track was laid down and adjusted.
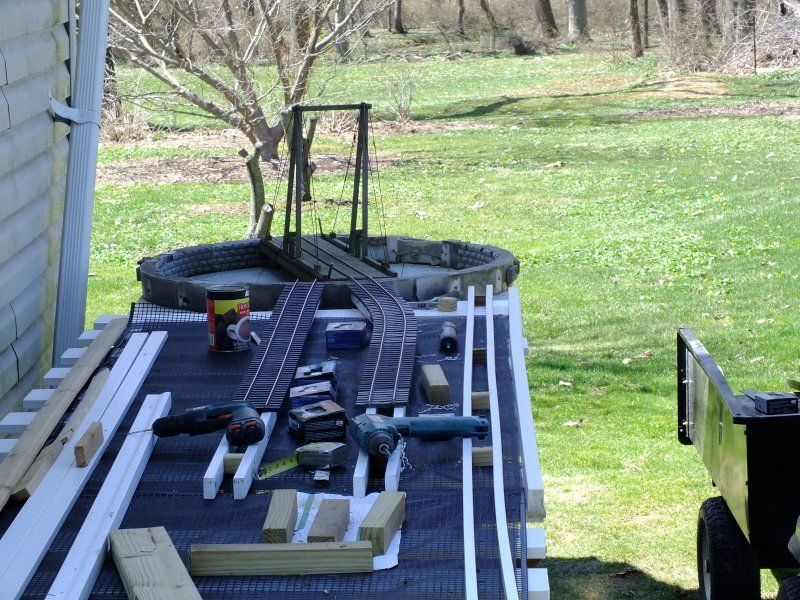
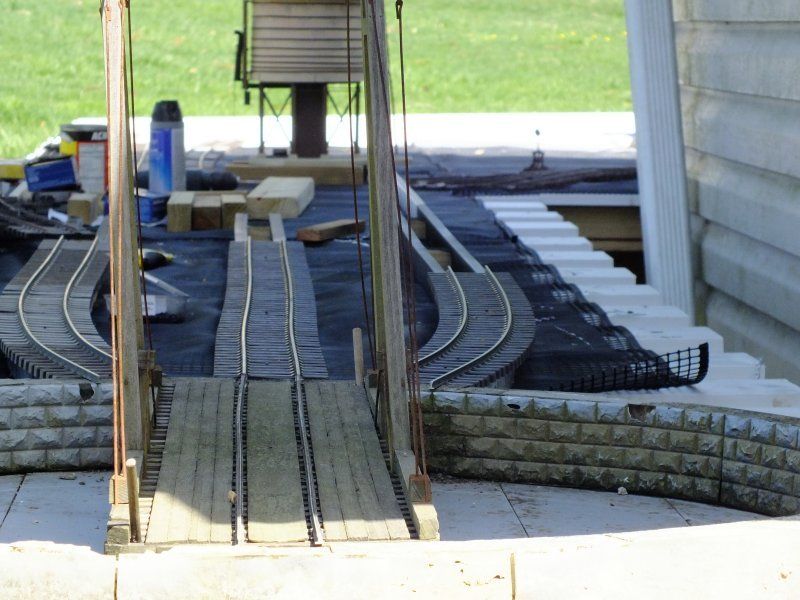
Then it was just a matter of laying the switches out to find where they worked the best.

I also found I could reach any switches on the left easily.
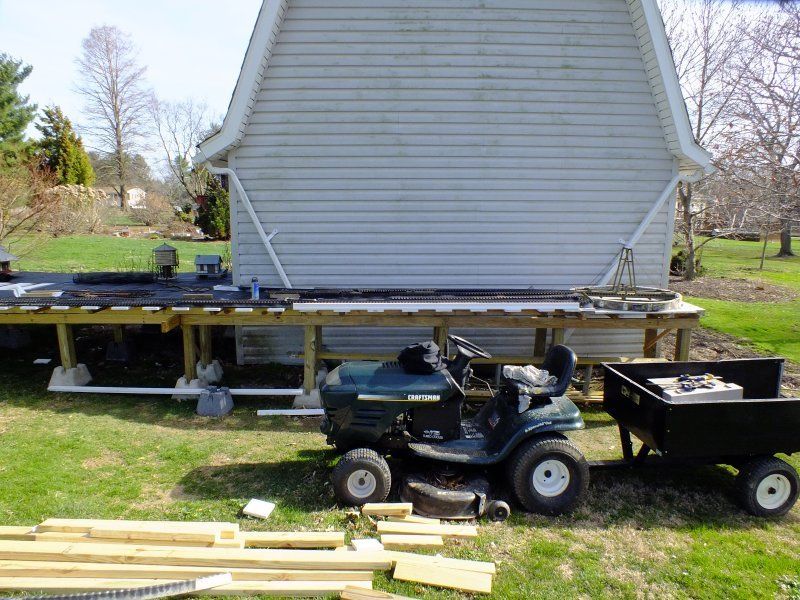
More to follow. (and yes Jon, the old Craftsman Lawn Tractor is still going strong)................
Part 2: http://www.largescalecentral.com/articles/158/part-2-a-raised-road-bed-a-build-log-for-the-rgs-raised-layout
Part 3: http://www.largescalecentral.com/articles/159/part-3-a-raised-road-bed-a-build-log-for-the-rgs-raised-layout-mancos
Part 5:http://www.largescalecentral.com/articles/161/part-5-a-raised-roadbed-on-to-porter
Part Six: http://www.largescalecentral.com/articles/166/part-6-a-raised-roadbed-porter
Part Seven: http://www.largescalecentral.com/articles/169/a-raised-roadbed-part-7-odds-n-ends
Part Eight: http://www.largescalecentral.com/articles/170/a-raised-roadbed-part-8-odds-n-ends
Back to the top: http://www.largescalecentral.com/articles/156/a-raised-road-bed-a-build-log-for-the-rgs-raised-layout