Large Scale Central

Aristo Heavyweight - Questions

Guys, I picked up a set of 4 Aristo PRR Heavyweights to accompany my AML K4 Pacific, and I also grabbed a PRR baggage/RPO when it was offered, as I figured that they were few and far between.

Which raised a whole bunch of questions.

  1. When did Aristo switch from blue/grey end-load boxes to yellow top lift boxes? Or vice versa - which came first? I thought it was the blue/grey ones were older?

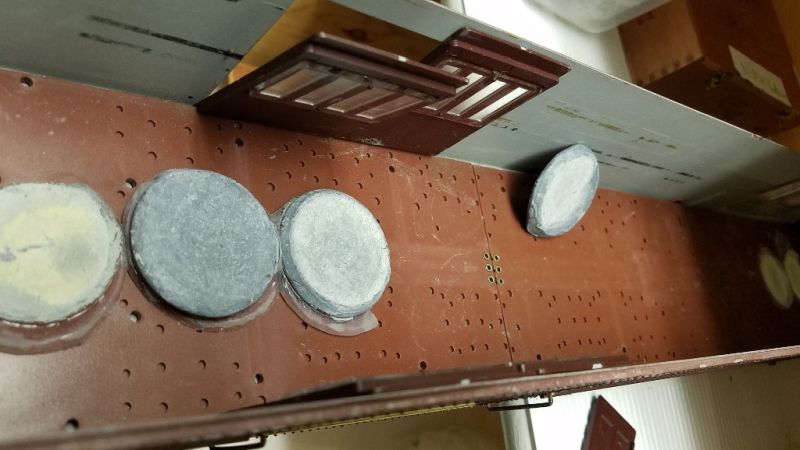
The baggage/RPO arrived with a horrible rarttle inside, which looked like a load of circular weights. I got the top off and found them all rolling around - see below.
  1. Is there any reason to weight these cars? This is my second or third batch of heavyweights, and I never saw a need for more weight.

The trucks are interesting. I have a combine that came as part of the set of 4, but although it is in an old blue/grey box, it has blackened wheels and brass springs. (bottom truck in the photo below All the others, including the latest baggage/RPO in the yellow box, have shiny wheels and black springs.
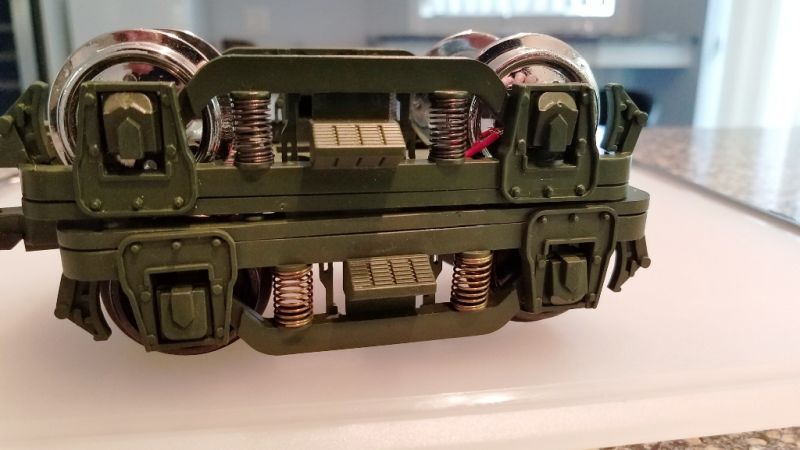
  1. Is there any practical difference in the two types of trucks?

Any and all comments appreciated.
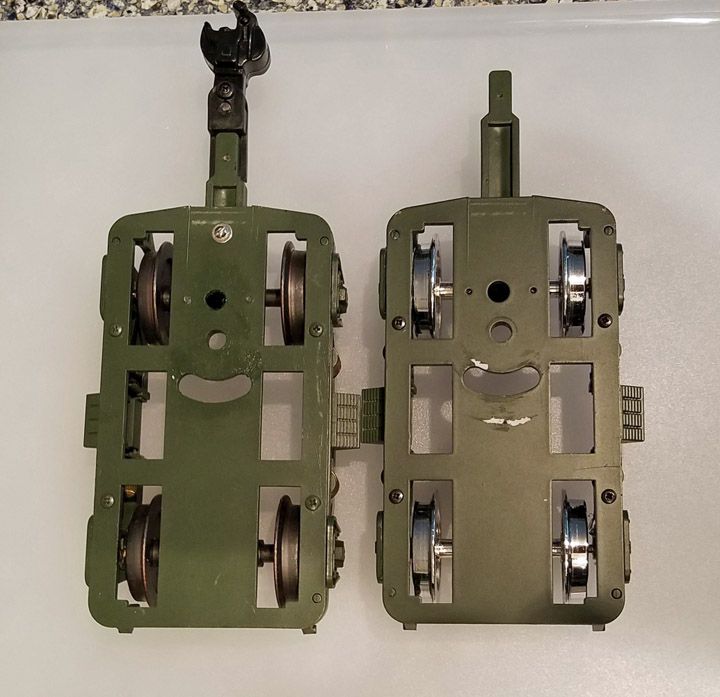
So, there are differences in the trucks and the wheels, please show shots of the top of the truck and also of the axles.

Yellow boxes came last.

Black boxes, usually Korea, then Silver Blue (China), then Yellow, and last were the ones with the clear plastic bubble around the car.

Weights? Sounds like someone was having derailing problems, they are heavy enough, it’s problems with bolsters, lubrication, wheel gauge, etc.

Greg

And the black wheels in the older truck, are they the cast black wheel half axle with the plastic center part that splinters at the worst possible time?

Thanks.

Greg - The RPO seems to have been fitted with body-mount couplers, although all I see are mounting pads and Aristo couplers in a separate bag. I guess that might have given the owner derail problems. But I’ve never had any, so the weights are out.

As the trucks are off the car at this time, I’ll take a photo as I’d like your comments.

On the left is the truck from my combine, with black wheels. (The bolt is from my shortening the tang of the coupler.)

Dave - all the wheels are half-axles with the plastic center. We can only wait for them to fail . . . Fortunately I don’t use track power so they can be replaced.

Comment about Aristo-Craft’s “Heavyweight” car trucks & wheel types:

Relevant to track power, the Aristo trucks with the older wheels having the insulated plastic axle had an electrical pickup at each sideframe journal bearing. When Aristo went to the newer type wheels with metal axles (only one wheel is electrically insulated), so the trucks that these wheels were fitted with were factory rewired for half the electrical pickups compared to the ones used with the older wheels.

As to car weight:

I added about 1 pound of extra weight (low in the underframe) to the relatively lighter Aristo plastic RPO and Baggage cars to avoid “string lining” on the layout that includes 10 foot diameter curve tracks when operating these as “head end cars” in a consist with other heavier metal passenger cars (e.g. Aristo Streamliner, Smoothside or USA Trains cars)

This is described in “Appendix B - Adding Weight” (within vignette, “Aristo Heavyweight Passenger Car & Body Mount Kadee 907s”)

I use body mount couplers with Heavyweights having 3 axle trucks.
If interested, there is a Video of an example Southern Pacific Daylight train operating with mixed car types.

-Ted

Thanks Ted. My pal has some streamliners with the metal axle, so I noted they were different on the newer cars, and only pickesd up on one wheel in each truck.

I think adding weight to the RPO is probably a good idea - I’ll have to compare it with my combine which is out of its box - your website was most thought provoking.

Great video!

Thank you Pete,

Just so everyone knows, I don’t have my own Web site or YouTube site. Greg E. graciously hosts my material (“vignettes”, aka articles) on his Web site for me. He also hosts my videos on his YouTube site, so if replies with questions are made on YouTube I can’t respond to them.

-Ted

I just do the administrative stuff, Ted is the brains (https://www.largescalecentral.com/externals/tinymce/plugins/emoticons/img/smiley-cool.gif)

Greg Elmassian said:

I just do the administrative stuff, Ted is the brains (https://www.largescalecentral.com/externals/tinymce/plugins/emoticons/img/smiley-cool.gif)

I’m just going to let this one lie. It is tempting, though. (https://largescalecentral.com/externals/tinymce/plugins/emoticons/img/smiley-innocent.gif)

Ahh… don’t leave all the fun to rooster!

In any case, these trucks and the cars have caused people grief over the years, I find greasing the rib makes a big difference, as does the type of rib on the truck, although these early ones did not even have the rib.

Some more tips: https://elmassian.com/index.php/large-scale-train-main-page/rolling-stock-mods-aamp-tips/aristo-rolling-stock/heavyweights

Also, the truck mounted couplers don’t help as transmitting the forces of the train through the couplers, especially the 3 wheel trucks, leads to a lot of friction and the wheels try to climb out of curves.

Greg

I seem to recall, but could be wrong, that putting the wheels in a certain way can create an electrical short on the later trucks. My heavyweight diner has these from when I replaced the three axle truck and I seem to recall having this occur at one time.

BTW, the truck-mounted Kadees work much better if you trim back the mounting tangs as much as possible still allowing the mount to work. This brings them closer together and they look better too. Mine do back-to-back LGB 1600 turnouts without problem this way.

Very interesting. Following Ted’s comments about the light weight of the RPO, and as I have 8 big lead weights from the interior, I did glue/screw one of them underneath in the center. Finished shortening the tang for close-coupling - I’ve been taking 3/4" off recently, though on my first hywt coaches, 20 yrs ago, I only removed 1/2".

I had a discussion in my last similar thread about replacing the second screw that controls the amount of rotation. On the heavyweights, it prevents the truck from tilting in one direction, which I don’t like. I’ve been leaving them off, with no adverse results yet.
But the point in mentioning it is that I was working on an aristo extruded alum ribbed UP coach with Jerry this am, and it has similar trucks, but the protrusion in the slot for the second screw is quite long, and allows the truck to pivot up and down. Very Interesting.

Todd Brody said:

SNIP…“I seem to recall, but could be wrong, that putting the wheels in a certain way can create an electrical short on the later trucks.”…SNIP

Yes, this can happen because the axle itself on the late type wheels is not electrically insulated, so conduction from a sideframe that has an electrically wired eyelet would go through the axle and its non insulated wheel that makes contact to the opposite railhead (when installed in wrong direction). However, if all axles were swapped the same way in both trucks, I would not expect a short circuit.
Further confusing the situation, Aristo’s factory wiring has been very inconsistent, not only from different production runs, but on a given car itself!

In this regard, see vignette, “Aristo-Craft Heavyweight Passenger car 3 axle truck types”,
AND scroll way down to “Electrical Issues”

-Ted

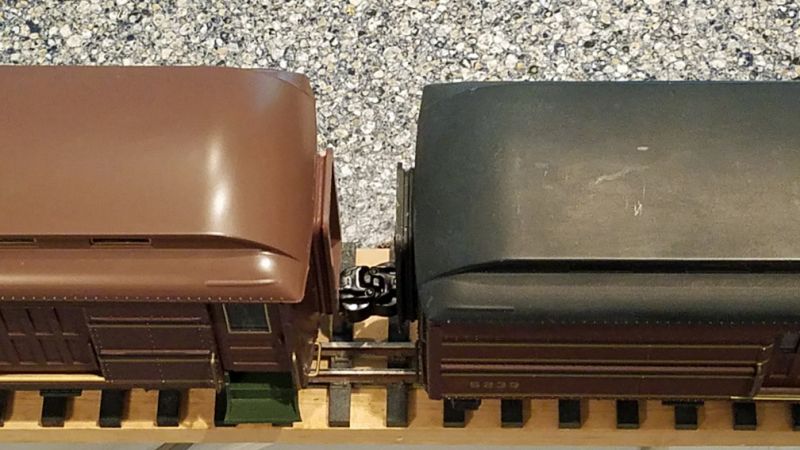
As I took a photo this afternoon, I thought it should be posted in this thread. This is the Baggage/RPO coupled to my existing NIB combine, both with 3/4" taken off the coupler tongue.

It is very interesting reading the page Ted linked above, as it shows a ‘modern’ RPO with a much shorter tongue from the factory.

I also noticed the baggage/RPO has a black roof. It’s gold stripes are a little different from my NIB coaches, so maybe that’s the way it came.

Pete,

It would be interesting if you could measure your coupled cars’ distances with their truck mount Aristo couplers and 3/4" taken off the coupler tang.

Illustrated below are example cars that I installed body mounted Kadee 907 center set couplers having a chosen coupler mounting location so as to be compatible when operated on 8 foot diameter track. The illustration includes measured coupling distances.

Thank you,
-Ted

Ted, I’ll try to remember to measure next time I have them out of their boxes.

Stretched out, mine are 2-5/8" apart at the outter edges and 1-1/2" apart at the door bellows. When looking from above, the outter edge of the coupler box is about the same as the outter edge of the door bellows so the complete coupler and its shank show.