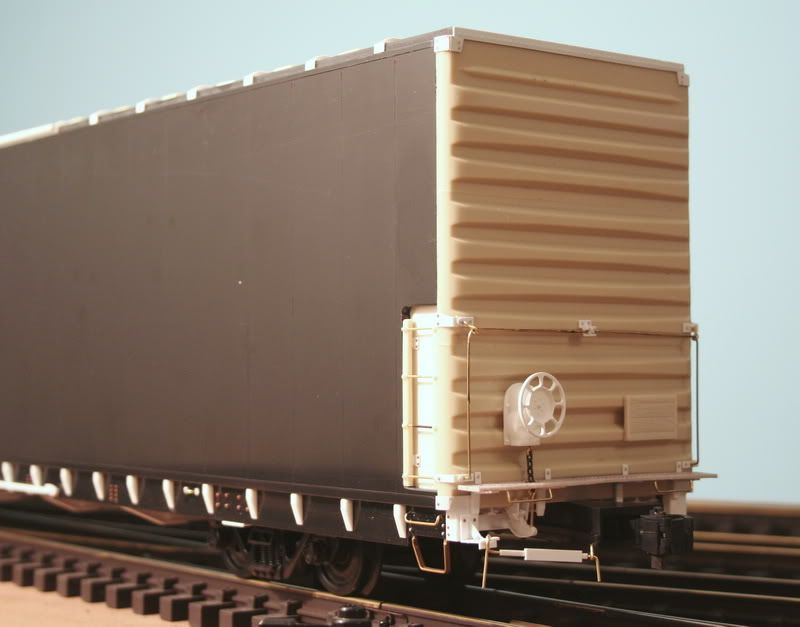
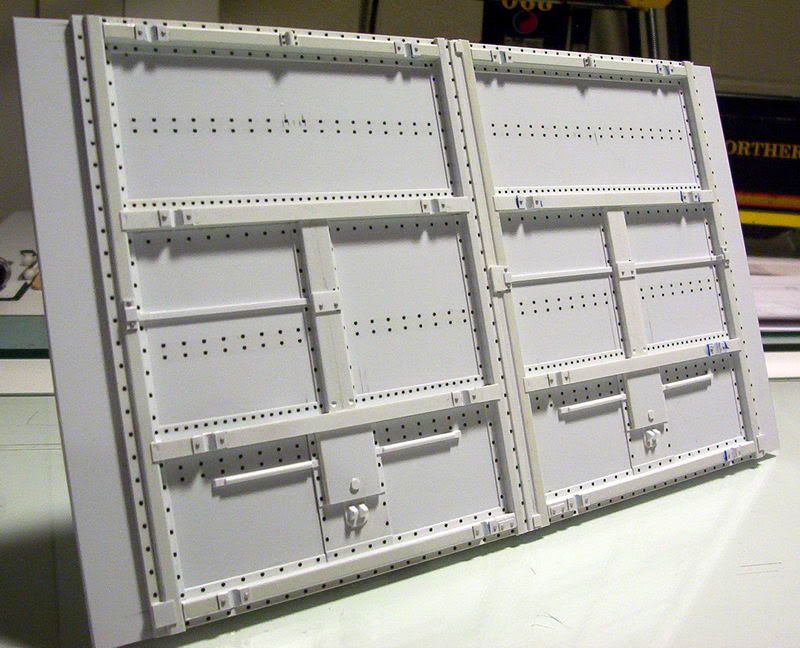
OK, next installment. Here’s a shot of my first cast door part.
(http://i1044.photobucket.com/albums/b450/DTI973/G%20Scale%20projects/86%20foot%20P-S%20Hycube%20boxcar/86footP-SHyCubeboxcar02.jpg)
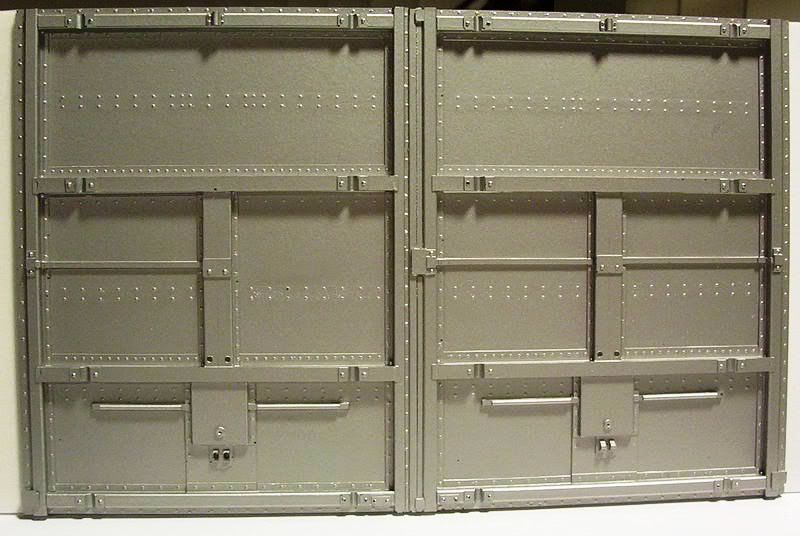
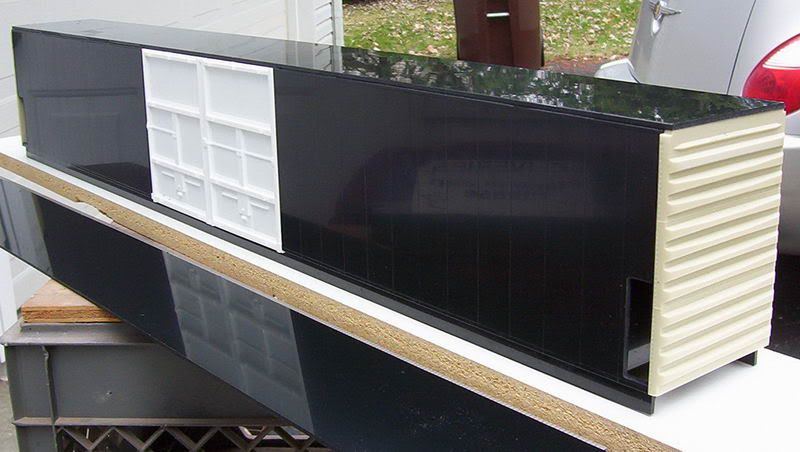
This is A.K.A. the cast that cleans out the mold and exposes where you need to concentrate your efforts when pouring them. A few of the resin rivets remained in the mold and are part of this casting. I also found out where air bubbles are likely to be a problem - as you can see in this part so now I use a little brush in the trouble spots when I cast each piece and that pretty much took care of that problem. Just for giggles I shot this part with Krylon aluminum spray to see how cool they’ll look painted. Here’s a shot of the body flipped over showing the basic box construction.
(http://i1044.photobucket.com/albums/b450/DTI973/G%20Scale%20projects/86%20foot%20P-S%20Hycube%20boxcar/86footP-SHyCubeboxcar05.jpg)
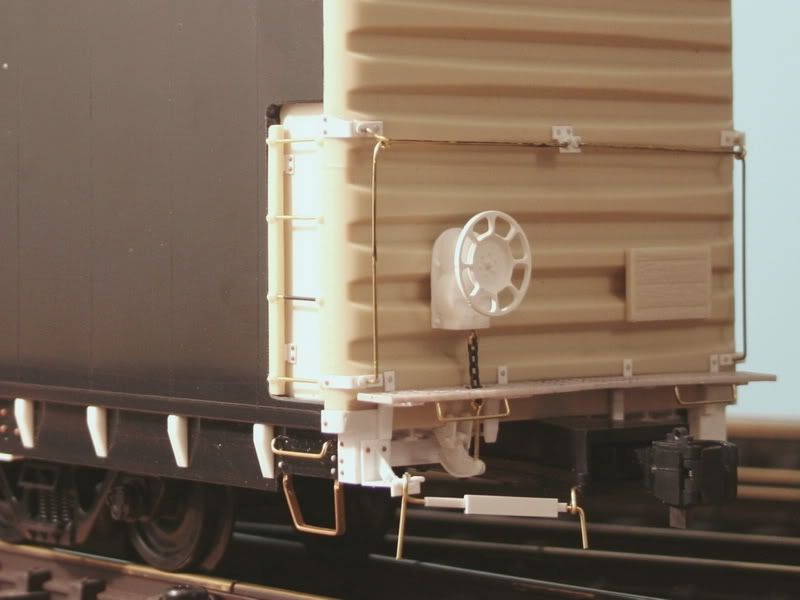
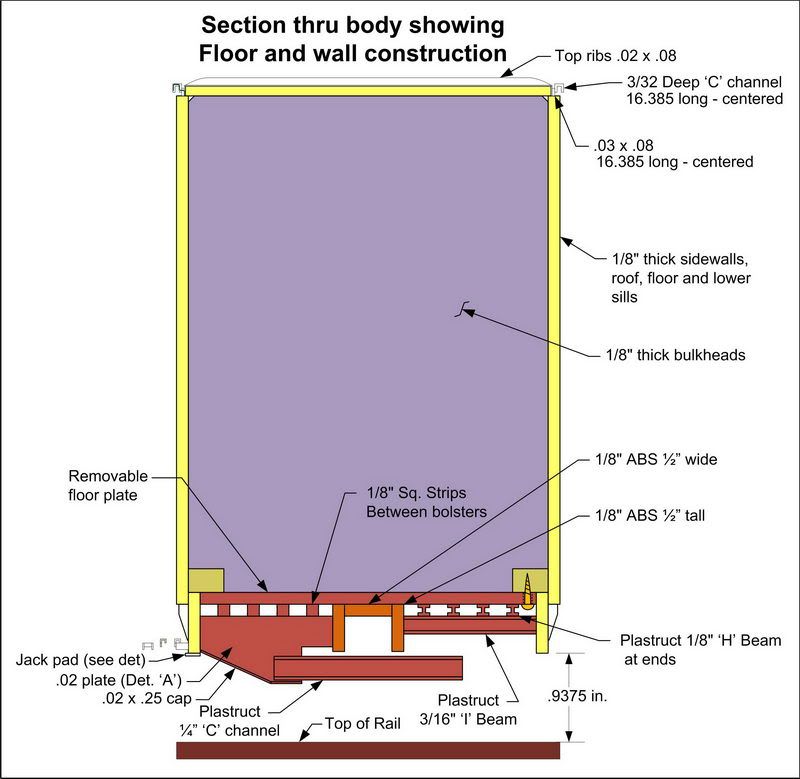
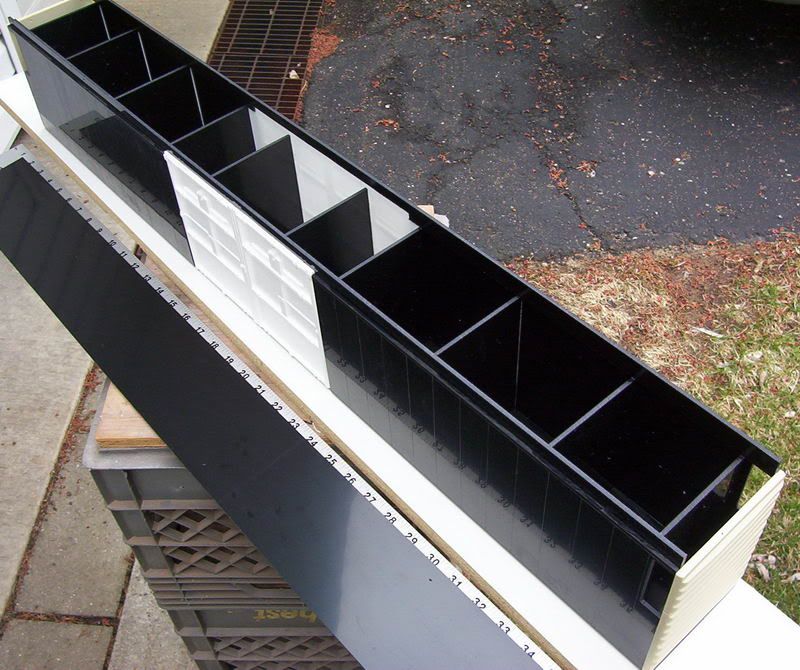
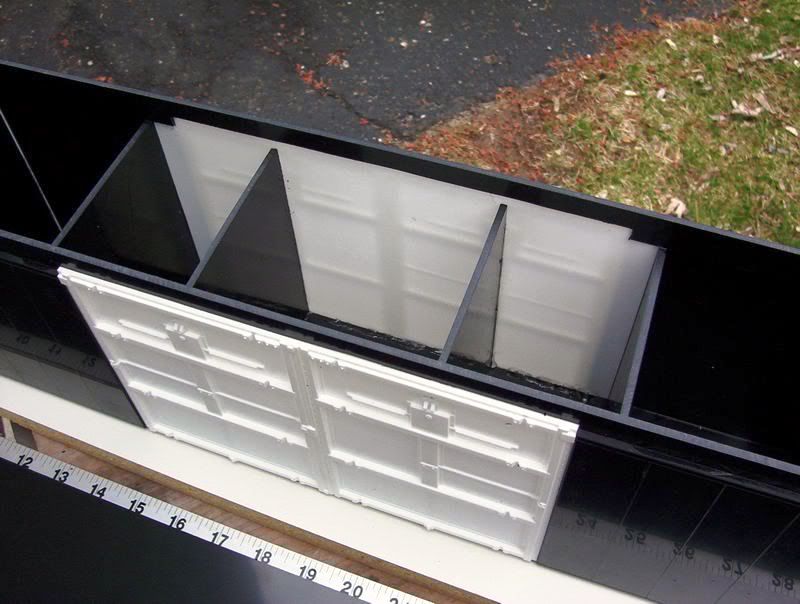
I cut the inner bulkheads to the height that the lower sill piece would register against them, that way no measuring to make sure they would parallel the side sheets. The lower sill pieces are one per side whereas the side sheets are 2 per side, as the doors interupt them in the middle. Cutting all the black ABS plastic sheets is done on a table saw as that is the most reliable way to make panels of the same size. I rip all the inner bulkheads at the same time which makes it easy to keep the box square and parallel. Then use the table saw and fence to cut all the bulkheads to the same height so the floor will have a group of even surfaces to rest on. Refer to my end view plan to understand what I’m saying. Here’s a closer shot near the doors
(http://i1044.photobucket.com/albums/b450/DTI973/G%20Scale%20projects/86%20foot%20P-S%20Hycube%20boxcar/86footP-SHyCubeboxcar06.jpg)
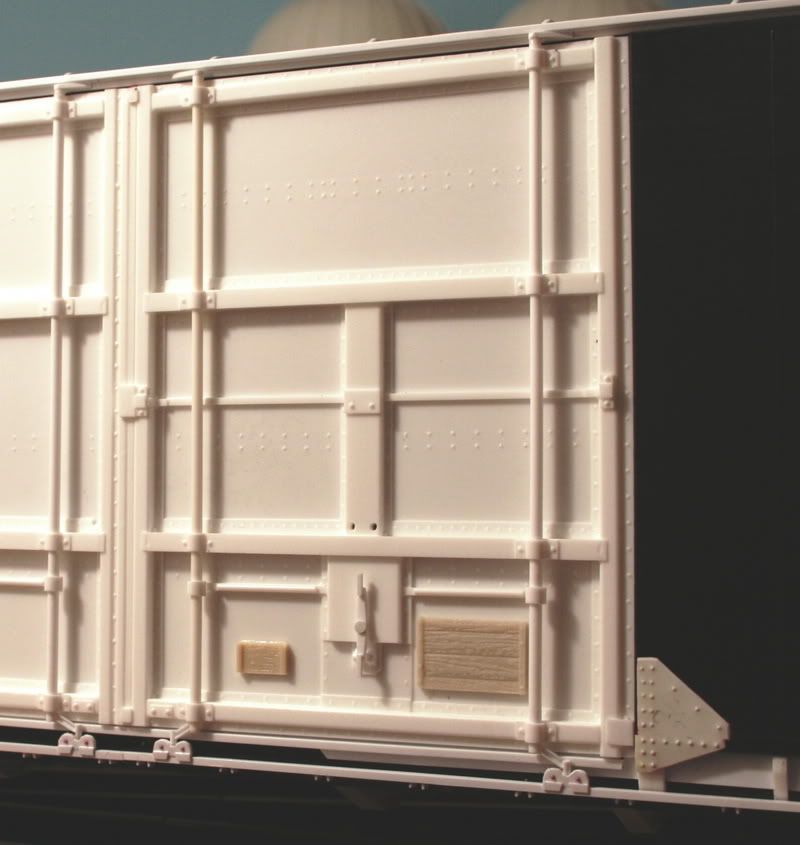
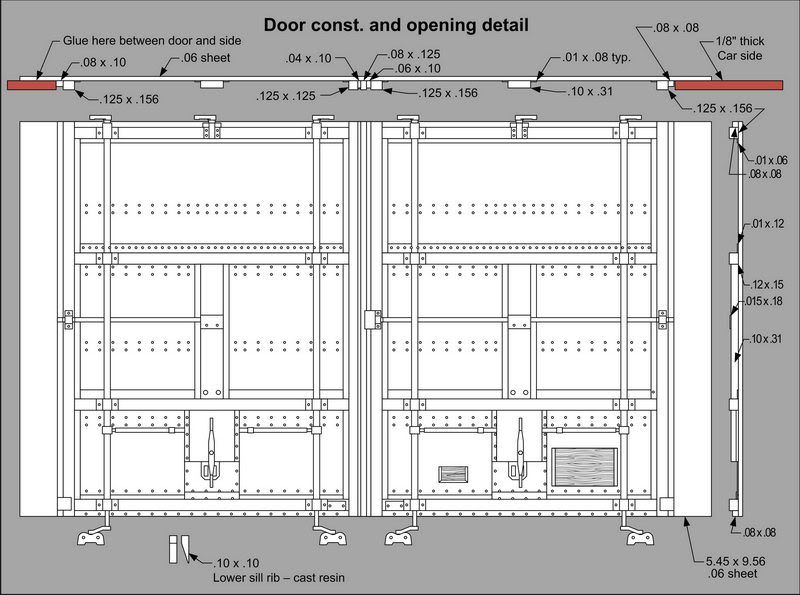
As well planned as I try, improvising along the way does happen. Notice I had to notch the lower sill pieces to clear the door casting. Notice also the bulkheads between the doors are narrower than the bulkheads between the sides. I built the box with the side bulkheads first, then I shaved (on the table saw) the bulkheads between the doors til they fit nice and snug. They are CA (superglue) glued to the resin door backsides. Let me go backwards a second. Once I had the side pieces cut I scribed the weld lines on them, then to make one complete side I first glued the 2 side pieces to the doors using a straight edge to keep them all inline at the top surface. The bulkhead width then was determined by the end castings width. I played with a piece on the table saw till the sides were just a bit under the overall width of the end castings. At that point I stood the sides on thier top surfaces (another great use for a table saw is to use it as a surface plate to assemble on) and solvent welded some of the bulkheads to the sides. With them all on the table saw top it keeps the top of the sides and bulkheads flush so when I attach the top I know I have a solid and flat surface. Unfortunately I didn’t take pictures of any of the above process. Once the sides are glued together with the bulkheads I then CA glued the ends to the sides. Now it was time to cut and fit the roof. I left it a little long at each end knowing once the top was on I could file it down flush to the ends. Here’s what that stage looked like
(http://i1044.photobucket.com/albums/b450/DTI973/G%20Scale%20projects/86%20foot%20P-S%20Hycube%20boxcar/86footP-SHyCubeboxcar03.jpg)
At the same time you rip the bulkheads to width it’s good to rip the floor to the same width, and then when I went to fit it all together I shaved just a bit more off the side of the floor and it fits like a glove. The bulkheads are great because when you have the floor off they make nice handles to carry the body around when you work on it. I’ll use them when I paint the body also. That’s enough typing for tonight…I’ll continue tomorrow.
