Gary, I bought one of those cordless drills a few years ago.
I really like the ultra low speed setting on mine. I can drill plastic and plexi without melting the stuff.
Gary, I bought one of those cordless drills a few years ago.
I really like the ultra low speed setting on mine. I can drill plastic and plexi without melting the stuff.
I HAVE 3 OF THE OTHER STYLE BUT I HAVE ONE OF THESE TOO!
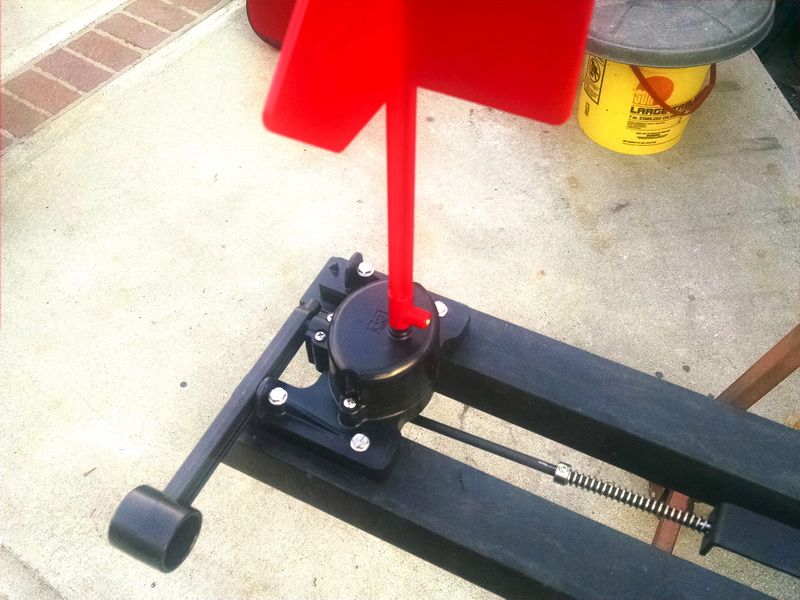
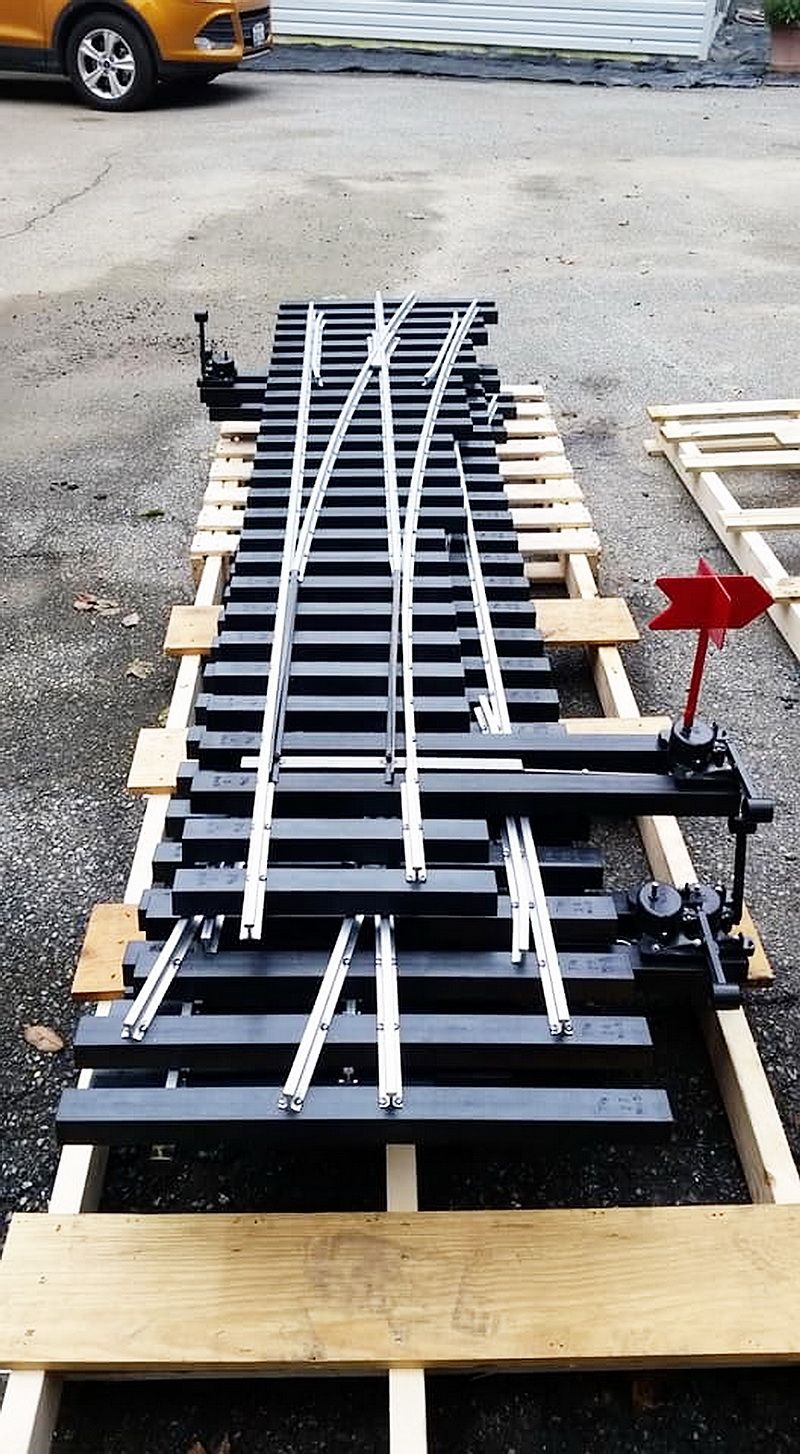
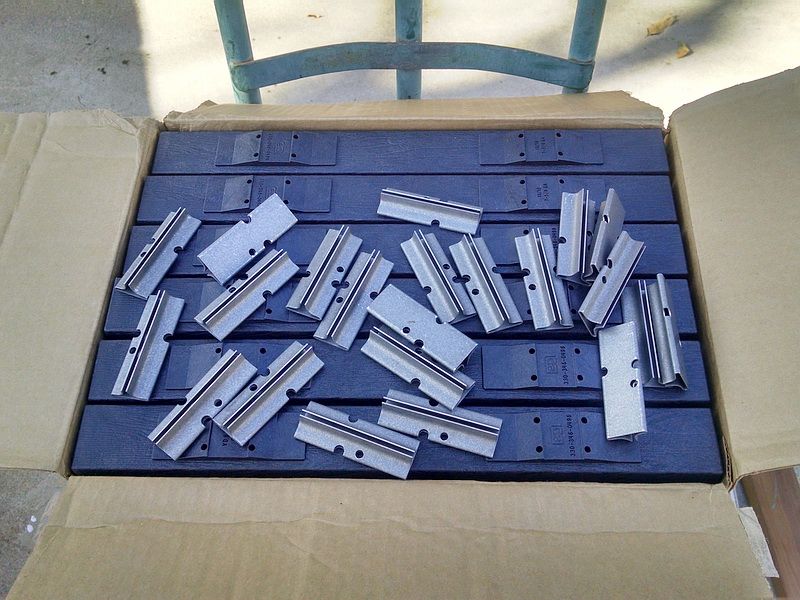
Finally decided on the switch stand/switch machine to use on my just completed #5 RH turnout. After looking at the tall switch stand and the low profile aluminum switch throw, I went with the switch throw that is actually made for these switch “kits”. Accutie Product (EP Plastics in Kent, Ohio) has had this particular switch throw out for a few months. It is made of injection molded ABS plastic, completely assembled and sealed from the weather. All brass fittings inside including bearings. The switch throw is fairly inexpensive at $30 plus a hardware package including the switch throw rod and point rod and all hardware to install on the switch ties. Aklso includes the two compression springs to use on the pushrod to make a “spring switch”. Photos below:
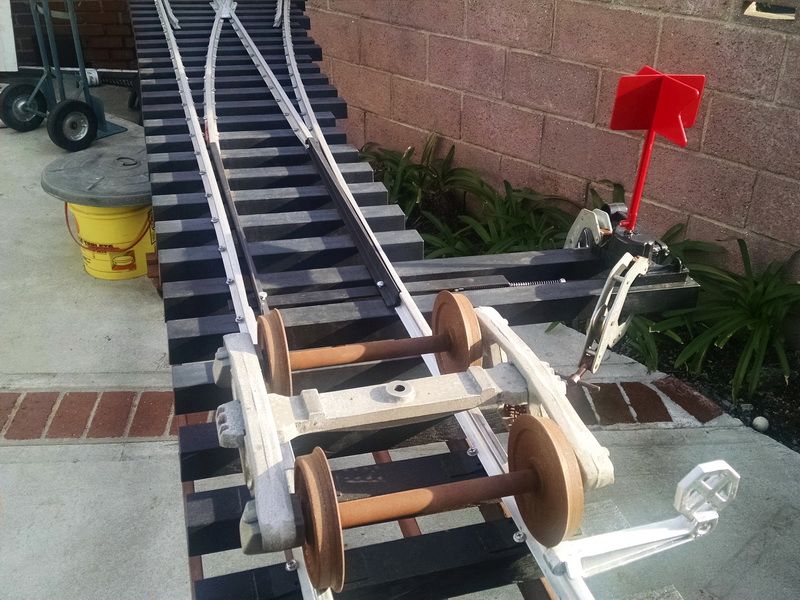
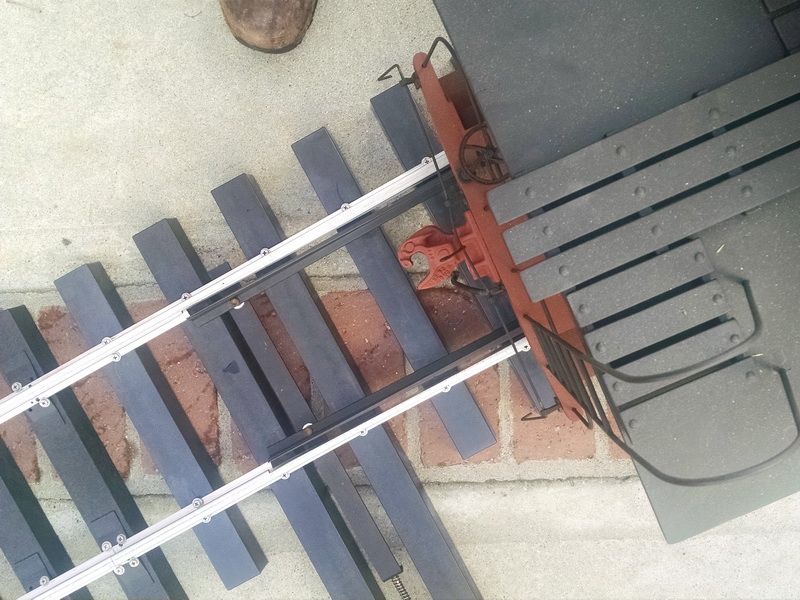
Lining up the switch throw on the switch ties before drilling for screws.

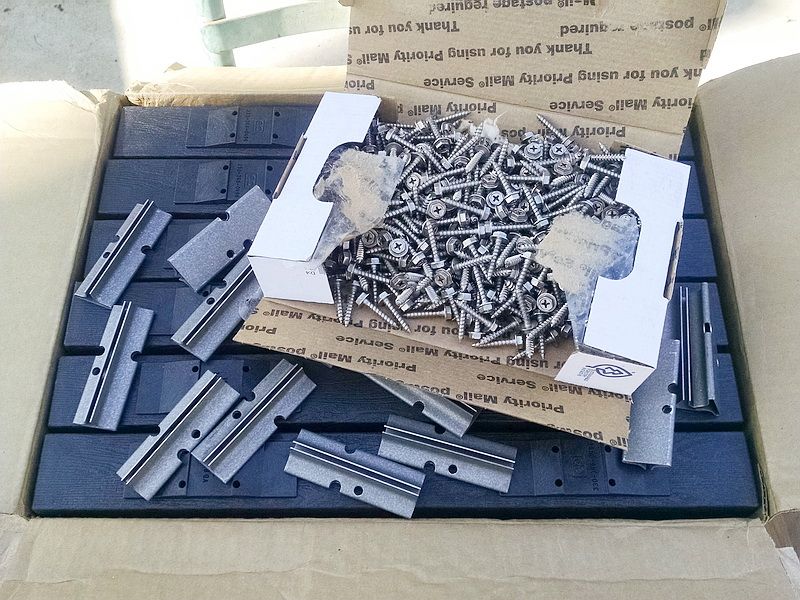
Close up of the springs on the pushrod for the points. I have them adjusted pretty close now, but I have to put the turnout on the ground now and try my lightest piece of rolling stock to see if the points react to the wheels going through the points. I will use the wood caboose as the test car. It is the lightest at about 125 pounds.
1/4 inch-20 by 3/4 inch long steel socket head cap screws to attach the point pushrod to the individual points.
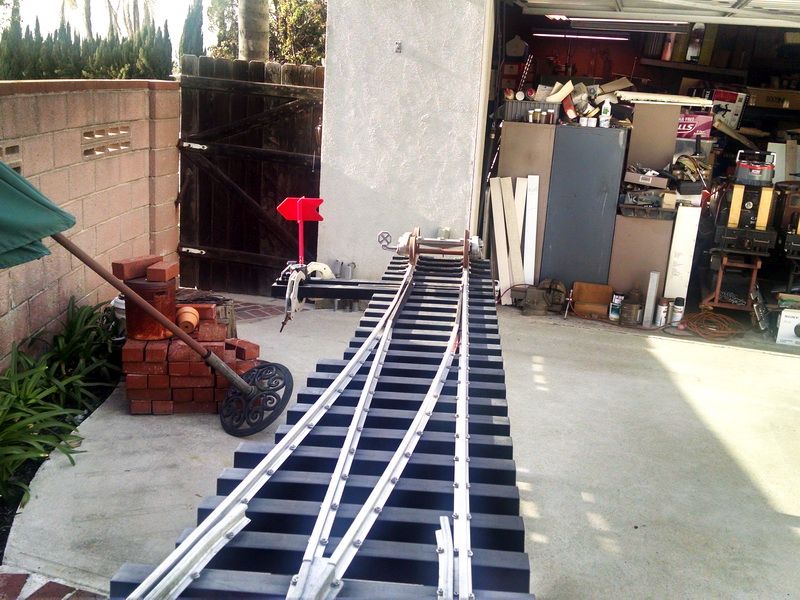
Have to wait now for the rain to clear out of So. California before I can roll a car through the turnout. Kind of a “Golden Spike” thing. I have ordered a second #5 RH turnout for the siding at the front of the house for the “station”. This siding is just about midway in the point to point layout. I have two separate Baldwin electrics and enough rolling stock to make two “complete” trains". The grandkids are coming up in a few weeks, so we can have “bi-directional” running using the station siding to separate the trains. This should be interesting running at night with a 7, 4 and 3 yr. old as engineers :)!
Looks good Gary,
Your right, that is cheap for a throw, a person can spend that much on a 1:20 scale throw.
As for those young engineers on their way, they will probably do a far better job than you once they
get the hang of it(https://www.largescalecentral.com/externals/tinymce/plugins/emoticons/img/smiley-foot-in-mouth.gif)(https://www.largescalecentral.com/externals/tinymce/plugins/emoticons/img/smiley-laughing.gif)
Nice work. (https://www.largescalecentral.com/externals/tinymce/plugins/emoticons/img/smiley-smile.gif)
Down right spiffy lookin…(https://www.largescalecentral.com/externals/tinymce/plugins/emoticons/img/smiley-wink.gif)
Gary,
The next turnout will be a complete kit and not a scratch build? That is a nice looking throw. You going to paint one side green or just use the arrow?
Paul Burch said:
Gary,
The next turnout will be a complete kit and not a scratch build? That is a nice looking throw. You going to paint one side green or just use the arrow?
Hi Paul,
Yes the next one is a full-on kit for $625 and my partner on the Baldwin electric project is "delivering the parts to me. He only lives about 4 miles from Allen Models of Nevada (the Western United States distributor for Acutie Rail Products). All the rail is pre-cut, drilled for ties and bent and cut to length. All ties are numbered and drilled by CNC. With my prior experience with building one of these from scratch, it will probably take me longer to take the items out of the boxes than the actual assembly. Probably around an hour to build!
I am going to paint the stem of the “direction indicator” black and the “arrow” both green and red.
Adding some photos (screen captures) of some completed turnouts delivered to a home railroad in the midwest. These are custom made for 7-3/8 gauge (as you can see “engraved” on the ties. Note the tie numbers, turnout number and the gauge. There is no way to make a mistake when assembling these kits and they are assembled fast (less than 90 minutes the first time).
Three fully assembled #5 turnouts, custom-made to 7-3/8 inch gauge. Delivered by Acutie Rail to a home layout.
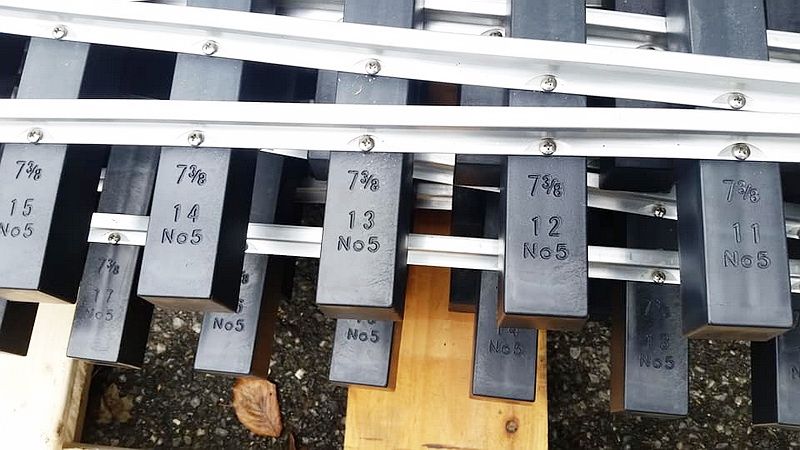
Close-up of the numbered plastic ties. Pretty nice system. Each one of these kits is $625 each, but assembly by Acutie is extra. And the more kits you purchase in bulk lowers the cost of each. Buy quanity one is $625, quantity 2 is $600 each and quantity 3 is $580 each. Considering that SS Valley SS turnouts are now $220 each, this is a fair price in this scale. Remember these are 1/8th scale :).
There are at least seven completed #7 turnouts in this photo. All custom-made to 7-3/8 inch gauge. ONE of these is $800 each, in multiples of 3, they are are $750 each. At least $5500 in these two pallets. This guy must have one heck of a layout :)!
Laying the rail to it is going to take a lot longer! This railroad will look nice in your neighbor’s yard!
Doug Arnold said:
Laying the rail to it is going to take a lot longer! This railroad will look nice in your neighbor’s yard!
Hey Doug,
I don’t understand this statement :)…the track panels are already made and ready to lay here at our home in Burbank. Just “oversize” snap track, about 220 linear feet. Has nothing to do with my neighbors :).

Wow. Zers.
Gary Armitstead said:
How are those track panels tied together? With rail joiners like the smaller gauges or bolted together like the full size RR’s?
If it weren’t for the wall and the other stuff to give it some scale, it looks just like aluminum sectional track from LLagos Creek or Sunset Valley… (https://www.largescalecentral.com/externals/tinymce/plugins/emoticons/img/smiley-wink.gif)
Ken it looks like a larger version of our rail joiners … hard to see if they used screws …
Hey guys,
Both of you (Sean and Ken) are correct about the rail joiners. They are no more than “giant” LGB rail joiners :). The ones I use are called “Train Mountain” joiners, used to connect track panels at the world renown 7.5 inch gauge layout in Oregon. L.A. Live Steamers still uses “fishplates” like the prototype. But for a home layout that is semi-portable (temporary set-up), these TM joiners seem to work great. Each track panel weighs about 25 pounds (with the “tie configuration” I use), so using these “slide-on” joiners makes it much easier to put the layout together in a “one-person” operation. I’ll try to find some photos of these and add to this post.
EDIT: I found a couple of photos of the Train Mountain rail joiners I use on these track panels.
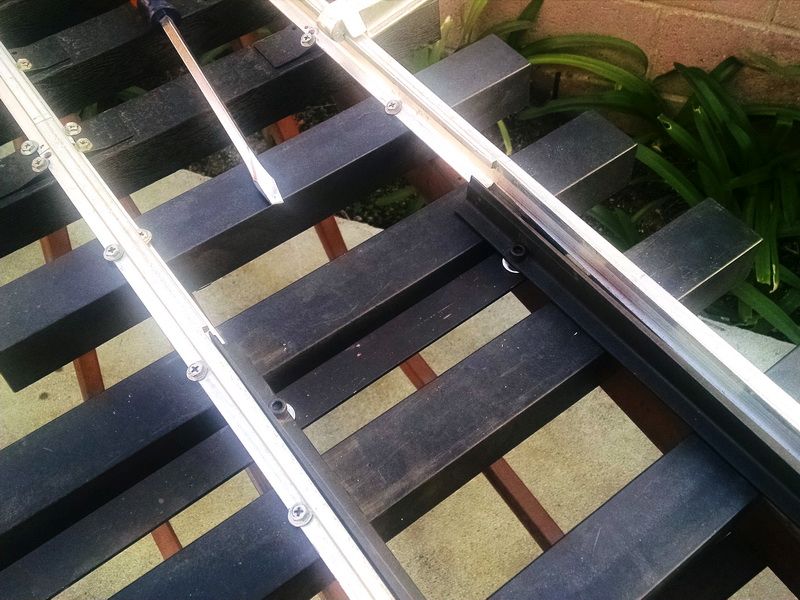
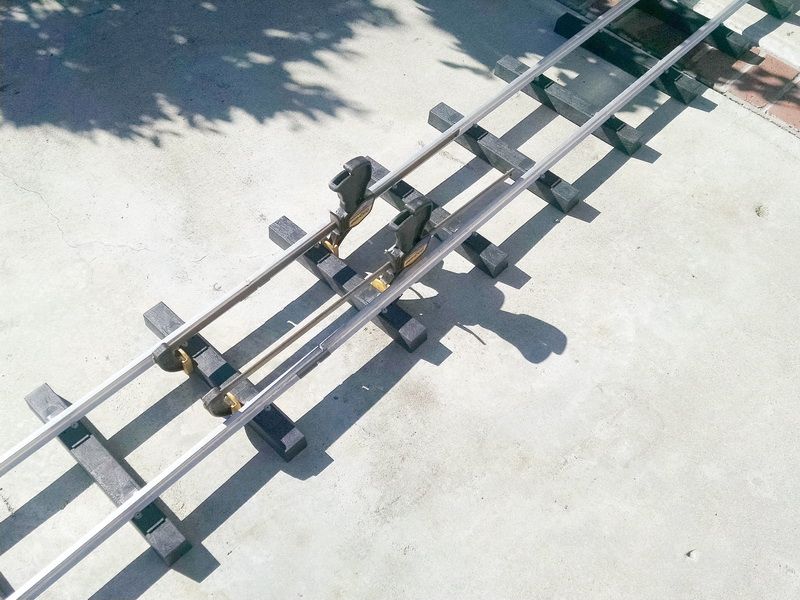
As you can see in this photo, there are two “notches” and one hole in each joiner (these are 4 inches long and a little over 1 inch wide). The single hole is used if you want to permanently mount the joiner to the end of the Code 1000 aluminum rail. The two notches are used as “temporary” holding to keep the panels from sliding apart in train use. So far, I have found I didn’t need to do this. The panels are heavy enough that this slippage doesn’t occur.
These are the SS screws used to fasten rail to the ties. #10 X 1-1/8 inches long. These screws also fit the single hole in the joiners and the notches.
You must have a really big pair of pliers to tighten those joiners!(https://www.largescalecentral.com/externals/tinymce/plugins/emoticons/img/smiley-wink.gif)
John Caughey said:
You must have a really big pair of pliers to tighten those joiners!(https://www.largescalecentral.com/externals/tinymce/plugins/emoticons/img/smiley-wink.gif)
10 inch Vise grips John :). Actually they slip together easier than the small scale joiners. Already in place of one track panel. Then just “slide” the adjoining panel on. Note the photo above with the large furniture clamps (Sean’s post).
Thanks, Gary. I guess I should have paid more attention to how the track was put together when I was up at the Finger Lakes Live Steamers. Too busy havin fun…(https://www.largescalecentral.com/externals/tinymce/plugins/emoticons/img/smiley-wink.gif)
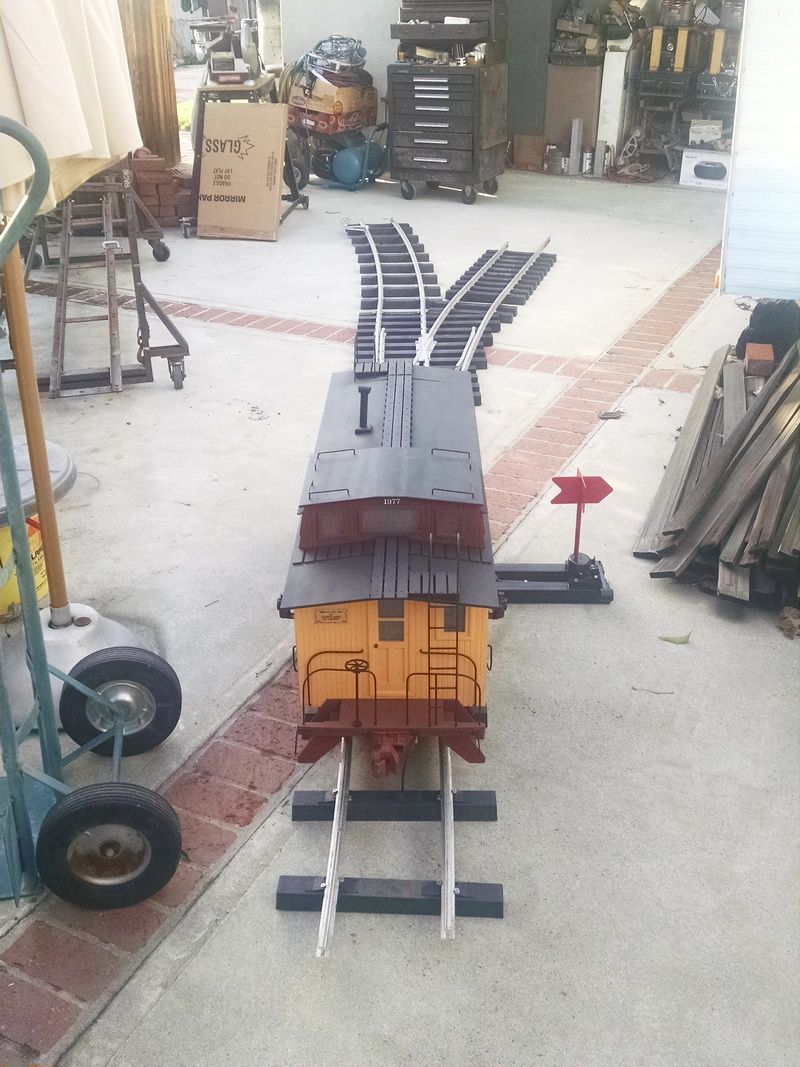
today was a big day here at the shortline. I finally put the new turnout on the ground and ran the first piece of 1/8th scale rollimg stock through the spring points and #5 frog.
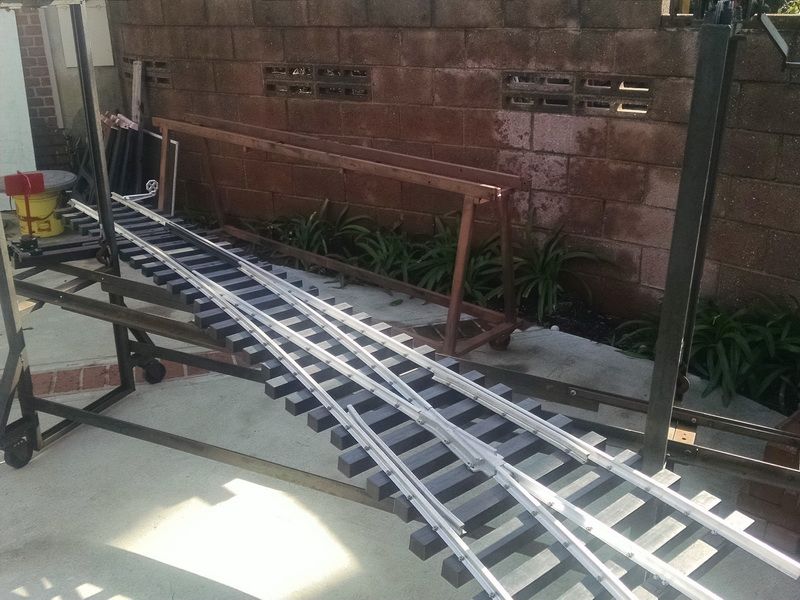
First thing I had to do was move the completed turnout from the locomotive rack it has been stored on and get it on the ground. I wasn’t real sure how awkward this switch would be to lift and set in place. Actually it was pretty easy to put part of the turnout on my locomotive/rolling stock lift rack, get it balanced and then just lower it down. A lot easier than I thought…at the end of the day, I was just lifting and carrying by hand to move into place. This switch is very sturdy and there is no flexing or bending anywhere.

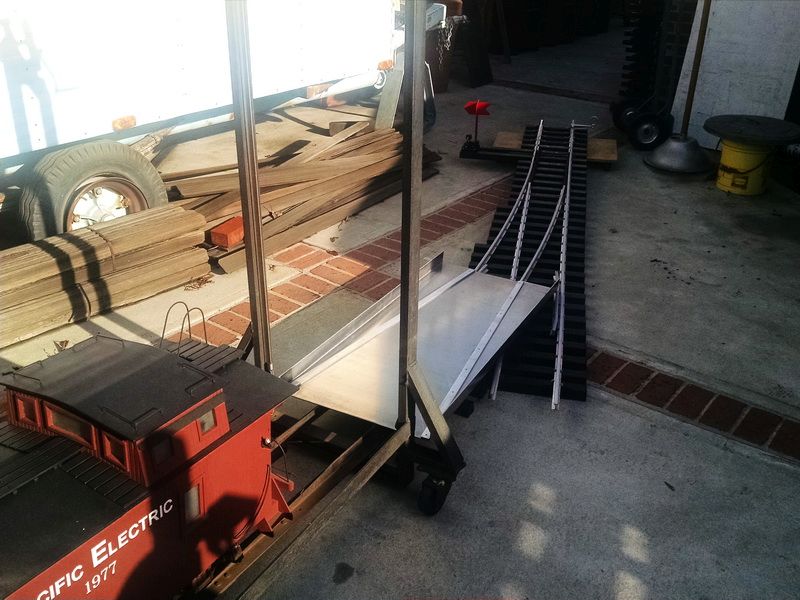
Next step was to pull a piece of rolling stock out of storage and place on the track and turnout. This method worked great with the aluminum loading ramp I purchased a couple of years ago from the Big Boots & Western RR in Florida. Made of 1/8th thick aircraft 6061 T5 aluminum plate. This ramp/rerailer is capable of holding locomotives up to 800 pounds. Very strong, but lightweight. My caboose is the lightest car I own at 125-130 pounds. The caboose rolled right off the lift rack and right onto the switch tail track rails…no derailments. The tapered “rails” worked just as advertised by quiding the trucks right in the proper position. I had been skeptical, but it worked great.
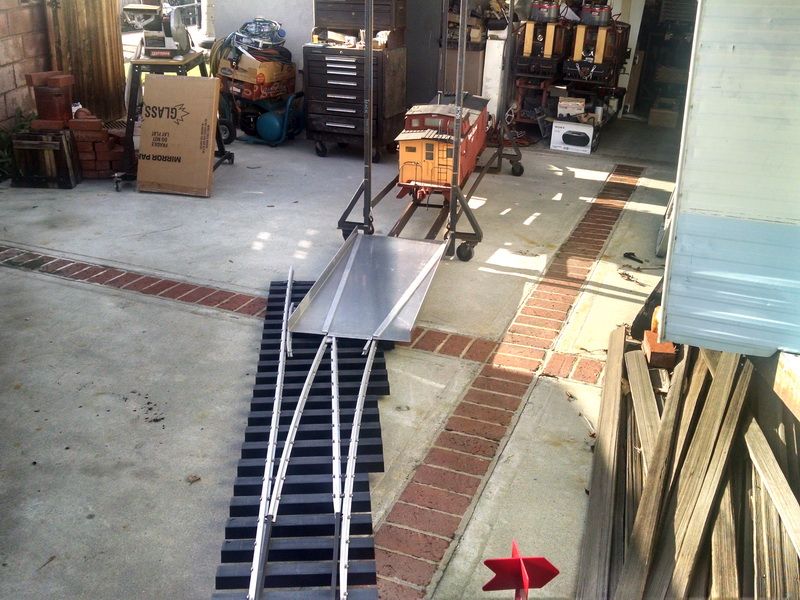
Another view of the operation.
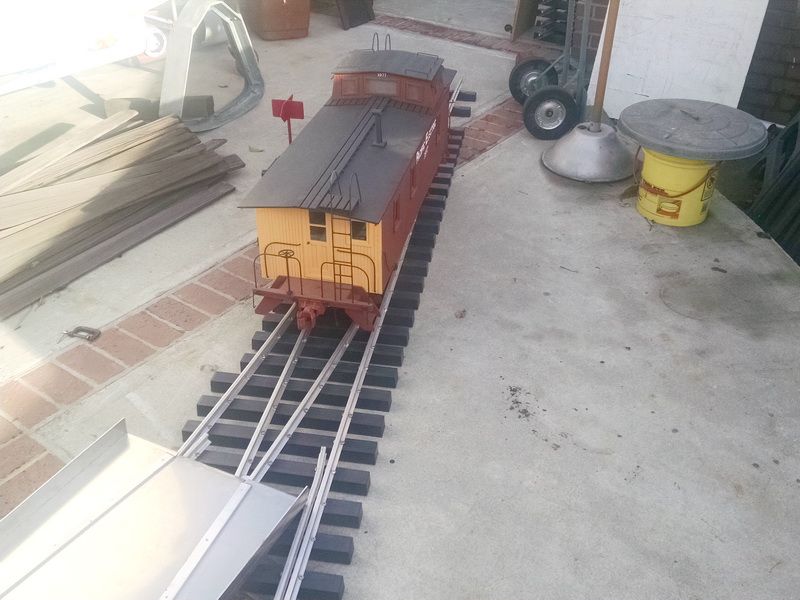
First time on the rails!
First test of the spring switch points! Because this is the lightest car, I wasn’t sure if I had the springs adjust correctly on the switch throw. But as you can see in this photo, the wheels are moving the points and no derailments. Very smooth going through these points.
First test of the caboose trucks through the cast aluminum #5 frog. Smooth as glass.
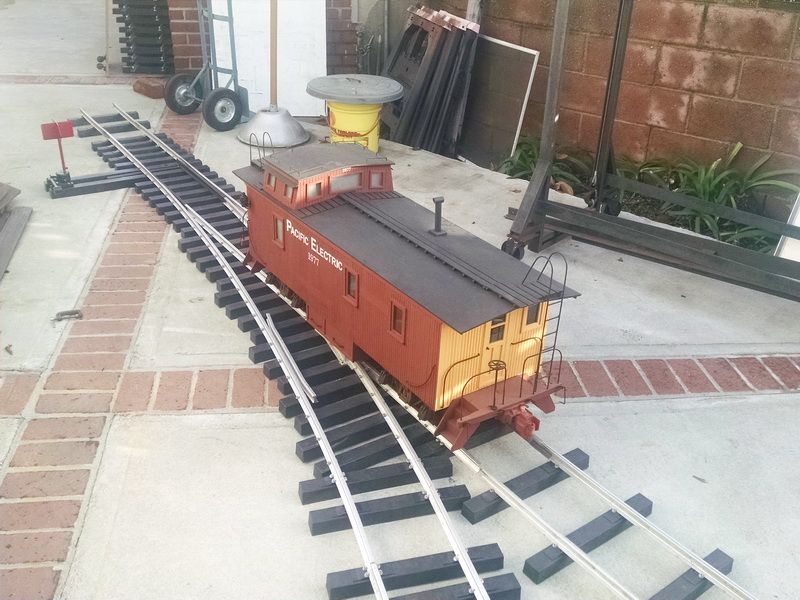
The new turnout is approved and ready to be installed on the shorftline. I can’t wait to get delivery of my second #5 turnout “kit” to be installed about 150 feet up the driveway for the “station” and siding for multi train/bi-directional running.
The rain stayed away today to get this testing finished. This finally completes the #5 turnout “build”. Thanks for looking :).
Isn’t It is a nice feeling when everything works like it’s suppose to… (https://www.largescalecentral.com/externals/tinymce/plugins/emoticons/img/smiley-laughing.gif)
Looks real nice and will last a long time…