Large Scale Central

2020 Mik's Build Challenge Entrants Photos for voting

PLEASE DO NOT POST COMMENTS ABOUT BUILDS IN THIS THREAD.


Post them in the individual build threads.


This thread is for pictures of the builds for voting.


Each participant needs to post his photos and comments of his finished or unfinished challenge build.

Please identify who you are, and what you built, and any other comment you would want to tell about your build. 


Please keep this thread clean of comments about the builds. 

And limit posting to the participants of Mik's build Challenge 2020.

Pepper’s Ice Co. Devon’s MIK 2020 build.

First the glamour shots.

So for me this is the first building I have built for the outdoor layout. All my previous work was for the now defunct indoor RR. As such it was a lesson in enduring the elements. The very first decision was what to make the base out off. This won’t be sitting in a mass of dirt, it will be on a screened platform that will drain so standing water is not an issue but I still wanted something that would last. So the base is made from four PVC boards left over from the construction of the layout glued together with PVC cement. This also gave it the height it needed above the track. Next was to make that pretty so I surrounded it with some Taylor stone and decked it in aromatic cedar.

I then made the main building using Masonite and, thanks to a tip from Dave, sealed it with Titebond III on all exposed wood surfaces. (Still not sure about using Masonite, we will see). That was covered with some cheap knock of tin from Alabama. Its not Taylor tin, but we had it on hand. It really is aluminum pop cans crimped with the paper crimper. That was attached using liquid nails which should hold up just fine in the weather. It is weathered with a dusting of flat black and then oil paints dabbed on and drug down to create streaking rust. The roof is 100 grit wet/dry sand paper. Doors were added. No windows as in my research they wanted as few openings as possible in an ice house, makes sense.

The office building is masonite with aromatic cedar lap siding and a corrugated metal roof and a nice chimney for the pot belly stove. And finally and upper deck was added with drop down ramps that extend onto the roof walk of the reefer car. This allows ice to be taken to the roof walk and dropped down the roof hatches. I made the pulleys out of aluminum cans, a paint brush handle, and a sewing pin. I added some ice made from clear resin. Pepper’s need. . .well. . .a Pepper; so On the bench is Pepper and her friend. The friend is not me, for one he is too skinny, and second he is sipping bourbon while I am actually inside working.

For me, the best part of this build, and important part of this build, is the lighting. I like to stretch myself with every one of these projects. I want to do something I haven’t done. So based on ideas here, mainly from Bill, I used a dollar store solar path light to create lighting. The solar cell is located in what has become know as Dino Turd Rock (thanks Jim and John C). on the underside of the rock is the little PCB board and battery. then that goes to a warm white LED in the office and two pico LEDs that are inside some lanterns. That was done by taking Ozark lanterns and drilling the bottom and gluing in the LED, these are all wired in parallel. I am happy to report that now that it has sat outside for awhile that the battery has enough umph to keep the entire thing lit all night.

Thats my build. I spent less than $10. I did have to buy a tube of liquid nails, some super glue, and a solar path light.

Another great showing of imagination, skill and talent from all the participants.

In the past Mik’s build challenge has been a time to try new techniques and really stretch my modelling skills but this year had me spending most of my time renovating a house about 60 miles from me during the week and home for the weekends with most of my tools staying behind. I ripped the wood needed and brought it and my brad nailer home. As a result my build was not as ambitious as usual but I’m still happy with the outcome and it will be a welcome addition to the RR. The “switch shack” will be wired in this Spring and will control 2 sidings on my track powered RR. I did cut the Taylor chimney in half because my original plan was to build 2 small buildings. The overall cost was $0 with all bits and pieces already on hand. In the future I might add a bit of trim and maybe a window but for now the building is done.

For Mik 2020, I decided to build a small blacksmith shop. Modeled after what you would find in many turn of the century towns out West in New Mexico. Built from locally sourced cut stones. Every town had it’s own blacksmith, a well respected and very needed local citizen. The blacksmith shop was always a bevy of activity in the town.

I present to you. Paul Cozza Blacksmith shop. Named after a departed friend, and his inspirational wife Kathy.

The out door environment in Northern New Mexico has high temps in the summer with extreme UV levels at the 6000’ elevation, and even snow in the winter. I have adopted the principal that builds for the pike need to be way over built to survive, and to try and keep the little fragile details to a minumin. When it rains, it pours… so waterproof becomes an extreme measure. I try to seal out all possible sources of leaks to the 1/2" plywood central structure. and then extreme waterproof the wood, before I hide it with the exterior.

And here is my required Chimney… And yes I did get it a touch crooked…

There is no exterior surfaces that are exposed wood, cast resin doors and windows, and cast stones, and the trim work and signage is made from Syntra. And of course the roof is “guaranteed Never To Rust” Taylor Tin.

The photos were shot in the sunlight, it’s perament location on the pike is in deep shaded shadows this time of the year…

night

the lady of the house

living room

back

painted and base

My build, “Cracker House” features left over Playmobil building parts, PVC sheet, board, evergreen styrene, screws, glue, and rattle can paint + fond memories. I lived in one of these till the first grade and when I saw the build included a chimney it was on. Even though my home didn’t have a chimney, we had a wood burning stove for heat and cooking, figured why not step it up with a brick chimney. First I assembled the chimney, harder that it looks, then added detail and tried to make it look like new old brick. Went thru all my old Playmobil parts and found every thing I needed. Started with the design, then glued using my favorite ACE surehold, Plastic Surgery. Painted the building using Krylon flat white rattle can and while waiting for the paint to dry made the base from leftover PVC 1/4" board, making footing concrete blocks using #3/4’ PVC board which is somewhat porous giving the look of concrete block after being painted. Toped them with .10 heated sheet styrene for termite barrier and then securing using drywall screws from the top down. Found suitable plank flooring for both the front and back porch and secured. Next to the roof, needed extra detail as Playmobil really doesn’t look too much like metal roofing, which this build had to have, as then is nothing like a metal roof in a rain storm, that is where I learned redneck sign language, so I added appropriate size styrene strips adding 8 on each side then painted the roof. Onward to the windows and doors, painted again with a rattle can a light mine green, then slid suable thickness clear acrylic for windowpanes opting to leave windows open a different heights and the making roll up blinds using the same acrylic sheet only this time I painted it with glass paint which color them but allowed light to penetrate. Added a little furniture detail in side using playmobil parts just in case one could see inside the open windows, than a mist of Krylon matt finish for UV protection. Porch uprights were next and was done with styrene, last but not least was the chimney, did a little research and it said it had to be 3’ from the roof and if within 5’ of the highest spot another 2’ was needed, done, added a top to the chimney to give it a finished look and hid my pathway solar light panel in the top, solar light was left intact with the exception of the solar panel and it was glued to the under side of the roof. Finally after weathering a little and coating with matt finish added my crowning detail. If what could be better that a pregnant woman with 3 young ones hanging on to show the husband wasn’t taking any chances, both barefoot and pregnant and it appears to have been going on for a while. Finished it off with a black dog and “Rooster” as no LSC project can be done without a “Rooster”, my expenses were $12.95 for the figures, $3.95 for the ACE plastic surgery glue and $.50 for a styrene strip + I still have enough parts left to build 2 more building or 1-2 store, very fun build brought back some very fond old memories. Thanks especially to Dave for his time and expense, and all the great builds in this endeavor, Bill

partsbasebuild and base

Vic Smith’s “where’d the damn chimney its nowhere in sight utter failing to even start reassembling his project because he wanted to shovel his personal equivalent of the Panama Canal, or as it shall be forever remembered as, the Mik’s Memorial Retaining Wall”.

I don’t know why some of my glamor shots came out fuzzy. I reserve the right to reshoot after I’m less fuzzy.

Eraser Division

Entrance to the Pencil Division

Delivery! Sorry, one of the fuzzy ones.

Hole In One Golf Pencil Company

Another fuzzy picture.

All Rights Reserved Hole In One Golf Pencil Company

I forgot to mention the building supplies. The base and walls came from leftovers from Jon Radder (thank you), the roof and pencil sign are from deserted Board of Education signs, the Eraser Division is a Bachmann Lil Critter bought some time ago, foundation blocks and door are leftovers from some guy named Taylor… Some signs were made on the P-touch labeller. Everything else is “stuff” that was laying around, some of which I can’t even remember where it came from. Total expense $6.99 (less 20 % coupon) for glue that takes much too long to cure.

First, the glamour shots:

Building is constructed of a pink foam core, overlay is individual cedar strips to make up the siding, trim and structure. The temporary tar paper roof is made of masking tape. The doors were scratch built and the windows were cut down and bashed to make double hung units. The Goodrich tire sign is paper, thinned down and glued on, then sanded to weather it thru. All other signs are printed on vinyl and covered with a UV film. They are mounted to .040 styrene for rigidity. Lighting is installed and working, just not finished with the wiring. I had the two Gilmore pumps, purchased the other two after the challenge began; other than that I had everything on hand. Weathering is light to give it a look of a well maintained station.

Now that the challenge is over, a proper base for outdoor use will be made, and pump islands for each side will be fashioned. A plethora of details will be added, which would have broke the $30 bank. The roof will also be changed over to corrugated metal and additional weathering to the structure will be done. I will also modify the size of the chimney to look more appropriate to the building.

Neal S MIKs Challenge - Peterson Post Newspaper HQ.

Glamour shot:

PP

This is constructed from a kit. Kit included walls with brick molding and window frames plus doors. I added paint, the bottom concrete block foundation, entry steps, awning, window glazing, historic headlines in windows, rooftop signage paperboy and MIK’s chimney.

The building will go nicely with the rest of Peterson village on our club layout, which is set in 1957.

Kit and almost everything else were already on hand. Purchases: paperboy figurine and 1 can spray paint, total $18.

Well here it is, just a humble little backwoods flagstop station. The trains run on an every other day basis and don’t stop unless the Station Master posts a flag.

The pictures show the building just plopped on the layout, not in it’s permanent location, but it’s forever home is now under construction, maybe pictures will follow somewhere else.

Just basic construction, nothing new or different, however this is the first time I have used popsicle sticks as siding, not to bad. The chimney was cut down to better fit my minds eye for size to the building.

Windows are by Grandt Line, doors are scratch built, and the roof is doll house shakes, that aren’t too bad for size.

Everything that went into this building was on hand, including the 9V battery for the lighting so my cost total is zero dollars for this project.

The final shots

And, of course, the Drone flyby.

The night lighting shots, I like the nice soft yellow glow that I get with using 14V bulbs and a 9V battery, 2 bulbs in series.

It seems to fit the 1939 era better than the stark white that comes from LED’s. Having said that I know all the arguments in favor, but to me bulbs and batteries are simple.

That’s is it for my Mik 2020, it was fun to participate again and to follow along with all the great stuff that was happening during this challange. I learned a lot from you all and I thank you for sharing your builds and especially the fun.

Rick

Denray Welding Supply

This has been a great contest with so many great models built for the contest.

I thank all the entries and the people that headed up this contest

My structure was a lot of fun and there are still ore to do on it

This model is built out of Precision Board, a product used mostly for outdoor signage

The base is 16 gage steel, made a couple inch bigger than structure so details, people, and tree’s can be added

The roof substrate is 20 gage steel, so it can set outside without worrying about getting wet inside.

Redwood shingles, steel shim stock for lean too roof, (so it can rust)

For outside 3 LED lights

Signs are made from 2 layered Acrylic plastic, lasered to get lettering.

Windows and Doors 3D printed

Painted with acrylic paint

IMG_E4933 by Dennis Rayon, on Flickr

IMG_E4930 by Dennis Rayon, on Flickr

IMG_4965 by Dennis Rayon, on Flickr

IMG_4958 by Dennis Rayon, on Flickr

IMG_4951 by Dennis Rayon, on Flickr

IMG_4949 by Dennis Rayon, on Flickr

IMG_4945 by Dennis Rayon, on Flickr

IMG_4969 by Dennis Rayon, on Flickr

IMG_4968 by Dennis Rayon, on Flickr

IMG_4971 by Dennis Rayon, on Flickr

IMG_4955 by Dennis Rayon, on Flickr

And now Something Completely different;

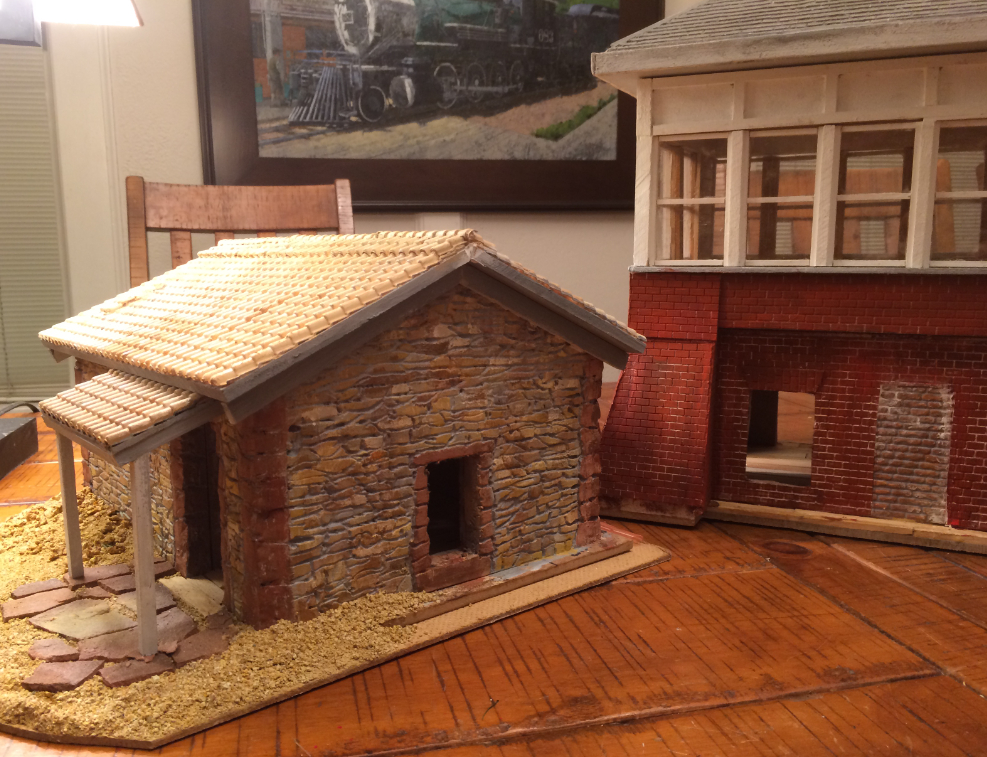
A Stone Assay Office.

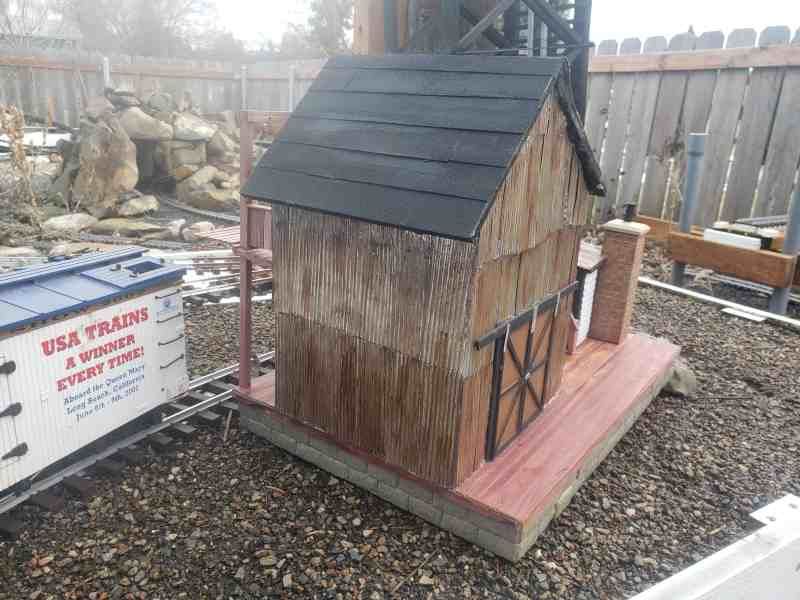
On my layout wood buildings dissolve …

Image result for split face tile

Stones should survive … it took 3 sheets of these to build my Assay Office, the first I bought for my junk box gamble. This year it paid off. Contest cost = $26.00

Unfortunately they are glued to a backing for application as a unit and I needed individual stones. Half my build time was liberating the rock. Luckily for me I have a lapidary shop and could sand the glue off, but tedious was the rule of the weeks.

Overlooked were the polished stones included, but they became a floor and counter. First sheet …

(https://www.largescalecentral.com/FileSharing/user_2288/2020Mik/rock01.JPG)

Also since the blocks were all 3/8 x 1 1/8" I cut some into 3rds and 2/3rds as seen on left. Overlapping seams is a must for strength.

The longer white stones were foundation and lintels over doors and windows.

I have a plan! (subject to changes)

(https://www.largescalecentral.com/FileSharing/user_2288/2020Mik/DeluxFloorplan.JPG)

Since I have polished tiles I changed the showroom floor to tiles and for the contest compromised an a dirt floor for the shop portion, but if I have the tiles…

I used a caulking gun and a tube of sanded Ceramic Tile Caulk for my mortar. The tin is my layout’s footprint for the building.

(https://www.largescalecentral.com/FileSharing/user_2288/2020Mik/wallsUpish.JPG)

I tried using the box to keep the outside surface semi- flat, but oozing caulk made a bond with the cardboard that was a tough peel away, but the box did contain my mess somewhat so it’s good.

(https://www.largescalecentral.com/FileSharing/user_2288/2020Mik/IMG_0576.JPG)

Spirit of Mik … As a folk artist Mik was great at re purposing trash, my bottles below are from small glass syringes cut on my diamond saw.

(https://www.largescalecentral.com/FileSharing/user_2288/2020Mik/bottles02.JPG)

A little paint via Q-tip went inside to make the glass appear colored …

(https://www.largescalecentral.com/FileSharing/user_2288/2020Mik/IMG_0589.JPG)

(https://www.largescalecentral.com/FileSharing/user_2288/2020Mik/details01.JPG)

I haven’t mentioned the brick oven that gives cause for the Chimney …

I had a sheet of embossed O scale bricks, molded in red, over the years that sheet was splattered with a cream colored paint. I cut a block of wood for the core and JB welded brick panels to it. The corners were covered with Plastruct 1/8" angle strips and brass tubing was cut and spring steel (black) wires became binding rods… The grey barrel came from a glass jar and the melting furnace from plastic mini vinegar bottles…

A black marker denoted the oven’s openings… as seen above.

(https://www.largescalecentral.com/FileSharing/user_2288/2020Mik/details03.JPG)

(https://www.largescalecentral.com/FileSharing/user_2288/2020Mik/details04.JPG)

Above are my Mik recycled details.

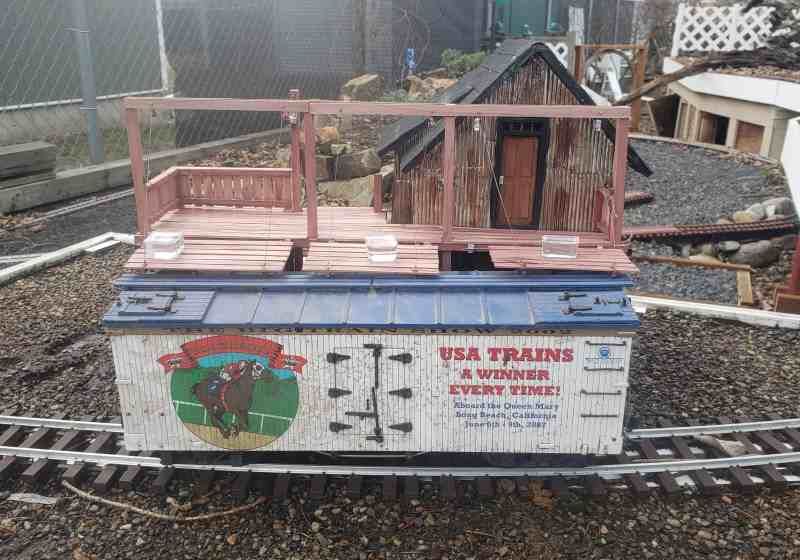
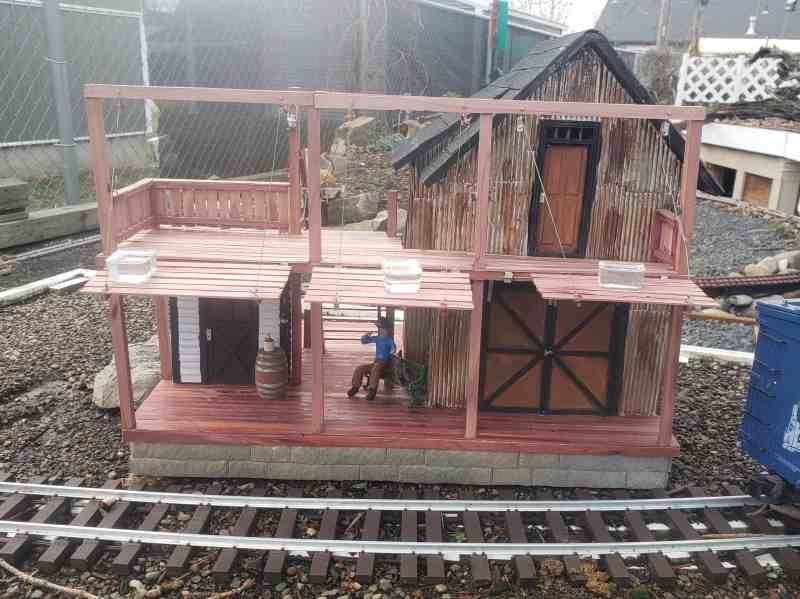
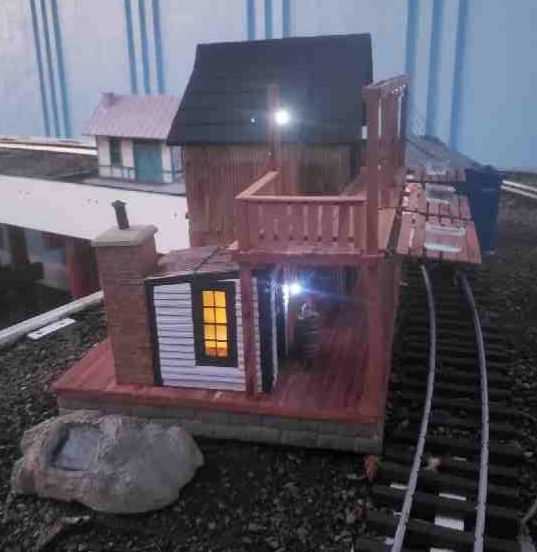
Since the interior makes this model, I decided to go with a Ruins look to be seen on my Scenic Railroad … only a partial roof around the chimney

(https://www.largescalecentral.com/FileSharing/user_2288/2020Mik/details07.JPG)

(https://www.largescalecentral.com/FileSharing/user_2288/2020Mik/001.JPG)

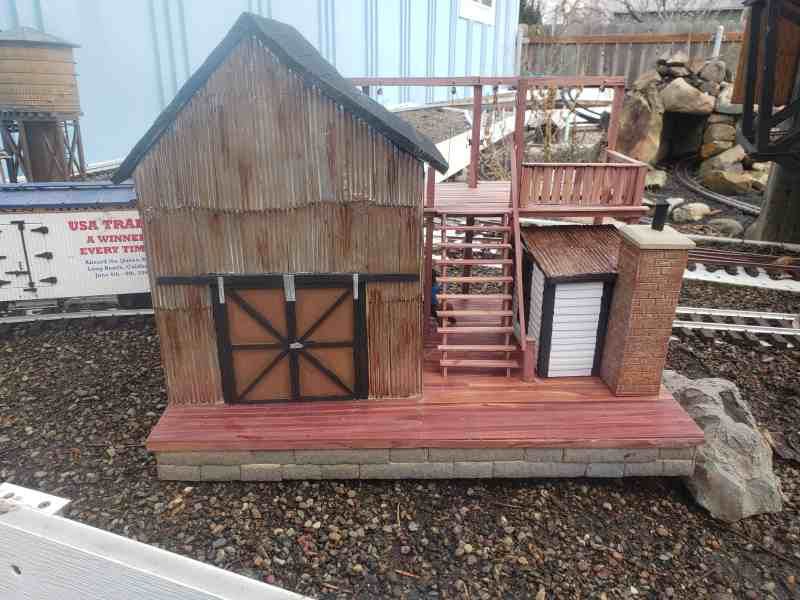
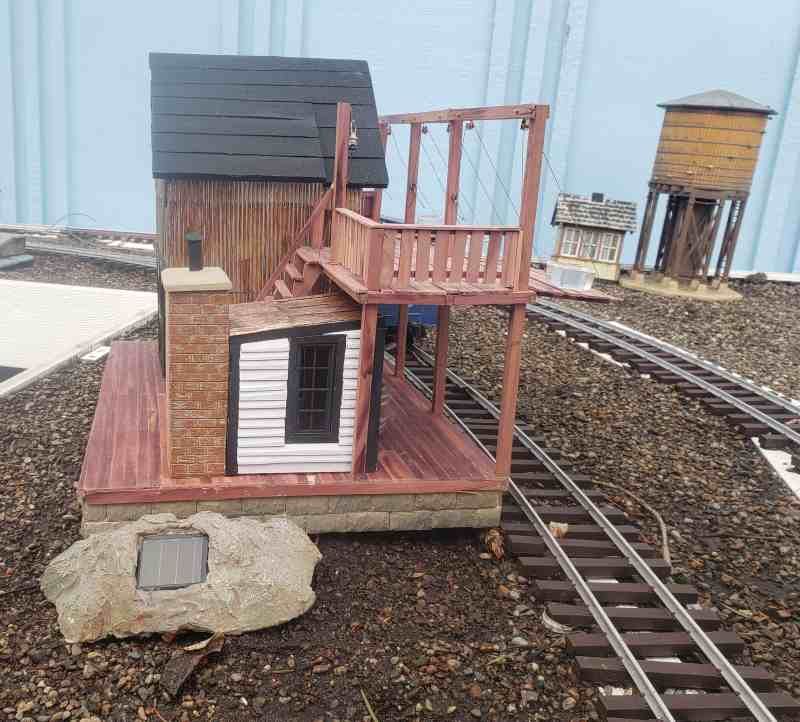
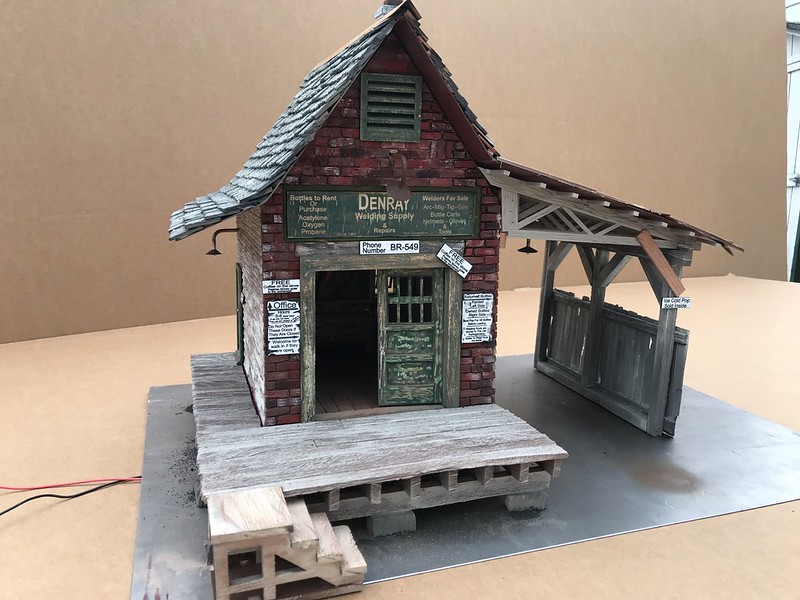
When planted, dirt will hide the shadows and cover the lower half of the foundation and the track will be ballasted too.

(https://www.largescalecentral.com/FileSharing/user_2288/2020Mik/005.JPG)

(https://www.largescalecentral.com/FileSharing/user_2288/2020Mik/01.JPG)

(https://www.largescalecentral.com/FileSharing/user_2288/2020Mik/006.JPG)

Thanks to Benevolent Bob our underappreciated Host and to Dave Taylor as our acting Trail boss, keeping us headed in the right direction: To Have Fun and beyond!

I look forward to this event every year, it’s fun to rub shoulders with truly great modelers, mebbe some will rub off on me!

For more details; https://www.largescalecentral.com/forums/topic/30146/2020mik-chimineyastoldto-john-c

Over the past year or so, various folks here suggested Kenai’s Russian Orthodox Church would make for a Mik project:

https://www.google.com/maps/uv?hl=en&pb=!1s0x56c67c85289b3b03:0xad08146c88e752c7!3m1!7e115!4shttps://lh5.googleusercontent.com/p/AF1QipMi_1Rt9pR0raBTIq4jnO7fiTplkVh5JB04oxMi%3Dw239-h160-k-no!5skenai+russian+orthodox+church±+Google+Search&imagekey=!1e10!2sAF1QipMi_1Rt9pR0raBTIq4jnO7fiTplkVh5JB04oxMi&sa=X&ved=2ahUKEwjJ-9SE-8_nAhWPGDQIHQHEDRAQoiowCnoECA8QBg

(note on pronunciation - most people outside the area pronounce it as Ken-Aye. It’s actually Keen-Eye - a moniker adopted by one of the early locals who ran ‘Keen-Eyed Joe’s’ bar back in the old days. Not likely to happen, but should the opportunity to arise, I suggest you take in the ‘Ballad of Kenai’ sometime - a strange yet engrossing mix of native american belief and the old homesteading days)

Space is tight on my pike. Not much room left for buildings…especially with the slot car track streets. Still, Middleton, the ‘big city’ of the fictional line (which is also set on a fictional world) was the only berg on the layout lacking a church. I mean Cliffport has the Shrine to Saint Dagon and Bachmann the Church of the Risen Dead and even the 2D town of Nocturne Deep (Summit or some such in the last challenge) has a churchly facade…but not Middleton. (no offense intended to the devout types here - my layout is more than a little ‘out there.’ Buildings are mostly ‘background’ or ‘props for gags.’) And there wasn’t much room, what with the gas station, Office Building, and Sin Tower (a pair of total rebuild projects that occupied me through the holidaze.) But repeated careful measurements revealed a possible spot…so I went for it.

I started with scraps and leftovers from the rebuilds of the Office Building and Sin Tower, plus the last of the scribed siding from long past projects. To this, at the suggestion of a member here, I added teardrop shaped Christmas ornaments. Later, I went and bought more scribed siding and strips for trim…though the former didn’t match what I had. Tack in the priest figure, and the total tab is just under $25, much of that shipping. Only used one ornament of four, so maybe that rates a discount, plus I still have some of the trim pieces left.

This project was a trial right from the start. Everything from repeated miss-measurements to bad cuts to glue that didn’t stick. The scribed siding had an annoying tendency to curl and split when cut. The prior two projects had their woes (Sin Tower, for example is nowhere near square, and a piece of plexiglass broke wrong during a cut for the Office Tower) but this was much worse. Because of these travails, I named it the ‘Shrine of Saint Murphy the Muddled.’ Amazingly, though, it didn’t turn out too terrible apart from the steeple, which has a visible tilt to it. I figure it works as a rundown shrine in a seedy part of town. Anyhow:

Anybody spot Waldo?

My buddy John P withdrew for personal reasons, but I think his work should be shown and considered. Mine isn’t finished, yet is entered, so in my mind; this does deserve consideration;

(http://johnpassaro.com/saintfrancisrailroad/sharedimages/Signal79.jpg)

done

Mama’s Bakery No Ka Oi

by: Clan Mueller

I entered the contest with CINCHOUSE guidance “This cannot be just your hobby” which I operationalize as “All may participate; none must participate.” The primary objective is to get the kids involved with creating and getting them outside. For personal skills, I really wanted to tinker with foam as a material, try making corrugated metal, and improve craft-stick-on-core techniques. The crew wanted to make a bakery dedicated to CINCHOUSE, who is an accomplished cook and baker. We built to 1:24-ish PLAYMOBIL scale, which is close enough to the 3’ gage OR&L from which I (we?) take the guide without sacrificing “play value” by detailing it beyond where we are ready to be. Total cost was about $30 on the nose for crafsticks, replacement cutting wheels for the Dremel, and Mama. On to the photos…

Opening day at Mama’s was quite busy, with live music and delivery of goods by the world’s only ka’a wa’a (double hulled sailing locomotive), Wahineokaalahao (Lady of the Iron Road) from the Mik 2019 challenge.

Below, you can see the baker, Mama, seems pleased! The little detail painting is courtesy of my daughters and my niece. The pastries are PLAYMOBIL, with the exception of the blue one. Youngest Daughter crafted that from Scultptamold:

Side shot, following by a close-up of more “pastries:”

Rear shot. The chimney was painted white, smeared with red acrylic, then given a heavy wash of black.

A close-up of the service entrance. Oldest Daughter free-handed the petroglyph symbols to direct those who’ve overindulged in coffee!

And the last side, where a family inspects more pastries drying on the shelves:

The roof is removable at the insistence of the crew. You can make out the Velcro tape in this shot, unfortunately. I do plan to light this building in time. Oh, the roof topper is the remains of an epee blade. As mentioned in the build log, incorporating fencing bits into build where I can is a running sight gag. In the meantime, Mama’s adds needed infrastructure and even a little industry to the Triple O!

Thanks for the interest and encouragement!

Aloha,

Eric

I also did not finish so I will abstain from weighing in on the DNF question. Here are a couple glamour shots of what I did complete as it will soon be added to my layout as part of a winery project.

When I discovered that I lacked the materials to finish the roof, I stopped work on the project for a few days. There are still a number of things to do and I am now back at it. My BAGRS open house is in May and I want to have it done by then, along with some other ongoing projects.

  • Doors and windows, of course, need to be installed.
  • The fireplaces and chimney need to be completed. I never did like the way the fireplaces had come out so I am redoing them
  • About the only thing that cannot really be seen from the layout, unfortunately, is the staircase, so I am not sure what to do about that.
  • A back porch and some kind of decking, planters, walkways, et al. around the perimeter.
  • Access to the house from the lower area of the compound and a ramp/driveway along the right side
  • Some sort of lighting, both inside and outside
  • Weather-proofing.

I spent around $20 for another tube of Weld-On 16 and the beads/crushed rock for the fireplaces. I also bought a couple packages of styrene.

Leroy’s Transfer & Warehouse - Build Log I DID NOT FINISH

I chose to go down a different path with my build technique this year. The buildings are 100% 3D printed. The only wood used is in the deck and the flooring on the 2nd floor. Here are some statistics on the printing:

Total Print time = 297 hours

Total individual print jobs = 109

Total individual pieces printed = 205

Total length of filament used = 5,346 feet (just over a mile)

Total Cost of filament = $96.23 (all in possession before Jan 1, 2020, so it doesn’t count toward $30 limit) But still ridiculous.

The only costs that go against the $30 is a couple bottles of CA glue at $4.67 each.

Items left to do: Roofing (corrugated tin), attach front steps, attach rear steps and a ramp that goes on the side, more painting and weathering and add a jib crane to the far right corner. So, without further adieu:

Thanks for following along and thanks to all those that participated this year and many, many thanks to Dave Taylor for being our fearless leader each year.