Large Scale Central

2018 Mik's Build Challenge Entrants Photos for voting

PLEASE DO NOT POST COMMENTS ABOUT BUILDS IN THIS THREAD.

Post them in the individual build threads.

This thread is for pictures of the builds for voting.

Each participant needs to post his photos and comments of his finished or Un-finished challenge build. Please Identify who you are, and what you built, and any other comment you would want to tell about your build. PLEASE limit the number of photos to not more then 10 total, in this thread.

PLEASE identify if you are a “first time entrant” this year. Special prize for 1st timers.

Please keep this thread clean of comments about the builds.

And limit posting to the participants of Mik’s build Challenge 2018

Vic Smith, Hole in the Head mine for the Barrel of Fun wine barrel layout.

Napkin sketch

Construction drawing, materials single PTDF 2 x 4 x 48, scrap wood and scrap plywood, leftover roof shingles. Tools: Skillsaw, power drill, hammer, glue

Finish building on layout

Total costs $00.00 Mik would be proud (http://www.largescalecentral.com/externals/tinymce/plugins/emoticons/img/smiley-laughing.gif)

Link to build thread

http://www.largescalecentral.com/forums/topic/27788/2018-miks-vic-smith-hole-in-the-head-mine

EARLY 20TH CENTURY OIL DRILLING RIG

Builder: Joe Bussing

Dimensions: 37”L x 12”W x 38”H BIG!

Cash outlay: $28.44 High cost items: Paint $5.87, Nylon washers and spacers $5.53

Setup and location on layout: Built in two sections. Can be set up in 5 minutes on weekend of a meet. Will be located above two-foot retaining wall at waist-high level.

Build log: http://largescalecentral.com/forums/topic/27838/mik-s-2018-joe-bussing?page=1

(http://largescalecentral.com/FileSharing/user_2932/Big%20Joe’s%20Pics/PIC1.jpg)

(http://largescalecentral.com/FileSharing/user_2932/Big%20Joe’s%20Pics/PIC1-2.jpg)

The view from the top.

(http://largescalecentral.com/FileSharing/user_2932/Big%20Joe’s%20Pics/PIC2.jpg)

The platform.

(http://largescalecentral.com/FileSharing/user_2932/Big%20Joe’s%20Pics/PIC3.jpg)

Side view of steam boiler, wash basin and water supply.

(http://largescalecentral.com/FileSharing/user_2932/Big%20Joe’s%20Pics/PIC5.jpg)

The rigging.

(http://largescalecentral.com/FileSharing/user_2932/Big%20Joe’s%20Pics/PIC6.jpg)

Close up look. From left to right: casings on the deck, bailer leaning against the derrick, lever operating the sand winch, telephone post connected to base of walking beam, bull wheel in foreground, tender screw, water supply with hose and snatch block.

(http://largescalecentral.com/FileSharing/user_2932/Big%20Joe’s%20Pics/PIC7.jpg)

View from the engine house. From left to right: sand winch for operating the bailer with beam connected to lever at well hole, band wheel for powering the walking beam, walking beam, tender screw, bull wheel. In foreground are crates of pipe fittings, wellhead ready for installation and casings. Water supply and hose are in the very back.

(http://largescalecentral.com/FileSharing/user_2932/Big%20Joe’s%20Pics/PIC8.jpg)

Corrugated tin roof.

(http://largescalecentral.com/FileSharing/user_2932/Big%20Joe’s%20Pics/PIC9.jpg)

Ladder to mid-level platform and up to crows nest.

(http://largescalecentral.com/FileSharing/user_2932/Big%20Joe’s%20Pics/PIC10.jpg)

I learned a lot of new modeling techniques and a lot about the history of oil drilling. Thanks for looking!

Here is my entry, a coal tipple that has been loosely based on the one at Chama. I googled images of it for inspiration. It has been condensed to fit in the spot on the main yard bench top. There is approx. 325 pieces of wood that were stuck together to make this project. I did use almost the entire 2x4x8. The total cost of supplies including the Taylor tin was $25. The tipple measures 11x13x25 with the extra details sticking out beyond the base.

The napkin sketch.

This is where I ran out of the allotted wood for this challenge. As you can see there was still lots of planking to be done.

The finished tipple.

A close up of the coal chute mechanism. It is totally fudged from odd parts and non working but I think it conveys the idea of what it is supposed to do.

This was another fun challenge to participate in and as in prior years you guys amaze and inspire us all to keep building better and better. Well done to all.

This is my entry for this years Mik’s Challenge. The Dizzy Loco Roundy Round!

It is made from pressure treated 2x scrap left over from various projects. I didnt really take note of how much I used. probably well within the legal limit for 7/8th scale. I used a bunch of nails that I had on hand and a few nuts and washers also on hand as well as wire and brass rod that was also kicking around. i dont know how much money i would have spent if i went out to buy the stuff, probably close to $20 if I had to by it all (except the wood)

It is a model based on the new turn table built at the WW&F Railway Museum in Alna Maine. I spent today firing #9 as we switched some cars and ran to the end of the line. It was a fine day to “play” trains. My model is not really accurate, that is what happens when you work from Napkin Sketches! it is about 36" long ( or 40 feet to scale) plenty long enough for any of my engines or any I plan.

2018 Miks build Challenge Build by Dave Taylor.

http://www.largescalecentral.com/forums/topic/27831/dave-t-s-2018-build-challenge

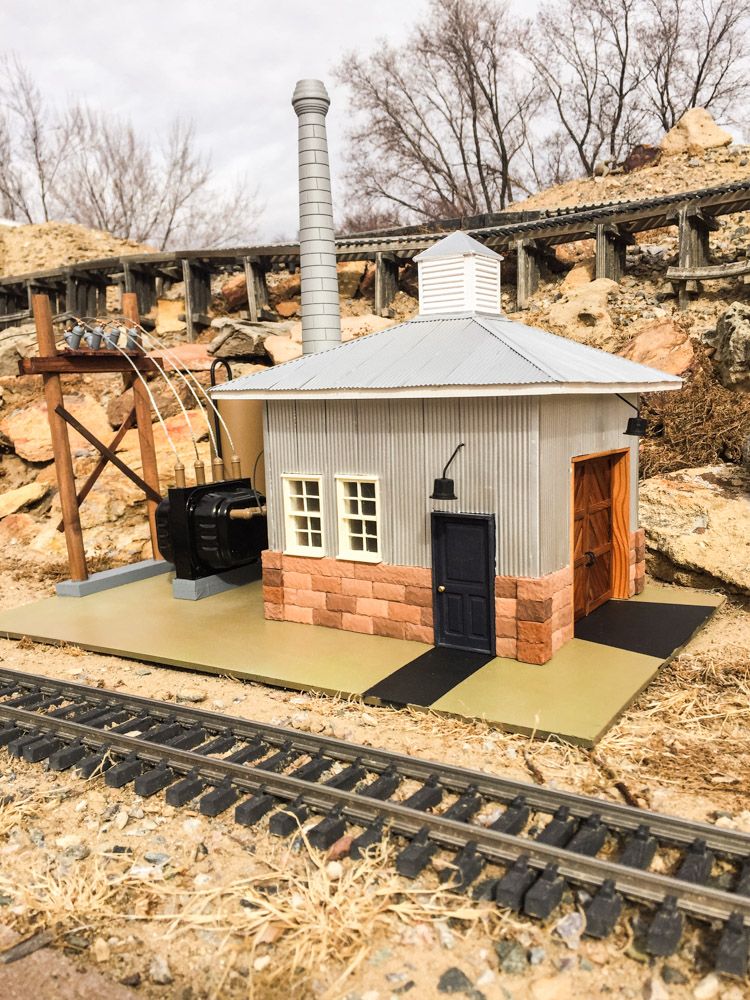
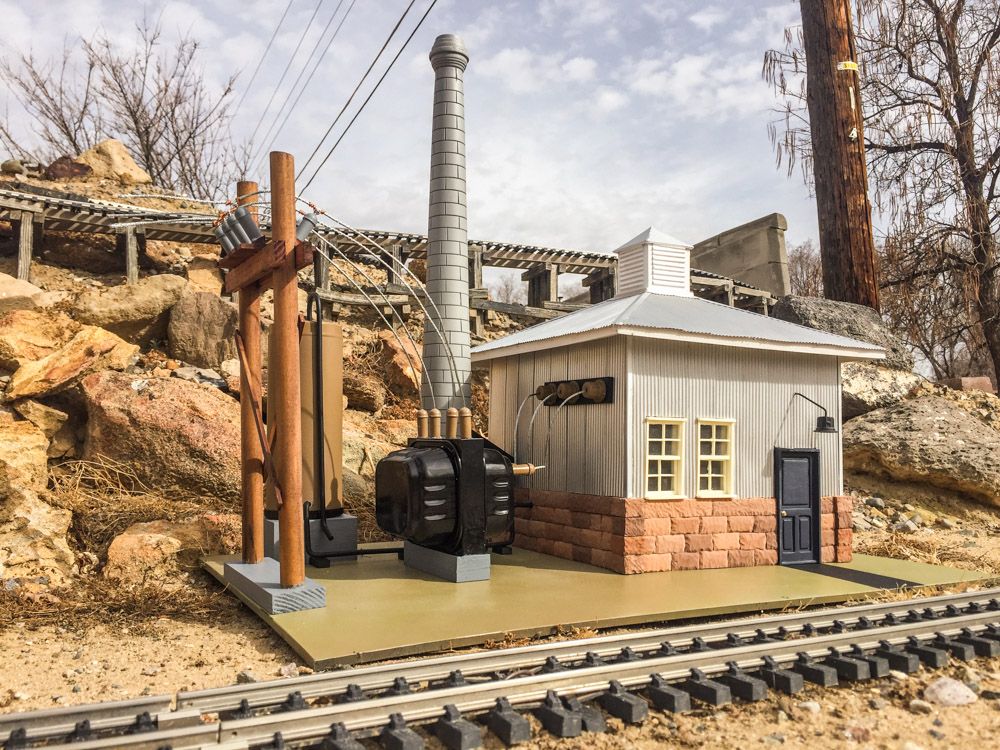
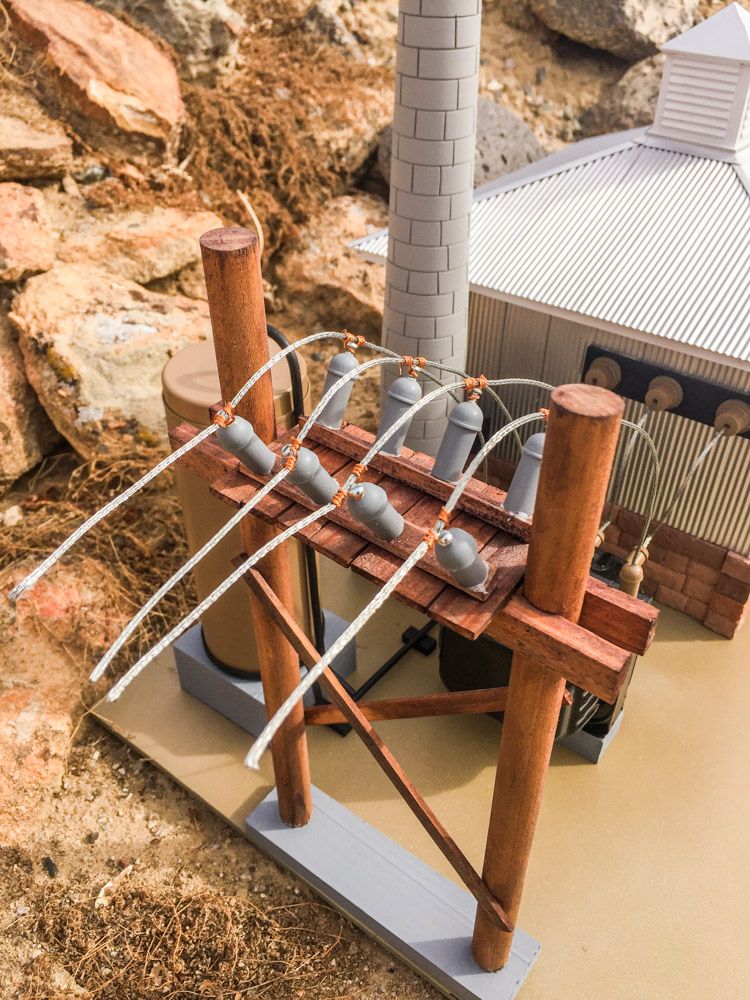
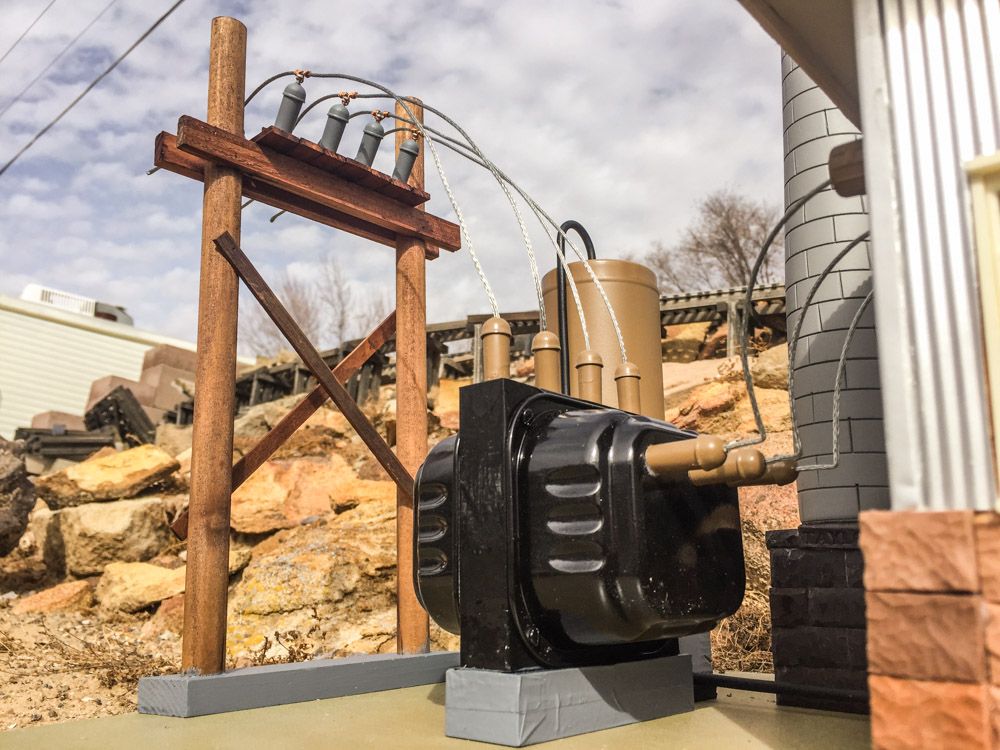
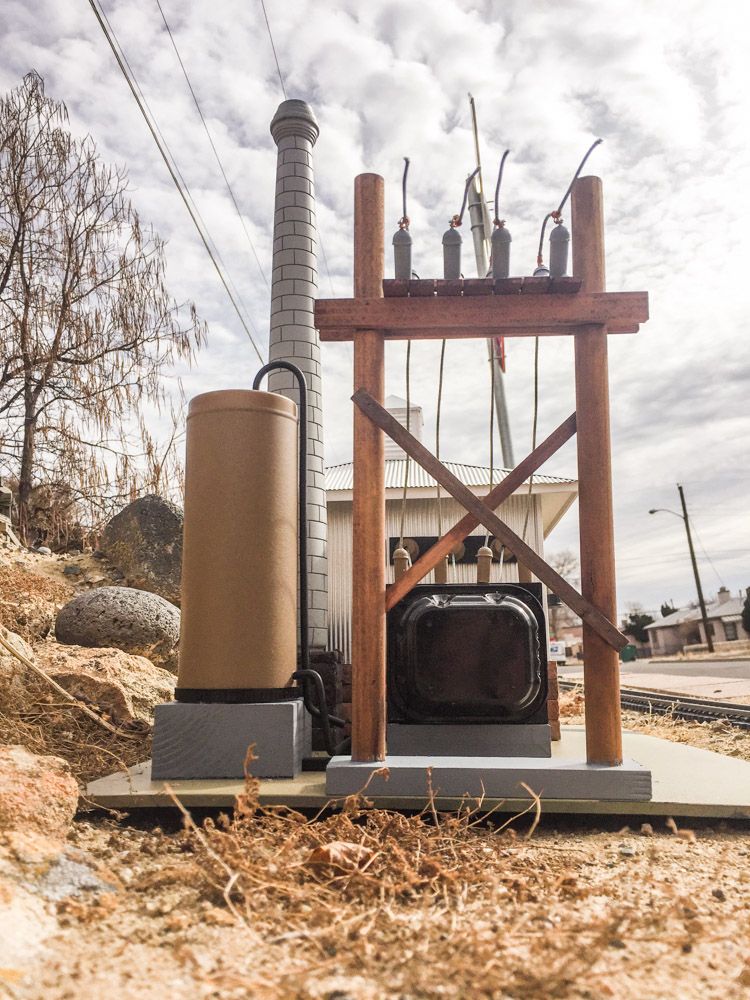
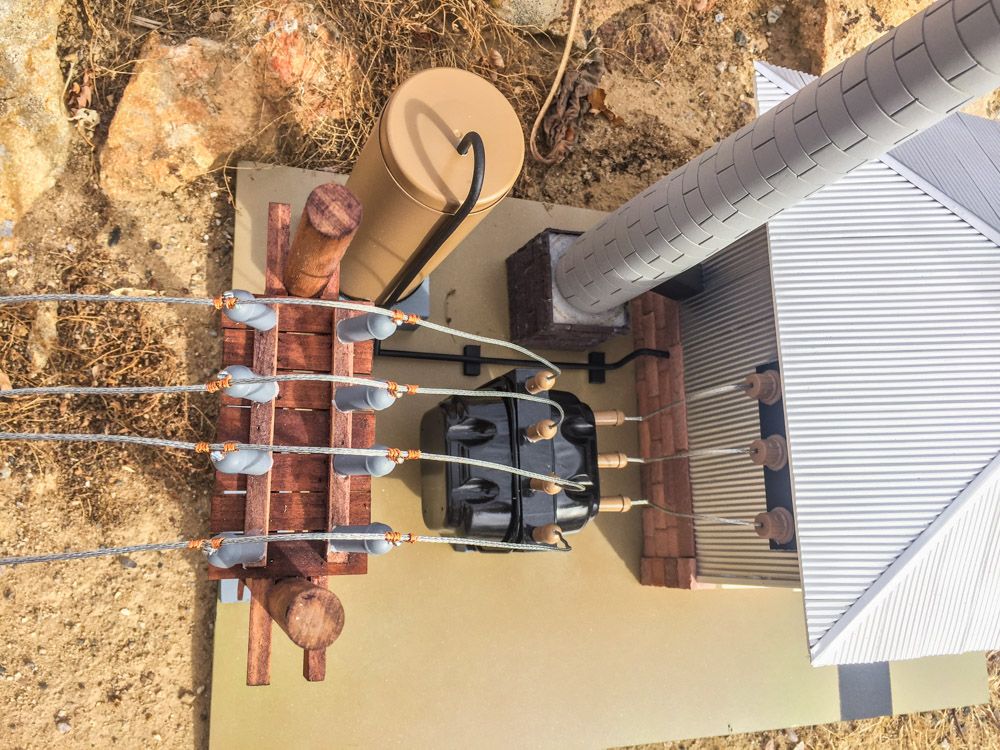
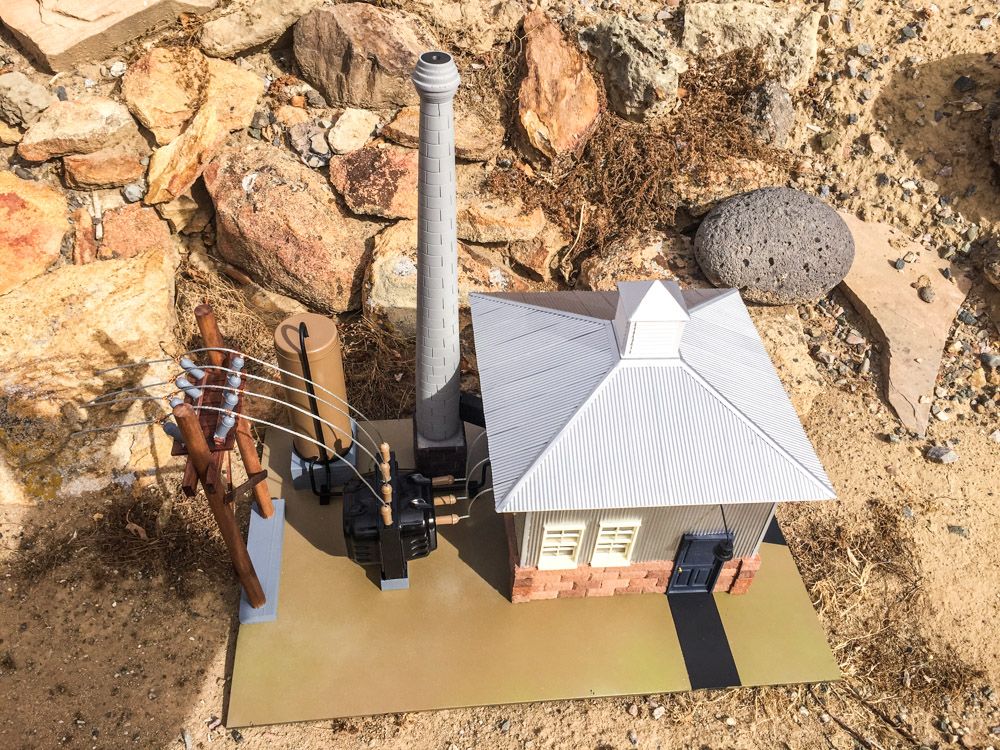
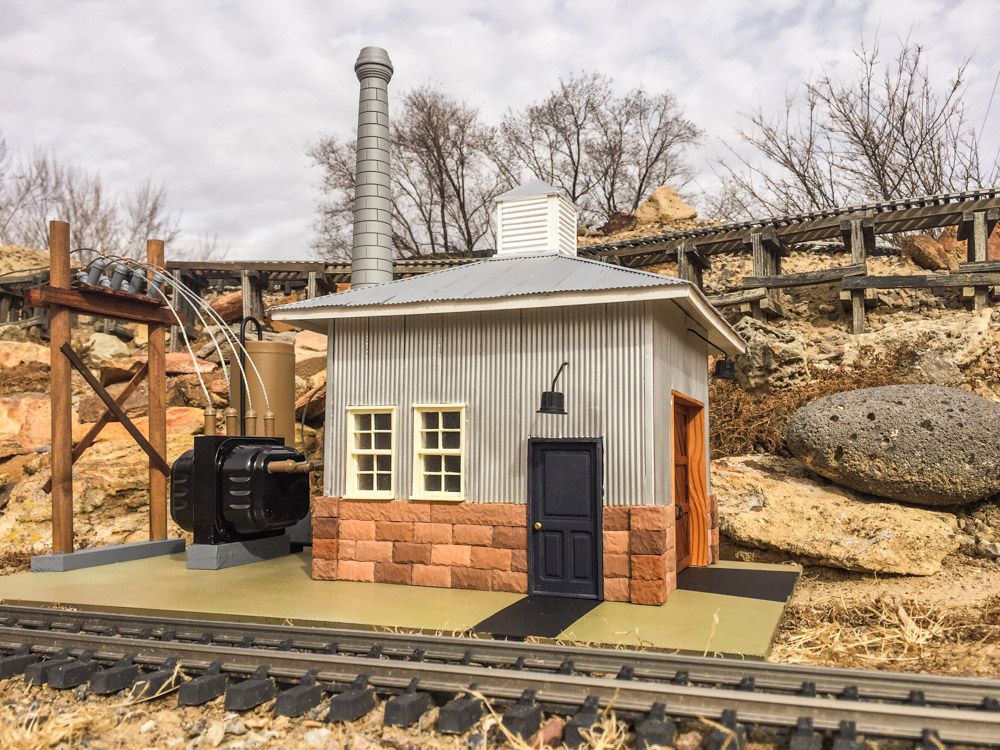
I started out to build a simple industrial building that housed a small generator Power House. The kind of structure that doesn’t get a lot of notice, but just sets out there and does its job.

A Power House, has to have an output to the grid, so I built the Poles and insulators. The pad mount transformer was made from a couple of alum, tins and scrap.

I really dislike the base, But ran out of time to do a better job. I’ll change it out latter.

I do like how the Smoke Stack came out.

I used almost all my 2x4, and I had to sub a chunk of ash for the stack. My out of pocket for this build was $9.89. But I had a lot of left overs from the past challenge builds. Stone and door and windows. I did have to make some custom "Taylor Tin " from stock.

Down the road I would like to get lights in and on it. But I’m happy how it came out, considering how much time I spent the last month at the hospital.

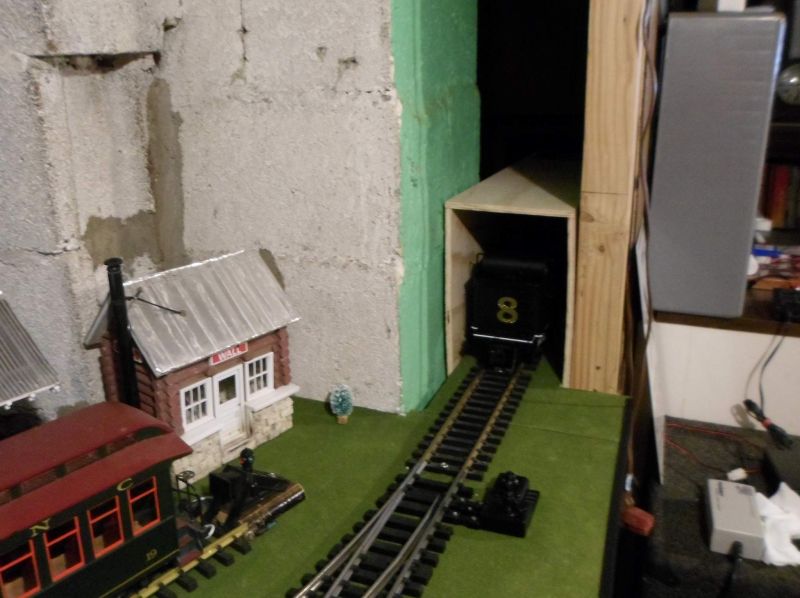
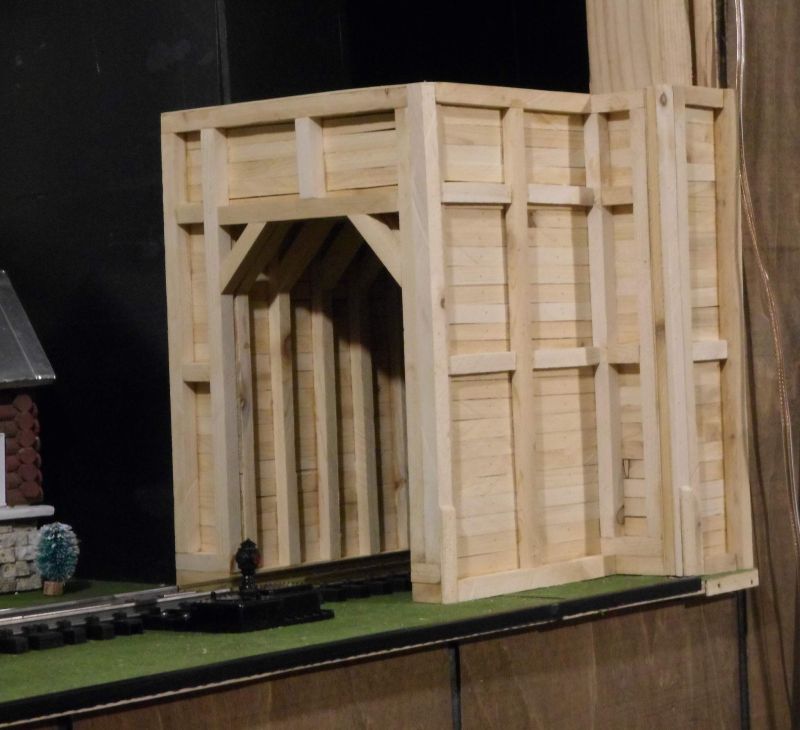
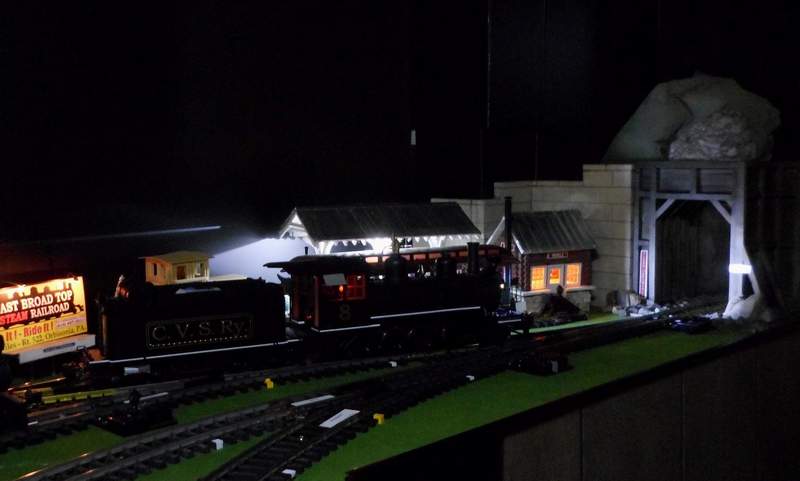
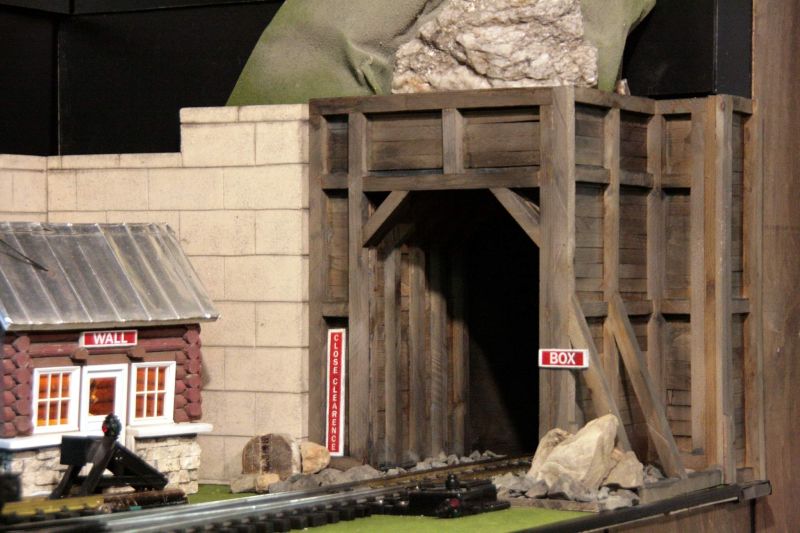
My name is Jon and I my entry this year was titled Outside The Box. The Box, or CP BOX on the Candlewood Valley Scenic Railway is yet another dead-end tunnel where my indoor layout ducks behind a finished wall to gain the room needed to switch the town of South Willow Hill. This is a “before” shot of BOX…

When Dave T announced this year’s Challenge I was going to pass since I needed to concentrate my time this winter on adding some scenery to my indoor benches that were built last winter. When I realized that I could accept teh challenge AND build a scenic element the die was cast and a napkin sketch submitted of A Tunnel Portal to Decorate BOX

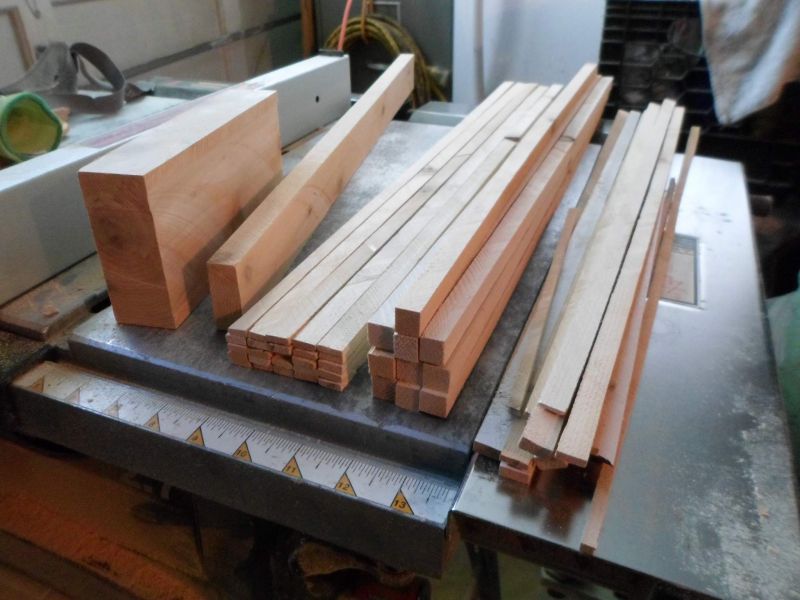
I began by cutting down few 5x5 chunks of Cedar to the requisite 1.5" x 3.5" x 53" for 1:20.3 scale. This is my “allowed” wood stock after milling…

I declared needing more wood early in my build, but that was due to poor judgement when cutting. My leftover pile contains more board feet of wood than the extra I cut, just in smaller pieces. If I had planned better I could have done the job with the allotted wood and still had leftovers. For high resolution progress pics (and there are A LOT of them) check out my build thread at https://www.largescalecentral.com/forums/topic/27806/mik-2018-outside-the-box-jon-radder?page=1

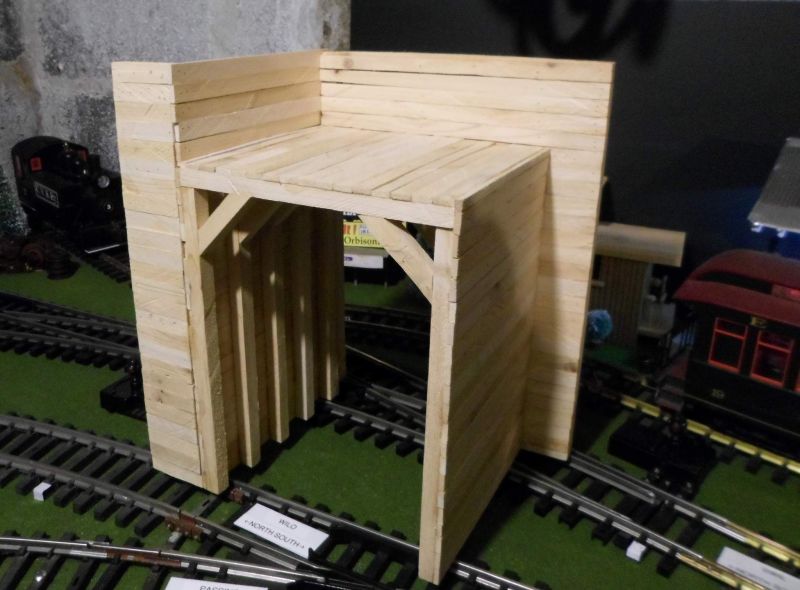
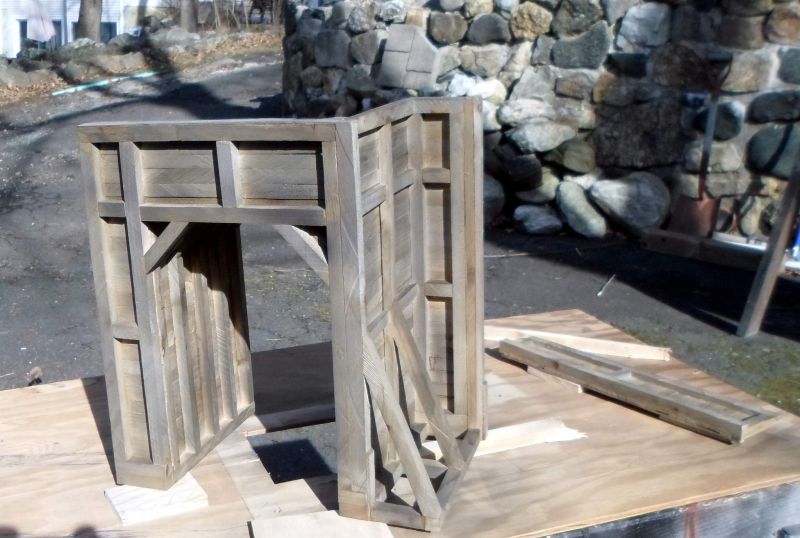
This is my portal fully assembled before stain…

Stain was sprayed outdoors using an HVLP spray system borrowed from work. I used India Ink diluted in denatured alcohol…

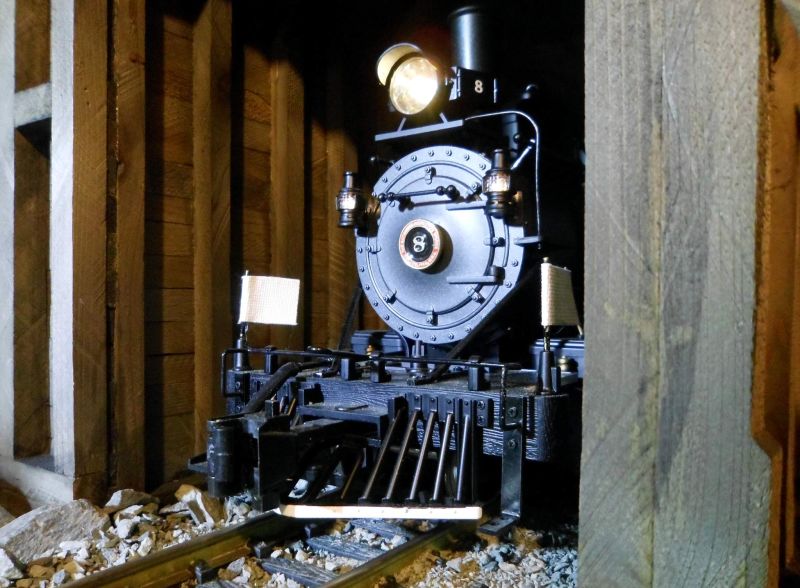
Since this is intended as a photo prop it made sense to shoot some close-ups with a locomotive…

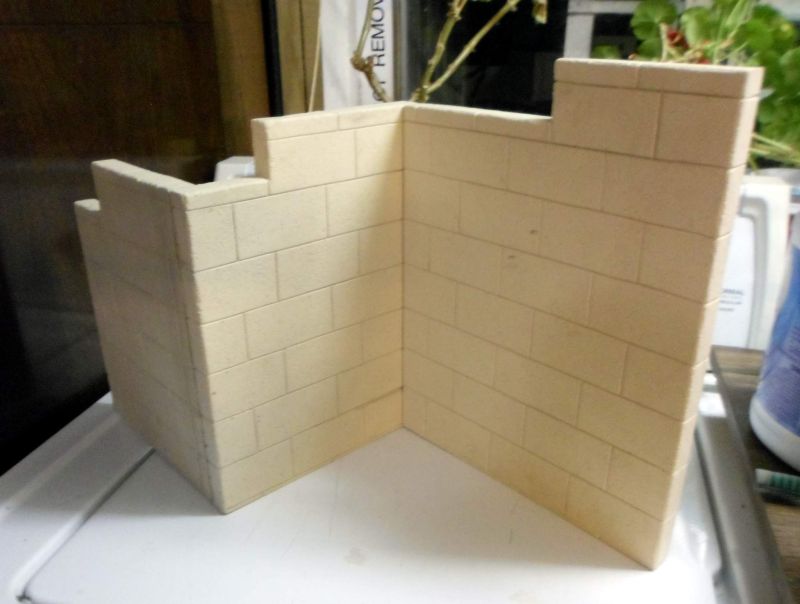
With the wood portion complete well ahead of schedule I turned to elements to complete the scene. To hide that ugly concrete block a prettier concrete retaining wall was carved from High Density Urethane Foam…

The balance of the block and exposed framing was covered using matte black PVC and Composite Aluminum signboard scraps from work. The goal was to hide all that ugly block creating a good environment for “night” photography…

For my last photo, a close in shot of the completed scene…

My total cash outlay was $8.50 for the denatured alcohol. all of the materials were scrounged from the trash at work.

This is my third year participating in the challenge. It was very enjoyable and helped get through the coldest January we have had in a long time.

OK,

This is as far as we got…Yes, we are first timers. No, it is not finished, though material is on hand to do that job. This includes palm fronds for the tower’s roof.

“Detail” parts, such as are worthwhile in Kid-zilla territory, are shown below:

We are probably not too far from finishing, but, alas we did not cross the line. Kid-zilla has retreated to his lair to contemplate our failure…and to plot next year’s attempt (Then he got up and derailed the train, anyway.)!

I - and WE - have had fun. Thanks for the encouragement along the way!

Aloha,

Eric

Never before have I met with such ridicule and derision … for I have a beautiful Mack pickup in the works and thought that I might challenge my own No More Wooden Buildings decree, after watching a board and beam construction dissolve before my eyes in my environment and build a suitable Section house stable…

A beautiful drawing ensued…
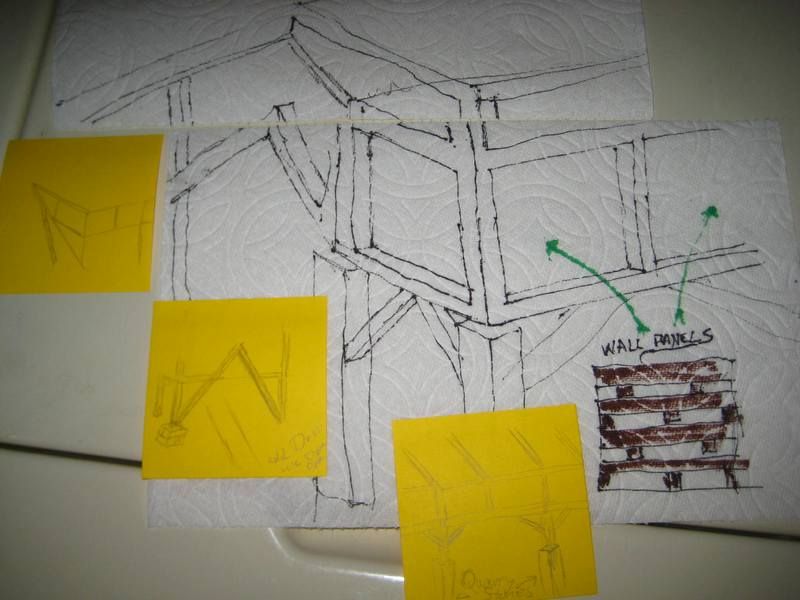
With Post-its and color!

But No! My nervous buddy couldn’t bear the thought of my winning again and his attack was relentless!

I beat the depression a couple of weeks later and thought of my promise to Dave, well I do need bridges, especially after my potential winner warped all to heck last year …

So I researched through my wasted youth… er wasted time saving interesting and informative photographs and recalled a 100 year old beauty and 2 variations …
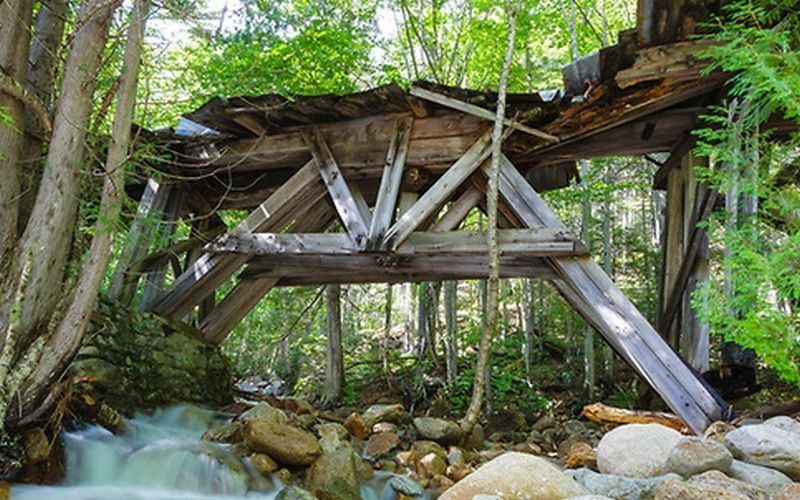
Another drawing; 1st, a need to bend it…

Still my heckler was on me about dirty sox!

My intention was TheTribute to The Mik who used the washer/dryer tops as his workshop… I had to step away from the laptop …

The above is silliness, while the mocking was true … it was in play. We are still good buds.

Just ‘splain’ my change of plans.

90 degrees in the shade in February … I pre-cut the parts the day before and started shooting…

Tops trimmed on the band saw for the stringers … next to check the fit…

Kinda lonely in all that space. Gee if 1 is good, then 2 will be better … Go for it!

Time to remove some plastic…

Since I decided to use wooden ties, I knew I’d need a lazy butt way to spike my rails… Turns out I have a Harbor Freight rail spiker!

By playing with the pressure setting and spacers to defeat the safety I found a dangerous way to shoot spikes. My trial and error way at the beginning was wrong! I know Go Figure!

In the end… leave them long, use Channel locks (pliers) to squeeze them over the rail foot, then off with their heads! A separating disc and the Dremmel. The burr even kinda looks like the spike head… so I dream…

Gluing stringers to arches with clamp substitutes

I glued the ties on and test fit the guard rails…

Ties/rails are spiked and more details…

I painted the guard rails.

Thanks for looking, yes it is a simple bridge and too much story, oh well.

Thanks to Dave for letting me recycle old wood.

It was nice to finish something this year.

Edit; Cost;$0.00, Old recycled wood, some from an open TitebondIII, barrels from the hope box (as in I hope I can use some of this junk someday) and the link to my whinny build…

https://www.largescalecentral.com/forums/topic/27790/mik2018-recycled-or-pilfered?page=2

I started you on the 2nd page to avoid the heckler…(https://www.largescalecentral.com/externals/tinymce/plugins/emoticons/img/smiley-surprised.gif)

I am building wood buildings in our climate for indoor use only! I have molds I got from Jigstones a number of years ago and anything outside was being built from those. With those strong dust devils we have been getting even one of those blew over! At least it wasn’t damaged!

Fr. Fred blessed Doug’s Place on Tuesday.

I always enjoy the Challenge and this year I set my personal best.

I spent $0

The double doors are a leftover from a Challenge a couple years ago.

Mik and I communicated a lot on and off the list. He probably would be proud!!

I always work to see how little I spend on my project. This year my total cost on Doug’s Place was $0! Since I spent a lot of time communicating with Mik I figure he would be proud!

Brown Dog Timber & Logging Division

Waverly Southern RR

Dan Hilyer

Total $ Spent: $14.27 on glue and some paint.

Exceeded the 53" 2x4 maximum by about 20"

Build Log : Maxwell T’s Cookhouse

Waverly Southern’s BDT&L (Brown Dog Timber & Logging) division boys have been eating their daily meals on top of a flatcar and any other flat surfaces they could find and the cook, well, he has just been cooking wherever he could build a fire. B.C. Paws decided it was time to build a more permanent cooking and eating location. So, R.E. Mington came up with plans for a cookhouse and named it after a dragon of a man, the late Maxwell T.

After plans were approved, Mington and his men went to work and built a fine establishment that all the RR workers would be proud to enter and have a great meal. Without further adieu, we present:

Maxwell T’s Cookhouse

One of the challenges for this build was coming up with a way to separate the base from the main structure so I could have access to the interior for future additions. The issue was the front porch and how to support the porch roof when the columns which were integral to the base were removed. So, I doubled the beam running across the columns, attached the bottom one to the columns and the top one to the roof rafters. Here is how it looks separated.

So there it is. I want to thank everyone who followed along and those who provided input and suggestions. This project was a lot of fun and I am looking forward to January 2019 to begin another. Good luck to all the entrants.

EDITED: To add link to build log

So, after getting battered by Devon and after a really snarky remark I decided to build a retaining wall, I built it almost to the specs he gave me, except at the last minute I couldn’t find a can of gray spray paint to color it

I think it turned out quite impressive.

Ok that was probably more to cheer up Devon since he is going under the knife again on Monday.

I decided to build a tunnel Portal, not knowing what or where buildings will live on my not built layout, but plans already called for 3 seperate tunnels. So with a big chunk of a 2x6 piece of scrap redwood I cut away the not legal piece to bring it to 2x4 dimensions for the challenge in 1:29 scale/gauge/size for my layout. The build went fairly well, except for braces for the portal which I didn’t mirror it side to side as is normal practice, but, Like someone else said, most will not notice, and those that do will be asked to leave.

Problem # 1 came as I stated earlier I have no layout, so pictures of a portal without a tunnel look very lacking in every aspect, so with a large box, a bush, 3 black pairs of jeans from the wifes dirty clothes pile to fill in the light leaks, and some flagstone, I think I created a fake , squint real hard and it might look better tunnel, placed a piece of track, added some ballast, my trusty GP38-2 and… Taa Daa!

I am kind of partial to this shot, I can’t wait until the day when I can watch my locomotive actually come rolling out of a real tunnel, and the portal.

I kind of stopped building because of my earlier mention of the of cut from the orginal 2x6, when I was done cutting everything down to scale sizes, the off cut was no where to be found, so it must have been accidently run through with everything else. I didnt want to over use so I stopped when I felt that there was way more wood leftover.

Expenses were $0.00 since I elected to leave the wood its natural color.

This is my second Mik Challenge and it has challenged me both times to do something for the first time. Thanks to all!

delete

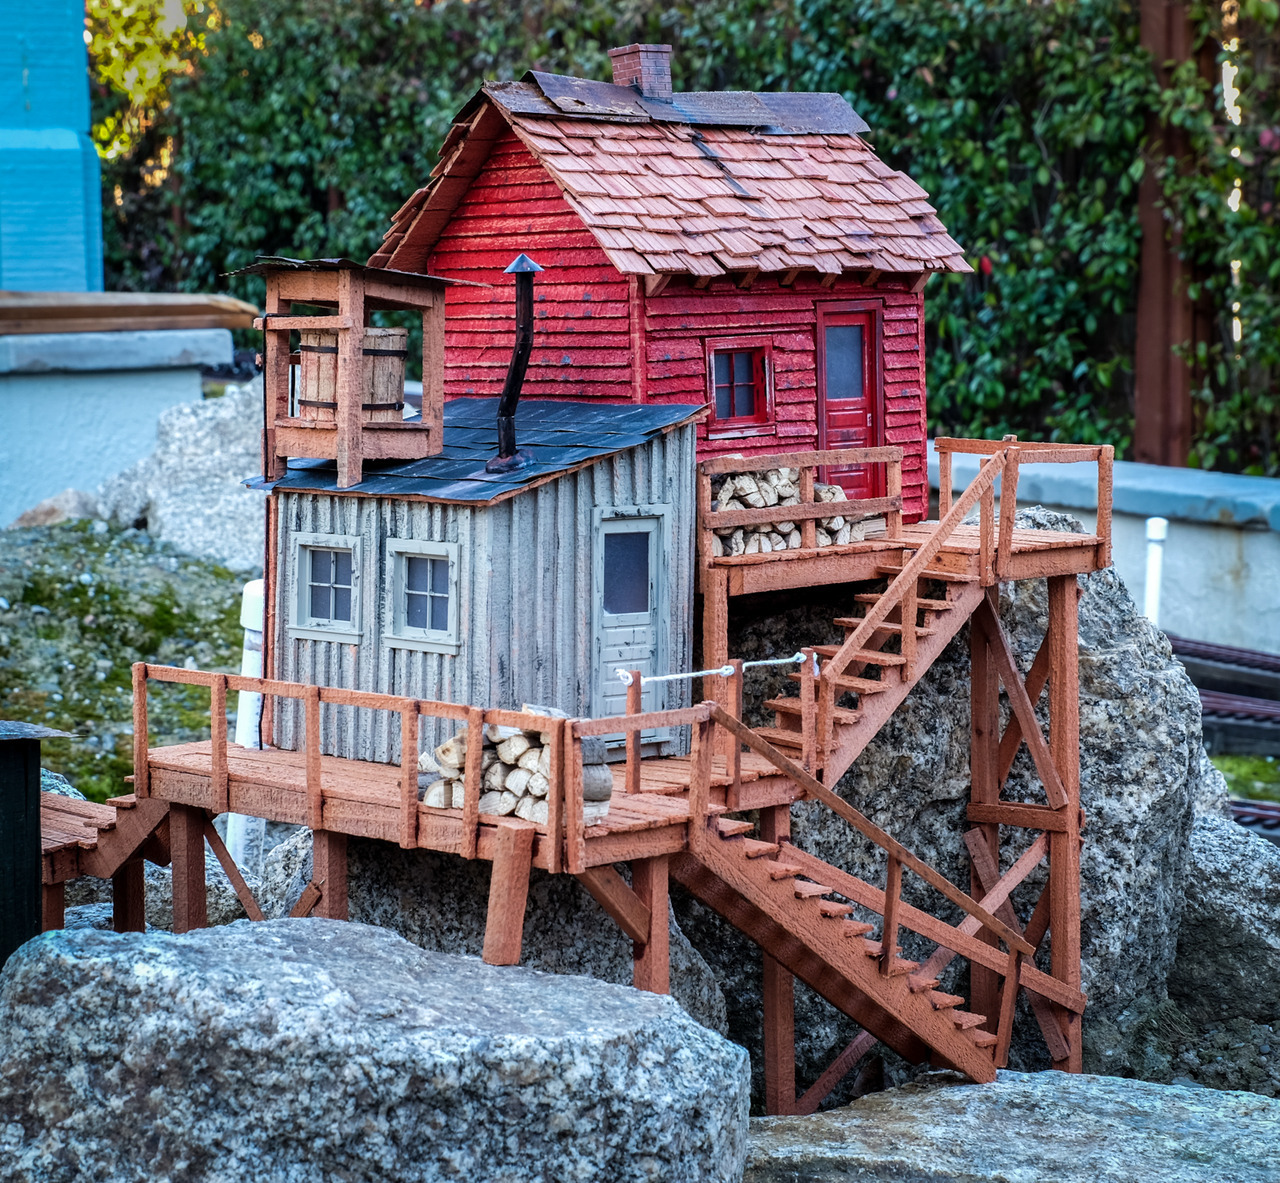
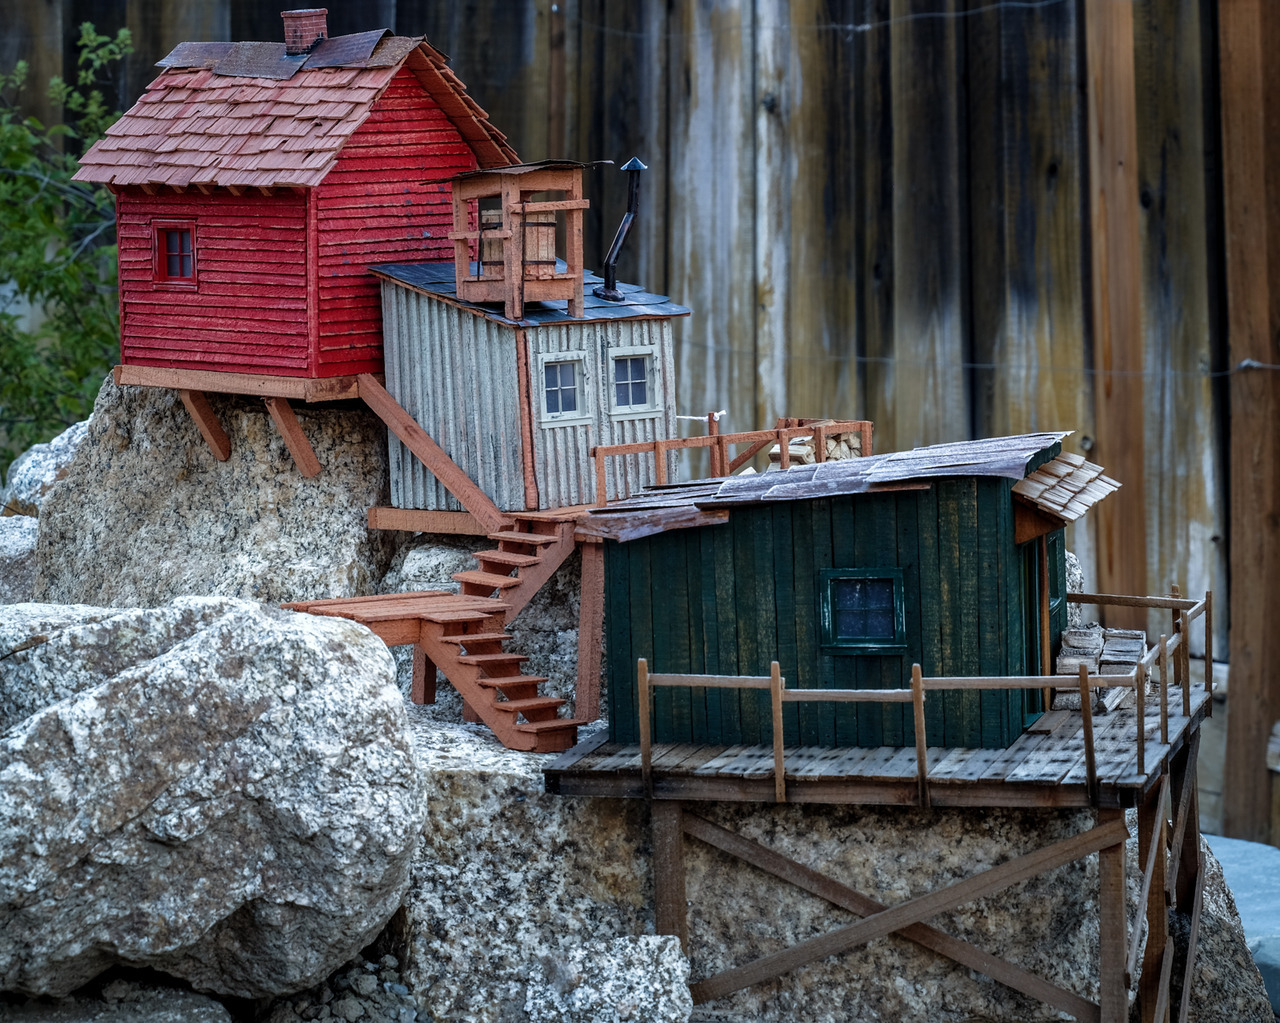
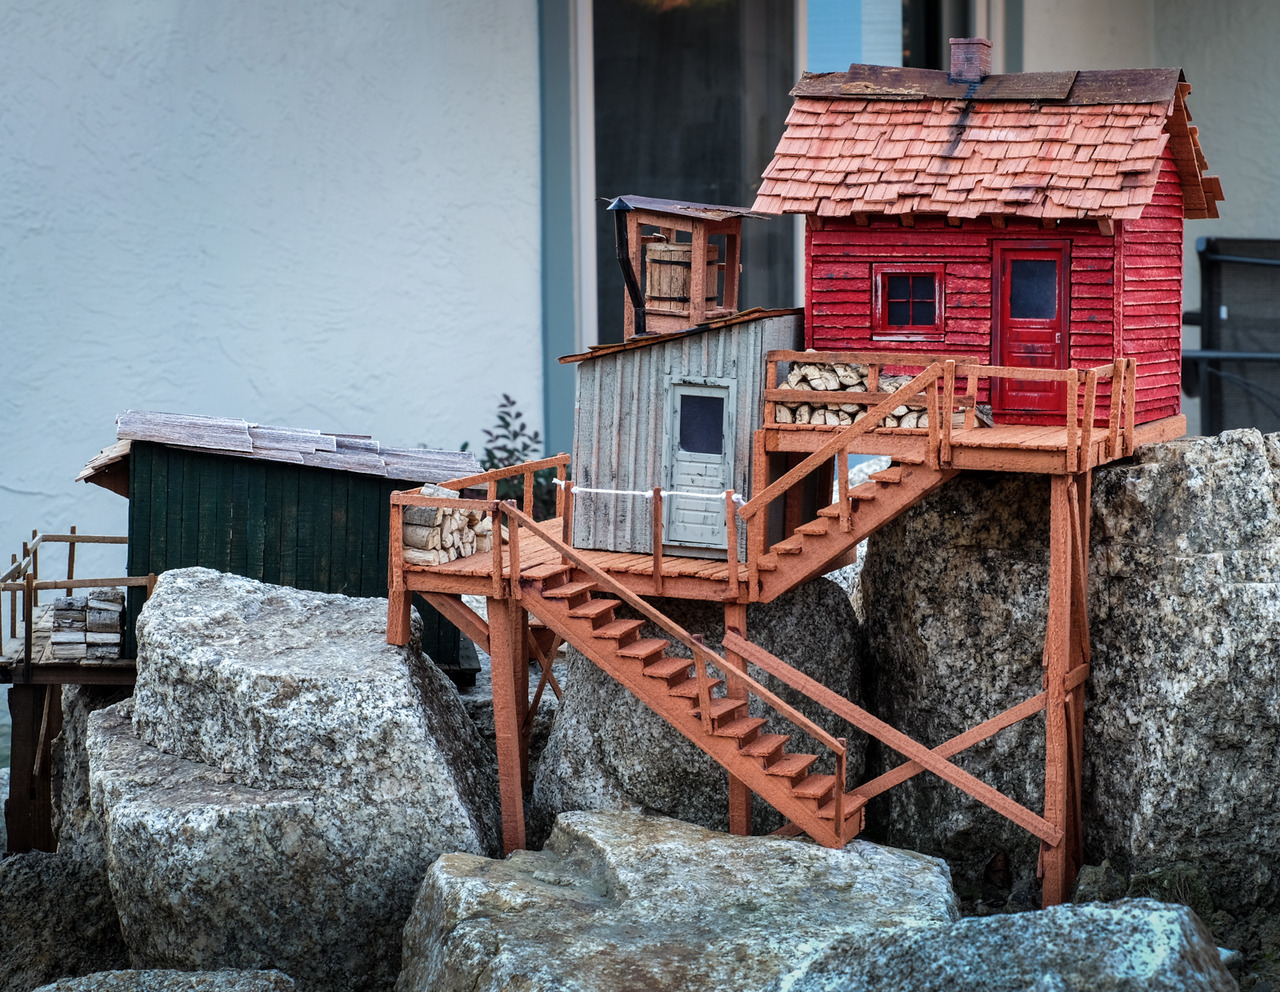
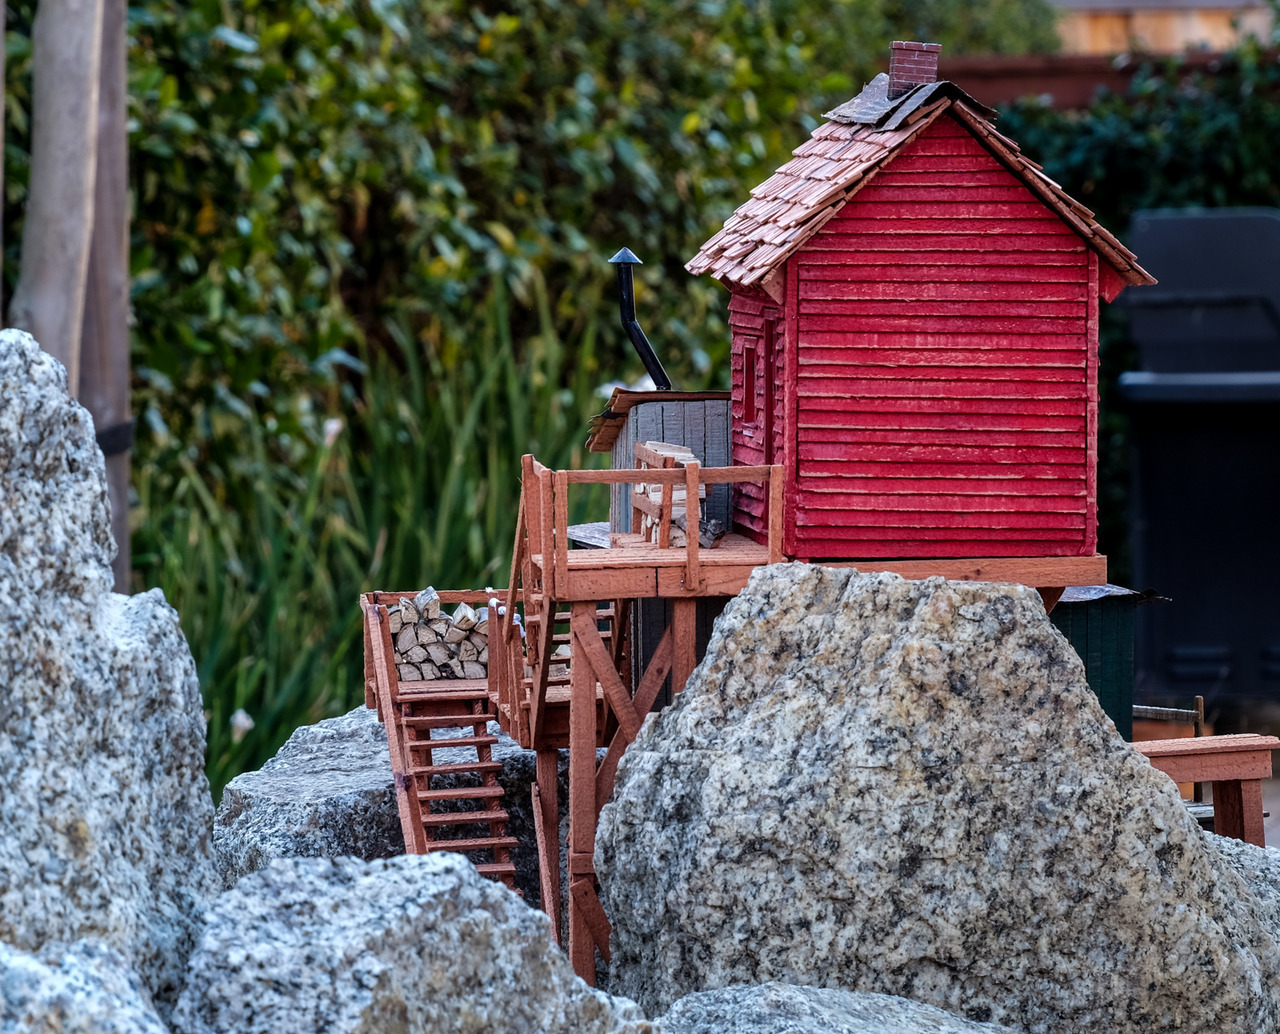
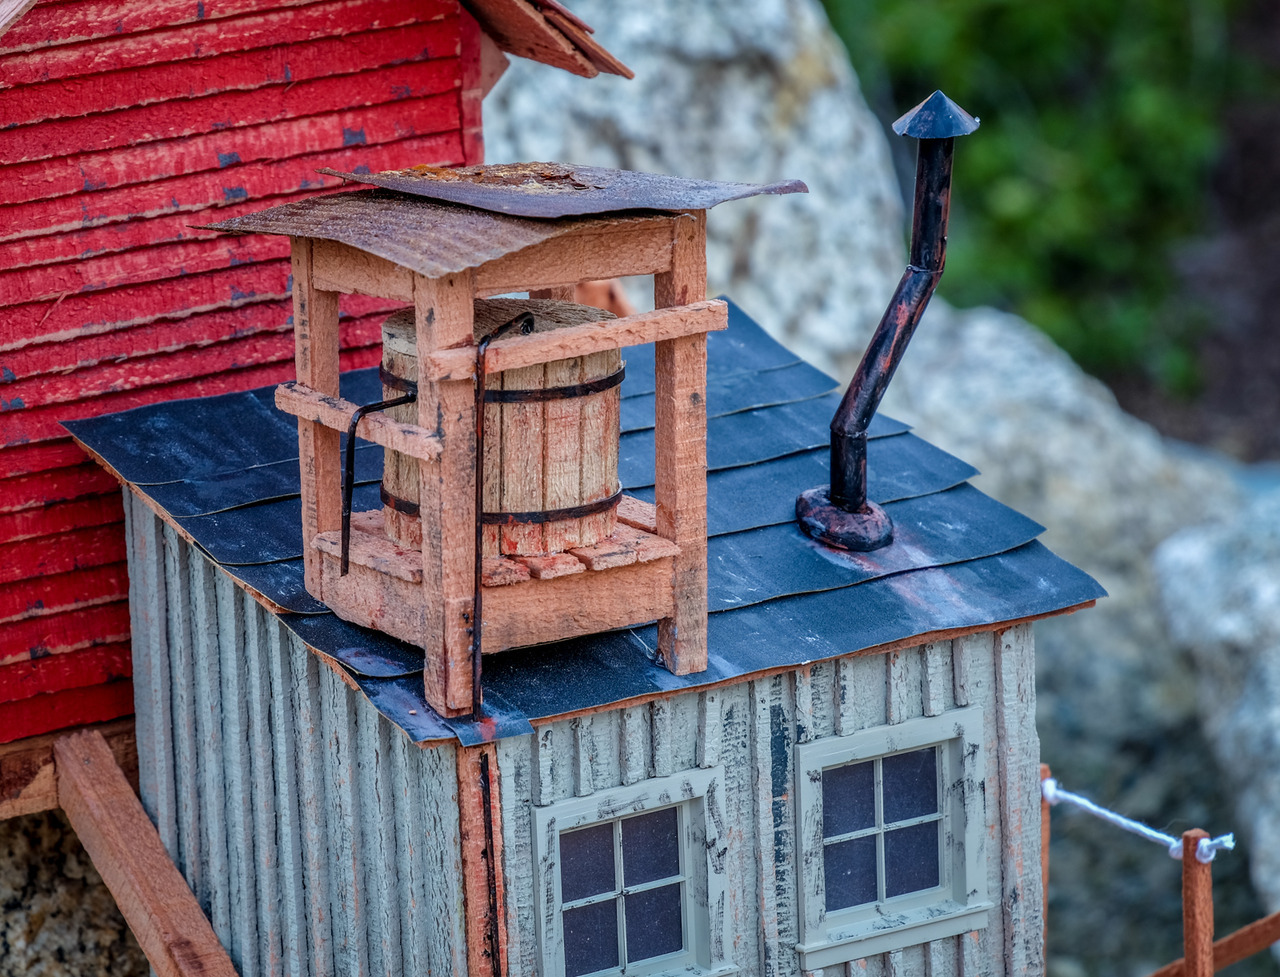
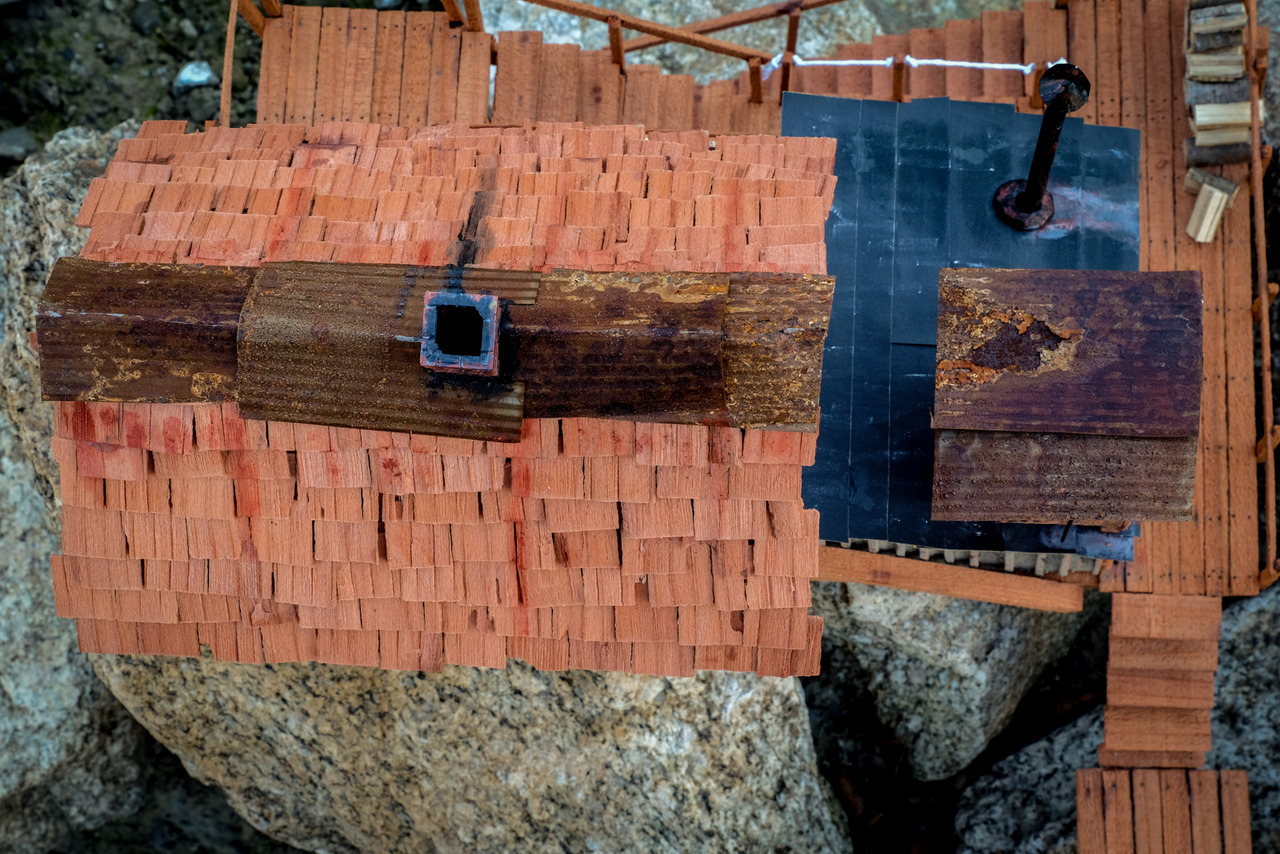
I am Jim Rowson, a first time Mik challenge participant. Inspired by Dennis Rayon’s cliffhangers (link), I chose to build some “worker shacks” for the folks who toil in the stamp mill in Durango here in the Durango & Jasper garden railroad.

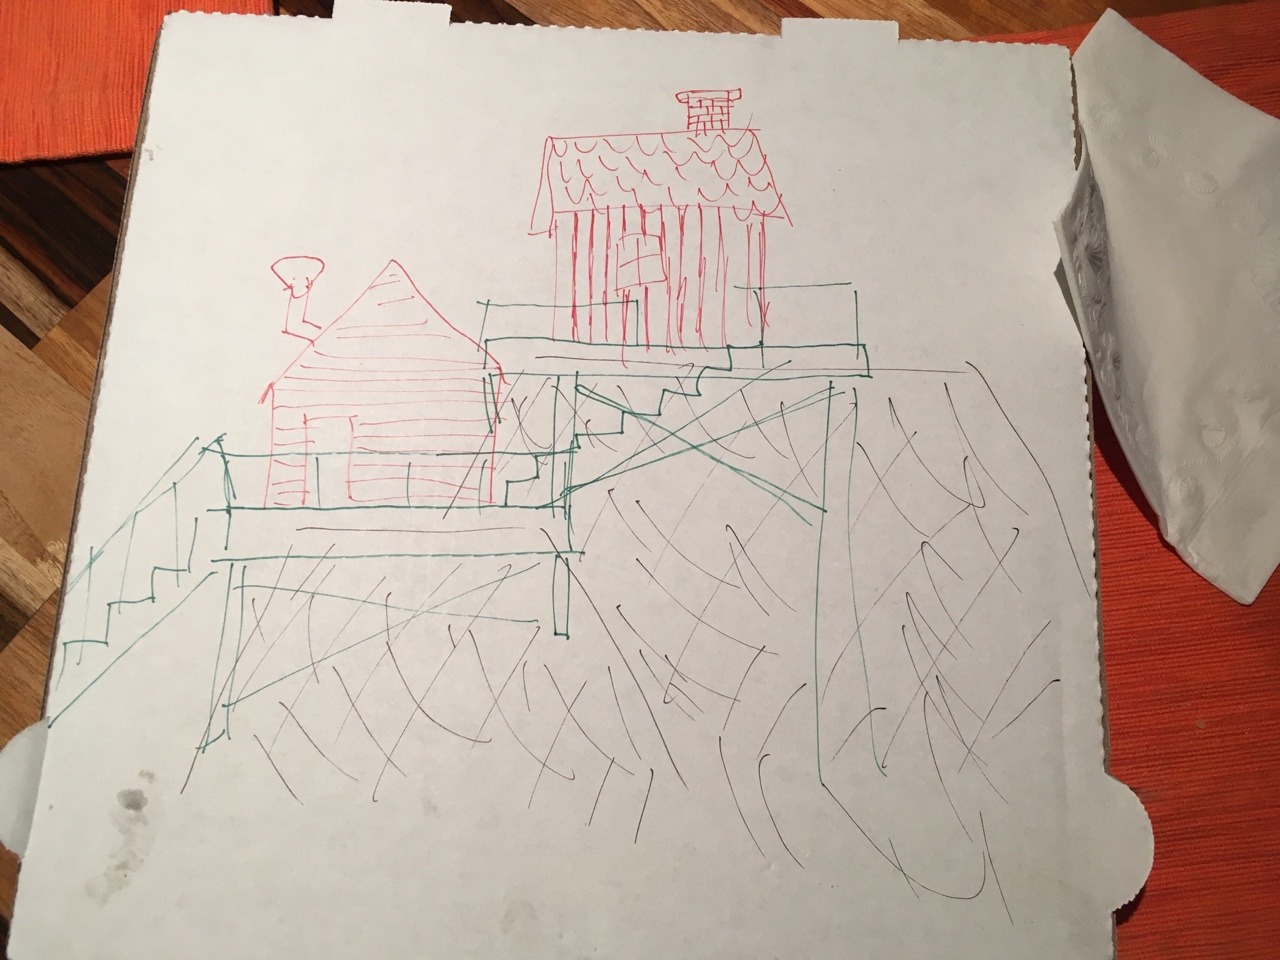
This build (link) started with a pizza box and only a vague desire to have a couple of shacks, connected, of different color, and at different elevations, on 2 different existing rocks:
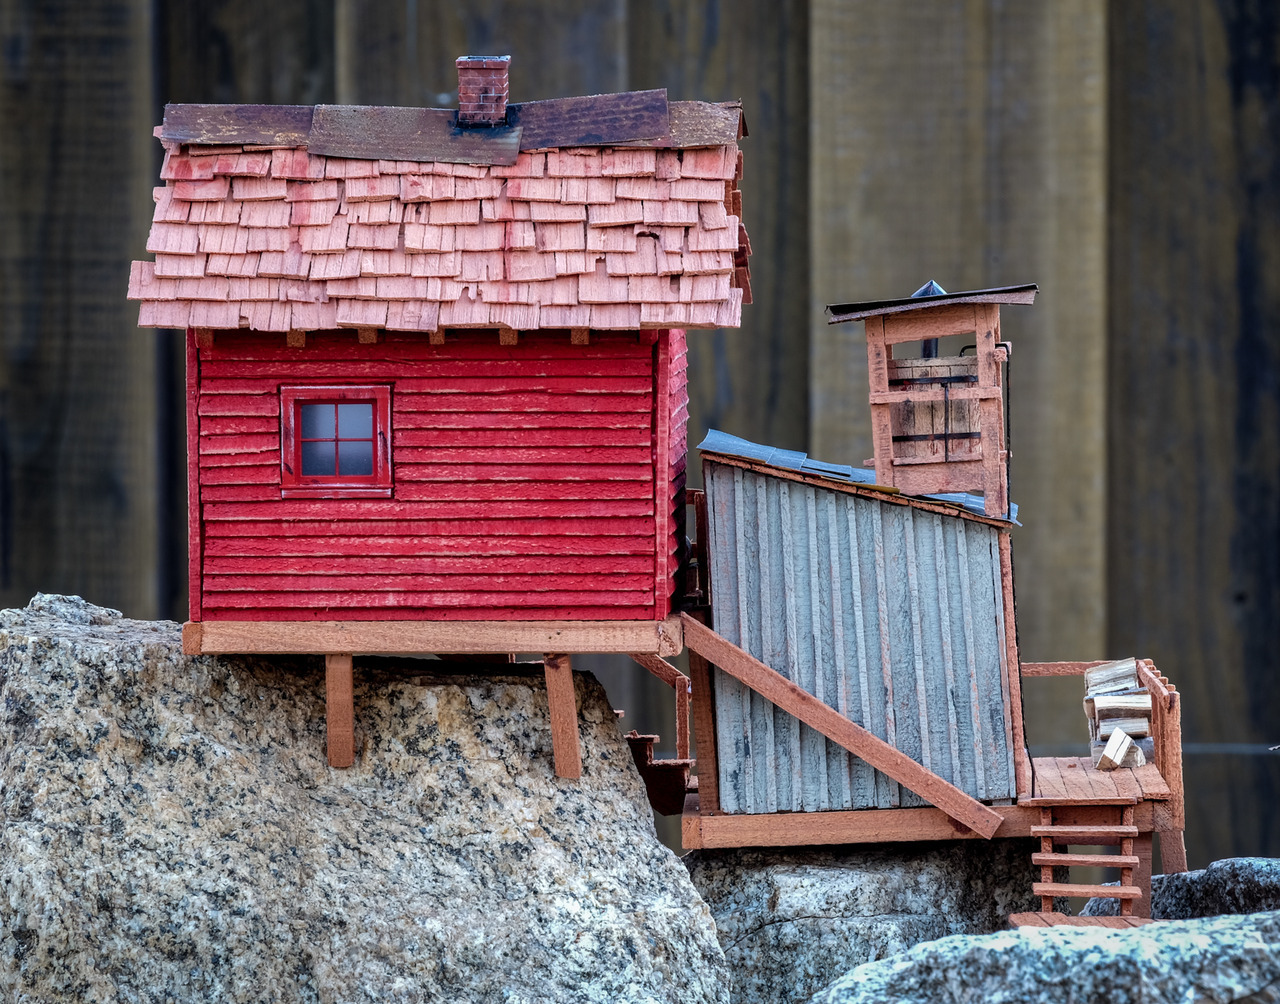
I ended up choosing red for the upper shack to draw your eye, and a light gray to help separate these shacks from the existing darker green one:

After many years of reading Model Railroader magazine and other how-to’s, it has soaked in that roofs are extremely important. Most people look down on the layout and a boring roof is a problem. So I spent a fair bit of time trying to make these shacks have interesting details up top. The lower shack has a water tank with fill and overflow pipes. The upper has several textures and colors and some weathering.

I actually didn’t quite use all of my 2x4 (on hand redwood), but did add a small bit of cedar strip wood for the water tank. Other materials on hand include the doors, windows, paint, various pieces of styrene and brass for the crooked chimney, tank strips, and piping, as well as weathered corrugated iron sheeting from a previous project. I did purchase the chimney for a few dollars, a pack of wet-or-dry sandpaper that I used 1/5 of, as well as the cord for a rope handrail (but there I used less than 1/10 of a cent of material). So I’m all in for under $5.

All in all it was a fun build and I’m more and more thinking that this scratchbuilding thing is a hoot.

Let me first say it was an honor and privilege to have known these two men.

Dick Whitney Chuck Inlow

Both men were fine modelers, railroad buffs, good Christian men, and friends. They are and will continue to be missed. Rest in peace gentlemen.

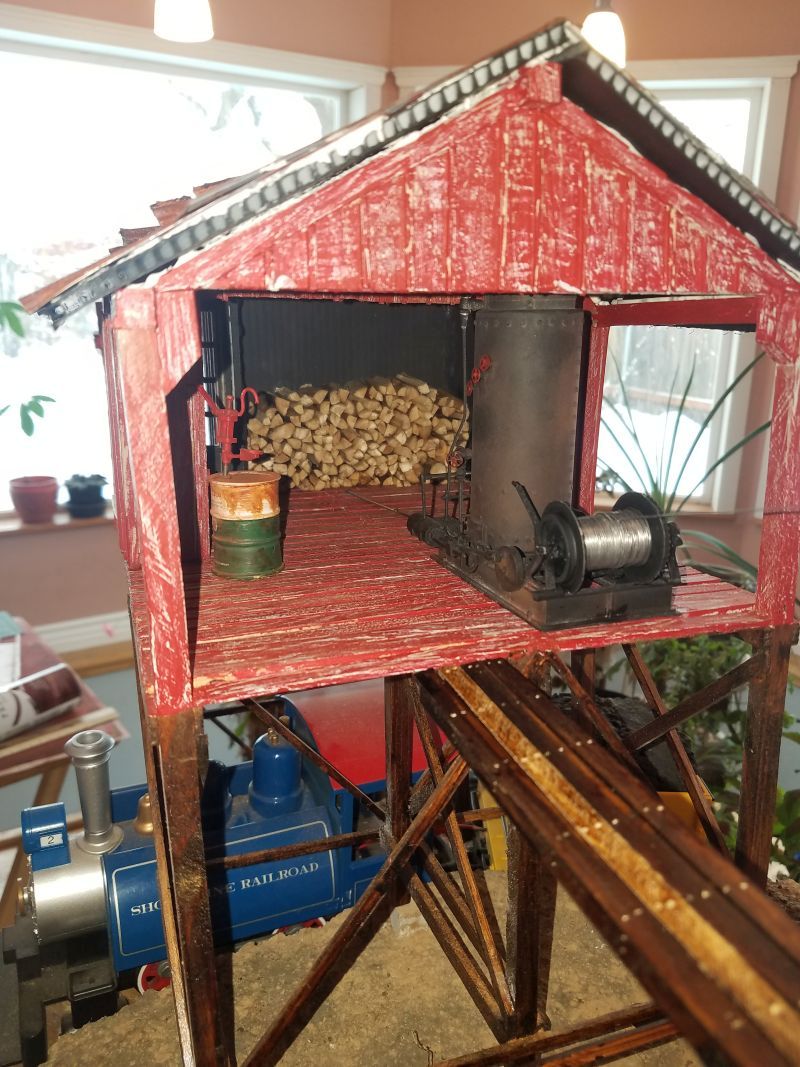
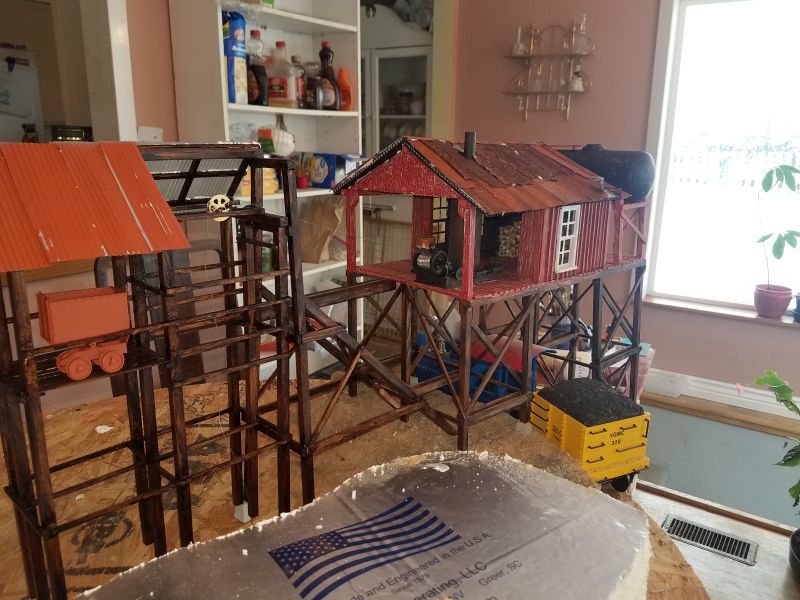
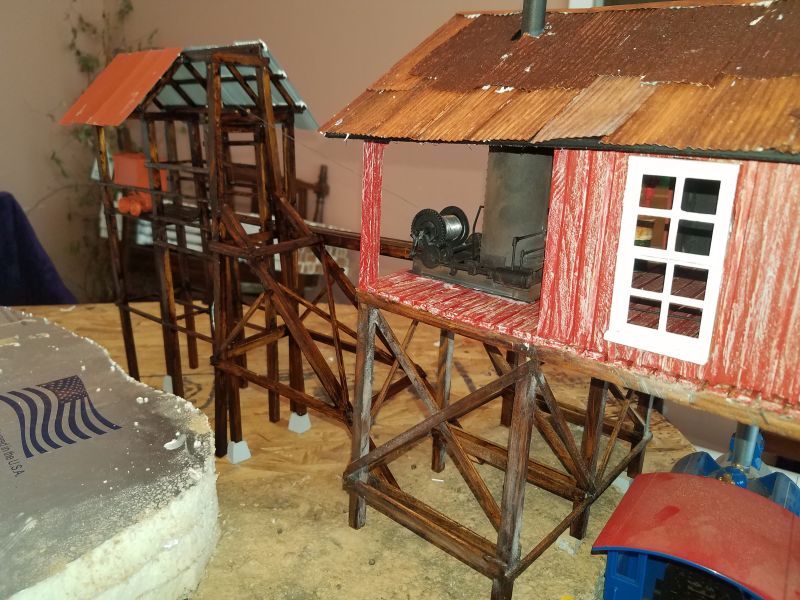
The Inlow-Whitney mine is the Sinsley Mountain Logging and Mining Companies tribute to my friends. This little gold ore body was discovered claimed by two prospectors of notorious character. The Sinsley family decided to grub stake these two miners and fund their mine. After sinking a prospect hole, good color was found, and the mine went into production. After the passing of the two miners who discovered it; the Sinsley family took over operations and named the mine for its founders. Unusual to typical mines in the area this ore body was discovered in a quartz body that has been capped by a later basalt flow. Inlow and Whitney discovered the vein while prospecting placer potentials in the creek to the south of the mine site. A bedrock quartz vein was discovered heading to the north. Good color was found in the creek and Inlow and Whitney figured this vein had to be the source of the placer deposits. The conned the Sinsley Co. into grub staking a claim. What they failed to mention was in order to tap the vein they would have to first drill through solid basalt. In the end it was accomplished and a nice little mine has been developed. So without further ado here is the Inlow-Whitney Mine operations.

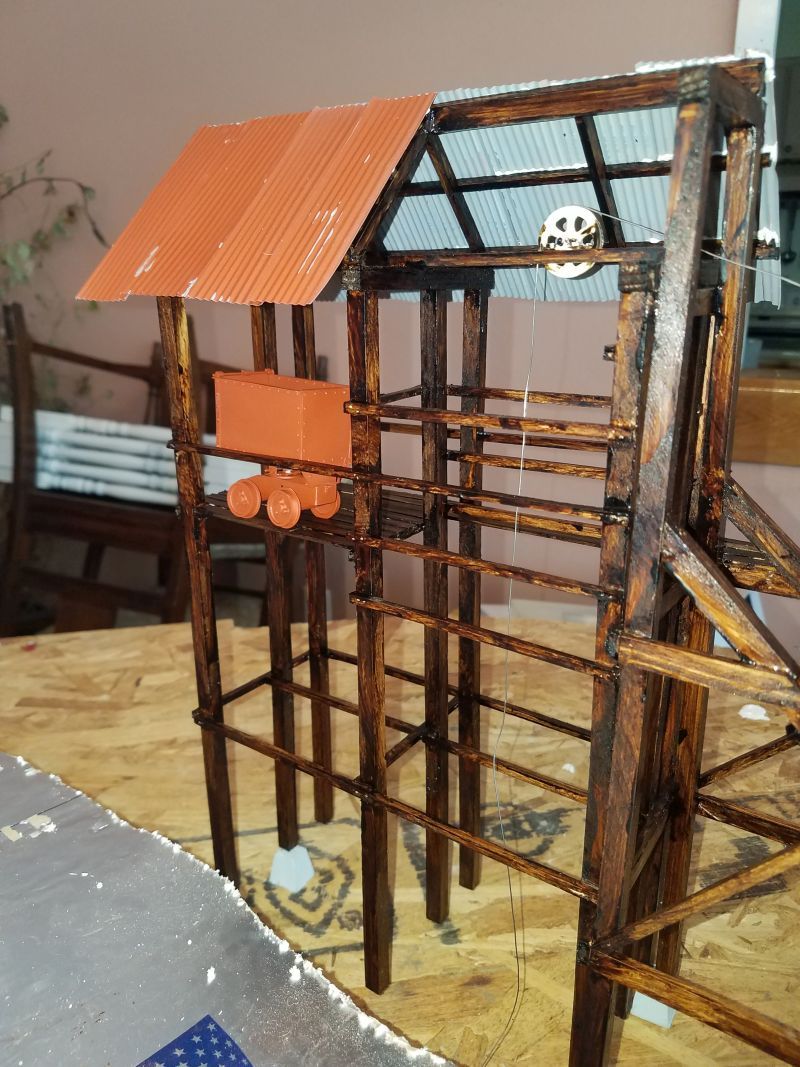
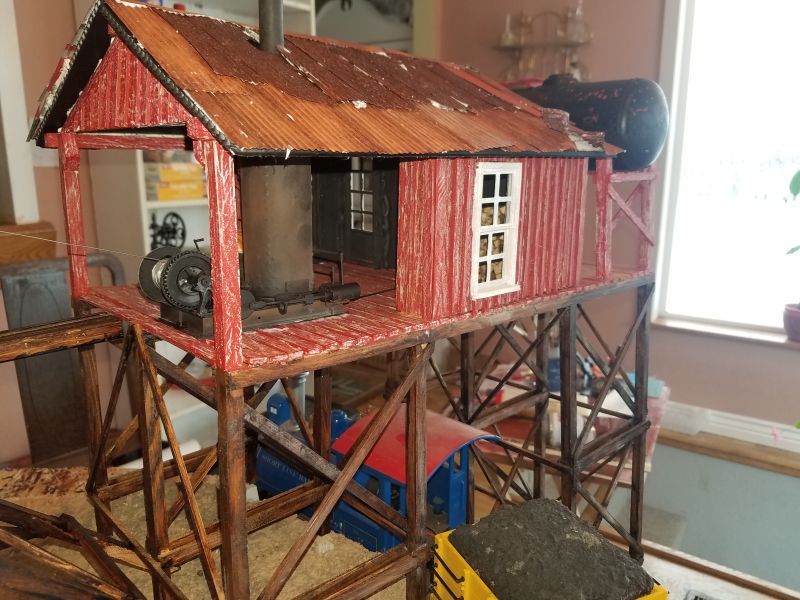
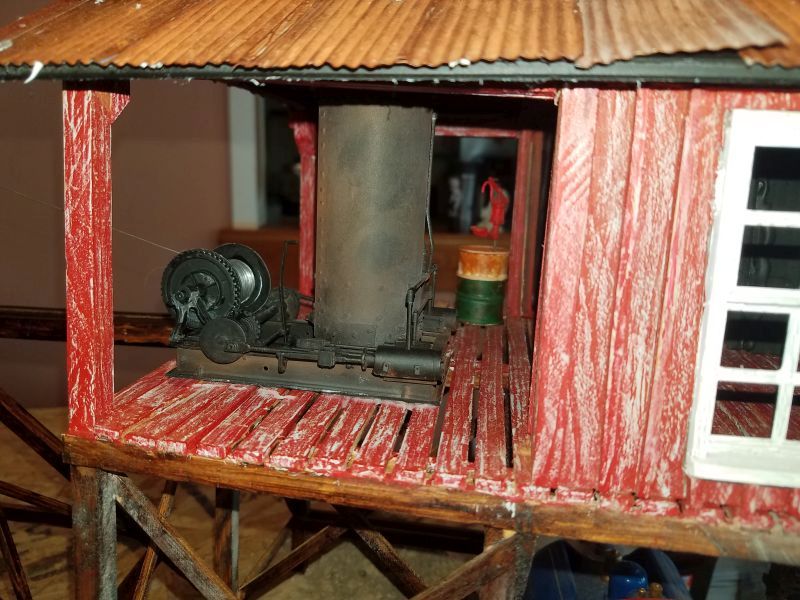
As part of the rules for the build we can use whatever we have on hand prior to Jan 1. Dick’s wife Cami and Dick’s kids were very very generous in giving me almost all of Dick’s modeling supplies. He was a master modeler. And as such I got lots of stuff. Particular to this build I received the gorgeous hand built from scratch steam donkey/winch that is used for this build. Dick would take pictures and plans and build scale replica models, making masters and casting all the custom parts necessary to make an accurate model. I am not sure if this is ine such projects but it is a very nice piece. I added a few details like the tri cocks and did some weathering but for the most part this was all Dick. The water tank is also a piece he cast. I painted and weathered it. The mine cart was scratch built by him entirely from bits of styrene. The wheel for the mine head is something he cast. The windows and door were courtesy of Chuck’s wife as was most of the paint I used.

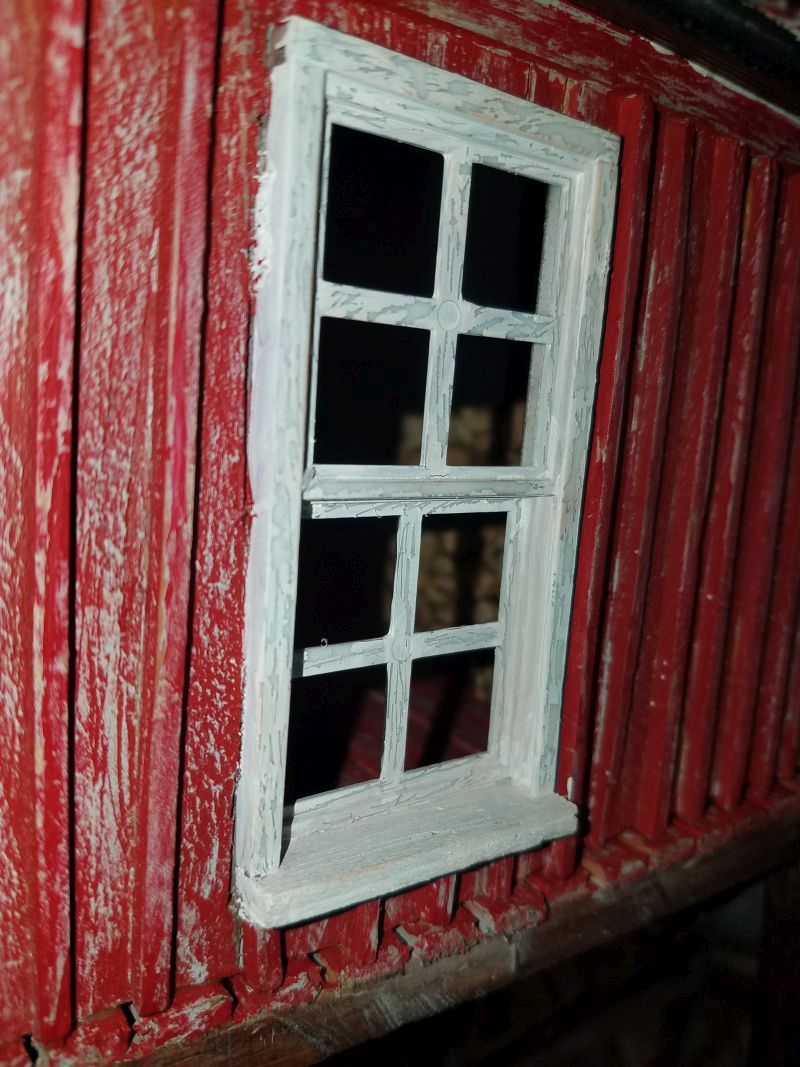
For my part in it; I always pick one thing to try and strive to work on for the challenge. This year was weathering. I have never really cared for my weathering. So I wanted to use new techniques or perfect old ones to get a more authentic look. The most glaring example of the weathering is the peeling red paint. I used a base coat of grey. Then over that applied 4 layers of weathering chalk from a dark brown/black working back to a light grey. I then over sprayed hair spray to act as a fixer for the chalk and to create a barrier between paint coats. Then I applied the red. After that dried I came back and shipped off the red exposing the layers underneath. I m very happy with that technique. For the roofing, I applied grey primer to the corrugated aluminum pop can panels. I then went over it with my patented rust which is a combination of Burnt Umber, Raw Umber, and Burnt Sienna oil paints. it was first brushed on then stippled. After it dried I used a red chalk and a grey chalk to further weather and tone it down a bit. It is not done and in the pictures you can see various stages of the process. I also on the head frame switched to red oxide primer instead of grey. Will be interested to see what the effect that has. Another weathering technique was an old standby using salt for chipped paint. The tank was painted with red oxide primer. when dry I sprayed water on it and then liberally dusted with table salt. I let that dry and then removed what I didn’t want peeled. I then sprayed the whole thing flat black. When dry you wash/rub off the salt leaving the red exposed underneath. Its a good trick. Finally on the weathering front I used grey chalk over my standby Red Mahogany stain for the creosote look on the timbers. Using the grey chalk knocked down the sine and gave the wood a more aged feel. You can see the difference because the head frame does not have chalk yet and the winch house does. Much better look.

Finally I love my barrel. This is a cast resin barrel Dick made. I painted it to look like a texaco barrel. I then made a decal for it. then i weathered it with my rust mix and some red chalk. I finally made a transfer pump for it. I think this is my favorite part.

Anyway I hope you enjoy it. I am no where near done and consider myself DNF. I was however encouraged to post my work. And since rule #1 is to have fun and I did have fun among friends here it is for your review and pleasure. Here is the link to the build http://largescalecentral.com/forums/topic/27776/devon-s-hat-in-the-ring-mining-facility

Oh the price tag. I have 15.00 into latex for making the molds for the basalt off masters Dick made. I have 5.00 into artists pastel chalks for weathering. and 2.99 in a bottle of paint. None of which was used in its entirety. So I have somewhere around $25.00 spent. I also declare that I did use a few pieces of wood other than my 2X4. Some of the battens and some of the planking are from Dicks supplies.

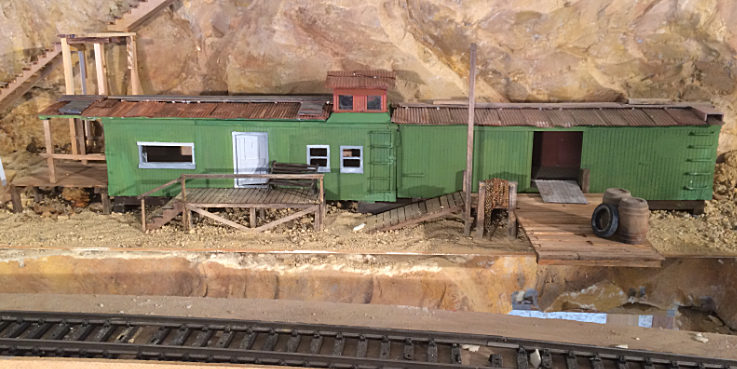
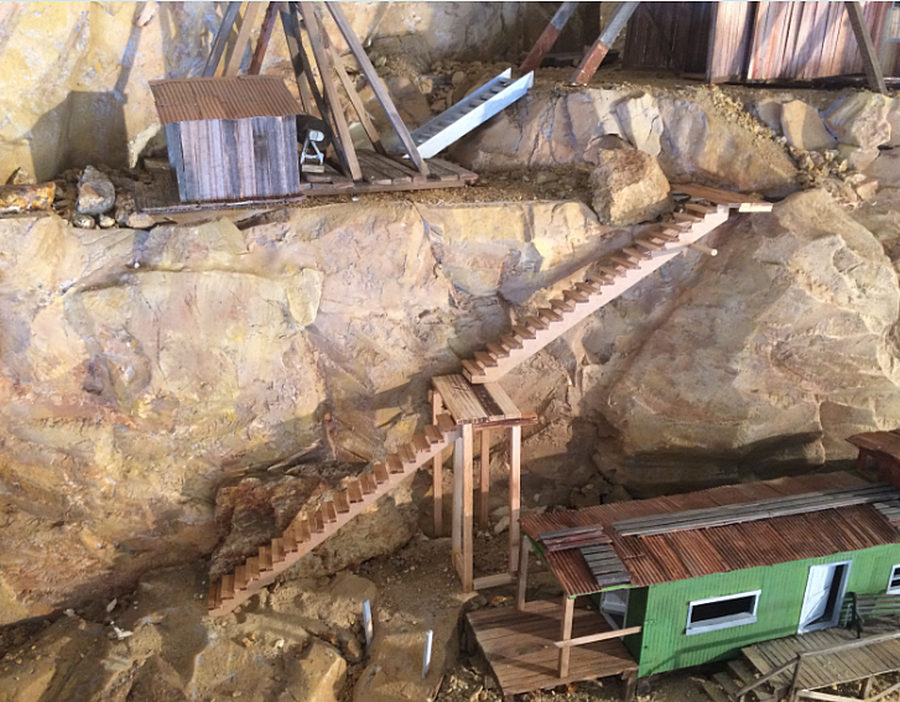
I have a mining district on my layout I’ve been working on for quite some time, including a minehead that was part of last year’s Challenge, and for this year I set myself the challenge of making a lot of progress toward finishing off as many parts of the district as I could. I needed to finish the mining office, needed a way to get the raw ore from the mine to waiting ore cars below, and I needed a set of stairways and platforms to connect the various levels in the district…including a set of stairs to a mine high up on the mountain ledge behind. That’s when a certain fella up there in Idaho suggested a “Stairway to Heaven.”

Here’s what I started with on the mining office, and what I finished with, kind of before and after pictures:

Then I made stairs to get from the mining office to the minehead above (haven’t painted them yet or built railings…better watch yourself on these steps for now, it’s a long drop):

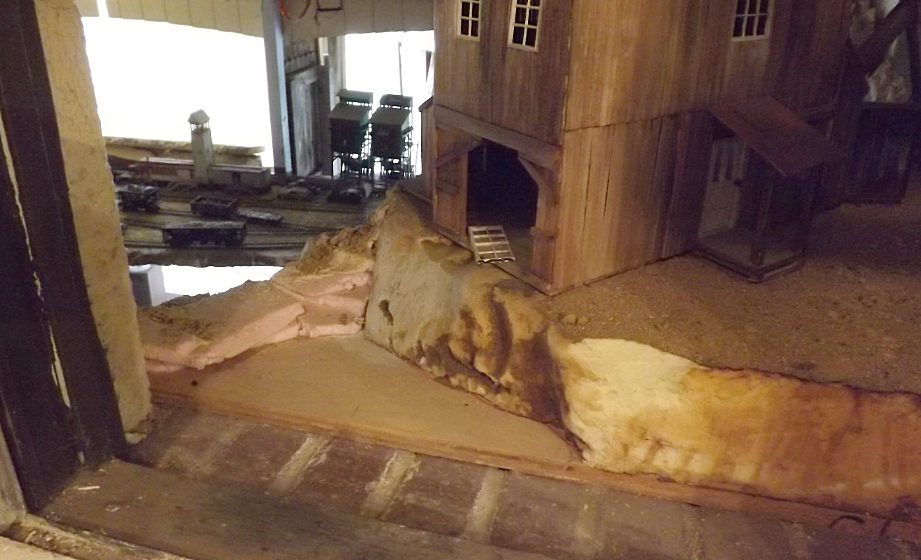
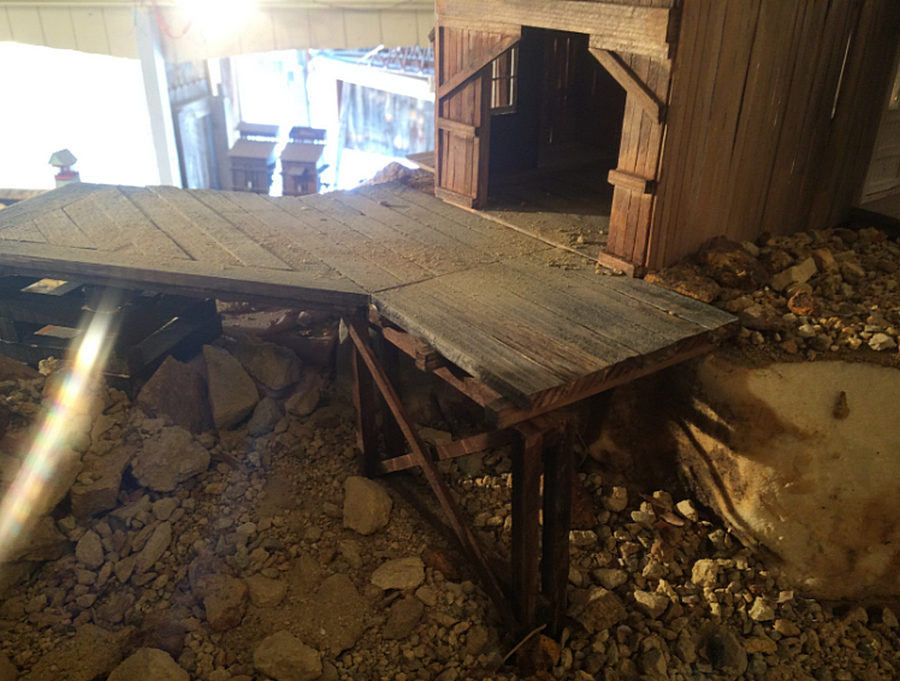
So here’s the area that need filling in to get the ore to the cars and the after picture of what I built.

Before:

And after (sorry for the glare). I really like this platform for some reason!:

Then there’s the chute to get the ore from this platform to the ore cars, which I got half done until I could figure out how to hinge the second part. I came up with a hinge that will hold a round bar on which the lower part will lower into place (haven’t built the lower half of the chute yet):

And then there is the abandoned mine entrance in the cliffs, which needed a ladder to get to get to it’s platform. (I built both mine entrances but unfortunately they don’t fit in the space where there were to be installed, where I imagined them to be, so I’m forced to take pictures at work here and not on the layout…I’ll have to modify the layout later.) Here’s the abandoned mine, and a ladder suggested by one of the fellas:

And, then, finally, there are the stairs to the other mine entrance, the highest one in the cliffs behind the mining district:

Thanks to everyone for looking, commenting, encouraging me, and suggesting ideas. I couldn’t comment on everything I saw, but I watched every build in the Challenge with the greatest of interest and I learned a lot again this year. It’s great to have made some progress on my layout, but, truth to tell, it’s the fellowship of the Challenge that makes it all additionally worthwhile.

EDIT: Uh, oh, I forgot to make a link to my build log, and I don’t want youknowwho getting on my case:

https://www.largescalecentral.com/forums/topic/27792/2018-passaro-challenge-stairway-to-heaven

Also, I forgot to mention that I didn’t spend a doggone penny on this build ($0.00), but I did go over the allotted 2x4 volume by about 1/3 or so, all from existing stock.

Thanks again.

As many of you know, the Carquinez & Alhambra Valley RR is loosely based on my town, Martinez, California, around the turn of the 20th century. On August 19, 1904, fire destroyed a two-square block section of downtown Martinez. I’m not sure exactly why I became interested in fire per se – although perhaps the wine country and other California wildfires over the past year had an influence – and I had been looking at doing some kind of model of a structure either under construction or deconstruction. And then Mik’s Challenge came along, I did some further research into the 1904 fire, and the rest, as they say, is history.

Here is my initial napkin drawing and what I think was the final version of the framing. The design was created in SketchUp and it changed a bit, especially due to the observations of a couple of you regarding the roof, which I was very appreciative of.

Here are a couple shots of construction. I also experimented with crackling of the paint to create a distressed whitewash effect.

And here are some of the finished results. The structure was always intended to be highly distressed and the rear of the building was intended to be a patchwork without the clapboard siding.

And, finally, the fire. I will have other photos and a video of the fire later on, but I spoke with a friend of mine who is a technical theater director and has lots of experience with special effects. So, first of all, I thoroughly watered down one side of the building and then placed a votive candle and, when that didn’t work, one of those fireplace log starters on the other side. It took quite a while for the structure to really take hold, but when it did, things went quickly and I took the garden hose that was standing by and put the fire out.

Once I have edited the video I will post it on my build log, and I assume there will be more still photos of the actual burn.

As for materials, I pretty much used all of my 42 inch 2x4. I also had some rough cedar on hand for the sidings. The shingles were 1/16 basswood strips that I had run through a Cricut die cutting machine several months ago (more on that experience in a separate post later). I used craft sticks I already had on hand but I also purchased a couple 10-piece bags of strip wood for the longer clapboard sidings, and a couple packages of .020 basswood rounds for the elevation of the clapboard.

All of the paint was from supplies on hand. The sliding mechanisms for the barn doors I got at a swap table from the BAGRS annual meeting, and the crackle medium from Michaels. The “tree” was actually a weed from our front yard and the sign I created from Affinity Designer out of simple copy paper.

Total out-of-pocket cost for this first-time entrant was about $27.75. Compliance with Rule No. 1, priceless!

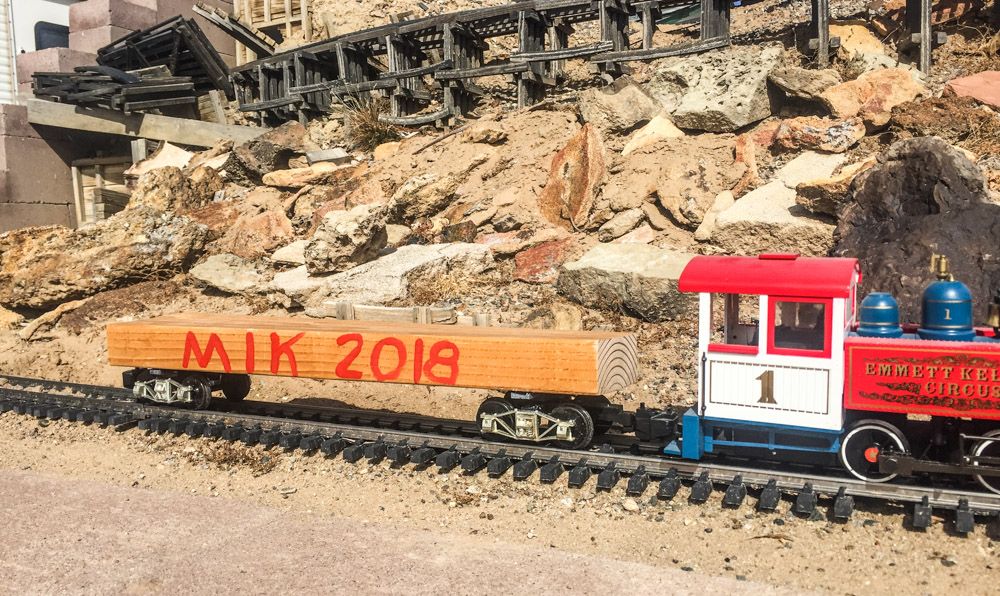
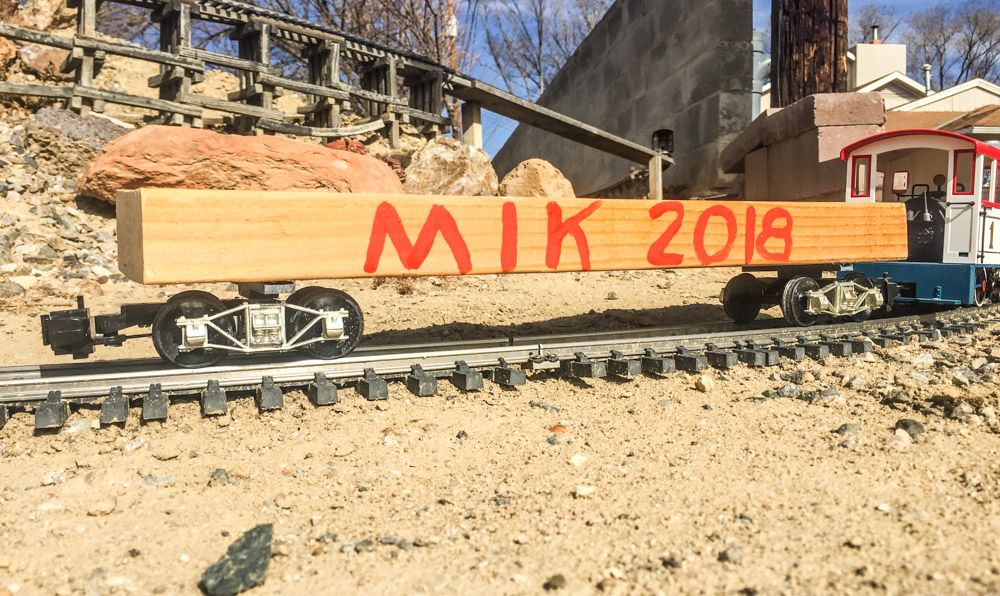
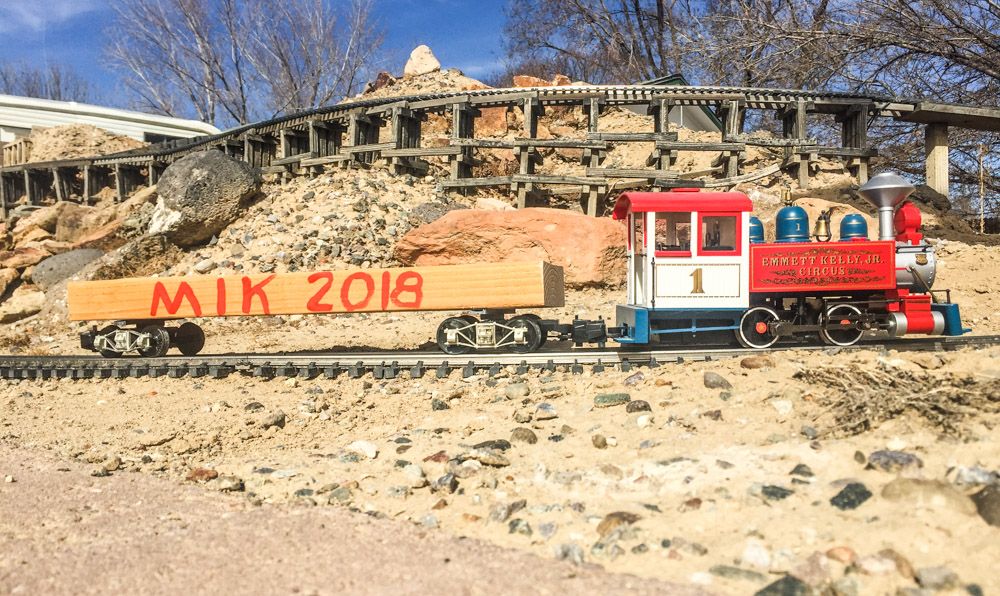
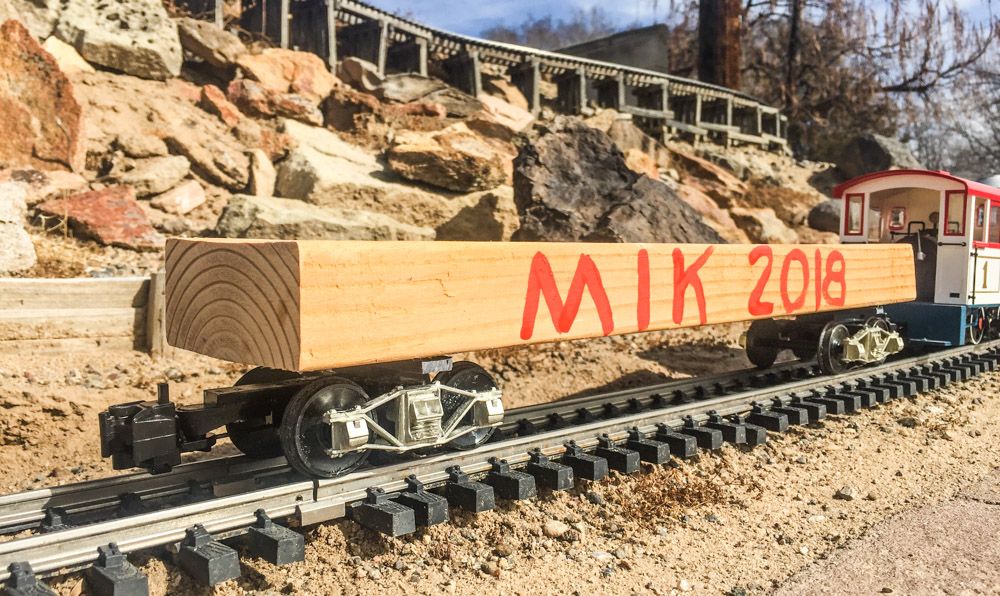
This last minute entry was sent to me, under the title “MIK just MIK”

The Mik 2018 heavy duty flat car!

OK, every one of you had the same idea at the start! I could’t help but think that this would have been the entry from MIK.

MIK would have painted it with a different brush(https://www.largescalecentral.com/externals/tinymce/plugins/emoticons/img/smiley-wink.gif)(https://www.largescalecentral.com/externals/tinymce/plugins/emoticons/img/smiley-cool.gif)