Large Scale Central

2012 Challenge - Mik's

I dithered about making a camera car, but since this August will be our steam club’s 50th show, this back-burnered project won out. 13 months? Really? WOW!! http://www.largescalecentral.com/LSCForums/viewtopic.php?id=13972 Picking up where I left off 400+ days ago… cutting coffee stirrers.

The derrick floor alone required 80 coffee stirrers. If Kim only grabs a dozen or so extra ones with every cup of coffee, this thing will cost a bloody fortune! (good thing a few other folks scarf 'em for me too!)

Bored with match cutting, I decided to start work on the derrick itself. A bit of coroplast worked quite well for drawing a template upon. The legs SHOULD be L shaped, but I figured the 1:1 world would be too hard on it, so solid 3/8" square will serve

small nails are used for locating pins and to help give the joints strength

I got two sides to this point before I ran out of the 3/8" stuff. I’ll need to take a ride to Grove City (14 mi away) to get more. Maybe Tuesday… and not a year from now…

This morning I found 2 sticks of 3/8" stock (4 feet total) that had fallen behind a dresser… Yay! Not enough to finish the derrick, but enough to complete the two sides with some left over!

(http://i1082.photobucket.com/albums/j371/AlleghenyValley/derrick/P1160002.jpg)

The bottom 3 sections of cross bracing were all longer than your standard coffee stirrer, so I did what the old timers did… splice 'em long enough

(http://i1082.photobucket.com/albums/j371/AlleghenyValley/derrick/P1160001.jpg)

Derrick going up!

(http://i1082.photobucket.com/albums/j371/AlleghenyValley/derrick/P1160006.jpg)

Once more, I used nails for locator pins on the corners. Hopefully it never gets whacked hard enough to split the legs.

(http://i1082.photobucket.com/albums/j371/AlleghenyValley/derrick/P1160003.jpg)

While all that was drying, I decided it was time to start on the steam drilling engine. These engines came in sizes from about 8"b x 10"s to 12"b x 15"s… the most common in this area were 10" x 10".

(http://i1082.photobucket.com/albums/j371/AlleghenyValley/derrick/Ajax.jpg)

(http://i1082.photobucket.com/albums/j371/AlleghenyValley/derrick/DoubleEccentric.jpg)

A couple typical identifying features of a drill engine were the large, narrow rim flywheel, and the big vertical lever connected to the link reverse (a reach rod connected to this and ran out to the drill floor) One of the neighbors was tossing out a broken r/c car (no remote), so I decided to narrow up the rear end to motorize this thing. The flywheel and pulley are Ertl. I’ll mount this to a block, then fabricate the rest of the engine around it.

(http://i1082.photobucket.com/albums/j371/AlleghenyValley/derrick/P1160008.jpg)

All I got done on this today…

(http://i1082.photobucket.com/albums/j371/AlleghenyValley/derrick/P1170001.jpg)

15 sec vid of the engine running. I’ve been trying to get rid of that #$&@ wobble all afternoon… turns out the hub is cracked. I made a compression band from a bit of Plastuct tube, and manage to get the runout down to 1/16"
http://s1082.photobucket.com/albums/j371/AlleghenyValley/?action=view&current=P1180001.mp4

I decided to heed my own warning that the clock was ticking on this year’s build challenge - even if nobody else has. I figured a little more boiler work this evening certainly wouldn’t kill me (and it didn’t…sorry Rooster!) Fill, sand paint, repeat – until you get it right, or in this case, close enough.

(http://i1082.photobucket.com/albums/j371/AlleghenyValley/derrick/P1290001.jpg)

backhead detail from brass nails and beads

(http://i1082.photobucket.com/albums/j371/AlleghenyValley/derrick/P1290002.jpg)

Smokebox door is Kalamazoo. It’s a little fancy for an oil field boiler, especially after about 1880, but it was here.

(http://i1082.photobucket.com/albums/j371/AlleghenyValley/derrick/P1290004.jpg)

Stack transition started. I’ll use a 2" sanding drum in the drill press to shape the bottom to fit the boiler.

(http://i1082.photobucket.com/albums/j371/AlleghenyValley/derrick/P1290003.jpg)

Hard to believe, but that tiny bit of progress was 3 hours work… much of it spent just scratching my head and disturbing the termites (aka thinking how to proceed)

For your amusement, here’s a few more ancient photos I found… Some real early rigs were as short as 36 or 40 feet tall

(http://i1082.photobucket.com/albums/j371/AlleghenyValley/sherman.jpg)

(http://i1082.photobucket.com/albums/j371/AlleghenyValley/barrel2.jpg)

Rigs under construction 1865ish

(http://i1082.photobucket.com/albums/j371/AlleghenyValley/derrick/Pithole_1865-1867.jpg)

drying laundry on steam lines in Cali

(http://i1082.photobucket.com/albums/j371/AlleghenyValley/derrick/OILBOILERSSTEAMDETAIL.jpg)

Another wooden rig in Indiana

(http://i1082.photobucket.com/albums/j371/AlleghenyValley/derrick/EOilDerrickWoodCambridgeInd1914glassneg-1.jpg)

A period sketch. And yes, many folks DID drill for oil in their back yards, literally… imagine what your average HOA would have to say about THAT!

(http://i1082.photobucket.com/albums/j371/AlleghenyValley/derrick/Housewithwell.jpg)

An early tank farm for loading oil

(http://i1082.photobucket.com/albums/j371/AlleghenyValley/derrick/TANK.jpg)

Antebellum “tank cars” were just barrels on flat cars

(http://i1082.photobucket.com/albums/j371/AlleghenyValley/derrick/FirstRRTankCars.jpg)

Followed by the wooden tanks on flat cars

(http://i1082.photobucket.com/albums/j371/AlleghenyValley/derrick/WOODEN.jpg)

I think deep down, I’ve known all along that this thing was NOT going to be finished by tomorrow night. I haven’t been procrastinating, exactly - more trying to figure out how to do stuff that simply hasn’t jelled, even yet… But here are some progress pics of the various bits, anyway My big problem was, and still is the bull wheel… I need to make the two wheels about 3" or 3-1/4" in dia x 3/8" wide, but haven’t quite figured out how to make the rims without a LOT of work – any ideas?

(http://i1082.photobucket.com/albums/j371/AlleghenyValley/derrick/kcmuseum_bull_wheel.jpg)

Easier to make was the well jack…

(http://i1082.photobucket.com/albums/j371/AlleghenyValley/derrick/generalcatalogpa00fairrich_0093.jpg)

A chopped up Ozark railroad jack and a bit of 2mm square Plastruct worked really well.

(http://i1082.photobucket.com/albums/j371/AlleghenyValley/derrick/P2110004.jpg)

(http://i1082.photobucket.com/albums/j371/AlleghenyValley/derrick/P2110007.jpg)

Getting the center irons to look right stumped me for a few days as well…

(http://i1082.photobucket.com/albums/j371/AlleghenyValley/derrick/Bigdetail.jpg)

But in the end, I think they came out OK - and it works free and easy

(http://i1082.photobucket.com/albums/j371/AlleghenyValley/derrick/P2100002.jpg)

The big bandwheel was cut by hand, and sanded round… and it doesn’t wobble too badly, so the belt should stay on

(http://i1082.photobucket.com/albums/j371/AlleghenyValley/derrick/P2110008.jpg)

I could only afford 5 pulleys off Ozark, so my crownblock is freelanced - and simplified.

(http://i1082.photobucket.com/albums/j371/AlleghenyValley/derrick/generalcatalogpa00fairrich_0058.jpg)

(http://i1082.photobucket.com/albums/j371/AlleghenyValley/derrick/P2100003.jpg)

Fitting the crossbracing is a much bigger PiTA vertical like this than it looks… I’ve been doing a little off and on for 2 weeks. It’s about 3/4 done.

(http://i1082.photobucket.com/albums/j371/AlleghenyValley/derrick/P2100001.jpg)

The enginehouse side walls have been framed for about a week.

(http://i1082.photobucket.com/albums/j371/AlleghenyValley/derrick/P2110009.jpg)

This morning I added the windows. Tonight I’ll cut a mess of coffee stirrers to plank them

(http://i1082.photobucket.com/albums/j371/AlleghenyValley/derrick/P2110010.jpg)

And that’s where it stands tonight

Mik - how about a piece of PVC pipe cut thin? May be a bit thick for a rim though.

I’ll have to find some and look into the wall thickness… thanks for the idea

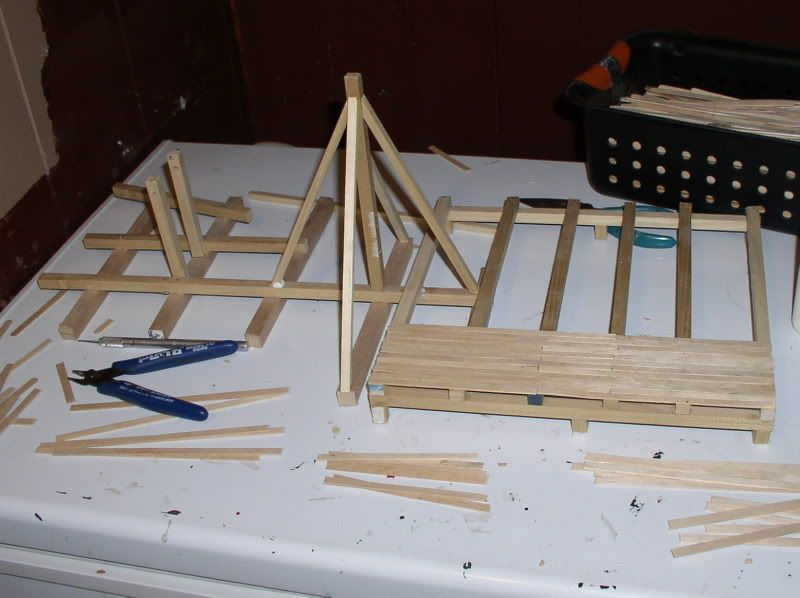
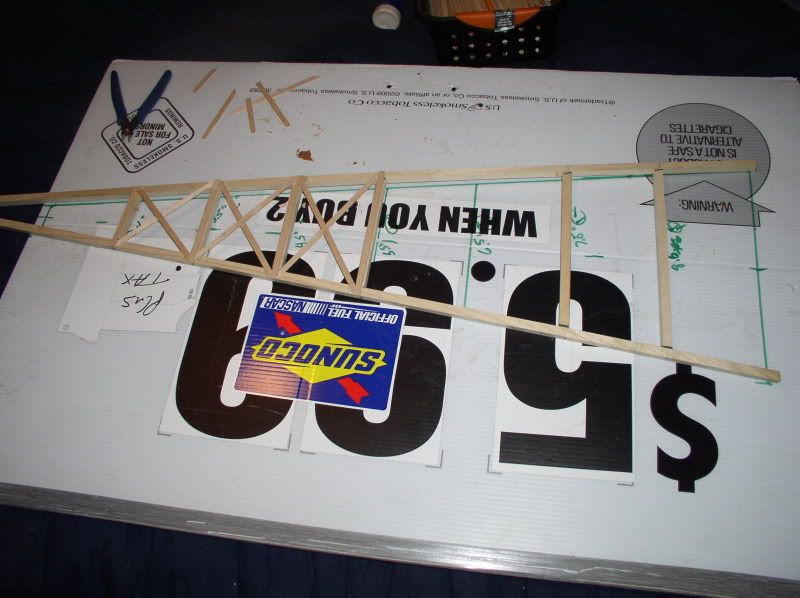
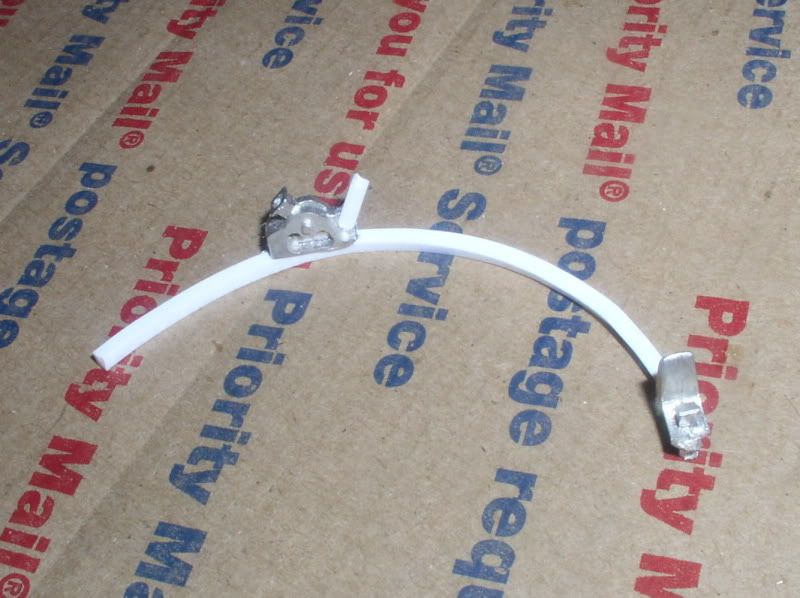
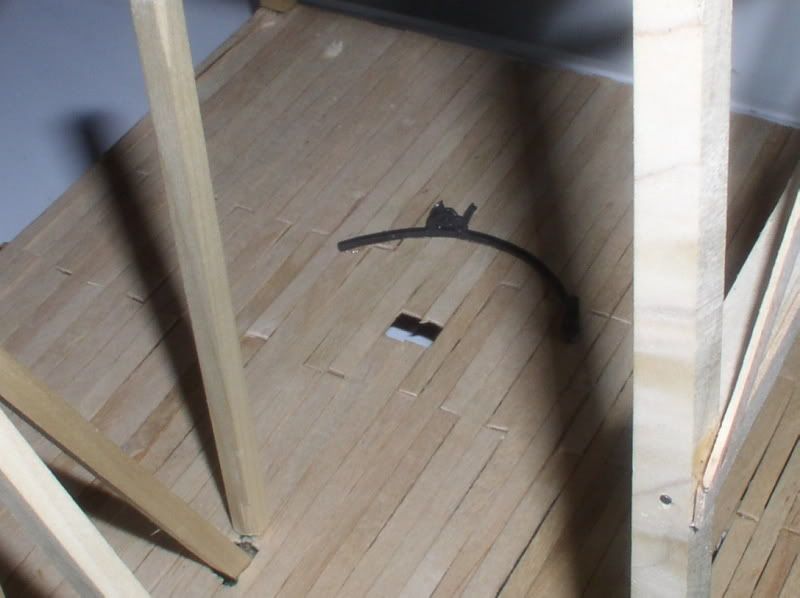
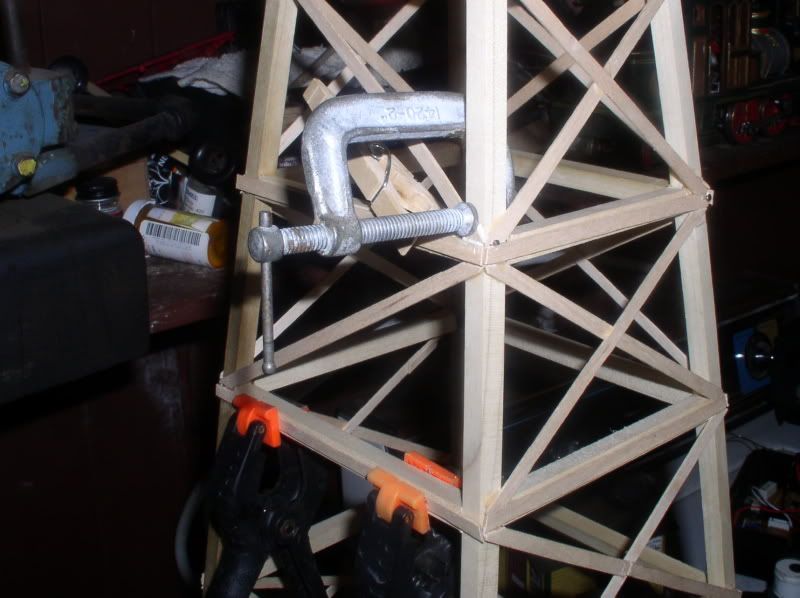
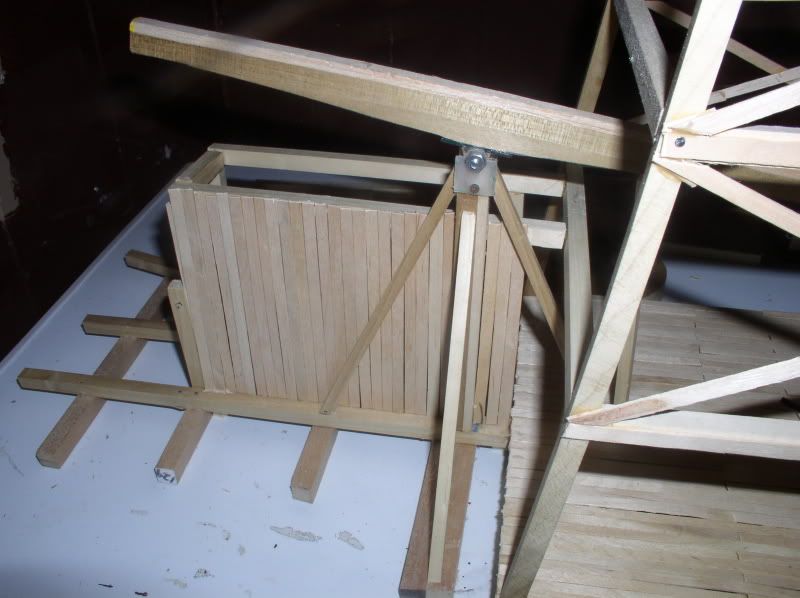
Well, I guess I get a DNF again this year. I kinda rushed a few things, but you just can’t rush wood glue… Framing for the beltway extension. On the model it’s just a big empty, but on a real rig not only would the ‘telegraph’ rope to the engine throttle, reverse reach rod, and sand reel lever run through it, but stuff like fishing tools, spare jars and coils of extra wire rope would be stored in there as well. Handy for when you need them, but otherwise out of the way. As usual, I’m allergic to making too many details nobody will see.

(http://i1082.photobucket.com/albums/j371/AlleghenyValley/derrick/P2120001.jpg)
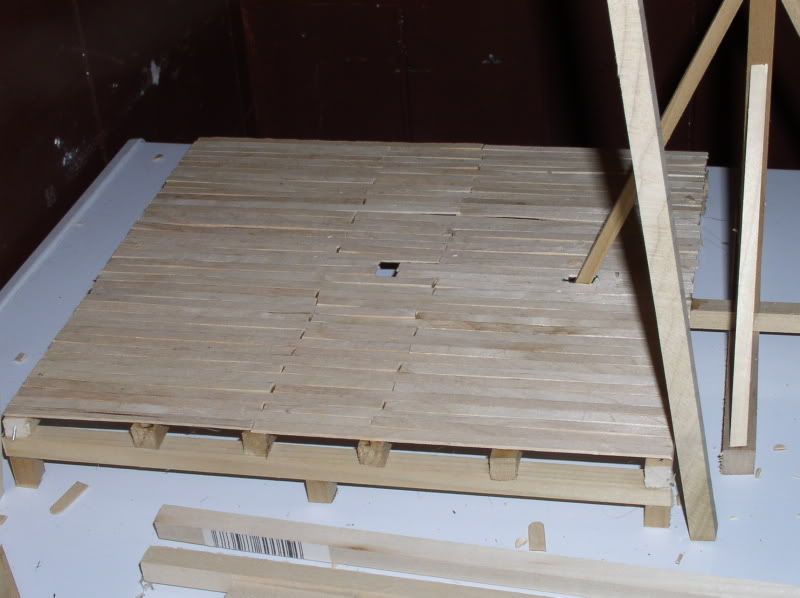
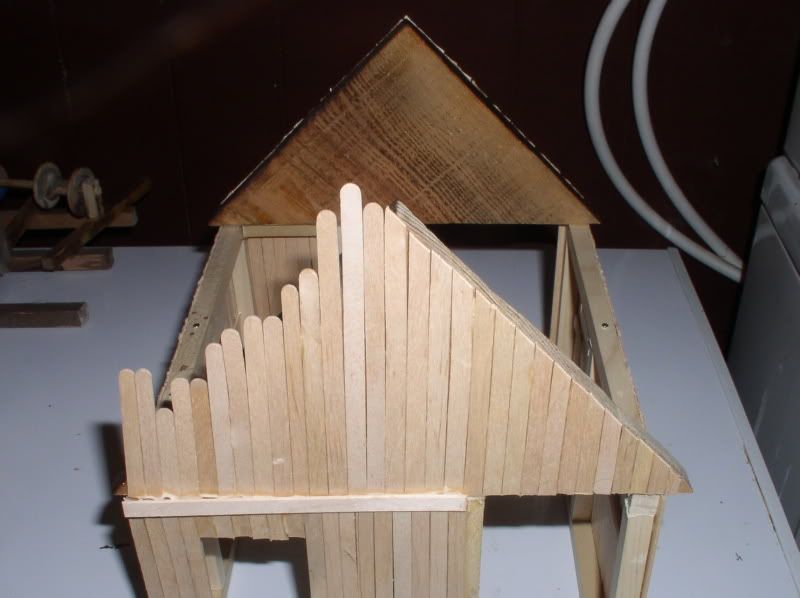
Planking going on…

(http://i1082.photobucket.com/albums/j371/AlleghenyValley/derrick/P2120002.jpg)

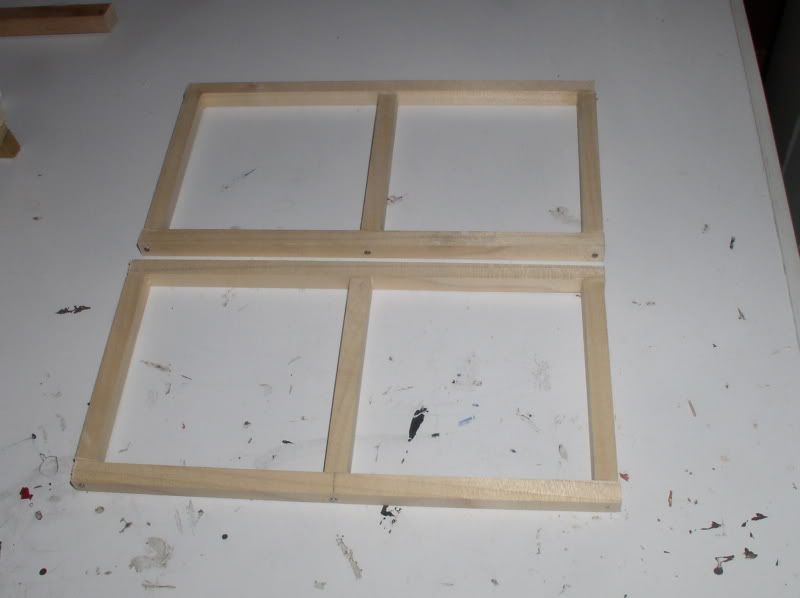
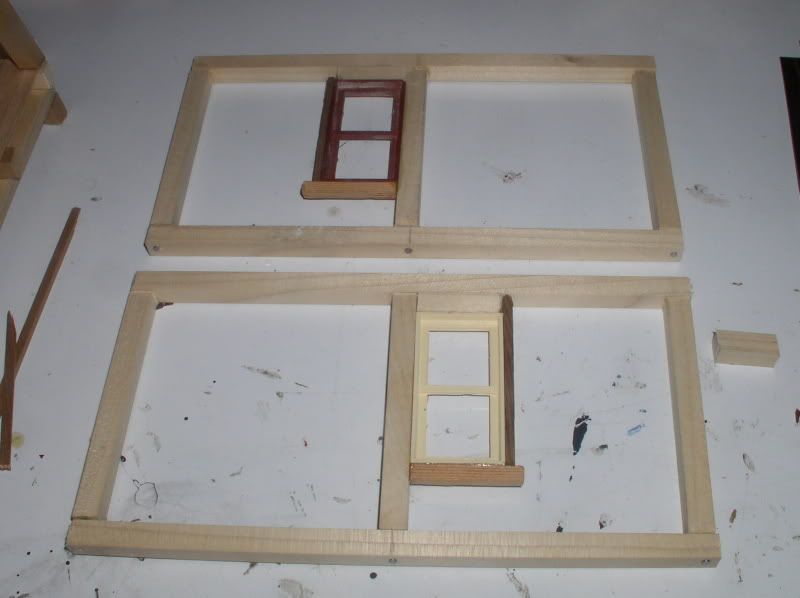
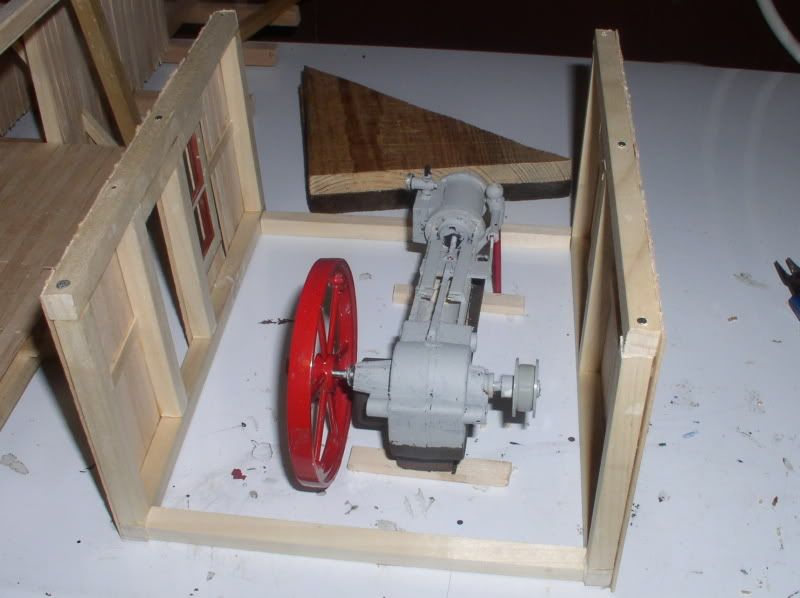
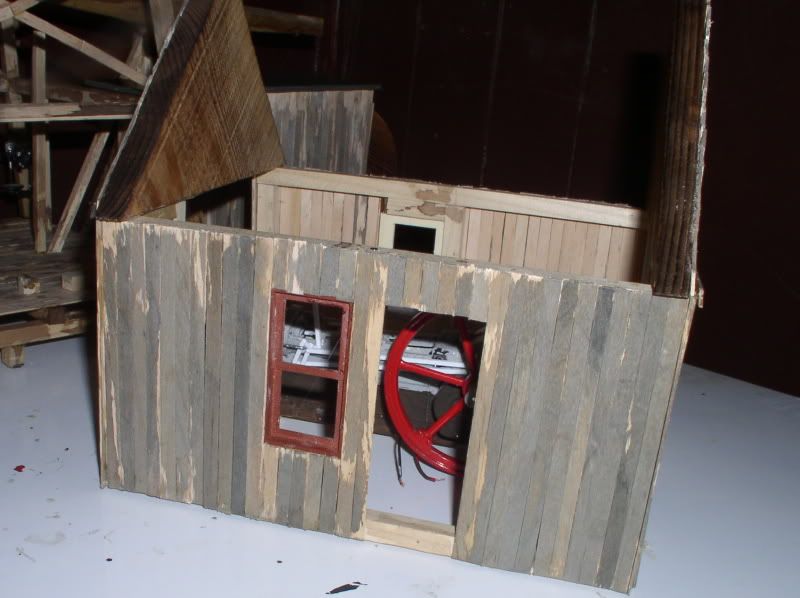
Jumping around a bit, the side walls of the enginehouse went up…

(http://i1082.photobucket.com/albums/j371/AlleghenyValley/derrick/P2120004.jpg)

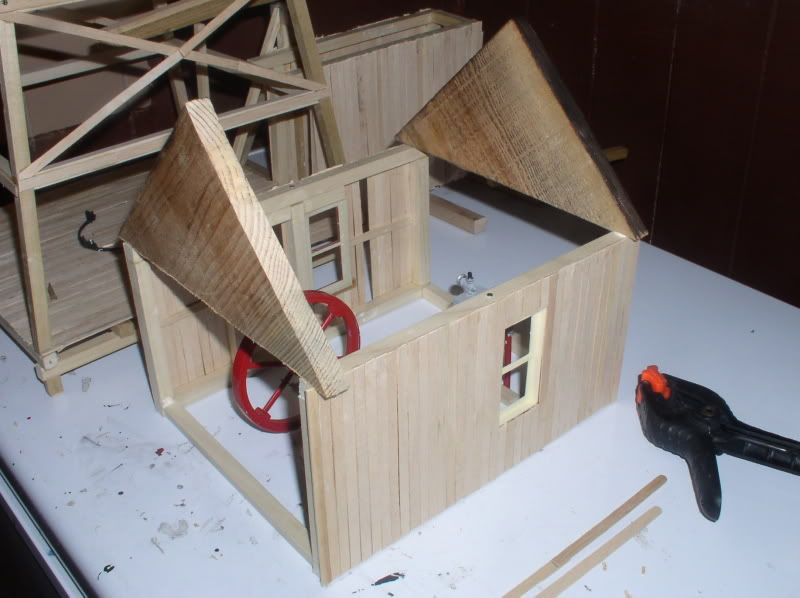
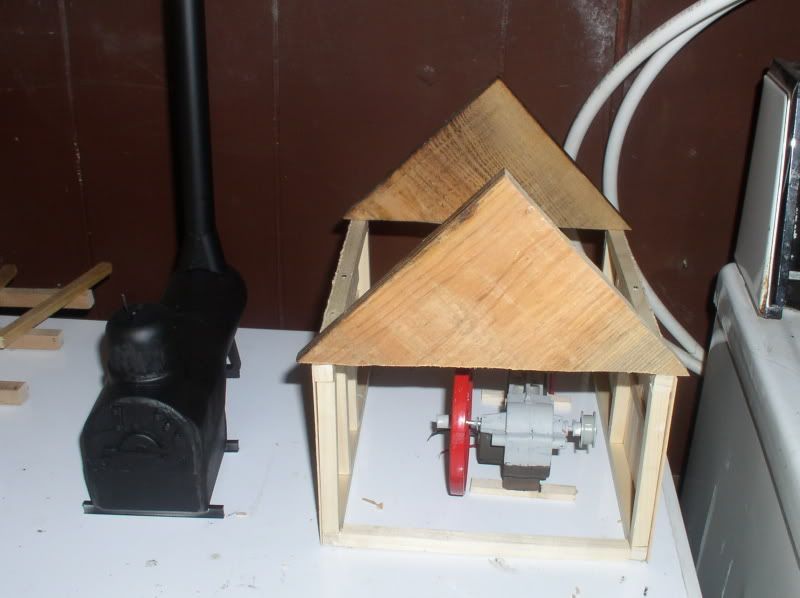
My usual cheater roof trusses.

(http://i1082.photobucket.com/albums/j371/AlleghenyValley/derrick/P2120005.jpg)

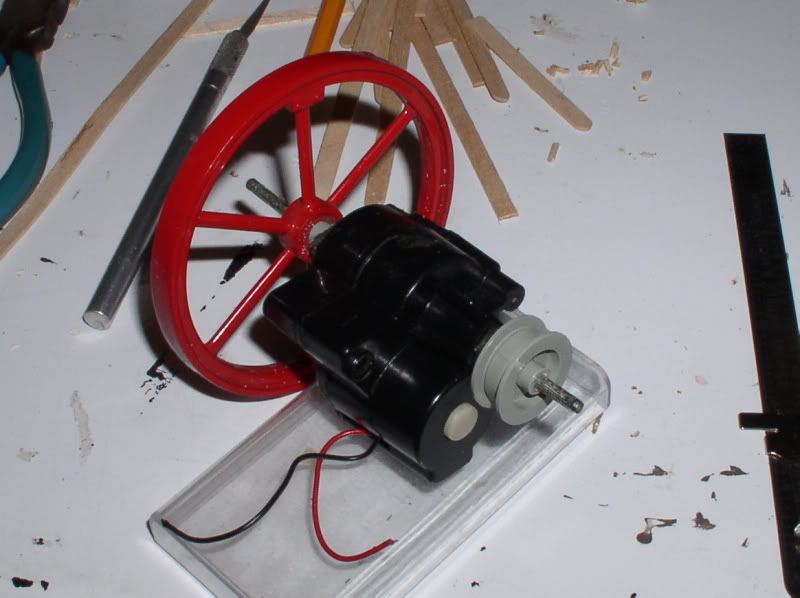
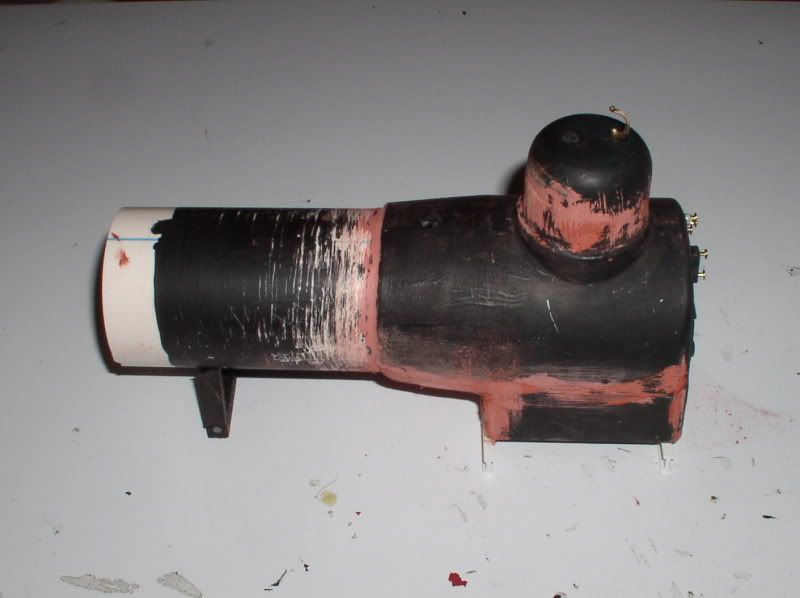
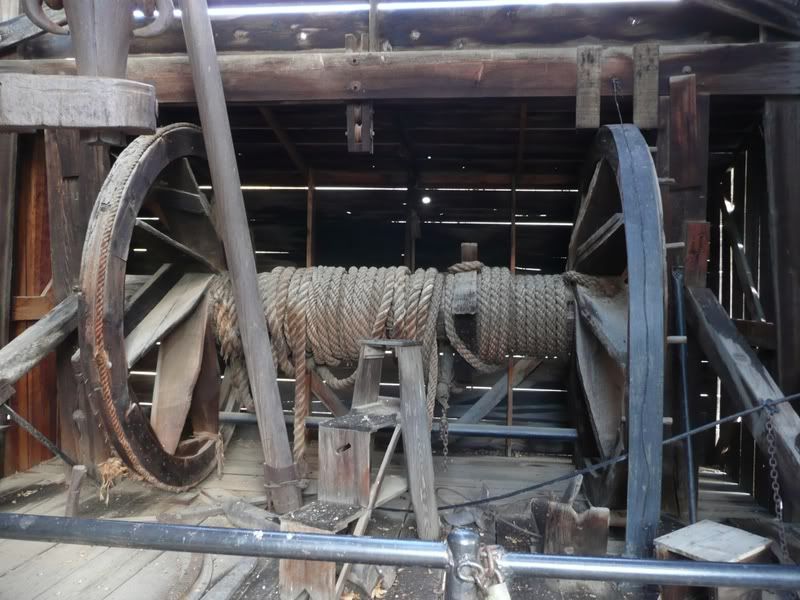
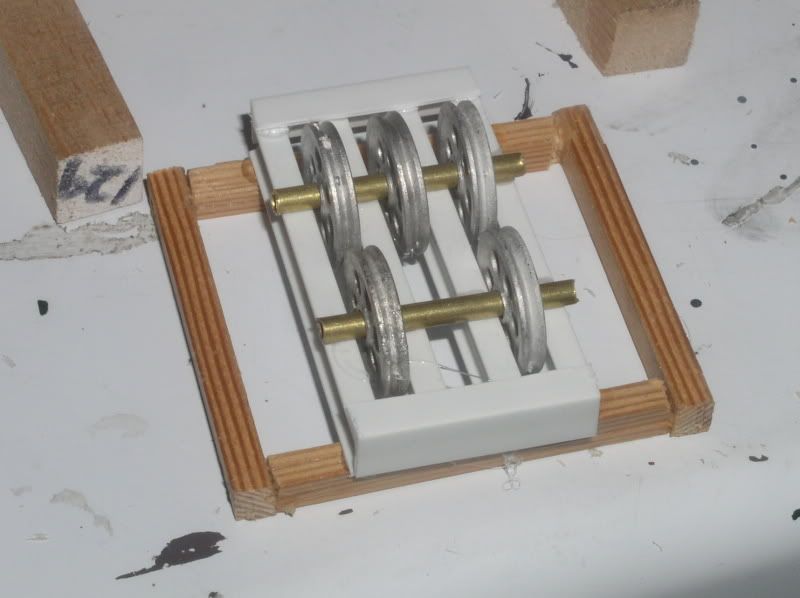
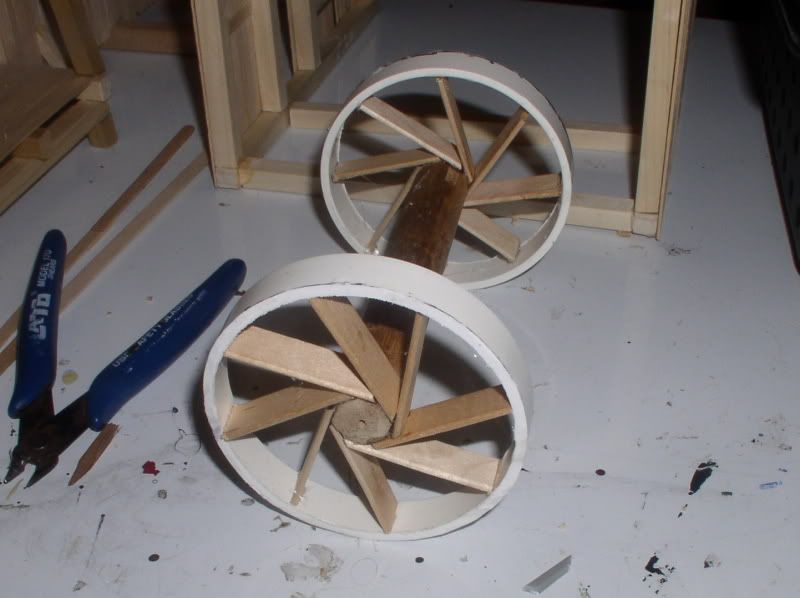
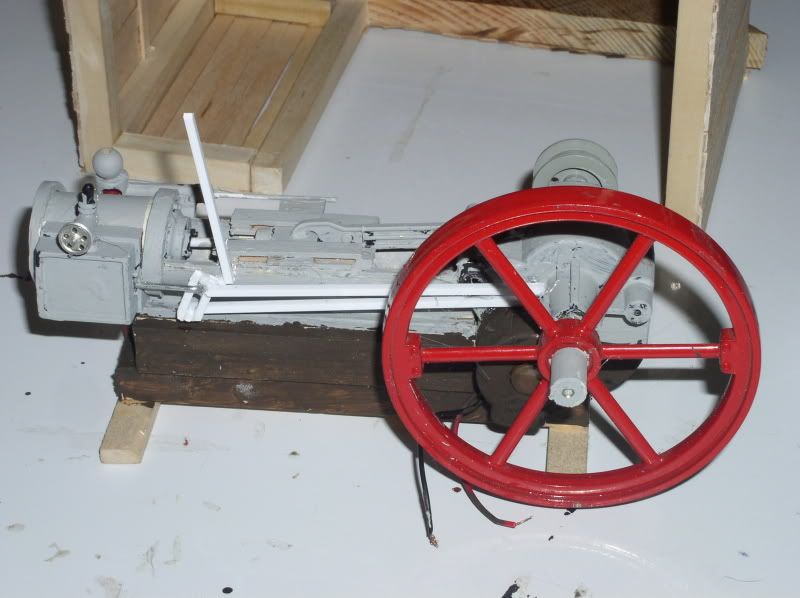
The bull wheel. A big thank you to Steve Widener for the hint I needed! I remembered this morning that I had a 3" pvc pipe couple in my scrapbox (to make traction engine wheels). The spokes are tongue depressor size craft sticks.

(http://i1082.photobucket.com/albums/j371/AlleghenyValley/derrick/P2120007.jpg)

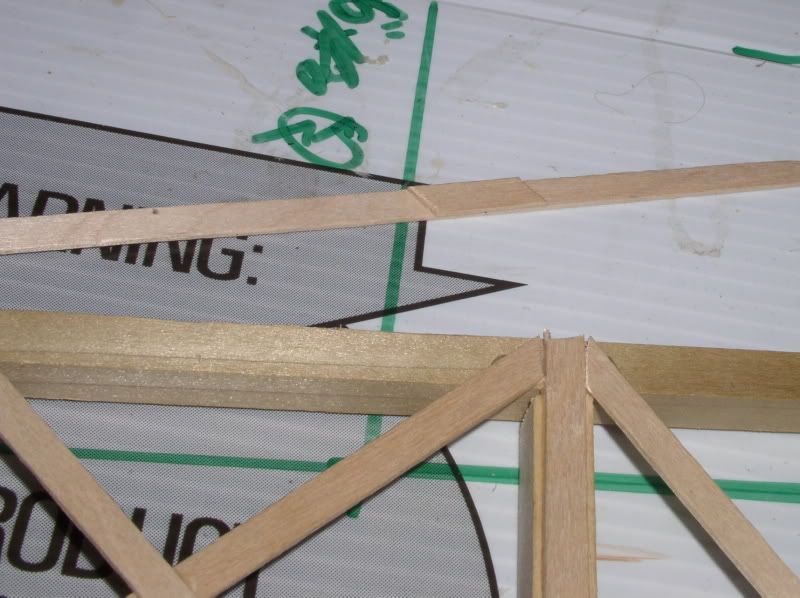
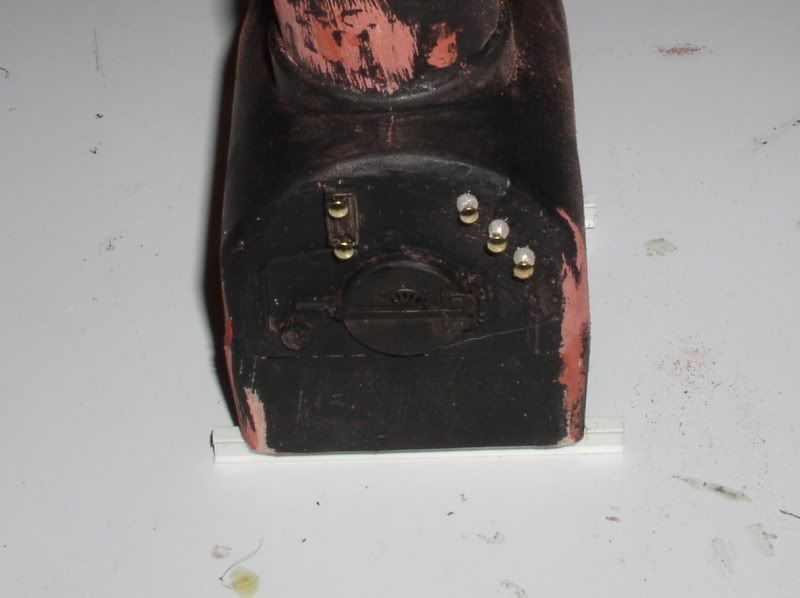
mounted and braced. Now I just need to find the ball of surveyor’s string that I put somewhere so I wouldn’t lose it…

(http://i1082.photobucket.com/albums/j371/AlleghenyValley/derrick/P2120008.jpg)

The freezer is about 6" too short!

(http://i1082.photobucket.com/albums/j371/AlleghenyValley/derrick/P2120009.jpg)

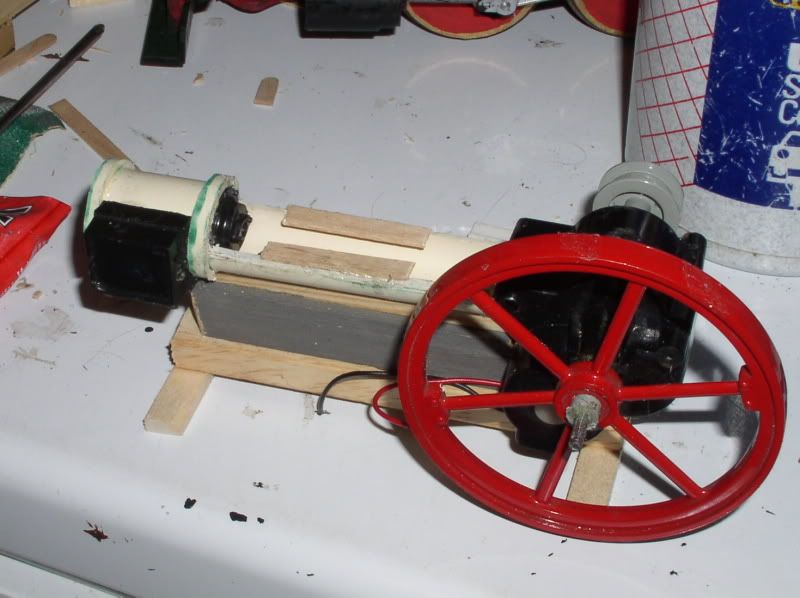
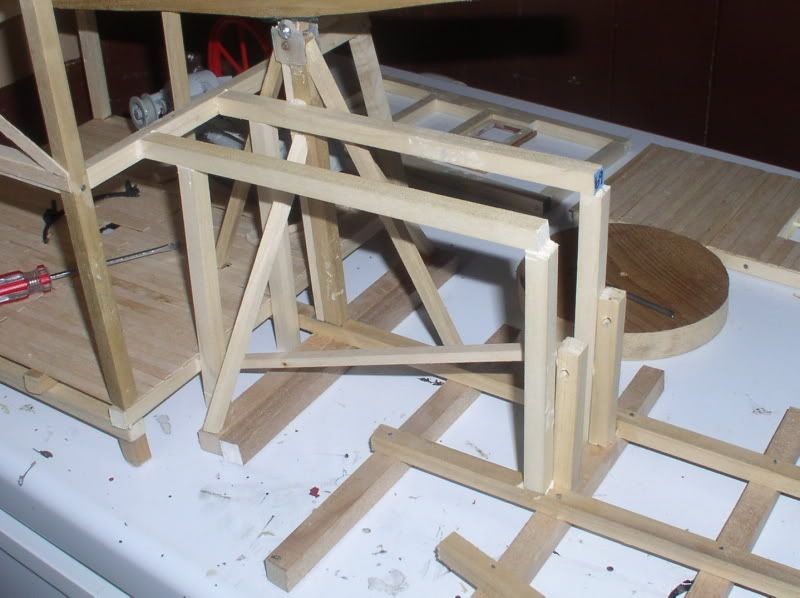
Trying to visualize the layout of the boiler and enginehouse

(http://i1082.photobucket.com/albums/j371/AlleghenyValley/derrick/P2120010.jpg)

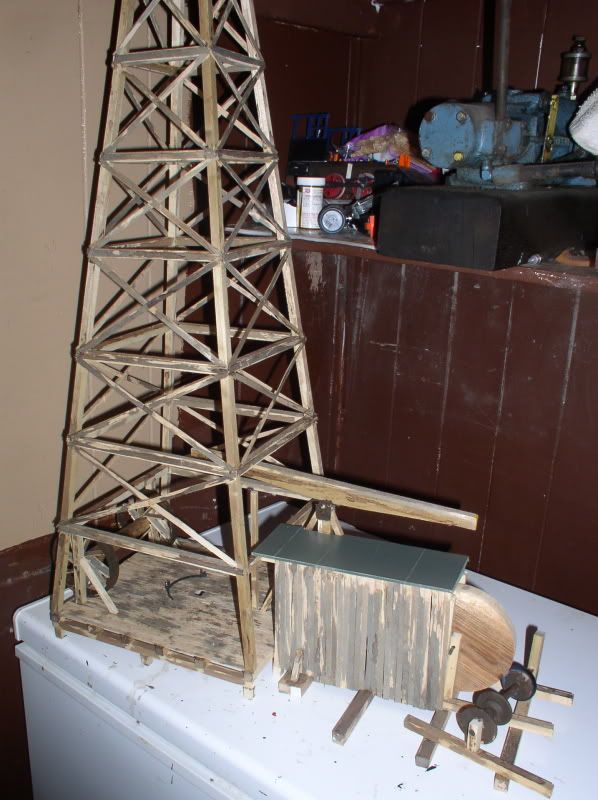
Sand reel is a spool and two wooden nickles. I really wanted to roof the beltway with corrugated sheet. But I never got around to buying a crimper, so ‘tarpaper’ it will be - once it stops snowing long enough to spray the aluminum furnace tape flat black (or maybe flat olive green)

(http://i1082.photobucket.com/albums/j371/AlleghenyValley/derrick/P2120013.jpg)

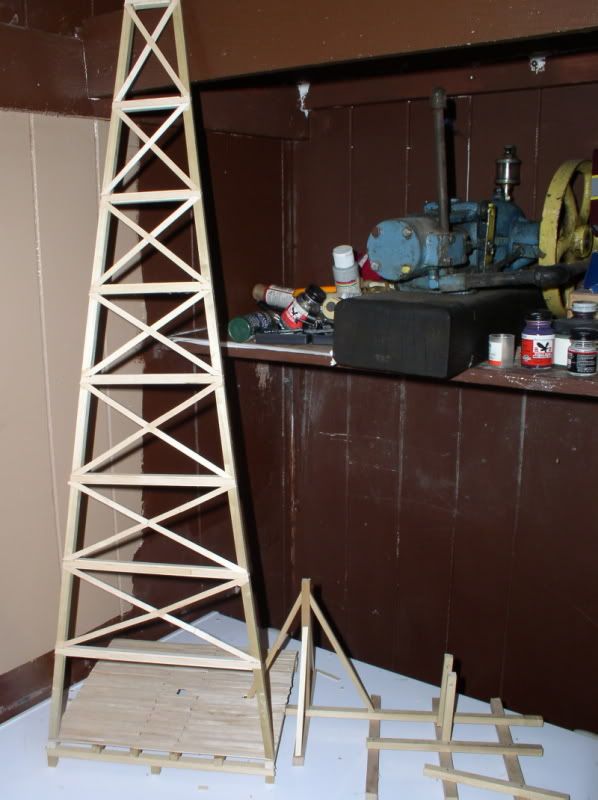
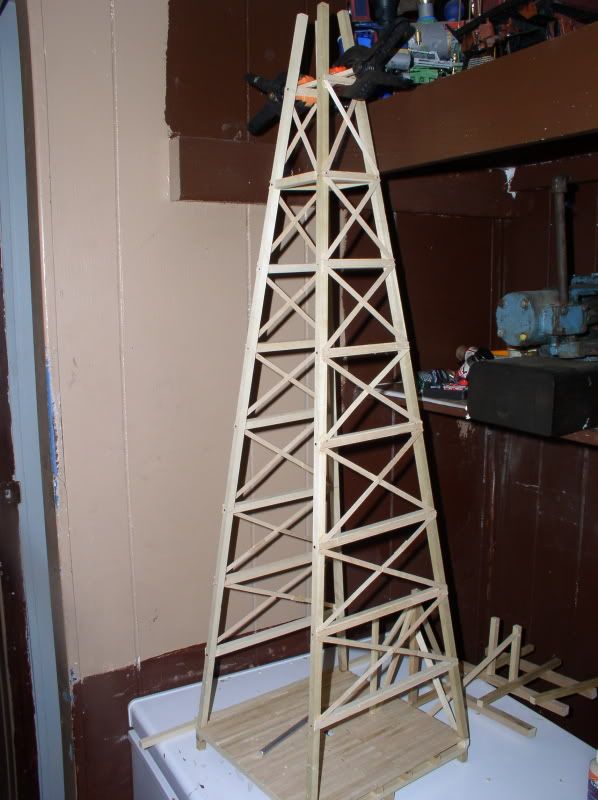
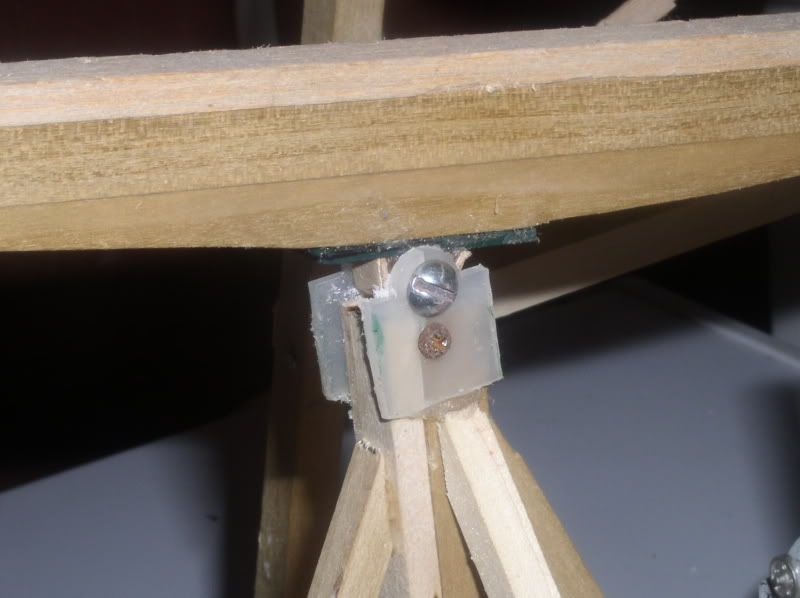
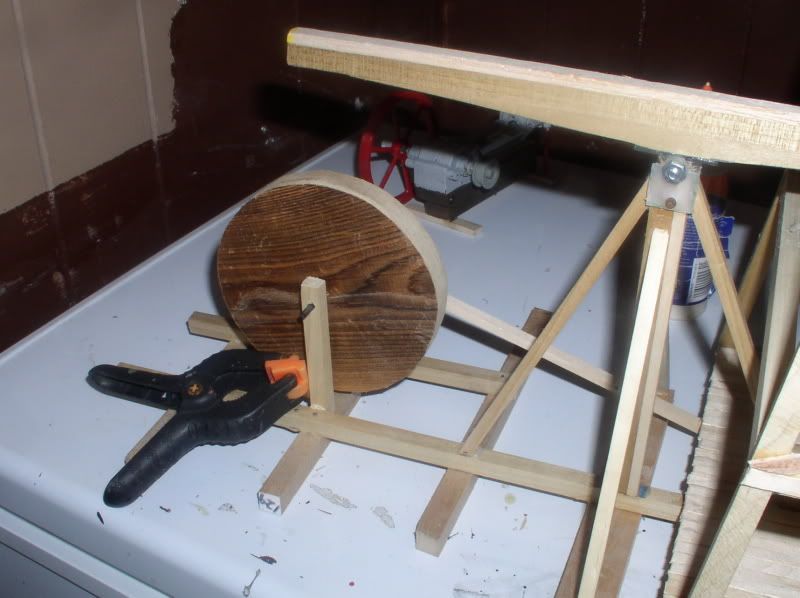
The derrick itself is probably 95% done now. The only major bits missing are the wire ropes, the walking beam stirrup and pitman, crank, and temper screw… Another day or two and maybe $5 worth of parts would have finished it. The enginehouse needs the siding on the end walls and roof. plus a bunch of details… And the beltway needs built. But first I really need to find a piece of decent plywood for a base (about 15" x 40"!)

These came out great…

(http://i1082.photobucket.com/albums/j371/AlleghenyValley/derrick/P2120007.jpg)

Coming our nice Mik.

Well, Photobucket is being a pain again… about once a year I supposedly come close to or exceed their bandwidth limit, and try to pressure me to buy their upgrade… nevermind that if they averaged it, it wouldn’t even be close. So if many of the pictures disappear, they’ll be back on the 2nd. But these photos are on my old account In the past couple weeks I did a little bit more on this. I built the (static) valve gear for the engine. Yes is has an Allen straight link, not a curved Stephensons, but once it’s in the engine house you won’t really be able to tell.

(http://i397.photobucket.com/albums/pp52/steamnut1917/derrick/P2230002.jpg)

I built and planked the engine house end walls with coffee stirrers. Rather than try to cut each piece of the gable part to exact size, I cut them “close enough” then trimmed them to final size after the glue dried - using the plywood ‘truss’ as a guide.

(http://i397.photobucket.com/albums/pp52/steamnut1917/derrick/P2230001.jpg)

Then everything got a coat of vinegar/steel wool solution

(http://i397.photobucket.com/albums/pp52/steamnut1917/derrick/P2230006.jpg)

The derrick got a coat as well. It looks a little less brand new now

(http://i397.photobucket.com/albums/pp52/steamnut1917/derrick/P2230003.jpg)

I also found a piece of OSB to use as a base, but need to buy paint for it… and unfortunately, I can’t do a whole lot more until I do.

Thanks for bringing this to the top.

Wow, I remember when he started it. This should remind us why we are doing the challenge… For the fun, Learning from each other and a way to remember a person who loved to model and share ideas…R.I.P my friend…