Large Scale Central

Budget Boxcar Kits

Budget Boxcar Kits! Does anyone remember them? Our Benevolent Dictator just posted some for sale a week or so ago. There are a lot of us that have been around for a long time that remember when these were a big deal, not so much anymore. For you newer guys a little explanation may be helpful. So here, to the best of my recollection, is what they were about.

Back about 1998 or so there were a number of very good model builders that were campaigning for a scale change that would make 45 mm track exactly 3 foot gauge. There was even a web site created that was dedicated to the correct combination, the 1:20.3 group. Coincidently, about that time Bachmann introduced a 2 truck Shay locomotive in 1:20.3 scale. Myself, like many others were immediately hooked on this new correct gauge/scale combination and the fascination of the large scale geared locomotive.

A problem soon became very evident, there was literally no rolling stock yet being produced in 1:20.3 scale to go with this beautiful new locomotive. A number of cottage industries soon popped up and started supplying equipment to fill the void. People like Bob Hartford and Don Winter, to name a couple, started delivering a small supply of car kits to fill the growing demand.

About 2001, on the old 1:20 E groups page a bunch of guys started “what if’ ing”. What would it take to produce some cottage industry cars in this new 1:20 scale; can anybody come up with some ideas? Well it wasn’t long before several guys stepped forward and said we can do this.

I hesitate to name these guys because I am sure I am forgetting someone but as I remember the ones that took the lead in this project were; Jeff Saxton, Curt Johnson, John Clark, and Bob Hartford. Curt drew the plans of the prototype car, Bob supplied an array of soft metal castings for detail parts, John supplied building/framing jigs and Jeff did the entire laser cutting from the company he was working for at the time, American Model Builders? Now I know I am forgetting to give credit to a lot of others that jumped in and donated time and effort to this project and for that I apologize.

The the prototypes for these 1 to 1 cars were ordered by the Florence & Cripple Creek railroad of Colorado in 1899, construction numbers 500 thru 699, and they were produced by the American Car and Foundry Company in 1899 to 1900. By the early 1900’s the F &CC fell on hard times and sold off all the rolling stock. The boxcars went to narrow gauge railroads all over the west and even as far as the Navel Depot at Pearl Harbor, Hawaii.

One car in particular caught my eye several years ago. Boxcar #536 went from the F&CC to the Nevada, California, Oregon line (NCO) that ran from Reno Nevada to Lakeview Oregon. It ran there until the NCO was bought by the Southern Pacific Company and the road was changed to standard gauge in the late 1920’s. Car # 536 was sold to a local ranch and went on the ground as a feed storage shed. There it remained until the 1960’s when it was “found” and rescued by a bunch of college students from Shasta Junior College in Redding Ca. The car was acquired and transported to the museum at Shasta College and put on display. I discovered this car in the 1990’s and when the Budget Boxcar project came along it just seemed the perfect fit. So the first Budget Boxcar project I constructed was of course boxcar #536.

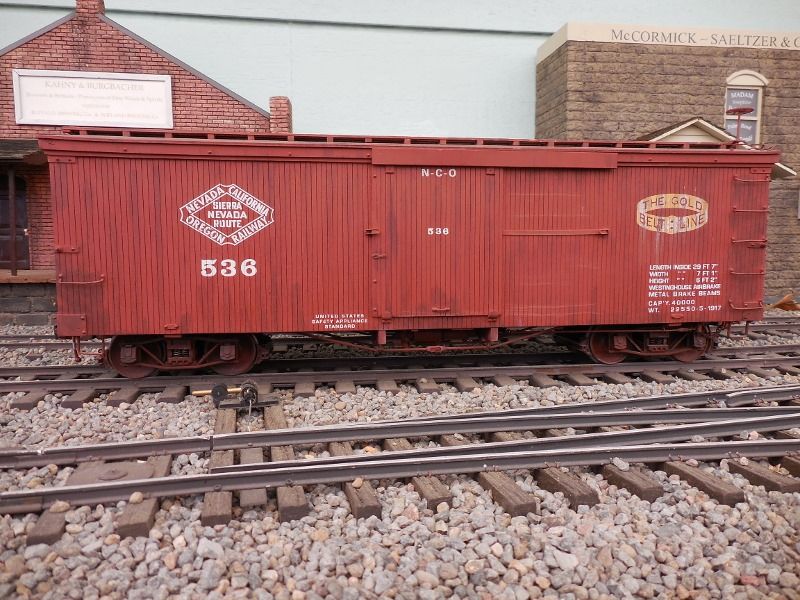
The NCO boxcar #536 as built in 2001. I couldn’t resist using the old F&CC “Gold Belt” logo as a faded herald even though the car is now lettered for the Nevada California and Oregon. The custom decals were supplied by Rick Blanchard of Blanchard Design.

Among my paperwork I found the old workup notes for building this kit.

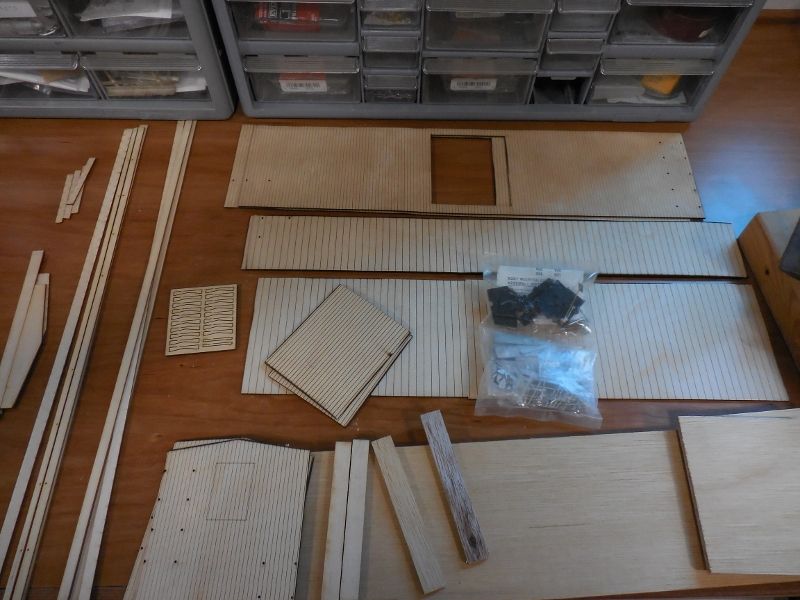
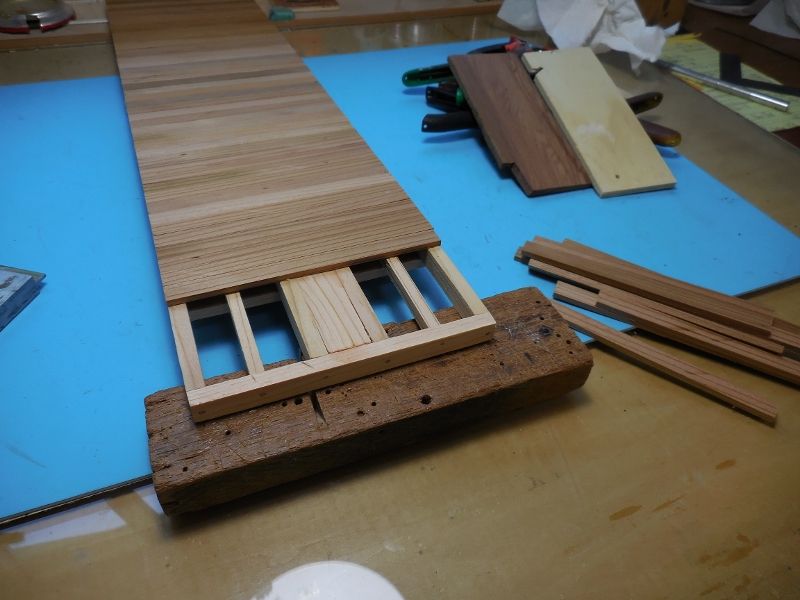
1- Boxcar laser cut wood $45.00

2- Hartford metal details $30.00

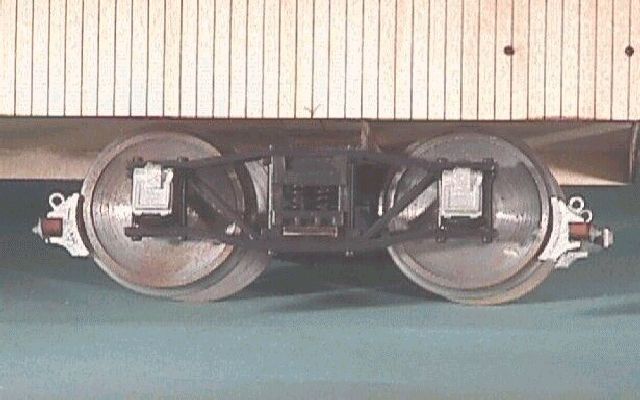
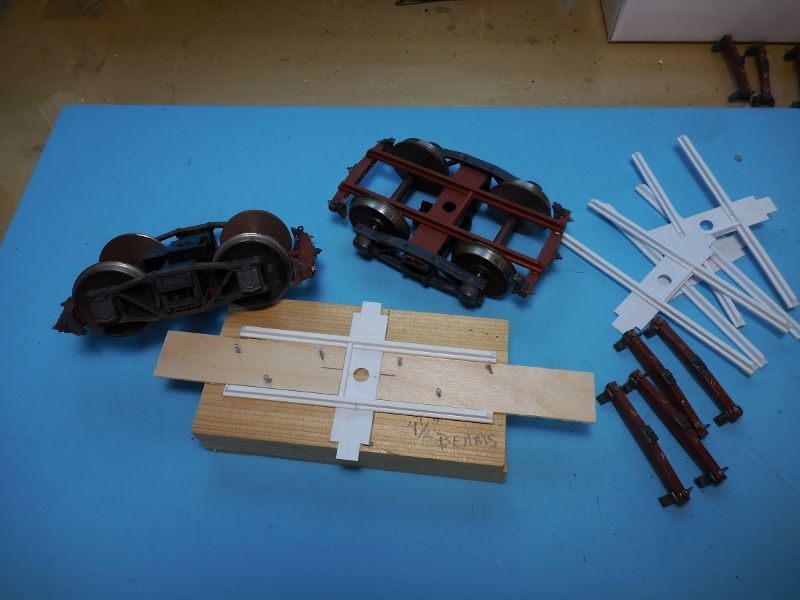
3- Delton trucks (Gary Lantz) $12.00 per pair

4- Sierra Valley wheels 4 axles $12.00

So $99.00 for the basic kit then add paint and decals. If you were going to do a custom frame then you had the cost of wood for the sills and further metal castings. Also if you bought the custom frame building jigs from John that was an additional $45.00, but wasn’t a per car price addition.

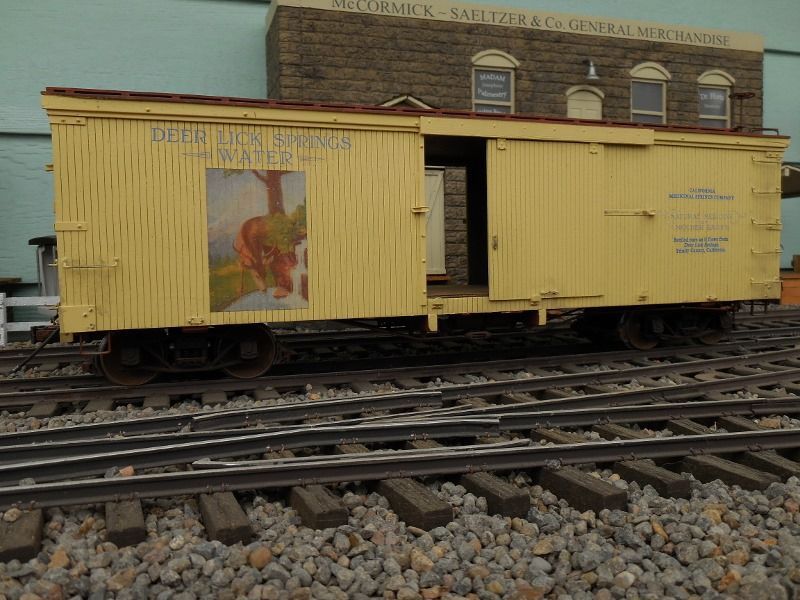
The second car I built in 2001 was a custom private industry car for the Deer Lick Springs Water Company. Deer Lick Springs is a real place way back in Trinity County, California that was a very popular Mountain Spa back in the day. Unfortunately a railroad never came within a hundred miles of the resort but I didn’t let that slow me down any. The custom decals were done by Stan Cedarleaf, the art work is from a bottle label from the 1920’s

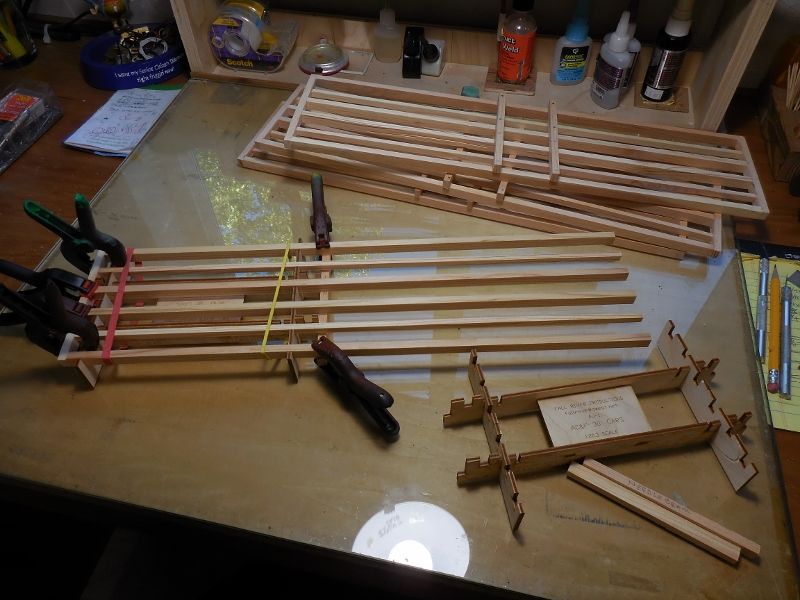
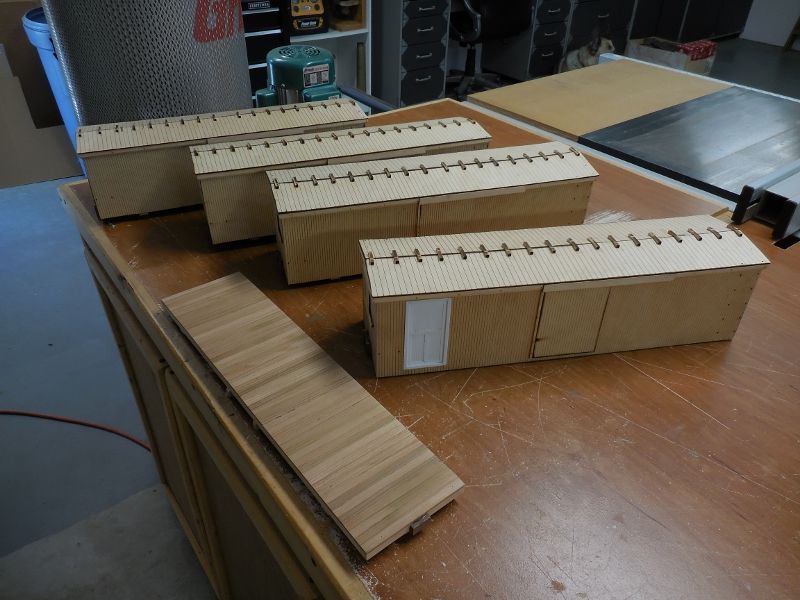
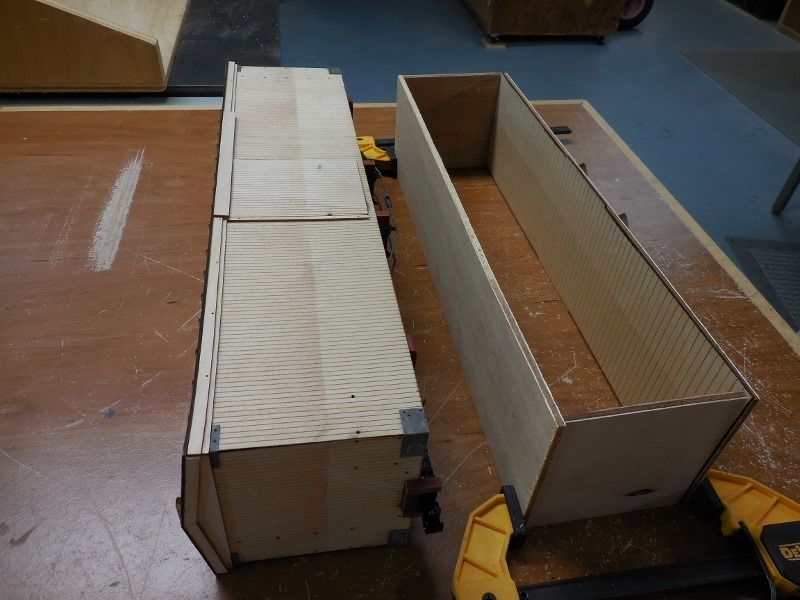
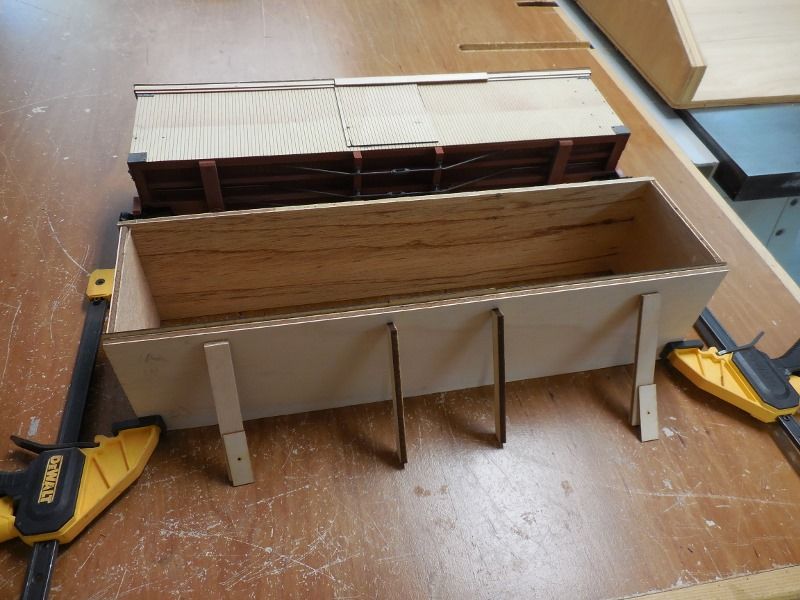
Well four more of these kits have been laying around since 2001 with all the parts and pieces to complete them all they needed was ambition and time. Like everybody else I have been catching up on a lot of projects around the house and railroad the last few months so stick around and I’ll walk you through my build of the 4 great old kits.

Looking forward to seeing your build progress, Rick.

Bachmann had plastic car kits and I have seen these time to time at the ECLSTS. These were 4 axle American rolling stock and were at least 1/24 or bigger.

Looking forward to watching this. I liked the kits, they were very well thought out.

Dan Pierce said:

Bachmann had plastic car kits and I have seen these time to time at the ECLSTS. These were 4 axle American rolling stock and were at least 1/24 or bigger.

Dan, those are/were just their regular 1:22.5 “Big Hauler” cars in broken down / unbuilt form. Plastic wheels.

Budget Boxcar Kits! Does anyone remember them?

Oh yes. I was in the One-20point3 group and closely followed the boxcar. These photos date from 2001 - first the “test build”. Jeff Saxton worked for a laser-cutting company making dolls houses, among other things, and he was the protagonist.

The car was very cleverly set up, with 4 big pieces of plywood: 2 ends and a bottom and a top, which made a basic box, to which you glued the nicely cut scale pieces. The Delton trucks turned out to be the correct size, so with Hartford wheels and brake gear they looked good:

Jeff also cut a slightly longer version model of an NCO (?) boxcar, and I still have the parts as I intended to make it into EBT #170, the sole wooden boxcar on a steel frame [no underbody details to worry about!] Jeff offered help recently - I’ll let him know about this thread.

There’s an archive at Michelle’s website with all the instructions
https://www.michelle.lu/saxton-car-and-foundry.html

F&CC boxcar kit - assembly manual

They were very fun to build. I think I bought 10 of the budget kits and a couple of the longer ones.

I started a conversation “Budget Boxcar Redux” on the One20point3 group (which is now at Groups.io) and got several responses, including from Jeff Saxton. Rather than derail this thread, I’ll suggest that anyone interested join the group!
https://groups.io/g/One20point3/message/97

Thanks for chiming in Pete. We seem to have stirred up a lot of interest/memories in quite a few guys about these old kits. I saw the postings over on the 1:20 site and the remarks about the possibility of re-releasing the kit. In my opinion there probably would be very little interest in these kits among today’s train runners. With the glut of RTR cars available and the waning interest in model building and the hobby in general I think it would be a pretty hard sell.

Here is what you got in the basic kit; top, bottom, and 2 ends of ¼ inch ply to form the basic box. Scribed ply sides, ends, floor and 2 roof panels. Two side doors and end door. Trim pieces for around the eves and above the doors. Roof walk supports and planks. Some ply pieces to act as bolsters and needle beams. A bag of basic metal detail parts and KD couplers. Brake beams and their support structure, not shown in this picture.

If you wanted to build the car with a little more detail you ordered the frame assembly jigs from John at Fall River, and cut your wood to use as sills etc. There was also an additional detail kit available from Bob Hartford. In this picture you can see the jigs in use to assemble the four frames I need for this build. The beams are cut from some dry, fine grain Pine that I had on hand. This is the point where you have to know what coupler, what truck and wheels and what your standard coupler mounting height will be so you can cut and mount the bolster beam accordingly.

I saw the postings over on the 1:20 site

In which case you noted that Vance Bass still has bags and bags of metal detail parts for these kits.

Let’s say, hypothetically, these kits were re-offered…Having never tried anything like this in my life, would they be a good “intro to wooden kits” project? Also, given I run truck mounted hook-and-loops, would that work? Would it be the modeling equivalent of putting nail polish on a pig? Box cars are on my short list of things I “need,” and a kit of something that made it out to Oahu is intriguing.

I am looking forward to this thread even if this particular kit is not a viable option for my needs, as it opens my understanding of what is possible.

Eric

Let’s say, hypothetically, these kits were re-offered…Having never tried anything like this in my life, would they be a good “intro to wooden kits” project? Also, given I run truck mounted hook-and-loops, would that work? Would it be the modeling equivalent of putting nail polish on a pig? Box cars are on my short list of things I “need,” and a kit of something that made it out to Oahu is intriguing.

Eric, it seems very unlikely that any more of the budget boxcars will be available. But someone might have one and may be willing to sell.

If you are not totally focused on the F&CC prototype, there are a few other boxcar kits around. For a first time, I’d try the Ozark “30ft” boxcar kit.

https://ozarkminiatures.com/collections/30-ft-car-kits/products/basic-boxcar-kit

I suspect (though I have never seen one) it won’t be too much different from the 10ft caboose I built and documented.

Ozark also sell the Hartford kits, but as someone on the One20point3 group commented, they are super-detailed, time-consuming to make, and delicate. Phil Dippel (http://www.philsnarrowgauge.com/) also makes boxcar kits that aren’t too tricky but he says he’s only doing limited runs of them (again, I’ve never made one.)

As I said above, I have one of the longer kits that Jeff cut, without the hardware or trucks. Vance has the hardware, and trucks are easy to come by. I’d be happy to sell it in to a good home.

X

Eric Mueller said:

Let’s say, hypothetically, these kits were re-offered…Having never tried anything like this in my life, would they be a good “intro to wooden kits” project? Also, given I run truck mounted hook-and-loops, would that work? Would it be the modeling equivalent of putting nail polish on a pig?

Eric

Eric,

3 questions there and in my honest opinion I personally say …YES, YES and not sure …However I think if “ONE” became available you would do a bang up job. You need a project “For Eric” and Eric only!

I will still hold my breath and await a budget Amtrak something . But Pete said he has a “kit” here …https://www.largescalecentral.com/forums/topic/30940/beating-the-boredom-triassic-gilpin-ore-wagon-quot-kit-quot/view/post_id/410229

As usual very nice Rick!

Eric,

I think you shortchange yourself on your skills. Unfortunately I packed up my Garden Railways Plan Sets in prep for house repair, but you might look at my web site. I have taken the GR Plan sets and updated them some based on NOT having readily available scribed siding. My plans are overall dimensionally equal to the GR sets. I think you have the skill to take my drawings and build from there. Here is a link to the page which lists all the car types I have worked on. https://gscalejunkie.com/GRPS.html

There is also an article on that page on cutting scale lumber on both a table saw and a band saw. I am not the author, but reference the article myself. https://gscalejunkie.com/Articles/MillingScaleLumberRev-01.pdf

My plans also include a parts list of all the materials, including purchased materials, needed to build each car. If you have any questions shoot me an email and I will answer as best I can. narrowgauge [at] gscalejunkie [dot] com.

Everyone,

Thanks for the tips and encouragement. I really was only dimly aware of the existence of these sorts of kits. I am not hard over on any particular prototype, so these are all options that open intriguing possibilities for the Triple O. I have to get my mill out on the railroad before I move on another big project, which gives me some time to evaluate a suddenly large range of options!

Eric

My plans are overall dimensionally equal to the GR sets. I think you have the skill to take my drawings and build from there. Here is a link to the page which lists all the car types I have worked on. https://gscalejunkie.com/GRPS.html

That is a great piece of work, Bob. Thank you.

Eric, I don’t think it would matter which of the simpler kits you started with. Any of them will be a great learning experience and a gift of personnel satisfaction on completion. Please just don’t make the mistake of trying to start out with a Hartford, Bronson & Tate, or similar complicated and fussy kit to construct.

Meanwhile back at the build(https://www.largescalecentral.com/externals/tinymce/plugins/emoticons/img/smiley-laughing.gif), things are progressing slowly(https://www.largescalecentral.com/externals/tinymce/plugins/emoticons/img/smiley-cry.gif).

Of the four sets of trucks I had for this project three are Delton plastic and one is Hartford die cast metal. The kits come with a ply cutting to use to mount the brake beams to but I decided to make new ones out of Styrene simply for the ascetics. In this picture you can see the build-up and the finished truck with brake rigging.

With four kits to work with I decided to build three of them into standard boxcars and use the material of the fourth kit to build a flatcar and a line side shed. I will use the metal trucks for the flat car for the additional weight they provide and cut framing and decking material as needed.

The Pine flat car frame with the Redwood decking being installed and this basic car is just about complete.

Since this is not a SBS tutorial we have skipped pictures and information on a lot of the basic steps involved to get the boxes together. That information is available on line as has been pointed out in the above posts. If anyone wants more detail just ask.

Here the basic cars are assembled, the three boxcars in the background and the flatcar on the left. The boxcar in the foreground is the one to be used as a line side shed. I cut out an opening and added a door built up from Styrene but stopped short of adding a bunch of windows.

That’s it for now will probably be slow in adding more info as we are in the middle of repainting the exterior of the house, have to get it done before the rainy season starts.

Does anybody still have one of those Fall River jigs available? I got one years ago and put it on the shelf… but now I’m asking “what shelf WAS that?”

TiA

we have skipped pictures and information on a lot of the basic steps

Rick, do you have any picture of the basic 1/4" ply frame with or without sides/ends? I always thought that was one of the neatest ways to build a solid boxcar, and it would be easy to replicate for any size of car.

Pete Thornton said:

we have skipped pictures and information on a lot of the basic steps

Rick, do you have any picture of the basic 1/4" ply frame with or without sides/ends? I always thought that was one of the neatest ways to build a solid boxcar, and it would be easy to replicate for any size of car.

Pete, didn’t take any assembly pictures but here are a couple I just took of the “box” stuck together from the left over car bottoms, maybe this will show what you eould like to see.

This shows the “box” as it goes together, the open side is the side of the car and the scribed ply that is the car floor if you want to leave the doors open. I opted to model closed doors on these cars so flipped the floor sheet over and put the scribbed side down to show through the “added” frame(sill) members, it can just be seen in the next pic. Remember when building a frame you don’t use the piece of 3/16 ply that is the floor of the box, just the scribbed piece.

If building the “Budget” style the supplied pieces of wood representing bolsters and needle beams glue directly to the 3/16 floor of the box, no detail involved. The partially assembled car in the background kinda shows how the scribbed siding laminates to the basic box. Like you said a pretty easy way to form up any size boxcar. I probably forgot to mention earlier that these cars are the longer 30 foot versions, the F&CC cars rather than the regular “Budget Boxcar” which were based on 27 foot cars.

Didn’t get anything else done on this project today except these couple of pictures.