Large Scale Central

Ruby Bash : 1:20.3 0-4-0 Build

Hi All, I’m going to start with a teaser and give a bit of closure for the helpful folks that posed in my silver soldering thread. I’ll add another post tomorrow detailing the history and current status of the project.

So, this first picture shows the new floor with it’s ribs soldered in place. The steel rod had some fire brick on it to hold things in place when you add the heat. I still had one that moved a bit. I had to poke it back with a scribe.

New Foor

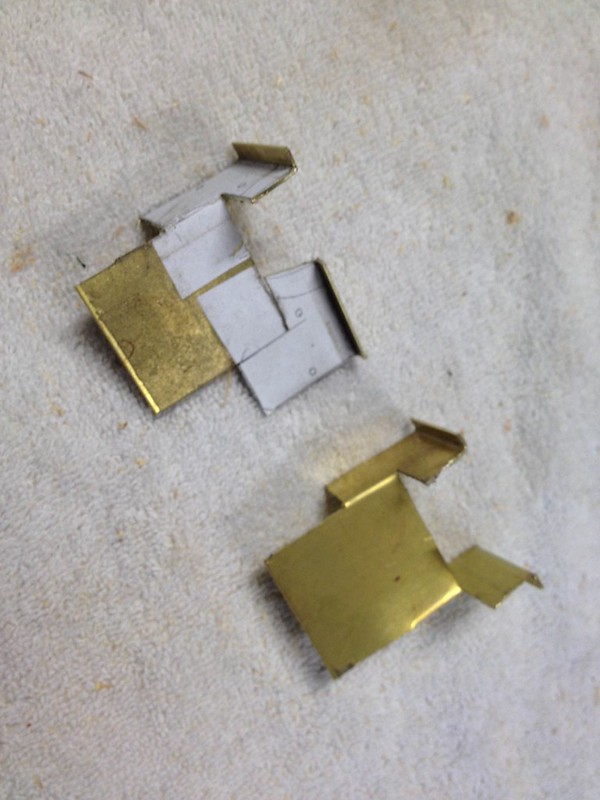
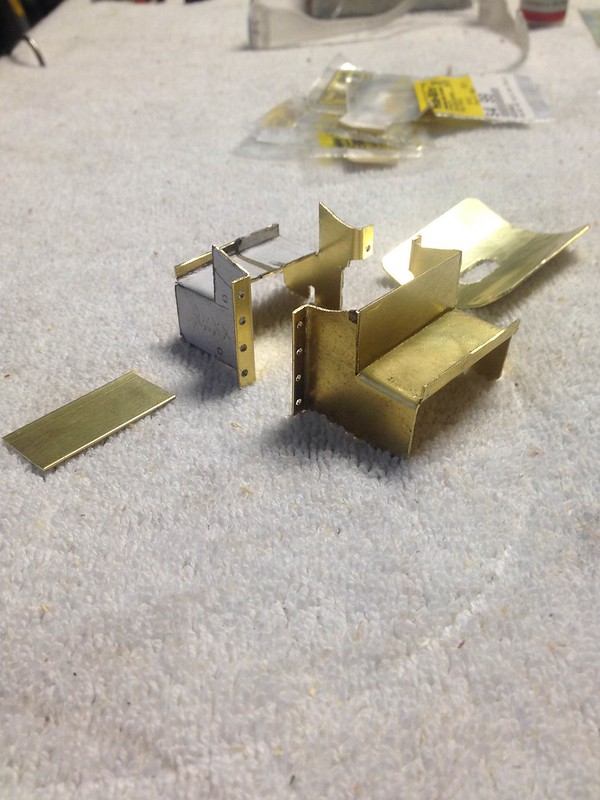
This next shot shows the mid frame parts that I bolted ans soldered.

Inner Frame

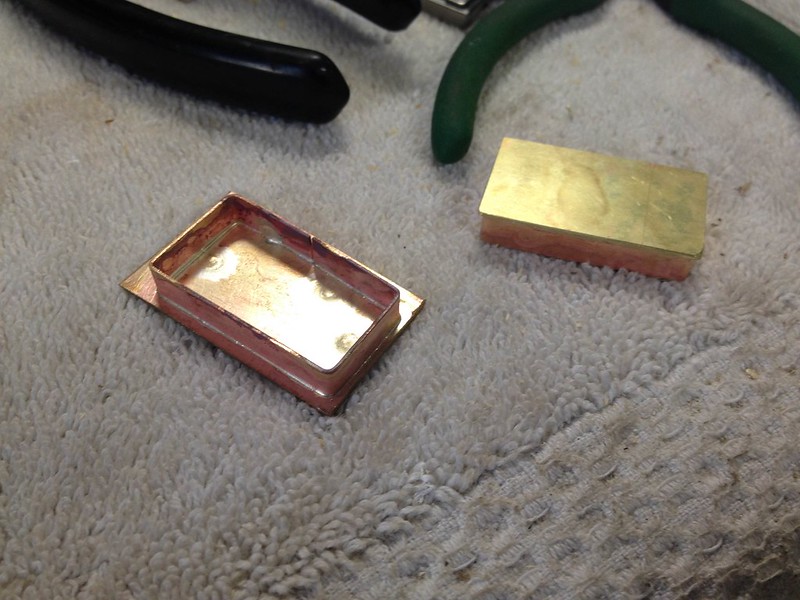
In this photo I’m using a water bath to keep the finished back end cool while I add the strips to the front.

Almost Frame

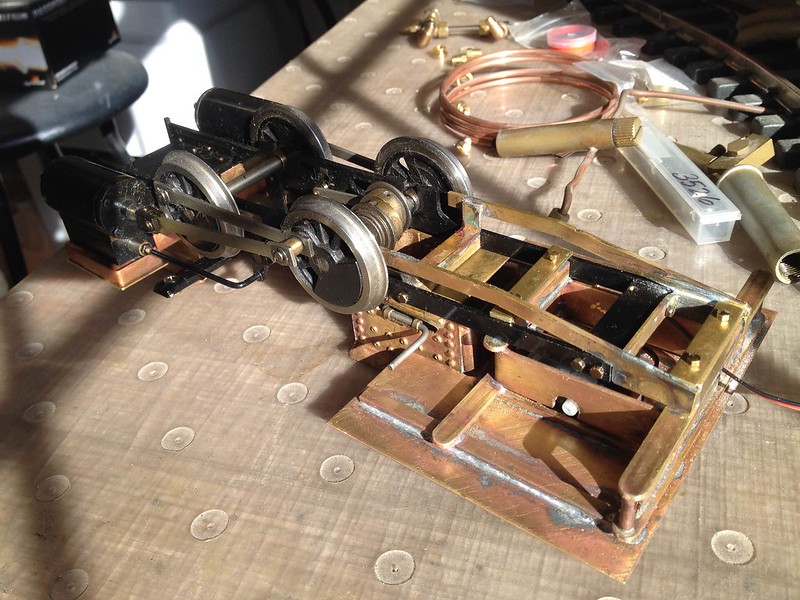
Finally every thing is soldered down to the floor, Slow and steady. I did only 2 of the 8 solders at at time. each of the 2 would be in opposite corners. I’d have a small bit of solder lying at the joint while heating and as soon as it melted and sucked it Id pull the torch away.
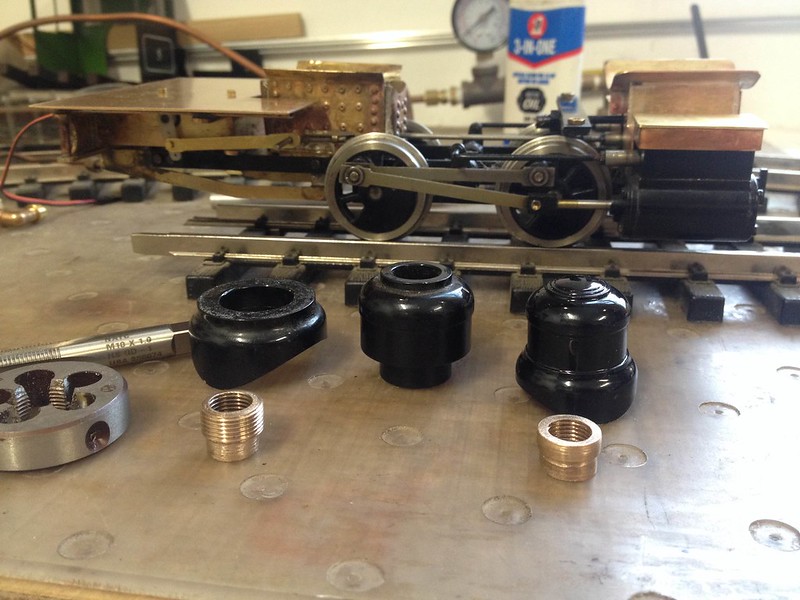
Finised Floor frame

And the back view

Floor Back

Hope you enjoy, I’ll get “the rest of the story” up tomorrow.

The ruby kit from Accucraft was my first LS purchase about five years ago. I assembled it and had some fun with it on the dog-bone of track in the yard for a few years. But soon I new that it would need improvements for me to really love it. Well I began to make the list of improvements to add, and it fast became long. First a new larger boiler boiler with fittings for feed water, a sight glass, and the usual back head steam distribution tree. The old boiler in my opinion was just too small to be a believable 1:20.3 model. I would want a tender to hold a larger butane tank, water and a Servo powered pump to pump the water into the boiler. Servo you ask? Yes, My plans are to R/C all of my loco’s so that my layout can be ground level with grades. It will also include lots of belly height areas to check things and tinker. The original build was started about 2 years ago and then stalled out for the last year. (way too many projects in my life) Also In that time span I stopped posting on that forum and landed happily here. For that reason I’ll post a link below to the original build thread on another site which mainly describes the building of the tender.

Previous Thread: http://forums.mylargescale.com/18-live-steam/25501-plrw-0-4-0-build-ruby-bash.html

So here were all of the pieces yesterday at one point. This gives you a good Idea of the construction.

Loco Parts

Here is a view that shows things a bit more assembled, with the new floor structure in place. A servo will hide under that new floor inside the framework to actuate the reverse link.

Partial Assembly

This picture shows the inside of the tender. Butane tank and and water bath/reservoir in the back. The front compartment will hold all of the electronics. You can see the Regner servo pump from Jason at the Train Dept. wedged in there at the side.

Tender Details

And finally, Every thing mocked up as far as can be. This shows the general stance of the new loco.

Full Mock up

Stay tune for more in a week or so. Hope you like.

That’s some impressive soldering there, Randy. Looking very nice.

Sweet! What are you using to punch your rivets?

Later,

K

Nice work Randy. Good to see the soldering help helped and you are moving along.

Thanks Gentlemen,

Yeah, it was good just to get talking about it and back in that mode of thinking. Once I started working I realized I had already done more silver soldering than I remembered. The frame extension an fire box were both silver soldered.

Kevin, the rivets were punched using a homemade die set that I mounted in my drill press. That was all .025" stock. There are lots of photos of this process in the old Build link above. Despite how they look it was a very good set up and moved along quickly. I’m pretty sure you had interest in the rivets back then too.

I’m already tracking down a few more various chunks of brass shape I’m going to need for the next phase. I’ll try my best to keep the gaps between postings short.

I’m going to follow this with interest. Even though you call this a bash of the Ruby, to me, it looks like a complete scratch build.

Hey Steve, Not sure It could be scratch since I’m using what I consider the hardest part to create, the chassis. But the rest you can call scratch.

The next bit I’ve been working on are the “cylinder halves”. Of coarse on this build, this is only a cover to make this area look more real than was done originally. I started with with some .025 brass sheet cutting and bending to get these two halves.

2 halves

In this shot you can see all five parts before they get put to the heat. One of the small rectangles has been wedged in to it’s half for this photo.

All parts

This is after the first soldering job. The 2 halves were bolted together and then sat on top of the smoke box flange, followed with copious amounts of heat and solder.

1st Solder

For the final touch, two caps were crated for the valve chests. Bands were formed and then silver soldered to over sized sheets. Next the sheet was cut and filed down to size. This shot shows one finished and one yet to be shaped.

Valve chest caps

Once I had the two caps, they were then soldered to the flanges on the center section. Here is the final shoot.

Final Soldering

And this shot with it sitting in it’s new home.

IMG_1002

Nice metal work Randy.

This is going to be a good looking loco.

Thank you John. I’m doing my best to make a respectable locomotive out of the Ruby. I’m getting a bit more comfortable with silver soldering the dainty things. My next attention will turn towards getting the boiler finished. I’ll need to wake the Lathe from it’s slumber and make a few fittings. I’m also going to try and build my 6 cell battery pack tonight. I ordered them almost a year ago. I hope they haven’t ruined from sitting.

Randy nice work so far. Its going to look great when done.

Thanks Shawn, I hope your right.

Here is a quick update. I put the finishing touches on the cab floor today. This entailed soldering two 1/4 x 1/4 pieces of bar to the bottoms of the frame work. Each has a match drilled and taped cover that clamps it all to the frame. I also fabricated a servo mount that holds the servo up under the floor.

CB1

Here is everything all bolted up. The servo horn will hang out and easily be connected to the Reverse rod to the left.

CB2

I also got a bit of work done on Boiler fittings and accessories today. I’ll be posting more on the boiler soon.

Just an update so I don’t leave you all hanging. Here she sits waiting for a m14x1 die to arrive and make the final boiler bushing. It’s the one that belongs under the steam dome. Ironically the sand dome that goes over the front fitting I lost. As soon as my new die arrives I can make the last fitting and solder everything together. Until then I’ll be watching the build challenge.

Boiler fittings

I have a sand dome if you want it.

Thanks Eric! Sending a PM.

Nice work. After seeing all the cool things done with a Ruby has me tempted to get one some day.

Shawn, I encourage you to try. This is my first attempt ever at all all of this brass fabrication and silver soldering too. Not to mention being very new to machining and making the various fittings. I’m very happy with how it’s turning out and I’m learning a ton in the process. I would say if you don’t have a lathe available you would have to be very creative with how you used your drill press. Take the plunge!

Randy Lehrian Jr. said:
Shawn, I encourage you to try. This is my first attempt ever at all all of this brass fabrication and silver soldering too. Not to mention being very new to machining and making the various fittings. I’m very happy with how it’s turning out and I’m learning a ton in the process. I would say if you don’t have a lathe available you would have to be very creative with how you used your drill press. Take the plunge!

Thanks Randy. I just might give it a try. I do have a Lathe. I acquired an old South Bend lathe last winter. I just have to set everything up and build a new workshop.

Sounds like you are ready to go Shawn. I’m using a south Bend 10" Great machines.

My M14x1 die finally came on the proverbial slow boat from china. Also at the same time, our good friends up at the Winnegance and Quebec Railway were kind enough to send a spare sand dome down. In this picture you can see the long awaited die and the new dome. Also pictured, are now 2 boiler fittings for the domes. Behind all this wonderful stuff You can see that I made a bar to link the horn on the servo to the reverse rod. I ran it on air and was able to reverse it well with the servo.

New fitinggs

In this shot you can see all of the parts that need to be soldered to create the boiler. I made all of the parts in the picture except for the smallest fitting in the front. I may be able to give the silver soldering a shot tomorrow. Just need to give the boiler tube one last shinning up first.

all fitings

Before I talk to the photos below, let me pass on a great tip. I’m using used pipe for my boiler, To that end it probably had 80 years of crud stuck to the inside. Long ago when I cut it to size, I tried for hours one day to clean it. Sanding soaking in lime away sanding and blah blah blah. Well I still didn’t think it looked good enough to solder on, so I went and bought a secret weapon. A cylinder honing tool at the auto store. In 10 minutes it looked perfect. All this for only $35 dollars. I wish it was the first thing I had tried long ago.

Well Ive done the first couple rounds of soldering on the boiler with good but mixed results. Every thing is in, but not sealed. The good part is that the first solder of the tube sheets and flue went great. It’s messy but very sealed. All of the fittings are soldered very well too, except for two which are hardly soldered.

It should be pretty easy to heat them back up and seal them for good.

IMG_1062

IMG_1063