Large Scale Central

Rebuilding an Accucraft Mogul for my SPRy

Hi,

I found a used Accucraft livesteam Mogul on eBay for a very good price and couldn’t resist. This one will become #1 on my Southern Palatinate Railway.

I’ll go to rebuild her to the look of the Colorado&Southern Moguls , which are favorites of mine. Therefore I’ll add some changes to the tender, which acutally needs a lot of rebuilt, and I’ll shorten the wheelbase of the loco to a more C&S-style wheelbase. I found photos on the internet showing such a rebuild and I like it much more than the Baldwin-style long wheelbase.

Here’s the loco as she arrived in my workshop this week.

And beside my Bachmann C19. I find the Mogul is a perfect match.

Gerd

sounds cool. I’ll definitely be watching how the wheelbase move goes

Hello,

I dismantled the loco down to the frame for the changes on the chassis.
(https://waldbahner.de/wp-content/uploads/2018/12/Lok_6.jpg)

Once the wheelsets are removed, I took a closer look to the frame. You can barely see some marks on the frame, where the axlebearing will be located after the modification.

(https://waldbahner.de/wp-content/uploads/2018/12/Lok_9.jpg)

Now comes the hard part - I cut the new slot into the frame. As it’s made from steel, I used an angle grinder for rough cutting and finally filled the slot to proper dimensions. Be carefull to get a proper slide fit for the axle bearing. You have to file away a few millimeters of the firebox-sheet on the inside as well to make space for the lip of the axle bearing.

(https://waldbahner.de/wp-content/uploads/2018/12/Lok_11.jpg)

The steel frame is rigged enough and will keep the axle right in place. If you like, you might add a piece of material to the rear end of the new slot to close the gap, but it’s not needed to keep the bearing in place. Once the springs and lower bearing lock are in place, the bearing will suspend and work as before, just on the new location.

(https://waldbahner.de/wp-content/uploads/2018/12/Lok_12.jpg)

I closed the old slot with the original bearing locks and made new ones for the new location.
(https://waldbahner.de/wp-content/uploads/2018/12/20181215_215852.jpg)

Last step is to shorten the connection rods. I determined the correct length first and used a lap joint and silversolder to reconnect the halfs of the rod. It still needs some finishing.

(https://waldbahner.de/wp-content/uploads/2018/12/20181215_233848.jpg)

And here we are - A 2-6-0 chassis with shortened wheelbase.

(https://waldbahner.de/wp-content/uploads/2018/12/20181215_233903.jpg)

Next is to reinstall the brake detail, adding some brake cylinders at the rear and installing a Kadee coupler to the pilot.

Gerd

This is a good project Gerd! Looking forward to seeimg your progress.

Gerd, Very nice!

Jason

Nice work, Gerd. Thanks for sharing your progress.

Hi folks,

I found some minutes “between the years” as we call it in Germany (meaning the time between Xmas and NewYear) and did some progress on my mogul.
I reinstalled the brake rigging and added two brake cylinders made from brass stock. All is non-functional. There’s a brake cylinder on each side as typical on such engines.

20181216_170216.jpg

Here’s a view from the underside. Due to all the black paint, the details are not very vissible.

IMG_20181227_220751.jpg

Next I spend some attention to the front pilot and tried to install a Kadee-coupler. the first attempt with a #830 worked well, but looked terrible.

20181216_130759.jpg

So I rebuild the whole pilot again and installed a #835 instead, which turned out perfect. I also installed a brake hose.

IMG_20181227_220721.jpg

As I have to wait for some parts to continue work on the loco, I’ll spend some time on the tender next.

Gerd

Great work Gerd. As someone who worked briefly as a trainman/brakeman, I can really appreciate having the front and rear airline/angle valves on the engineer’s side of the locomotive. When coupling cars by yourself you always want to have eye contact with the driver, so this saves you from having to climb or reach over to connect the hoses and feather the valve open. The only detail to consider on the pilot end is having the gladhand face away from the coupler. Otherwise it would be very difficult to connect.

Hi,

thanks for the hint, I’ll turn the gladhand during the next workshop session.

Gerd

Hey, Rocky,

you may want to reconsider your comment, glad hand would be open to center of the gauge, including when placed on the opposite side as Gerd has currently. I worked in all manner of train service in preservation and as you sugest would just not work. think about it.

Al P.

Hi Al, It really does work. Check out this Portland Terminal switcher http://www.rrpicturearchives.net/showPicture.aspx?id=1037616

They were all like that on the PT…including Conway (now on Downeast) Scenic 1055 which even has backward angle valves believe it or not. (Yes, 90DEG for open)

Hello,

as announced, I did some work on the tender. My first plan was to rebuild the original tender frame but I got to the conclusion, that it might be much easier to build a new frame from wood instead.

(https://waldbahner.de/wp-content/uploads/2019/01/20181218_203028.jpg)

The new frame is longer and narrower than the original one. I’ll go to model the new tender to the style and type of the tender on my Bachmann C-19.

(https://waldbahner.de/wp-content/uploads/2019/01/20181218_203052.jpg)

From the original frame, I salvaged all detail parts and attached them on the new frame. The bolsters got cut to get a longer wheelbase.

(https://waldbahner.de/wp-content/uploads/2019/01/Mogul_3-e1546880000495.jpg)

The rear foot board was made from brass.

(https://waldbahner.de/wp-content/uploads/2019/01/20181218_223522.jpg)

And here’s the rebuild loco so far. I really like the longer tender together with the shorter wheelbase on the loco. It changes the overall look so well.

(https://waldbahner.de/wp-content/uploads/2019/01/20181218_223608.jpg)

In the meantime, I got the RC components so I can continue work on the loco as well.

Gerd

Real nice.

Thanks David, by now, the rebuild works better than expected, also the result.

I started to sand-blast the paint off the tender shell, but that paint is very sticky on the brass sheets. This will take some while.

Gerd

awesome looking with the shorter wheel base .

Thanks Dan.

I printed a line drawing of C&S Mogul #22 in 1:20.3 scale and compared this with my loco. The tender is a bit shorter on my engine, while the boiler is longer. The wheelbase matches neraly perfect. As I don’t model a specific prototype, I’m very happy with the result so far. You can also see that I managed some further progress on the tender in the meantime - I’ll share the details later this week.

Bild

Gerd

Hello,

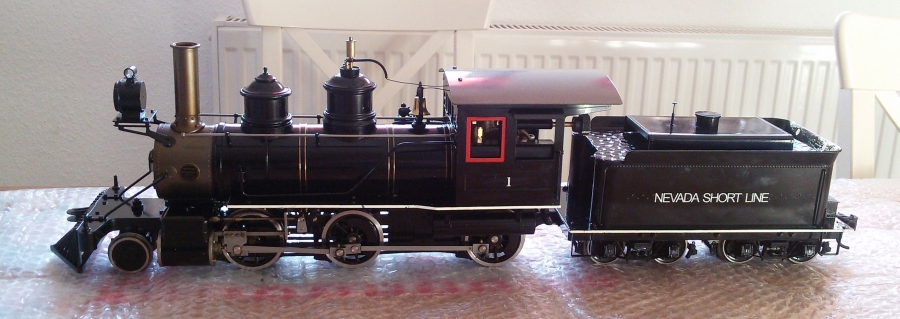
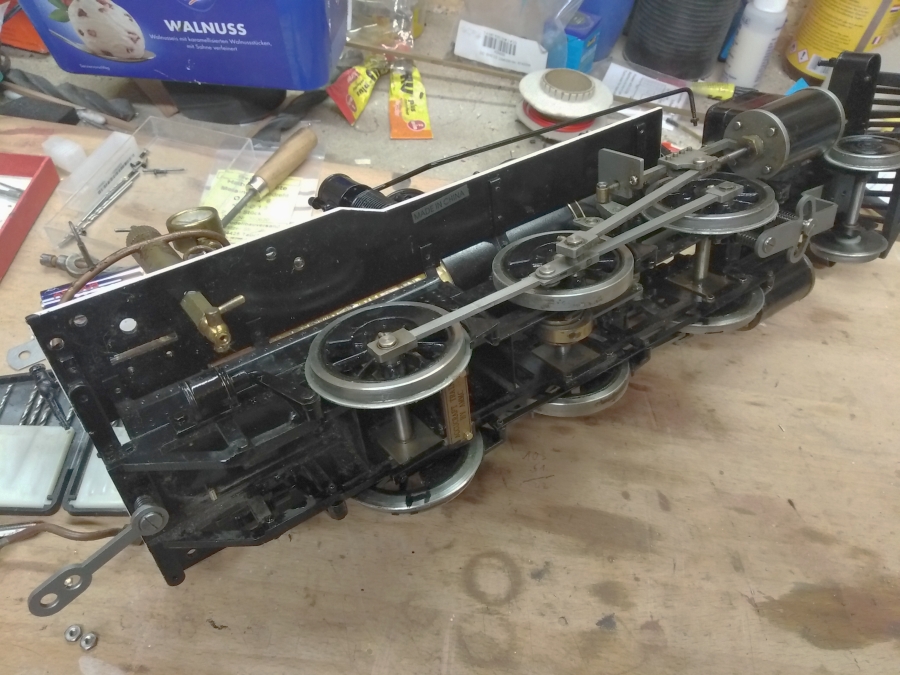
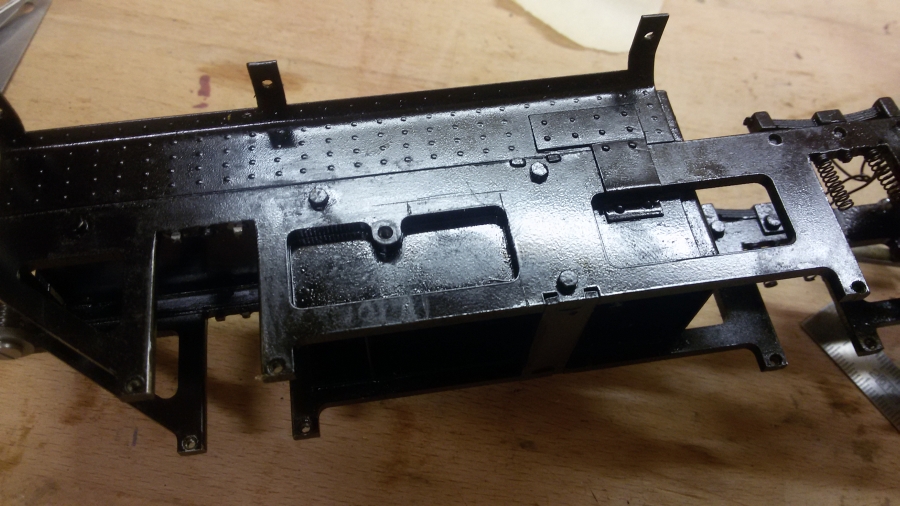
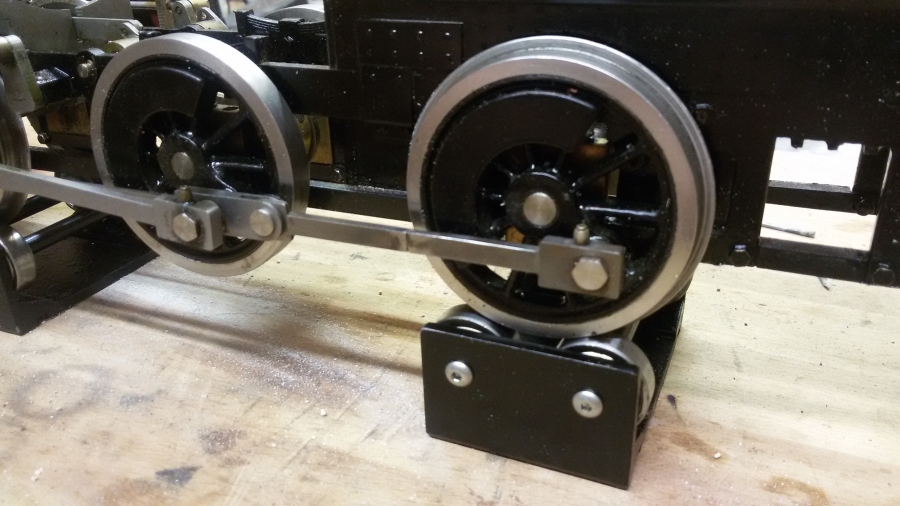
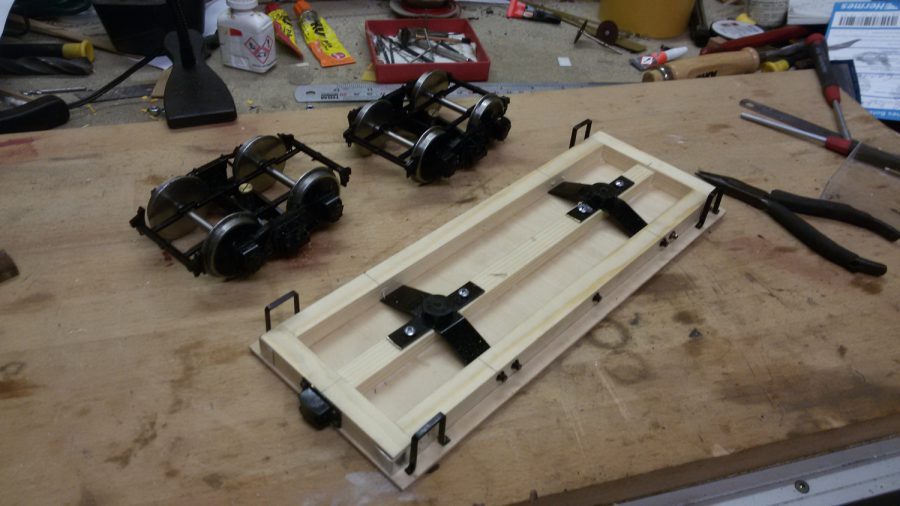
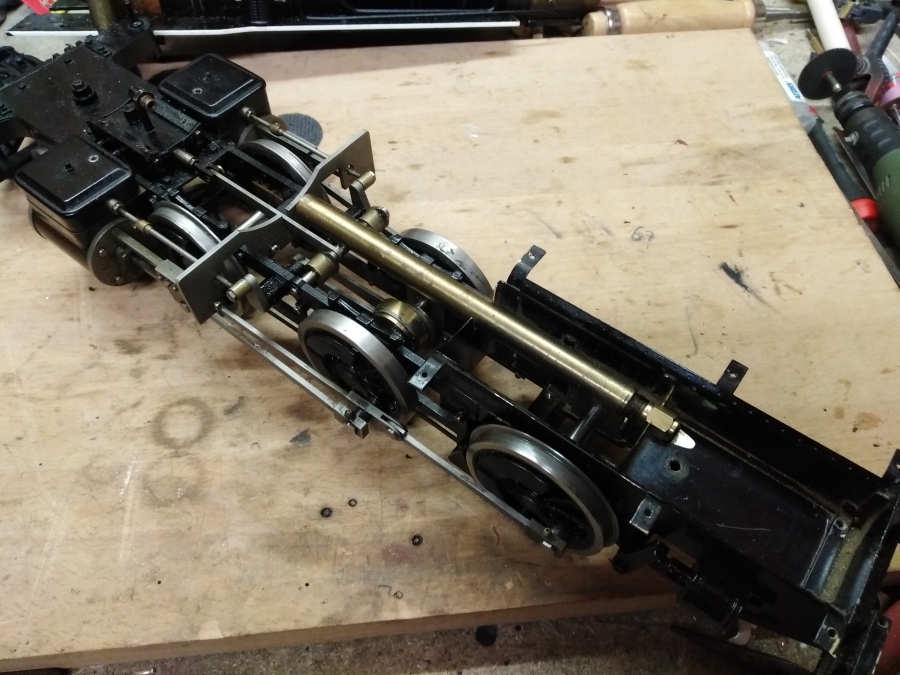
as promised above, here’s the latest progress on the tender body. I sandblasted the tender shell to remove all the paint. This makes any soldering action easier and allows some changes to the tender design. The paint was very sticky and it took me some while to get it off. Parallel to the sandblasting, I painted the tender frame, and let the paint rest to dry.

(https://waldbahner.de/wp-content/uploads/2019/01/IMG_20190105_203439.jpg)

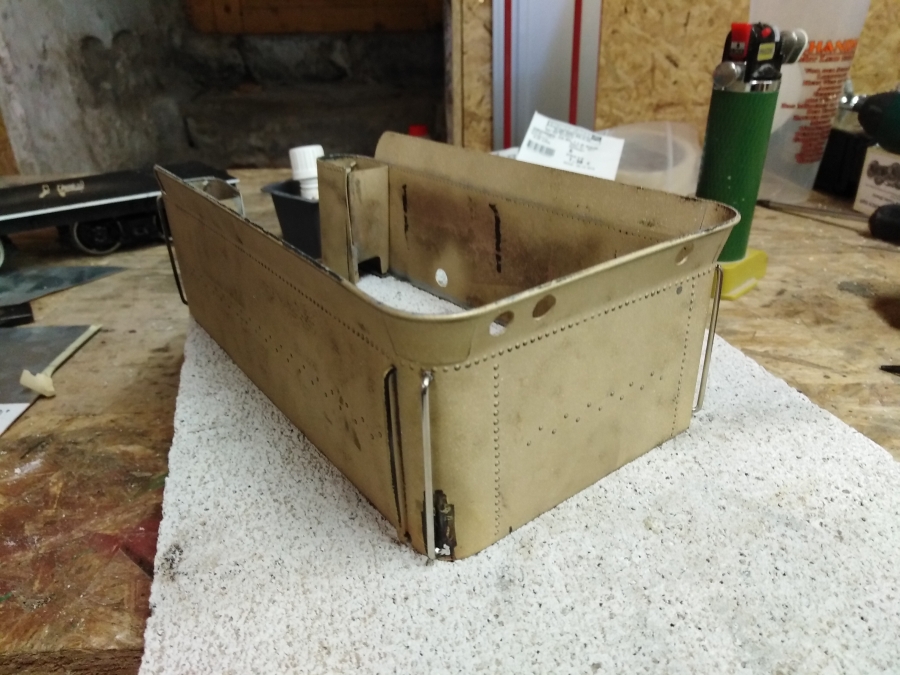
On the tender, I relocated the rear hand rails from the side, into the bend, just as on the front end. First I soldered new rails in place, afterwards, I snipped the old ones off and filed them flush with the tender shell. Before that, I un-soldered the tender brackets, which will get relocated as well, while my tender frame is narrower then the original one.

(https://waldbahner.de/wp-content/uploads/2019/01/IMG_20190105_210054.jpg)

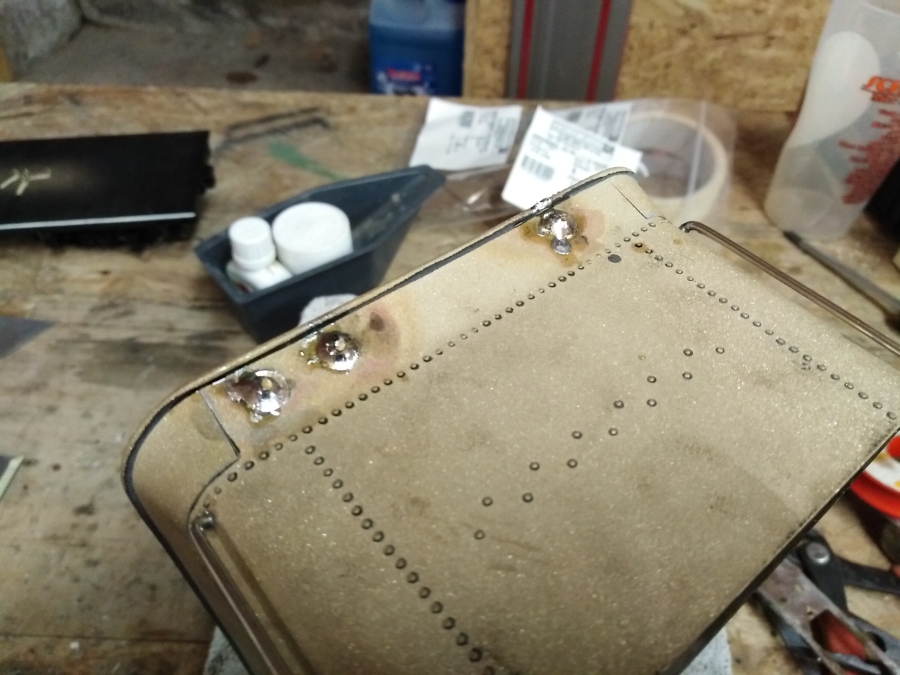
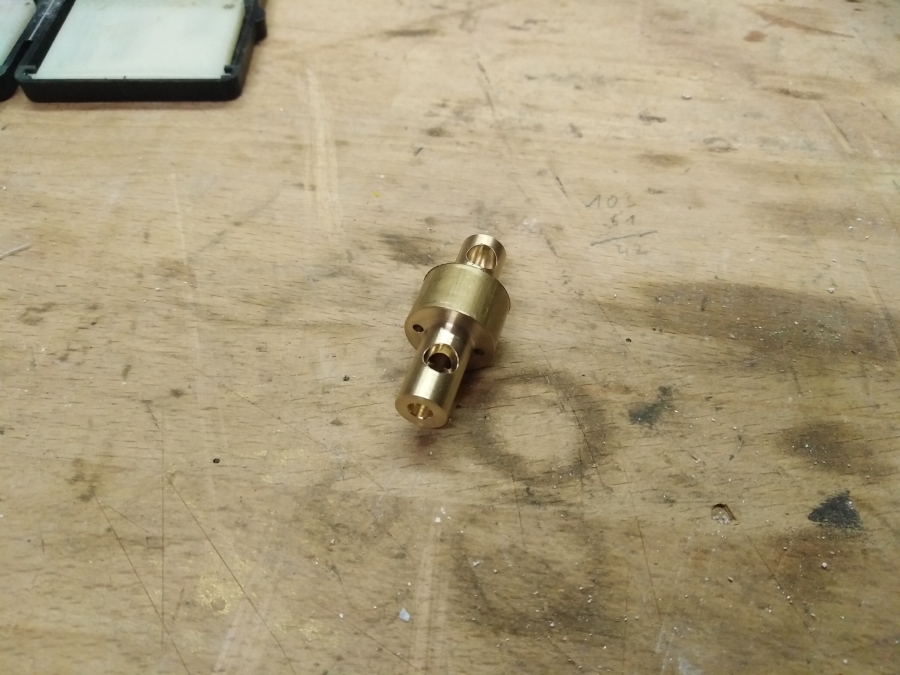
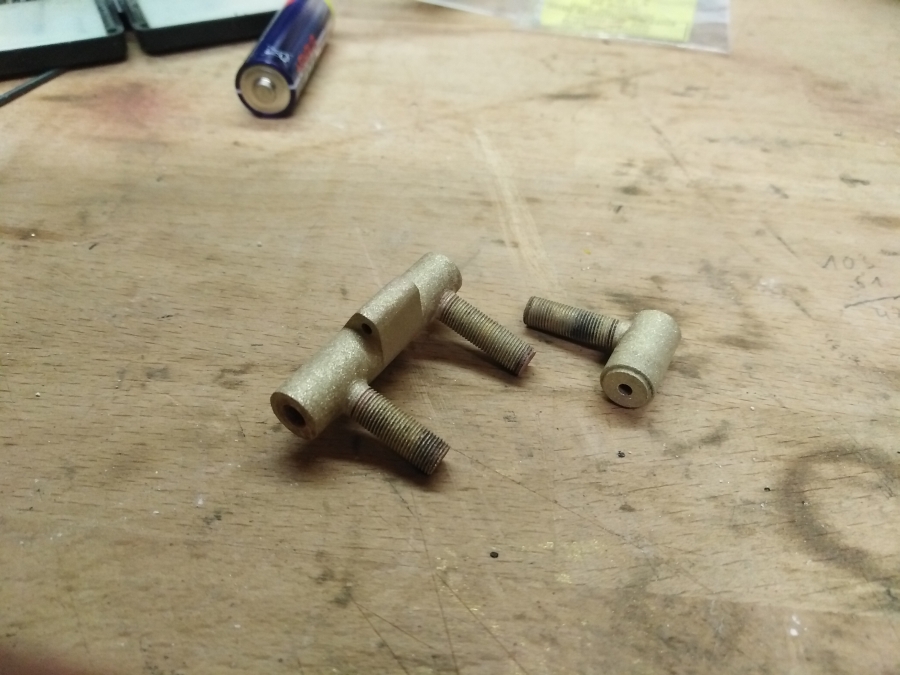
Another task was to fill in the holes in the tender shell. I mad small plugs on the lathe and soldered them into the holes.

(https://waldbahner.de/wp-content/uploads/2019/01/IMG_20190105_212104.jpg)

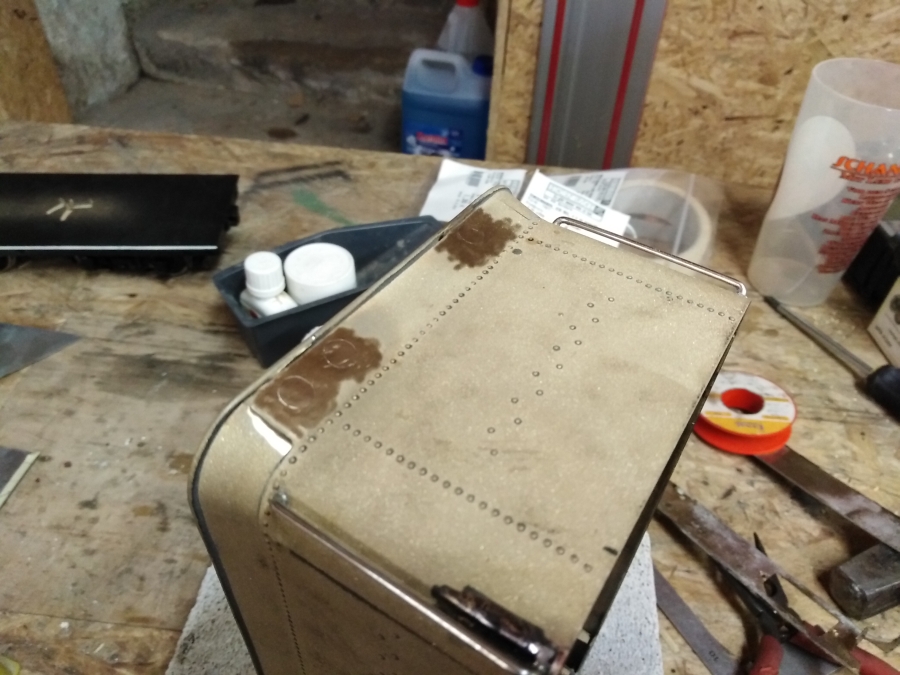
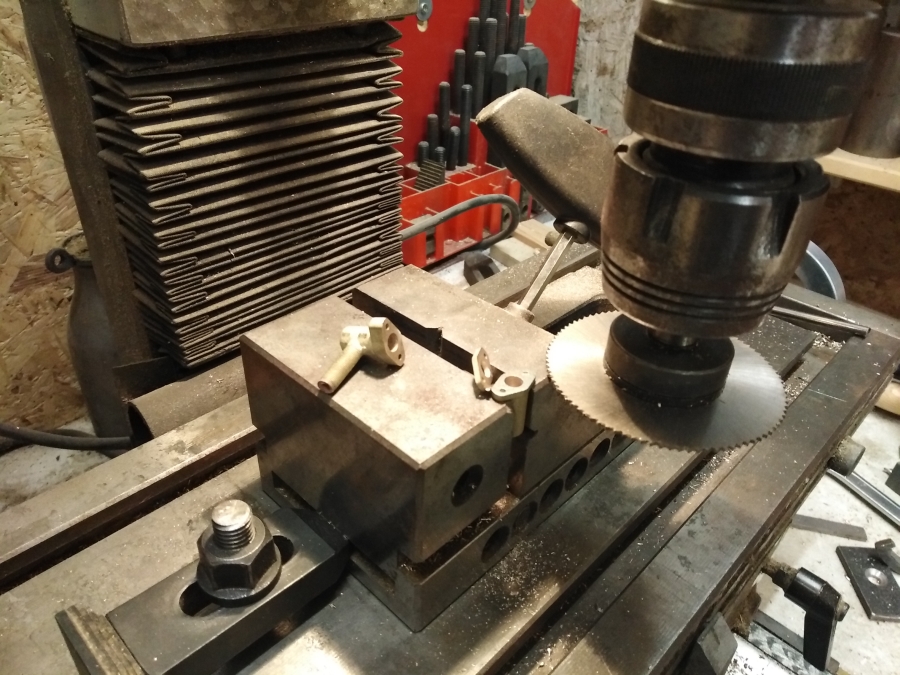
Then I sanded them flush with the tender shell on both sides. Once these are sandblasted and painted again, they wont be visible.

(https://waldbahner.de/wp-content/uploads/2019/01/IMG_20190105_212834.jpg)

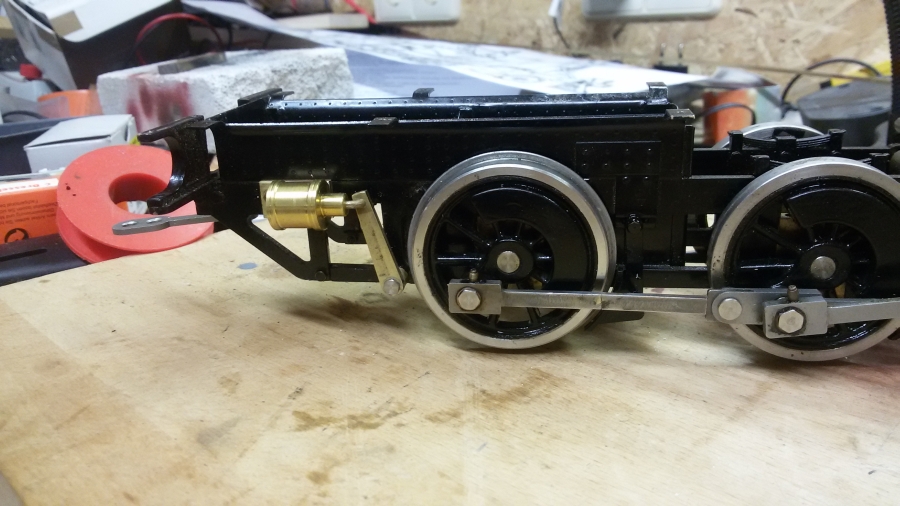
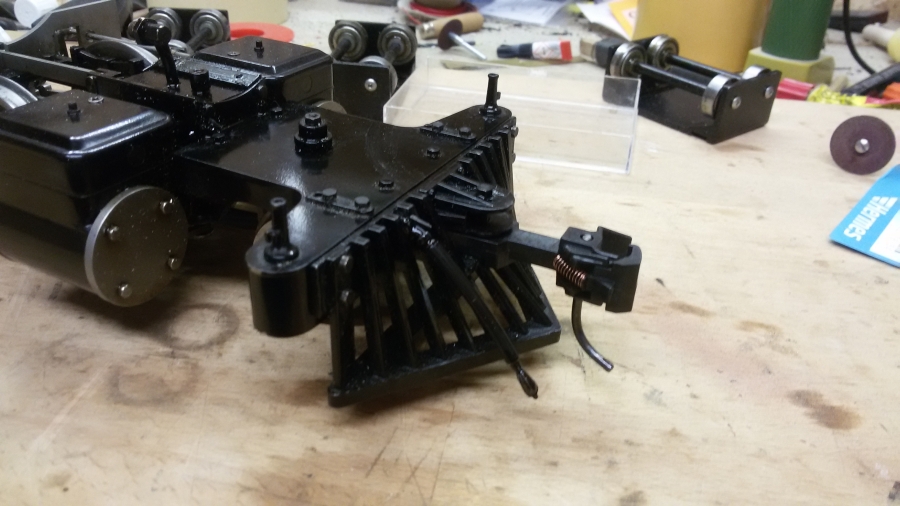
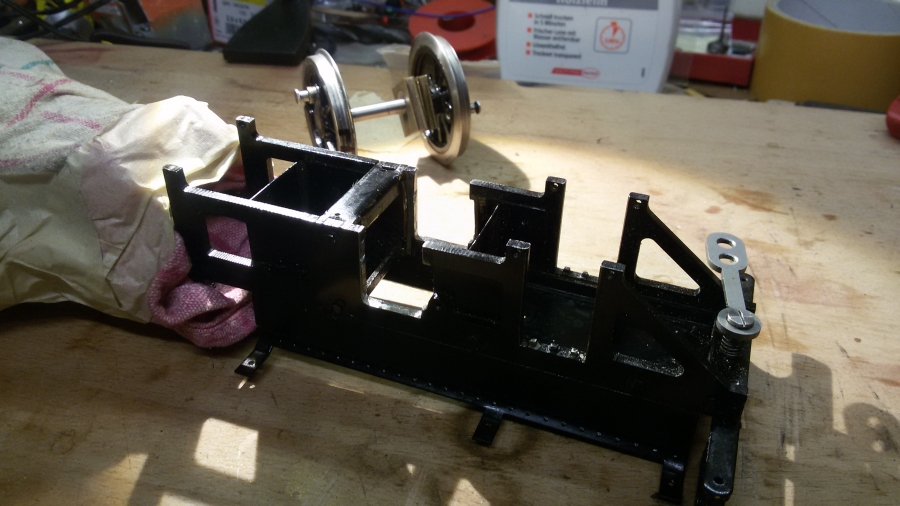
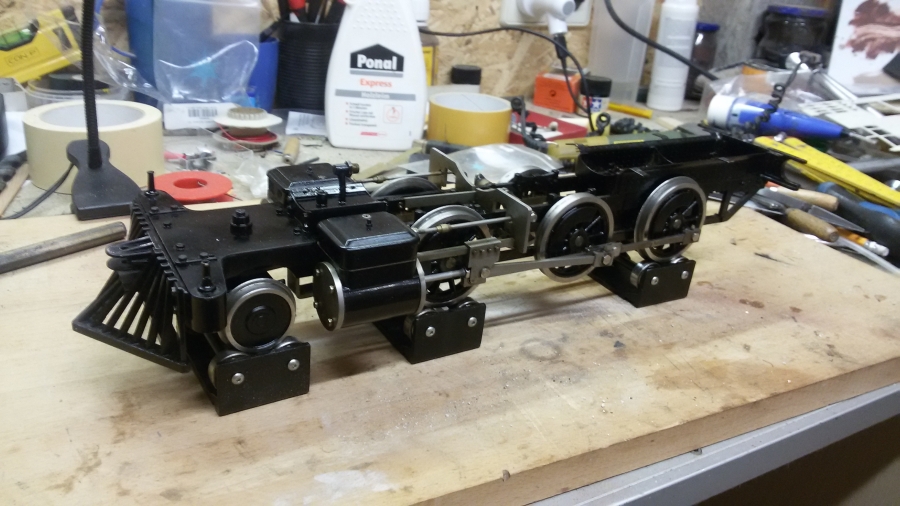
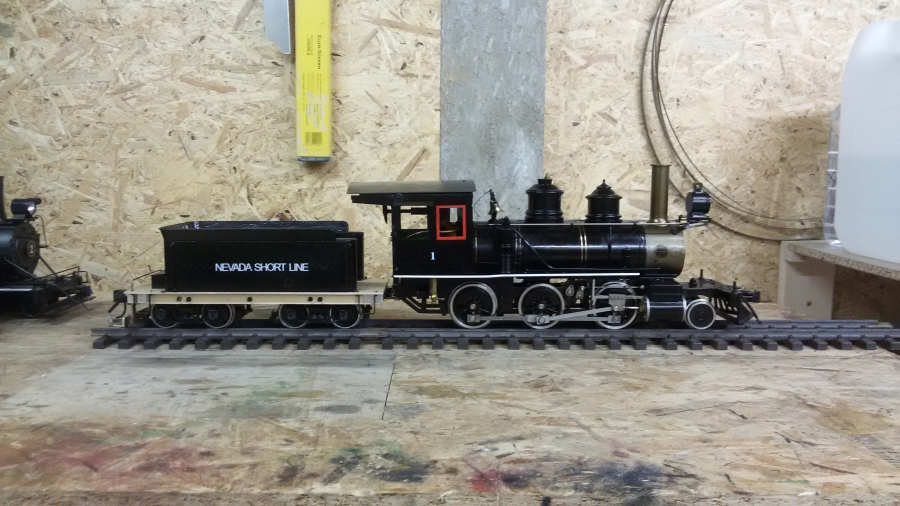
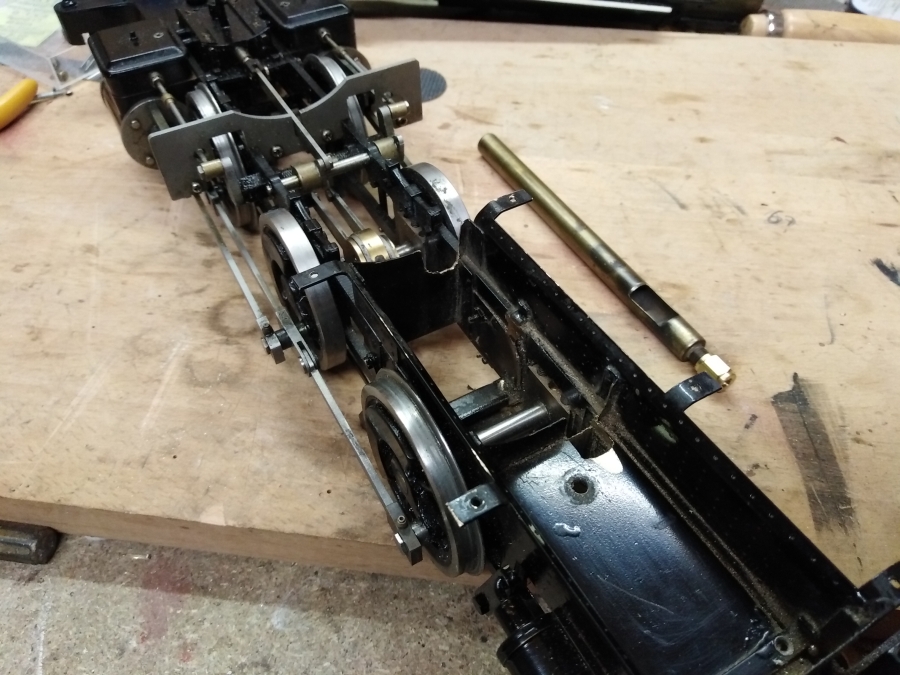
The fixed tender body does look much better now. Still missing were two new brass sheets to cover the front deck of the tender tank. Here you can see the tender brackets back in place at a right angle to the tender ends.

(https://waldbahner.de/wp-content/uploads/2019/01/IMG_20190105_215727.jpg)

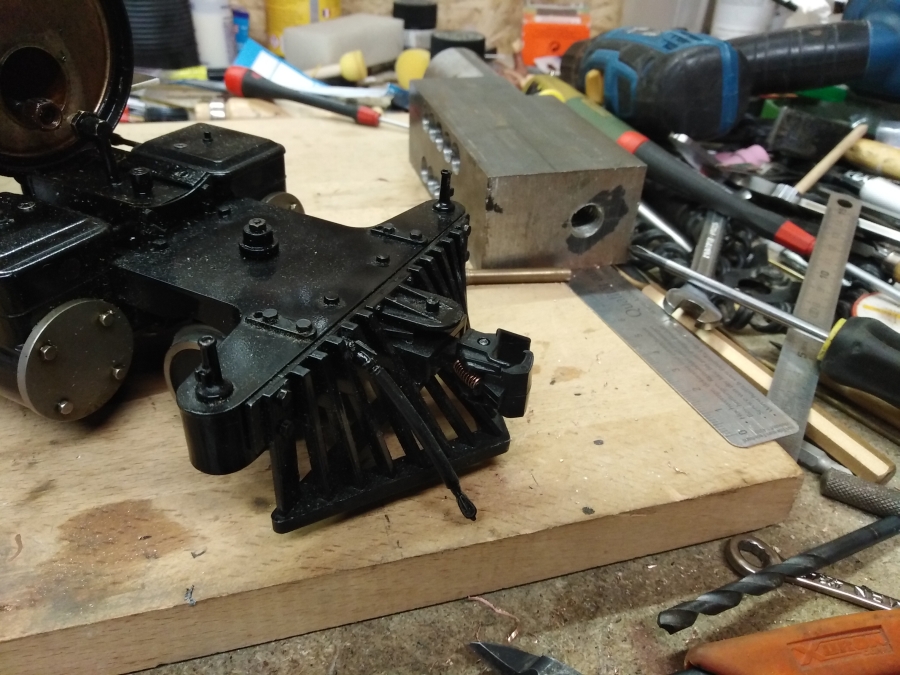
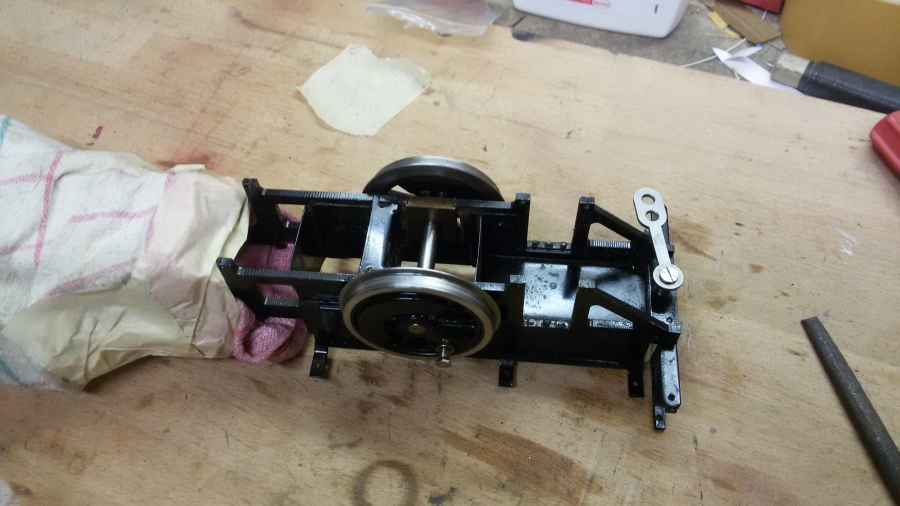
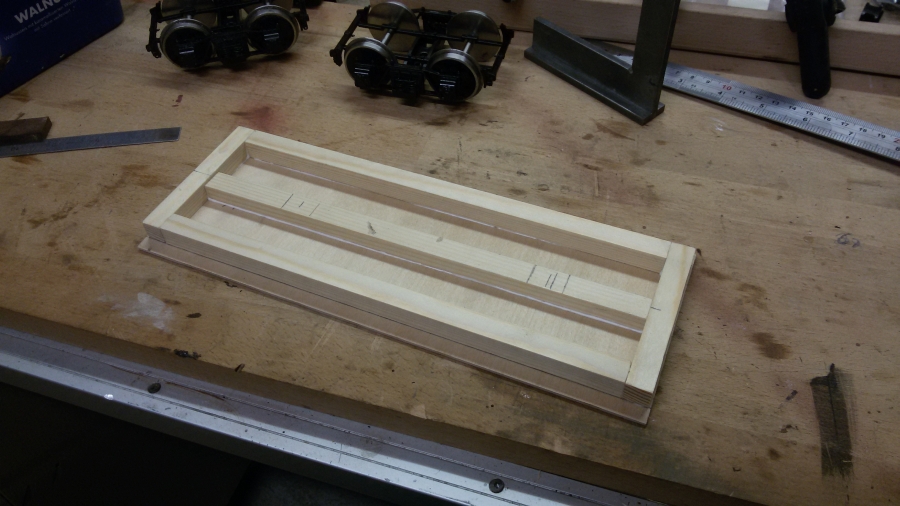
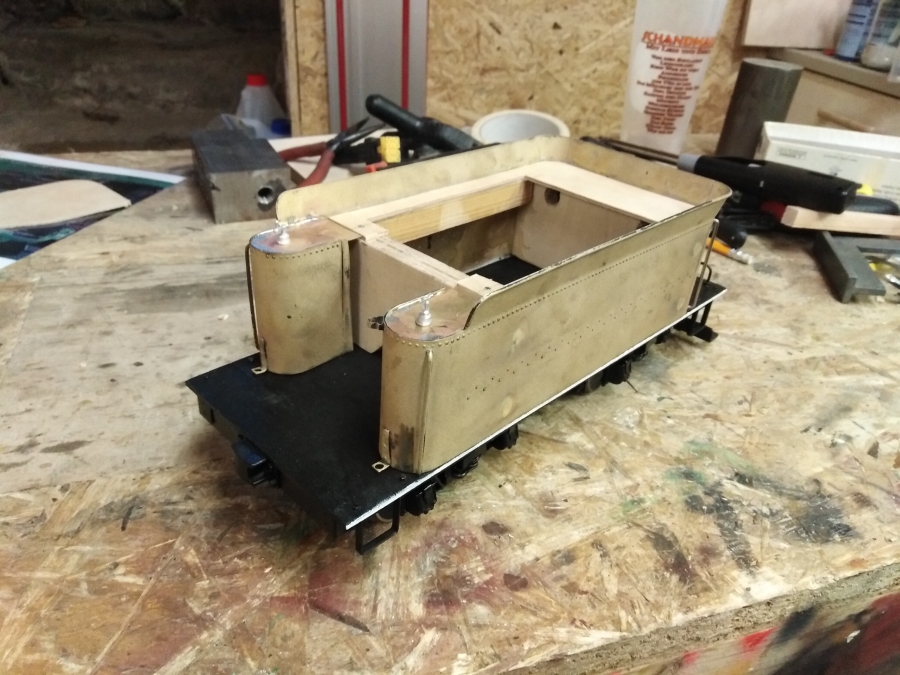
As the inner parts of the original tender were no longer useful, I removed them and decided to install a wooden interior to the tender. I epoxied two blocks of 1/2″ plywood at the far ends into the brass shell.

(https://waldbahner.de/wp-content/uploads/2019/01/IMG_20190105_224436.jpg)

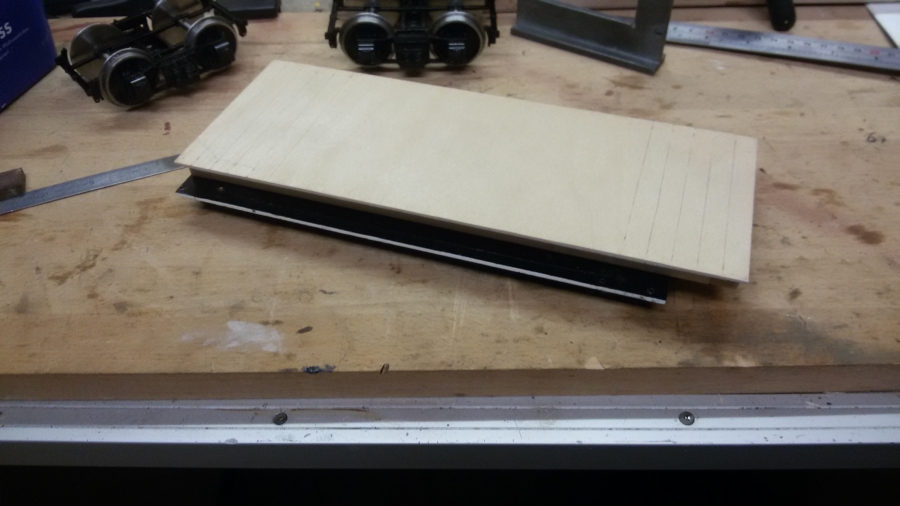
Later I added the top from 2mm plywood.The whole wooden part will be hidden by the coal bunker above, so I’m happy with this solution.

(https://waldbahner.de/wp-content/uploads/2019/01/IMG_20190108_164542.jpg)

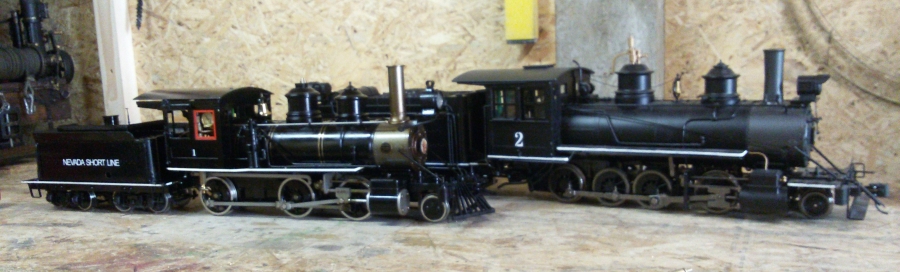
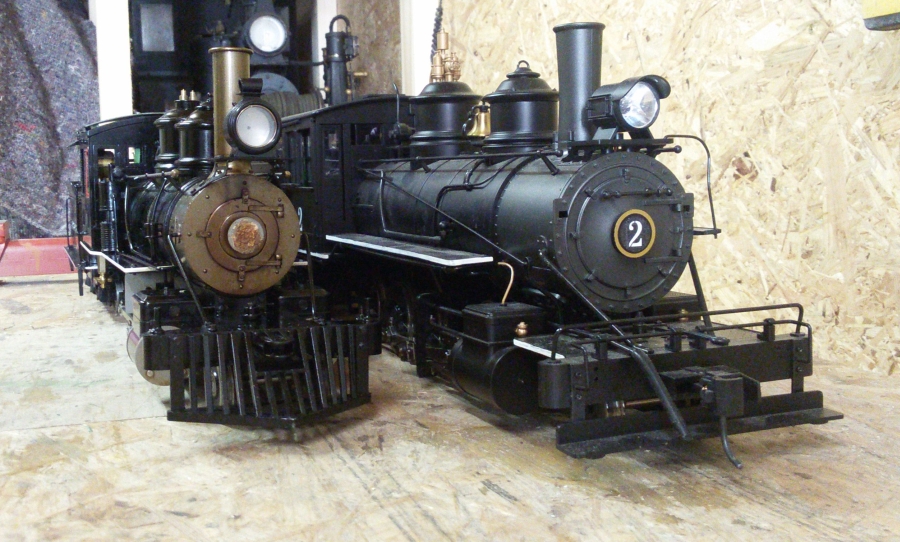
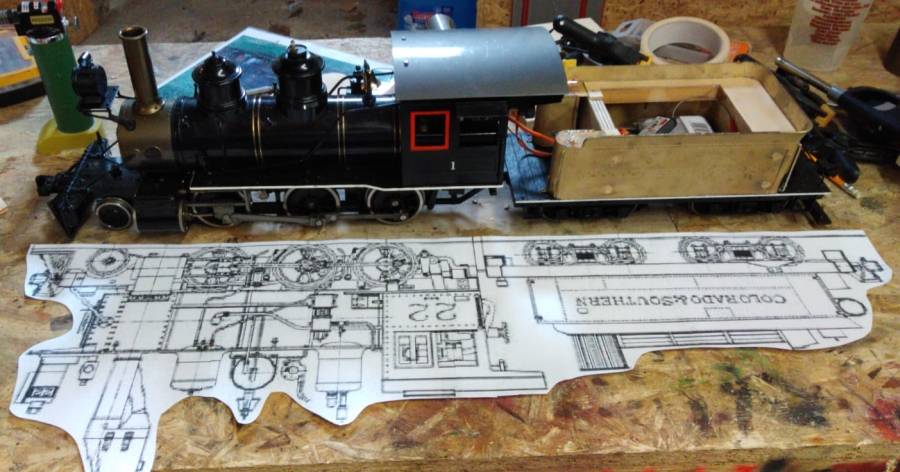
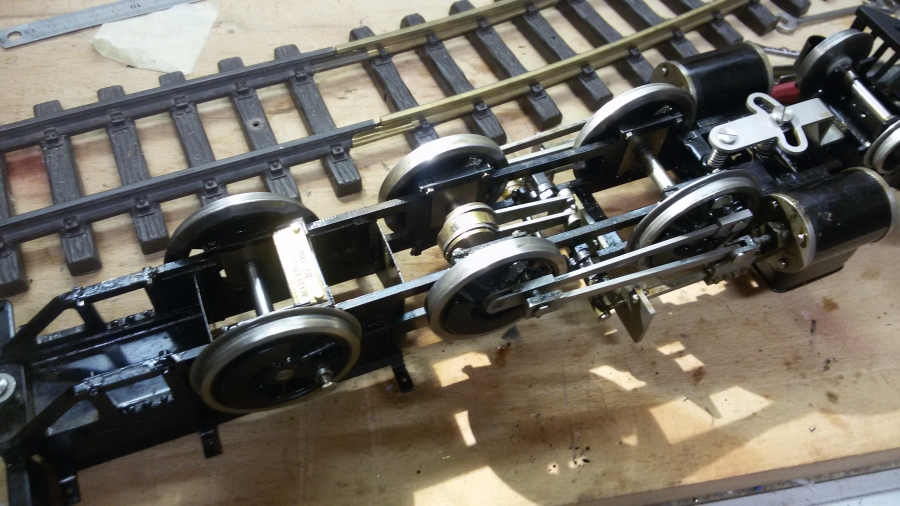
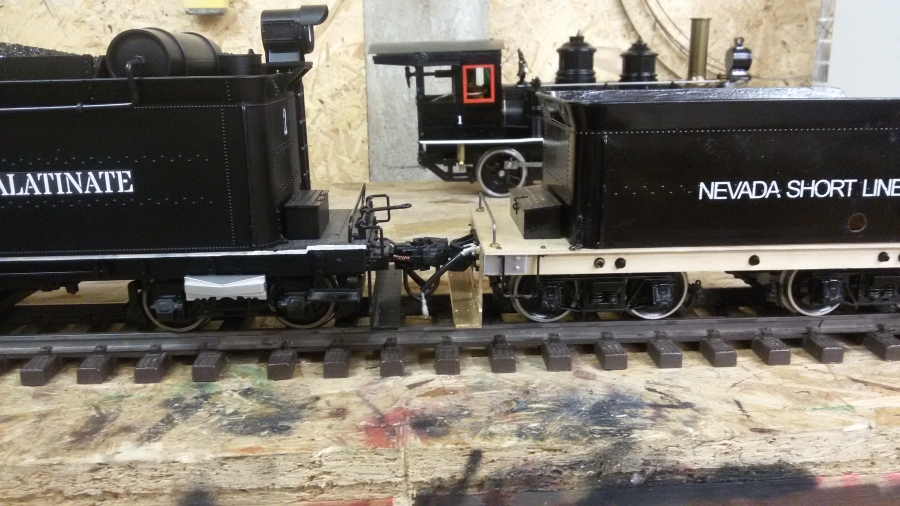
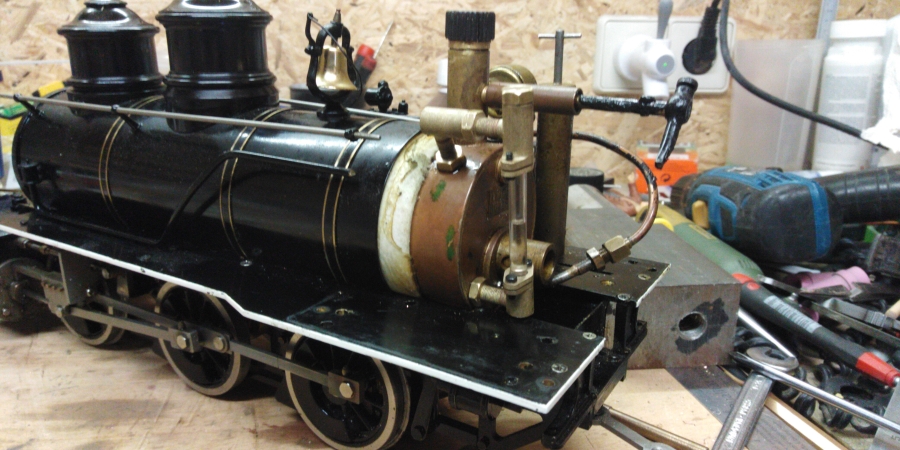
At the rear end of the tender, I placed the air tank, which was originally located under the cab. I use several Colorado & Southern Moguls for inspiration on this project. There are still lots of details missing and paint off course.

(https://waldbahner.de/wp-content/uploads/2019/01/IMG_20190108_164547.jpg)

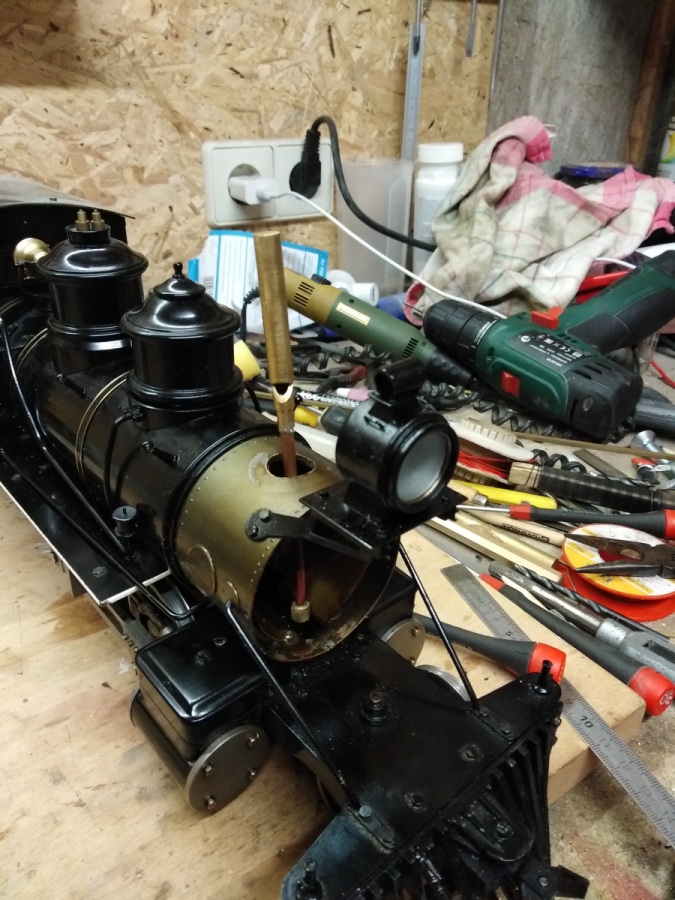
Now it’s time to get some more progress done on the loco. More on this will next week :wink:

Gerd

Hello again, I did some progress on my Mogul project.

Since the early AC boiler had no water gauge, I made the required fittings from brass and installed a home made water gauge.

I made all required parts in one single piece and sliced it into the separate parts at the end of the process.

(https://waldbahner.de/wp-content/uploads/2019/01/IMG_20181227_154145.jpg)

Shape finished, connecting pipes with threads silver-soldered in place and finally sand-blasted. The elbow will be used on top of the boiler and still needs some drilling and taping.

(https://waldbahner.de/wp-content/uploads/2019/01/IMG_20181227_195342.jpg)

Here I cut the single unit of the fitting into the top and bottom section, as well as into two clamping flanges.

(https://waldbahner.de/wp-content/uploads/2019/01/IMG_20181227_202404.jpg)

Here’s the finished water gauge installed on the boiler.

(https://waldbahner.de/wp-content/uploads/2019/01/IMG-20181227-WA0020.jpg)

Now I’m trying to fit a steam whistle…

Gerd

Nice machining work, Gerd. I assume the parts started out as round bar stock?

Yes Dan, all is made from round bar, using lathe and milling machine.

After some research, I found some space inside the frame to install a whistle. I had to do some cutouts at the firebox sheets.

(https://waldbahner.de/wp-content/uploads/2019/01/IMG_20181229_202056.jpg)

Finally I was able to install a long brass whistle here, which will be hidden by the boiler.

(https://waldbahner.de/wp-content/uploads/2019/01/IMG_20181229_202048.jpg)

Once the whistle was in place, I mounted the boiler back to the chassis. When installing the steam exhaust pipe, I cracked the fragile threaded end of the thin copper pipe. So I took the advantage and made a new exhaust pipe with a so called chuffer, which is an exhaust chuff sound enhancer.

(https://waldbahner.de/wp-content/uploads/2019/01/IMG_20181229_232939.jpg)

Gerd