Every railroad bridge is different. They were built based on many variables involving the geology of the location, loading requirements, availability of materials, current engineering knowledge, and the resources of the railroad. Even though each bridge was different, most railroads followed a set of standard practices and construction methods that resulted in similarities from one bridge to another.
For example, the Rio Grande Southern Railroad (RGS) followed loosely based standards similar to those of the Denver & Rio Grande Western Railroad (D&RGW). For a detailed explanation of RGS trestle construction methods, please see my article on the subject at:
http://www.rhyman.org/articles/trestles-rgs-style
My garden railroad is set in the late 1930’s – early 1940’s timeframe. The outer loop represents the RGS. Bridges and trestles on this loop follow the standards outlined in my article and are designed to handle heavier K-27 and K-36 locomotive traffic.
The inner loop represents an older branch line railroad that used several wooden Howe truss bridges. Howe truss bridges used wooden beams for the diagonal members, which were in compression. It used steel rods for the vertical members, which were in tension. The Pratt truss was the opposite. Thus, because the diagonal members are longer, the Howe truss used less of the more expensive metal. It made good use of the cheap wood which was readily available. These model bridges simulate wood truss bridges that were popular from the mid 1800’s through the early 1900’s. On my layout, they represent bridges that were built in the 1890’s and were never replaced due to limited resources. These wood truss bridges were not capable of supporting heavy traffic but were fine for smaller Shay, Climax, and C-class locomotives.
I have already built two different Howe truss bridges that will go on the inner loop. Both of these bridges were built and/or modified from kits and plans formerly available from Smith Pond Junction (SPJ). The first one is a 36” span through truss bridge. I built this one from a kit about three years ago and posted the review here:
http://largescalecentral.com/forums/topic/24475/howe-truss-bridge-kit
The second is a pony truss bridge with a 24” span. I also built this one from a kit about a year ago. It has been sitting on the shelf, along with the first bridge, waiting for me to start building the inner loop.
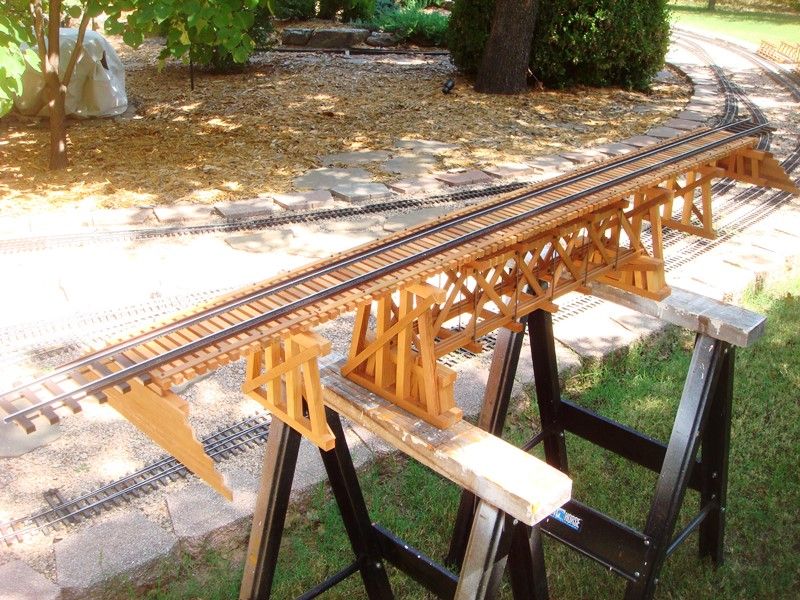
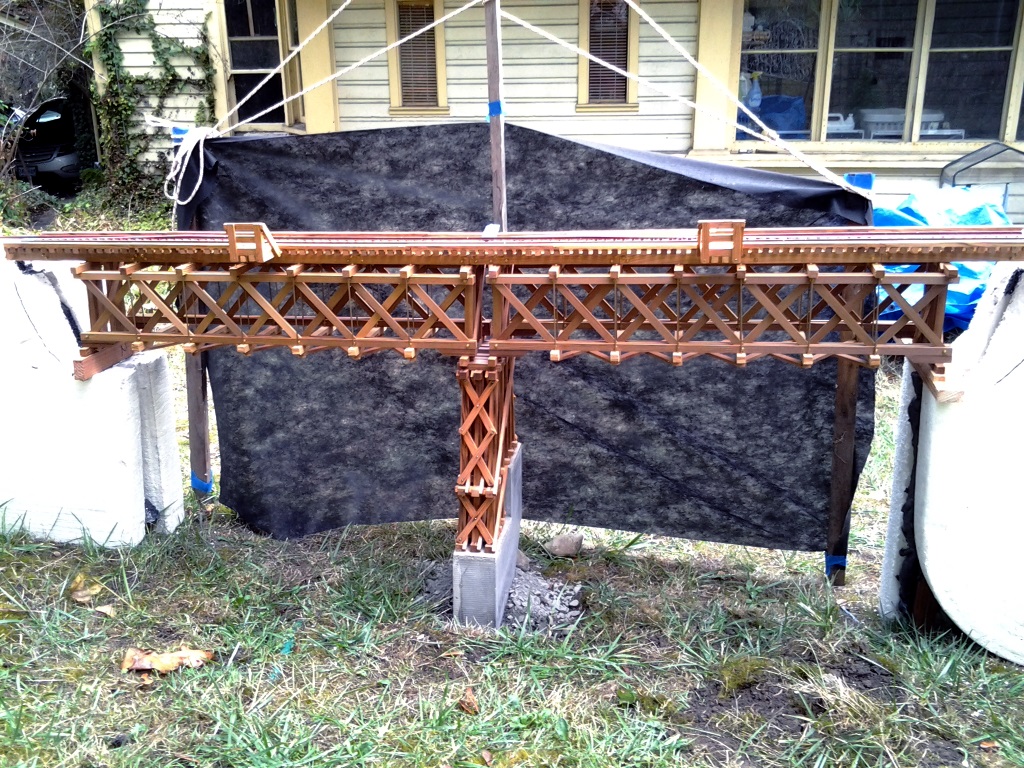
I wanted something different for the third bridge, yet still in-line with the Howe truss pattern I had established with the first two. It also needed to be longer, spanning about five feet. Here is the bridge I came up with.
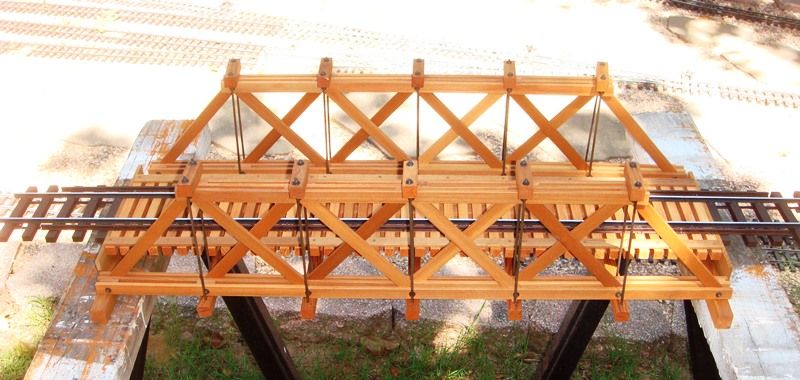
Here is another view from a different angle.
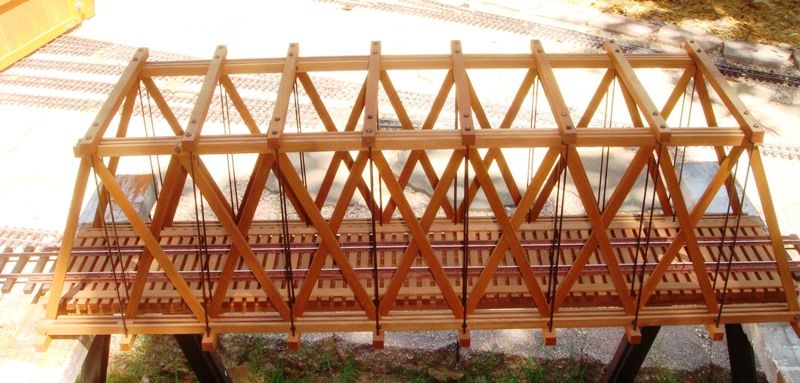
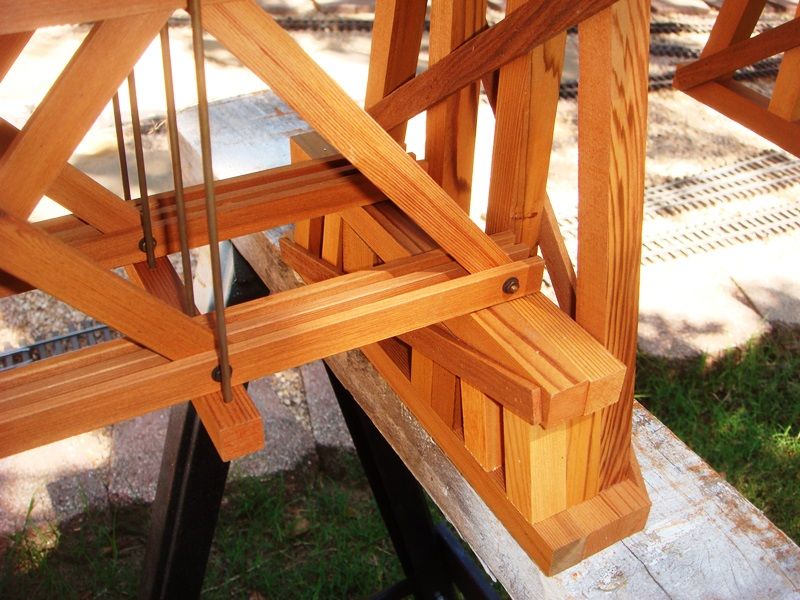
Here is a close-up detail view of the center truss section showing the deck details:

The center deck truss span is 24” long with 18” trestle approaches at both ends. I made the deck-style truss by modifying a Pony-style kit. I simply took the lower cross members from the Pony truss kit, cut them in half, drilled new holes for the tension rods, positioned them above and below the side trusses, and mounted the deck above the trusses. The support bents at the truss ends and the trestle approaches for the deck truss were built to the RGS standards detailed in my article. Here are links to a few of my previous posts on this site about building trestles for anyone not familiar with the technique.
http://largescalecentral.com/forums/topic/26223/long-trestle-project?page=1
http://largescalecentral.com/forums/topic/25941/new-trestle-project-in-red-rock-canyon
http://largescalecentral.com/forums/topic/20499/building-wooden-trestles
All three bridges are constructed with Western Red Cedar lumber. Ties and additional wood pieces not included in the kits were milled from cedar fence boards. All wood pieces for the deck truss bridge were dipped into Thompson’s® WaterSeal® Waterproofing Stain – Semi-transparent – Woodland Cedar color. I wiped off excess stain from the wood pieces with paper towels and allowed them to dry for a day prior to assembly.
The actual color is not important; I have used Acorn Brown, Timber Brown, and Natural Cedar Tone in the past on other bridges – whatever I had on hand at the time. I use the stain for the water-proofing, UV resistance, and grain sealing features rather than the color. No matter what tint of stain is used, the wood will still eventually weather to a brownish-gray color over time after the bridges are placed on the layout.
The trusses were assembled with brass rods, 4-40 nuts and #4 washers (no glue used anywhere.) Brass parts were weathered with a brass darkening solution. I used a drop of removable Loctite® Threadlocker Blue 242® Nut and Bolt Locker on the threaded ends of the rods to prevent the nuts from working loose over time. The ties were attached to the stringers with ¾” long 23 gauge pin nails. The running rails and the outside guard rails are hand-spiked Code 215 aluminum using ⅜” Micro Engineering steel spikes. The diagonal braces on the bents are attached to the sills, posts, and caps with ½” long 23 gauge pin nails. The deck stringers are attached to the upper truss chords at each end of the truss with #6 x 1” stainless steel wood screws driven in from beneath the chords. Similarly, the bent caps are attached to the deck stringers from underneath with #6 x 1¼” wood screws. Miniature NBW castings from Ozark Miniatures were used to simulate the bolts that hold the guard timbers onto the ties. Each bridge took about a day to assemble, not counting the time to cut and stain the wood.
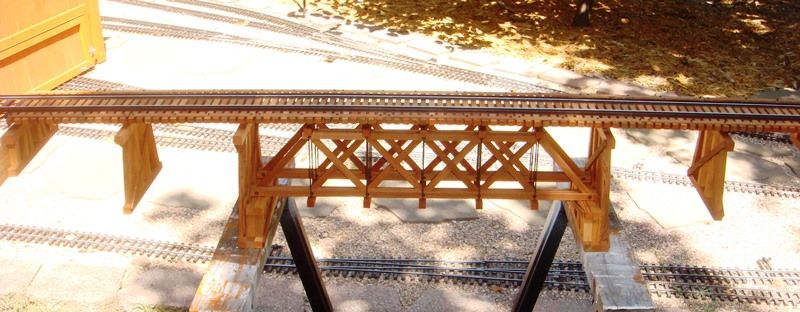
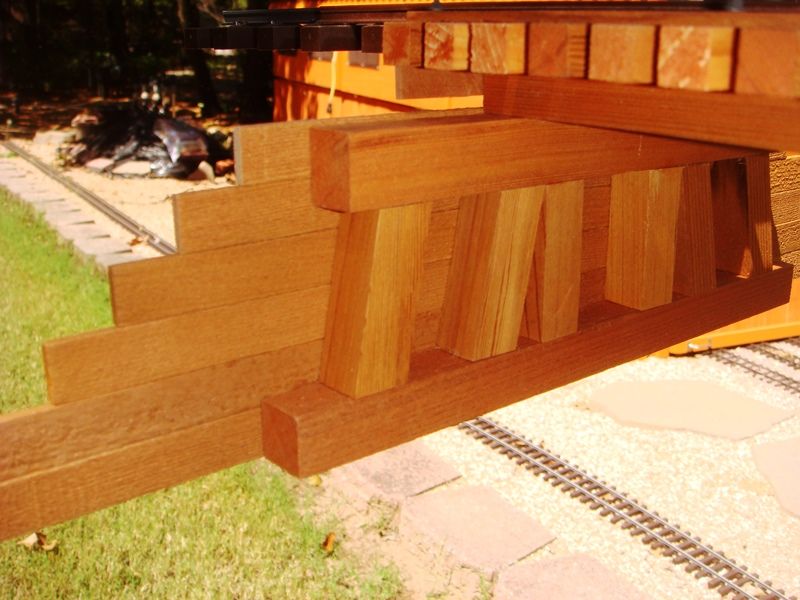
Here are a couple of notes about the deck truss bridge that involve prototypical features that are seldom modeled: (1) I doubled the support bents at each end of the truss and added extra vertical posts in the support bents to help transfer the weight of the truss to the bottom sill.
(2) I added 3” x 12” dump boards behind the end bents to hold back the earth fill under the track at the abutments.
Here are all three bridges sitting on the wall at Rico waiting to be installed.

These three wood truss bridge examples demonstrate how totally different bridges can share common construction methods and have a similar look and feel. The next time you are considering a new bridge for your layout, think about how your prototype railroad would have followed its own standard practices and construction methods. This is just one more trick in providing your visitors with a subtle, yet effective, sense of continuity and realism in your model world.