Large Scale Central

Scratchbuilding a wooden tank car

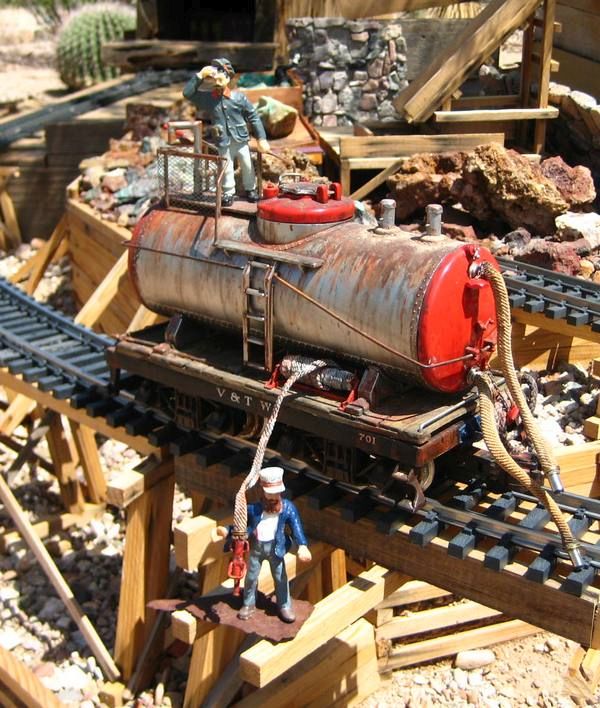
I am converting a Bachmann Climax to battery/radio operation and need a place to put batteries. I’ve seen pictures of wooden tank cars and thought that would be a good spot for batteries for my 1920-ish logging/mining layout. Here’s an example of the kind of car I am wanting (not my work, just inspiration):

I’ve just started attempting to build a similar car. This is my first scratchbuilt car (or much of anything really) so don’t be surprised if I screw up often. Advice is absolutely solicited as I’ve barely gotten started. I’m not very far so if I do need to throw something away it isn’t going to bother me too much (I kind of expect it, actually).

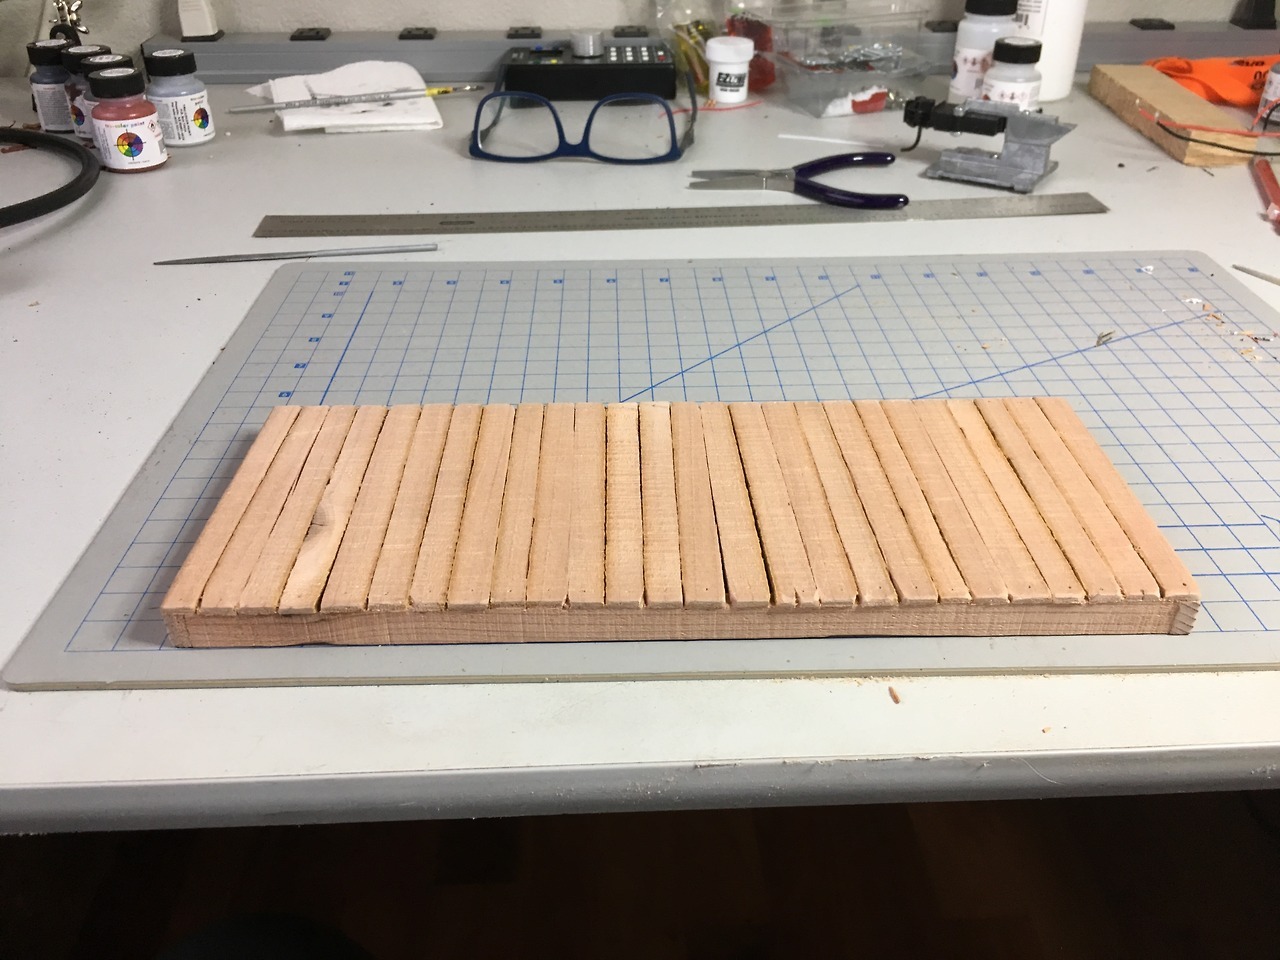
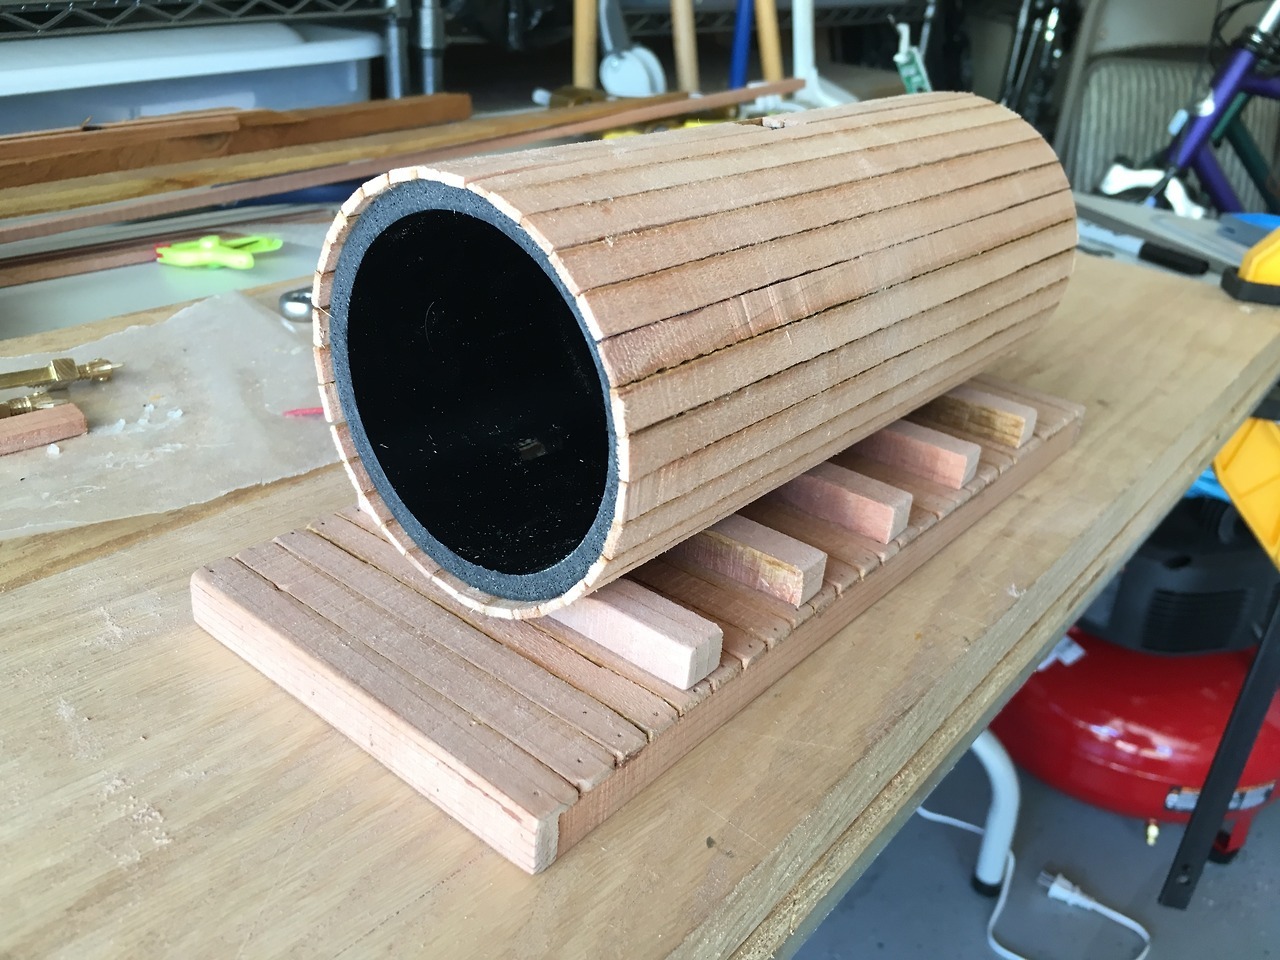
I’m using leftover redwood, used for the roadbed for my layout, ripped down to size on a bandsaw.

First step I took was to build a flatcar platform, vaguely following this scratchbuild tutorial. This is going to be at the head of a mine train with quite short cars, so I wanted this to be relatively short too. The flat car platform is 11" long by 4.5" wide, or 18.5’ by 7.5’ in scale. This pretty much matches the length of Bachmann log cars that I’ve been using. Here are a couple of pix:

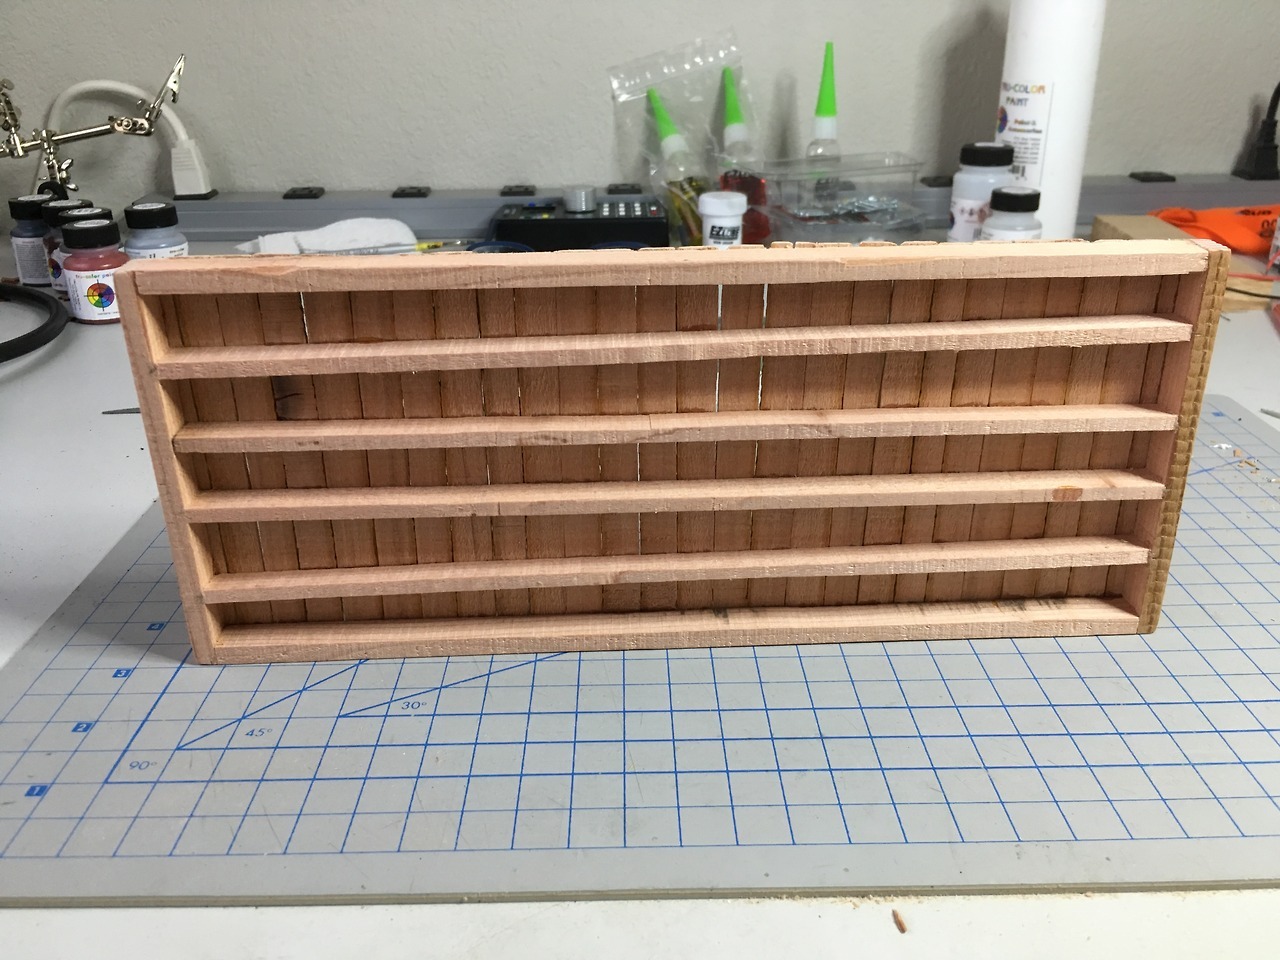
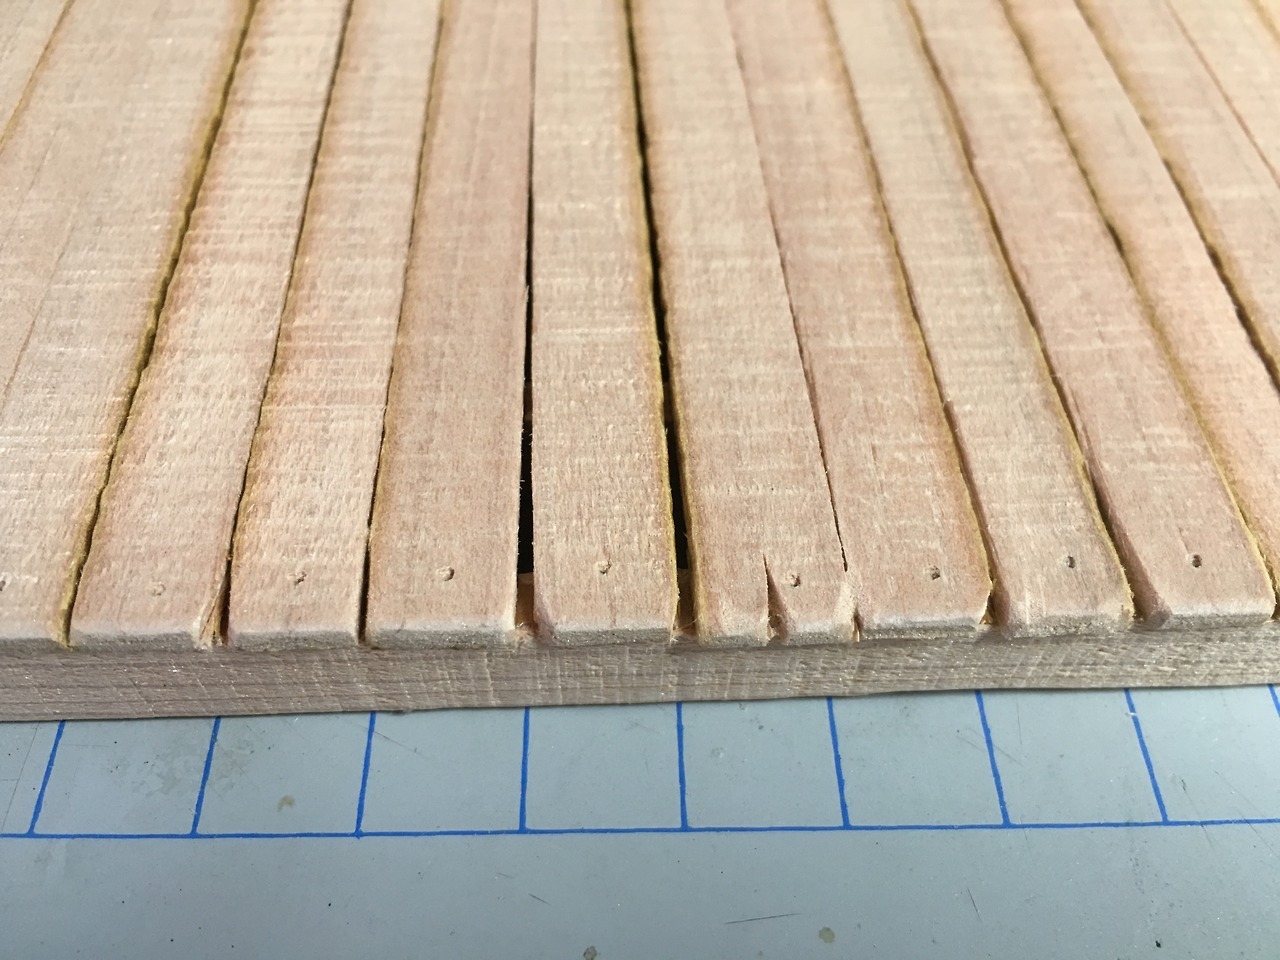
I stressed the ends of the boards a bit.

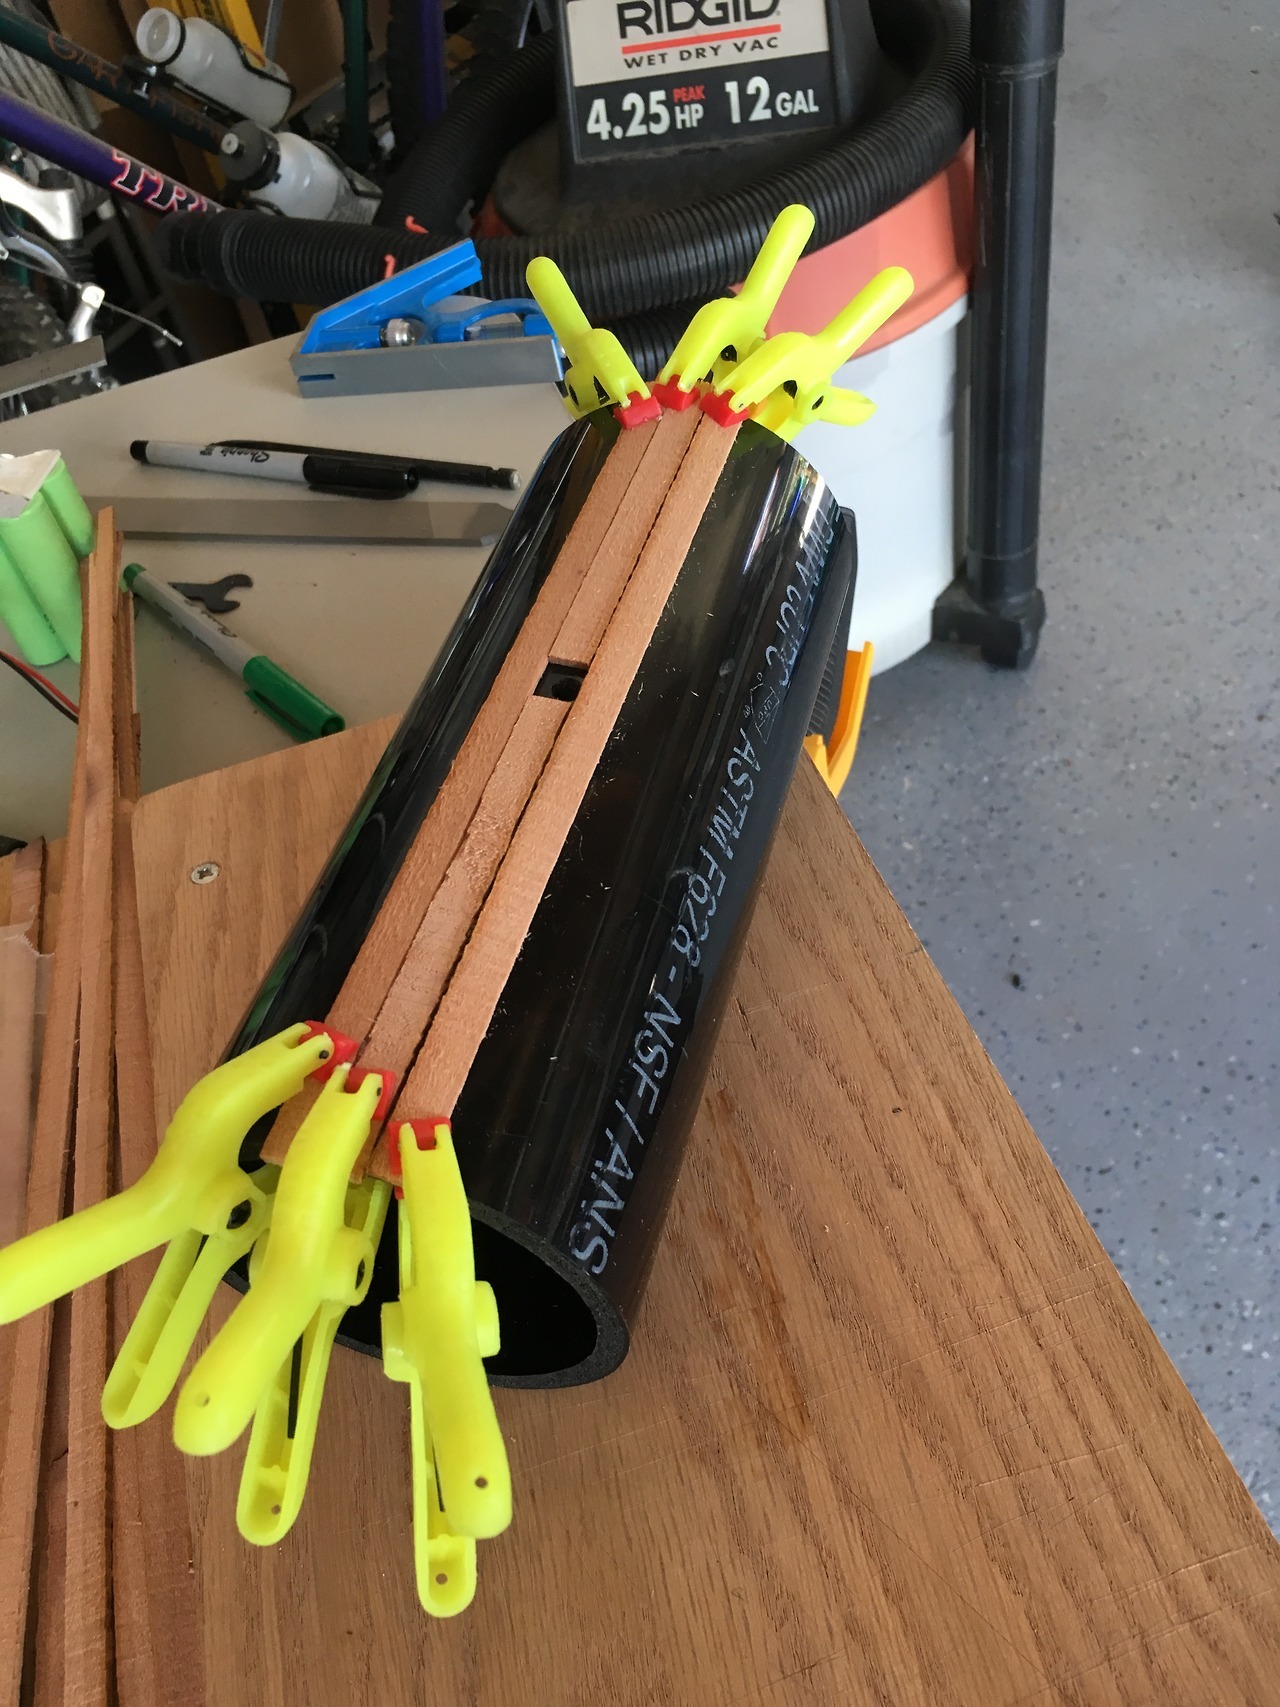
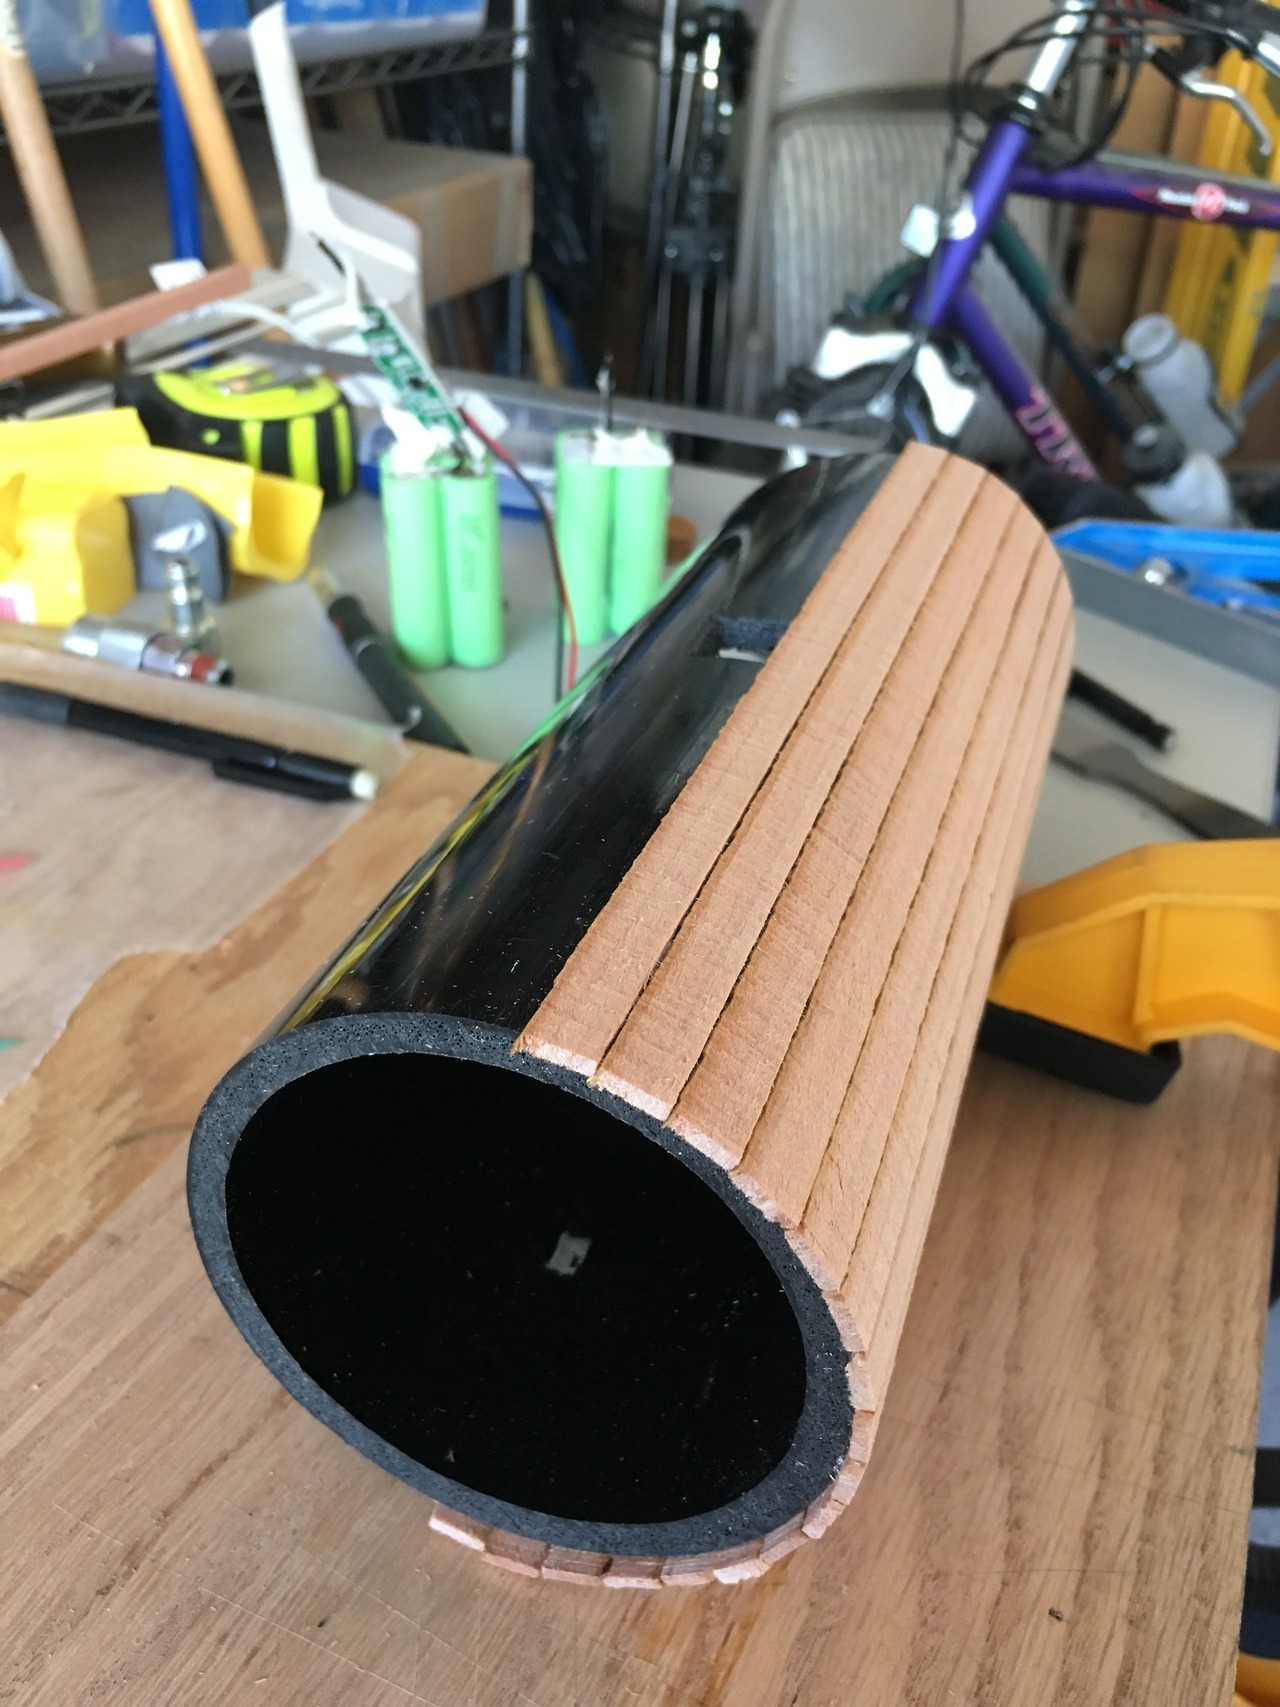
Now I’m partway through buildling the tank. I’m using a 3" PVC pipe as the structural element. I cut a couple of holes for wires, a switch, and a recharge connector on top and bottom. Currently about halfway through gluing planks on the PVC. I have some concern that the 3" (inside) diameter is going to be too big, but the same kind of pipe at 2" (my only other easily available option, at least on my first search) seems pathetically small.

I’m enjoying a staycation for a little while so I’m going to see how far I can get on this, though that will depend on bits and pieces getting delivered.

Cheers!

When I glue wooden strips to a pipe or a round mailing tube, I place an industrial 2 sided tape to the tube covering at least 1/2 the tube. Then I use Lexel glue on the rest, it takes 12 hours to setup but the tape holds for immediate work-ability. Mailing tubes provides easier workable tubes and better glue-able substrate. They also have caps that fit inside the ends that you can glue on the end pieces.

I love your idea and plan for a battery holder.

Dennis

How do you intend to close the gaps on the cladding?

Last model I saw with explanation of building such a car, recommended bevelling edge to edge so they fit neatly…

Needless to say…I chickened out!!(http://largescalecentral.com/externals/tinymce/plugins/emoticons/img/smiley-tongue-out.gif)

Fine work so far Jim. I scratch built a 1:20 scale tank car a number of years ago for the very same reason. I built the tank just like I used to build fuselages for my model airplanes. I constructed it like a clam shell so I could access the interior by simply lifting off the top half. I know this is a little late since you already started, but I thought I’d post it for future reference.

Here’s a view with the top off. BTW, I also used it for a sound car. The speaker is inside the red tube. To make the shell, I laid down some masking tape and attached the wood strips to the tape and then wrapped them around the frame and glued. Notice that the tape is still on the strips.

Here’s a photo of the completed car. The seam is pretty much invisible.

Doc Watson

Thanks for the tips folks. I’m digesting them.

Doc: I love your “airplane” method with the easy top removal. That would certainly make installation and future maintenance easy. I was hoping to only need access at the ends as I’m not intending to put anything but batteries (and simple associated electronics) in this car. Two sets of 4 batteries at each end with very simple wiring stuffed between them (and maybe a fuse) was all I was expecting to need. Hmmm.

Ross: As to closing the gaps between boards: I kind of chose to ignore that, hoping the black of the PVC would imply tar. I did not bevel :slight_smile:

Dennis: Wooden mailing tubes! D’oh! Two sided tape! D’oh d’oh! Let me think about that. I’m using Goop as my glue which so far has been working fine. It seems to hold relatively quickly so I can hand hold each board for a minute or two. I’ve left the first half to dry over night before I do the 2nd half.

I think I’ll go ahead and finish this one and see whether I like it (before I put on straps and other details), then maybe explore some alternatives.

Thanks for all the alternative ideas! Much appreciated…

Cheers!

Oh, and Doc? Where do I get some Olde Frothingslosh Pale Stale Ale? (love the artwork there!)

Sorry Jim, those were custom made by a friend in Pittsburgh who has since passed. They were even approved by Rege Cordic, a long time radio personality on KDKA in Pittsburgh. It was on his show back in the early 60’s that the name of the beer was created. I believe the Fort Pitt Brewing Company produced it around Christmas time.

Someone else from the Pittsburgh area might expound on this.

Doc Watson

Hey, that’s ok. I don’t really need the beer, just thought the name was a hoot. Glad to hear a bit of the backstory…

I went a different direction and bashed a plastic canteen.

It’s an Aristo 20’ tank on the sloped back tender’s chassis. I wanted 4 wheel trucks under all that water. The hoses carry power to motor and lights/ speaker. The 2 vents are rotary switches …

On top is a monitor with a nozzle and the Swede as usual takes the 2 man nozzle alone…

Wood is scarce, so we protect our trestles and bridges.

I made the nozzles from sheet brass and wire. The hose is ‘Piping’ from a fabric store. Stained with coffee.

John

PS; when I do wooden cladding, I eye ball the angle and have had good results getting ‘close enough’ setting the table or band saws.

Wow John, I love that water tank car. Nicely done. All the little touches bashed from common materials are great. Very creative.

Thanks.

The hoses detach and there are caps (nuts with a domed bit of brass soldered on top) hanging on the tank and tender for stealthier times… (http://www.largescalecentral.com/externals/tinymce/plugins/emoticons/img/smiley-surprised.gif)

I made sure the connectors wouldn’t short when joining, I’ve seen enuf magic smoke.

John

I’ve pushed ahead with the 3" PVC pipe plan to see how far I can take it. Here it is test fit onto the flat car platform:

So far I’m reasonably happy. We’ll see what jumps up to bite me…

Next steps: I need to weather this thing because I’m not going to leave it outside for nature to do that for me, so I’ll need to figure out how I want to get that wood looking reasonable. First thought is to use diluted India ink. Of course, I also need to build the end caps and how they are held in/come out on demand. I have a plan in mind… we’ll see if it works :slight_smile:

After that there’s a ton of details to add, underbody stuff to build, etc.

Cheers!

Where’s the “like” button when you need one, Great start, and I like the “tar” idea with using the black pipe.

This is an article from Garden Railways of Oct 2009 which may be of some help

Second half of the article

Thanks Graeme.

Shoe laces make nice covering over wire… Hose !(http://largescalecentral.com/externals/tinymce/plugins/emoticons/img/smiley-wink.gif)

I also used super flexible wire, for the connecting wires. I found it in an Airplane R/C shop. Silicone I think.

John

Mike Wlez said:

Where’s the “like” button when you need one, Great start, and I like the “tar” idea with using the black pipe.

You can borrow the one I use…

Thanks Joe