Large Scale Central

Snow Dozer Build

Craig Townsend said:

My 9th and 7th graders had been bugging me for weeks about my stone and why wanted me to bring it in to show it off. So I …

Oh that’s gooooood! ROFLMAO!

Having been to nursing school and having had stones, I understand the stones concept from both sides.

So I made the mistake of priming the main body of the dozer… Man I have a lot more sanding and putty work to do. One side is pretty close to being finished bit the other side has a lot more filling and sanding. It certainly looks better in gray primer, but that’s about it. I just worked some Bondo over the areas that need work so it might need a day to dry. I think tonight I might start building one of the side drag wings for something different to work on.

What your plans for making the heated window circles and will they work?

Thankfully this doesn’t have those heated windows. Only the UP seems to have installed them on their snow fighting equipment. I will have to make wiper blades for the windows though. I was think little brass bits when I get to that stage.
That is a good reminder that I need to order some roofwalks from USAT along with some other detail parts.

Primer paint - the definition of love-hate relationship. (http://largescalecentral.com/externals/tinymce/plugins/emoticons/img/smiley-laughing.gif)

Here is a little rust technique I discovered the other day. I like the salt method but this may show some real promise. Uses hairspray

Sounds like the same technique I was trying unsuceessfully. I’m not sure if it was old paint, bad practice on my part, just plan screwing up. I want to try again but my airbrush compressor gauge just went bad order so its affecting my ability to break out the airbrush. I probably should buy some new paint too, as the Polly Scale I have is 15 plus years old, and its not nearly enough for this project. So why learn in paint that I can’t even use later.

Devon Sinsley said:

Here is a little rust technique I discovered the other day. I like the salt method but this may show some real promise. Uses hairspray

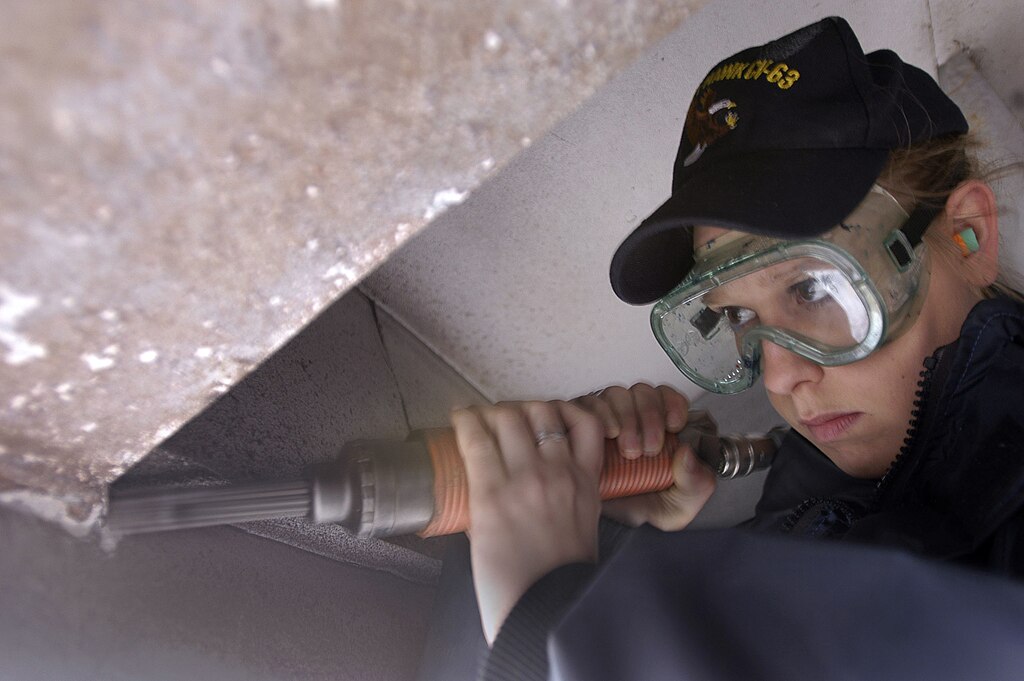
I just don’t understand you groundpounders tolerance of that much rust. Chief would have had a cow if any of his gear was rusty like that. A Seaman would have been out with a needlegun, chipping off the rust in preparation for repainting at the first hint of rust.

Let me sing you the songs of my people.

(https://upload.wikimedia.org/wikipedia/commons/thumb/4/4d/Needle-gun-uss-kitty-hawk.jpg/1024px-Needle-gun-uss-kitty-hawk.jpg)

A jetI …(http://largescalecentral.com/externals/tinymce/plugins/emoticons/img/smiley-wink.gif)

Wow Craig, Dozer is coming along nice.

I have not (…yet…) tried the salt or hairspray technique. Videos make it look pretty straight forward.

Old paint will not work well. Since Pollyscale went away I’ve switched to Vallejo. Really liking it and having good results with that paint. I tend to lean towards Vallejo’s Model Air paint line. I find it still needs to be thinned a little for the airbrush, but not to much. The paint straight out of the bottle also goes on well with a brush.

I always grab an old HO Tyco or other cheap car and practice on that. Give the salt and hairspray techniques on something cheap until you feel you get the results, then switch to the dozer.

I have plenty of scrap styrene to practice “rusting” on, but I need to find some time to paint. I don’t think my wife would like it if I cranked on the air compressor at 8 in the evening and woke the kids up. My regulator gauge went belly up, so I think I’m trying to shoot to high of pressure out of the airbrush, so the paint is splattering, instead of spraying nicely. I really need to find a micro regulator to I can really control the pressure from 5 psi to 40 psi.

I have also discovered once again that its easier to use strip stock to replicate H beams than use pre made H beams. Spent last night cutting up H beams to discover that they need a lot of work to make tight joints. Its easier and faster, along with a better end result to use pre sides strip stock and self glue the beams together. Redo everything I did last night tonight. I also discovered in looking at the drawings verses prototype pictures, one drag wing is built up of H beams covered partially by sheet stock, while the other side like to be a solid 1 piece beam.

I ran into some trouble last night trying to cut out some of the critical parts for the drag wing. The size of the parts is are just too small to cut by hand and have any hope of working. After frustrating myself to no end, I finally had an ah moment and realized I could have them printed out. So, now I’ve got to find time to draw up this parts to be 3D printed. It should be a good way to test the waters as the parts are relatively simple, just small (under 6").

Round 2 of the primer battle has begun… Results at 5pm… (http://largescalecentral.com/externals/tinymce/plugins/emoticons/img/smiley-tongue-out.gif)

Well, having a working gauge for the air compressor works well for adjusting the airbrush spray pattern. The old Polly Scale went on pretty good for its age. A few chunks of pigment made it through the airbrush. But overall not bad for practice weathering. I will let the base coat dry, and then try all 3 of the different weathering techniques.

After spending just a few minutes working on drawing 3D parts with sketchup, I’m glad I choose that route for some of the hinge pieces for the drag wing. A lot easier to draw than try to cut tiny 1" slices out of 6" wide pieces. Hopefully after a few more hours of drawings the parts will be ready to send off to be printed. My first time sending off parts to be printed, so I will see how that process works.

The primer battle continues, with more sanding and more sanding… Moving on to 300 grit sand paper now… Will this ever end?

https://flic.kr/p/RSzw8x

Keep it up Craig, it is looking really good. The primer is a pain, but is the best way to show where your seams need work.

Chris

Oh its showing plenty of seams that need work. I just need to keep plugging away at it.

Just hit another snag…

I’ve been meaning to call PSME to order some products that they carry. Such as .018" 7x7 stranded wire rope, pulleys, etc that I haven’t been able to find anywhere else. Called the owner today, and he is not taking orders presently, nor does he expect to anytime in the next few months. So off to Google, we go searching for the same products.

I did find in a short time, someone who makes wire rope, but the minimum order is 250’, or if it’s a custom run 1000’… Arghhhh

Nice work Craig…

Saw this & it made me think of your wire rope project. Maybe it will give you some ideas: https://www.youtube.com/watch?v=8r3zpQuylVM

Now he just needs to build a miniature rope twisting machine…

So if 49 strands make up 0.018" wire, how big is each strand? Way smaller than I want to deal with. That’s how small!