Large Scale Central

re-BUILD LOG- IRON ISLAND RAILROAD

Like Sean, I won’t touch that, but HAHHAha!

Anyway, Kevin, you’re mountains are looking GREAT! Nice to see you using the lathe mesh, pretty fun stuff isn’t it? Shape it to anything you want, pretty strong. Need a box of band-aids near by, but that’s ok.

Keep at it D’Dude!

Well, you could put a lightweight, removable, structure in front of the access, and then make the mountain look less like…um…less like a…less like it does now.

D Dude

Your mountains are really looking good, I will not comment on the " HOLE " it is amazing how a camera will make appear. Coloring will help

that area too, or it could also make it look worse. You have done a great job posting your progress.

Dennis

Dude,
All kidding a side, your mountains look great.

The volcano works. Great. There go our tourists and our tax base!

Great job!

Eric

Mother nature has been generous with the nice weather this fall and like the old saying goes, “You can’t lick a dead horse on the mouth.” Or is that a “gift horse in the mouth?” I dunno. In any event, we had another great weekend and a golden opportunity to move more dirt. And, since we needed to raise some low spots in the yard, why not finish off the mountainous regions of the layout as well.

Earlier in the year I moved tons of cemetery dirt to form the bases of Mount Keverest and Mount Cheektovegas. That dirt was basically fill dirt and has finally settled. This past weekend we topped everything off with some top soil and started planting rocks and plants. With any luck, the plants will do as well as the rocks. My ideal situation would have been to finish all of the cement/lath rock work, color all of it and then add top soil. But, I’m running out of time this season. Sometimes you just gotta go with the flow. So, it looks like I’ll probably be adding color to the cement mountains next season. For now, they are cement colored.

Here’s a shot of Mount Cheektovegas with the final load of top soil and some plants. I buried in the bottom of the volcano so it blends in better with the rest of the mountain. The sedum I planted at the base of the volcano is burgundy red and looks as if lava scorched it (thats my story). I used a green sedum in the middle and some other kind of green plant (very technical terms, try to follow along) at the bottom. The hill is definitely planted a bit sparsely, but it’s what we have on hand. I’ll also need to do some rock hunting next season. By the time I took these pics, leaves had already started taking their annual fall death plunge.
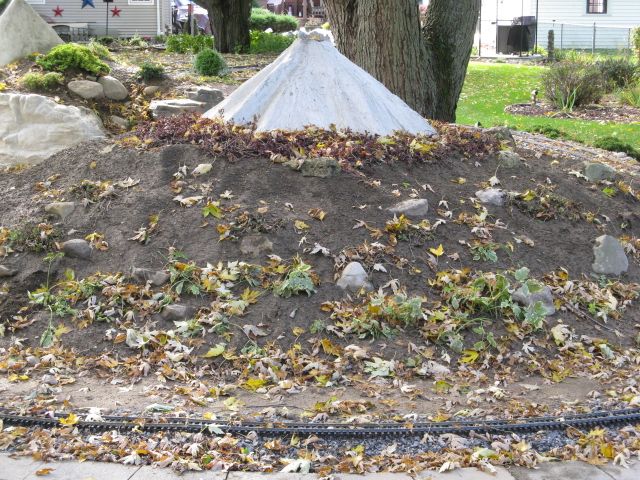
The day after completing Mount Cheektovegas, Mother Nature provided a ceremonial sacrifice. As fate would have it, Mr. Squirrel was seen digging in the base of the sacred mountain. A real big no no. Mister Hawk was summoned by the Mountain gods. I’ll save the picture for another time. Moving on…

Mount Keverest also received the dirt/rock/plant treatment (no sacrificial ceremony, sorry). I also fixed the “rock” cover that hides the waterfall top. Now it looks less like a giant mushroom top and more like rocks. Again, everything is cement colored for now. There’s always next year.

Front:
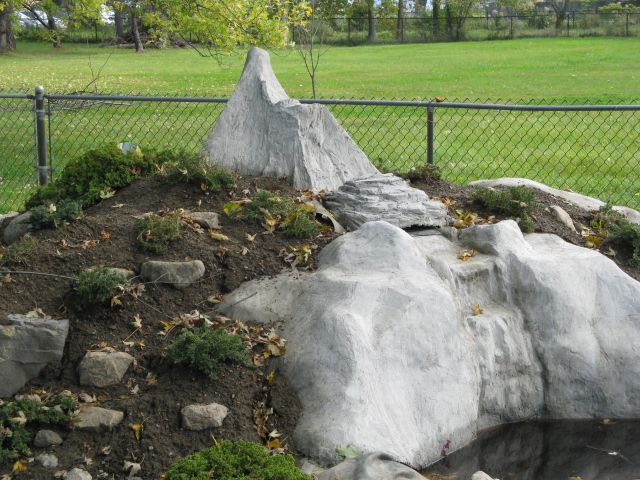
Back:
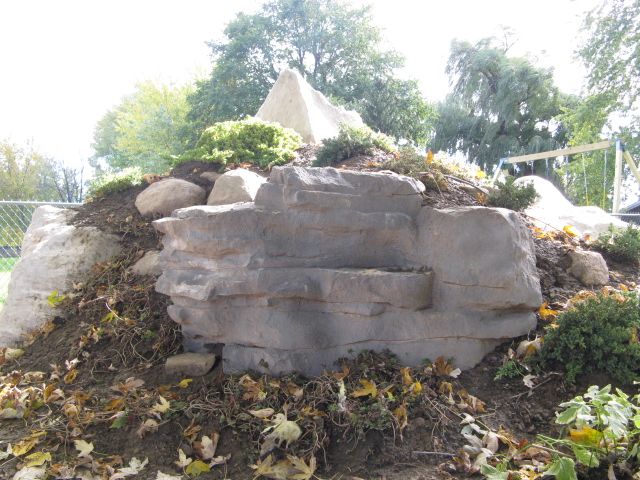
That is all…

-Kevin.
Nice progress.

You should look into Acid Washing for a color treatment. Be good to do it before you plant too much, should you go that way…

I’m wondering what Nico see’s in this picture !

John Caughey said:

Nice progress.

You should look into Acid Washing for a color treatment. Be good to do it before you plant too much, should you go that way…

Enlighten me. I’ve never done any acid washing. I did own some acid wash jeans once, but I think they’re out of style now a days. I looked it up and found something about acid coloring concrete. I’m guessing that is what you are referring to. Looks like a technique you’d use on a concrete floor. Have you done any acid coloring? From what I read (very briefly), there seems to be a lot of prep and cleanup involved, but if it’s worthwhile, I’d be into it. What do I need to know? Details, details, I need details…

-Kevin.

One of our cement mountain men did it, I believe.

I’m rock rich, so I never followed it up. I did see some nice effects on google images…

" Rooster " said:

I’m wondering what Nico see’s in this picture !

This…

-Kevin.

" Rooster " said:

I’m wondering what Nico see’s in this picture !

DO YOU REALLY WANT TO KNOW?

John Caughey said:

One of our cement mountain men did it, I believe.

I’m rock rich, so I never followed it up. I did see some nice effects on google images…

Ok, thanks. I’ll do some research on it and see what there is to see.

I’ve got another idea in mind for staining the cement, but I’m running out of time this season to attempt it. Looks like I’ll have to wait till next spring. Oh, the suspense.

-Kevin.

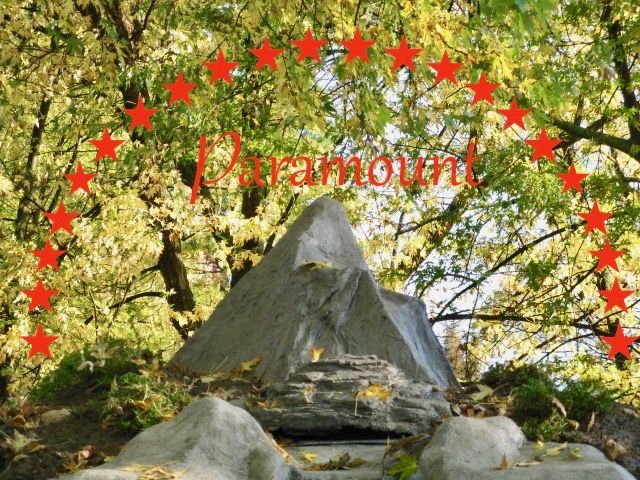
Turning out nice Kevin! And that is spot on for the paramount logo. (https://www.largescalecentral.com/externals/tinymce/plugins/emoticons/img/smiley-cool.gif)I think your right, winter really feels like it’s knocking at the door. I’d say you got a good bit done for the year. You even managed to go crazy on a cool bobber caboose during the monsoon season this year. I’m interested to know a bit more about Mount Cheektovegas. Is the flame generator in it permanently? How is ignition worked out. will it ooze too?(https://www.largescalecentral.com/externals/tinymce/plugins/emoticons/img/smiley-surprised.gif)

Thanks, Randy. Yeah, I couldn’t decide on a proper mountain peak so I figured I’d go with something familiar. What could be more familiar than the Paramountain?

As for Mount Cheektovegas, it’s another one of those goofy ideas that I said out loud jokingly and my wife (my partner in crime) said, “Do it.” I totally blame her for encouraging this foolishness. She’s the best!

For the “flame generator,” I totally went low tech (pretty much what you’d expect from me). I actually just used the canister from an old tiki torch. First I read the directions completely, then I did just the opposite. According to the directions, you should keep the wick cut low and straight to prevent lots of smoke and flare ups. But who wants a volcano that doesn’t smoke and throw fire in the air? So, I raised the wick up quite a bit and mushroomed it out. Thats it. Instant volcano. I do wish that the camera would have captured more of the smoke. It actually does put out quite a lot (Mental note: the next camera I buy should have a “smoke setting”). When I built the volcano, I lined the inside with cement. After seeing how much smoke and flames it throws out, I also lined it with a steel sleeve.

It does actually ooze lava as well. And yes, it’s another “Kevin low tech junior high science fair effect.” Before I can finish the lava ooze, I need to color all of my cement rock work. Unfortunately, the weather is changing here and I probably won’t get it finished this season. But, as the saying goes, stay tuned. I’ll get some pictures of the lava flow in the spring.

-Kevin.

Hey Kevin - Just catching up. You’ve made some great progress this year. Nice work & thanks for posting.

Well Kevin, has winter let up so we can see progress ???

Kevin Who…(http://www.largescalecentral.com/externals/tinymce/plugins/emoticons/img/smiley-tongue-out.gif)

Oops I meant to use his code name Diesel Dude ! Sorry Kevin Diesel Dude I didn’t mean to blow your cover identity.