Burl Rice said:
I’m not sure what I said to make you think it’s solid?
I would suspect it will weigh 12 oz, since I put 12 oz of resin in it.
I assumed…by looking @ pics.
So how are you making it hollow and in one piece?
Burl Rice said:
I’m not sure what I said to make you think it’s solid?
I would suspect it will weigh 12 oz, since I put 12 oz of resin in it.
I assumed…by looking @ pics.
So how are you making it hollow and in one piece?
This is an interesting project Burl!
Two thoughts I had as I read
Could you use a syringe to inject the resin, you could suck it out of the mixing bowl and squirt it into the mold…this would make it faster at the expense of a disposable syringe
When working with epoxy, I often use thickeners to adjust the viscosity from the syrupy consistency of the epoxy out of the containers, to like peanut butter for large gap filling putty. I have also used micro balloons to add volume where light weight is needed or when a sandable filler is needed. The micro balloons do not add much strength and only change the viscosity with fairly large concentrations. If I were doing as you are, I would try a fibrous filler. Chopped or milled fiberglass is very strong, cellulose (paper) powder is a good thickener and will add some strength.
Where micro balloons might be good is in the second of three applications. It could bulk up that layer thickening the shell. Keeping the inside and outside as strong as possible and separated by as much as possible would give the strongest possible layup.
Different fillers are available anywhere west system epoxy is sold.
I have tried using syringes in the past, but never was a fan of it. I couldn’t find large enough ones for a price cheap enough to make it worth it.
The chopped fiberglass is a good idea, and I may give that a try if I can’t do what I want with the micro balloons. I have a couple gallons of micro balloons on hand though.
Later, I will see if I can get a good photo of the first casting to show the difference between it & the second. I feel like I am very close to having a process dialed in that will give me production castings.
Here’s the result of 100% resin, with no micro balloons:

This was pouring two ounces at a time.
The second casting was three ounces at a time, with half an ounce (by volume) of micro balloons. Or, 16% micro balloons, by volume.
For the third casting, I’m upping that to 25%. Should have some results in the morning.
Do you see any sign of the thick place on the outside? Shrinkage?
No, you generally can’t tell from the outside. You have candle it to get an idea of the thickness. The problem is when its a large mass that sets up like that, it affects the balance of the car body.
When I see warping, or bubbling is when I’ve tried to come back an add more resin after the casting has sat for over 24 hours. Then you have the 2nd layer trying to shrink, when the first one already has - then its an unpredictable mess.
Burl Rice said:
Ohhhh…Centrifugal force!
Gotch Ya!
Well, here’s an interesting failure:

I guess my hypothesis about thickening the resin wasn’t the way to go.
Hmmmmm …I wonder how you could use that failure to represent a Lionel aquarium car! (http://www.largescalecentral.com/externals/tinymce/plugins/emoticons/img/smiley-wink.gif)
After talking to Mike at Alumilite, he advised me to increase the inner rotation speed of my machine, and increase the micro balloon ratio to 50%. I also modified a plastic Büchner funnel (from Amazon), that makes pouring the mold much faster. Apparently, I wasn’t getting the resin thick enough, and I wasn’t mixing enough either. Its the thickness of pancake batter when I mix it to his spec, and I was afraid I’d never get it all in the mold before it kicked. So now I’m starting to get consistent castings. This is #8. I can build a model from this:

Burl,
This is just very interesting for sure. Glad patience is paying off.

Most excellent Burl
Thanks.
Couplers are currently in production, so hopefully they’ll be here in 6-8 weeks.
I used NWSL wheels for a stand in. I’m hoping Gary Raymond’s 36" wheelsets become available soon. His have the correct profile on the back of the wheel, where these are flat.
So far, everything is fitting well, and the kit build is fast. The photo shows the result of about two hours of work. I figure another two, and it will be ready for paint.
Burl mighty fine job as usual! (http://www.largescalecentral.com/externals/tinymce/plugins/emoticons/img/smiley-laughing.gif)


Ooh!
Ah!
Oh!
Purdy.
kits pleeeeeeeeease!!!
Burl,
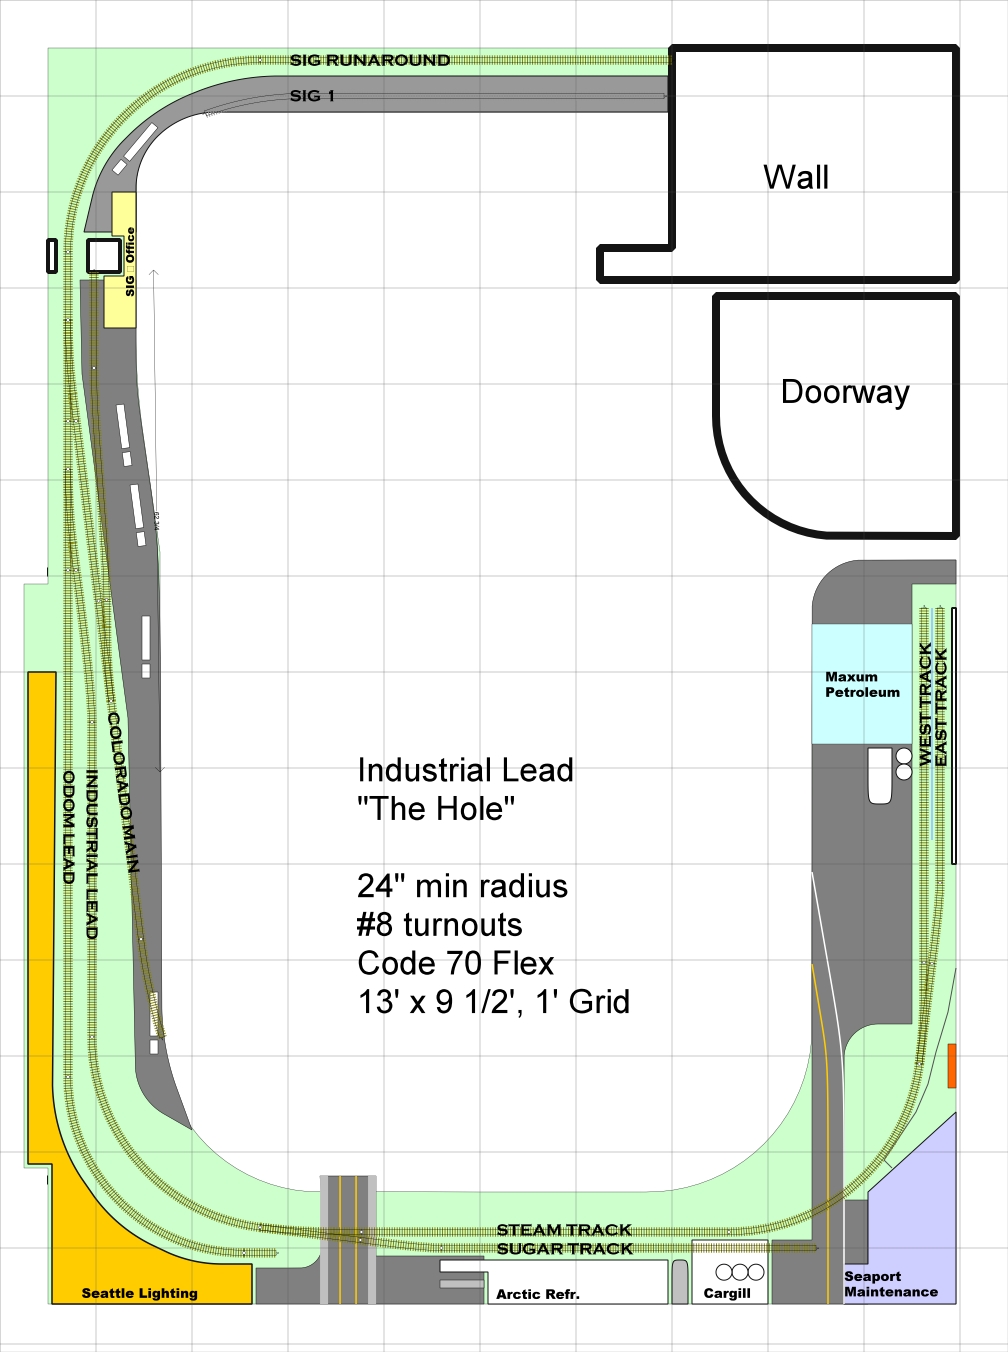
Another 15 or 20 of those and you’d have enough to model the “Hole”, a much hated and feared industrial track served by the BNSF Railway at Stacy Street Yard. With a good crew, we could pull, respot, and spot new cars on the “Steam” and “Sugar” in 2-3 hours, but with a inexperienced crew it could take up to all 12! Humm very tempting to think about for a modular layout!
A friend and fellow hogger is building a HO layout to replicate the Hole. Here’s Greg Amer’s blog post about the Hole and his track plan.
http://www.gregamer.com/index.php/2012/10/28/cargill-closeup/
