Nice progress on the foundation Jim.
1 Like
as your napkin wasn’t very detailed, looking at this foundation, i have to ask:
does Casey’s have similarities to the empire state building?
See my characterization in the original post, Korm 
And remember, beer is pretty heavy. So: many, many kegs to be stored. Plus whiskey.
Casey (the inspiration for the saloon) came by today and helped build the last wall of the foundation. Cool!

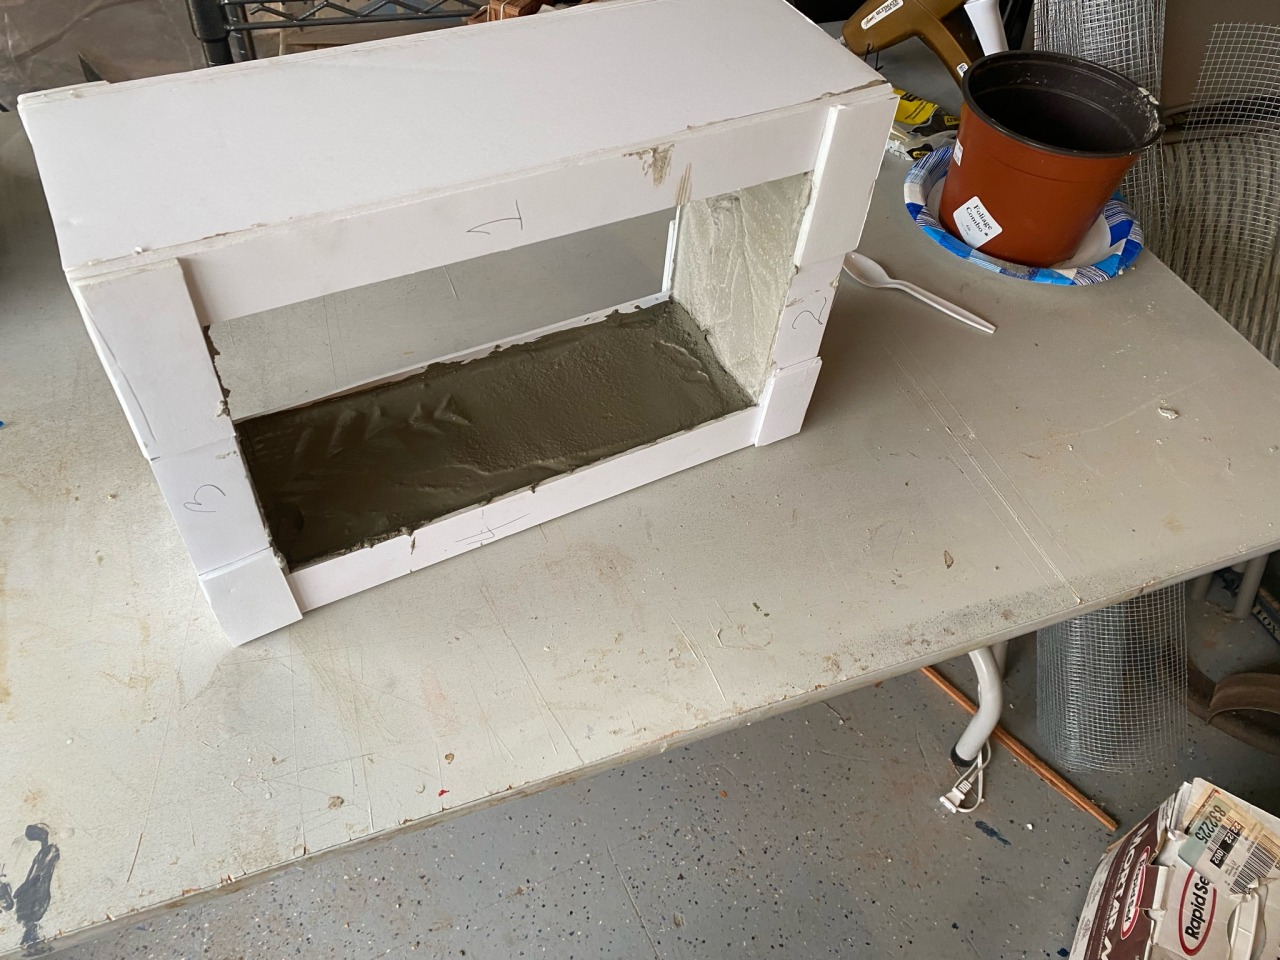

Maybe on Sunday I can unmold this puppy and see how we did on the mortar…
4 Likes
Looking forward to the grand reveal, Jim.
1 Like
From a sign guy who does lots of different ways of mounting dimensional letters; I think you have a great idea. I just did something similar with 3/4" thick PVC letters suspended on 1/4" clear acrylic…

I used a reverse printed paper pattern to keep things aligned, pre-drilled the acrylic then used sharp point lath screws to attach the acrylic. That was followed with good dose of SciGrip WeldOn 3 which is a water thin welder. I apply the welder with a syringe.
2 Likes
I thought that you wanted to “un mold” while the mortar was still “green”, so you could clean it up…(not that I am an expert in anything)
2 Likes
Thanks for that, Jon. Interesting!
Bruce: I have no idea what I am doing. Giving the mortar more time to set seemed right to me, but I am SURE I know less than you. Will report back after I unmold….
Not sure, but I seem to recall when doing my mill that I had to take it out and scrub it to get the mortar off of the front of the stone. (It’s a LONG time ago, so I could be wrong…hehe…I probably am wrong! Anyway, we shall see pretty soon. Looking good!)
1 Like
Ok. Unmolding happened! It was surprisingly fast and easy. And though I lost a few rocks, it looks pretty decent to me. Some cleanup to do: gluing in lost rocks, removing some mortar in a few spots, adding grout to fill in between the rocks. Cool!


6 Likes
Looks great! Things must have changed - I had to take a toothbrush (not MINE!) to clean the rocks. I’m very impressed.
1 Like
Well done, Jim. That looks great. Like Bruce, I was concerned the mortar would get on the face of the rocks and be a pain to clean, but I would be wrong  .
.
1 Like
I think Jim’s guess on the mortar consistency was key. If it had been wetter it may have pooled in the voids between the stones and mold, but he guessed just right!
2 Likes
Definitely a guess, Jon!
There are a few spots where the mortar made it through and looks a bit stupid (like a flat ended stalactite). That’s part of my cleanup. But I guess I didn’t get it runny enough to flood the rocks and cause me lots of problems. Lucky…
Cool stuff. What are you planning on cleaning it up with?
1 Like
Boomer helped guide me to using un-sanded tile grout when I did this before in my dynamite shack.
So I’m sticking with that because it worked well the last time.
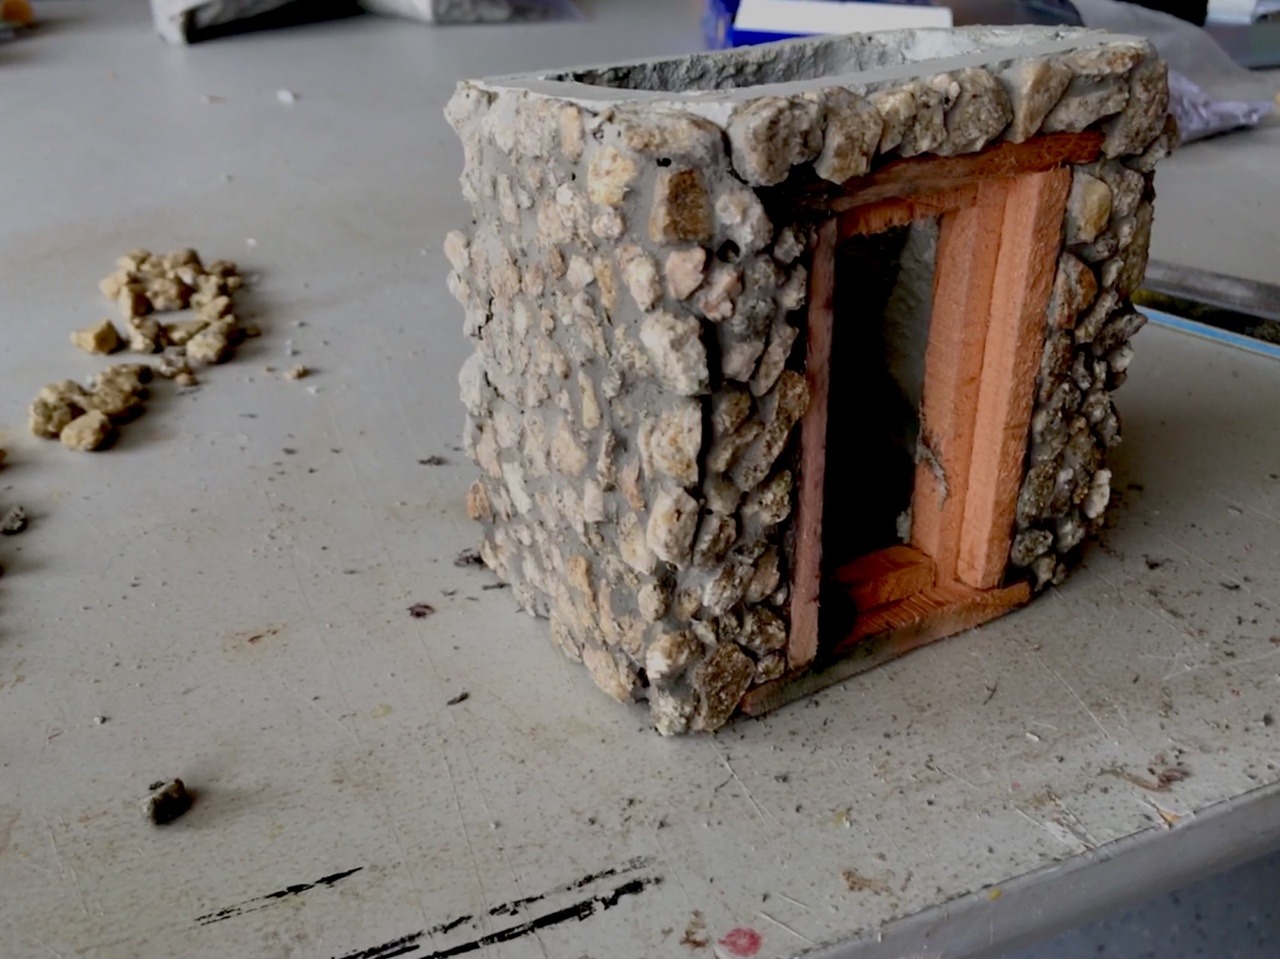
As for removing the stactites, I’ll just break those off and fill with grout.
1 Like
FANTASTIC work Jim. I think you might be giving Ray D. a run for his money on stonework. His hand carved stuff is great, but this is real. Can’t wait to she this ‘planted’ on the layout.
2 Likes
JIm,
That looks great! Thanks for the thorough documentation of the process!
Eric
1 Like
More work on the saloon: glued on some rocks, added a wood topper to make it easier to attach the upper stories, checked the fit on the layout. Then I got cold. It’s 57F today and windy. Brrrrr!

Next step will be to add grout to make the rocks look mortared together a bit better. I may need to glue in a few more rocks on the left side too… Here’s the grout I’m using:

It fits where I hoped it would fit. Yay!
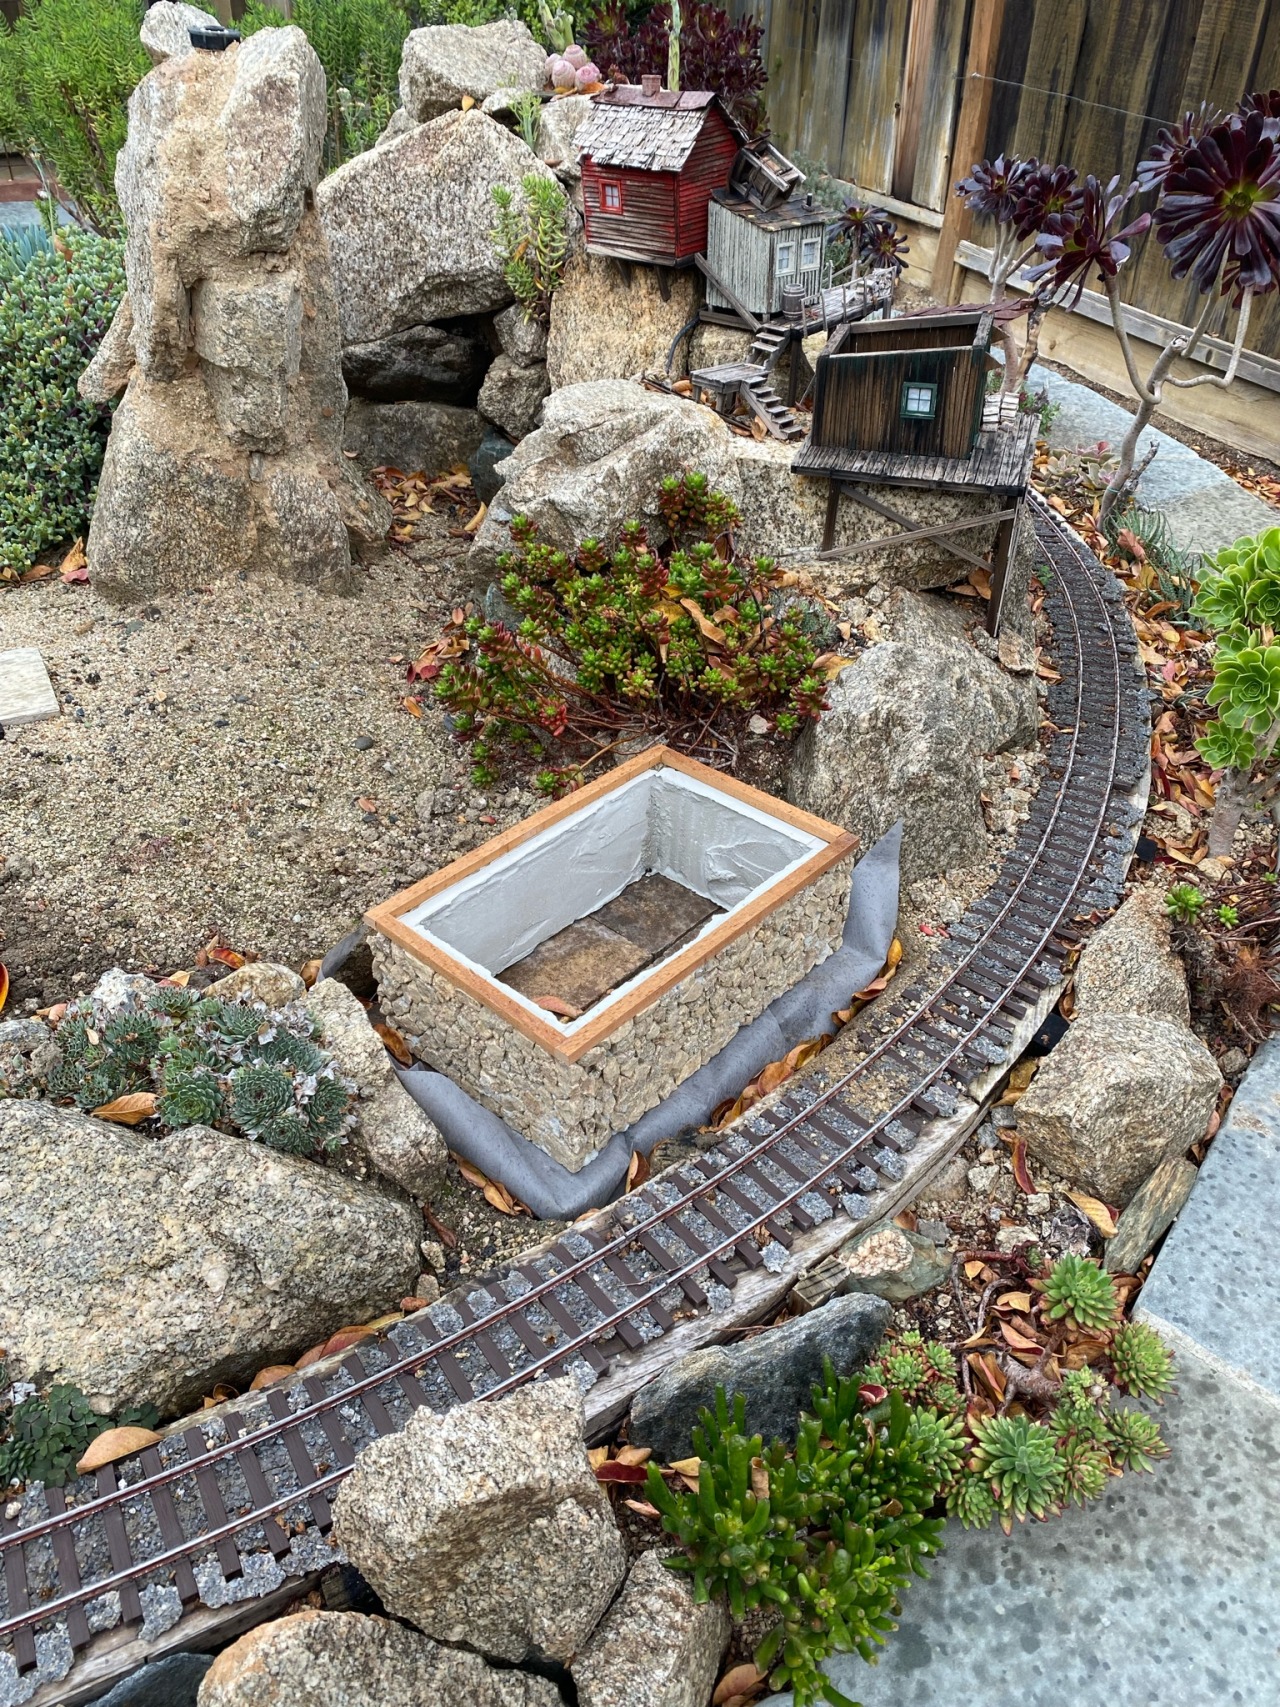
And it’s even the right height:

And level-ish!

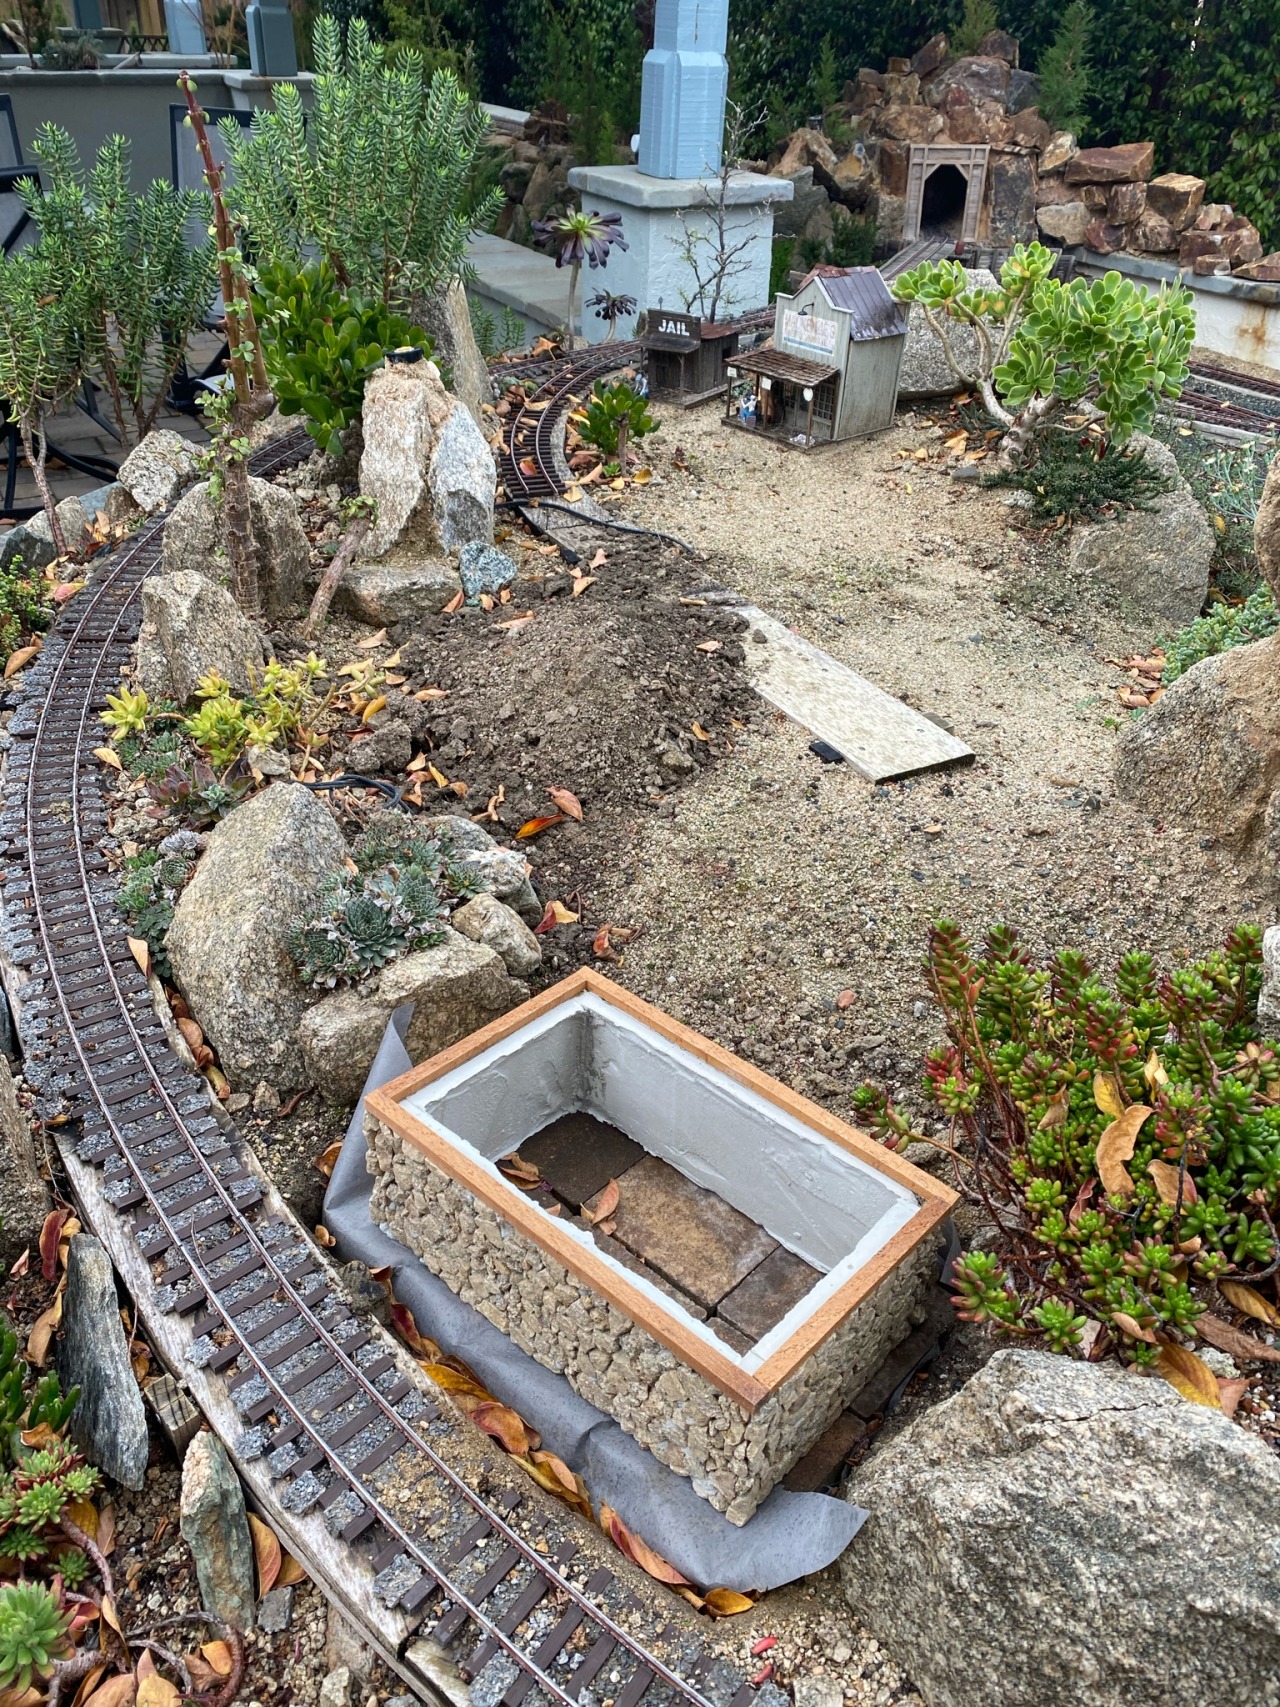
Here’s a view showing how steep the grade is as the train runs past the saloon (this picture is a bit tilted toward the right):

Dirt will be filled in to be level with the back-top, and in the front it will be level with the roadbed.
Sorry, I have this tendency to over-photo-document…
Brrrr…
3 Likes
Jim, that looks great and the grout will only make it look better. I’m interested to see how you apply the grout. And BTW: there is no such thing as “over-photo-documenting” 
1 Like