Large Scale Central

Building turnouts

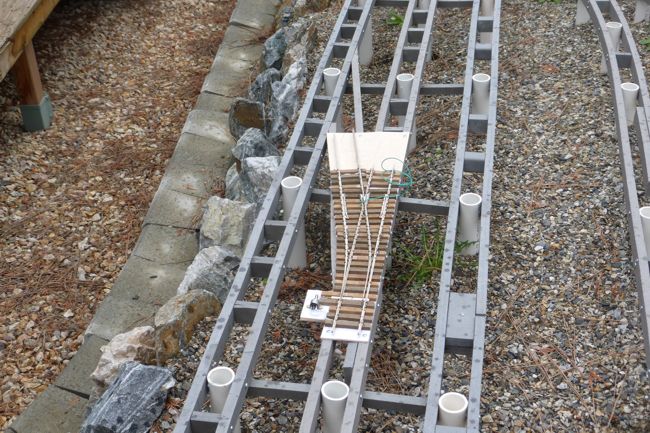
Those are brass screws (Robertson type) that serve as fix points to solder the rail to. Through the tie and into the plywood.

Home made track gauge using NEM standards.

Closure/guard rail combo that leads to the frog.

The hole is in the stock rail in the points area; to hold the rail in a fixed position without soldering points.

Yes, it is all C215 NS rail from Llagas Creek. Tough stuff, hard to file. I machine whatever is easier to machine than file.

Confucius say, man with broken rib should not sneeze. I know these things. I fell on the last day of downhill skiing a few years ago and broke 4 of them. Ouch. I still feel them if the wind sets from the south.

Take it easy.

Honey and whiskey.

Throw away the honey.

I’ve always admired your turnouts. I wish mine looked half as good.

Thanks Steve.

On that whiskey, we moved here 15 years ago, amongst other things that meant combining the contents of two liquor cabinets into one. It is an ongoing process, but I managed to clear up a few orphaned bottles while my ribs were healing. The stuff had the same effect as Extra Strength Tylenol, but tasted nicer.

Thanks HJ, now another question. NEM standards, are they the same as G1MRA standards? I tried to Google the NEM and MOROP but the web site is not available functionally.

Bob C.

NEM-Morop standards are slightly tighter and are really based on the 45mm track gauge. Which means the nominal gauge is 45.00mmm +0.3mm

http://www.morop.eu/de/normes/nem110_d.pdf

From what I remember the English version was pulled because for some it wasn’t English enough — probably something about ties and sleepers, points and switches/turnouts etc. etc.

Once I found that out there was no need for me to volunteer and do the translations. Life’s too short.

Thanks HJ. I took German in High School, but have long forgotten what I learned. I have a close friend in town that can translate for me if I need to, but I think ‘a picture is worth a thousand words’.

Bob C.

I’ve seen quite a few build logs of turnouts and hadn’t seen the screw idea. I really think that is the way to go. I will file that away for when I build turnouts, someday…

Those are super pix, and I agree with Bob C that SOME explanation is required . I’ve built some switches from kits (and rebuilt some time-destroyed switches), so I appreciate all the work you’ve done.

At the risk of hijacking this thread, what would you do to make a curved switch? Either from scratch, or from a standard kit. I’ve got a micro-engineering nickle silver switch which just won’t fit on an existing curve. The mainline will follow the curve, but the straight portion will require either a curve, or an extensive relaying to fit the straight portion into the curve.

Perhaps I should open a new topic? “Curved switch question?”

Dick Friedman said:

Those are super pix, and I agree with Bob C that SOME explanation is required . I’ve built some switches from kits (and rebuilt some time-destroyed switches), so I appreciate all the work you’ve done.

At the risk of hijacking this thread, what would you do to make a curved switch? Either from scratch, or from a standard kit. I’ve got a micro-engineering nickle silver switch which just won’t fit on an existing curve. The mainline will follow the curve, but the straight portion will require either a curve, or an extensive relaying to fit the straight portion into the curve.

Perhaps I should open a new topic? “Curved switch question?”

Thanks! The curved switch build is covered in this

http://www.rhb-grischun.ca/html/curved_turnout.html

It was an after-thought since the standard version was not such a good fit.

Two more off the list, five left to go. The End is near!

Your turnouts, especially the curved ones, are probably the best i’ve seen on this site

well deserved kudos

:wink:

Mark Dash said:

Your turnouts, especially the curved ones, are probably the best i’ve seen on this site

well deserved kudos

:wink:

Thank you Sir!

The big curved one is off the list; two more to go! Nope no pictures until I have those two done, I have my priorities.

(http://rhb-grischun.ca/phpBB3/images/smilies/39.gif)

They are done, now I need better weather to install the last one on the layout. It has been raining for most of the long weekend and keeps on going.

But not to worry, plenty of Llagas flex to assemble; not to mention the gazillion other projects in various stages of “non-completion”. The rain is a major nuisance as far as the weeds go, can’t spray and I’m not in the mood to get digging in the rain.

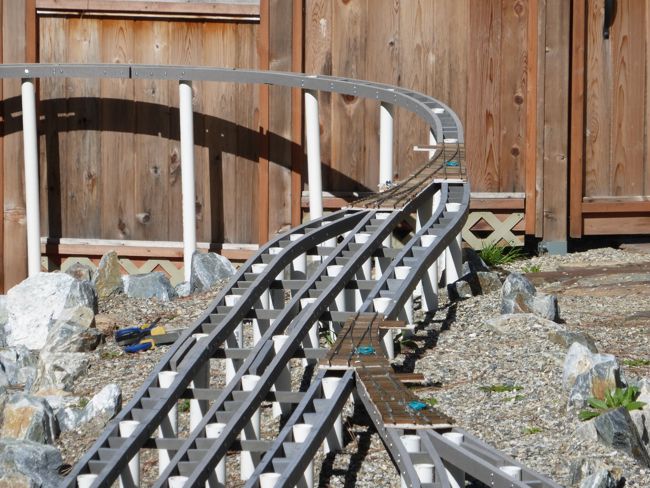
This was the first combo

Followed by the two at the North end of Bergün

The large curved one at the south end

End the crossover to get to the freight shed/station combo

Supports on that combo to be adjusted when the rain stops.

The view from the balcony.

(http://www.rhb-grischun.ca/P1a/TO_Bergun19_s.jpg)

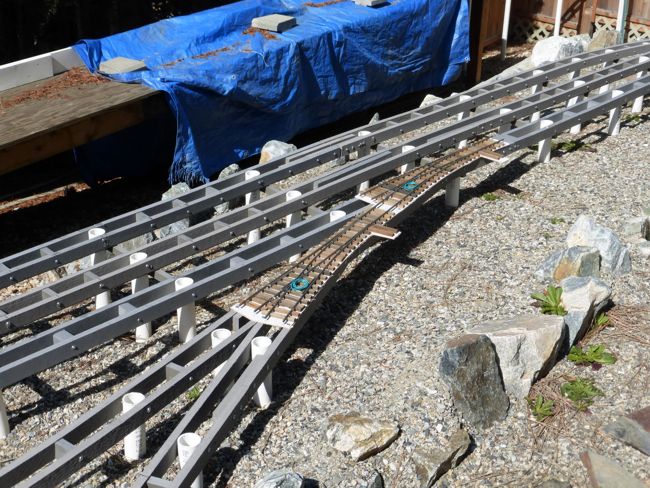
The entry turnouts to “Thusis” (End of line) are placed. If I get a move on I could get the other end done before it rains, again.

(http://www.rhb-grischun.ca/P1a/TO_Thusis20_s.jpg)

The rain held off and I got the other three placed.

(http://www.rhb-grischun.ca/P1a/TO_Thusis21_s.jpg)

(http://www.rhb-grischun.ca/P1a/TO_Thusis22_s.jpg)