Large Scale Central

Aristocraft U25B Handrails Needed/Imagination Station KOT

The RS-3 stanchions have a big square base, that goes into a recessed square hole in the RS-3:

Not sure how you would mount these, perhaps cut the large square base away?

By the way, if you heated the USAT ones to red hot and then let cool (just the end) I would bet they would bend without breaking, of course a repaint would be needed, all of a few seconds.

Greg

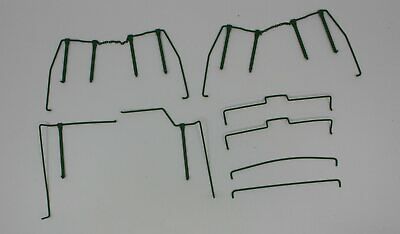
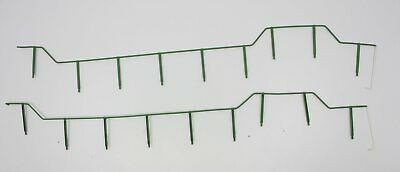
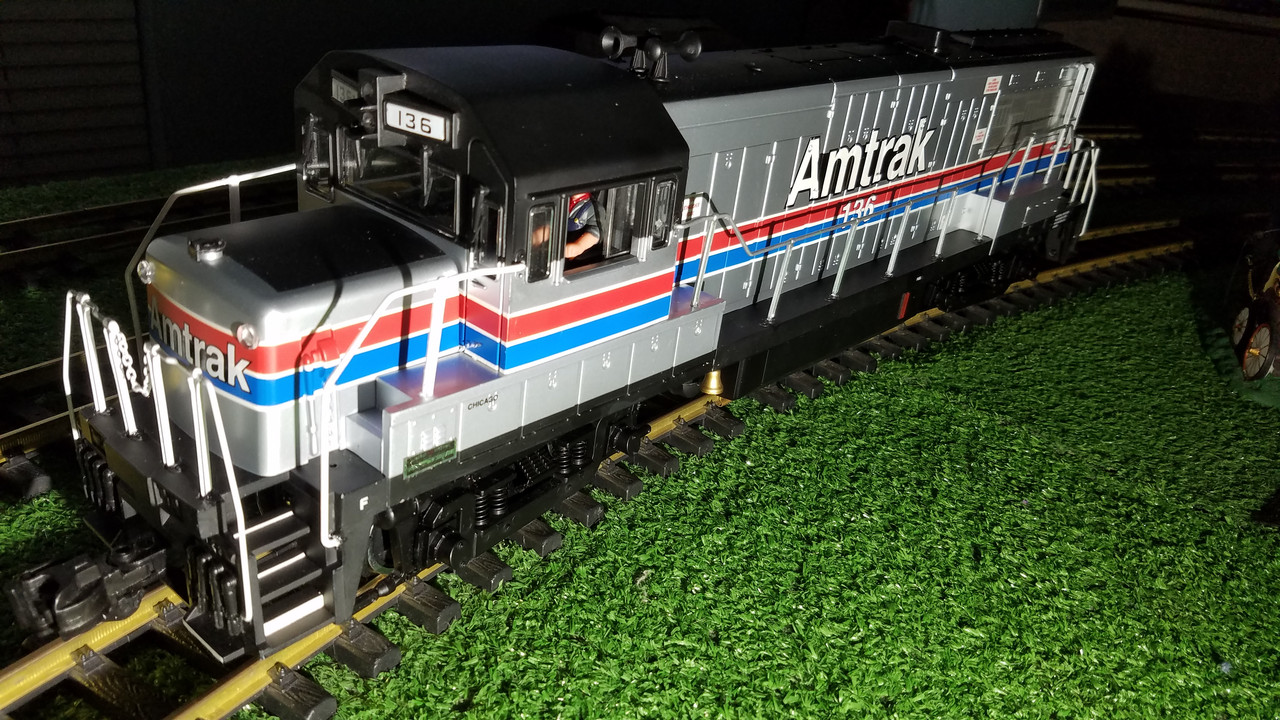
Greg, I would not cut the base away on the RS3 plastic stanchions. Instead, file off the U25B catwalk detail flush, and then enlarge the hole, if need be, to accept the square / rectangular peg at the bottom of the stanchion.

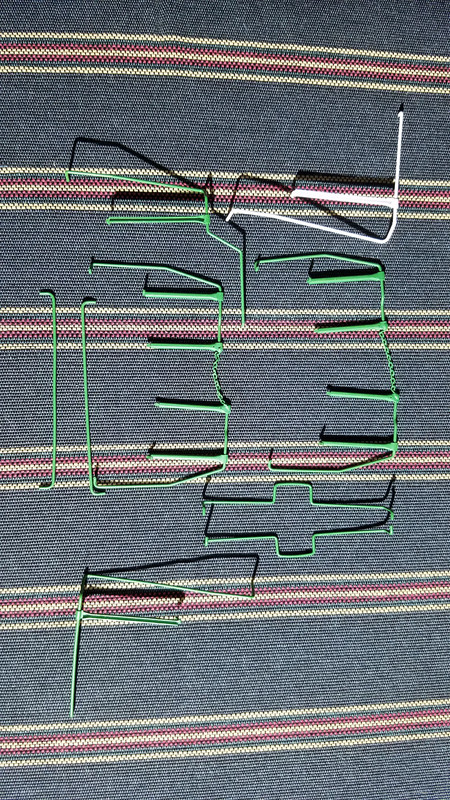
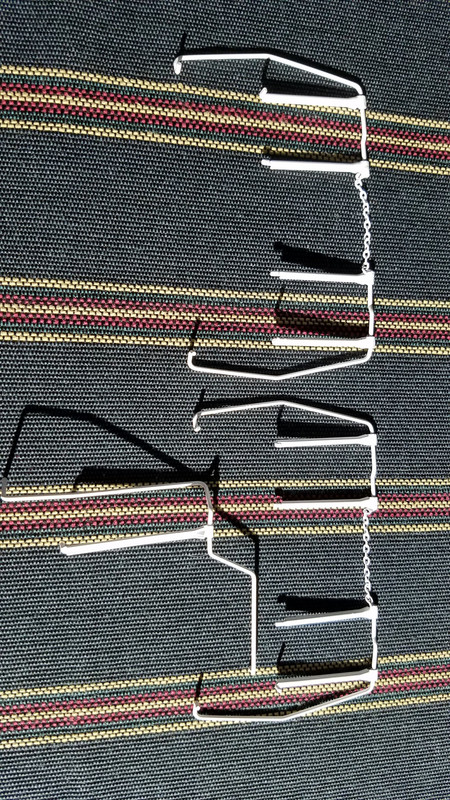
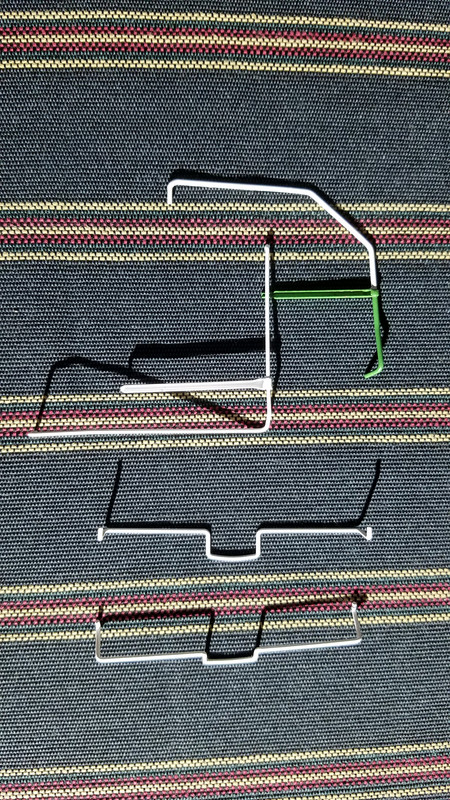
But thinking a bit more of what Rooster suggested, I suppose holes could be drilled in the sides of the U25B sill to accept the USA Trains side / end rail stanchion right angle prongs. That way they don’t need to be bent straight. Doing this, I suppose spacing between the stanchions could be left as is with the USAT railings, too - ignoring the U25B spacing. The problem may be figuring out how to deal with stepping up over the boxes near the rear of the loco.

As to bending the USAT railing wire, if done carefully with 45 degree angle, it should work to transition over the boxes. Using longer “donor” SD70 or SD40-2 railings would seem to allow for enough excess to optimize position of the stanchions in optimal places to be more pleasing to the eye.

Just a thought,

-Ted

Hopefully one of these mage links will work.

https://postimg.cc/cgFv9d90

https://postimg.cc/cgFv9d90

20190909-205927

Easy now Rooster…

Nice pictures Ken except not one shows the existing holes for the stanchions… how about one of those?

Of course the point is probably moot, since Ted’s picture is fine. I’d be interested in the hole size.

Ted, those bases on the RS-3 stanchions are ugly huge if they are sitting on top of the walkway I think… of course the stanchions are huge in of themselves.

Greg

Sean McGillicuddy said:

Easy now Rooster…

Not my cup of tea Sean but a nice paint job either way !

Honestly in the VERY brief research I did on the GE 25 Uboat. I personally see no reason why holes cannot be drilled on on the sides allowing the use of the USA railings. That way you do not have to bend those USA railing tedious tabs that will break at the bottom of the stanchions.

I find this thread quite humorous. ALL THOSE that have bitched about Aristo Craft products over the years saying they are NOT prototypicaly correct nor are they to scale are now trying to fix an un-prototypical locomotive with Aristo parts…LMAO !

BTW …Amtrak never owned a U25 that I’m aware of …however I challenge the experts to prove me wrong ?

Nice looking loco Ken and I’m sure the kids will enjoy. I have added my advice so carry on gentlemen.

This post has been edited by : ROOSTER

Thank you Rooster,

As to prototypes from what research I had done, early production U28Bs resembled U25Bs in appearance and used their car bodies. Later U28Bs had split windshields and side mounted stanchions like the New Haven picture above. Some railroads, like the Rock Island, replaced the single large windshield when damaged in their U25Bs with the split windshield for cost reasons, but vertical mounted stanchions remained.

Example New Haven U25B with typical single piece windshield and vertically mounted stanchions:

Like Rooster stated, I did not find Amtrak U25Bs, and I did not find they had U28Bs, either.

That said, Ken’s U25B really looks nice no matter what railing types would be installed or even if none are installed at all. It still would look great pulling several Amtrak passenger cars irrespective of the"10 foot rule".

-Ted

Nice photos guys! Great example of both handrail mountings. I ordered USA handrails today because they said that even if the stantion mounting tab breaks, you can easily solder a piece of rod to these and according to them, you can just bend the top railing catch or holder just a half millimeter outward to free up the stantion from the railing. This allows for adjustment in spacing. Also, they told me that the actual handrails can be significantly bent without breaking, as long as you don’t overdo it by bending it to many times. I hope I can handle this project because I can’t seem to find actual handrails anywhere. I did put a post on the Arstocraft Forum just in case someone may have a set or parts engine aying around. I kinda knew, like Rooster said, that Amtrak never had U25B’s but I don’t think most of the public is going to be aware of that and I’m sure the kids that run it won’t care whether it’s prototypical or not.

We would just like to get it looking as good as possible, even if that means side mounting the handrails, which I am considering, due to Roosters photo and info.

Thanks! Ken

Hey guys,

I found this item on eBay from Trainz.com for $18.99 and $10 shipping, or (thereabouts) and snapped it up right away hoping it was the right right set for the U25B. Maybe some of you can look closely at these photos and tell me if you think this is the right hand rail system for the U25B, since the listing didn’t give any idea what locomotive it was for. I’ve also provided a link, which I hope works and the eBay item number in case my photos don’t work again. Here is the photos, hopefully.

Couldn’t contact them immediately for information and didn’t want to loose them, if they are correct. If they are correct, just wondering if anyone knows what color the handrails need to be painted on that Amtrak engine? I can’t find a photo. I’m guessing here but, maybe black or silver??

Here is the link,

392345936909 Ebay Item #
https://www.ebay.com/itm/Acme-3000X-121-Green-Metal-Side-amp-End-Handrails-/392345936909?txnId=935988222026#vi__app-cvip-panel

You guys think these will work?

Ken, the pictures you show of the railings do seem to resemble some used on the Aristo U25B, except for the end railings that appear to have right angle prongs at the base of the stanchions.

As to what color the railings are, it seems they are white (and or both) silver for the Aristo Amtrak U25B:

A prototype Amtrak GP40PH that has railings seems to have silver railings, too

To see most Amtrak locos, clink on link below.
https://www.hebners.net/Amtrak/index.html

-Ted

The Aristo U25B Amtrak that I have has white handrails. Those you show in the picture Ken are very similar to the ones on mine except for the front and back handrails as Ted said. The front and back rails need another kink at the bottom but do go into the side of the loco. I have never posted a picture on this website before, but tomorrow when I have the time I will try.

Colin

Ted, Colin,

Appreciate the nice clear photo Ted! Both of you are very correct after looking at the link that Ted supplied. Many of the handrails are painted with silver centers and white ends. That’ll be good information for me when I paint them. There is another picture that I couldn’t seem to provide here because it wouldn’t download from eBay. That photograph shows the front handrails much clearer and it also shows the side, front handrails as well. I do see what you are referring to Colin about the wrong angle at the bottom and this makes me believe that maybe this is a combination of USA trains and Aristocraft handrail sets, although I’m not sure until I see them. One thing for sure, between both sets of handrails, the ones that I ordered from USA and this set, I should be able to make a usable set that will look good. I’ll paint them silver except for the handrails that show white as a color on Ted’s photos.

Like you guys suggested and I kind of figured, I’ll paint all 8 ends white in addition. I really appreciate your input and I’ll let you know what I find when they arrive and if they’ll fit or have to be modified. I’m not a handrail expert so I hope I can handle this project! I’ll post some photos when they arrive and I’m finished.

Thanks again everyone! Ken

Ken, so you can see what the U25B railings (both side types and end types) look like, there is a loco on ebay the shows them in the foam packing:

-Ted

Thanks Ted,

A few modifications, some silver paint and a moderate amount of time yielded these results. Not perfect but acceptable to the kids that run it. I am in need of one gearbox though, if anyone has a spare. One is making a little noise. Maybe the screw needs adjustment. It looks like someone turned it before and I don’t know where or how to set those screws at the ends of those gearboxes/drive? Thanks!

Good job Ken!(https://largescalecentral.com/externals/tinymce/plugins/emoticons/img/smiley-wink.gif)

Thanks everyone! Ken

Ken,

I would check the “U-joint” connecting the motor to the gearbox. Unless there’s an actual gear issue. This is usually the noise maker. You might try putting some grease on there to quiet it down. Also when open you may be able to see if the adjustment screw has any effect on the pressure applied to this joint. I’m honestly not sure if it makes a difference…and there are many different versions, some don’t even have the screws at all.

Rocky,

The gears are in good shape as the engine hasn’t been hardly ever run. I did grease the gears and shafts very well and that did seem to help quiet the noise quite a bit but I just wanted to make sure that turning that adjustment screw doesn’t cause excessive wear on the gears or shafts. I know the screw has been turned, I can tell. The reason I have a concern about it is because when I first started using the locomotive I had a 1 amp draw on the transformer, especially in reverse. That problem seems to have gone away now and I was just trying to make sure that we weren’t going to have damage to the drive by having that screw out of adjustment. It’s one of the things I don’t understand in the Aristocraft, G scale world and I didn’t know how to adjust it. I didn’t know if I should try to re-adjust it or leave it alone but one thing I do know for sure is that it has been messed with before by the previous owner and that may not be good. The locomotive drive seems to be fairly quiet now and is no longer pulling any amperage in either direction, so maybe it’s okay. I just hate to run it and damage the gears down the road, if it is out of adjustment. However, if anyone knows how those are supposed to be adjusted, any information would be appreciated on it.

Thanks so much! Ken

http://www.girr.org/girr/tips/tips1/brick_fix.html