Andy Clarke said:Since you're the one with the imagination, we'll put you in charge of building it...................;)
Now, I'm sure someone can come up with a way, to mount one of those 20 dollar mini electric chop saws that are sold at Harbour Freight, on a drop belly flat car, so that it could be used to grind slots into the track.... It only takes just a little imagination.... :)
I have no imagination… Absolutely none… hehehe 
“If you build it, he will grind” OK, back to serious expansion related stuff. Taking what I learned from mistakes in trying to cast in ladder roadbed connections in the switch pad, I built the form for the crossing pad last evening. I didn’t get a picture yet, but this drawing may help explain what I’m trying to do…
(http://lsc.cvsry.com/XingPad-720.JPG)
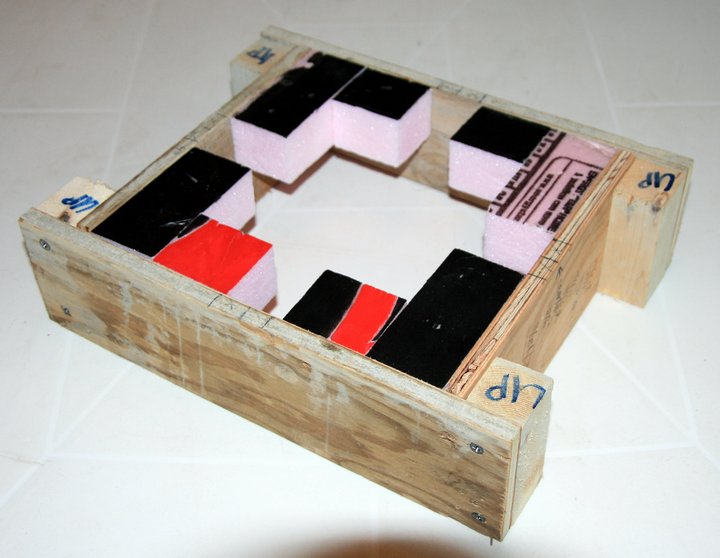
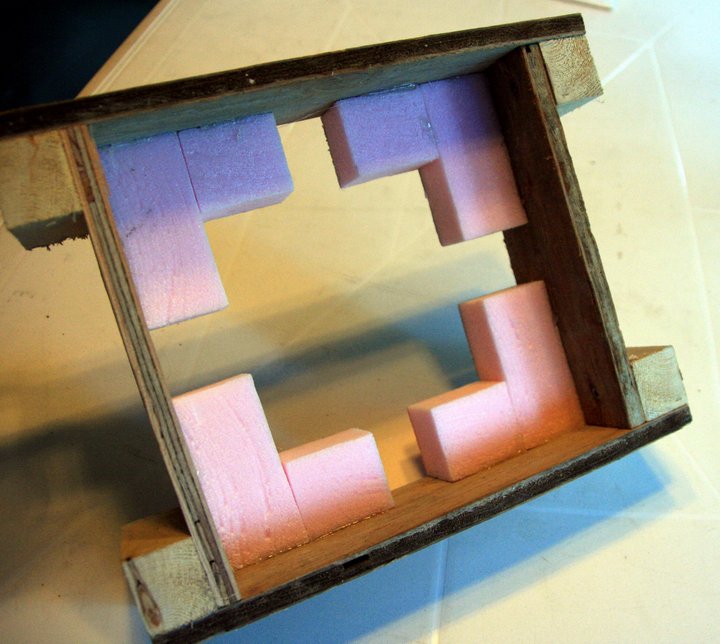
The dark gray shape is at track level. The light gray is 1.5" below track level. This creates a shoulder and separator for the ladder roadbed. Heres what I’ve learned from casting mistakes on the switch pad… Forms must have the ability to be taken apart from the outside. Blocks intended to create voids must be made of multiple slip fit pieces, or a soft material that can be cut away without force. With those ideas in mind, I created an outside frame plywood open top/bottom box as the basic form. It can be completely disassembled into 4 pieces by removing 8 screws. When looking through my scraps for blocking ideas, I found a small piece of 2" thick pink foam. I cut this to the appropriate sizes to create the blocking represented by the light gray shapes in the drawing. I ended up with 8 pieces. These pieces were then attached to the plywood form and each other with hot glue. I don’t think the pink foam will stand up too well to motor oil, so I will rely on the ease of tearing and crushing it to remove it after the outside of the form comes off. This will likely be the last of the roadbed related concrete I’ll pour. All future roadbed will be ladder or bench work. Just to be sure of that, I’m going to burn my collection of wood scraps used for blocks and forms 
Jon,
I’ve had good luck using WD-40 as a mold release on pink foam. The foam didn’t seem to suffer at all.
Take pictures!
Thanks Bruce -
I have that or something similar around, and many scraps to test spray on.
Film at 11.
Well it’s not quite 11, but here are the pics…
(http://lsc.cvsry.com/XingForm1-720.jpg)
(http://lsc.cvsry.com/XingForm2-720.jpg)
Still raining, no end in sight.
That’s some form! Now we have to see it in action.
Yeah, I’m wondering if we can ever make it to 72 hours without rain this spring. Rain, rain, rain. Save it for August!
Bruce Chandler said:We have been trying to build a new bike path since late last fall. Struggling to get ground dry enough to lay concrete. Amazing amount of rain and yet flooding has been kept somewhat under control.
Yeah, I'm wondering if we can ever make it to 72 hours without rain this spring. Rain, rain, rain. Save it for August!
Bruce Chandler said:
That's some form! Now we have to see it in action.Yeah, I’m wondering if we can ever make it to 72 hours without rain this spring. Rain, rain, rain. Save it for August!
I forgot what the sun looked like. Just in the last 3 days we picked up over 5 inches of rain. Future forcasts are calling for a break in weather sometime next week. Lets hope they are rght for once, we need to play with the our trains.
The only good thing with the rain is I dont mind building some structres and helps everything grow nice.
I’ve had to pump 4 inches of water out of the pool every day and several times some days.
It is sunny while I’m working, monsoons when I get home.
The grass is growing like kudzu and it’s always too wet to mow.
Jon,
The form looks good.
I think I’m going to use concrete bases for my buildings in the future.
Hopefully a little more complex than a simple square or rectangle. So your information will prove useful to me.
Ralph
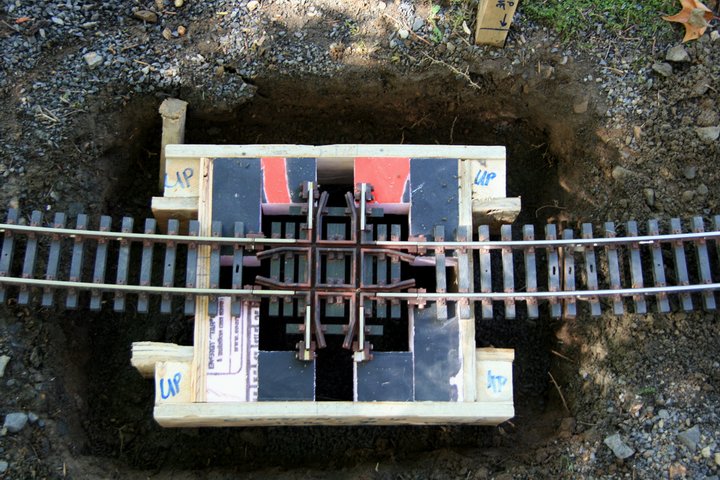
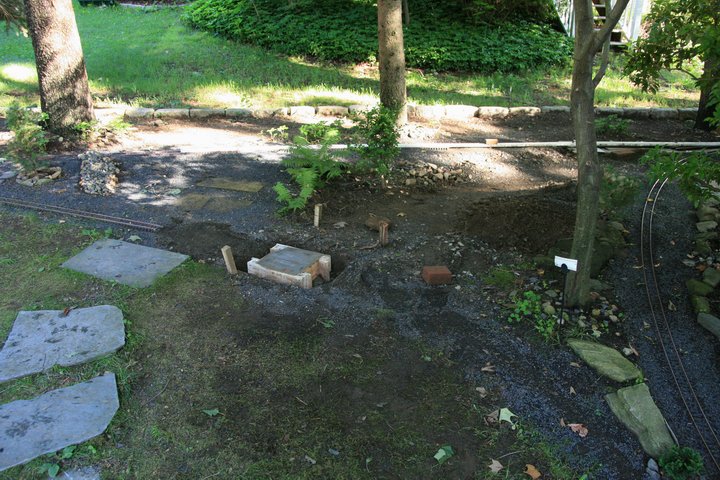
We had a rare dry afternoon today so I took advantage of my day off to pour the crossing pad. The first challenge was alignment. With the ladder transition points cast-in, there is no margin for error in placement. It took several attempts to get the form to line up with all 4 leads of the crossing. Next I struggled with decisions on level. At first, I planned to cast the crossing pad dead level in all directions and have the approach tracks level off while crossing. This proved to be too difficult to do with the existing grade on the wye leg. I decided a compromise would do, and allowed the pad to follow the grade of the wye. This will give nearly a full bubble of lean to the new track crossing over the wye. That would be OK if it leaned to the inside of the curve, but unfortunately it leans to the outside. This will always be slow order territory, [url=lsc.cvsry.com/NewSw-31-1200.jpg]
(http://lsc.cvsry.com/NewSw-31-720.jpg)
[/url][color=blue]Form in place - Final check of alignment - FF: Click to Enlarge - IE: Right Click Photo and select Open Link in New Window to Enlarge[/color] [url=lsc.cvsry.com/NewSw-32-1200.jpg]
(http://lsc.cvsry.com/NewSw-32-720.jpg)
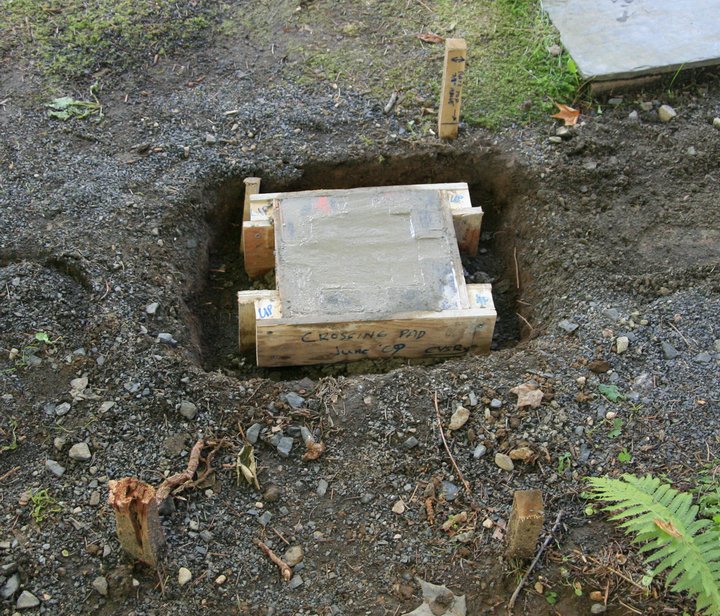
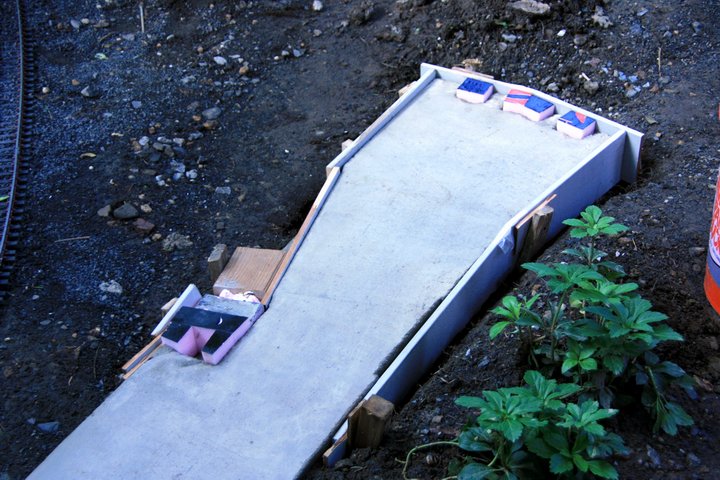
[/url][color=blue]Adjusting the approach grade - FF: Click to Enlarge - IE: Right Click Photo and select Open Link in New Window to Enlarge[/color] With no form edges to speak of, it wasn’t easy to screed off the excess and conform exactly to the form. With a trowel I was able to get a fairly good surface, but as you can see in the following picture, it did sag away from top just a bit. [url=lsc.cvsry.com/NewSw-33-1200.jpg]
(http://lsc.cvsry.com/NewSw-33-720.jpg)
[/url][color=blue]Concrete in the form - FF: Click to Enlarge - IE: Right Click Photo and select Open Link in New Window to Enlarge[/color] [url=lsc.cvsry.com/NewSw-34-1200.jpg]
(http://lsc.cvsry.com/NewSw-34-720.jpg)
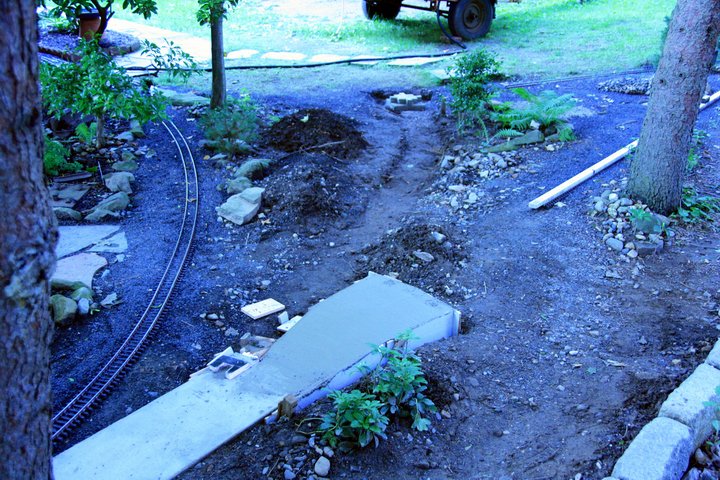
[/url][color=blue]Overall view of the pour site - FF: Click to Enlarge - IE: Right Click Photo and select Open Link in New Window to Enlarge[/color] One thing that has bothered me since I bought this crossing is the plastic rail in the center. I had considered painting it, but decided that the paint would wear off too quickly. Tonight, I ran across a roll of self adhesive foil tape. I experimented with using it to shine the rail tops of the plastic section. In the picture below, half of the centrer rails have been foiled. [url=lsc.cvsry.com/NewSw-35-1200.jpg]
(http://lsc.cvsry.com/NewSw-35-720.jpg)
[/url][color=blue]Foil experiment on the diamond - FF: Click to Enlarge - IE: Right Click Photo and select Open Link in New Window to Enlarge[/color] I think that looks 100% better so I continued and finished all the wheel contact areas. [url=lsc.cvsry.com/NewSw-36-1200.jpg]
(http://lsc.cvsry.com/NewSw-36-720.jpg)
[/url][color=blue]Foil experiment on the diamond - FF: Click to Enlarge - IE: Right Click Photo and select Open Link in New Window to Enlarge[/color] Hopefully tomorrow, the wye track can be re-laid and the MOW train run across the diamond.
Good work, Jon.
You are an inspiration!
I like that tape idea hope it holds up for you.Looking good on the pads Jon
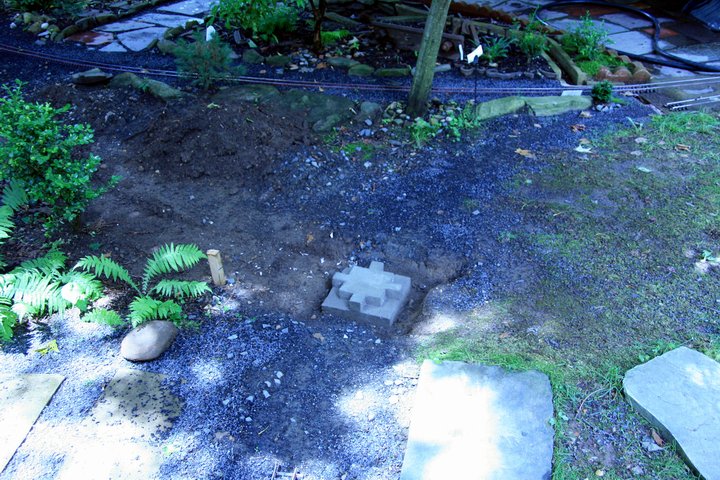
Wow. I was actually able to get some work done both Saturday and Sunday in-between the rainy evenings/mornings The forms came of the crossing pad late Saturday morning with good results. Once again, when I poured the pad I was in a rush to get finished before dark, so the WD-40 was forgotten. Again. The pink foam stuck in a few places, but was easy to cut loose. This time I finally was able to get near perfect results on the first try. [url=lsc.cvsry.com/NewSw-37-1200.jpg]
(http://lsc.cvsry.com/NewSw-37-720.jpg)
[/url][color=blue]Forms removed to reveal the pad shape - FF: Click to Enlarge - IE: Right Click Photo and select Open Link in New Window to Enlarge[/color] Next up was the repair of the switch pad. I either made an error setting the forms, or the form sunk. In any case, the last third of the pad sloped off, so that needed to be corrected. Forms for the repair are easier because the base of the pad can be used to shape them. This time I used the pink foam around the transition blocks and I DID remember to spray them with WD-40. [url=lsc.cvsry.com/NewSw-38-1200.jpg]
(http://lsc.cvsry.com/NewSw-38-720.jpg)
[/url][color=blue]Repair forms in place on the switch pad - FF: Click to Enlarge - IE: Right Click Photo and select Open Link in New Window to Enlarge[/color] And finally some mortar mix with a little stone sand added was used to level out the pad. [url=lsc.cvsry.com/NewSw-39-1200.jpg]
(http://lsc.cvsry.com/NewSw-39-720.jpg)
[/url][color=blue]Concrete in the form - FF: Click to Enlarge - IE: Right Click Photo and select Open Link in New Window to Enlarge[/color] I never did get to putting back the wye track or bringing out the MOW train 
I can’t believe it’s been over a month since i started this project. Time flies when you’re delayed by rain
The repair pour to the switch pad came out great. I removed the forms yesterday and checked it out. A straight edge will now lay flat across the entire length. The fix to the transition block didn’t work though. It’s just to small an area to get any adhesion. I might try one of those TapCon screws, or just not worry about it.
Today, after work, I reconnected and ballasted the main-line from Indian Hill Junction, which now consist of 3 switches, to Deep Cut. I also ballasted and reconnected the East Leg of the Wye between Deep Cut and Walk which now includes the new diamond. By the time I finished the family was requesting I cook dinner, so a test train and photos will have to wait for tomorrow.
Once I was done ballasting, I watered the track. I’m hoping it will grow soon
Jon Radder said:
I…
Once I was done ballasting, I watered the track. I’m hoping it will grow soon
Jon, why water the track with all the rain you’re getting?


So you stated you can’t build which is ok…but I hope you can paint?? Mr “I want my doors to open…”
(http://i45.photobucket.com/albums/f72/Shortybear/The%20Railroad/Scratchbuilding/June172009007.jpg)
Dave -
That’s pretty cool
I’m just OK at painting :o
Jon Radder said:Just for the record - I was perfectly happy with non opening doors. In fact I'd be happy with nothing :DDavid Russell said:No. But if I say yes would that discourage you from building it? I [b][u]REALLY[/u][/b] was kidding :D
Do the doors need to work?
Jon Radder said:You hurt my feelings Jon so I'm not giving it to ya' anyway, as a matter of fact I'm holding my breath till I turn blue! :P Your infastructure work looks smokin so far'Jon Radder said:Just for the record - I was perfectly happy with non opening doors. In fact I'd be happy with nothing :DDavid Russell said:No. But if I say yes would that discourage you from building it? I [b][u]REALLY[/u][/b] was kidding :D
Do the doors need to work?