Large Scale Central

Actually starting the expansion?

Wow. I never expected this to take all day, but it’s done! I guess I’m out of practice - I had a real hard time getting the finish the way I like. [url=lsc.cvsry.com/NewSw-11-1200.jpg]

(http://lsc.cvsry.com/NewSw-11-720.jpg)

[/url][color=blue]Waiting for the cure - FF: Click to Enlarge - IE: Right Click Photo and select Open Link in New Window to Enlarge[/color] The next challenge is getting the forms off without breaking those transition blocks off. I normally start loosening the forms while the concrete is still green, but that probably won’t happen this time as it’s getting dark.

Looking good, Jon.

But DARK? The sun doesn’t set until 2014. If you were a kid you’d claim it was still light out at 2100.

Bruce Chandler said:
Looking good, Jon.

But DARK? The sun doesn’t set until 2014. If you were a kid you’d claim it was still light out at 2100.


Electric lights work in the dark too :lol:
I see why you wanted the mixer :wink:
Ralph

Nice Work. I think that roadbed is thicker than my driveway !

Old motor oil from the lawnmower or other sources keeps the forms from sticking, but then I think you knew that.

Ric Golding said:
Old motor oil from the lawnmower or other sources keeps the forms from sticking, but then I think you knew that.
I did know that and was planning on painting the forms with it. In my excitement to start using the new mixer I completely forgot that plan :(
Bryan Johnson said:
Nice Work. I think that roadbed is thicker than my driveway !
Thanks Bryan - The form is 3.5 inches, the hole was more like 5 but then brought up close to the form with a gravel bed. I think I got the thickness recommendation from Marty Cozad. It's worked well for me. I used two layers of square metal fencing for reinforcement. Gave up on the rebar for this one.
Ralph Berg said:
Electric lights work in the dark too :lol: I see why you wanted the mixer ;) Ralph
Well not only was the sun tired out, but I was too! The pour took 2.5 bags on concrete + 2 bags of mortar mix. That, and this isn't the only concrete project I have to do. The front walkway is next.

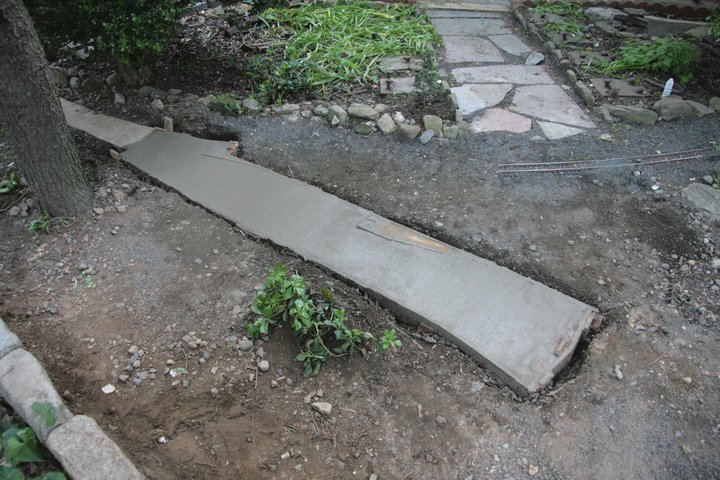
The forms came off this morning. When I added the blocking I tacked them on with my nailer using 1" brads, then added deck screws to hold them tight. In retrospect, I should have passed on the deck screws. I knew that there was no way the blocks were coming out with the side forms, so I had to dig more to make room for a screwdriver. [url=lsc.cvsry.com/NewSw-12-1200.jpg]

(http://lsc.cvsry.com/NewSw-12-720.jpg)

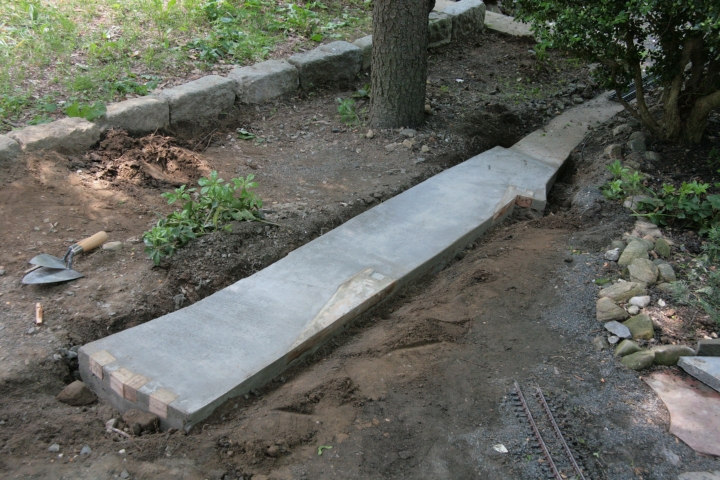
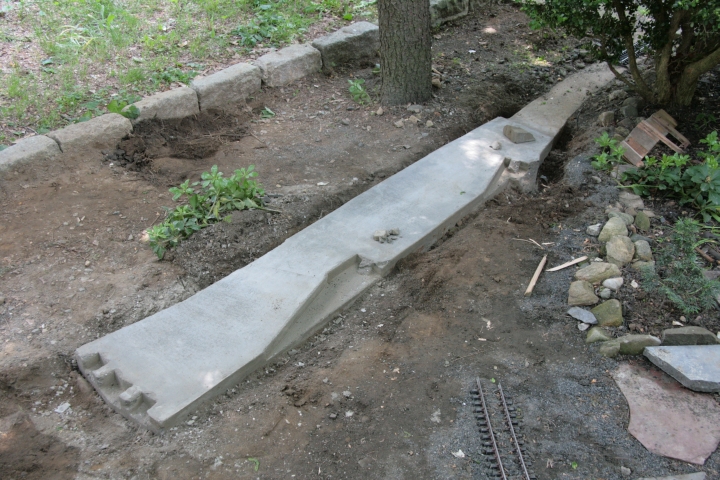
[/url][color=blue]Forms off but blocks in place - FF: Click to Enlarge - IE: Right Click Photo and select Open Link in New Window to Enlarge[/color] Getting the blocks out was a real treat. Next time they won’t be single pieces and they will be treated with oil to aid release. [url=lsc.cvsry.com/NewSw-13-1200.jpg]

(http://lsc.cvsry.com/NewSw-13-720.jpg)

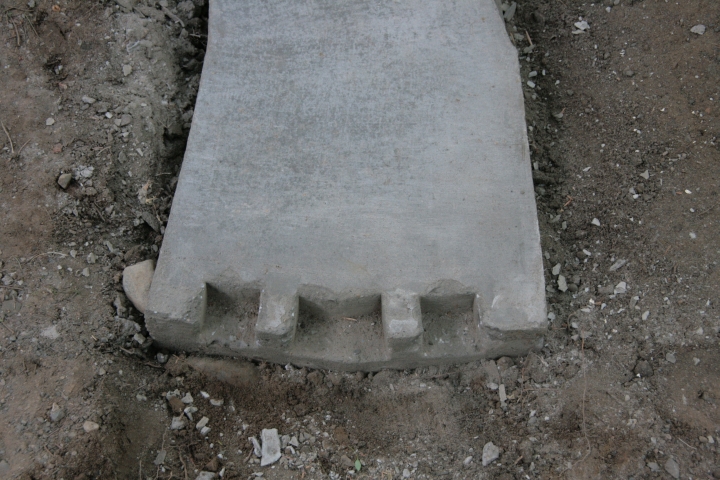
[/url][color=blue]The blocking for transition points removed - FF: Click to Enlarge - IE: Right Click Photo and select Open Link in New Window to Enlarge[/color] I really expected these small blocks to be the most troublesome, but they weren’t too bad. I was working on green concrete so I did loose some of the edges, but all-in all not bad. The middle block was the easiest because it was two pieces. I didn’t fare so well with the larger blocks. I even tried splitting the blocks with a chisel, but that didn’t help. [url=lsc.cvsry.com/NewSw-14-1200.jpg]

(http://lsc.cvsry.com/NewSw-14-720.jpg)

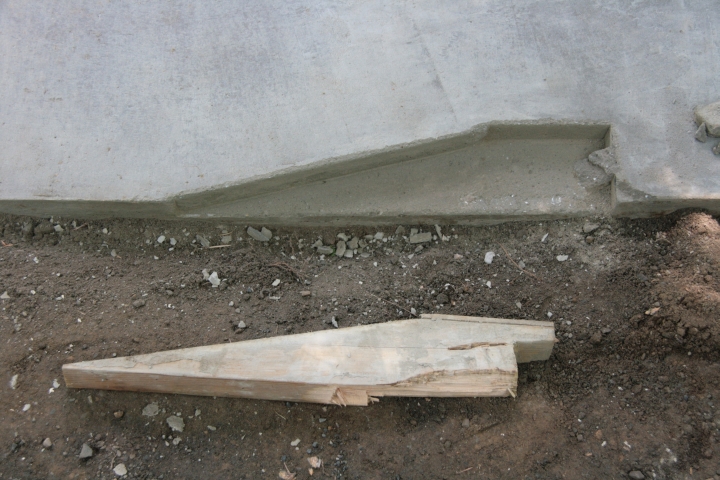
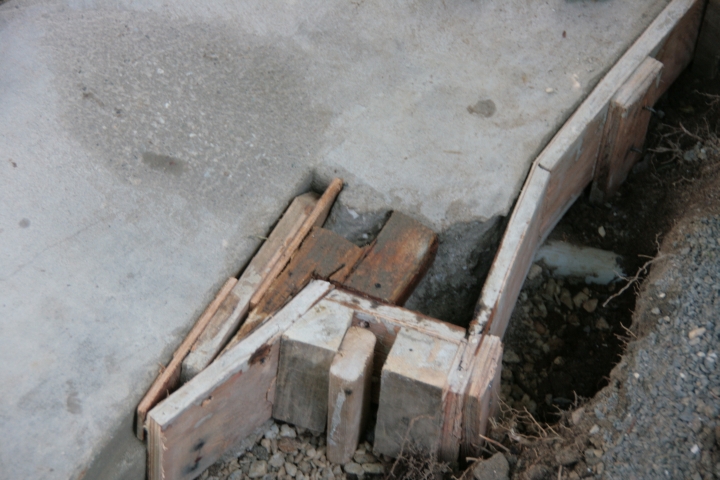
[/url][color=blue]Block removed, along with some of the concrete - FF: Click to Enlarge - IE: Right Click Photo and select Open Link in New Window to Enlarge[/color] Chiseling the last block put too much stress on the corner and it broke right off. [url=lsc.cvsry.com/NewSw-15-1200.jpg]

(http://lsc.cvsry.com/NewSw-15-720.jpg)

[/url][color=blue]Lost the corner and most of the transition point - FF: Click to Enlarge - IE: Right Click Photo and select Open Link in New Window to Enlarge[/color] [url=lsc.cvsry.com/NewSw-16-1200.jpg]

(http://lsc.cvsry.com/NewSw-16-720.jpg)

[/url][color=blue]End result with forms off and blocks out - FF: Click to Enlarge - IE: Right Click Photo and select Open Link in New Window to Enlarge[/color] I immediately went to work on the repair. This time I oiled the forms and made sure there were pieces I could remove to relieve the pressure. [url=lsc.cvsry.com/NewSw-17-1200.jpg]

(http://lsc.cvsry.com/NewSw-17-720.jpg)

[/url][color=blue]Repair form #1 - FF: Click to Enlarge - IE: Right Click Photo and select Open Link in New Window to Enlarge[/color] [url=lsc.cvsry.com/NewSw-18-1200.jpg]

(http://lsc.cvsry.com/NewSw-18-720.jpg)

[/url][color=blue]Repair form #2 - FF: Click to Enlarge - IE: Right Click Photo and select Open Link in New Window to Enlarge[/color] I just got the repair concrete in place and troweled out when a huge line of thunderstorms blew through. The entire pad was under water at one point so I’m not sure how well my repair held up.

So you did this with no help from the boys?
Looks good Jon…where is the cigar store?
:wink:
I had this on my mind all night…the more I look at it the cooler I think it is…Thats a good bit of work,
Don’t have to worry about that moving!

Thanks David -

Boys??? One is grown and away from home. The other is 18 and too busy with work and social life to help his old Dad :frowning: He does at least look interested when he comes home for food or money. The Cigar store is waiting for you to build it.

At one point I was considering concrete roadbed for the entire railroad based on Marty Cozad’s method. I started by placing all on my main-line switches on poured pads and one tail of my Wye on the far side of the walkway crossing is all concrete.

Then I saw the adaption of the ladder roadbed that Brice and Ken were using. It’s a lot faster build and comparable in cost. All new roadbed beyond this point will be ladder using their method and materials (Tuff noard).

The only possible exception will be a diamond crossing where the middle of these three switches will lead to. I’ll probably pout a small square pad with the transition castings for the diamond. Once switches are laid and the existing track re-opened the diamond is the next destination for the expansion project.

Jon, that expansion is really coming along and looking great.

Jon Radder said:
Thanks David -

Boys??? One is grown and away from home. The other is 18 and too busy with work and social life to help his old Dad :frowning: He does at least look interested when he comes home for food or money. The Cigar store is waiting for you to build it.


One cigar store “front only” coming at ya’… Screw it too your lexan box or a bird house…However there is a 2 or 3 decade national backorder in affect for the “cigar store” front with no deposit required. Your concrete dovetails are wicked!
OK so “old dad” is playing with trains …what do you think the boy’s are playing with right now? My boy is growing so fast and your depressing me!

:wink:

:smiley: I think it must be called Dave’s Big Indian Cigars

Still trying to repair the broken blocks. Using wood forms, even multi-part ones failed. Next attempt will use pink foam board to make the form. That way I can compress the form, not the concrete, when removing it.

Weather not looking too good for the next few days. Sunday’s storm nearly cause My RV to head down the hill to the neighbors house. 2+ inches of rain in less than an hour. The retaining wall for the RV/Boat pad was completely undermined by run-off water. I don’t know if my insurance will cover repairs, but I’m going to look into it.

I remember a few yrs ago we had 4" of rain in about 1 hr… unreal…watched beautiful water falls flowing in my basement windows with my wife screaming what can we do. My answer “nothing”… About 1hr later all was back to normal except a freaking mess in my basement!
Find a picture of a cigar store you like and e-mail it to me?
:wink:

David - You’ve got mail :smiley: :smiley: What do y’all think. The future [b]Dave’s Big Indian Cigar Shop[/b]… [url=

(www.nps.gov/klgo/parkmgmt/images/Lease_Buildings_7-07_001_1.jpg)

]

(http://www.lscdata.com/users/jrad/_forumfiles/Cigar_Store.jpg)

[/url][color=blue] A HUGE Picture changed to a link - FF: Click to Enlarge - IE: Right Click Photo and select Open Link in New Window to Enlarge[/color] Weather has been cool and gloomy the last two days. No ambition to work outside (again).

…winking…

Interesting, but kind of boring. What does the roof look like?

And, where’s the Chief? :lol:

Steve Featherkile said:
Interesting, but kind of boring. What does the roof look like?

And, where’s the Chief? :lol:


There are no photos that show the roof. Other buildings in Skagway built in the same tome frame (late 1800’s) have sloped roofs, so that’s what I would guess is behind the false front. For details you could check out: http://www.nps.gov/klgo/parkmgmt/verbauwhedes.htm

Which Chief - Mine or the one that belongs in front of the store? For mine, see a few posts back. As far as the store goes, probably long gone. It was a cigar store in 1898. It has been many other things since. Currently a jewelry store.

Do the doors need to work?