Large Scale Central

D&RGW combine build

Hi guys,

For reason I can’t now remember, last summer I decided to build a combine. I don’t model in the spring/summer/fall, so here we are in the depths of January gettin’ 'er done.

I was only able to find one good pic of the prototype:

This pic lives at the Denver Public Library. They have lots of good historic photos and you can zoom in on details. The link is here:

https://digital.denverlibrary.org/digital/collection/p15330coll22/id/51900/rec/1

A retired Grande guy was able to send me the folio sheet for said car. I imported it into AutoCAD and printed it at 1:29 scale:

Back in June I bought an Aristo donor car dirt cheap off of eBay:

The Aristo car provided its trucks, its roof, its steps, and some of its seats to the project.

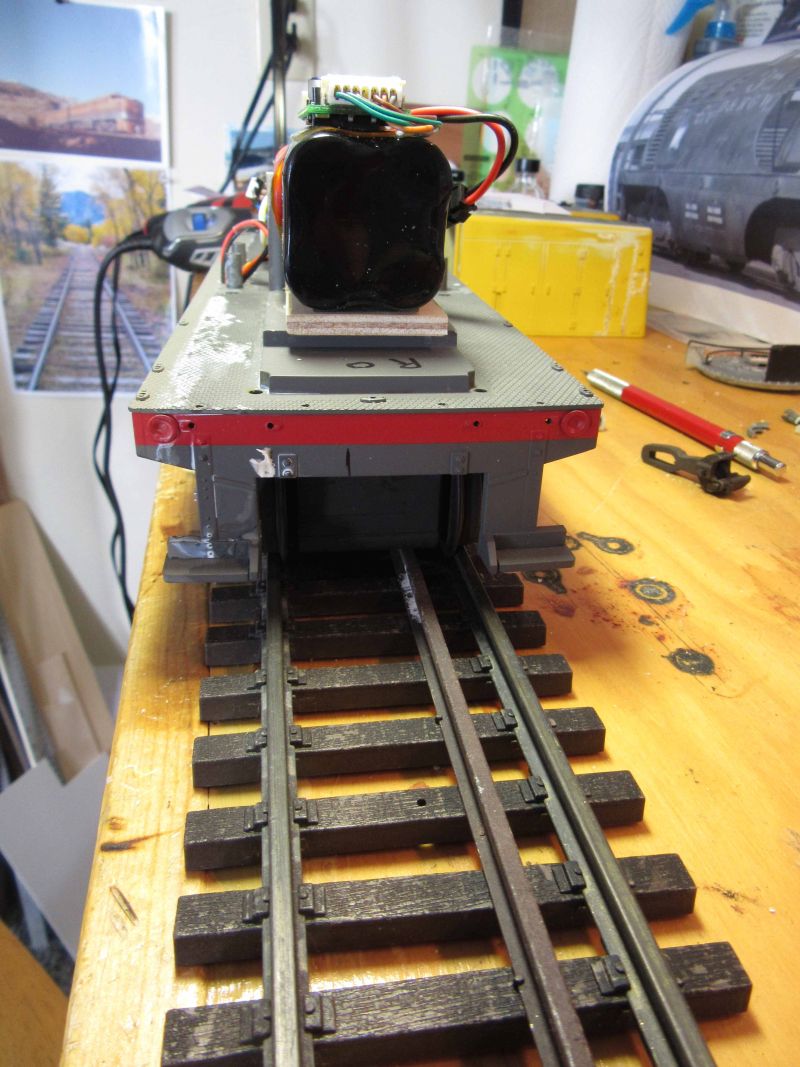
I finally began work on this project on Sunday. The floor is 1/4" craft plywood from Midwest Products. Here the trucks have been attached and a couple of weights. After this pic I took it out for a couple of laps on my mainline to make sure it tracked well:

The walls were created from a mix of 1/16" thick basswood and balsa. The siding was scribed with a pen just like the caboose I built last winter. Here are the walls temporarily sitting on the floor - obviously I still need to cut about 4" of length out of the Aristo roof:

This afternoon I began to finish up the windows and baggage doors. The long wall in the middle has its windows trimmed out with 1/16" thick basswood sheet and the top windows have been trimmed with 1/16" square basswood strips. The baggage door on the lower right has been cut out from 1/16" basswood sheet:

That’s it for now.

Cheers,

Matt

Nice. That is looking awesome! I’ll be watching this build

Jason

Matt, you made quick work of that. Nice looking combine. Will Definitely follow along to see the end product. Thanks for sharing.

Thank you for the kind words. I’ve been working on the walls this week and got a bit more done. Here’s one of the walls completely trimmed out. Trim around the windows is all 1/16" square or 1/16" sheet. The metal protection plating beneath the baggage door is metal duct tape. The letterboard will get trimmed once I know where the ends of the Aristo roof end up. I put grabirons on the baggage door, but I’m not thrilled with their size and may redo them with something smaller:

I wanted to see how one of the walls would look when painted, so I primed and painted it. This let me see if anything needed to be revised before I glue all of the walls together and to the floor. The wall paint is Rust-oleum Hunt Club Green. I sure miss the days of Floquil Pullman Green:

That’s all for now, hope to get more done over the weekend.

Cheers,

Matt

Nice work Matt!

Great project and I like your work so far. Following with interest…

Looking good, Matt.

Watching

Matt,

Thanks for taking the time to post this! We took possession of a battered LGB combine, and there are elements in your project I am sure we can “steal” to bring it back to service!

Aloha,

Eric

Hi guys,

Here’s an update for this weekend. I made the end doors from 1/16" basswood sheet and glued them to the end walls:

I then primed and painted the remaining walls and glued them all to the floor. I replaced the grabirons at the baggage doors with castings that are more to scale. Here’s the whole thing while clamped:

I re-attached the trucks and the end beams. I smoke a cigar or two a month, and sometimes boxes of cigars have nice square cedar spacers in them. The end beams were cut from one of those spacers:

I am hoping to finish this up next weekend.

Cheers,

Matt

Progressing nicely, Matt. Thanks for the update.

Hi guys,

Here’s an update from yesterday.

I whacked almost 5" out of the Aristo roof:

I then began working on the various railings:

The curved railings at each corner are kind of a pain. I use 1/16" round brass tube from K&S and hammer one end flat:

The flattened end is rounded off with a Dremel cutoff wheel:

I use a punch to mark the location of the holes for the end, then drill two #60 holes:

The end is then bent with needle nose pliers:

The rod is then bent around an appropriately sized bottle:

The bending and and flattening and drilling and rounding process is then repeated. The railing is then attached to the car body with HO scale track nails:

That’s all for now.

Cheers,

Matt

Do I spy a pair of Burl Rice couplers? I love mine too.

Yes, I generally use Burl’s couplers on the mostly unused or viewing ends of my projects.

Cheers,

Matt

Railings look very professional, Matt. Thanks for the how-to.

Okay, last update for the weekend.

I don’t normally make interiors for my models since they usually can’t be seen. I made a partial exception for this project. I kept the Aristo seats and restroom, and I also had an LGB stove. I left the Aristo seats on their floor because they were pretty much impossible to remove. The windows are scaled from the Grande’s folio sheet, and as it turn out the Aristo seats line up nicely with the windows:

I put the end beams back on. I kept the Aristo steps because I am too lazy to make new ones. The doorknobs are sewing pins stolen from my wife’s pincushion. The lettering is Microscale 24-21 decals; they are at least twenty years old and broke apart when applied, but with much muttering and swearing they were slide into position:

I still need to make the end beam railings, add air brake hoses and brake wheels. The roofing still needs to be added, along with roof vents and smokejacks.

Now, off to more important things. “Are you ready for some football?”

Cheers,

Matt

Hi guys,

Here’s an update for today.

In a nearby museum there’s an old Grande caboose whose interior has remained untouched for the 65+ years since the Grande donated it. I have some good interior pics, and one of those pics is of one of its shades:

I dropped that pic into AutoCAD and scaled it to match my combine windows, then printed a bunch of them on a laserjet. I added glass windows made from microscope slides. Shades were then added to most of the windows:

Next I made the end railings from 1/16" brass tubing and brass wire:

Truss rods were also made from 1/16" brass tubing, with Ozark Miniatures turnbuckles:

Finally, the end railings were attached. The brake wheel is from Precision Scale. The air brake hose is from Burl Rice:

A couple more hours should see this finished. It needs some touchup paint, trimming of the letterboards, and roofing. I’d run a mixed train, but it snowed and blew madly over the last 24 hours and my railroad is closed again, and it had just melted open on Friday for the first time in three weeks! Oh well.

Cheers,

Matt

High craftsmanship on display here. Thanks for posting your progress.

If you send me the Pennsy shell, I’ll make a barracks out of it!!

Thanks for all the support!

John, had I know you were interested in the Aristo shell I would have held onto it. Sorry!

Cheers,

Matt

Very fine work Matt. A first at that scale.

Doc