Large Scale Central

Repairing Wall Passenger Shelter [MIK 2016 entry]

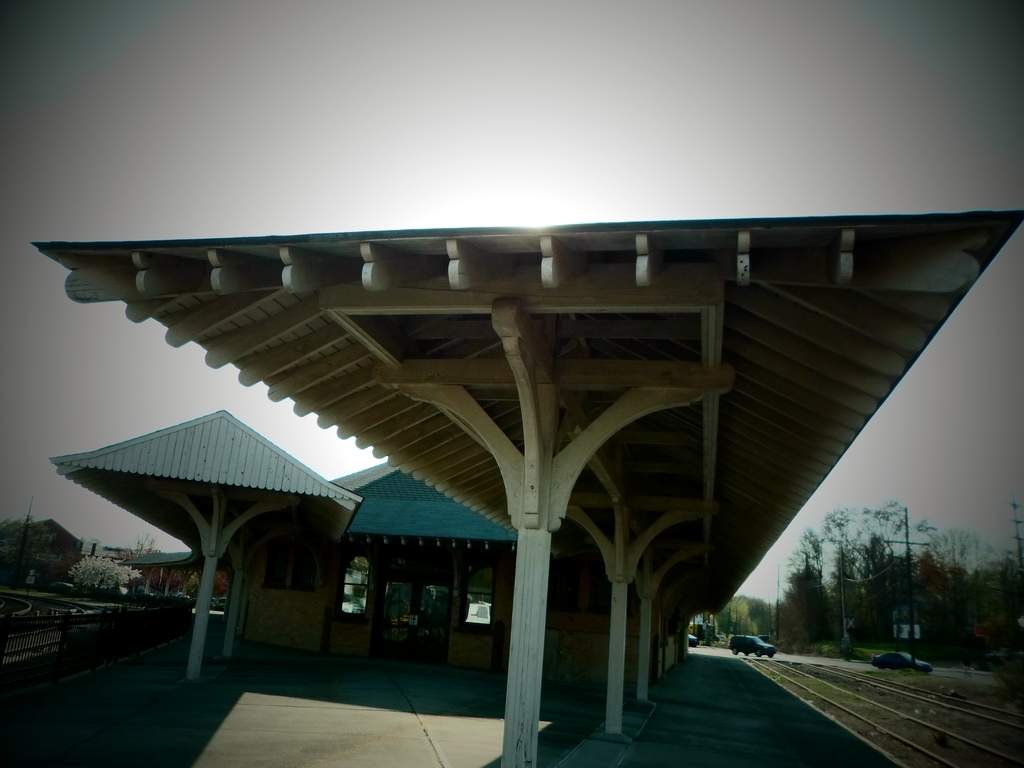
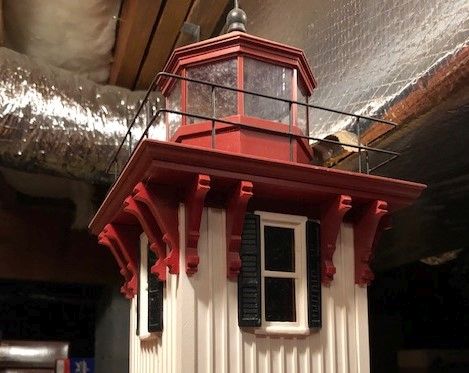
For the 2016 MIK Challenge I built a fairly complex passenger shelter for my Wall Station. It looked really good when I first planted it outdoors in the spring of 2017…

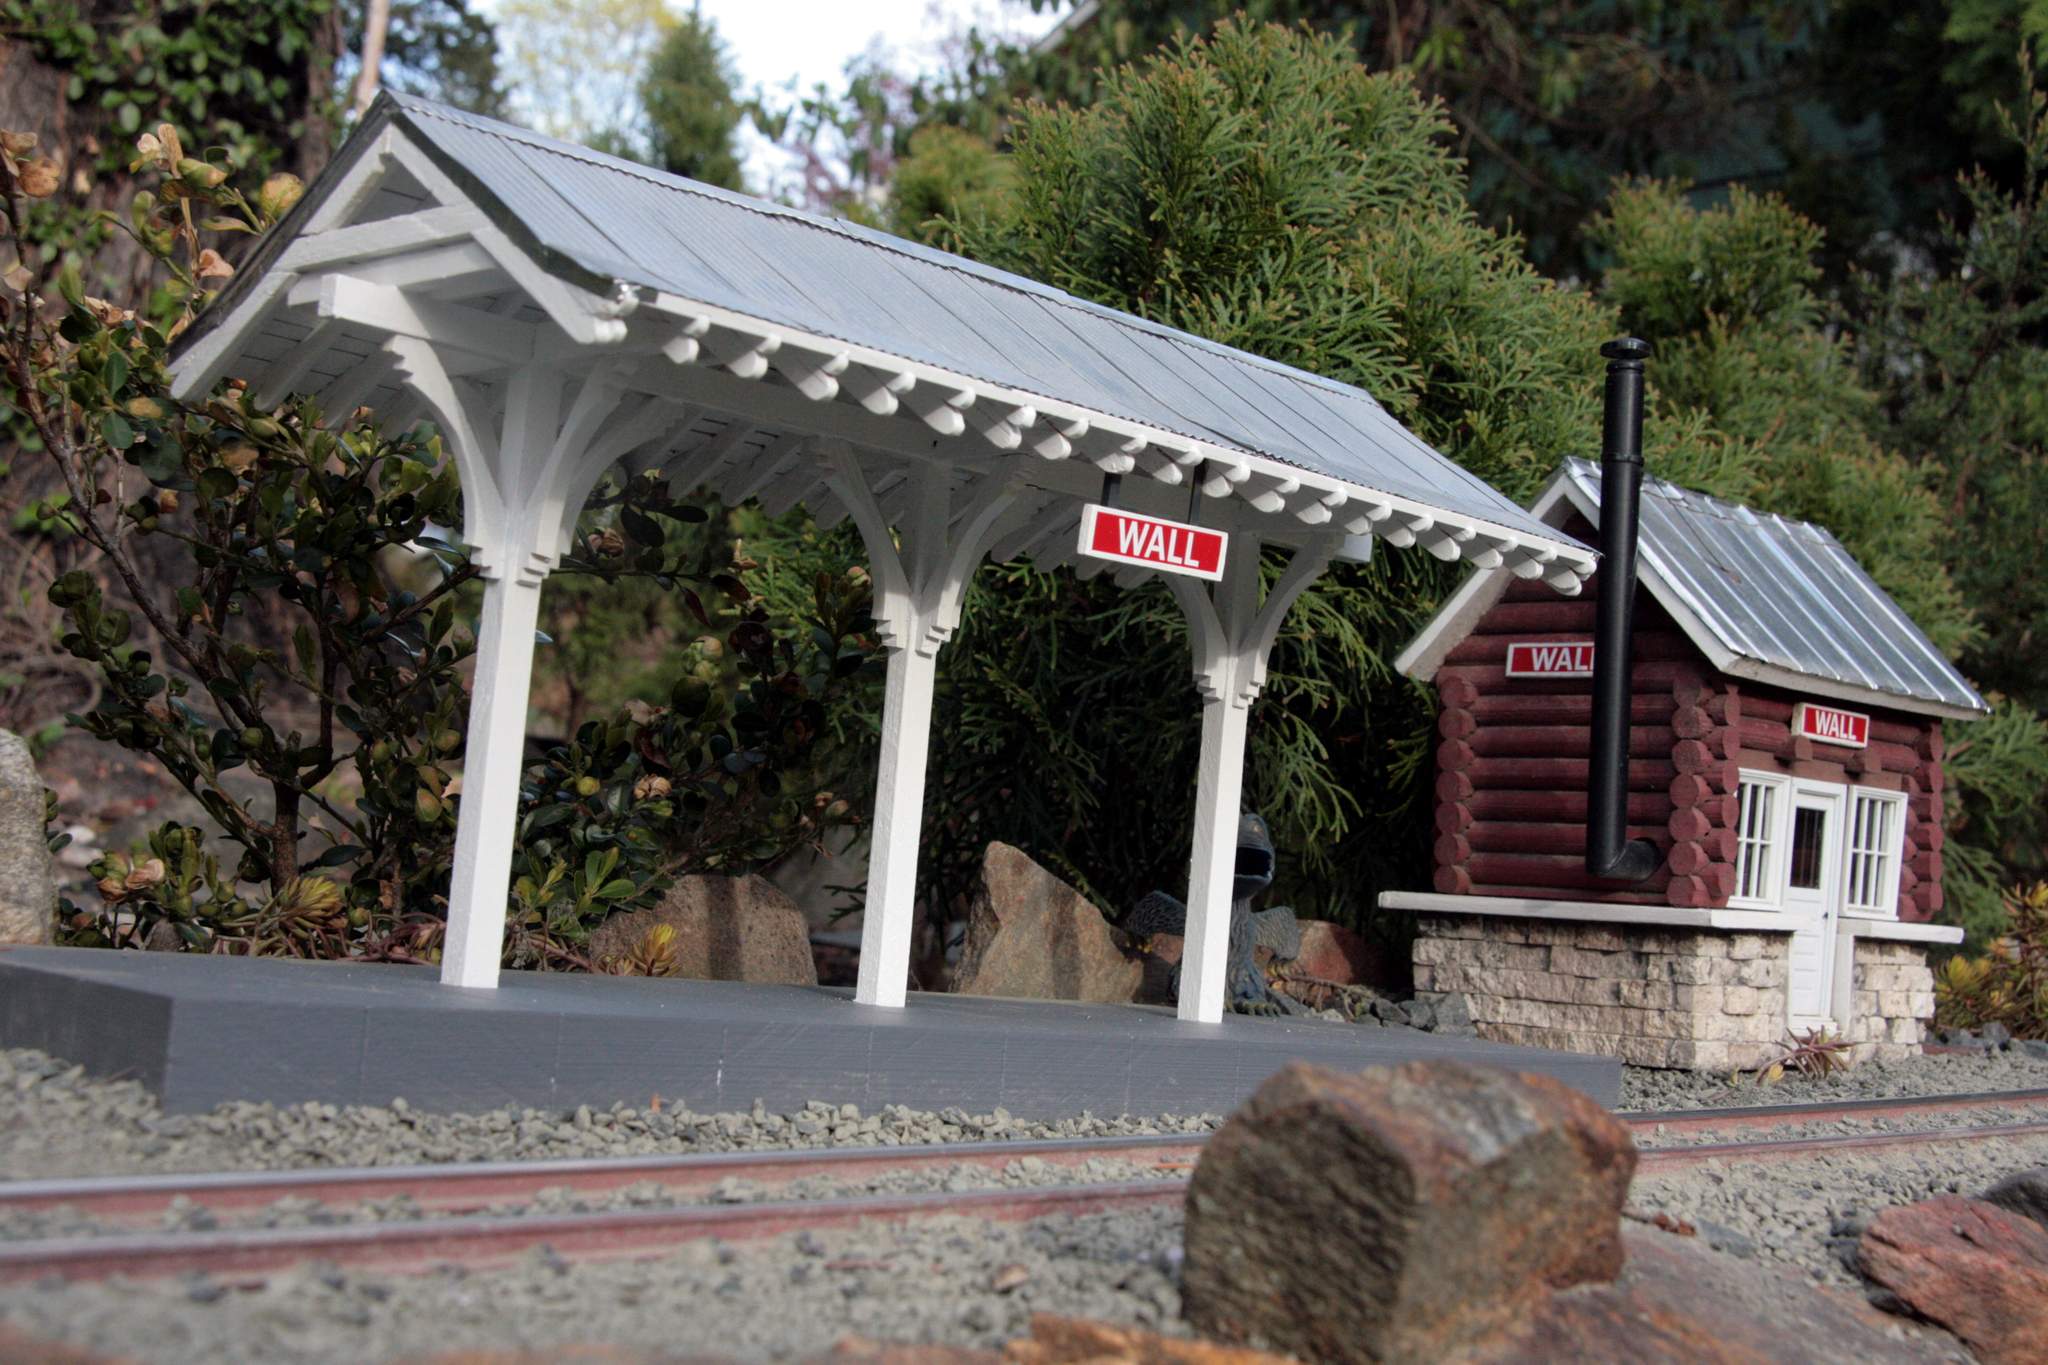
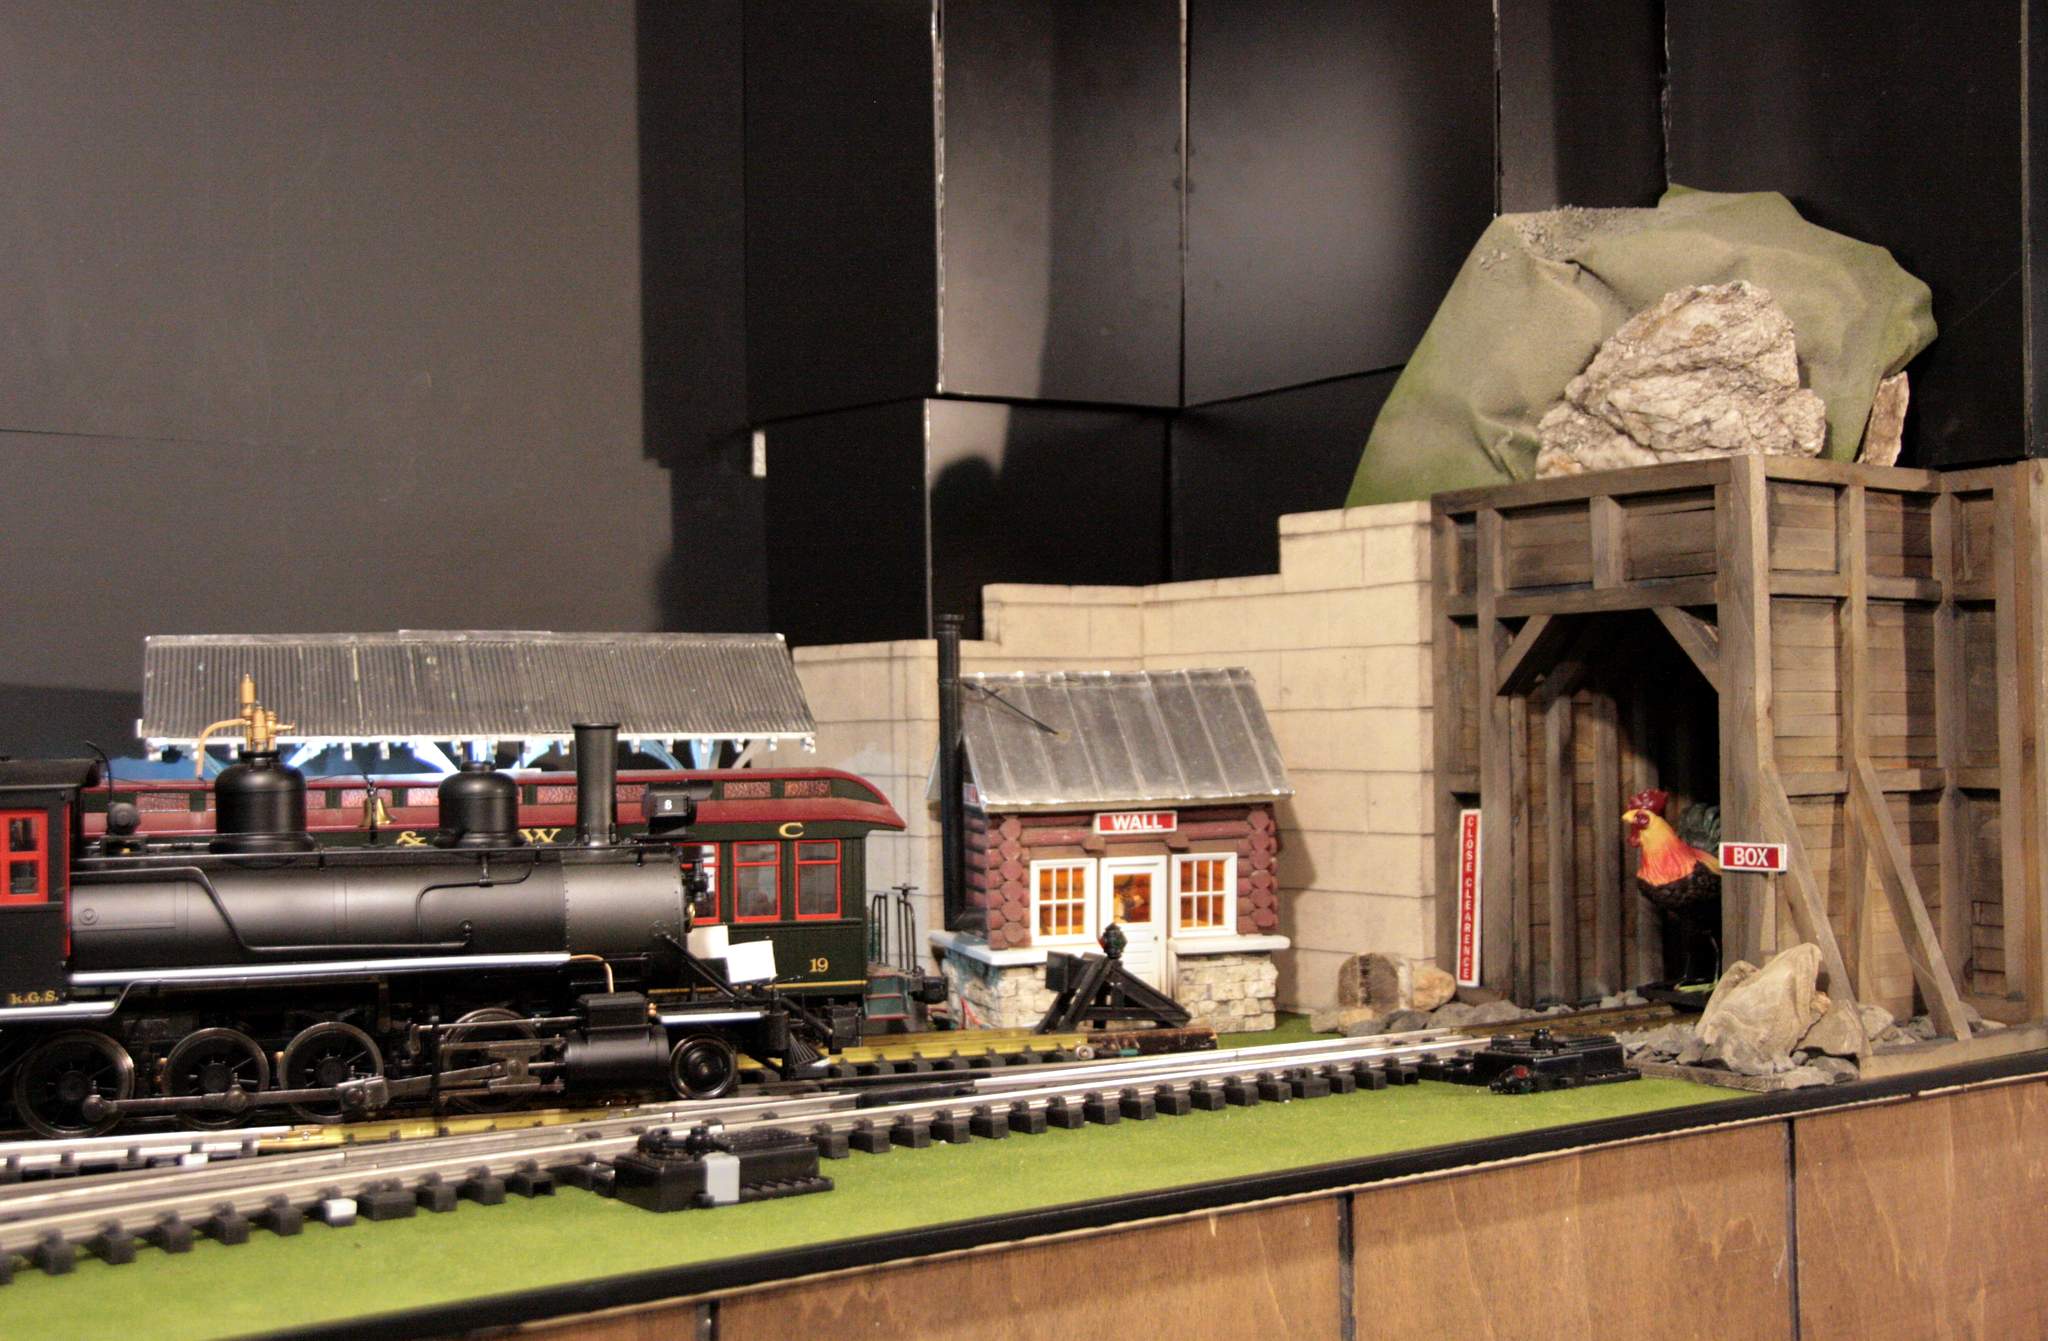
It lived outdoors until the fall of 2018 when I decided that if it was to be saved, it needed to come indoors. It has lived on my indoor layout since then awaiting motivation to repair it. Seen here posing with my MIK 2018 entry…

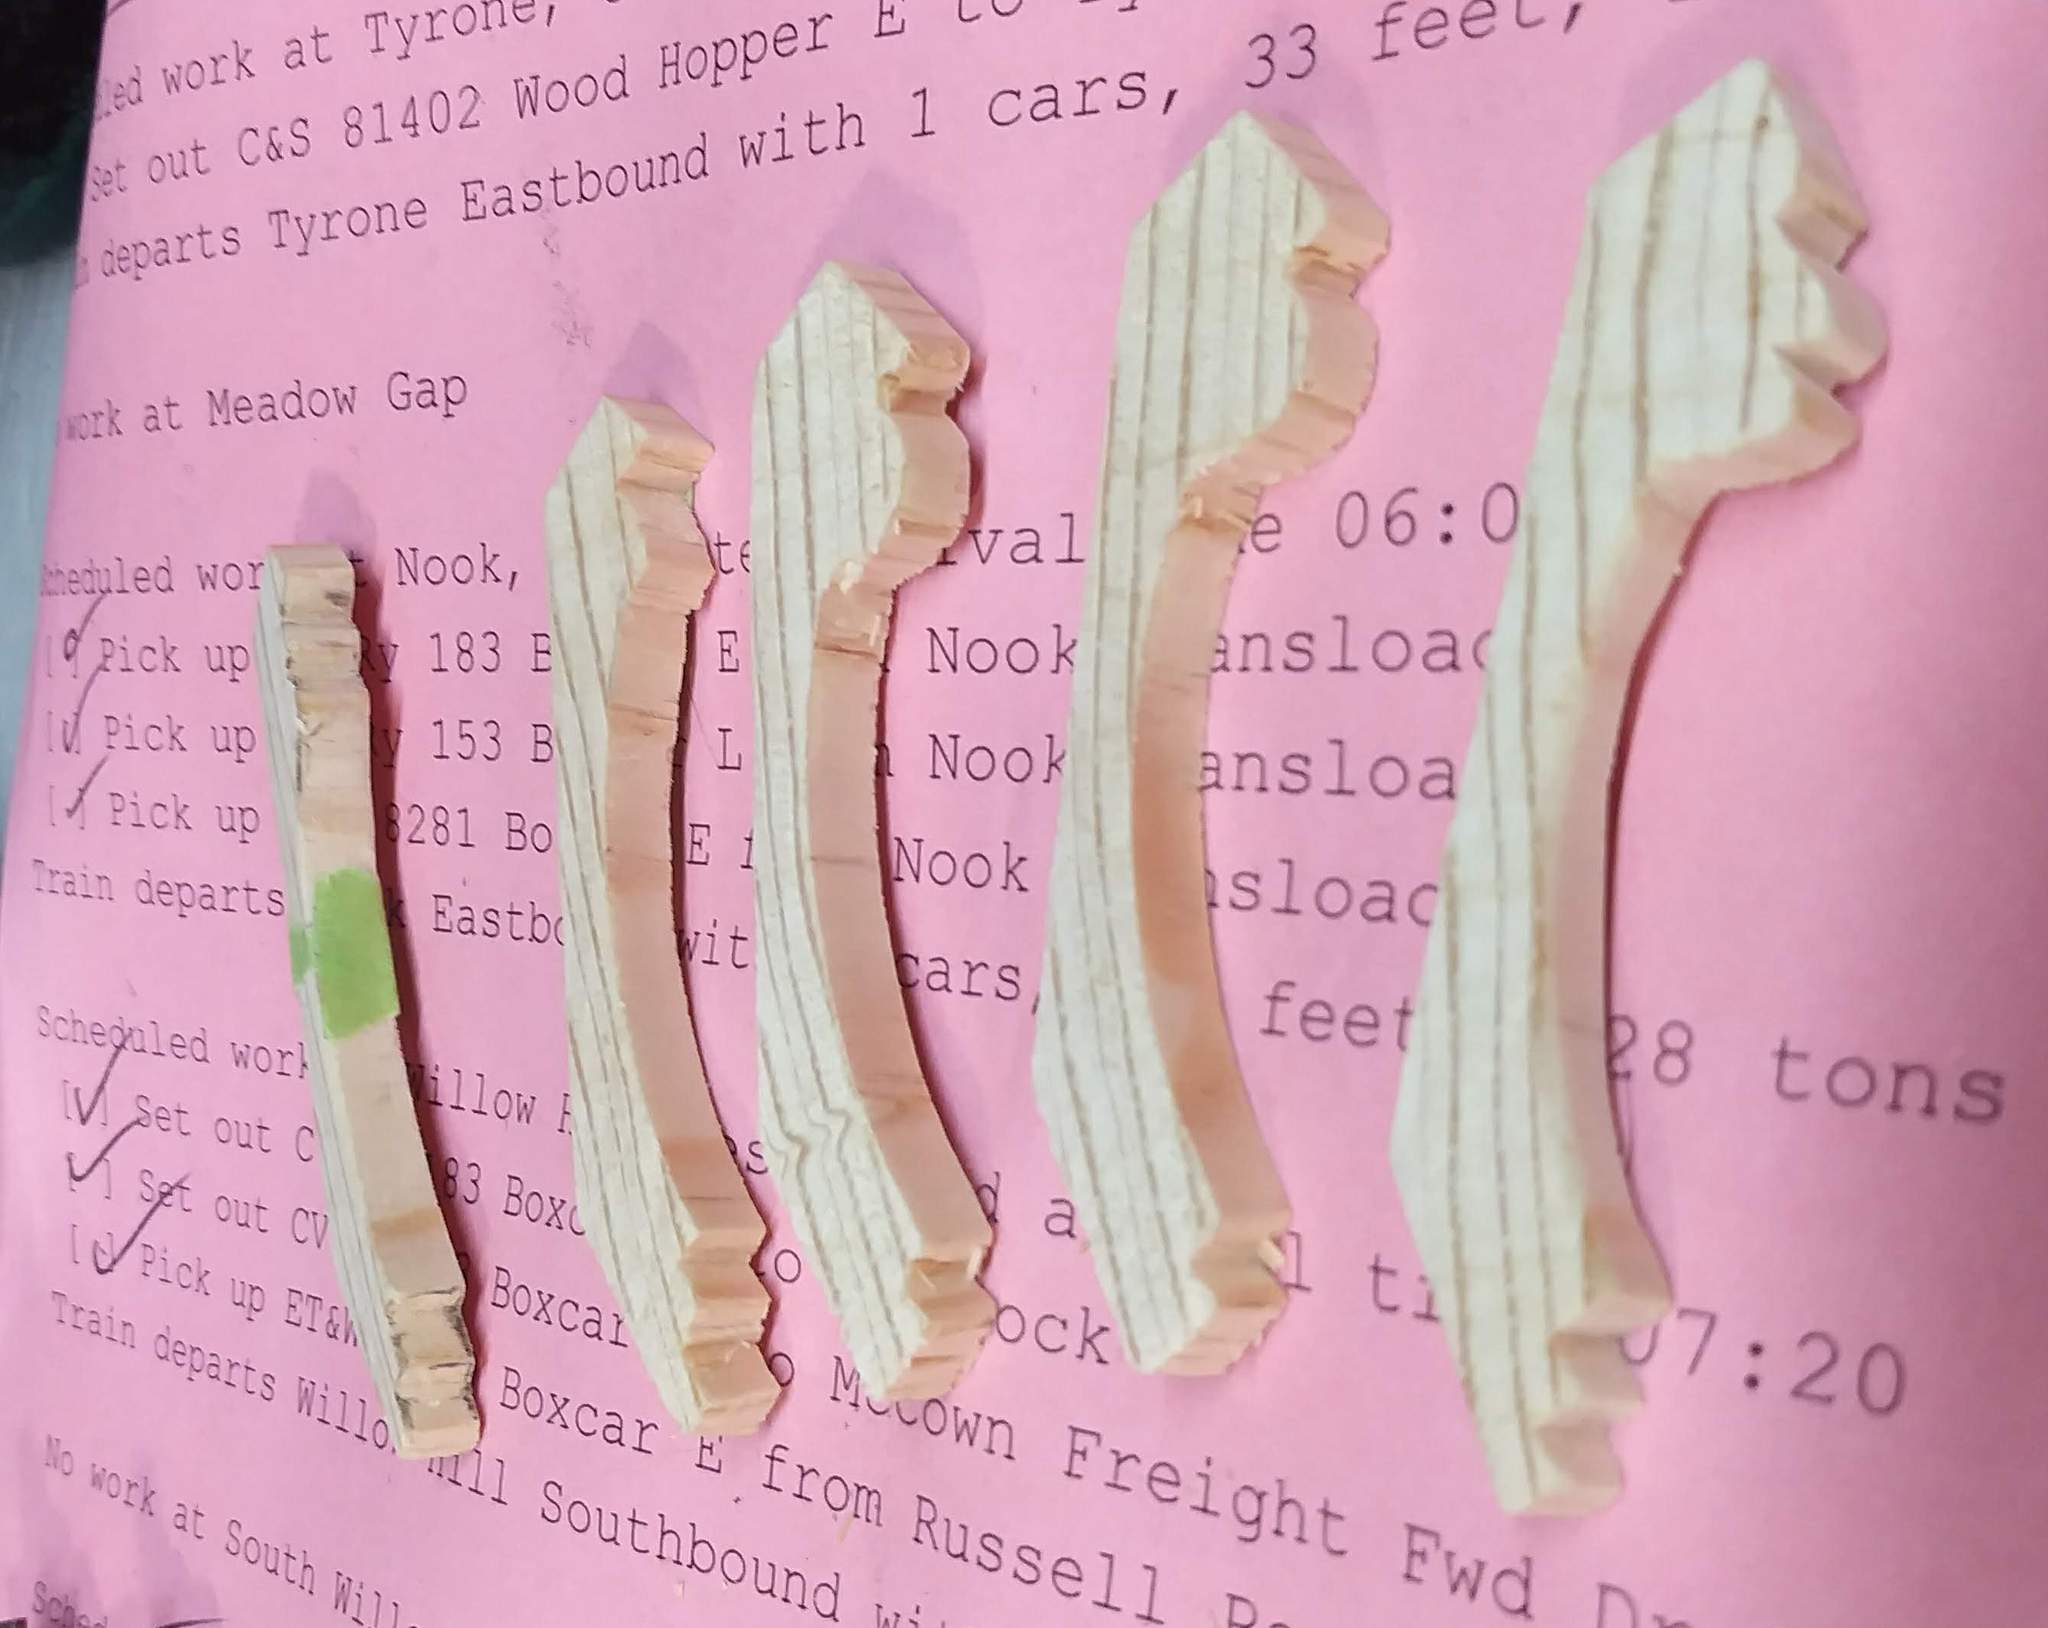
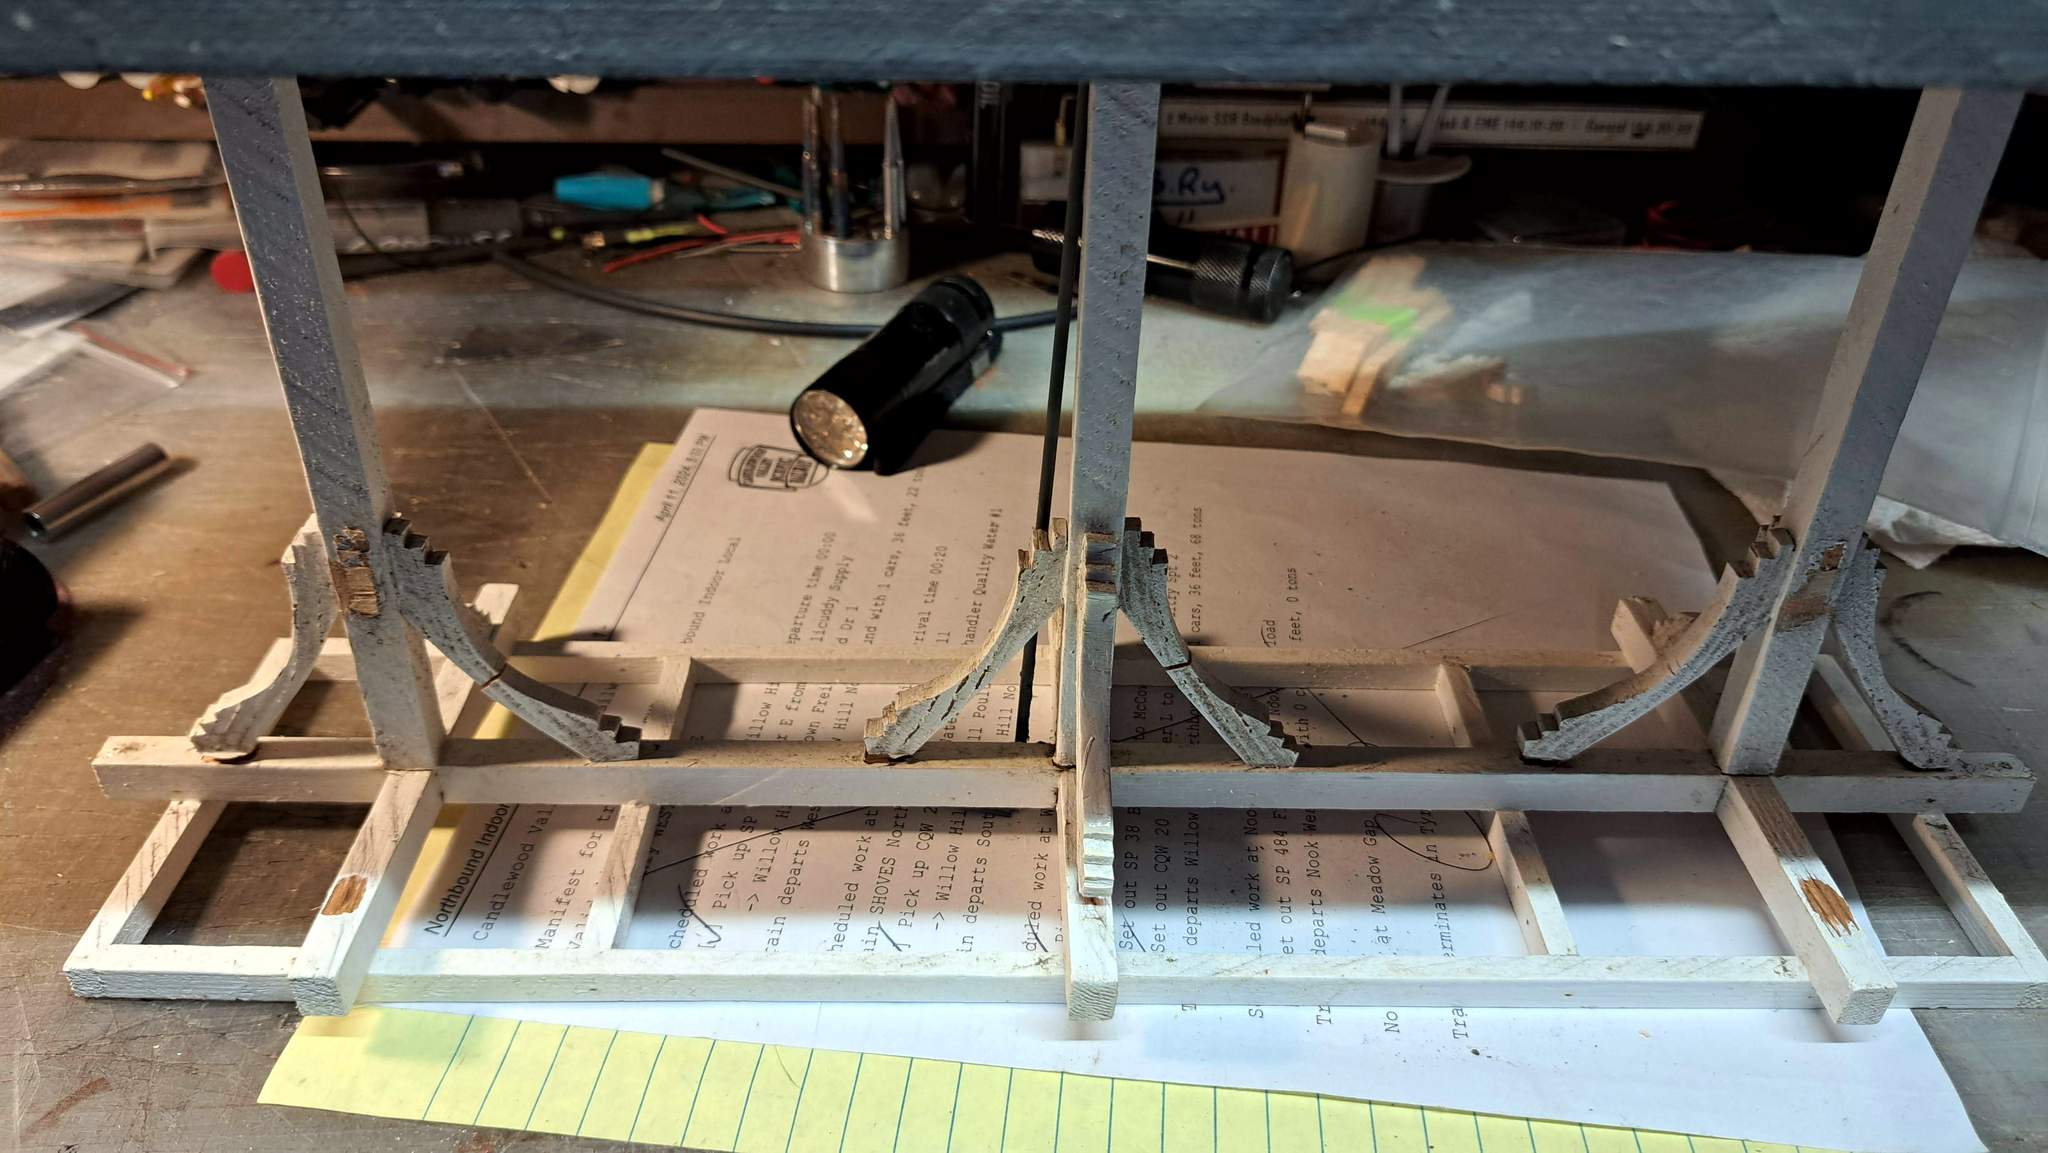
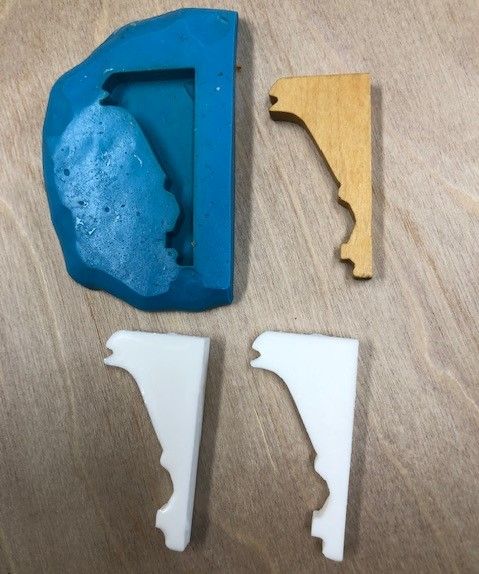
I moved the shelter from it’s spot on the indoor to my bench for inspection, then spent nearly all day looking for the spare corbels I know I saved after the build. I finally found them, safely packed away with parts from yet another MIK build that was never finished. This is why I need them…

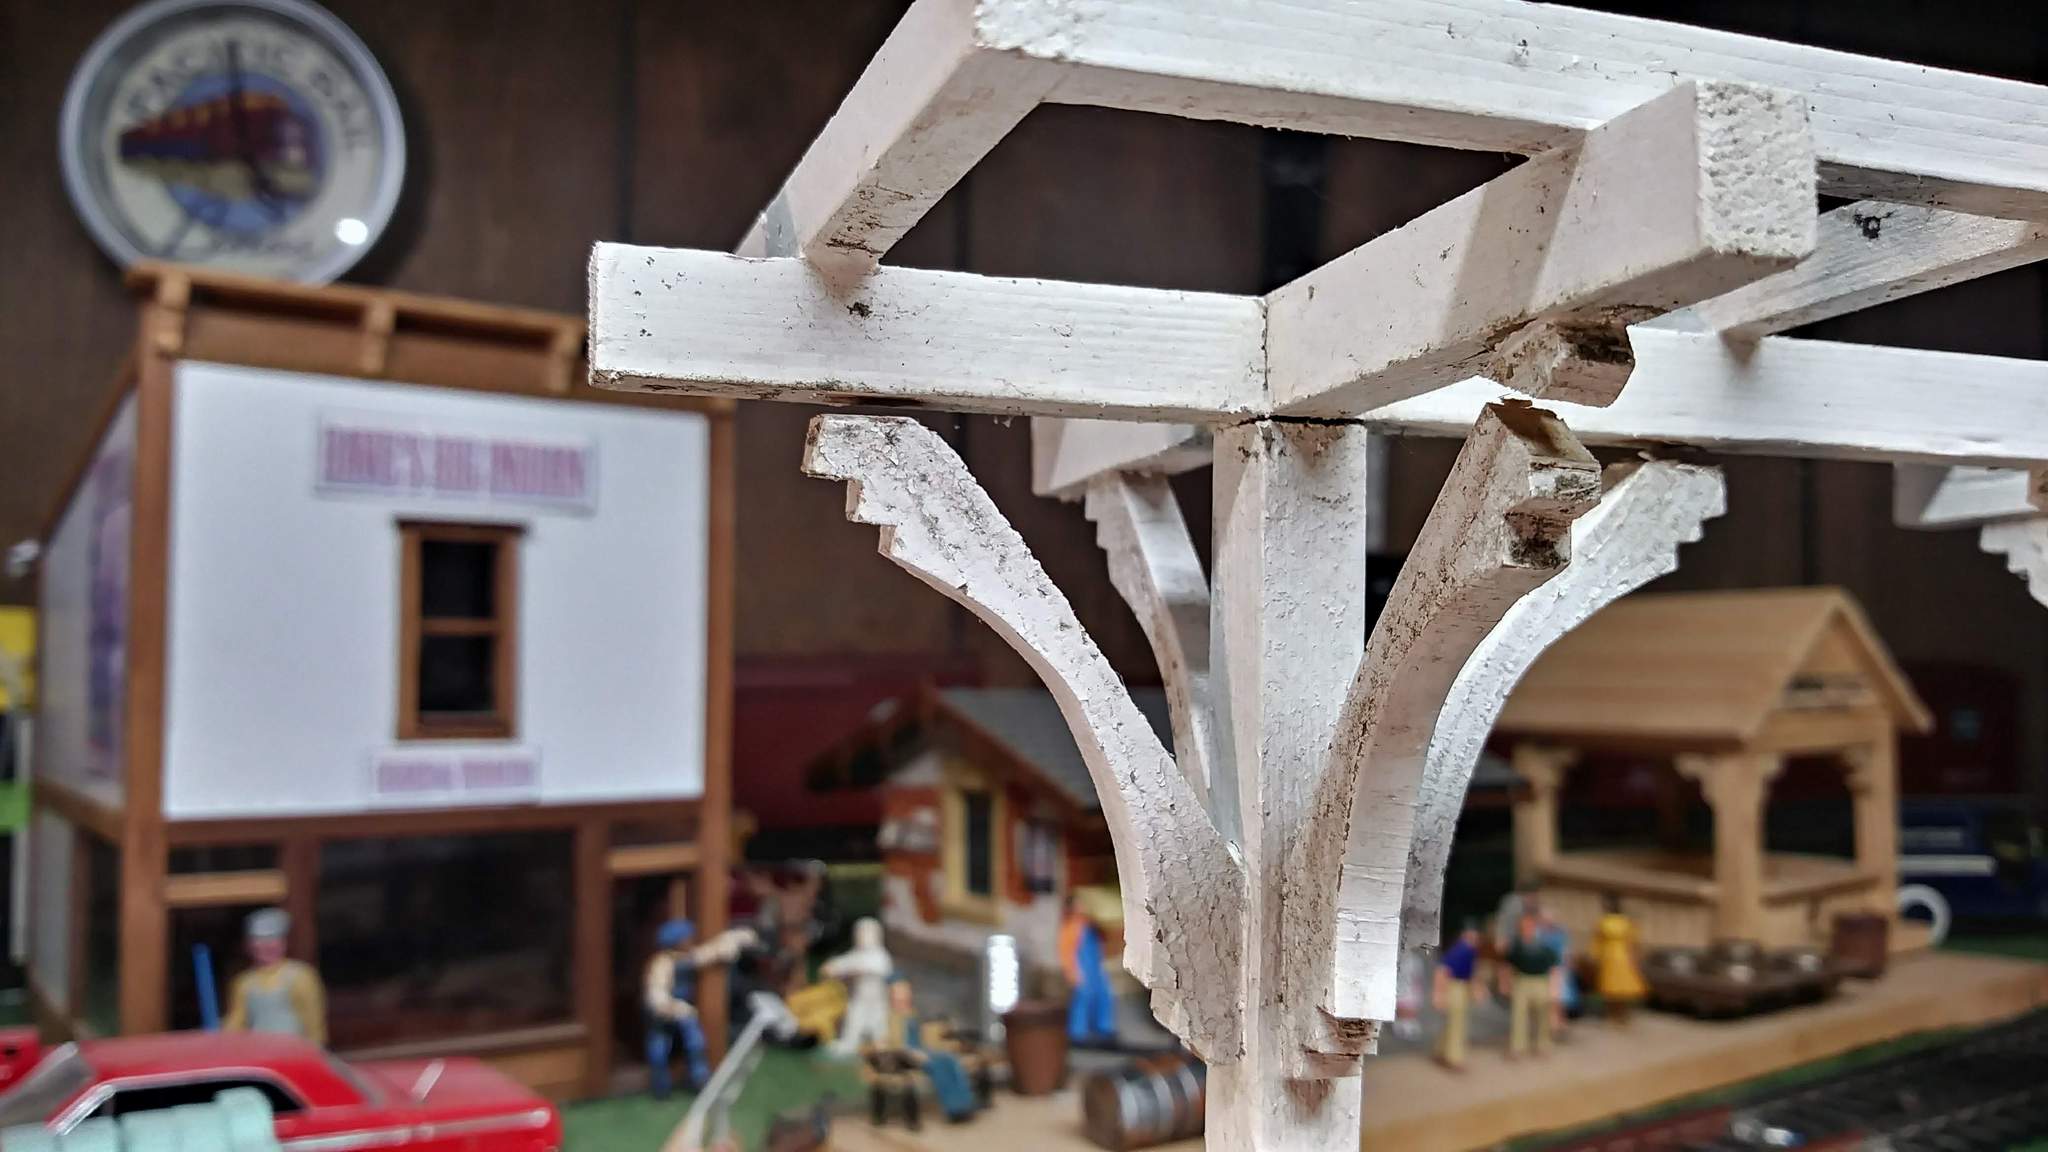
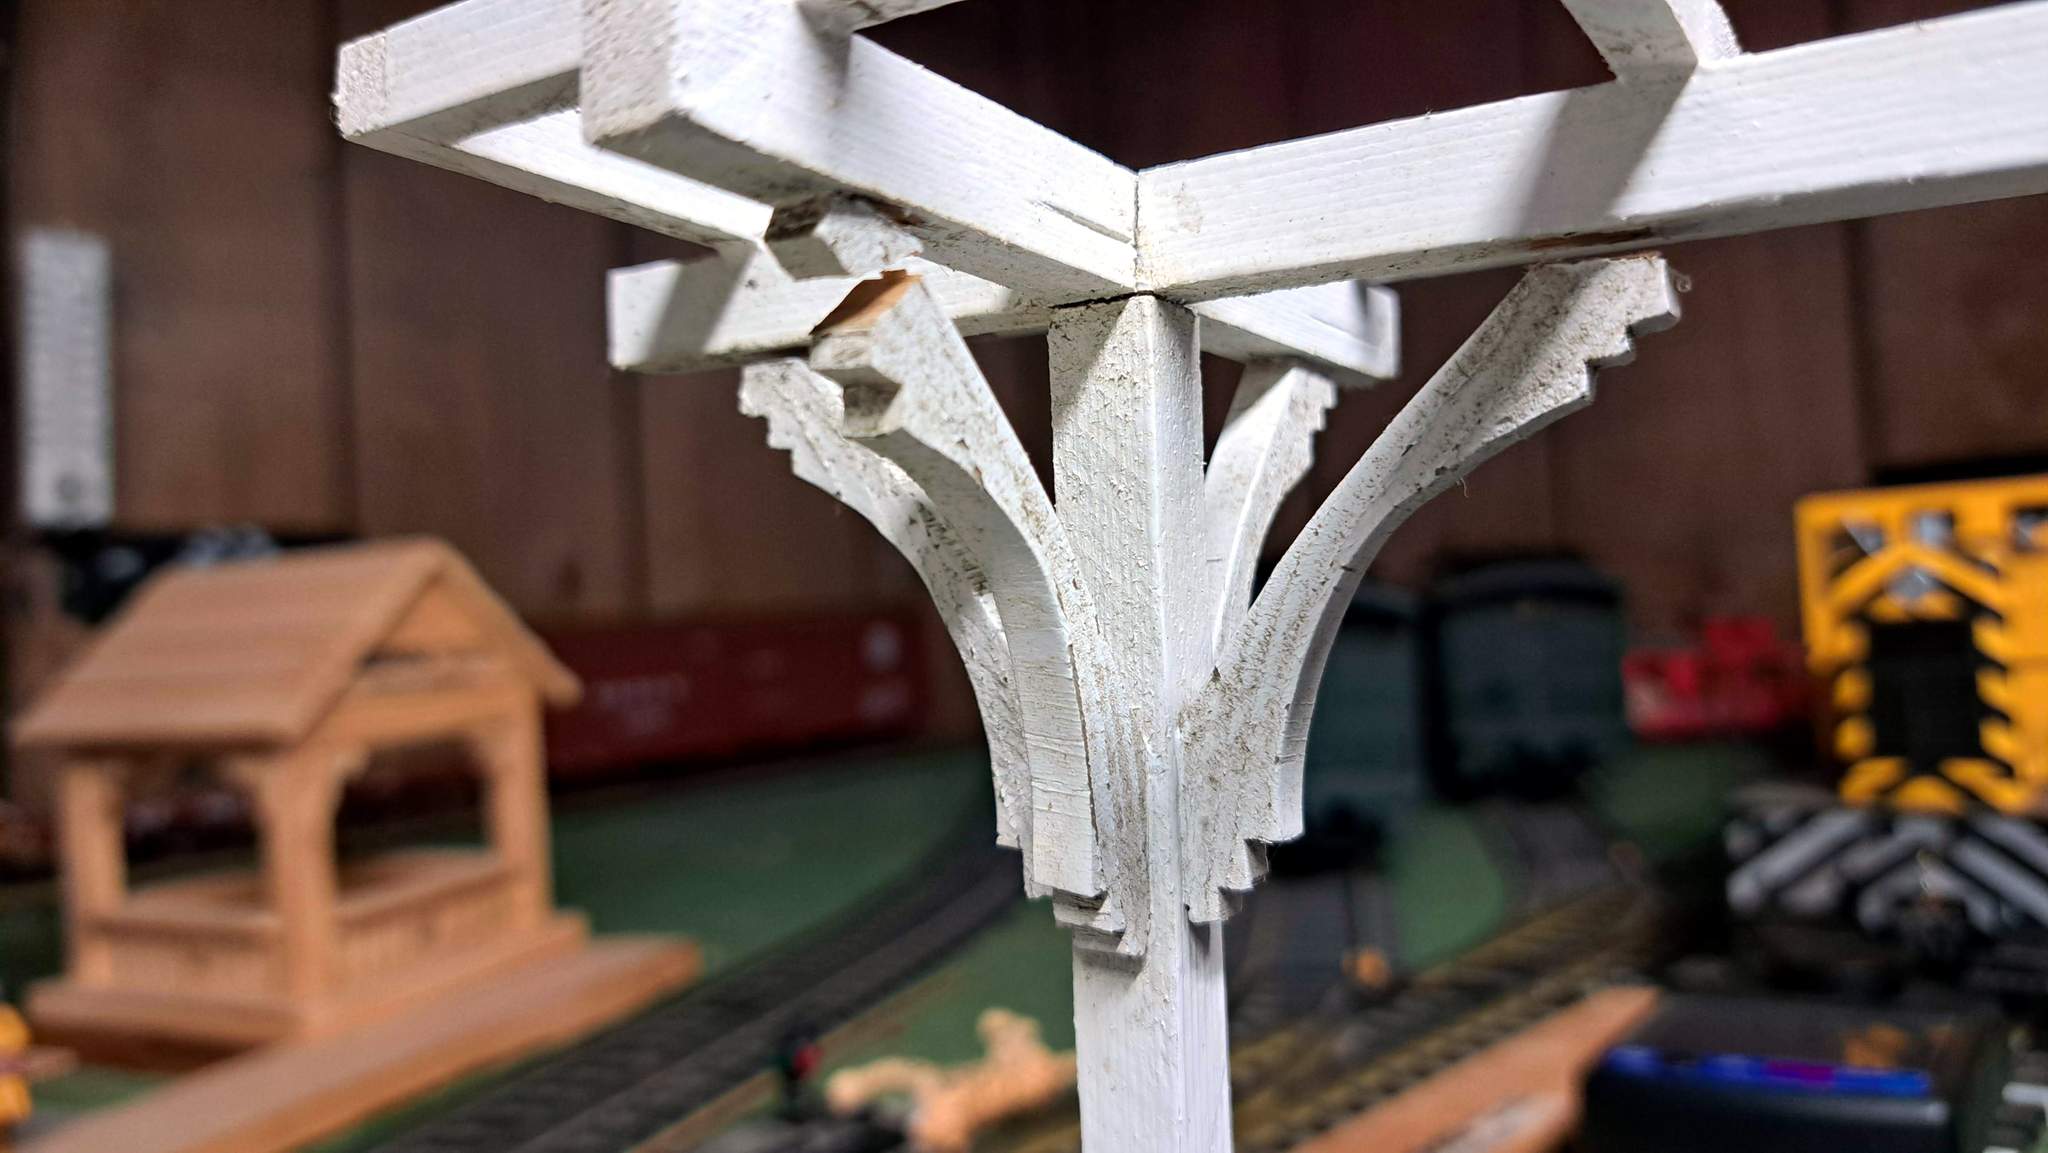
It appears that the two different woods, Cedar for the timbers and pine trim for the corbels did not have similar moisture content when assembled, so as the pine dried it shrunk and pulled away from the cedar or cracked depending on the strength of the glue joint. All three posts have at least a few corbels that need work…

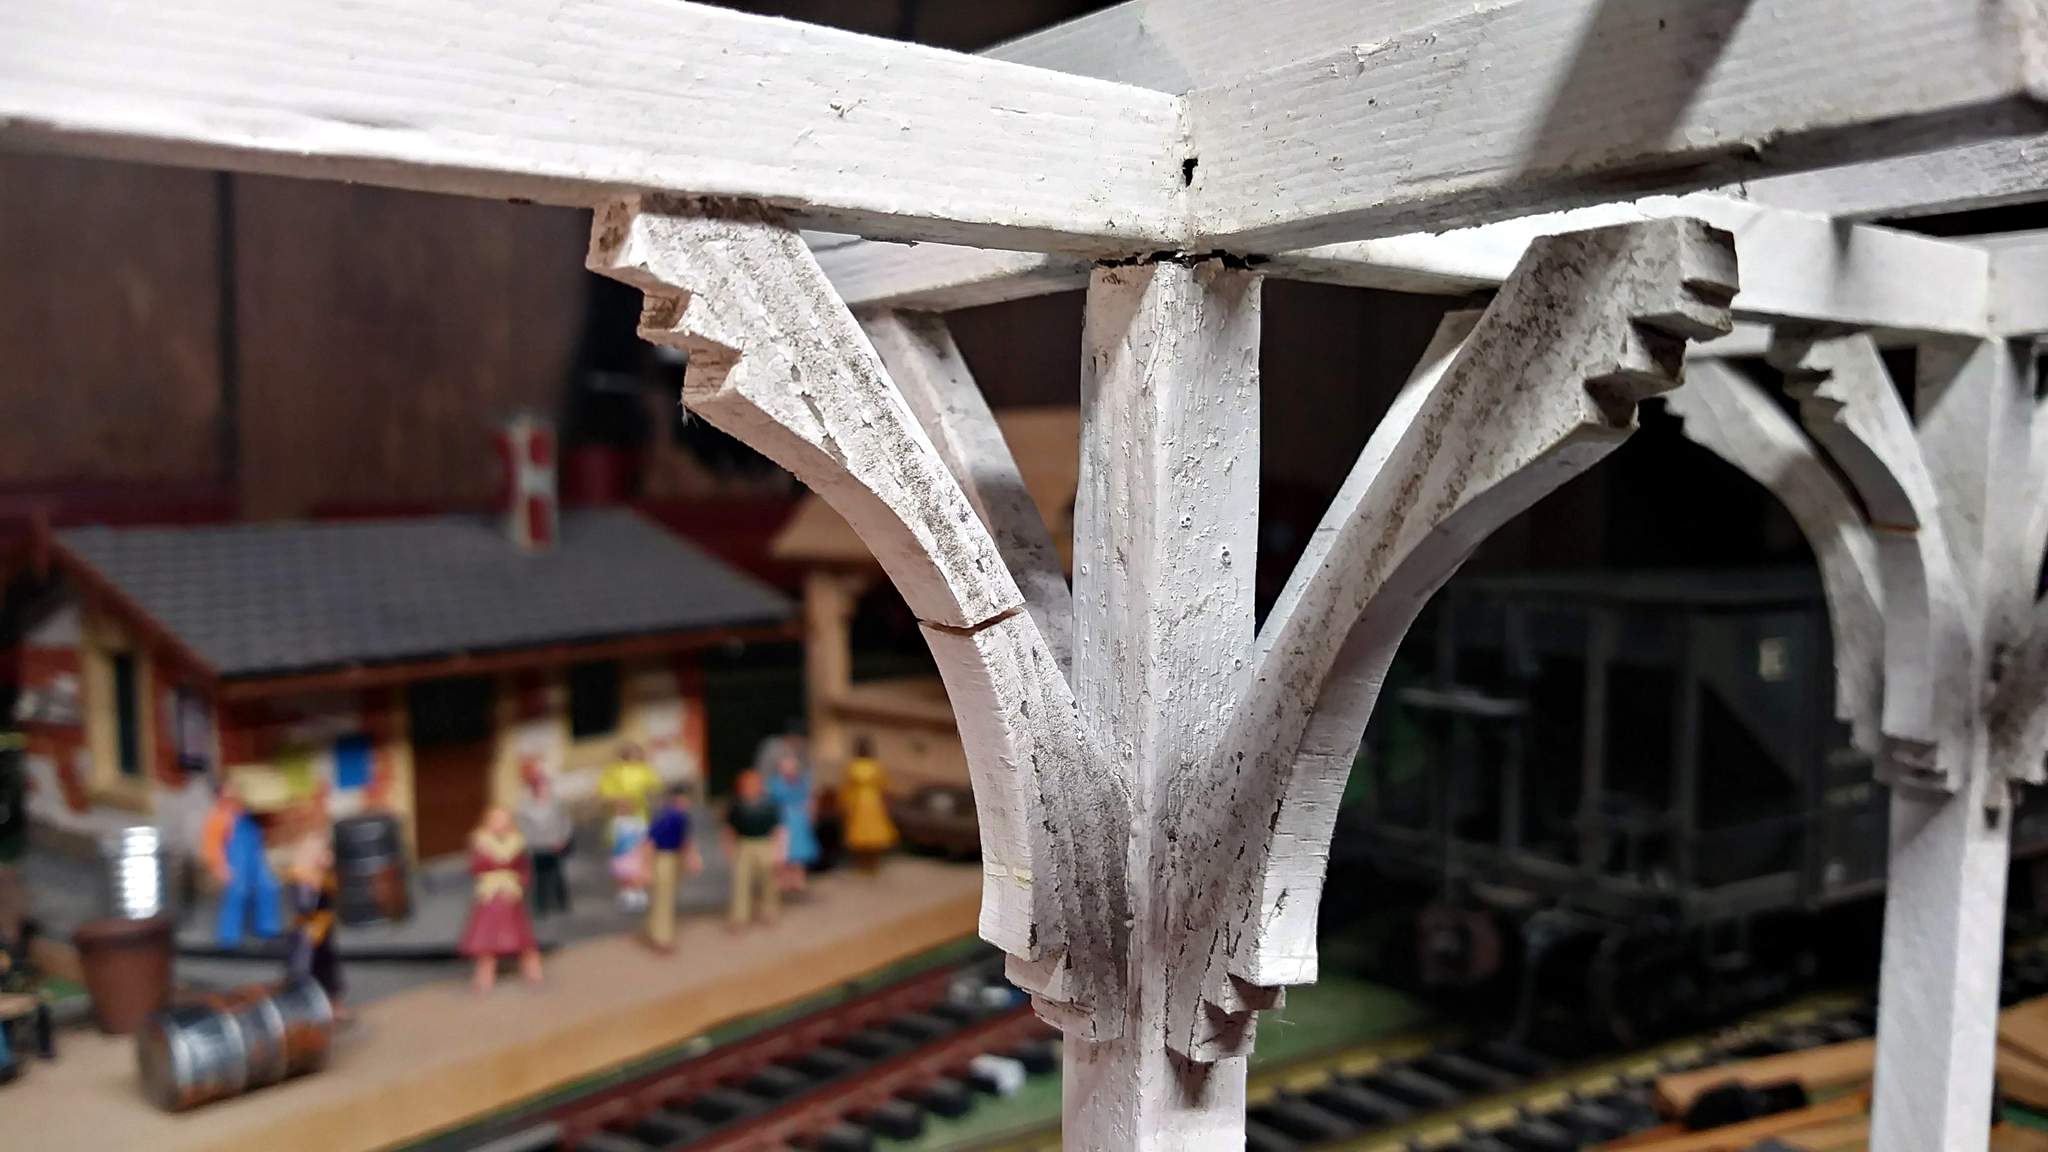
I’m debating what the best course of action for repair should be. I could try and remove them all to be reset, but I am afraid of breakage as I only have a few spares. All but one in this photo needs shaping…

I’m leaning toward fill and paint where possible, probably using wood shims except for the cracks which might get epoxy. I’m interested to hear any suggestions.

Jon, your right, that structure needs to be saved.

Hmmm… I just remembered I’ve got an old Craftsman router table I picked up used a few years ago and a nice assortment of bits came my way last Christmas/ The roof is the complicated part and it is still in great shape. Maybe I should just re-make the frame all cut from the same chunk of Cedar. Need to experiment with what shapes I can mill up.

Since cedar is better for outside and moisture, maybe you can make new maybe not so elaborate ones out of cedar and they will last

as long as the rest of the build. I remember it well, it was a great build

I’ve found that coating wood with epoxy resin really helps with outdoor projects. It seals the wood against moisture, and can then be varnished or painted to suit.

Jon, do you not have any left over plastic scraps left from signage, or did you give it all away? You could take white, and if you have a scroll saw, easily cut to shape. Lasts forever.

Nice station. The trim work is good.

Lou Luczu said:

Jon, do you not have any left over plastic scraps left from signage, or did you give it all away? You could take white, and if you have a scroll saw, easily cut to shape. Lasts forever.

I have a good stock of several sizes. Doesn’t look as nice as wood to me and it’s pretty flimsy at this thickness. Been studying how to cut cove on my table saw. Between that and the router I think I can mill a shape almost exactly like this, then slice it up. I did track and fence work today so this is on hold for a few days.

Jon:

I successfully use a technique similar to this - Make Your Own Cove Molding

The first time I did it (in junior high school wood shop) it scared the crap out of me, and it still does! (https://www.largescalecentral.com/externals/tinymce/plugins/emoticons/img/smiley-surprised.gif)Thankfully I don’t do it very often.

Be careful.

Thanks Mark - That’s the technique I have been reading about. Interesting that I drew up the cuts needed just like in the article a few minutes before checking in here. The basic cove shape is pretty straight forward. Its those little cuts on the end. I’ll need some kind of a holding jig for them.

Jon:

The first one I did in school was just 1x4s clamped to the table top, I was making a picture frame. I’ve made jigs similar to the ones described in the article. If I was to do this more often I probably consider a jig like this one from Rockler (plus I get to buy another tool). I figure that $80 is a reasonable investment in my safety.

Mark

My “virus fence” is done, so tomorrow I break out the table saw for two cedar projects. First up: mill enough 12x12 timbers and 2x7 planks to build a model of the Rockhill Furnace coal delivery trestle that will be built under the track at Brunt Coal in West Willow Hill. Next I’ll set up the saw to run some cove experiments to re-make the corbels from Cedar.

I was thinking this would be a great time to revisit the prototype corbels since the shape I used was a compromise to utilize available cove moulding which I modified a bit with an exacto. So I drug out the prototype photos today to study the corbels. Frankly I’m not impressed. The prototype is is a replica of platform roofs that were lost years ago to neglect, and this shape does not look to be up to New Haven standards…

My compromise end shape actually gives more shadow and depth. I may stick with that unless I find some New Haven prototye ones I like better.

Oh, if you haven’t figured it out by now, my modeling is a mash-up of the New Haven and the East Broad Top.

I have always thought it very dangerous to push wood through a table saw blade sideways to make cove molding. But having done it it isn’t as bad as one might think. The key is trying not to take to much at a time.

I didn’t know the New Haven used popsicle sticks for construction!?

Jon,

You might consider making one master and casting the rest. A long time ago I scratch built a combination light house/ RR station. The upper light platform required a number of corbels so I decided to cast them rather than cutting multiple ones and trying to get them all the same… Here’s what I’m referring to:

(http://largescalecentral.com/FileSharing/user_2849/Misc/Mold-1.jpg)

Here’s what I ended up doing.

(http://largescalecentral.com/FileSharing/user_2849/Misc/Mold-2.jpg)

Just an opinion to save fingers and patience.

Doc

Those are nice Don. I have yet to try my hand at casting. If mine were that ornate, casting might be the only option.

The table saw is set up at the moment, cutting timbers for my COVID-19 project. I’m at least going to run some experiments.