Large Scale Central

Painting/weathering Bachmann skeleton log cars

I’m a newbie at painting/weathering and am seeking advice.

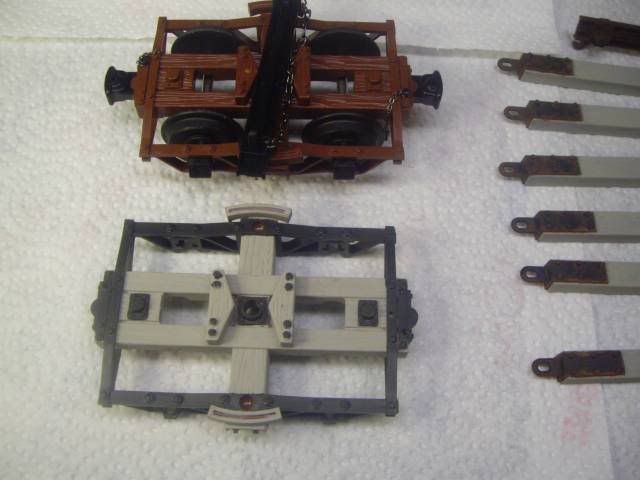
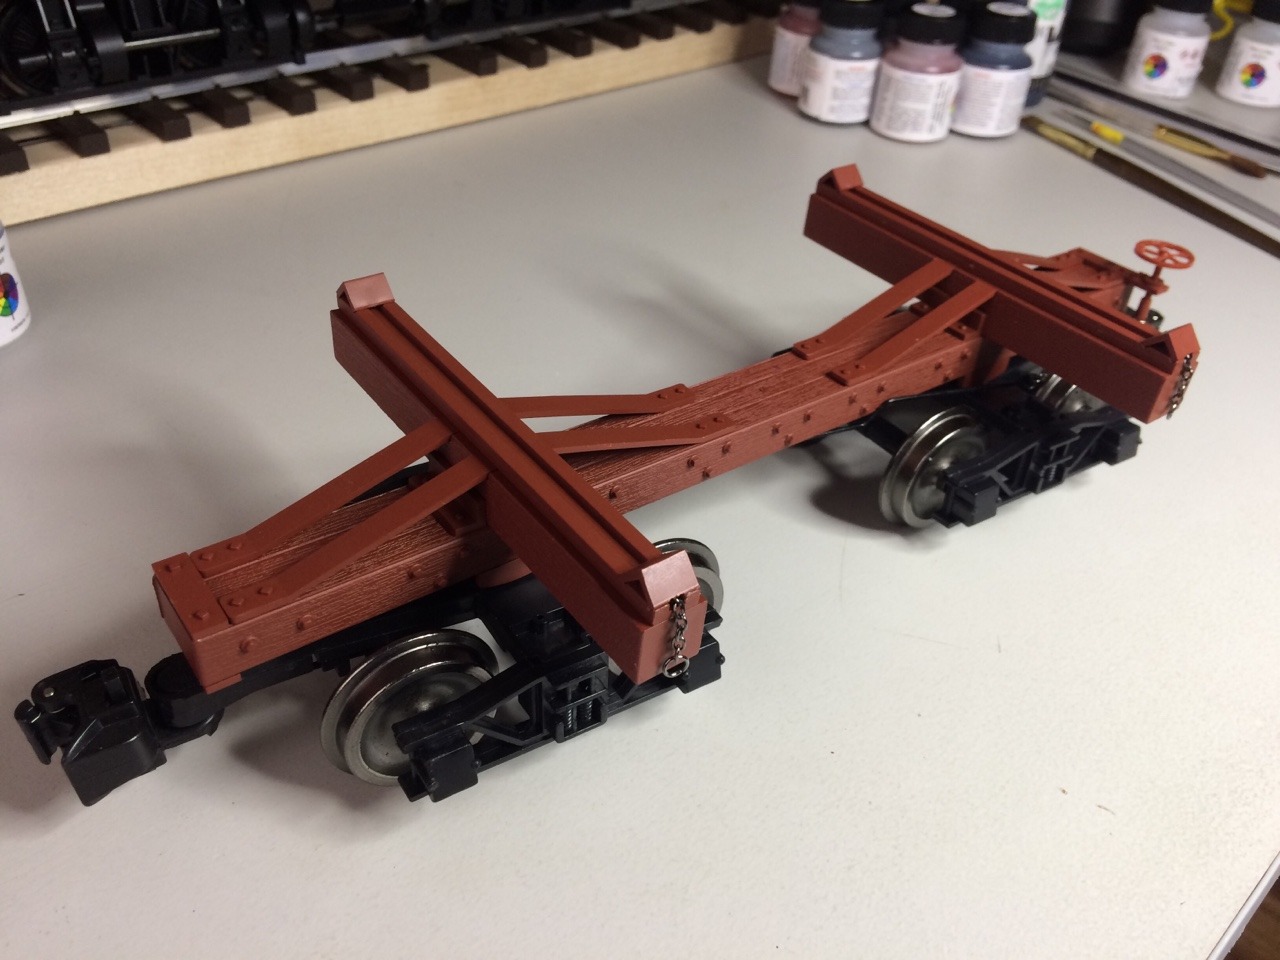
My first set of cars on the Durango & Jasper are Bachmann skeleton log cars, like this straight out of the box:

New skeleton log car

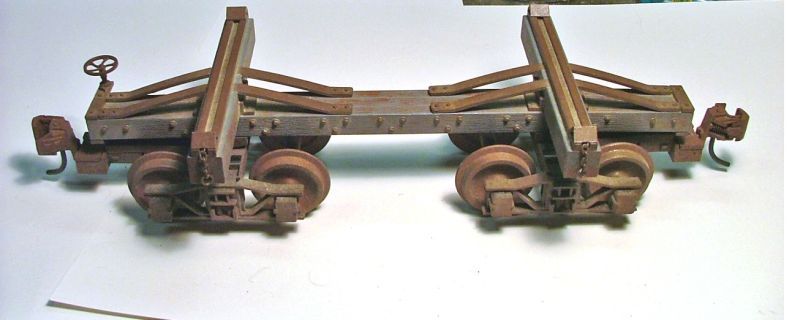
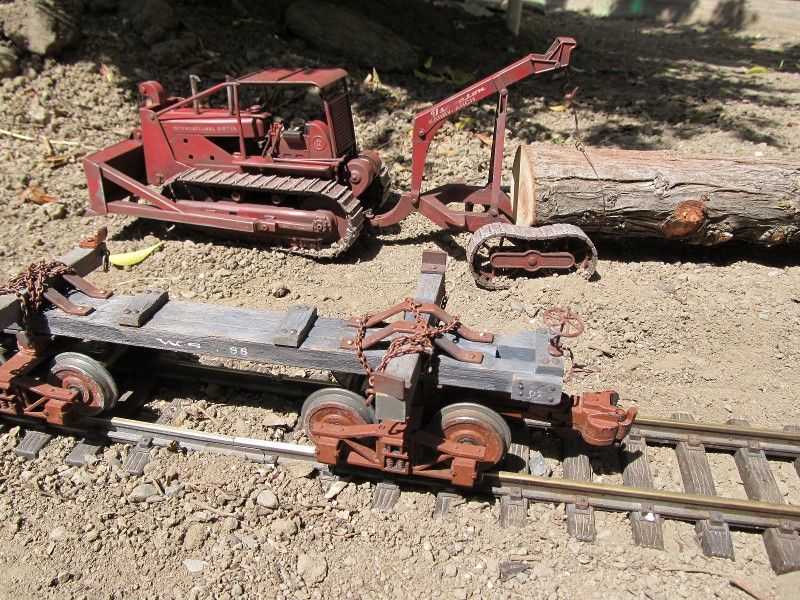
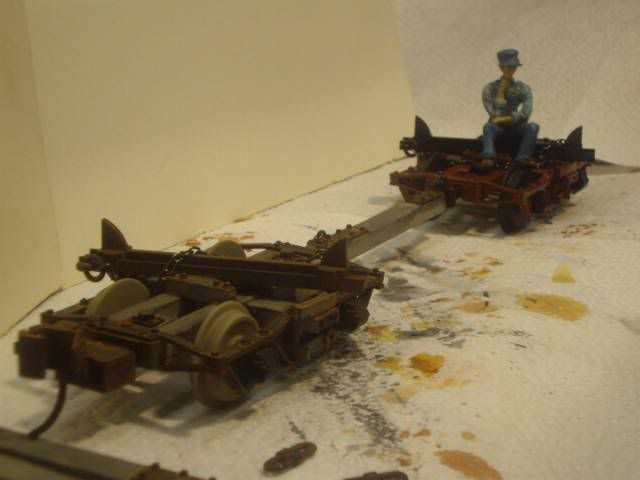
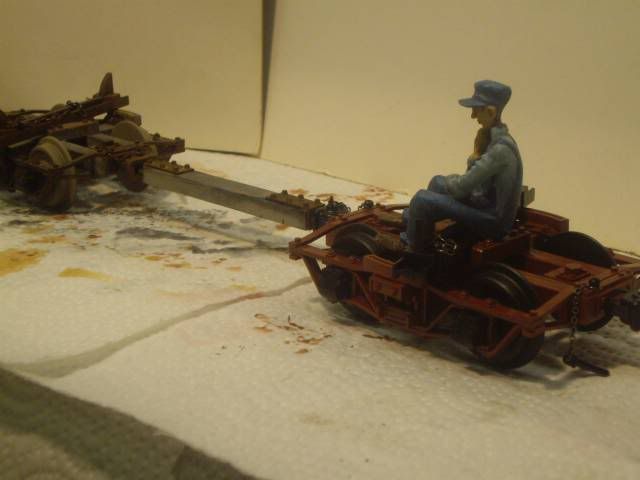
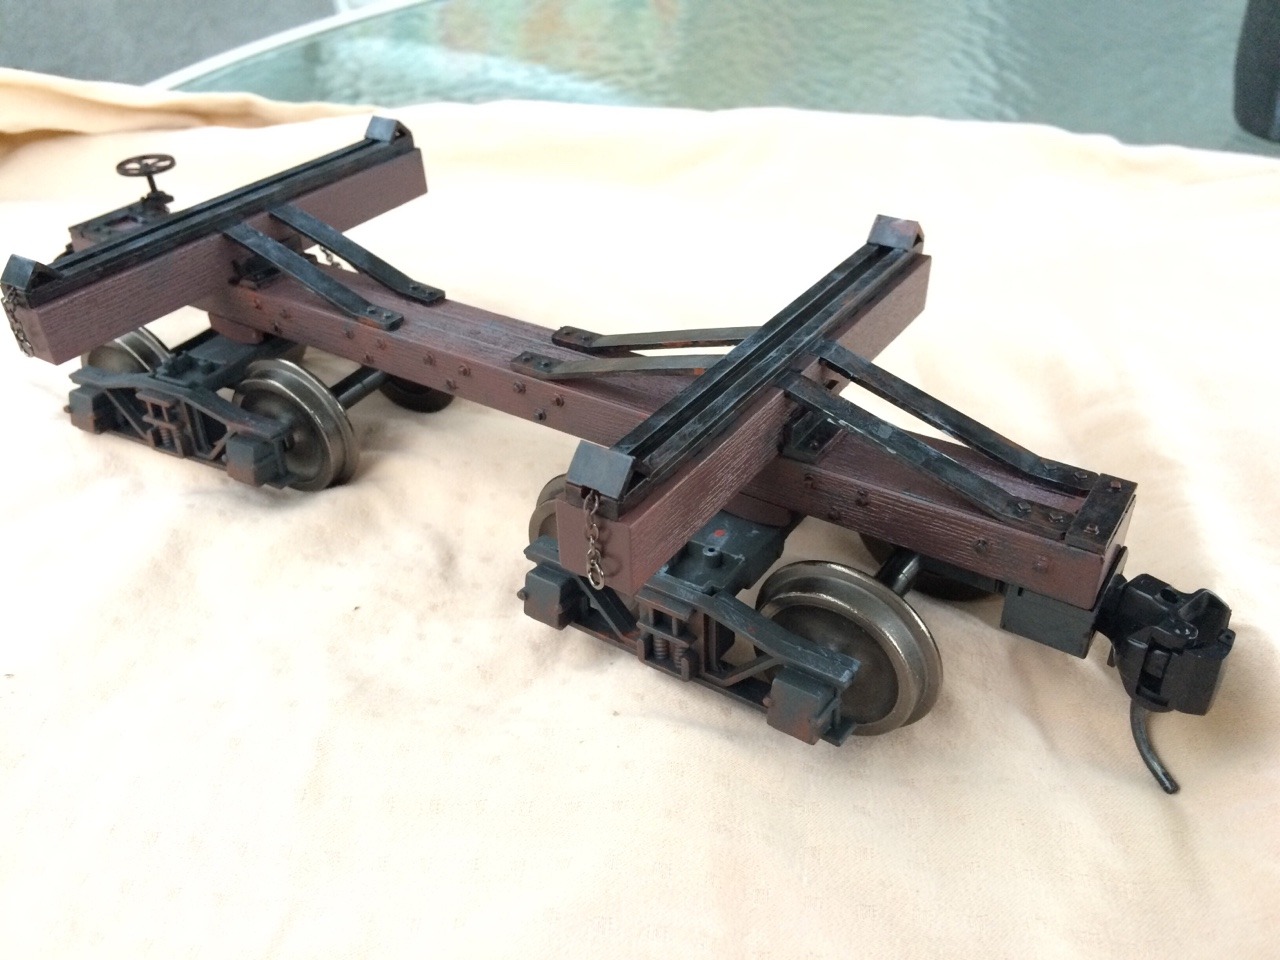
I spent a little time airbrushing, brushing, and dry brushing on my first car, and ended up with this:

Post paint/weather skeleton log car

After “rusting” the wheels:

Rusty wheels

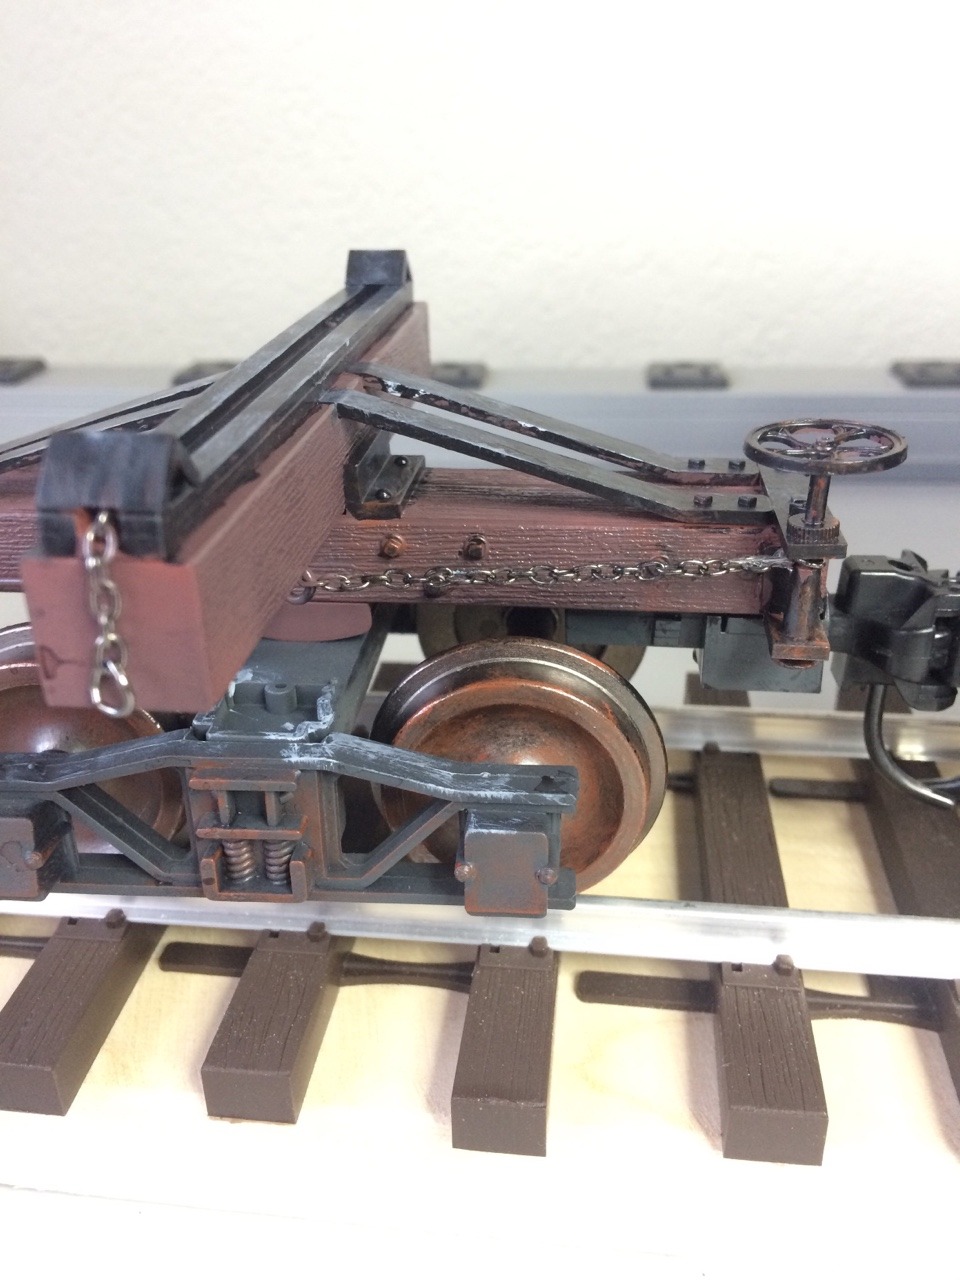
The steps I used are (weathering technique from this video):

  • Remove couplers from trucks (using Kadee instead)
  • Airbrush the main body box car brown (using TruColor acrylic paints in all these steps)
  • Airbrush the trucks grimy black
  • Brush paint the “metal” parts on the main body a flat black
  • Dry brush on a few layers of weathered rust, grime, and dust on body and trucks
  • Dry brush weathered rust on the wheels
  • Use a diluted India ink wash on the main body

I like the metal being distinct from the wood, and the weathering is ok (certainly better than out of the box, imho). It isn’t quite as “beat up” and heavily used as I’d like.

Since I’m about to do 5 more cars, any advice or alternate techniques would be great. For now I’m thinking I’ll do this same technique to the other 5 so they are relatively consistent, and then add whatever sounds good to beat them up more.

If there’s interest, I’ll post the intermediate steps (as listed above) with pictures as I do the other 5.

Thanks in advance!

I painted the car with gray primer, and then brush painted the parts that were supposed to be metal (like the bolts) with iron oxide paint. Then I dry brushed the car with some red paint, and I used a home made stamp to stamp end grain on the cross pieces with some red paint. Than I gave the cars an overspray of tan. I only did a few of my cars, I must have about a dozen more that need “abused”.

Those look great David! Thanks for the set of steps. I like the level of rust you ended up with. Definitely more “used” than where I got to, that’s for sure!

Well, some railroads run a shoestring budget, mine runs on a frayed shoestring budget. Deferred maintenance is standard operating procedure round here.

I really like weathering and the best part is that there are so many different levels to the natural aging and rot.

You are off to a good start Jim and you produced a nice custom piece. Keep beating up on your equipment.

Your stuff does look beat to heck David. Cool.

Happy RRing

David,

What iron oxide paint are you using? that is the perfect rust color. Please tell us more.

Al P.

Al, I use Ceramcote craft paints. Unfortunately that line of paint is getting hard to find. Being as they are water based paints, I sealed the cars with Krylon matte clear and I don’t leave them out in the weather. I also brushed some rubbing alcohol onto the cars after the clear coat set up, and that fogs the clear coat a bit and helps give the cars the dusty appearance.

That is my style of weathering, very rusty and old looking,

Great Looking

Dennis

Here’s a couple of photos of skeleton log cars I built out of Oak and weathered them back in 2009. They have naturally weathered even more over the years. These photos were taken in 2011. I built 11 with varied weathering and numbering.

I love to use artist oil paints. Three colors. Burnt Sienna, Burnt Umber, and Raw Umber. Those three colors mixed right makes great rust. Now also remember rust isn’t usually just one color. It can range from a bright red to almost a black. By fudging with the ix of those three you can the variation. They don’t dry fast so you can mix and match the colors as you go. The burnt umber makes a nice dirty grease for around the journal boxes. the underside of journal boxes should have oozing grease that then collects dust. And oils you can do that perfectly, use the oil base then add real dust.

This is some track I did very quickly using three different variations of the above formula

Very nice weathering on those log cars, and thanks for the tips, as I’ll be getting some too.

The grain on the sides of the beams looks good, and will stand out with a black wash, but I noticed there is no end grain. I’m currently working on some HLW gons, and they need grain. So to make the grain, I use a sharp #11 exacto blade and a hobby saw. The hobby blade for gouging, and take the hobby saw and pull it sideways across the plastic to make the grain.

I just stamped the grain on the ends of the beams. The 10 foot rule is used quite liberally around here.

I took a block of blue insulation foam, and ran a screw across the foam in an arc. The threads of the screw put groves in the foam, and then I used that to stamp end grain onto the beams.

It is amazing what I little paint will do !

LGB items

Oh yes, paint is my friend. It can hide many sins.

A question about coupler sizes. I started using Kadee G size couplers but then was encouraged to look at Kadee #1. Since I’m not far along and don’t have a big investment, it seemed like a good thing to consider.

I got some #1’s and put some on so I could compare. The question is: which is more prototype? Does anyone have good closeup pictures of similar era (early 1900’s) couplers and what the proportions should be to be close to prototype?

G on the right, #1 on the left.

Thanks in advance!

The #1 coupler is supposed to be more in scale for 1:32nd. The G coupler… I am not sure if its even close to scale for 1:29. But you are modeling 1:20.5 narrow gauge, if you are using a Bachmann Shay. Narrow gauge railroads could use full sized couplers, or 3/4 sized couplers, depending on what they decided upon. So, use what you like. The “G” couplers are a bit more forgiving on uneven track, but the way your track is done, it should not be uneven at all.

For narrow gauge railroads the Colorado lines are about the only ones that used full size couplers and maybe the EBT, not sure about them. That is represented by the “G” size KD in 1:20 scale.

Most narrow gauge lines, especially logging lines used 3/4 size couplers if they weren’t link and pin. The #1 size KD is spot on for a 3/4 size coupler in 1:20 scale.

I have used #1’s on all my Fscale stock from the start, I model Short line and Logging. I have never had a dis-connecting issue at all and some of my track can get a little rough at times.

A couple of things. (personal opinions)

I always cut the drop pin off because I think it looks like crap and I don’t use the auto uncoupling feature plus in outdoor use that low hanging pin is a derailment hazard that can be avoided.

What ever you decide please consider body mount rather than Talgo.

Good luck

Rick

Well, the EBT used 3/4 sized couplers. They even had a cast metal (aluminum?) adapter so they could couple their 3/4 couplers to full sized couplers.

Link and pin was the most common coupler in use on logging lines. Since the logging lines weren’t “Common carriers” they didn’t have to comply with the railroad safety appliance act. And I am sure that arch-bar trucks and link and pin couplers were probably pretty inexpensive and readily available on the used market, after they were banned from interchange service.

As for the uncoupling pin, yes, it is, I mean, it does look bad. But properly adjusted (1/8th inch above the rail-heads) it shouldn’t be a derailment hazard. Almost all of my KaDees had that silly pin set too low. After setting them all to spec, I don’t have anymore issues with them. Well, except the fact that they are there.

Jim; try the 820 or the 1906 Kadees…their draft gear box fits nicely on those cars. You can get both in rust colour if that suits you better. They only need a thin shim of Styrene to get the height right on the money. The rust colour numbers are 920, and 1906R. I have a fleet of about 24 of them. I was planning on a logging branch line, but haven’t found a place for it…yet. They don’t have air brakes so they are banned on the IPP&W main line. For the Foamers, we occasionally run three of them with a van, but only run back and forth in the main yard at Craigleigh, which is all level track, so the engine brakes can handle stopping at low speed.

From a looks point of view, those using those offset shank Kadees, ruin the looks of the cars…but, to each his own…The smaller couplers look best to my eye.

They are nice cars… and look better weathered as you guys are proving.

Fred Mills

Yea, body mount would be better. As would lengthening the cars. But, even with truck mounted couplers and the cars being so short, a loaded string of them, behind a proper locomotive, is still impressive.