Large Scale Central

Has anyone ever bought this Emily conversion kit?

I plan on buying this Bachmann Thomas & friends G scale Emily conversion kit from “smallbrookstudio.co.uk” for my Emily loco. I was just wondering if anyone knows anything about this sight. Is it legit? Is it really for the G scale Emily as stated? The reason I ask is because two people from a previous post said it looks like the HO scale Emily. Kind of odd because the website says it is for converting the G scale Emily. Could somebody help me out here? I just plan on buying the smoke box door only. Also does anyone else own this Emily? How do you remove the face? One person on here said it should come off with fingernails…Thank you.

Below I have listed the web sight and it’s Emily conversion kit…

http://www.smallbrookstudio.co.uk/#/products-new/4569521214/‘G’-Scale-‘EMILY’-Conversion-Parts/6971799

No, just the diagrams in the first few links were for the HO version. You can tell by the separate chimney.
The kits are for the G scale version of Emily. All is good!
I’m not sure if you can just pull the face off. Possibly, but it has clips behind that may need squeezing. The boiler comes off with only 7 screws… and you can see the gizzards!

‘Back To Bay 6’ also have a kit. Not sure if it is the same kit or not though.
http://www.back2bay6.net/90270/info.php?p=8

Andrew

Kenny, here’s a thread that should answer all your questions…

http://www.largescalecentral.com/forums/topic/18219/the-bachmann-quot-emily-quot-s

I bought one, back to the bay six sells them. They are G scale. Look at my postings in the Rolling Stock column of how I used them and so did Dave. Be sure to cut out the backhead that reaches clear to the back of the cab. You can see what Dave and I did on that. I’m had a friend make metal rods for me. He plans to mold/cast them in metal along with the crossheads like Dave did.

Smallbrook Studio have some of the full kit parts separate such as just the smokebox or backhead.
I think the OP just wants the smokebox front rather than a full conversion.

Andrew

I can tell you with Thomas and Percy that you will have to pull not just the faceplate, but also the eye movement mechanism inside. This necessitated the almost complete disassembly of the model. Its not as hard as it sounds. These are VERY simple models.

I’m resurrecting this 2014 thread to offer a few observations about applying the Smallbrook Studios conversion kit to make Emily into a proper locomotive, a model of the Stirling Single. (Yes, I know it should be gauge-3 as it is standard gauge, but you can’t have everything.)

The link in the first post is still good, although the second one, back2bay6 is not. Jerry’s quot-emily-quot thread (link above) is a good resource, and here is another:

http://largescalecentral.com/forums/topic/21378/need-help-with-bachmann-emily-loco-face-removal-project

When I started unpacking the Smallbrook kit and trying to open up Emily, I found several bits of confusing information. In particular, to get the body off, Jerry mentions the screws behind the cylinders. There are two screws behind but inside the frame between the cylinders - these hold the smokebox on (along with the screw in the stack.) The body screws you want are hiding under the crosshead area - ‘behind’ meaning towards the rear. You don’t have to remove the brown splasher/fender bits under the footplate, but it might be easier to paint them separately.

Removing the eyes and the mechanism that wobbles them is straightforward. The smokebox front is equally problem-free. I did wipe it down with alcohol to reduce the casting residue, just in case. Smallbrook supplies two very small plastic tags to locate it, so I added some extra support inside.

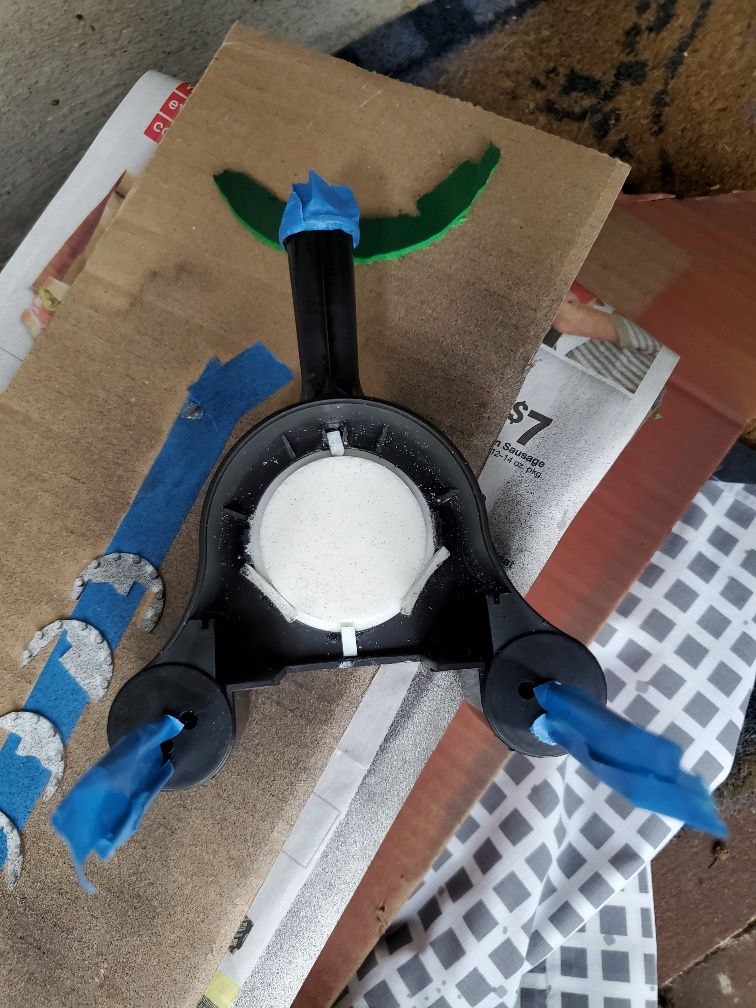
You can also see the cylinder covers waiting for paint. It started to rain just as I went out to take care of them.

I did get one coat on the pilot frame, and as someone pointed out it does not take regular paint very well! This is Rustoleum paint+primer in satin black.

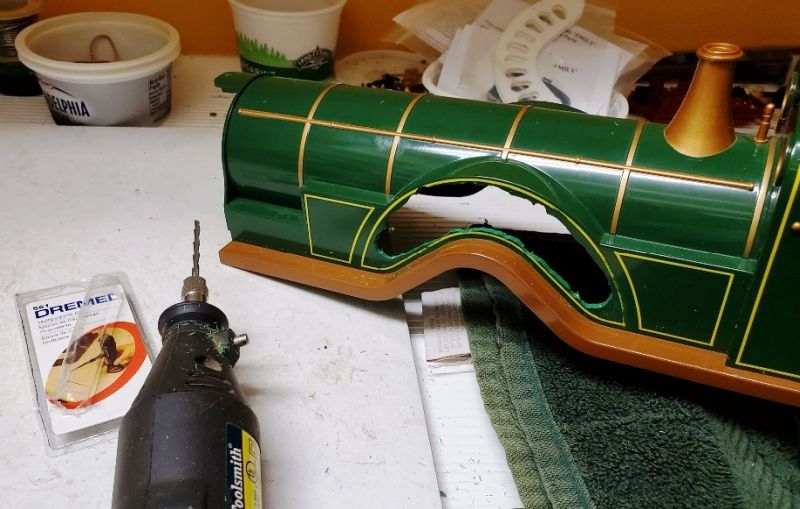
While waiting for the rain to stop, I attacked the splashers (fenders) over the driving wheels. Not only do you have to cut a slot so you can see the wheels rotating inside, but there’s a black plastic cover on the chassis as well. (That’s my next job.) I marked the slot on the side of the splasher, used my #11 chisel blade to scrap off the yellow lining as much as could be scraped, and then clamped it in the vice and got out my Dremel 561 multipurpose tool. I used it for cutting extra windows in coaches, so I was aware that it tried to wander and cut where it shouldn’t - a very steady hand is needed. This pic shows the bit, the cut, and the new splasher front behind.

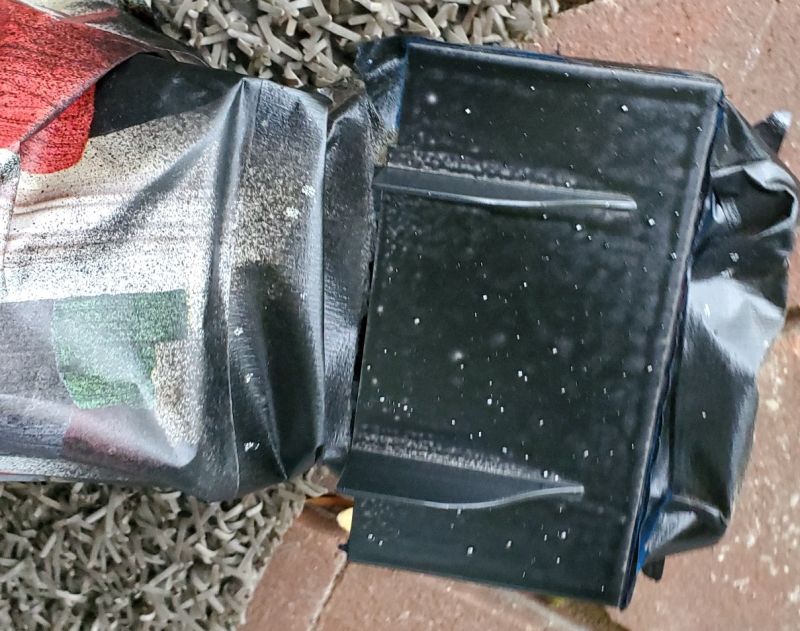
Finally, I took the piece cut out and sprayed it with Hunter Green to see if it was anywhere near a match. It did not sit down very well either:

I will have to go back and re-read what Jerry and co did to make the paint stick. . .

I will also have to figure out what tool will cut away the inner fender. My Dremel is too dangerous with the wheel behind. I may be able to separate the wheel from the frame while I do it. Hmmm . .

Pete,

It is my understanding that “Back 2 Bay 6” is no longer in business. Do you have different information?

Rick Marty said:

Pete,

It is my understanding that “Back 2 Bay 6” is no longer in business. Do you have different information?

Nope. I just clicked the link and got nuthin’ so I assume they are gone. (I usually ask the GSC crowd if I really need to know.) I got my kit directly from Smallbrook. I also got the “guards duckett” for my coach conversion - details in the coaches thread.

The test paint on the fender turned out fine. I think I will live with this “Hunter Green” for the splashers.

I found that Rustoleum 2X green worked real well to match the green. Cutting the holes can be okay for static display, but does not show up much when running.