Thanks very much gentlemen, it means a lot that you like the like the results so far!
Neat vent Bruce, and only 1" diameter. I’ll sure file that away.
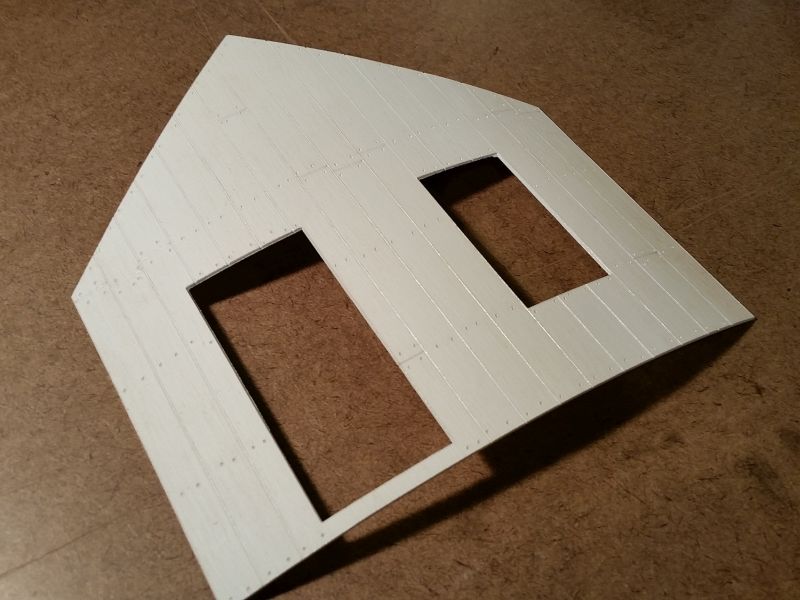
The next step with the siding experiment is graining. I took a belt sander and wire brush to a small sheet of stock, roughing & scratching the surface in one direction. Then I re-ran the part (this time with smaller nail holes).
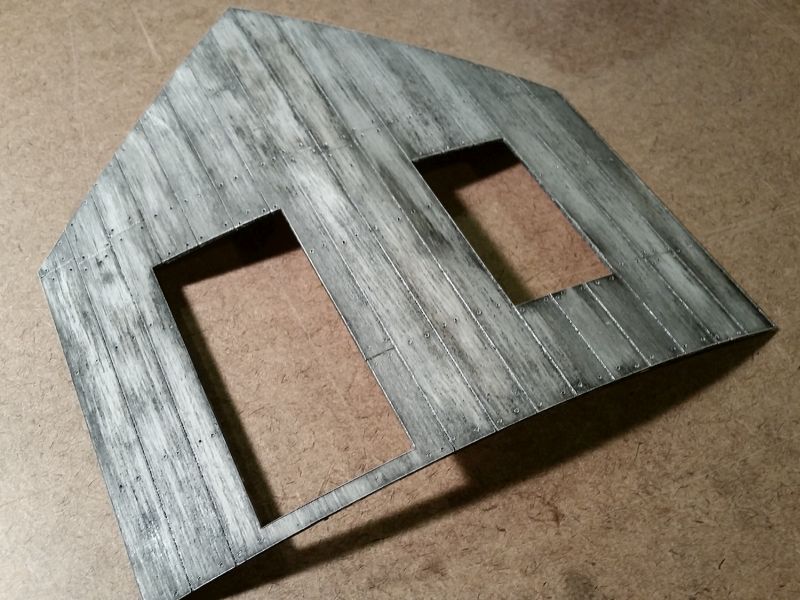
So now I had 2 versions of part to play with pre-staining with, one smooth and one “grained”. Here’s the smooth part with India ink smeared on and wiped off a few times.

And here’s the “grained” version with the same treatment.
Here’s a comparison,
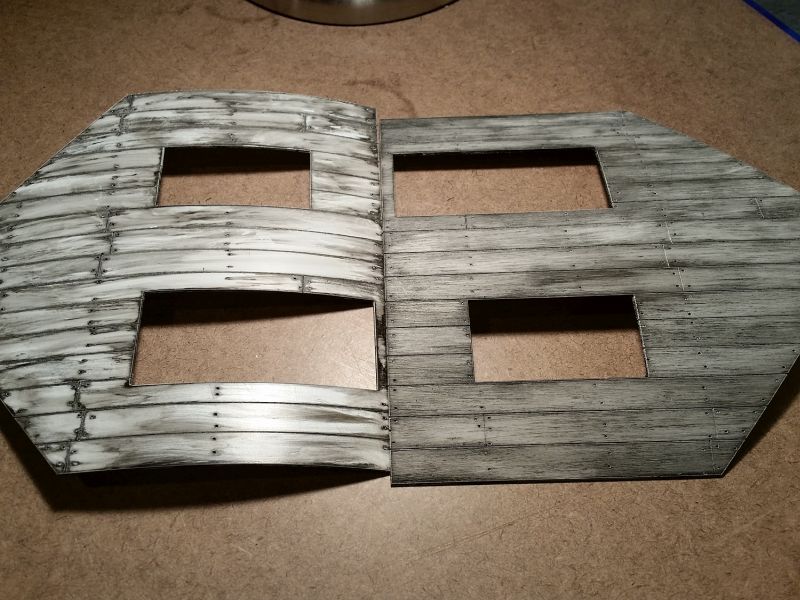
BTW, the new part seems flatter only because I cut it in a different direction on the (curled) sheet. Need to flatten that stuff out… maybe roll it up the other way for a while…
The more dramatic streaking of the first part is probably due to the ink’s behavior on the glossy surface. When wiping it down, there was a certain break-away pressure threshold where much more ink came away (vs being lightened up). Kinda fun and random effect, though the grained version didn’t have that quite as much. In either case, playing with slight squirts of Windex on the paper towel added to the variability.
Anyway, seems to me the grain treatment is worth it. Less shiny, held the ink better a lot, and probably will hold paint better.
Now I need to do all the other sheathing panels.
Thanks again,
===>Cliffy


