Also you can get rid of scratches with tooth paste
I used to clean and polish model aircraft canopies with Bon Ami.
While waiting for some paint, I had a few minutes so I went looking for underframe photos and found a few.

It appears to be steel rod, but without a turnbuckle - in the US the length is adjusted in the center, where it is easy to get to it. On the other hand, this is a steel underframe, so it shouldn't need adjusting!
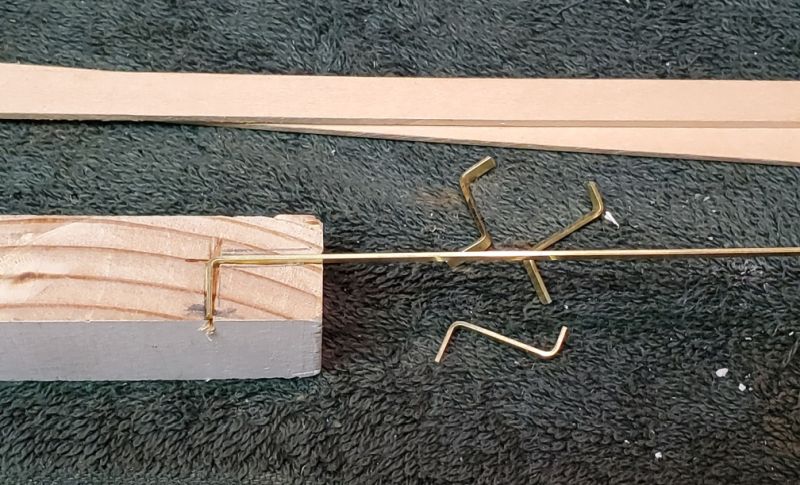
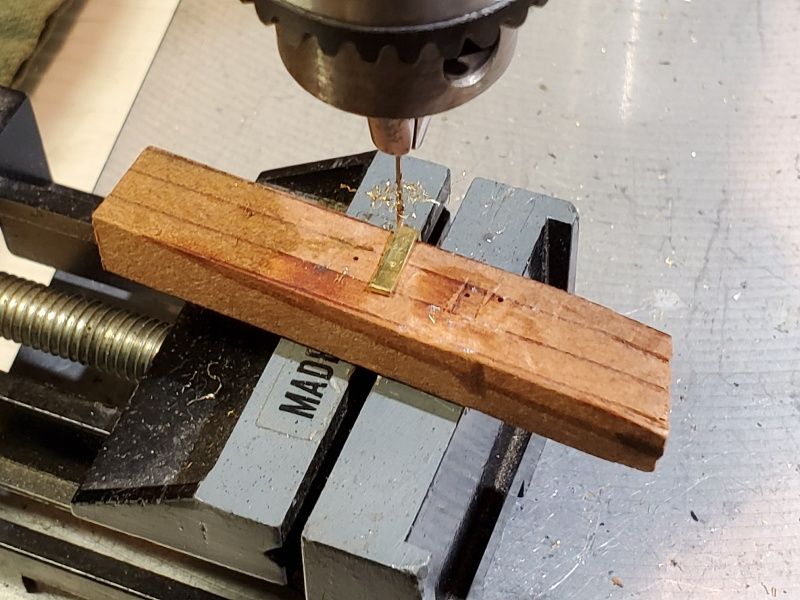
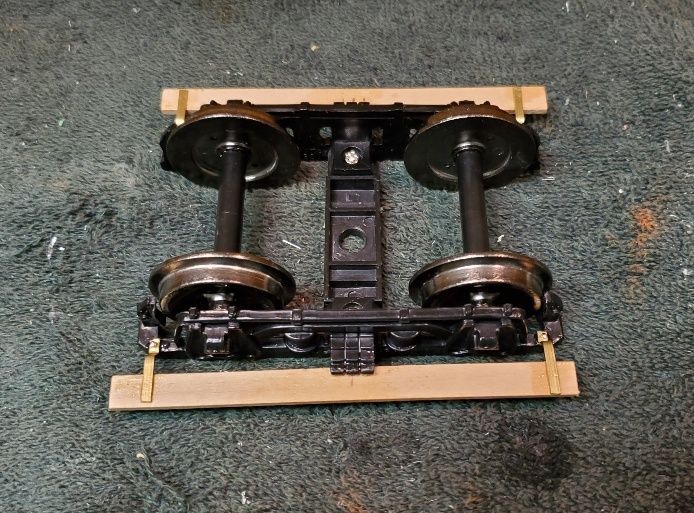
I dug around the parts boxes and found some 1/16th brass rod which seemed the right size. I also found 3 white metal bits that I think are Ozark pins for a link-and-pin setup. With a little 3/64th rod filed flat at the end to make a loop, a covering of 1/16th ID tube (5/64 OD) and a 3/16th sliver of tube on the end I had a credible truss rod support. It needs soldering together.

It appears to be steel rod, but without a turnbuckle - in the US the length is adjusted in the center, where it is easy to get to it. On the other hand, this is a steel underframe, so it shouldn't need adjusting!
I dug around the parts boxes and found some 1/16th brass rod which seemed the right size. I also found 3 white metal bits that I think are Ozark pins for a link-and-pin setup. With a little 3/64th rod filed flat at the end to make a loop, a covering of 1/16th ID tube (5/64 OD) and a 3/16th sliver of tube on the end I had a credible truss rod support. It needs soldering together.
Another spare 1/2 hour between packing, so a little progress on the underframe. The truss rods look much as I remember from my youth in the West Riding. Battery boxes aren't here yet, and I should probably be using gas cylinders for the lighting (!) but my coach made it into the 1920s so it got the new fangled lights.
Them rods look a bit low to me. Maybe they won’t look so low once the battery boxes are installed.
Looks within same range as this LNER coach, https://www.nymr.co.uk/lner-coach-association-lnerca
And this Pullman, https://www.kentrail.org.uk/Perseus_Pullman_Vehicle.htm
And the various photos and railway shop drawings of Irish coaches here, https://www.rmweb.co.uk/community/index.php?/topic/46649-coaching-stock-of-the-ncc/
I stand corrected. I was looking at a different prototype for reference.
David Maynard said:
Them rods look a bit low to me. Maybe they won’t look so low once the battery boxes are installed.
David, they come in all shapes and sizes (and thanks to Forrest for some more photos!) I do have drawings for several types so I could make them exact if I was so inclined. However, I’m after more of a general look that seems right to me.
In fact, they are getting full length foot boards, as in these 2 photos.


(This last one was photoshopped to lighten the underframe so you can see the foot boards.)
Incidentally, for your entertainment while this thread goes into hibernation for the winter (I am in Florida and the coach stays in Maryland,) there’s another full thread on GSC from last year with more ruminations and photos.
https://www.gscalecentral.net/threads/coaches-for-the-stirling-single.311794/
This photo of the footboards comes from that thread.
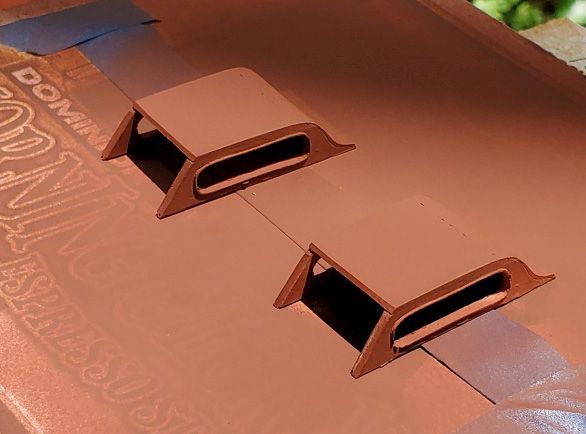
Looks like I will need some roof vents!
Pete Thornton said: …. (and thanks to Forrest for some more photos!)…
Welcome!
In 1980s I was big in to UK railways and did a lot of reading but product availability in the US and my income were both pretty low, so not much got modeled and out of frustration I moved on to other things.
Now there’s plenty of product, available all over the planet, and far more information available, …
… and my income is even lower and my health is a mess.
Oh well, such is life.
Hi Pete… Been lurking around the posts and watching the progress… Outstanding job… Sure looks good… (http://www.largescalecentral.com/externals/tinymce/plugins/emoticons/img/smiley-laughing.gif)(http://www.largescalecentral.com/externals/tinymce/plugins/emoticons/img/smiley-laughing.gif)(http://www.largescalecentral.com/externals/tinymce/plugins/emoticons/img/smiley-laughing.gif)
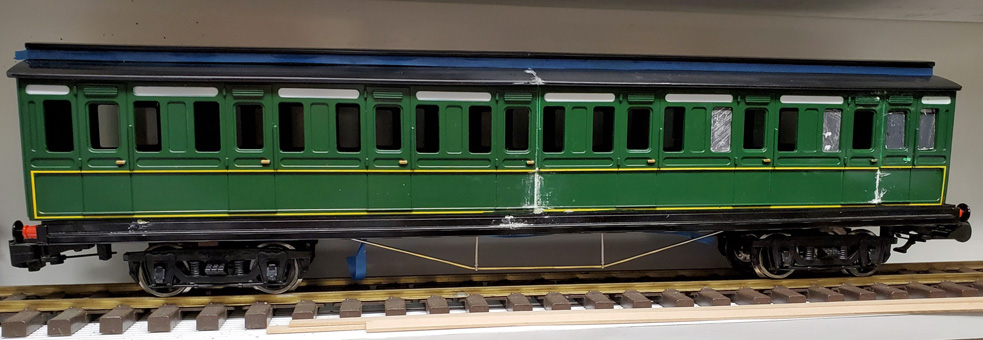
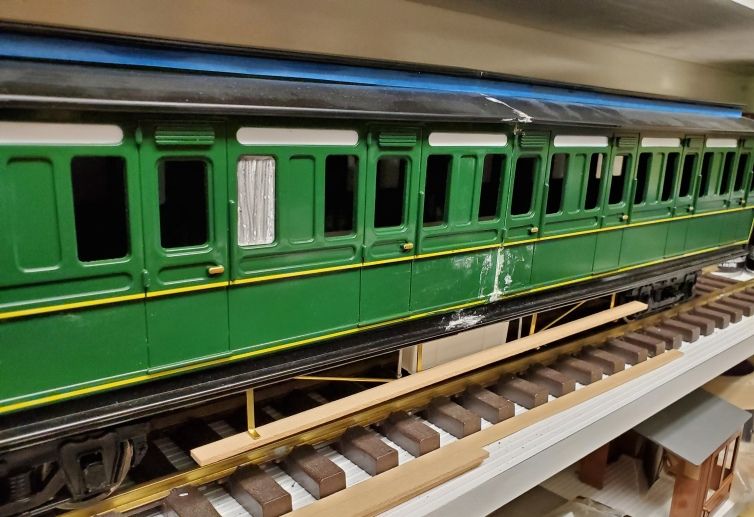
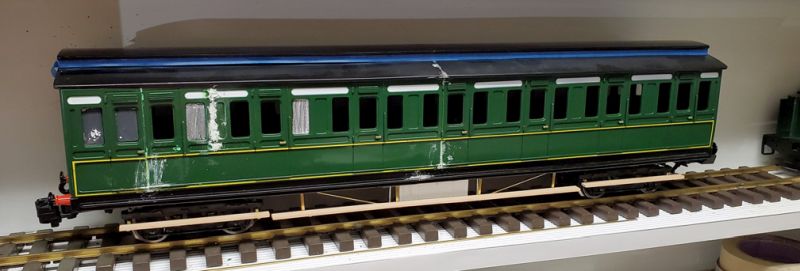
And we’re back . . I resolved to get this done as there isn’t much to do besides paint. Add footboards, attach ducketts and battery boxes, and clean the windows.
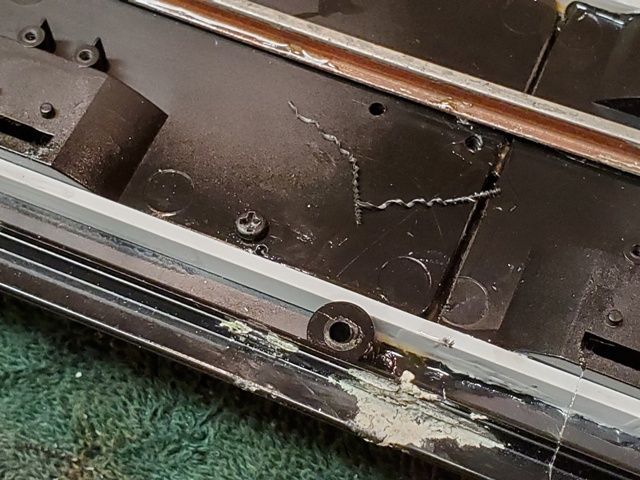
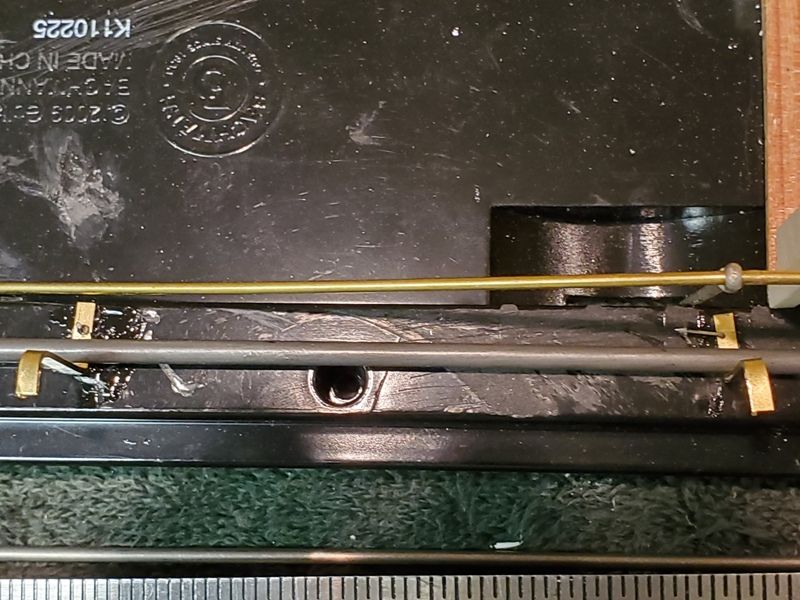
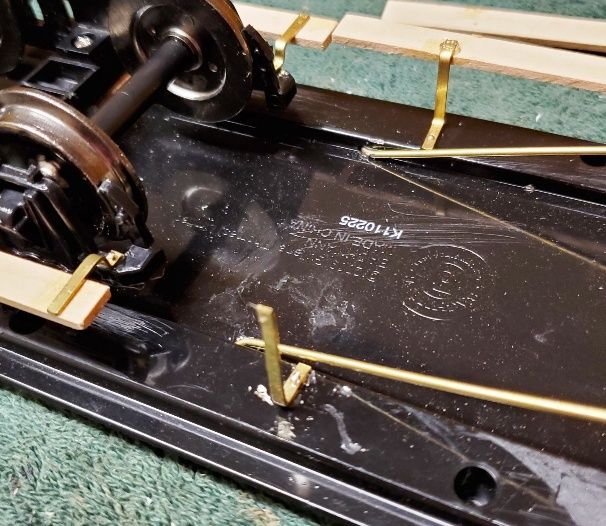
The battery boxes needed a bit of trimming and the truss rods needed adjusting. (The blue painters tape is marked with the positions of the center of the frame, and where the rods fit.)
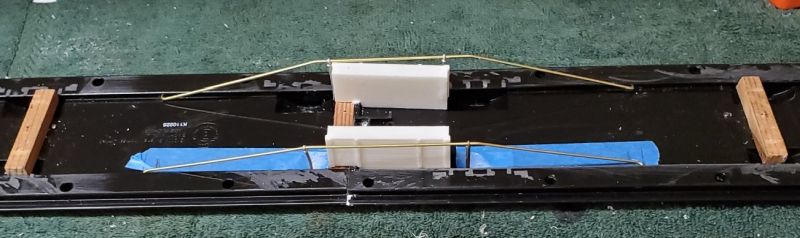
As the boxes are hanging down, I decided they needed proper support - i.e. a screw. (The pieces of rail is actually the frame reinforcement along the center.)
These coaches have a long “footboard” as there is no corridor inside. In an emergency, the passengers may be required to get out through the compartment doors. I had some basswood and a long strip of 1/32" x 3/32" brass so I made a little jig for bending so the 8 pieces would be close to the same size.
I also decided that the footboards needed some positive reinforcement, so the top was drilled #74 for some 1/2" pins that I have.
Here’s the footboard support with a pin and glue, and a metal rod lying on top while the glue dries. The pin on the right needs replacing.
With everything the right way up, I tried the footboard strip.
Looks OK, so out with the glue (gorilla, clear,) and some clamps. While that was setting, I made some similar supports for the footboards on the trucks. Glue and a pin and clamps, again.
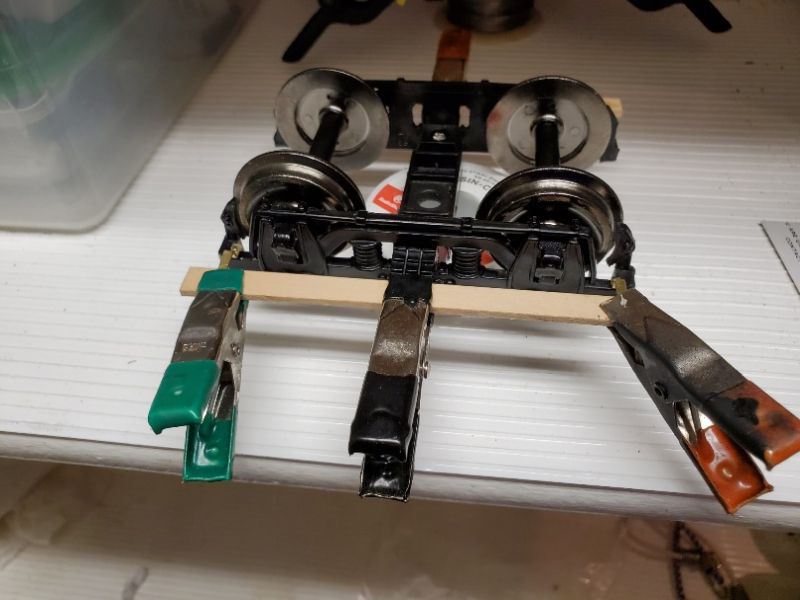
Unfortunately, as you can see, the supports are far too short. As soon as I picked it up, the boards fell off! So longer ones were fabricated (bottom left.)

That’s better. It did occur to me that getting the wheels out might be tricky.
And here’s the result after the glue dries. They don’t seem to line up perfectly! Maybe I’ll have to do something about it, or maybe not. Shouldn’t bee too difficult to raise the center boards.
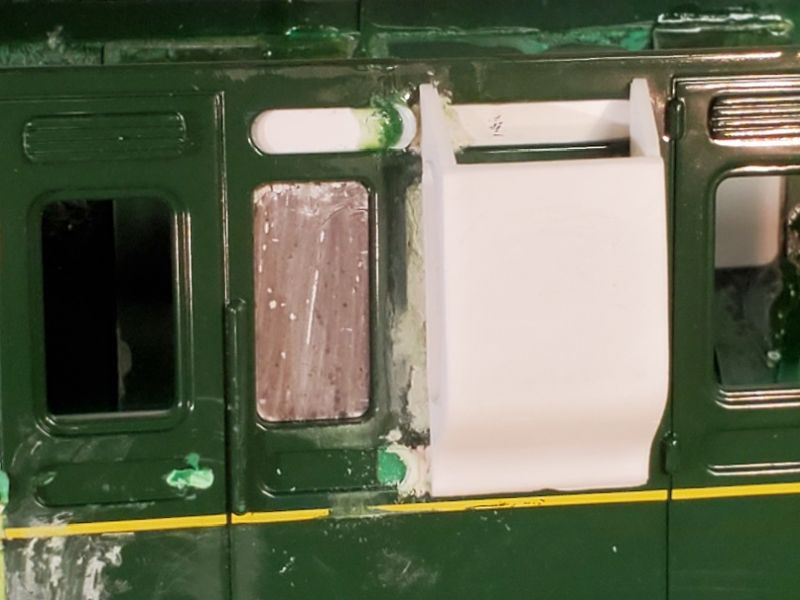
On to the guards lookout (duckett) that is going to fit by the Guard’s door. Unfortunately it is sized for the end of a Thomas coach, where there is a thin panel. I could just glue it to the coach side and hope no-one will notice, but I didn’t like the long top panel that dives under it. I chopped 2 pieces off a plastic tube and cut them down to almost fit in the panel, and thus after gluing, to make a new end.
.jpg)
The center panel is too short, so I filled the edge of it to fit the duckett with Testors contour putty. Certainly going to look better than just leaving it alone.
nice detailing Pete
Pete Thornton said:
And here’s the result after the glue dries. They don’t seem to line up perfectly! Maybe I’ll have to do something about it, or maybe not. Shouldn’t bee too difficult to raise the center boards.
If the boards line up, what is the probability of interference as trucks swing on curves?
Pete,
That is some awesome work, thanks for sharing your efforts.
George
If the boards line up, what is the probability of interference as trucks swing on curves?
If there is interference, what’s the probability of me chopping a bit off the end? (http://www.largescalecentral.com/externals/tinymce/plugins/emoticons/img/smiley-wink.gif)
I did decide to improve the alignment, so I gently removed the boards with a flat knife and bent the supports up. Having the pins in place helped a lot. Then I made another jig and bent them down again and glued the boards back on…
That looks better. We will see if any chopping is necessary. (The lighting makes the gaps look different.)
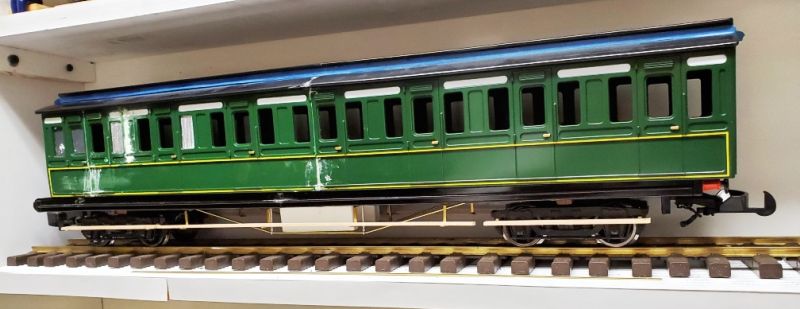
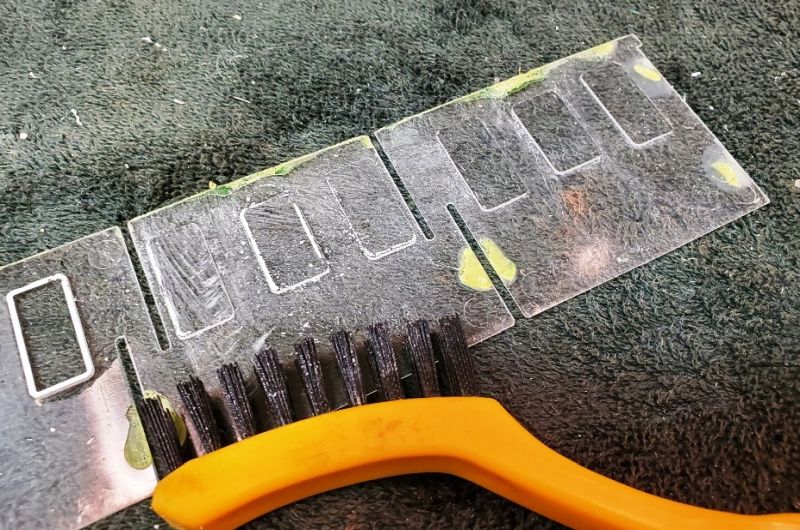
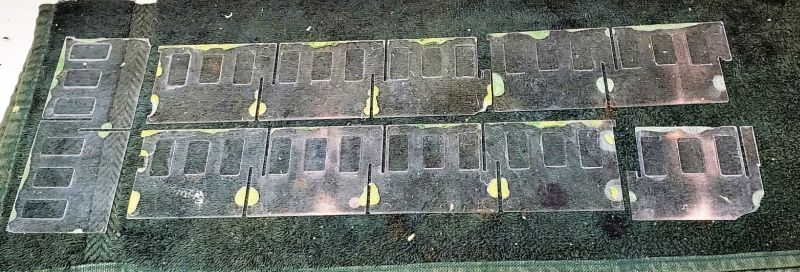
Almost done. Just had the windows to clean - see page 1 for the saga of the experiments. This time I resolved to follow the directions on the can of Poly S Decal Remover. They tell you to apply liberally, wait until the paint crinkles as it looses its grip on the surface, and then brush it off. Works like a charm.
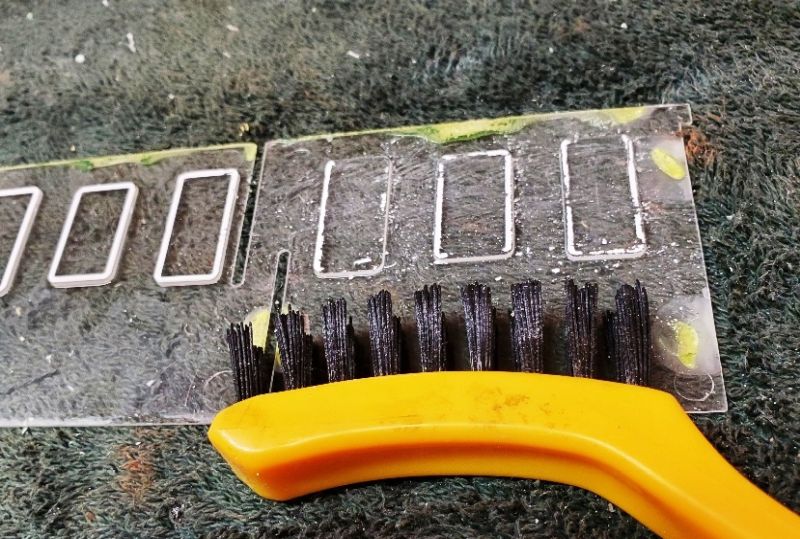
The nylon brush I found in my tool box. In this next pic, I have wiped the 3 cleared windows with a paper towel to confirm the PollyS hadn’t damaged them. After brushing the white paint off all the windows, I dropped it in the soapy water in the sink.
All told, it took about 30 minutes. So, time to start painting and get this coach done!
PollyScale was a good product, I miss it. As well as decal and paint remover, they had a plastic prep, wash for plastic models before painting them.
Today was a good day to start painting - slight breeze and hot. The ducketts got brown primer as a test for the body.
(As they are glazed, I have to fit them after painting.) The body got the same brown.
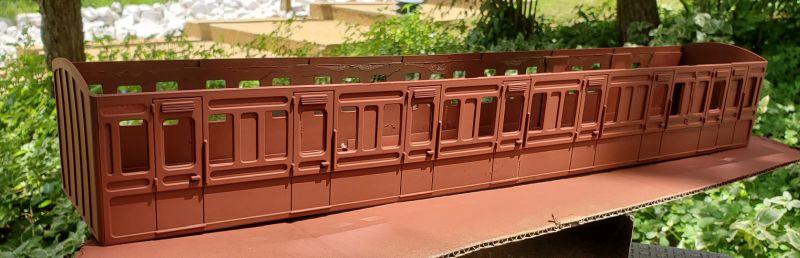
The underframe is just boring (semi-gloss) black, as is the (flat black) roof.
I then got one of my Ford Canyon Red cans and tried it on the duckett. I didn’t like the way it looked, and I accidentally touched it and discovered it was already dry. Didn’t one of our Brethren here discover that paint can dry before it hits the surface? This certainly did, so the red will have to wait for a cooler morning.
