Large Scale Central

Liquid Tight Connectors

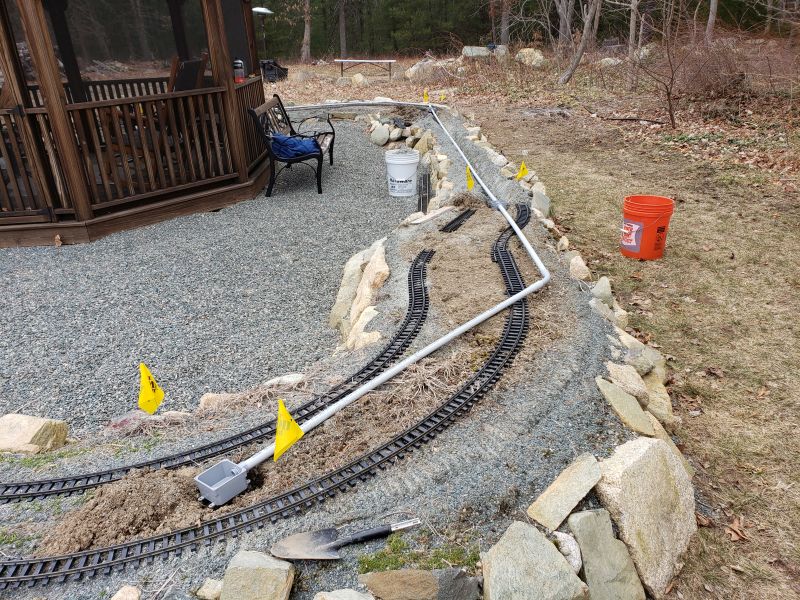
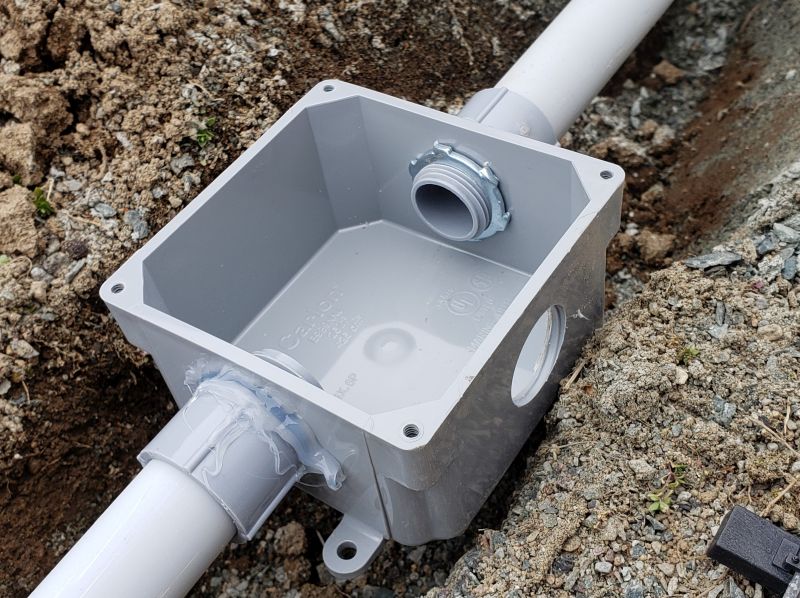
I am in the process of adding a main bus and feeders to my railroad. I think I pretty much got the main bus connections figured out to keep water out of my junction boxes but was wondering how you all dealt with penetrating the junction boxes for the feeders. My plan is to use either #10 or #12 stranded wire for the main bus and #18 solid core thermostat wire for the feeders. I have an almost endless supply of #18/6 thermostat wire but could easily purchase #18/2. Which ever way I go there doesn’t seem to be a liquid tight connector for such a small diameter (or is there?)

Thank You-John

next box, use the normal glue, not silicon… it will be stronger…

put gravel underneath, not just dirt, so it can drain

do not bury the lid if at all possible.

I used sweeps at the ends, and no junction boxes under the ground… no way for water to get in.

you can see 2 sweeps sticking out of the ground on the right, with the white caps.

This allows you to pull new wires without unearthing anything… it also keeps water out, it also makes the pulls shorter.

I like that idea Greg. Unfortunately all my boxes are already at the stage seen. I do have a rubber o-ring between the connector and box and added the silicone for extra safety. The conduit isn’t glued to the connectors yet. It was all just dry fitted for now but I will be using the glue for the conduit. I was on the fence between fully burying the box and not but now I am convinced to have the cover flush with the surface. I’ll probably cover the cover with a building or a rock. I tried zooming in on the picture but couldn’t quite see, did you just drill a hole in the side of the sweep and fill it with silicone? I will be off to Home Depot after work today.

Greg Elmassian said:

next box, use the normal glue, not silicon… it will be stronger…

put gravel underneath, not just dirt, so it can drain

do not bury the lid if at all possible.

I used sweeps at the ends, and no junction boxes under the ground… no way for water to get in.

you can see 2 sweeps sticking out of the ground on the right, with the white caps.

This allows you to pull new wires without unearthing anything… it also keeps water out, it also makes the pulls shorter.

Are the sweep whats stopping the siding from going in?

Tom

John, I probably won’t change your mind, but you could add the sweeps now and toss the boxes. Even though you have 2 pipes coming out of the ground, completely trouble free, easy.

The “wisdom” is that any place at ground level or below will eventually get water in it. By not having any openings below grade, this has been trouble free for 10 years so far. Even with the boxes level with grade, you have any rain trying to get in, and the covers warp over time. Also raising them puts your conduit very close to the surface, which can interfere with plants, or slight grade changes.

Just trying to help here.

Tom, old picture…

here they are again, changed the caps. putting a slot in one side of the tube lets you put the cap on and keep moisture out, but pull off any time to add wires.

lead in to switch yard, conduit is off screen to the left in the picture below

Greg, Yes you are correct about changing my mind (for this stage). I am going to incorporate your idea of the sweeps attached to the boxes thou. I do however plan on trying out what you have on the future expansion.

This current renovation covers a fairly small area.

My area is also raised and does drain pretty well. I know I will get water and at least condensation in it. Worst case scenario I’ll be ripping it out in a couple years when I do the expansion.

Thank You,

John

If it drains well, you might consider putting small holes in the 4 bottom corners of the box. If you have good drainage, then any condensation will go to the corner and drain out. This is a common technique in switch motor boxes, we had this issue in Georgia, and there was a drain hole in one corner, but it never was the corner that was lowest it seemed.

Best, Greg

Sounds like a plan Greg. I will also place gravel under it. We’ll see what happens.

Thanks a lot

John

Sorry, I focused on your conduit system and forgot to share the information on liquid tight connectors:

I found these on Amazon, search “8 pin connector”… this company has several different options on Amazon.

Note the comments, that the little red rubber thingies are the moisture resisting part of the device, and in the comments/reviews people mention that they are small, i.e. should be perfect for your smaller gauge wire you asked about. The “brand name” of “Qiorange” should also help searches, but the variations were pretty easy to find from the “customers also looked at”

John, I sent you a PM on Liquid Tight junction boxes.

Just remember that John can get more water in one day (plus freezing at or below zero occasionally) than Greg gets all year!!

In my experience:

  1. there is no thing (that we mortals can afford) that is truly “water tight” especially receiving heat and cool and moisture changes…

  2. your “water tight” enclosure will eventually collect moisture and you should have a way to eliminate condensation.

The forces of heat and cooling will make things expand and contract and will “pump” air in and out of your enclosure, unless they are truly “air tight” not just water tight.

In this installation, with well drained gravel below, the boxes shown will work, and the 4 holes in the corners will drain the condensation that will build up.

Greg

Freezing water will ‘lift’ objects out of the ground. For building codes in the Northeast, most homes have cellars as one needs to have the footings 4 feet below ground level, in Massachusetts it is 2 feet for frost, and 2 feet for occasional deep freezes. Farther north will be more depth for the frost.

So, I suspect that over time 4 inch electrical boxes will start rising out of the ground here where I live about 25 miles from John.

That’s why I believe he decided to put them just under the surface, and looking again at his picture, I would have to agree he should have good drainage.

Greg