Large Scale Central

Hale & Norcross

I’d like to tee up the next building project I’d like to work on, and it represents a mine complex of the Comstock Lode called the Hale and Norcross. It’s one of several I’d eventually like to make, and in fact my layout is designed around these things. I guess I’m obsessed.

Here’s a shot of the H&N in its heyday, taken from its main waste tram trestle.

A rear view, where the V&T tracks permitted delivery of timbers & cordwood & equipment & etc.

A Sanborn fire insurance map shows its guts,

Four years ago I made a stab at this model. I modeled in on the puter, printed full size plans and made its foam walls.

Oops, I promised that I’d help with dinner by now, I’ll have to post the rest later…

CJ

Naaahhh that’s to easy of a build Cliff …pick something more difficult!

Swinging for the Fence! I like it!

Chris

Do the one one the hill, over there…

Some day I hope you’ll just let yourself go!

Haha! Y’all crack me up!!

Yeah, it’s way too big & complicated, but I’ve painted myself into a corner, and need to get moving on one of these mines. My wife wants me to get buildings in, and I’ve put it off for too long. So I figure if I spill the beans on the project and interact with you guys, I’ll feel more motivated to do something about it. At least that’s how it’s been so far.

So, herewith, beans will be spilled.

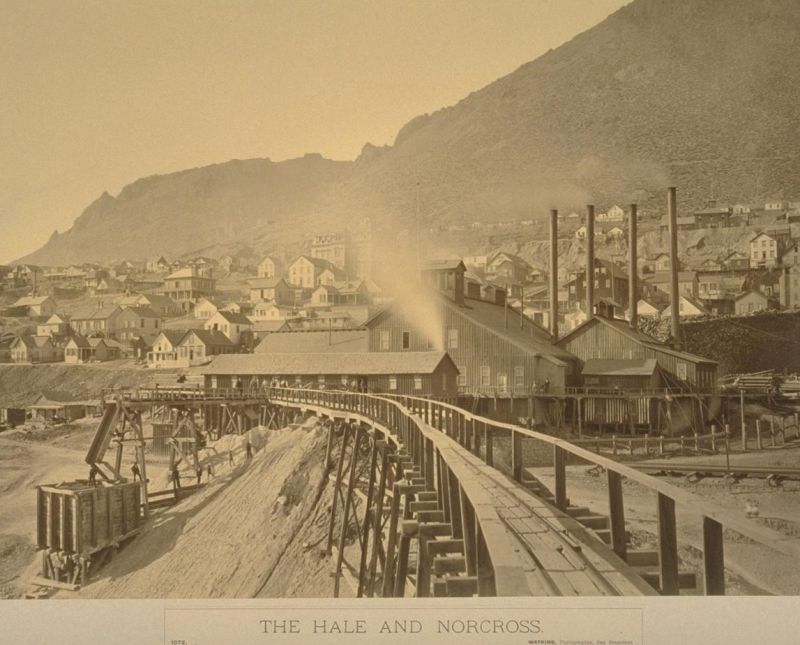
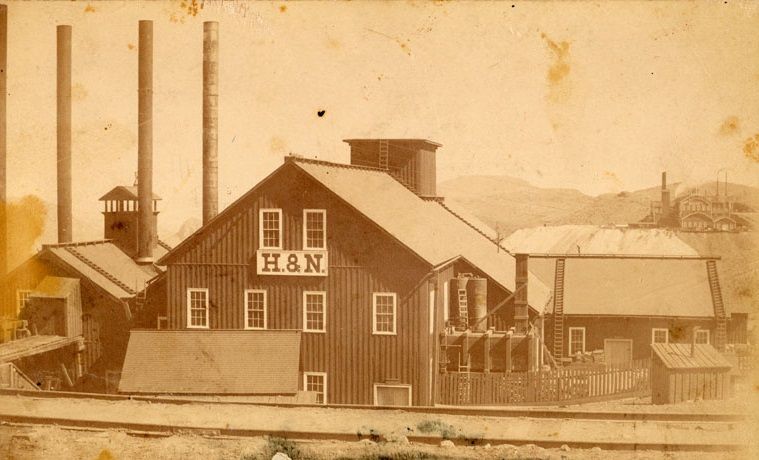
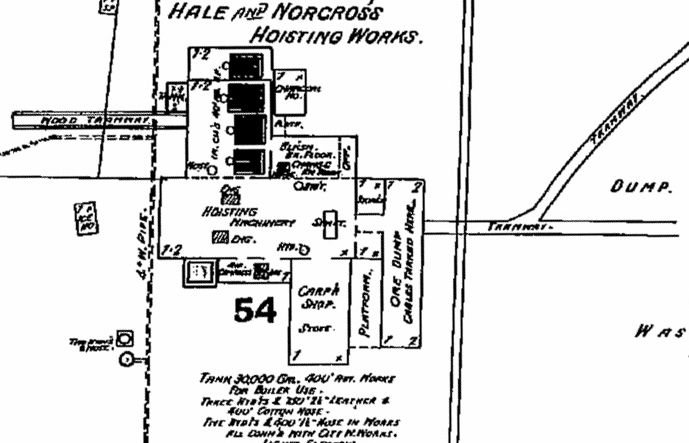
Of the (eight) mines in the layout plan, the H&N is medium-size, and the one I’ve put the most work into so far. Four years ago I worked up the puter model, based on a 1" structural foam core and a vague plan for sheating. Here’s a couple of shots from back then.

Putting that foam together was a blast! I also cast the doors and windows (in resin) for this.

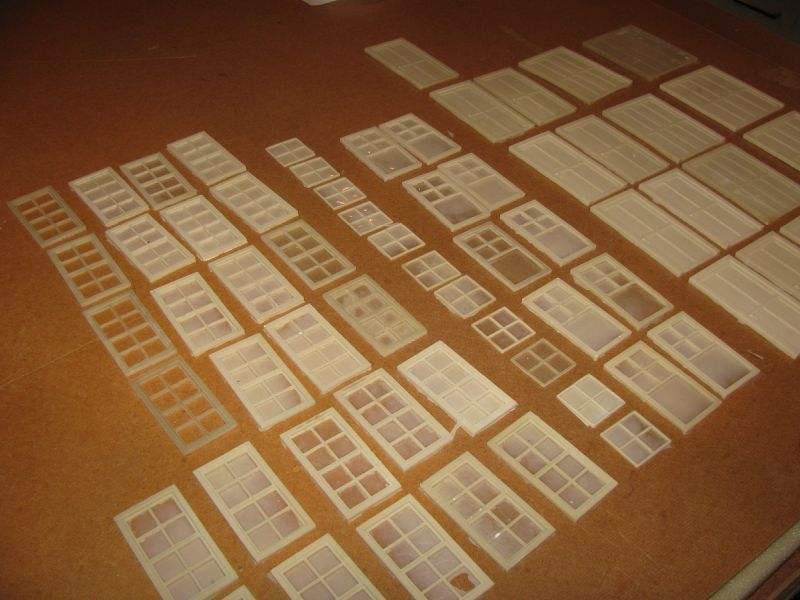
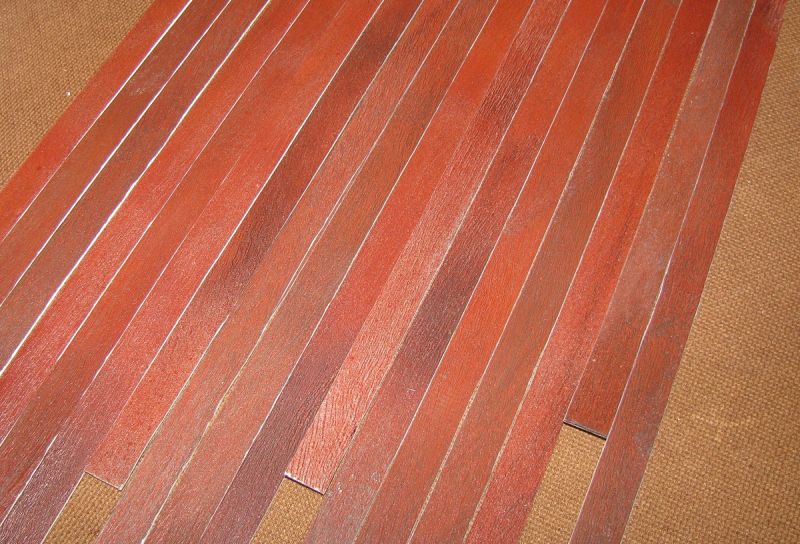
I worked hard on developing a means of making pre-weathered planks from styrene, and blew all kinds of time experimenting (with load testing) on how to glue styrene to this foam. John, and maybe Chris, you remember that.

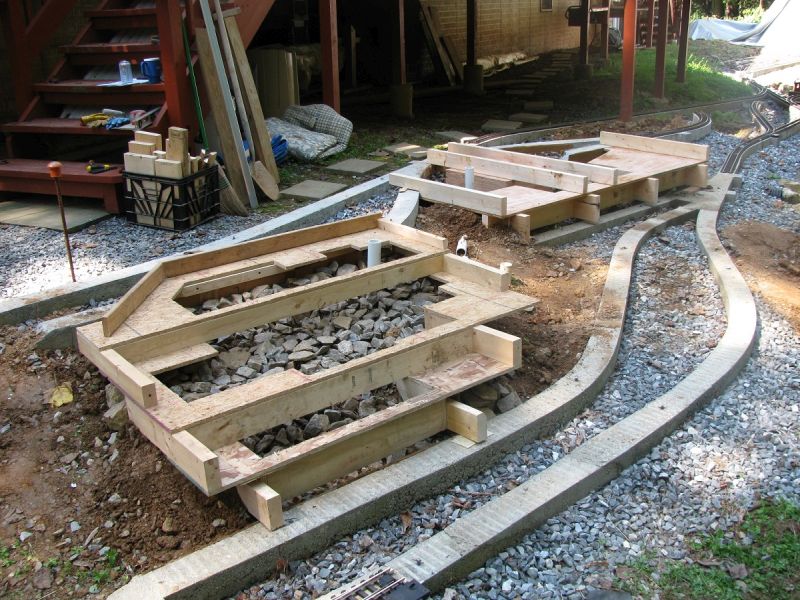
At this time I also made the plywood forms for the foundation and poured the concrete. The near one is the H&N, the further one is the Savage Mine.

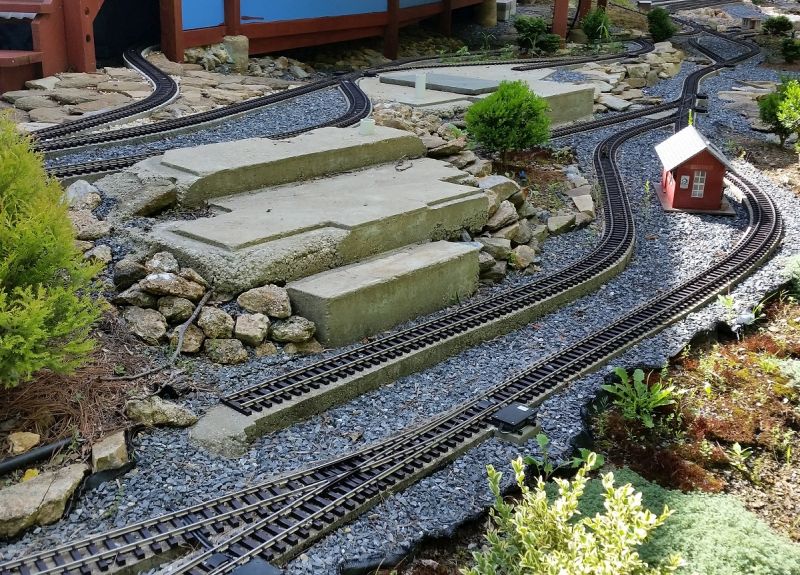
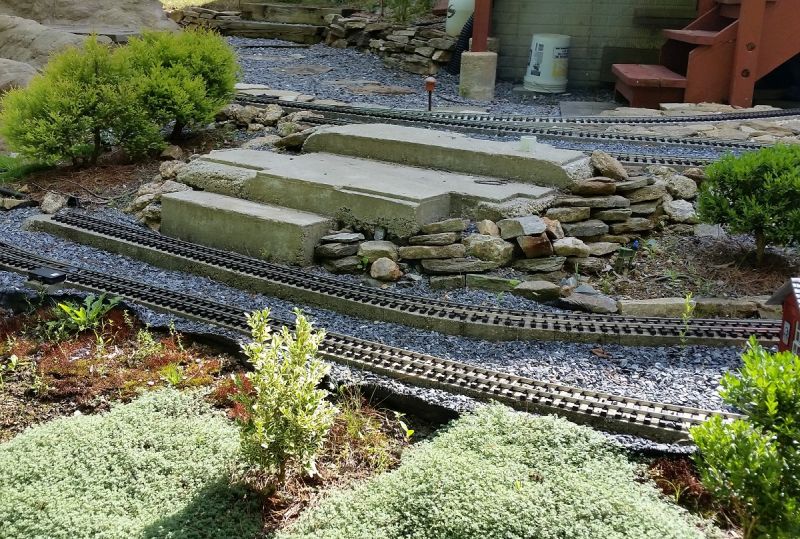
Again, this was four years ago and nothing’s been done since then. And besides needing to get a lot more infrastructural work done, I’ve had a problem with motivation. Mainly, I saw serious drawbacks to the foam method, at least how I was approaching it. Cutting holes for windows was sloppy; cutting it is very messy; cutting required warm enough weather to work in the unheated garage; walls are thick for lighting purposes; the full-size plotting of patterns was neither cheap nor easy to use. And it’s not straightforward on what adhesives will work with various materials.

So, fast forward to last December when I got a kit 3D printer working, and January where it began to seem possible to get a laser cutter. To me, as long as the ventilation could be worked out, that cutter would be the answer. Especially in permitting precise cutting of acrylic, and fitting them with 3d printed parts.

The “first laser building” was a test run on methods, and thanks to everyone who participated with me on that. I sure appreciated it, especially when things got bogged down.

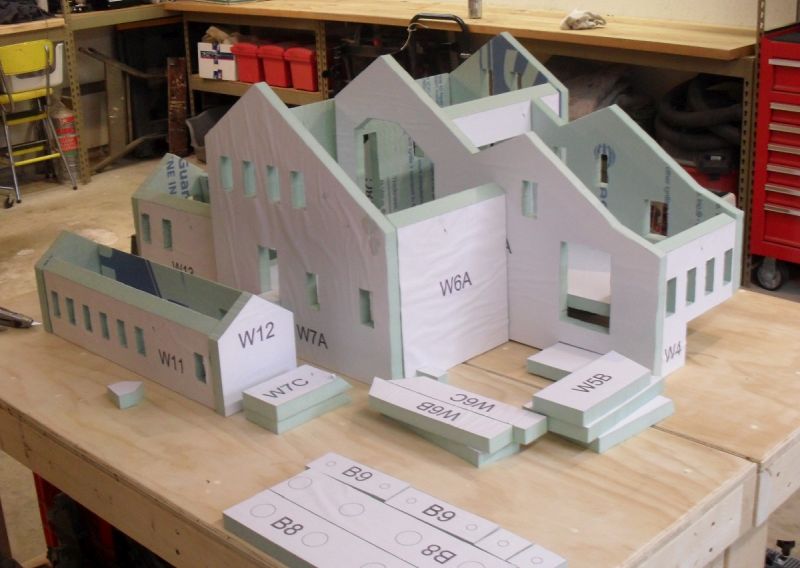
So now, I’m starting with a foundation, doors and windows, and a computer model that nowhere reflects the needed design approach. Here’s some model pics.

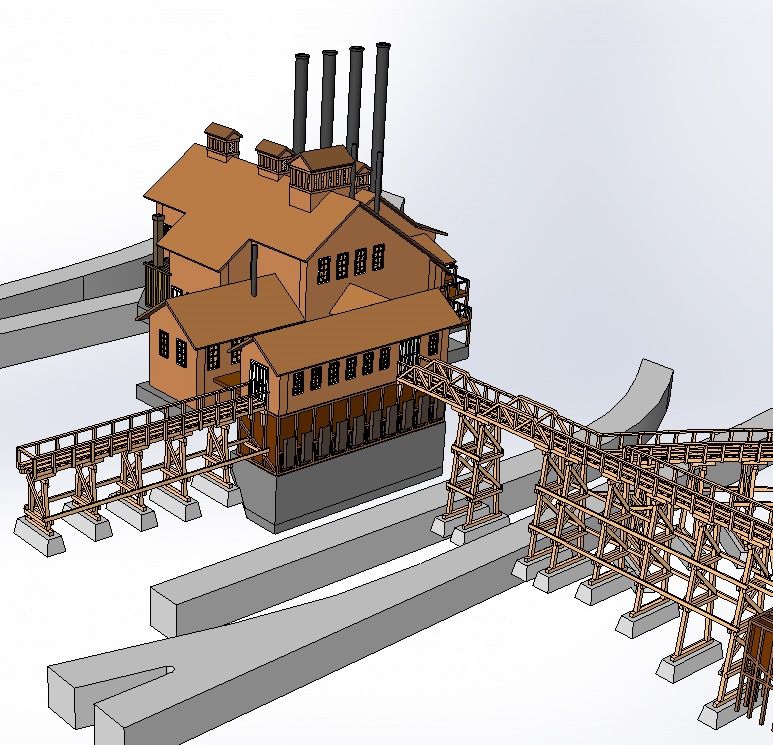
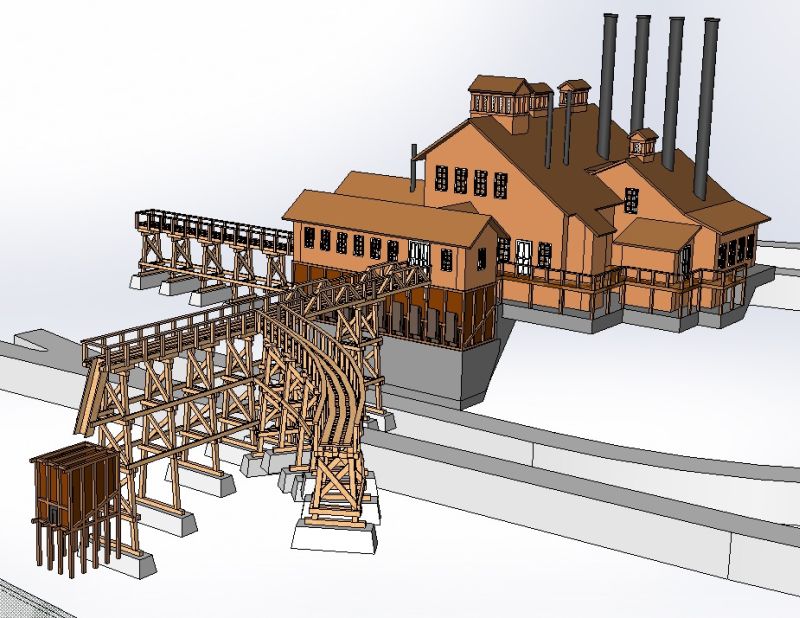
As you can see, the core model is woefully inadequate for an acrylic-based build. Furthermore, it needs to be divided into separable modules just so I can handle it (acrylic being much heavier).

In short, this will be a long-term thread; it might take me two years to build this thing, who knows. The model will have been laterally squished (50%) and vertically shrunk (~75%), so it won’t look anywhere near like an exact replica. Details will be lacking, mistakes will be plentiful. And all manner of interruptions will happen. But, spilling these beans is helpful to me, in regards to getting off my butt on the project. And if you’re intrigued or entertained along the way, that’s great.

Thanks for viewing,

===>Cliffy

Cliff Jennings said:

… if I spill the beans…the beans will be spilled.

Being a connoisseur of the 7-11 Burrito. you should choose different words. :slight_smile:

So your intention is to laser overlays for the foam structure? Yes, I remember your tests you did.

Chris

DOUBLE POST

Chris Kieffer said

Being a connoisseur of the 7-11 Burrito. you should choose different words. :slight_smile:

So your intention is to laser overlays for the foam structure? Yes, I remember your tests you did.

Good point Chris. I’ve not quite reached connoisseur level though… I’m still at brown belt :smiley:

I was completing my post while you typed yours, so I may have answered your question already. But yes, laser overlays, probably in .03 colored acrylic (vs. painted-only styrene). They would go over an acrylic core though, same as the test building. Thanks for asking.

I can invision the complex Cliff!

Love it !

Thanks brother Rooster!!

And John, I did get your joke about doing the one “on the hill”… The big Combination Mine. Maybe 20 years from now, haha! Never made money, because it never hit the vein they expected. But it was sure a beautiful & huge facility.

Posting to check the notifications box…

Cliff Jennings said:

Thanks brother Rooster!!

And John, I did get your joke about doing the one “on the hill”… The big Combination Mine. Maybe 20 years from now, haha! Never made money, because it never hit the vein they expected. But it was sure a beautiful & huge facility.

I like the curved roof lines and the general outline reminds me of side paddle steamboat… over there…

You got the biggest one meant as a compliment and…

I thought Dirk might have pushed you to let go some… and go BIG! :wink:

yer Bud

John, here’s a couple shots of that mine in the distance. I’ve seen the headframe for myself.

http://www.allaroundnevada.com/headframe-of-the-combination-shaft/

Notice the delivery tracks in the foreground of the historical pic. They never bothered with building an ore bin here, or making the (very difficult) trackage to pick up ore from them, because the mine never produced.

Good ol’ Dirk. Boy did he go big; he’s an inspiration to everyone who knew his work. I’ll bet you miss him a lot, you having been neighbors and close friends.

Two years?..We expect to see it done next Friday.

Good idea to make it in pieces so it can be moved.

Chris

Talk about jumping from the frying pan into the fire. From a simple square yarn shop to a complex mining building. How to go from “novice” to “expert” in one easy step. Well, maybe not so easy, but it should be fun to watch…:wink:

Thanks guys, and wow, Mr. Connery I didn’t know that was you under that avatar, thanks!! And Ken, if all else fails (which it very well might), at least I’ll have provided some entertainment, haha!

I reviewed the computer model last night, and wow, it’s really going to require a whole new “build” for acrylic, with walls-on-top-of-larger-base-sheets approach, tabbed joints everywhere, modular sections… see Chris, this is why I’m saying from teh get-go that this will take 2 years. :slight_smile:

Cliff

PS, here’s a quote from Mr. Connery: "There is nothing like a challenge to bring out the best in man."

Cliffy,

I think I mentioned this before, but you are old and probably don’t remember it. When you do the acrylic base structure, put some holes in the corners for countersunk screws and use a piece of aluminum angle to help strengthen your corners. Since your building is pretty good size and your acrylic isn’t overly thick, I would think a little extra strength in the corners would be a good idea. Then you can cover the screw heads with your styrene overlay.

What is your idea for connecting the sub-structures together? I have a building or two that may need to be built that way. Was considering alternatives to nuts and bolts…maybe magnets?

Chris

Chris, yeah, I’m old… thanks for being considerate! :slight_smile:

However, I do remember you bringing that up, and also not quite knowing how to point out that your approach would weaken the joint!! :smiley: Why, you might ask? Well, I used solvent welding (not adhesive), so It’s glued together like a fish aquarium. And with the added finger jounts to increase the surface area of those welded corners, you’d have to break the surrounding 3/16 plex before the corner came apart. BUT, anything like a threaded hole would create a fracture opportunity / probability, and that’s where any cracking would be encouraged to start. Especially self-tapping screws, which compress the acrylic around them, said compression looking for an opportunity to be released with any hint of a strain.

You young designers, sheesh… But you use Pro-E, so…

Image result for emoji

For module joining good question. I’m leaning toward making the modules independantly sealed, and connected only in a cosmetic way (e.g., overlapping rooves). Gravity will probably keep them parked (with a brick if needed). But for smaller sections, if that doesn’t work, I’d tend toward screws & wing nuts. Magnets are an interesting idea, but the wind across a decent surface area might be stronger. But if you intend to bring them in for the winter, an easily seperable approach would sure be handy…

My two… now, what was that word?

Geezer Cliff

Dos centavos, mi amigo.

Jaun, the grey geezer