Large Scale Central

Building a BIG "little" shortline RR

Chuck Inlow had asked me a few months ago to get photos posted of our 1/8th scale trains. I told him I would as soon as I built a railroad on which to photograph them.

Well a few days ago, I started building the track for this “little” layout around our house.

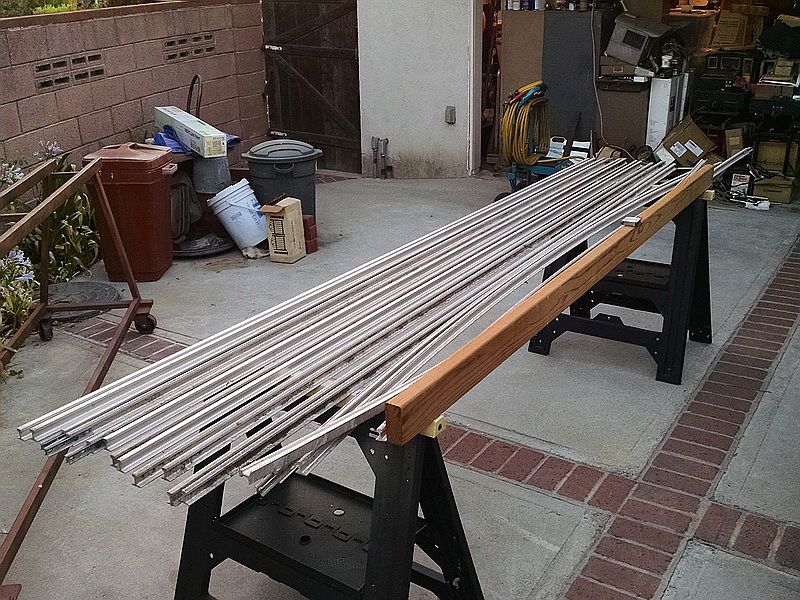
I had some rail leftover from a 7-1/2 inch gauge railroad for my kids from thirty years ago. But the problem was the wood ties. I found the solution to that problem from a company called Northwest Foundry and Railroad Supply in Washington state.

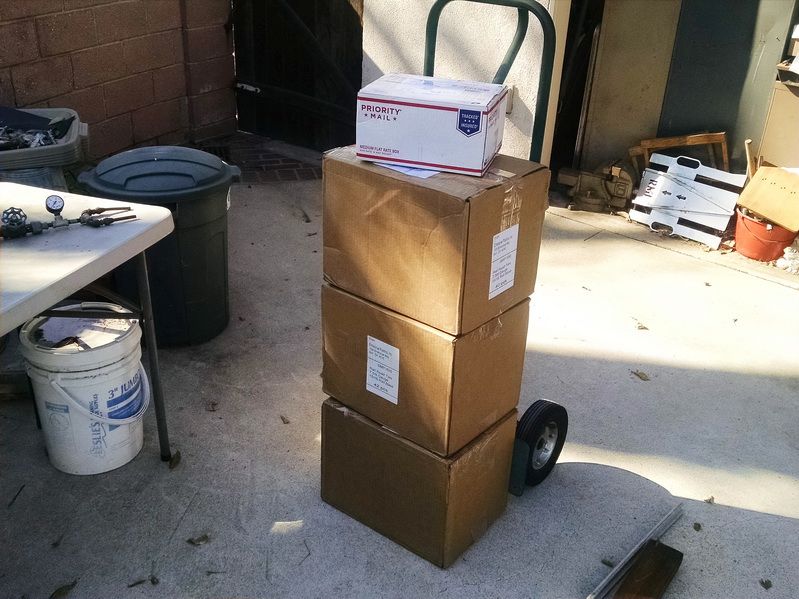
I received a shipment of 126 plastic ties, rail joiners and 500 SS track screws last Tuesday.

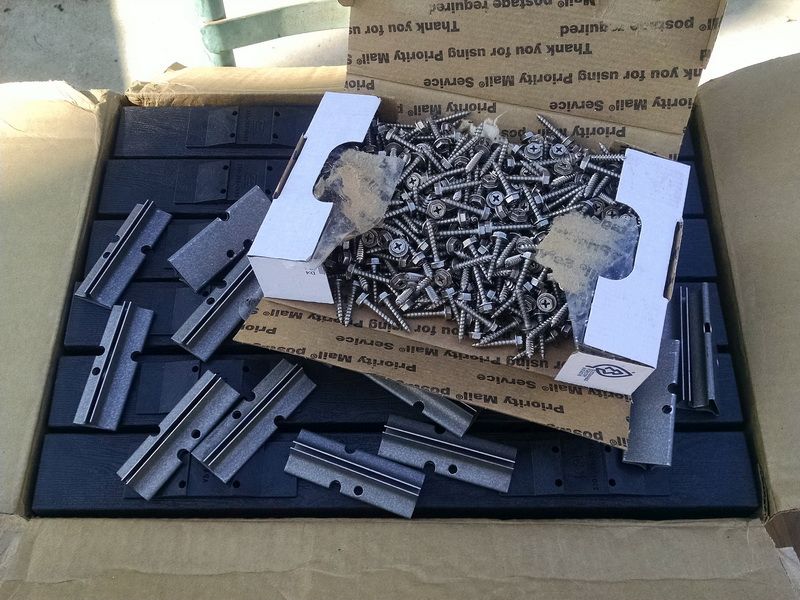
Each case contains 42 ties with the tie plates molded in and the screw holes molded in place.

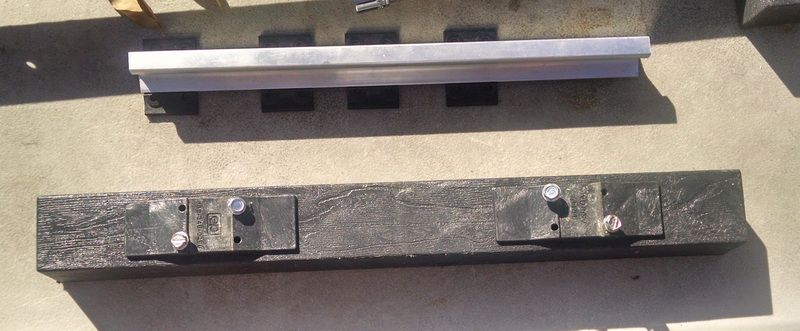
Here’s what the individual ties look like. This particular has been outside for two years and seemed to do well in So. Cal. sunlight (UV), heat and cold and rain. You can see the molded ties plates which automatically set the track gauge (in this case 7-5/8 inches) AND they tip the rail 1-1/2 degrees inward (per prototype). Works great for curved track panels. This tie is made for West Coast code 1000 aluminum or steel rail 1 inch tall and has a 15/16 wide foot profile.

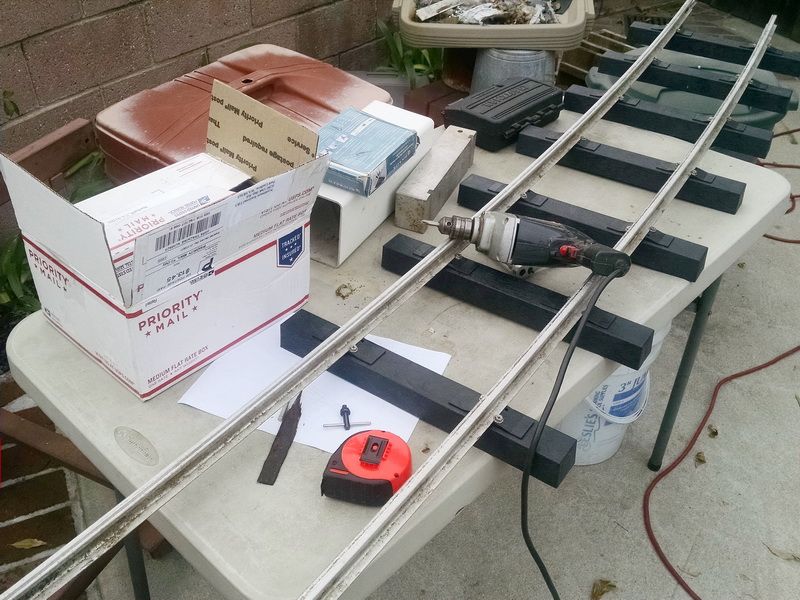
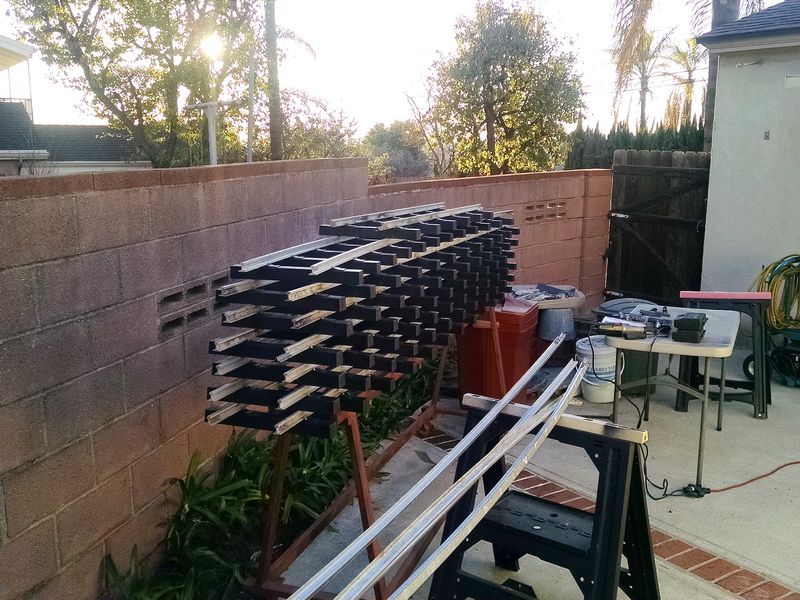
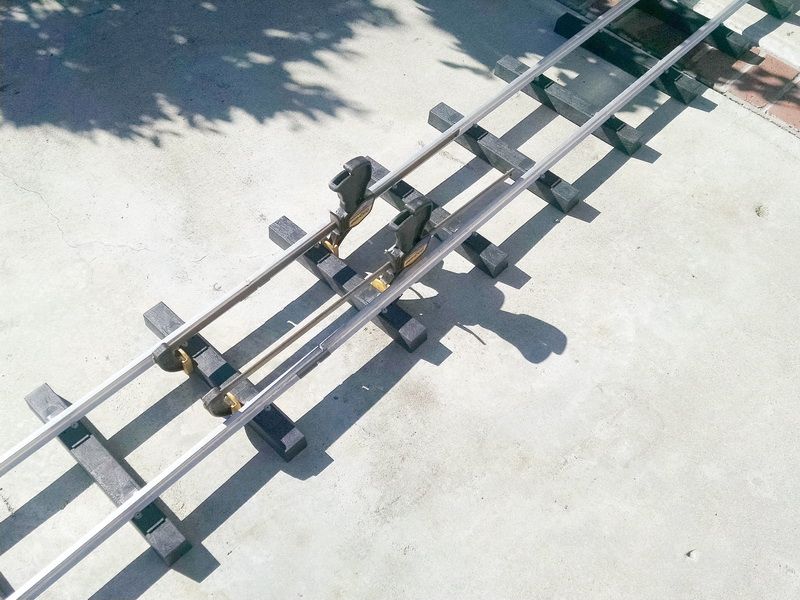
I started by building a ten foot long section of 30 ft. radius curve track. Went together very easily. This weekend, I’m going to build track-building fixtures with the tie spacing blocks in place. I am using 12 ties per ten feet now, but will add a tie between each of these ties. More strength and will look better.

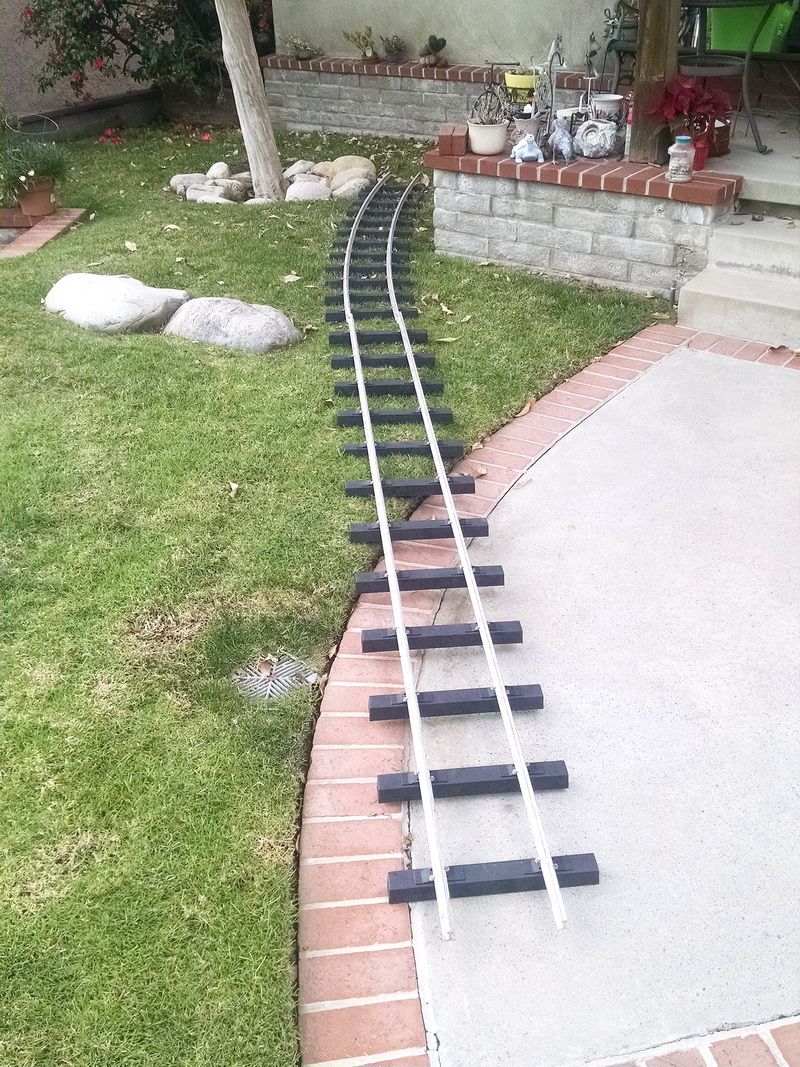
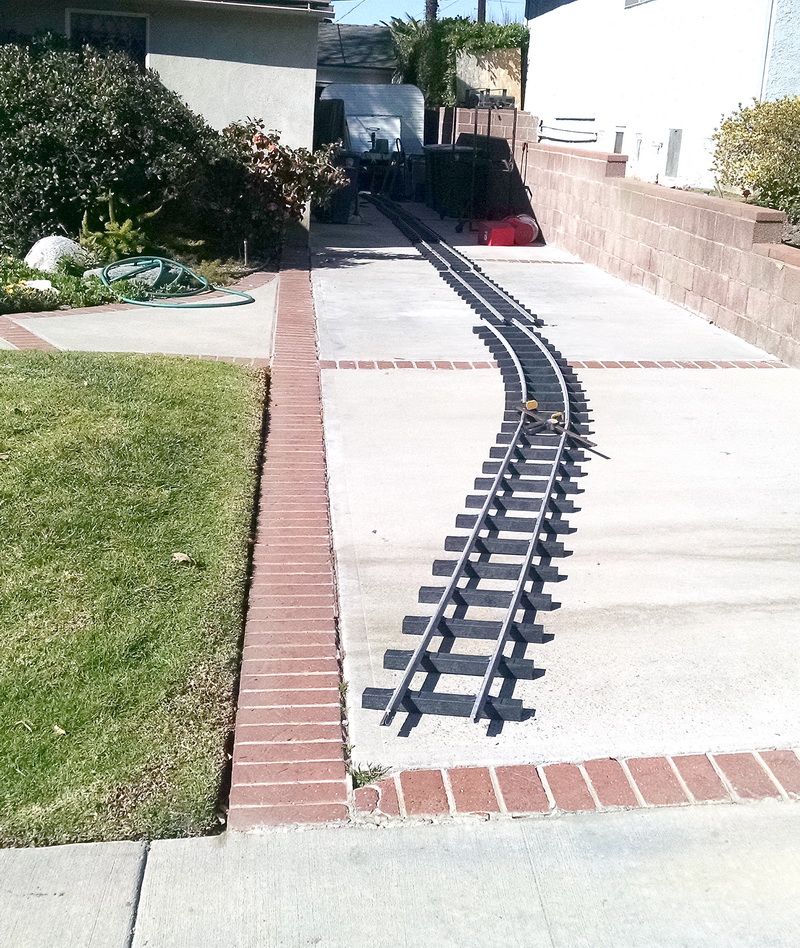
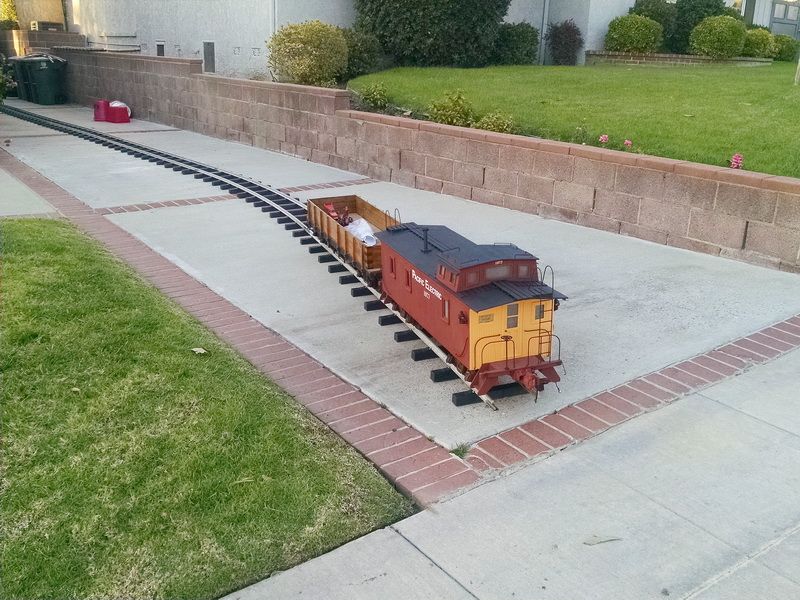
This will be the extreme end of the shortline using the 30 ft. radius. The drawing I made to survey the city lot shows a 25 fty. radius and will fit the yard better. My suburban lot here in Burbank is only 11,000 sq. ft. (69 wide X 159 deep), so I am cramped for room. By using these samples, I was able to “tweak” the drawing to get everything to work.

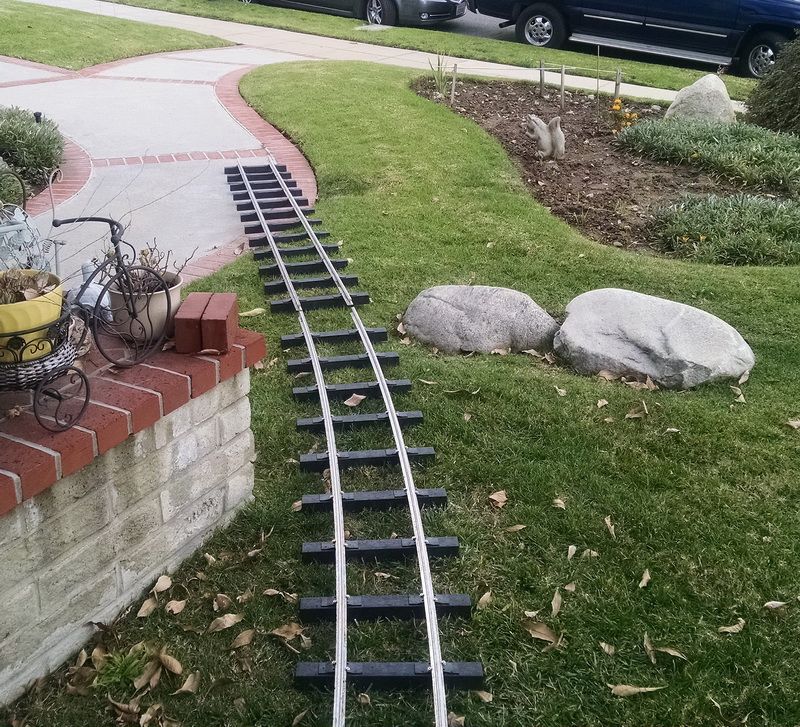
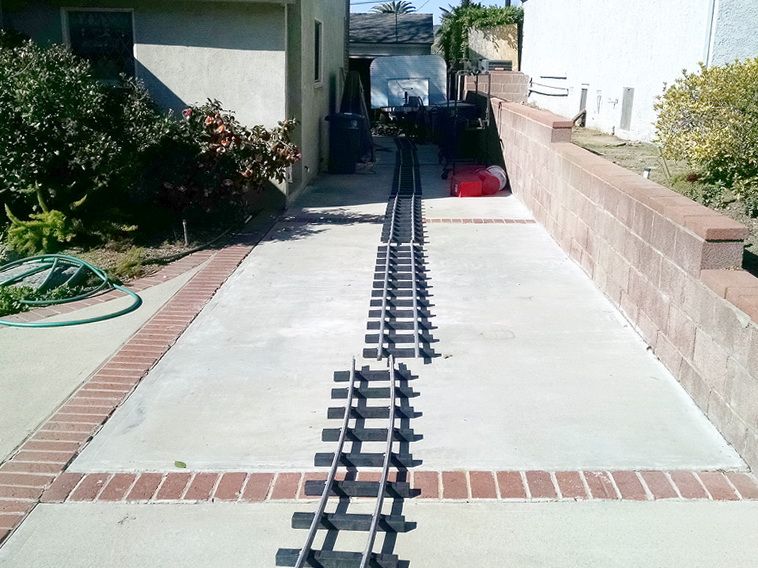
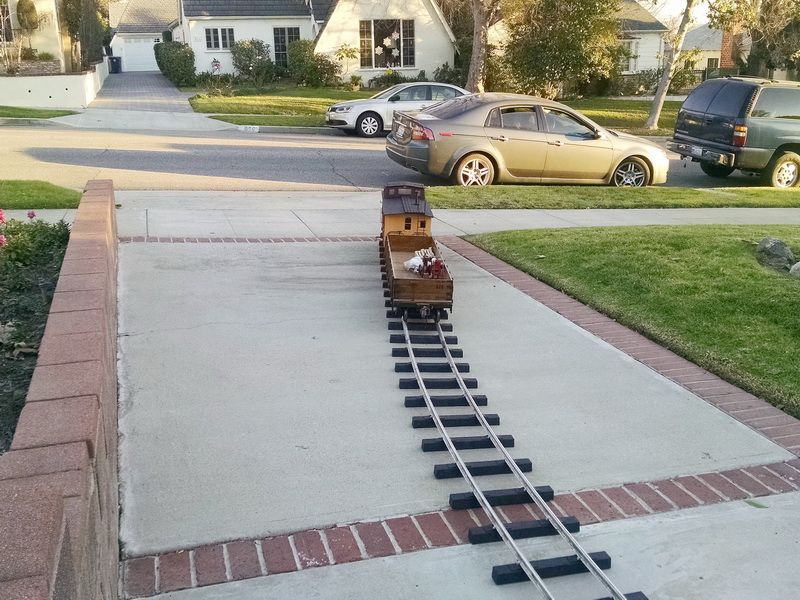
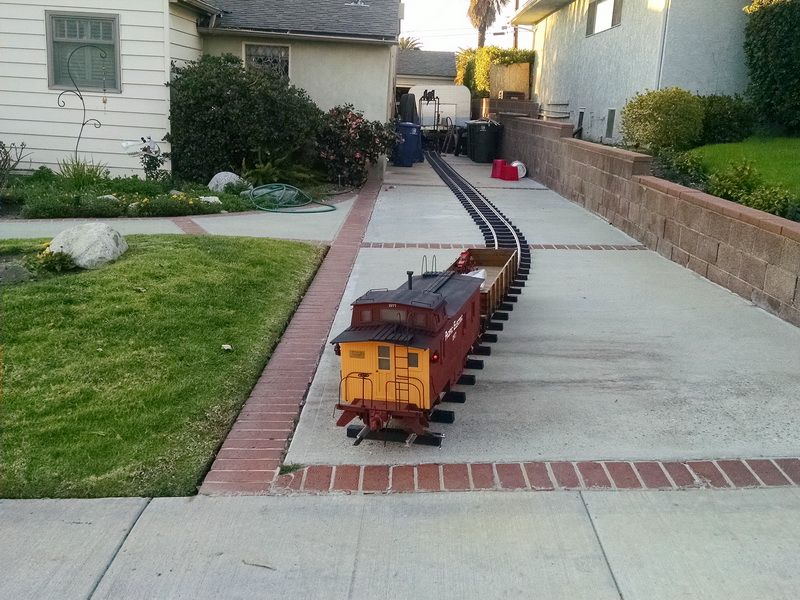
Same area as previous photo, in the opposite direction. This track centerline will follow the curved walkway to the driveway and head back down to the rear yard.

This is a photo of the turnout I will use at the driveway for a small 40 ft. siding. This switch is a #6 with steel points and is about eight feet long. This is now being custom-made at NWF&S Washington shops. Will be shipped by pallet in a few weeks. When the shortline is finished, it will be about 175 ft. long and should keep the grandkids occupied for a little while :).

My son and granddaughter running our two Baldwin electrics and the reefer at Los Angeles Live Steamers about 18 months ago.

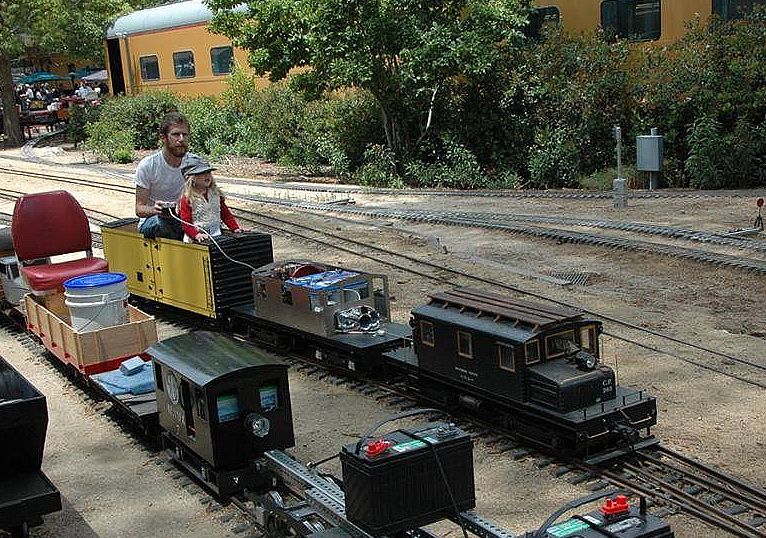
Again running at Los Angeles Live Steamers. Since this photo was taken, the new engine (second engine) now has new headlights, marker light and roof is in place, the wood roofwalk is completed and the hoods front and rear are in place and completed. There are still three more cars at home for this train (48 ft. steel gondola, wood gondola and the newly restored caboose I recently posted about. Another car is being built (the Arrowhead Water Bottle Car) I recently posted about.

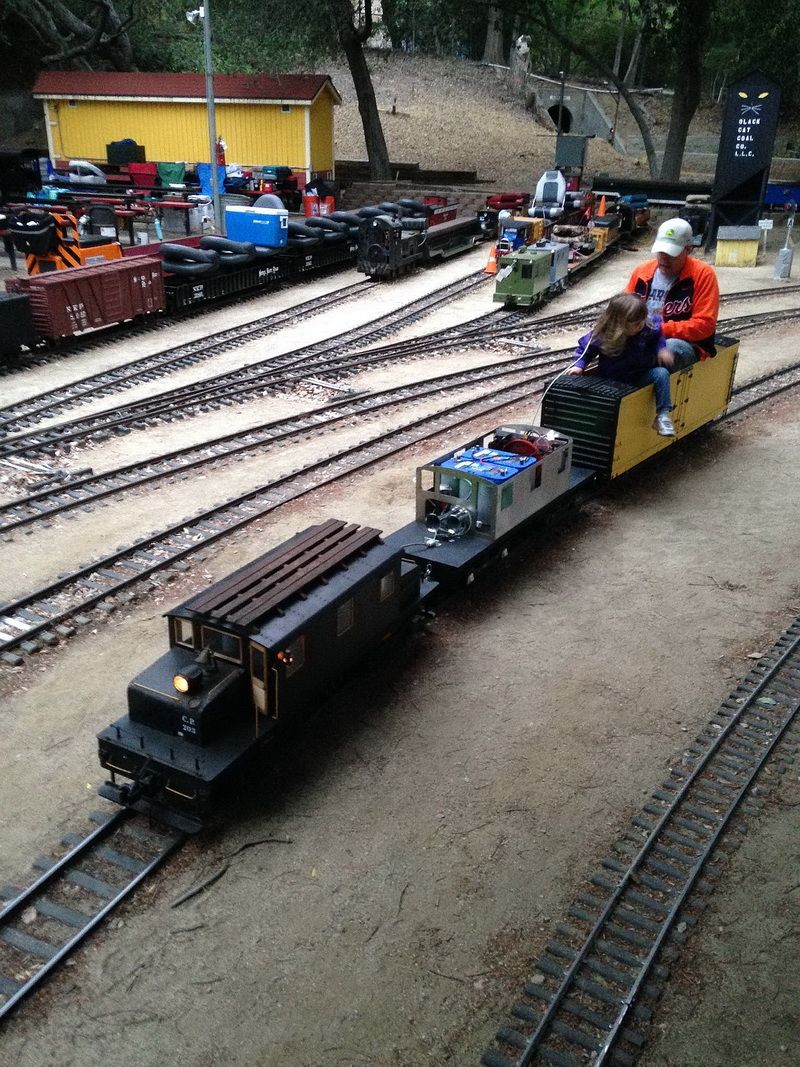
Granddaughter Aimee with her Dad.

I’ll add to this as I continue building track panels and soon have a “Golden Spike Ceremony”! :slight_smile: That’s all for now.

Great project Gary,

Glad you got the picture thing figured out.

What are you going to do about lawn mowing and such with that track down?

Rick

Thanks for the pictures. Great!

Nice !

Someday when I retire !!!

Rick Marty said:

Great project Gary,

Glad you got the picture thing figured out.

What are you going to do about lawn mowing and such with that track down?

Rick

The track will be laying on THIS grass area only and easily moved for the gardeners. The rail joiners used in this system are exactly like LGB joiners ONLY on steroids!! No different than taking LGB snap track apart.The remainder is on concrete walkways and a long driveway. There is a section in the rear yard where I’m seriously thinking of a trestle on a curve about 30 inches high and a little over 61 feet long. You know I told you about finally adding the 1/20.3 elevated track…well I could bring this trestle right up beside the elevated layout. Kind of “blend the two together” at a certain point.

Thanks Rick for providing the “photo posting” guide in your email. It really was easy after your explanation. :slight_smile:

Looking good Gary. I’ll be watching your progress and looking for pictures.

Gary,

Good photos. Thomas looks a lot like you.

That is Soo cool…

Gary thanks for sharing your adventures. It’s really getting me excited as I’ll be traveling down this same path in a year or two. We should soon be closing on 10.5 acres of relatively flat land Whose destiny now includes 7.5" gauge tracks. I’ll be watching for your up dates. I like the looks of the NFRS package but I may need to use steel rail with larger 2.5" scale locos in mind.

Curious about the 7.625" gauge you state. Is this the actual value given the rail tilt to build to the nominal value of 7.5"? Or is this meant to be a slightly wider gauge than the two norms of 7.25" and 7.5" that I know of?

Really looking forward to seeing your switch installation.

Randy Lehrian Jr. said:

Gary thanks for sharing your adventures. It’s really getting me excited as I’ll be traveling down this same path in a year or two. We should soon be closing on 10.5 acres of relatively flat land Whose destiny now includes 7.5" gauge tracks. I’ll be watching for your up dates. I like the looks of the NFRS package but I may need to use steel rail with larger 2.5" scale locos in mind.

Curious about the 7.625" gauge you state. Is this the actual value given the rail tilt to build to the nominal value of 7.5"? Or is this meant to be a slightly wider gauge than the two norms of 7.25" and 7.5" that I know of?

Really looking forward to seeing your switch installation.

Randy,

As I stated, the ties that were recommended for my track are listed as 7-5/8 inch gauge.That number is actually molded right into the tie in one of the tie plates. After I assembled the first ten foot track panel, I checked the gauge. It was 7-9/16 inches at the railhead. My ties are also made for “West Coast” aluminum and steel rail called “West Coast” because that is the “type” of rail profile) (Code 1000 which is 1.000 tall with a 15/16 inch base width). There are other ties available for all gauges and all sizes of commercial aluminum and steel rail. Check out this link for information on all the products available with this system: http://www.eprailsystem.com/. Everything is there to build your railroad, including switch components.

There are a number of clubs that are using the plastic tie system already. One of the newest layouts is in Skykomish, Washington. A few thousand feet of track and dozens of switches. I deal with Dr. Bill Zingheim (retired dentist from So. California) in Port Ludlow, WA because he is the western distributor (also builds custom layouts). He sent me quite a few photos of the layouts he has built, many for executives at Microsoft! Jim Stapleton (Dr. Rivet) is the one who recommended this system and is in the process of building a 7-1/2 gauge layout on his property in Virginia. He even had the company send me free samples of the ties (4), 2 small 12 inch lengths of West Coast rail, SS track screw samples, rail joiners and their new plastic automatic couplers. The distributor closer to you is located in Kent, Ohio. http://www.eprailsystem.com/contact/

I know you are building a 2-1/2 inch scale NG locomotive, but I wouldn’t be concerned about using aluminum rail. We had many NG engines here at Los Angeles Live Steamers and we had aluminum rail. Never any problems with the load on the rail. I would definitely think about West Coast Code 1000 rail though withe wider foot. You CAN get Code 1000 in a 7/8 inch wide foot. But I wouldn’t recommend it. Accutie tie DOES make ties for a 7/8 inch foot.

I’m having the switch built rather than doing it myself. NWF&RS has jigs and fixtures when they build and they are shipped in a crate in place in the fixture! Just drop the turnout in place and slide the fixture out and ballast. Each turnout costs between $600 and $900 each complete (depending on the complexity), ready to install and another $100 or so to ship. They were using steel points but have recently gone to aluminum ones. They seem to operate better. The frogs are custom machined on a NC mill and are cut to any configuration you need. I’m getting a #6 RH with a 42.5 foot radius.

The rail joiners that NWF&RS sells are not the typical aluminum fishplates…they are essentially “LGB type” joiners on steroids. I’m just starting to use them now and they work great.

If you have any questions about this system or would like me to send you some photos of the layouts he has built, just let me know.

Good luck with your future empire. :slight_smile:

WONDERFUL . . . a great “grandchildren railroad” . . . . . . (http://www.largescalecentral.com/externals/tinymce/plugins/emoticons/img/smiley-embarassed.gif)

I"ve go to go visit the Live Steamers . . . never seem to get over there on the right day . . . damn. . .damn . . . . (http://www.largescalecentral.com/externals/tinymce/plugins/emoticons/img/smiley-frown.gif)

Narrow Gauge Lover said:

WONDERFUL . . . a great “grandchildren railroad” . . . . . . (http://www.largescalecentral.com/externals/tinymce/plugins/emoticons/img/smiley-embarassed.gif)

I"ve go to go visit the Live Steamers . . . never seem to get over there on the right day . . . damn. . .damn . . . . (http://www.largescalecentral.com/externals/tinymce/plugins/emoticons/img/smiley-frown.gif)

Anytime…just let me know and I’ll show you around :).

Gary Armitstead said:

Narrow Gauge Lover said:

WONDERFUL . . . a great “grandchildren railroad” . . . . . . (http://www.largescalecentral.com/externals/tinymce/plugins/emoticons/img/smiley-embarassed.gif)

I"ve go to go visit the Live Steamers . . . never seem to get over there on the right day . . . damn. . .damn . . . . (http://www.largescalecentral.com/externals/tinymce/plugins/emoticons/img/smiley-frown.gif)

Anytime…just let me know and I’ll show you around :).

Gary . . thanks for the invite. I’m located out in the “wild west” of the high desert ( near Landers ). I’ll be over to visit a friend in Covina for a week sometime in February . . . visiting the “Live Steamers” would be a great Sunday outing for us.

Today I layed our first 7-1/2 inch gauge track panels for the railroad. This gave me a chance to see just how much work it was going to be for this 73 year old…to see if I had taken on more of a job than I could do. But I survived a great So. California day, temps in the 70’s and a slight breeze. This first photo is the stack of 75 ft. of track…one 10 foot section of thirty foot radius, one 5 foot section of straight and 6 10 foot sections of straight track.

First track panels roughly in place.

Because I was working alone on this project today, I had to figure out how to bring the panels today using the “Train Montain” joiners and line everything up. I decided to use bar clamps with a ratchet handle. It worked great. Each panel weighs about twenty-five pounds…2 rails, 12 ties, SS screws to hold the track to the ties.

Finally got to put the first train on the new track!

That was enough work for today. I have two more cars to get out tomorrow to join these two for more photo ops. Also have to make a “transition bridge” to unload the rolling stock and engines from the lifting rack onto the new line. Then I can put the two Baldwin electrics on the track for more photos and a little “running”. The neighborhood kids have been watching this very closely and one brought his grandfather down to see what was going on.

I’m expecting a delivery of 220 feet of rail, 6 cases of ties, screws and 50 rail joiners later this week for more extensions to the railroad. Also a delivery of a rail bender to do my own curve track. This thing is capable of bend Code 1000 aluminum rail fairly easily.

https://www.youtube.com/watch?v=maif-adguLI

Looks like a good way to take the trash cans out to the curb…I also can’t help but wonder what the neighbors think of all this…(http://www.largescalecentral.com/externals/tinymce/plugins/emoticons/img/smiley-wink.gif)

I see a nicely graded straight section just waiting for the track gang but first you have to make the sharp turn from your drive to the sidewalk

Ken Brunt said:

Looks like a good way to take the trash cans out to the curb…I also can’t help but wonder what the neighbors think of all this…(http://www.largescalecentral.com/externals/tinymce/plugins/emoticons/img/smiley-wink.gif)

Pretty cool neighbors actually…this is NOT the first 7-1/2 inch gauge layout I’ve had on this property. Had another about 30-35 years ago, when our two daughters were like 6 and 3! My son wasn’t born yet. The “3 year old” now has three children of her own! Those three grandkids is what this “new” layout is all about:).

Eric Schade said:

I see a nicely graded straight section just waiting for the track gang but first you have to make the sharp turn from your drive to the sidewalk

Eric,

That “nicely graded ROW” aka the sidewalk, is more suited for logging operations with a shay…that level sidewalk is deceiving in those photos. The little cinder block wall behind the cars is the high point of my property…70 feet down the sidewalk, the drop is five feet! You can see the street intersection a couple of hundred feet above our house. That intersection is thirty-five feet above us…and it continues that drop for another 900 feet and keeps going. Not too good for mainline engines!

Yea, you can really see the slope in this pic:

Shays are COOL!!!(http://www.largescalecentral.com/externals/tinymce/plugins/emoticons/img/smiley-cool.gif)