Large Scale Central

a slow caboose project

Hi guys,

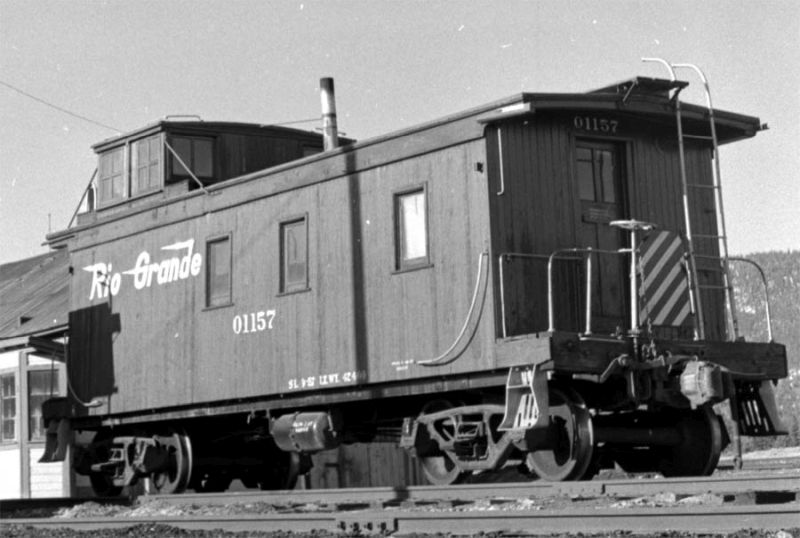
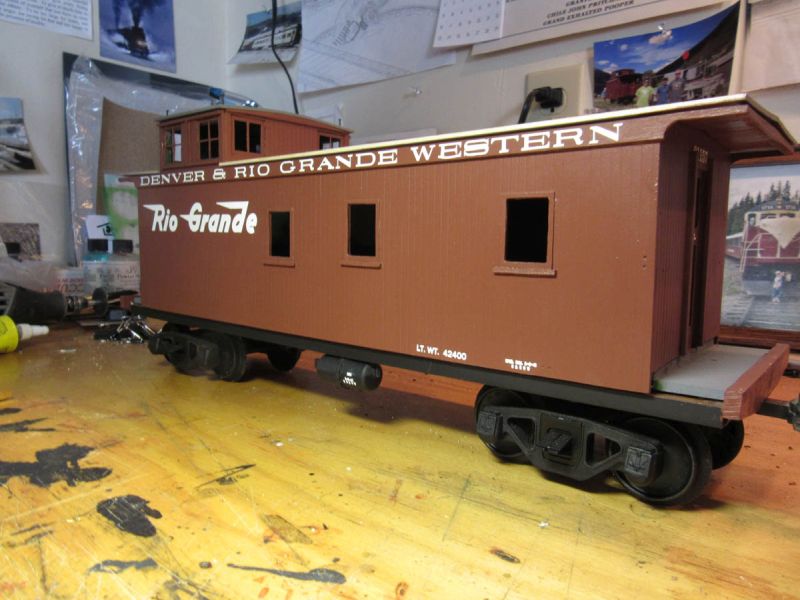
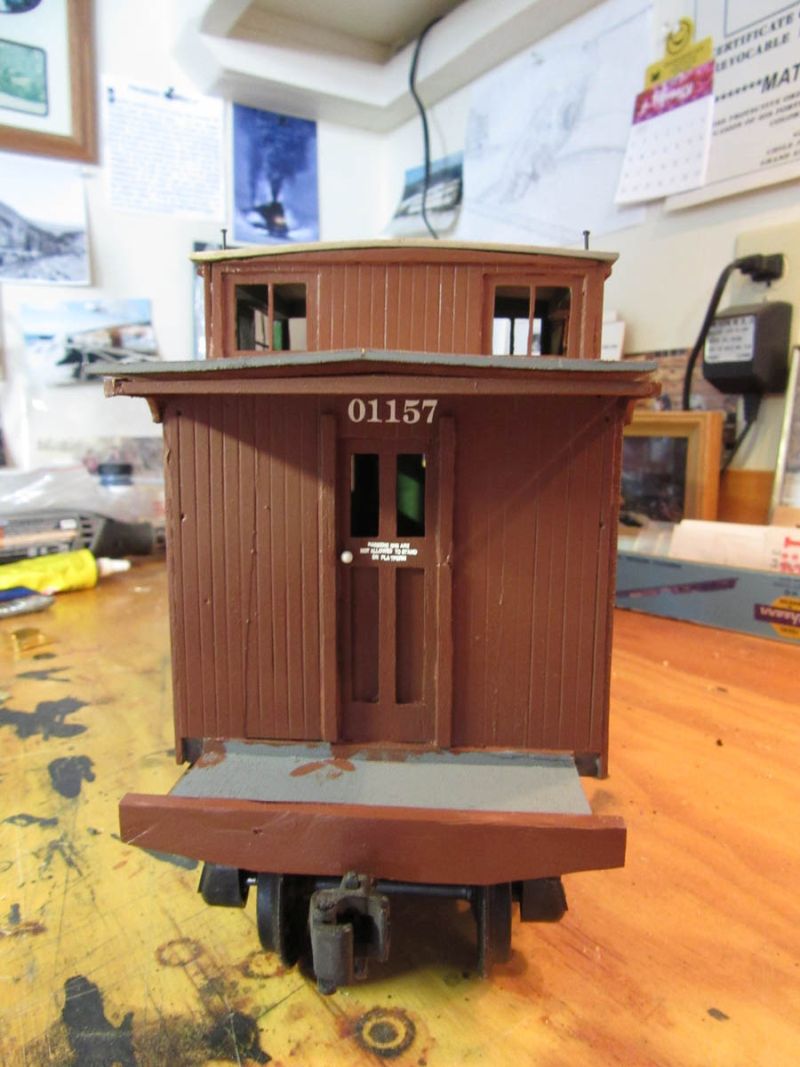
I have finally begun my D&RGW caboose #01157 project. I decided to do this build a couple of years ago after seeing this pic of said caboose in Leadville, Colorado:

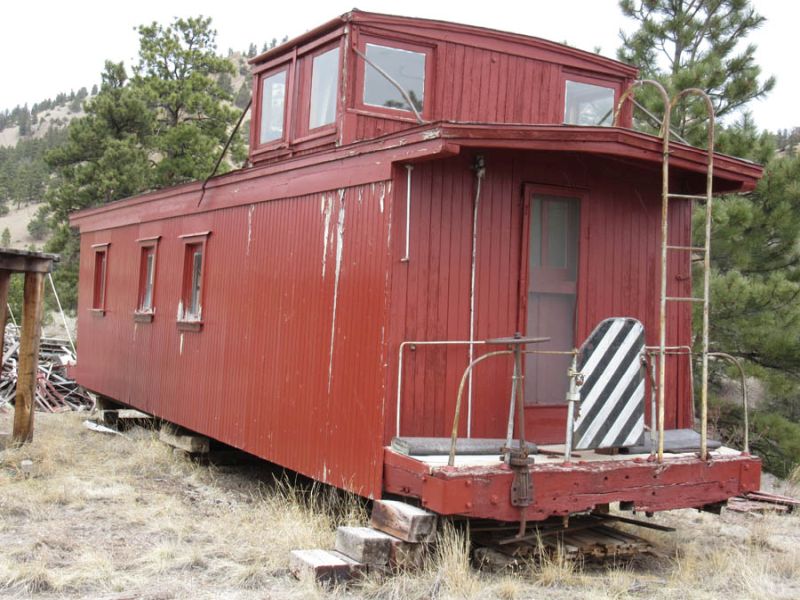
I found that there were two surviving examples of this class of Grande caboose. One, #01152, was located relatively nearby in Lake City. I found out who owned it and got permission for a visit in the spring of 2018 and took a bunch of measurements and photographs. I then developed plans in AutoCAD- said plan is attached. The Lake City caboose looks like this:

I started buying parts and raw materials. In November of last year I made a half-hearted start. Along the way I had purchased a USA Trains center cupola caboose off of eBay. I replaced its trucks with standard USAT freight trucks and re-sold the caboose. I soldered together a frame from 1/4" square brass tube and added some truck supports stolen from piece of retired rolling stock and then added the USAT caboose trucks:

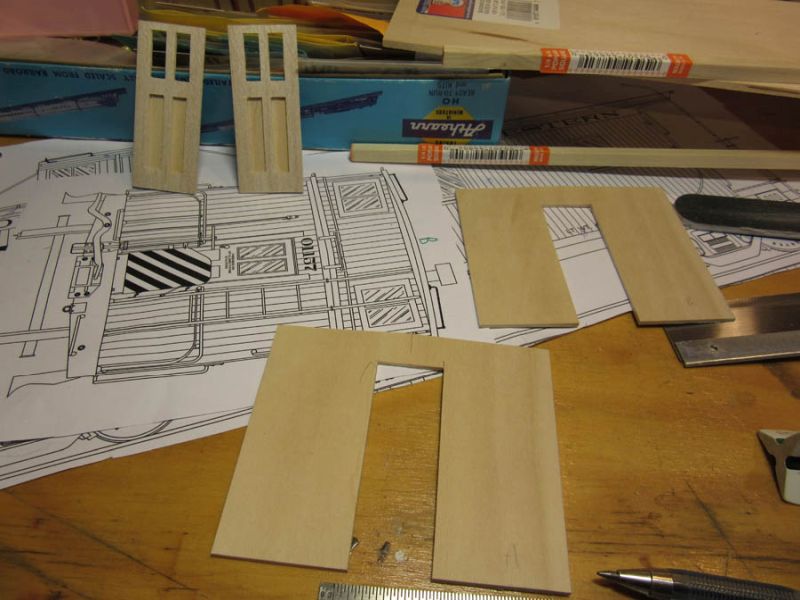
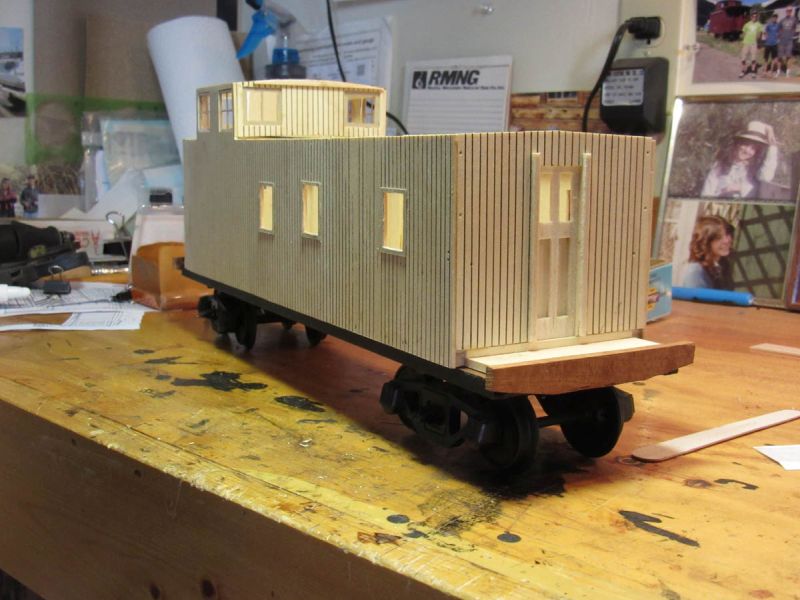
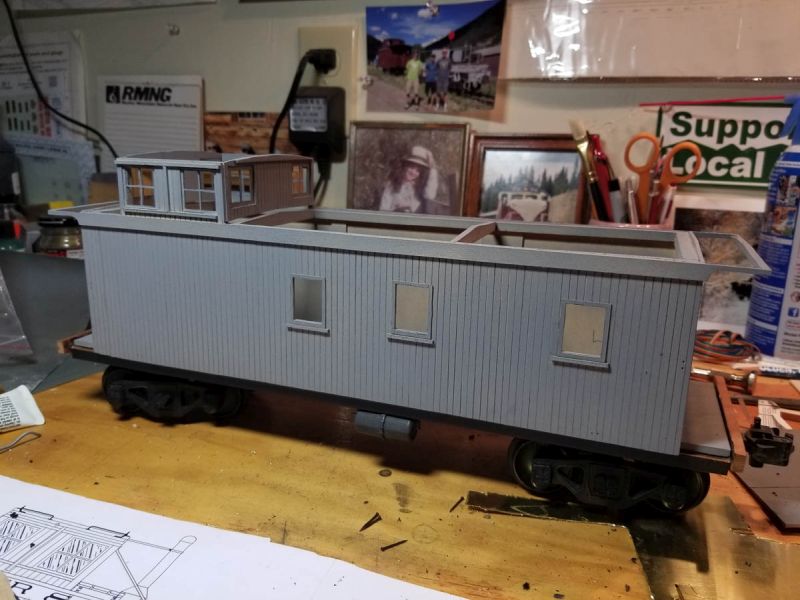
Over the weekend I began in earnest, for now at least. I cut walls from 1/16" basswood and framed them with 1/4" square basswood. I don’t DO interiors, so I’m not worried about a sloppy inside:

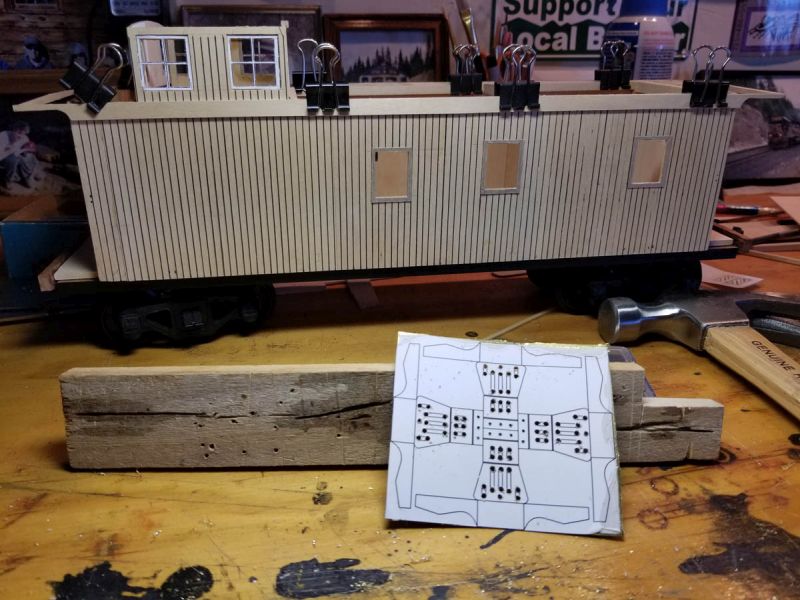
Tonight I taped the whole mess together to make sure everything fit the way I hoped:

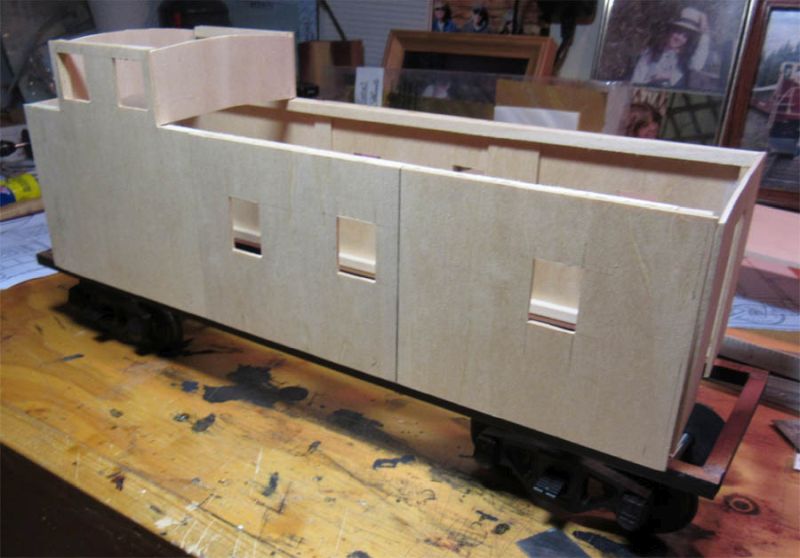
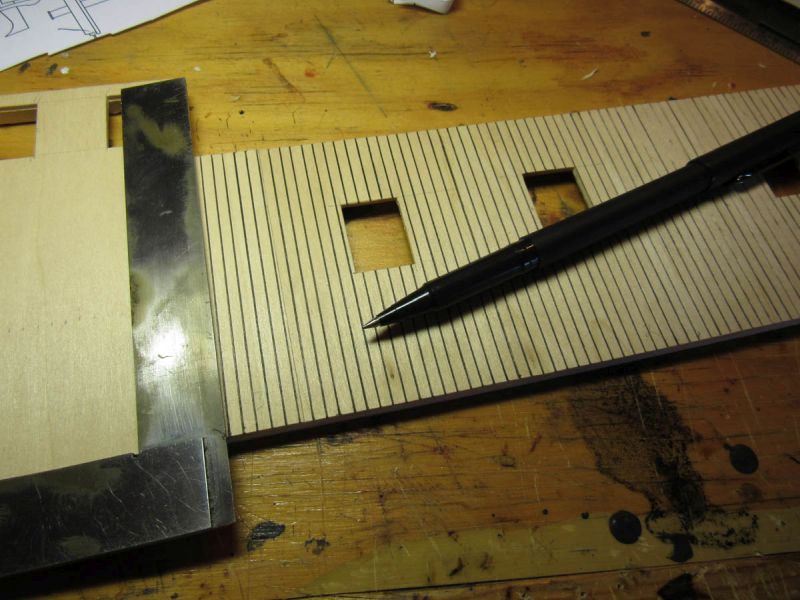
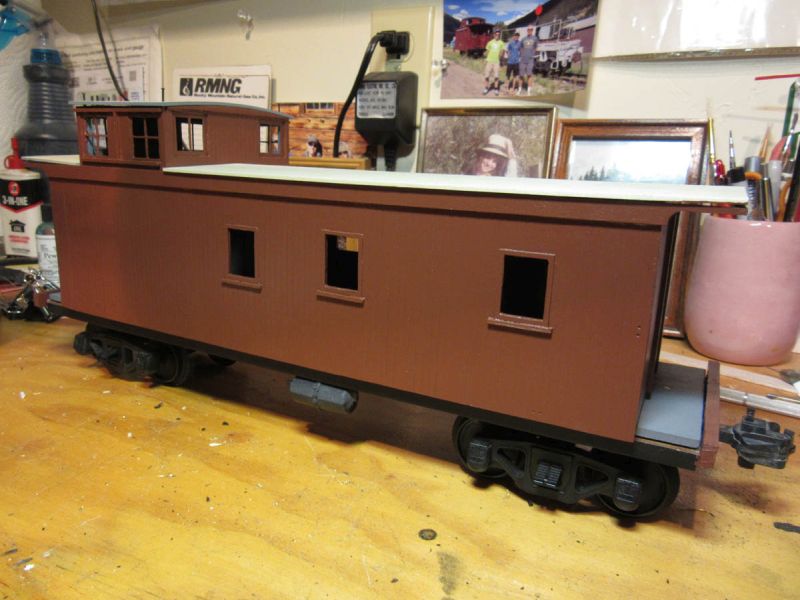
Next step will be to scribe the walls to simulate siding.

Cheers,

Matt

Okay, thank you for the thanks! Time for an update. I spent last weekend in Durango and so haven’t gotten as far as I’d like.

I scribed the walls to imitate tongue and groove siding. I used uni-ball micro 3 MM black ink pens for the scribing. They’re sharp and the black ink may provide a shadow effect even after painting:

For the windows I am using Midwest Product 1/64" birch plywood. Lately I’ve been testing the use of waterproof laserjet adhesive vinyl for signs on my railroad. For the windows I printed a pattern for all of the windows and stuck them onto the plywood, then cut them out. I have been wishing for that laser cutter all week!

Using AutoCAD, I also made a pattern for the steps. I test printed the pattern on paper and then cut it out and folded it together with tape to make sure it would work. When I was satisfied with the pattern, I printed that onto vinyl as well. Here’s how it looks on K&S .010 brass stock:

The steps will next be drilled, then cut out. After that I’ll fold them accordingly and solder together. That’s all for now.

Cheers,

Matt

Scribing basswood with a pen. Who would have thunk?..

I thing I’ll try that.

Thanks for the tip.

Nice to see another scratch building job adhering to the prototype.

Great work so far, Matt. I’ll be following along on this build. Thanks for sharing your project.

Hi guys,

Thank you for the comments here’s a quick little update. I swapped out the USAT wheels for a set of those nifty Kadee ribbed wheels. I finished cutting out all of the windows. AI added the doors. I glued the walls and floor together. A few years ago I got a 1" x 1" x 6" piece of cedar as a spacer in a box of cigars, which I threw in my raw materials drawer. yesterday I made the end beams from that piece of cedar. Here’s where things stand at present:

I need to add some more window trim and then I’ll be ready to paint the body. A 1:29 scale airbrake reservoir is on its way from Shapeways - you can find the one I bought here: https://www.shapeways.com/product/AS9WYG9JT/ab-brake-reservoir-with-bolts-1-29?key=bc58ed1241caa67987d40cabda95c184&li=shop-inventory

I still need to add the roofs and roofwalks, then a bunch of grabirons. Dry transfer lettering for the caboose arrived from Canada earlier this week.

Cheers,

Matt

Looking good!

Thank you for the comments to date! Here’s an update for the past week.

I have added letterboards. In the foreground is some brass sheet with the step patterns, showing the first holes drilled out.

Here’s the caboose with the first coat of primer applied. I have also added the 3D printed air brake reservoir:

Here’s the caboose this morning with two coats of PBL Star Brand D&RGW Freight Car red paint. I tried to airbrush it yesterday per PBL’s directions but the airbrush only spit and clogged. No worries, I brush painted the whole thing. I think it’s interesting that the prototype had a curved cupola roof while the rest were peaked. Roof sections are made from 1/16" basswood.

Here’s the one step I have completed so far. It needs a BUNCH of cleanup, but once that’s done and it gets a coat of silver paint I think it’ll look fine. Paint hides a multitude of sins - I think that’s a Marty Cozad quote. ;):

Until next time.

Cheers,
Matt

Putty and Paint make the job what it aint !

Nice work on that step!

Matt, Try pre-tinning your pieces; flow a thin layer of solder on the parts where they join. Clamp together and apply heat and the solders flow together. Helps to avoid blobs and creates fillets (uniform welds) along the seams.

A soldering pick is helpful pushing solder …

(https://products.riogrande.com/products/503021.jpg)

We used to make them from coat hangers, but not anymore…

Congratulations on your efforts, Way to go!

Hi all,

Thank you for your comments, and John in particular for his soldering tips. I only seem to end up soldering about every ten years, so have never really developed any decent skills in that area.

As of today I have painted the interior green per Grande practice. I won’t do a detailed interior, but at least it’ll look sorta right through the windows. Good enough for the five foot rule - I think that’s another Cozad truism.(http://www.largescalecentral.com/externals/tinymce/plugins/emoticons/img/smiley-wink.gif) The roofing has received a coat of Thompson’s WaterSeal - I like to plow snow and the caboose is bound to get wet from time to time. Roofing will be 3M Wetordry automotive sandpaper, 1500 grit. I have also added all of the lettering - lettering is custom dry transfers from AllOut-Graphics - https://www.allout-graphics.com/

Here’s a view of one of the end platforms. The doorknobs were stolen from my wife’s sewing pincushion:

Sharp-eyed viewers may notice a crack on the left side of the door. Right after I screwed the weights to the bottom of the floor, I promptly knocked the carbody off of my workbench with my elbow.The crash broke the floor and one of the letterboards and one of the roof endbeams, along with the end wall. I repaired most of the damage, but decided I could live with the crack in that wall. The coupler on that end is from Burl Rice: http://burlrice.com/_LS_Coupler/

I still need to make/add a bunch of grabirons, some ladders, roofing and roofwalks, and end platform decking. Still gotta make two more steps too, using John’s tips. And add some window glass.

Until next time,

Matt

Beautiful!

nice work

Very nice work.

make/add a bunch of grabirons,

You might find this helpful. Photos at the bottom.

http://www.largescalecentral.com/forums/topic/6940/ebt-grab-irons

Thanks guys! Here’s an update since Friday:

The safety gate is made from brass plate, with 3M Scotchlite reflective film for stripes. The air brake retainer is from Ozark Miniatures as is the brake lock. The flooring is scribed 1/16" basswood. Thanks to John’s tip, the soldering on the last two corner steps is a great deal less sloppy. The brake wheel, marker lights, marker light brackets, and bottom brake pocket are all from from Precision Scale. There are also four commercial grabirons, but I can’t remember where they came from.

The end railings and the curved corner grabirons are all made from 1/16" brass tubing. Corner grabirons are held on the body with HO scale track nails. None of these are actually glued on yet as they still need a coat of silver paint.

The air brake hose is from Burl Rice. I’m still waiting for coupler pockets from Precision Scale, but they should be here any day. I decided to clean up the crack on the end wall I mentioned earlier with a little sanding. I’d build the ladders but have run out of 1/16" brass tubing and I refuse to go to town today. (http://www.largescalecentral.com/externals/tinymce/plugins/emoticons/img/smiley-wink.gif)

Cheers,

Matt

Awesome!

Really cool!

Thank you all for the comments and thanks.

Today I finally finished the “B” end of my caboose. The uncoupling lever was cut from brass stock. The ladder is made from 1/16" brass tube with 3/64" brass rungs. Drilling tiny holes through 1/16" brass tube is…challenging. (http://www.largescalecentral.com/externals/tinymce/plugins/emoticons/img/smiley-wink.gif)The NBW’s are from Kemtron. Does Kemtron even still exist?

The coupler pockets finally arrived from Precision Scale, but got cut down quite a bit. Now that I see this photo on my monitor< can see that I need to do some paint touchups. It’s funny what you see on a computer screen that you don’t notice on the real thing.

So, now off to the “A” end to repeat the whole thing. Yay.

Cheers,
Matt

Hi guys,

Thanks for the thanks! I have reached a good stopping point for today.

All of the “A” end railings have been completed. The curved side railings are done. The four supports for the cupola are done. All are attached with HO scale track nails.

The stack has been added - it’s a 3D print. The Precision Scale cupola roof grabirons have been primed, but not painted or attached.

The “A” end has a USA Trains coupler as I need one that’s functional on that end. The remaining brass railings need to be primed and painted silver, except for the cupola supports wcich will be the same red as the carbody. And yes, the prototype had different tops on its ladders at each end.

Next I’ll give it a dose of weathering, then add window glass. Window glass will be microscope slide cover glass. I still need to add the roofing/sandpaper and the roofwalks and rain gutters and then I’ll be DONE. Yay!

Now I’m gonna go do my taxes, to be immediately followed by a visit to a certain local brewery for solace.

Cheers,

Matt