Large Scale Central

Rivets

I’ve tried various ways to simulate rivets in the past. When I originally built my 1:20 ten-wheeler, I sliced styrene rods to make very tiny cylinders and glued these in place on the side of smoke box. The front is done with commercial castings.

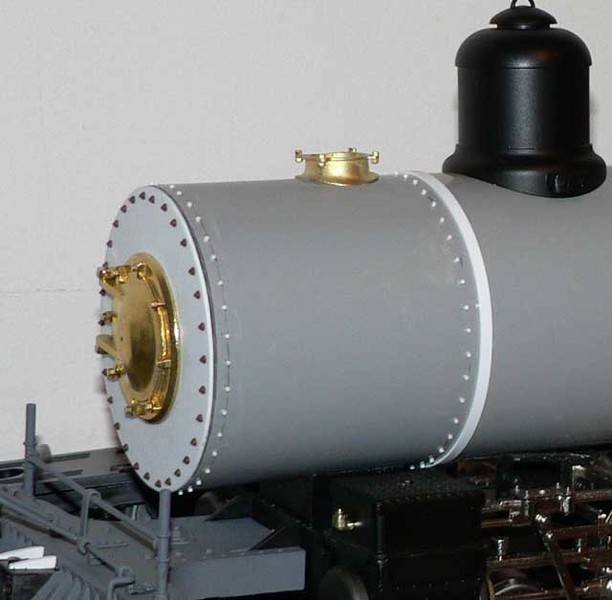
Needless to say, that was rather tedious for both methods. I have also used a pounce wheel. It was far less tedious, but the rivets are not crisp. Not only that, but you’re stuck with the spacing on the wheel.

Next, I tried texture paint. It’s not bad looking, but the rivets are rather all different shapes and sizes.

When it came time for my 1:20 Mikado project, I wanted something that looked very professional. None of the previous methods would work for this project.

When my Ten Wheeler bit the dust, that gave me extra incentive, as I would make a new tender and cab for it as well. My solution was to make an order from Micro-Mark. I debated long and hard for this as it is not inexpensive.

Not only that, it’s not just one thing. It starts with Press-It…A Precision Arbor Press. Add to that Emboss-It Model Rivet Simulator. This is a table that fits on the press and moves left/right in .001 increments. Finally, I got the Rivet Embossing Set which gives you .018, .026, .033, .041, and .050 inch rivet diameter punches and dies. This allows you to punch the different size rivets when they are put in the press.

In operation, this works well. I tape the styrene (in this case .020" thick) to the base of the table. I use a ruler and square to make sure that it is oriented correctly

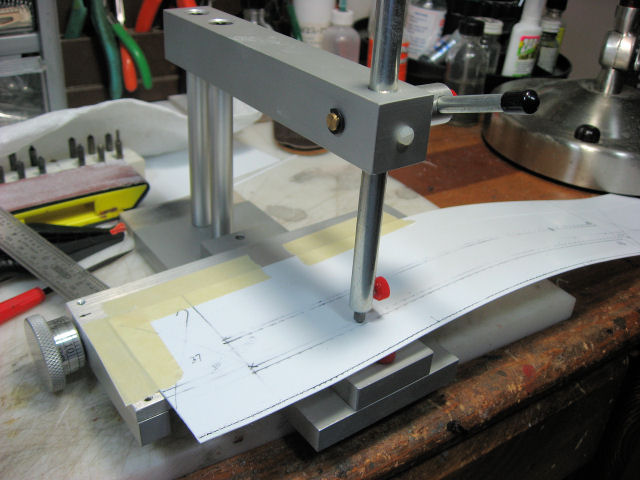
For a long sheet, like this tender side above, I made several passes. This means re-taping the sheet and setting it up again. I used a previous rivet to align it when continuing a row. It’s very helpful to mark lines on the side to be punched; remembering that this is the BACK side. I used a Sharpie at first, but found that the line was too thick to give me accurate placement. Later, I used my .5mm mechanical pencils to draw a finer line.

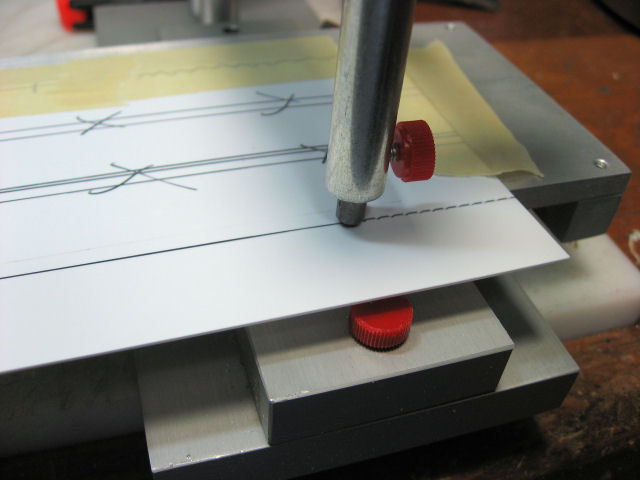
I’m pleased with the results.

In the above picture, the bottom row of rivets is spaced two complete turns of the know. Each turn moves the table .050", so the distance between these rivets is .100". The middle rows of rivets are 4 turns apart, or .200". For my cab, I used the next smaller rivet size (.033"), and a spacing of 3 turns.

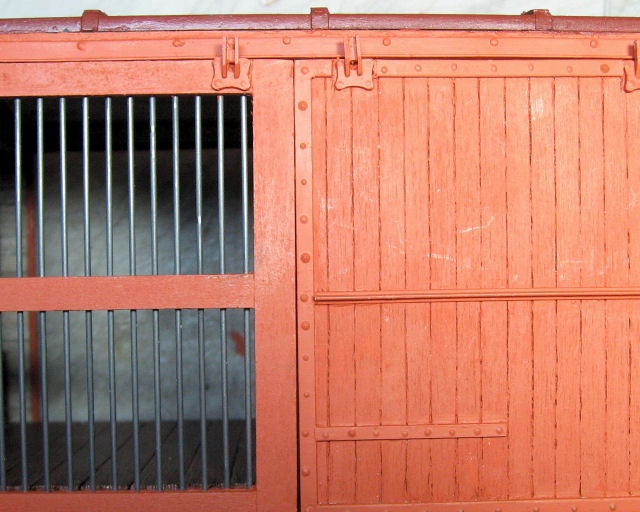
In the future, I’d like to do rivets for pieces like the boxcar door trim, but there’s no obvious easy way to move a strip that’s only .100 wide from left to right using the table. I’ll have to devise some sort of carrier to allow me space the rivets evenly.

you’re a sick man Bruce…

So, now I can say I personally know a rivit counter…:wink:

I used a ball point pen. The rivets turned out nice, but it took weeks for the bruise in my thumb to go away.

Bruce,

Could the embossing table work on a drill press? I use a punch and die set up in my drill press to do my rivets, but it’s all done by eye. Tedious doesn’t begin to describe it. A table like that would make life a bit easier.

Later,

K

I don’t see why not, Kevin. The key would be holding it in place. This table is made to attach to the press without any clamps - there’s a couple of pins on the press that it sits on.

You might want to look at an XY Table instead - they might have a lot more travel.

If they ain’t too big, you could use real ones:

http://www.microfasteners.com/catalog/products/TNMRVB.cfm

Wow !!!

I see a cottage business in your future: Punching rivets for those of us that are too cheap or too lazy to buy the tools and take the time.

The results are spectacular.

Excellent work Bruce. Thanks for the details and pictures.

Jon.

Dammit Bruce! My credit card just took a hit!

The obvious answer would be to do the rivet strips on a sheet then cut them off as needded

Just got mine in today and have been playing around in The Bunker with it…DANG! this si exactly what I was trying to do with the drill press a year and a half agao! Remeber how we were agonizing over the rivets on the EBT Boxcar kits? This critter is just the ticket! VERY GOOD INVESTMENT!

there is another option. taylors pins. they come with different sizes of heads. make a hole, smear a little glue in it, push the pin. done. (with a drillpress the holes wold line up better, than with a ruler and a handheld drill, i suppose)

(http://kormsen.ko.funpic.de/bahn/forumpics/sg-tender7.JPG)

(http://kormsen.ko.funpic.de/bahn/forumpics/sg-tender6.JPG)

This is a fantastic looking train and the rivet work is well done. Thanks for including the many close-ups as a part of the photo gallery. Did it require any lock washers during construction?

I used thousands of lock washers to hold those rivets.

Something worth noting for sure.

spam

My hat’s off to anyone who adds rivets to their projects!
Way to much repidity(sp) for me.
I’ll add a few to my projects for “authenticity” :slight_smile: :slight_smile:

Oh Yah!! This is coming from the man who uses a thousand little nuts, bolts, and washers on his bridges which means you have to drill every whole, insert the bolt, and then put the washer and nut on. Not to mention tightening it. he he he

But of course the bridges look nice and who’s counting?

That’s back when I was young and dumb. :slight_smile: :slight_smile:
‘sides, I was talkin’ 'bout an enjin or tender.
Notice I havn’e built one of them yet? :slight_smile: :slight_smile:
(I mean a real model–not a sawed off dash-9 or an 0-4-0 cab forward.)