Large Scale Central

Camp Six

Starting on the Camp Six area, Camp Six is/will be the main logging camp for South Fork Timber Co.

For those that don’t remember, and I bet that’s just about everybody, including me sometimes, The Shasta Pacific Railroad is a wholly owned subsidiary of the South Fork Timber Co. I always show pictures of the Shasta Pacific but very seldom any of the Timber Co. so just wanted to clear that up.

I will be able to reuse some of the structures from the old railroad like, fuel tank, water tank, sheds, etc but have to build lots of new camp buildings. Here are the first new ones, two 4 man bunk houses on skids. These buildings are cribbed up to car height for ease of loading and unloading as was typical in the day.

They are not scale models but built to withstand the outdoor climate even though they won’t be left out to survive all Winter.

Nice bunk houses, Rick. They look good setting on top of the cribbing.

Those look great, will need something like that for my RR too. Nice work.

Chris

Those look super Rick. Tell us it was made from a single milled 2x4 and you have a winning build challenge entry (https://largescalecentral.com/externals/tinymce/plugins/emoticons/img/smiley-smile.gif)

That’s a cool switch stand there in the picture too.

Thanks Guys,

Jon, I’m afraid that it was a little more material than the allowed 2 x 4 length in 1:20 scale, the buildings and walkway stretch a little over 3 feet.

Started the Shower house today and drew up the plans for the cook shack and dining hall.

Later

Rick

Rick, I have always enjoyed your work and these are just as nice! I hope you will share a couple of build pictures with us. I want to build some camp buildings to use as loads occasionally or on the layout. I am curious to learn how you beefed them up for the environment.

Steve

Rick

Steve, Thank you, glad you find my efforts worthy of your time spent(https://www.largescalecentral.com/externals/tinymce/plugins/emoticons/img/smiley-laughing.gif)

As I said above these buildings are not designed to be out in wet weather conditions, they will take a shower or a little drizzle but not a continuous wetting like they will get here in Oregon over a whole winter.

I didn’t take any SBS picts for this project so here is a brief explanation of my steps on this.

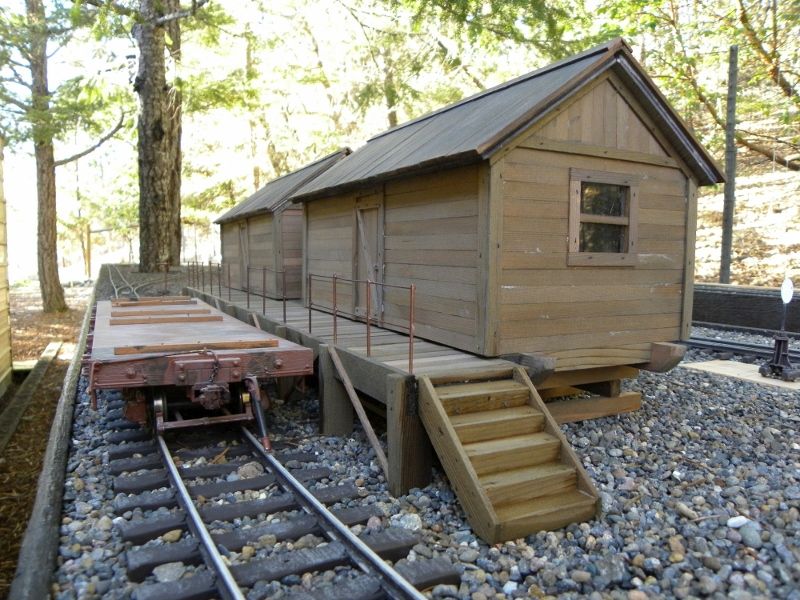
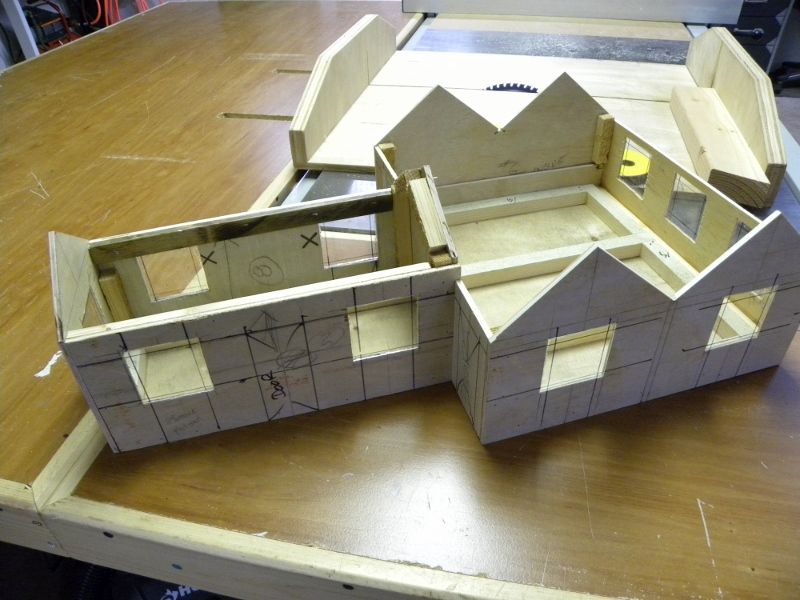
These are nothing more than 1/4 inch plywood boxes with blocking in the corners, glued and pinned, overlaid with 1/8 inch Cedar siding and roofing.

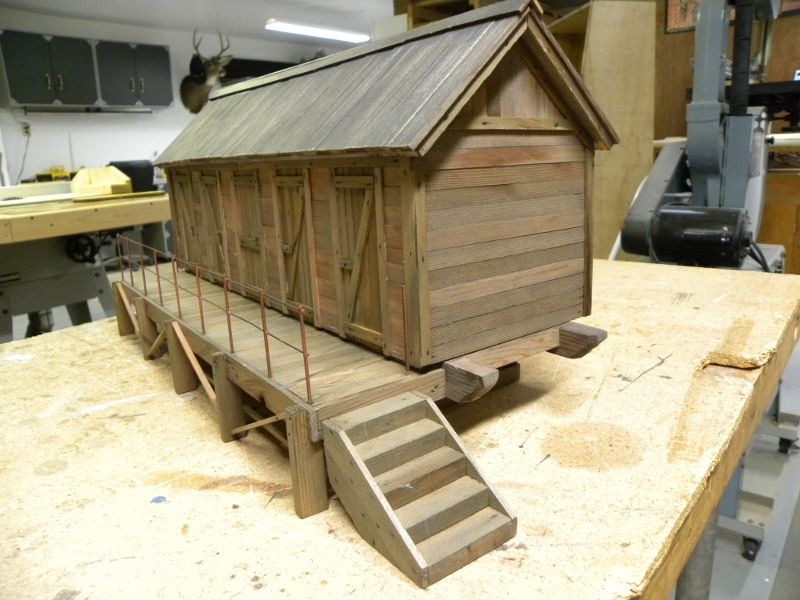
For windows if I want them to end up 1 3/4 inches square I cut out a hole in the wall 2 1/2 inches square and glue in a piece of Acrylic even with the outside. Then I glue the window trim at the 1 3/4 inches square on the Acrylic and the rest covers up with siding. This system helps me keep the messy gluing under control and off the “glass”, well sort of.(https://www.largescalecentral.com/externals/tinymce/plugins/emoticons/img/smiley-foot-in-mouth.gif)

Buildings like this with no interior finish I always fog the inside floor and walls with flat black paint to obscure the view through the windows.

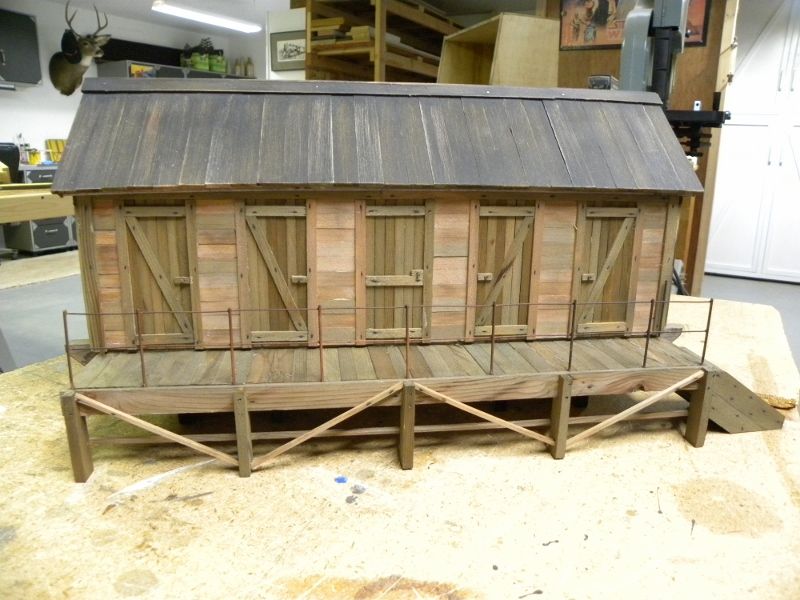
All the siding and trim wood are ripped on my table saw from Western Red Cedar, the siding is attached with Liquid Nails and the trim with Tite Bond and small brads.

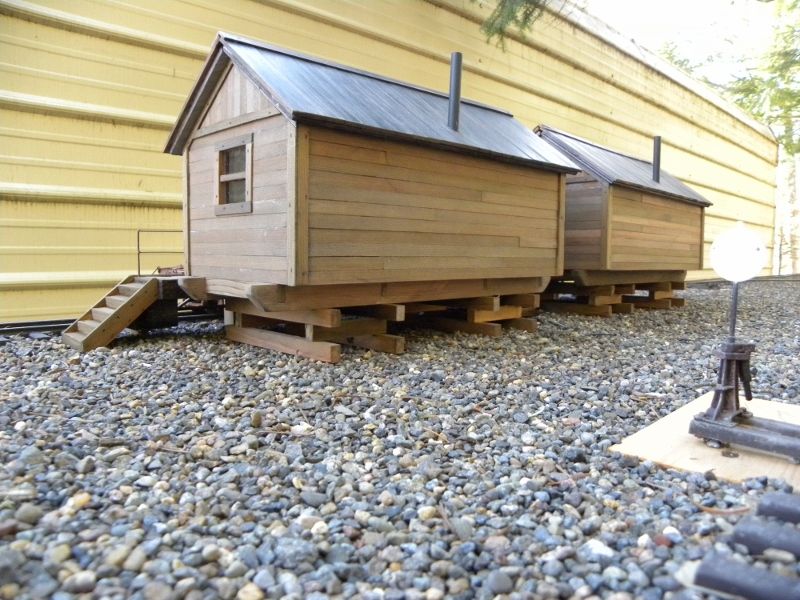
The roof on these was done with the Cedar strips then fogged with flat black paint then lightly sanded to represent “charred plank” roofing.

Size of the buildings are 11 foot wide by 24 foot long and the skids are 8’ wide by 28 foot long to fit a flat car.

I tried a new “stain” I found at home depot, it is a water base wood weathering in a gray color, the results, to me, are just so-so.

That’s about all I can think of, if you have any specific questions , fire away.

Rick

Rick,

Thank you for the explanation on the construction, just as good as pictures! Exactly, what I was looking for. With the exception of my live steamers, I wouldn’t have any of my trains out in the rain. My cars are mostly wood and I want to build a few of these for loads so I will be following your methods. When I do use them on the layout (still to be rebuilt) they will be set out for each day of use.

Thanks again, Steve

Rick,

I don’t know how I missed this thread…beautiful work as usual:)! IF I can just get this last 1/8th scale Baldwin electric finished, maybe I can get the 1:20.3 layout started again. So many projects…so little time :).

Those are great looking bunk houses and mounting them on cribbing is a neat idea.

Rick, those look great! I have a couple of construction questions for you. Do you treat the 1/4" plywood so it doesn’t delaminate or isn’t that a concern since they are outside year-round? What is your “fog” technique that you mention? Finally, are those brass rails on the front deck?

Since I can’t steal the bunk houses, I want to shamelessly steal your techniques!

Joe Bussing said:

Rick, those look great! I have a couple of construction questions for you. Do you treat the 1/4" plywood so it doesn’t delaminate or isn’t that a concern since they are outside year-round? What is your “fog” technique that you mention? Finally, are those brass rails on the front deck?

Since I can’t steal the bunk houses, I want to shamelessly steal your techniques!

Thanks Joe,

No, the ply is not treated as these do not stay outside in wet weather.

By “Fogging” I just mean that a light coat of Flat Black spray paint is squirted around on the inside walls and floor to kill the shine. Don’t forget to mask the windows first(https://www.largescalecentral.com/externals/tinymce/plugins/emoticons/img/smiley-foot-in-mouth.gif) I don’t bother with the underside of the roof as it really cant show through the windows.

Something that I may not have made clear before about window installs. I cut the window hole in the plywood wall panel about 1/2 to 3/4 inch oversize of the finish window. Cut the Acrylic to fit and glue in the hole with E6000 and lay the panel on a flat surface on waxed paper, out side down, and make sure the window is flush with the outside of the wall. Once dry I lay the finish window size out on the outside using a Sharpie marker and glue the trims to the lines the siding then covers any Acrylic that is left showing. This is all done, well except for gluing the trims, before the box is assembled. Whoooo, that was long winded, sorry(https://www.largescalecentral.com/externals/tinymce/plugins/emoticons/img/smiley-embarassed.gif)

I really wanted wooden handrails but by making them a correct size they would have just been to damn fragile. So I convinced my self that the logging company having to move camp fairly often went with something that could be easily reused, pipe and wire rope. I used .062 steel welding rod for posts and 20Ga copper wire for the wire rope soldered at each post. (Yes copper can be soldered to steel)

Steal away guy, that’s how I get all my best ideas(https://www.largescalecentral.com/externals/tinymce/plugins/emoticons/img/smiley-foot-in-mouth.gif)

Rick

Thanks Rick. One more question. How did you solder the rails? Traditional soldering, resistance soldering?

Joe Bussing said:

Thanks Rick. One more question. How did you solder the rails? Traditional soldering, resistance soldering?

I drilled holes in the deck and inserted the posts and got them all lined up and level then cut a length of wire a few inches longer than needed. Because the wire usually comes in a small dia. roll I put one end in the vise and grabbed the other end with pliers and “snapped” the line, this will pretty well straighten the wire and partially work harden it. I then cut a small wooden block and sawed a groove in it to use as a jig, it sits on the deck and straddles the post and gives a good solid work surface to solder against. Of course use a second taller block for the upper wire.

Soldering, well make sure both surfaces are clean, use a good liquid, all metals, flux and 60/40 rosin core wire solder, I like .032 dia.

For this I used a 40 watt soldering iron (pencil) make sure the tip is clean and tinned until it is all shiny. Make sure the iron is hot pick up a small amount of solder on the iron, apply the iron to the heavier piece at the joint and wait for the solder to flow, then get off it. Hold the pieces in place till the solder freezes.

Always unplug or turn down your iron if your going to be more than a couple minutes between soldering joints. Nothing ruins a good iron tip faster than over heating.

On a project like this (this size material) if you don’t have good solder flow within a few seconds or so there is a problem; dirty material, cold iron, dirty/burnt tip so heat can’t transfer, wrong solder or flux.

Hope this is a help to you

Rick

Great info! Thanks.

More buildings for Camp Six.

The Shower House, four shower rooms and the center is for supplies and water/room heating equipment. Again it is a “skid shack” and is cribbed up to car level, the walkway and stairs are removable on the model as they would have been on the prototype.

I thought about a construction photo, only because I took the shower house pictures(https://www.largescalecentral.com/externals/tinymce/plugins/emoticons/img/smiley-foot-in-mouth.gif). Here is the start of the cook shack, on the left and the dinning hall on the right. When done it will look like 3 separate skid shacks shoved together, at least that is the way it is supposed to turn out.

You can also get a better look at what I was trying to explain earlier about the window installation. Inside the black lines will be the finished window size.

Thanks for taking a look

Rick

Your outta control …nice 4 point

" Rooster " said:

Your outta control …nice 4 point

Thanks Rooster, I been that way for years(https://www.largescalecentral.com/externals/tinymce/plugins/emoticons/img/smiley-smile.gif).

Unusual to mount such a small rack but he was my first Black Powder buck, 80 yds with my .54 Hawkin, patched round ball(https://www.largescalecentral.com/externals/tinymce/plugins/emoticons/img/smiley-laughing.gif)