Large Scale Central

Have Angle Grinder, Will Try a Buidling

Aloha all!

OK, I have some “Hardiebacker” and a borrowed angle grinder, and I am looking to take a crack at a simple building. The last time I build a model was in the late 1990-s. It was a WWII era tank. 1:32 scale. Plastic. Not really applicable. My plan is to make three easy houses to learn how to use the tool and material, and then turn them over to the kids to paint. The kids are very young, so details are not important beyond the ability to get figurines in and out. For ease, I am thinking 1:24 or “good enough scale” which will work with my mostly LGB narrow gauge gear and the kids’ - and my - PLAYMOBIL.

I was planning to freelance a pattern on cardboard and trace it onto the concrete, but I thought I’d see if anyone had ready-to-hand plans first. Also, the whole process seems rather too easy, so I imagine I am missing something here.

Thanks in advance for your guidance and assistance!

Eric
Hello Eric.

Working with hardiebacker board is terribly dusty. I do use it on my buildings but only on the roof. If the backer board is in contact with the ground and moisture it will rot and become brittle.

Why not use wood which is much easier to work with and give the structure a good coat of paint and set it on gravel or a concrete paving stone and it will last for many years.

As for plans for a simple building you could just go with a bird house design and alter it as needed. I have bought bird houses at yard sales for instant buildings. I have also built many custom ones from actual photos and my imagination. I don’t build to any particular scale but I do keep in mind that a 3-3.5" tall human needs to go in through the doors.

Wood, plywood but not luan, plastic political signs are good building materials but in my experience the hardiebacker is tough to work with.

Just my 2 cents. I’m sure others will chime in.

Clamp a fence across your sheet to slide the grinder along as you cut, or your cut lines might be out of square a little.

Hi Eric,

If you do use the hardiebacker board make sure to wear a dust mask or even a paint respirator as the dust from this product is not good for your health. It can get into your lungs and cause permanent damage. I already have a good friend dealing with lung problems because of breathing in MDF dust.

Whoa! Thanks for the advice, everyone! Especially regarding the dust.

I am hoping to experiment with a couple building materials and methods this year as we shift focus from the garden’s perimeter to its interior. As for why Hardiebacker, concrete seemed kid-proof, the material was ready to hand, and I could borrow the grinder. The building(s) will sit in a raised bed, that has about 4" of gravel over packed earth (This is the result of a contracting in a state with almost no working idea of “railroad” an not forethought on my part. It is, however, weed free!). We are probably going to invest in the full Foam Factory crafter kit, as it will support other activities, and see how that works for buildings, too. My father-in-law, Owner of Tools and Holder of Sacred Skills, has built some simple wood structures, and they work pretty well. My limited woodworking experience, however, did not go well, so I have been a little loathe to invest in a small table saw.

We have no hobby shops that carry scale timbers of wood, styrene or anything else, and the Paradise Tax (aka “shipping”) makes it prohibitively expensive to order it (and not worth it absent base skills to apply to it), so I am looking for a way to start getting businesses and residences out on the railroad that capitalizes on what we can salvage or find at a hardware store.

In the meantime, I have my square and straight edge, and I’ll see what I can freelance!

Aloha!

Eric

OK,

  1. This was an incredible amount of dust!
  2. Even with a fence, I need practice.
  3. Doors…OK. Windows, not so much…The grinder was too big to make the cuts, and my Dremel was too small to be the primary cutter.

I am going to salvage today’s efforts just for forms sake. I think I will have something at least in “good enough scale” for my efforts. Maybe. This has been worth the experiment all the same.

Aloha,

Eric

On a tip, I used a drill bit to rough out the windows, wiggling the drill back and forth. Still cracked a wall. And the windows still looked awful. Over the last two weekends, I field things into a useable shape and then used craft sticks to plank over the walls. I have started cutting out the door and window openings. Ultimately, I’ll add paint and trim and call it done. In the meantime, my hotwire craft kit came in, and I figure foam will be the next material with which I try to experiment. A small tablesaw is simply not appropriate to this household for the forseeable future and kits are non-existent out here!

Aloha,

Eric

I use a jigsaw with a carbide blade. Cheap wood blades will work too but carbide will last longer. Works very well and way less dust.

Eric, high density foam boards, (insulation board) is an excellent medium to build structures with. It cuts easily with a jig saw, or a box cutter and can be glued easily with liquid nails that is permanent and easy to work with. The 1" thick foam board is not expensive either. Don’t use styrofoam board. It crumbles easily and is not structurally strong. Some of the other fellows here might have alternative ideas about glue. I’m working on a two story city hall for my layout out of foam. You can even sculp in stone or wood texture or other choices. Doors and windows are easy to cut accurately too. Fun stuff to work with. It is light weight, so if your area is windy, might want to consider a little weight inside.

Dan and Rich,

Mahalo (thanks) to you both. I am going to file both tips away for my next project, which will be foam based, however, just to gain experience with that material I am not going to reject HardieBacker outright, but it proved more difficult than I imagined to craft, even more difficult than the warning posted at the top of this post led me to believe!

Aloha,

Eric

Liquid Nails glue for foam. Otherwise you will melt the foam.

Steve,

I bought a foam glue with the hotwire stuff. Good to know about the Liquid Nails, though. I had been wondering how to glue things to the foam!

Look up Richard Weatherby’s articles on constructing buildings with concrete. He has built some beautiful buildings using rapid set concrete. they hve been outside on his layout for well over decade now.

I use Locktite PL 300 Foamboard construction adhesive, to make hills and mountains out of the pink foamboard, and it’s waterproof.

More great tips, all! My little project is grinding (no pun intended) away slowly. I forgot to label the walls, glued them all together, reinforced the joints, and THEN found I had glued the ends with the rook peak inside the side walls. Ooops. Had to do a good think on how to fix that…Glue. More wood strips from the craft store.

Nothing pretty, but it meets the basic criteria of looking about the right size and being capable of housing a PLAYMOBIL figure. At least until the next mistake! (http://largescalecentral.com/externals/tinymce/plugins/emoticons/img/smiley-laughing.gif)

Eric

Quick update…I think I managed a “save” on this project. Planking has held in place, minor mistakes overcome, and interior painted and sealed. We also put a base coat on the exterior, so I can paint that today. After that, a few strips of sandpaper will simulate tar paper, a black piece of plastic will do for a chiimney, and chunk of shattered epee for the roof topper (Not because it looks good, but it’ll be the first use for a broken fencing weapon I’ve ever found!). I am not going to bother detailing beyond that. Not only would it be throwing pealrs after swine given the numerous minor errors in basic construction, but also the kids are already planning to incorporate this building into their games, too.

Enjoy your weekends!

-eric

Think about saving the hardibacker for building bases, especially if you’re going to use foam. That way you can still use the saw…(but you still get a LOT of dust).

As suggested earlier, insulation foam is VERY easy to work with and can look nice when painted; it HAS to be painted as most won’t stand up to UV.

I’d still have it except for all the squirrel bites where they thought they could sharpen their teeth…

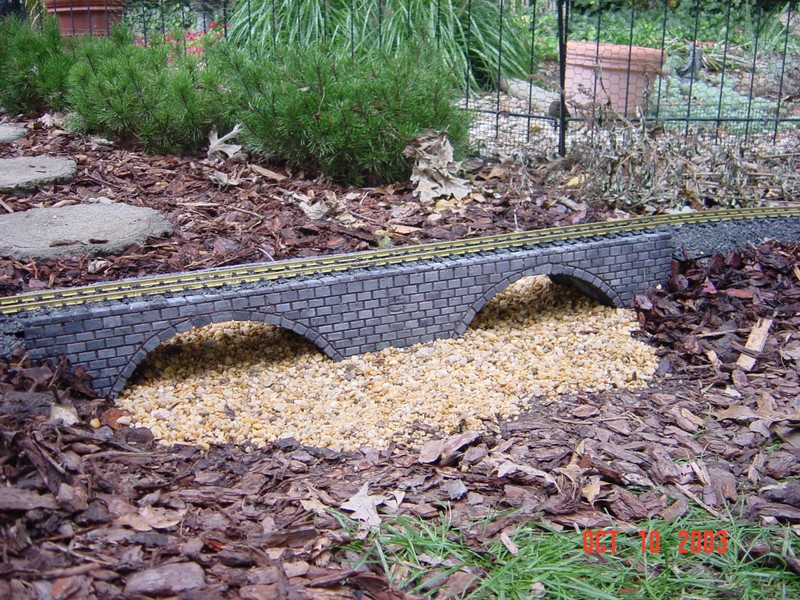
More on the stone bridge here: http://jbrr.com/stone-bridge.html (Didn’t there used to be a tool for a link? Did it go away with the emoticons?)

Dan Gilchrist said:

I use a jigsaw with a carbide blade. Cheap wood blades will work too but carbide will last longer. Works very well and way less dust.

That’s what I did for HB for a few temporary bridges. Must less material being removed, due to the thinner blade. But still massive amounts of dust.

I concur with benefits of the foam board approach.

However, if you can make plant-on doors and windows (out of some other material), and not do the openings, your HB method can more easily work. Regardless, for the outside cuts, you should consider the “score and snap” method, which is comparatively dustless.

http://www.popularmechanics.com/home/interior-projects/how-to/a8741/how-to-cut-cement-backer-board-for-your-next-tile-job-15238906/

Best wishes for your project!

Cliff

Aloha all!

Just thought I’d close the loop on this. As the picture will show, it lacks a base and some basic detail parts. Given the age of my “crew,” the latter will be limited. Also, to be frank, at some point details would be “putting lipstick on a pig.” Per the suggestions above, future HB projects will be limited to the base of buildings and, possible, the core. Speaking of the base, the crew wants to be able to move furniture in / out, so the building will be removable. I will glue down some craft sticks to simulate flooring, hit it with varnish, and let imaginations take over!

Hardiebacker House - A Neophytes Attempt at a Structure

Oh, I did use a broken epee for the topper. As joke for my fencing buddies, I left the barrel, which hold the spring loaded tip on. You can see it to the left. Also unseen is a solar panel to provide light at night.

Next project will be a foam retaining wall where settling has undermined the roadbed a bit. I’ll open a new thread when that gets underway!

Thanks again for all the support!

Eric

Eric Mueller said:

Aloha all!

Just thought I’d close the loop on this. As the picture will show, it lacks a base and some basic detail parts. Given the age of my “crew,” the latter will be limited. Also, to be frank, at some point details would be “putting lipstick on a pig.” Per the suggestions above, future HB projects will be limited to the base of buildings and, possible, the core. Speaking of the base, the crew wants to be able to move furniture in / out, so the building will be removable. I will glue down some craft sticks to simulate flooring, hit it with varnish, and let imaginations take over!

Hardiebacker House - A Neophytes Attempt at a Structure

Oh, I did use a broken epee for the topper. As joke for my fencing buddies, I left the barrel, which hold the spring loaded tip on. You can see it to the left. Also unseen is a solar panel to provide light at night.

Next project will be a foam retaining wall where settling has undermined the roadbed a bit. I’ll open a new thread when that gets underway!

Thanks again for all the support!

Eric

Just perfect! You don’t need any detail parts - those are provided by the imagination of the crew. Heck, I’m not sure I’d even bother with a base. I might do removable roof so they can easily access the interior, but I’m betting they don’t care about a base at all. Heck, let them make the decisions (you can always override if necessary)(http://www.largescalecentral.com/externals/tinymce/plugins/emoticons/img/smiley-innocent.gif)