Large Scale Central

Bachmann 3-truck Shay surgery help

I have a brand new Bachmann 55T 3-truck Shay. I’ve done a battery conversion and it is wonderful except for the part where the front truck sporadically stops working.

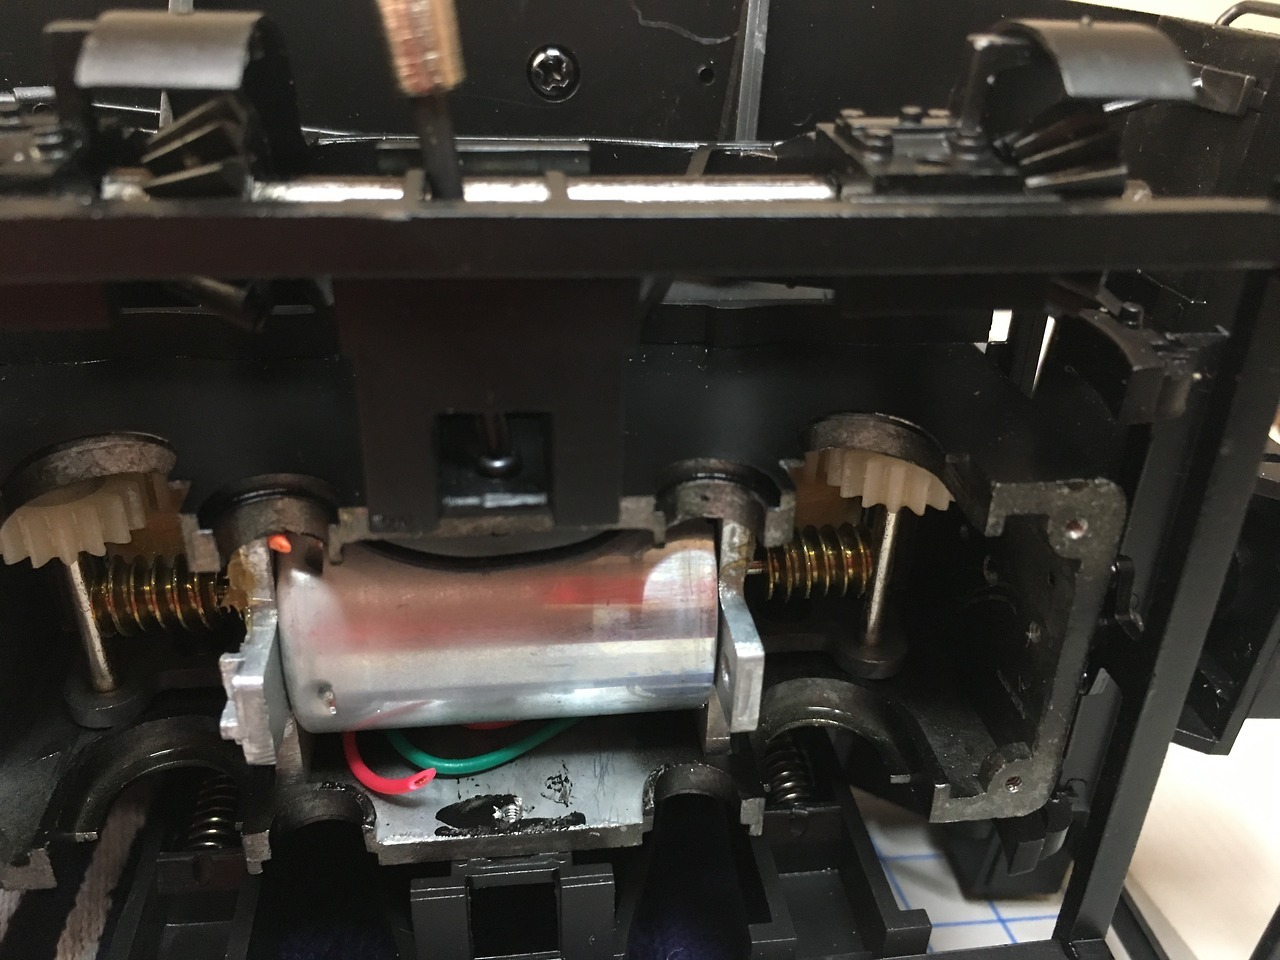
Investigating some, it appears that if I pull on the motor power wires just right then the front truck works ok.

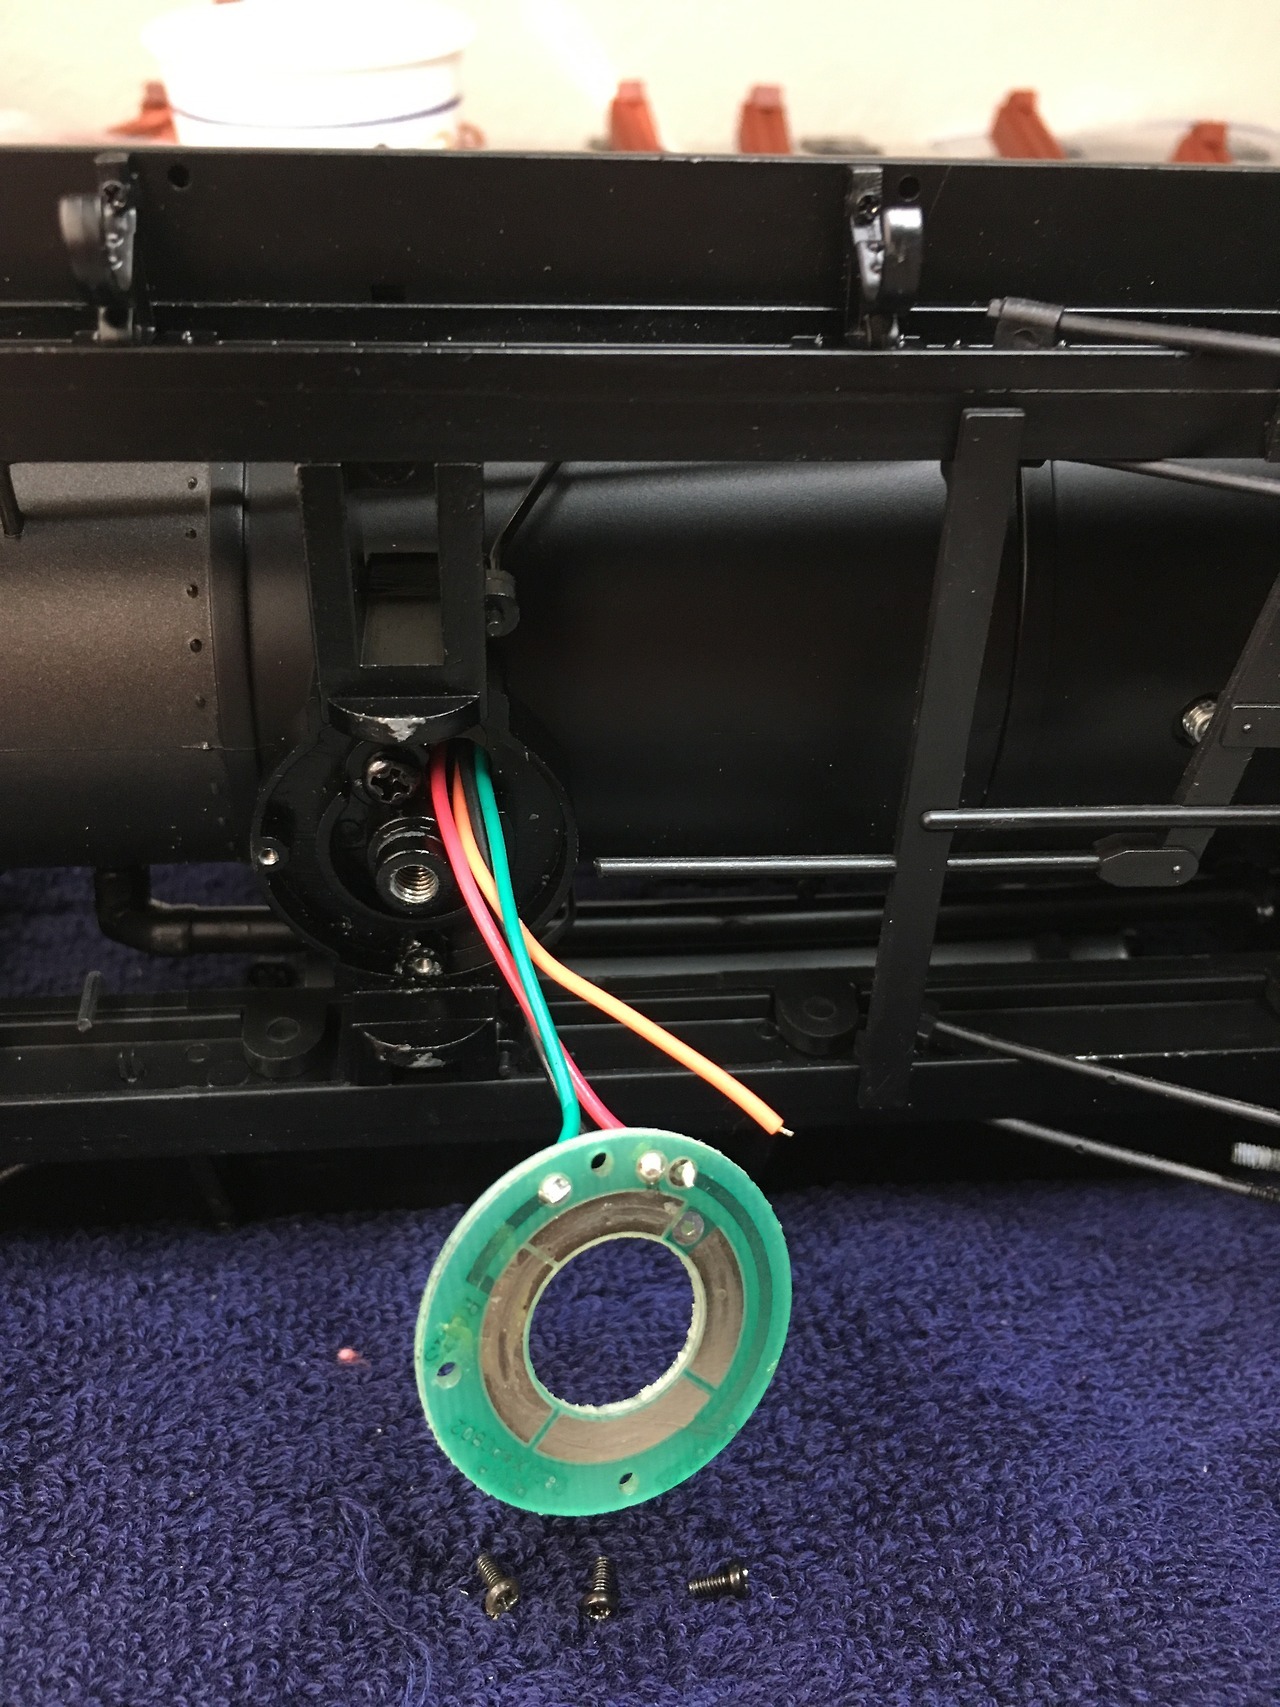
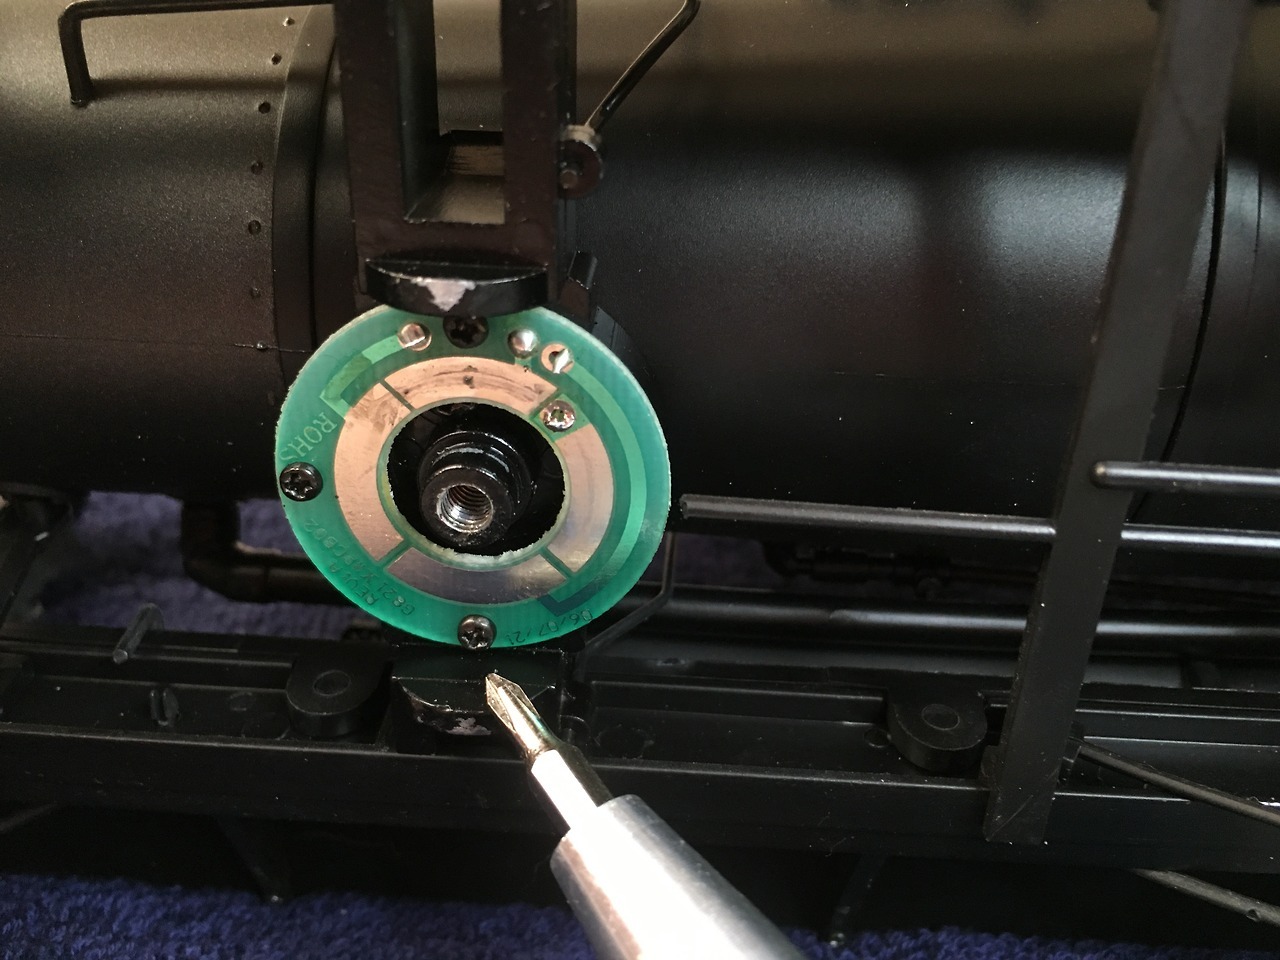
I conclude from this that there is a bad/flaky solder joint to the PCB that connects down to the front truck.

A few questions and a plea for help:

  • does this seem like a reasonable diagnosis?

  • how the heck do I get access to that PCB?

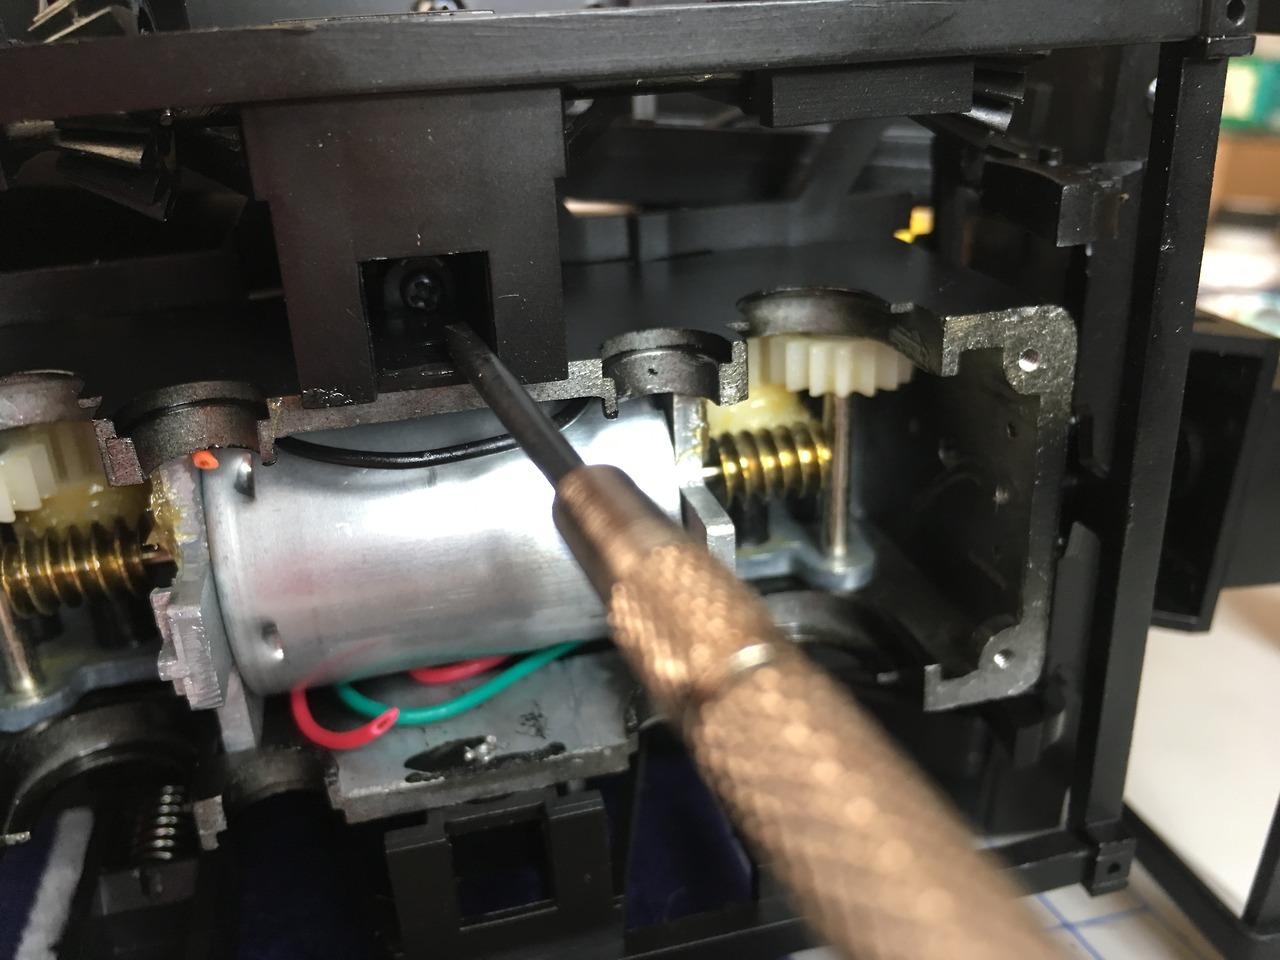
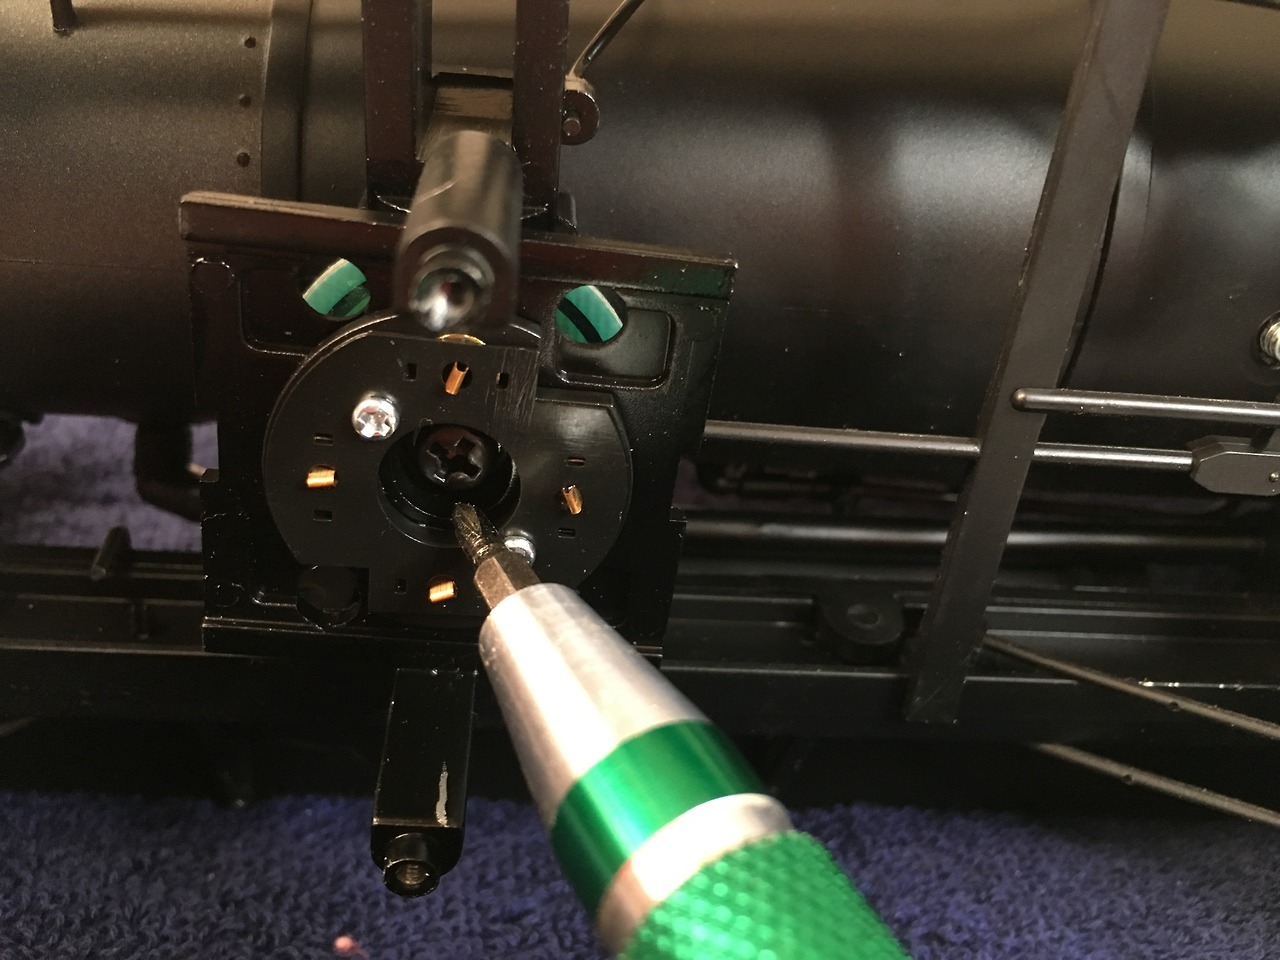
I can’t figure out how to get the boiler off. So far I’ve gotten the front of the boiler off and temporarily removed the smoke generator, and I can see the wires that I need to work with going into the PCB, but sure can’t get to them to try to fix them.

I’m handy with a soldering iron and am pretty confident that I know how to fix it if I can get access.

Any suggestions? I’ve googled around and seen various pages with Shay tips, but haven’t yet found how to dismantle things enough.

Thanks in advance!

Jim,

have you looked on the Bachman site for exploded view diagrams?

http://www.bachmanntrains.com/home-usa/dwg/dwgs/82494.pdf

Al P.

Al:

Yeah, I have those in hardcopy and have been puzzling over them. They kind of tell you what parts you have and vaguely how they are related but it doesn’t really guide you much on how to disassemble (or at least it doesn’t for me).

Jim did you go to the bottom of the link that Al gave you? It tells just how to get to the PCB.

cheers Richard

The PCB that I’m talking about is not the main one under the coal storage at the rear (I’ve already removed/replaced that with the Airwire board), but instead is a small round circuit board under the boiler on top of the front truck. That’s where my bad connection is.

I don’t see anything at the bottom of that link that shows how to get access to that. I’ll keep poking around…

Jim, I believe you have to take the truck off and then you will access it from the top of the truck. I have one torn all to pieces right now. I’ll take a look at it tomorrow and see if I can give you some better details.

Jim Rowson said:

The PCB that I’m talking about is not the main one under the coal storage at the rear (I’ve already removed/replaced that with the Airwire board), but instead is a small round circuit board under the boiler on top of the front truck. That’s where my bad connection is.

I don’t see anything at the bottom of that link that shows how to get access to that. I’ll keep poking around…

This is how John hard wired his trucks…problem gone…I did the same thing…

http://largescalecentral.com/forums/topic/18097/restoring-a-1st-gen-bachman-shay/view/post_id/197916

Jim,

You don’t have to remove the boiler to get the trucks off. You lay the shay on it’s side and remove the trucks from the pivot from underneath. Here is a link to George’s Shay Tips. In the Contents click on Disassembly of Shay Truck and it will take you to the instructions.

http://www.girr.org/girr/tips/tips1/shay_tips.html#trucks

Chris

You are so right. Finally got the truck off and the other things in the way and found my bad solder joint.

Thanks!

Will post pictures as I put it back together so I can remember what I did…

Loose wire.

Most folks just wire past the ring contact, since it can become an issue in the future. That should also be on George’s page IIRC.

David, and all: Thanks for all the help. I’m definitely going to wire past that silly ring contact. Seems overly complex for what’s needed. Thanks!

Meanwhile, for posterity, here are the steps to get the truck off and to get access to the ring contact so I could temporarily resolder it. I needed to get this engine running dagnabbit! I have new track that needs an engine to run on it!

After removing the 4 screws on the bottom plate of the truck and removing the wheels, I removed the screws just above and below the motor to give me easier access to the other screws deep inside that square hole:

Remove screws above/below motor.

Then remove the screws deep inside, which are what hold the truck on:

Remove screws to get truck detached

Then remove the screw in the center of the engine side of the ring contact:

Remove screw to take off ring contact

And finally take off these 3 screws to get access to the wires and how they solder into the PCB here:

Remove 3 screws to get access to the PCB

Pretty easy once you find those kind of hidden 2 screws deep in the holes to get the truck off.

And now the shay runs! Yay!

I bet that felt good to see it run on the new layout for the first time. It really sounded good.